
Don't wanna be here? Send us removal request.
Statistics
We looked inside some of the posts by fpslukparker and here's what we found interesting.
Average Info
Notes Per Post
1
Likes Per Post
1
Reblog Per Post
0
Reply Per Post
0
Time Between Posts
17 days
Number of Posts By Type
Text
17
Last Seen Tumblr Blogs


Fun Fact
Post activity is at the highest at 4:00 pm EDT; notes peak at 10:00 pm EDT.
Text
Creating random objects in one of certain areas
When randomness is desired around a specific area, rather than typing in the coordinates manually, using a dummy actor to base the area around allows for easier adjustments, as moving the actor would then move the area itself. The Target Point premade actor is designed for this purpose.
0 notes
Text
My final playthrough
Here is the final playthrough of the game, showing as many mechanics as I could https://youtu.be/JMKooDH45Uw Due to loading issues with obs and the game the game freezes at multiple moments but there’s not much I can do about that.
0 notes
Text
I updated some AI
The AI for level 7 looked VERY buggy and generally didn’t work too well. Therefore I updated it
https://youtu.be/w7WupPR0ZyU unfortunately obs keeps on freezing my game so the quality is a bit awkward
Everything beyond 0:22 can be ignored, since its just me struggling to close OBS
0 notes
Text
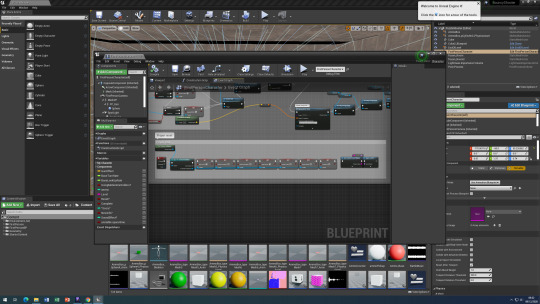
Enums, what they are used for and how to use them
and enum is a list of things that can be used, as an example they can be used to check what kind of weapon is equipped. They are basically lists like visual basic but they can be checked against. enums can be used for inventory checking, figuring out the current weapon that a character is holding (useful for both displaying the correct model and also correctly calculating which kind of projectile/ projectile pattern to use) To make one, simply right click go to blueprints- enumerations and then make one, then just add the parts of the list you want and go ahead!
0 notes
Text
Evaluation for this topic
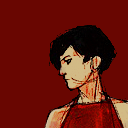
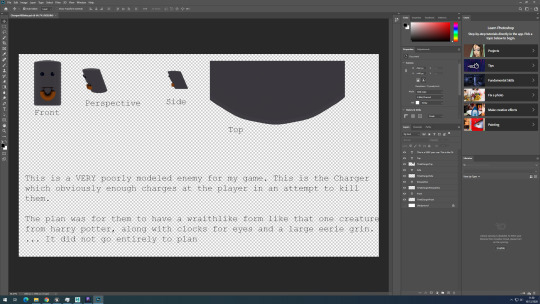
To begin with, a lot went well with this topic. The game is decently long, there is a variety of levels and the game has a proper ending. I have learnt a lot about the structure of levels, how to add sound and ways to circumvent issues related with spawning and projectiles.
Despite this, there were certainly some issues during development. For starters I lacked any playtesters due to Covid restrictions, secondly near to none of my actors actually had models, with me using cubes for most objects rather than actual models.
Next time, I will focus more on making some strong standalone mechanics before moving on to the next mechanic. This will help with game feel as rather than a bunch of one and done mechanics they will be able to more seemlessly go together. Additionally, I will either work with somebody to assist in modeling, or produce my own models in order to actually create a game with strong game feel.
Overall, I am quite happy with the way my game turned out. It may not look ANYWHERE NEAR as pretty as other games may do, but it has taught me a lot about coding and NOT putting off modeling over and over in order to do more interesting things
0 notes
Text
Moving into the final week
Considering we have very few working days left, it is time to talk about what I will be doing, how important it is to do and what I will no longer be doing due to issues of either time or knowledge
High priority: fix bugs in the code. There are a large variety of bugs, mostly to do with the AI that need to be prioritised. This includes ai bugs that cause teleporting due to timelines being too absolute to properly be used as AI along with clipping issues with movable doors. Low priority: Most of my game is lacking models, while it would be nice to add models to these rather than using cubes I am lacking in time in order to actually do this. Will not be done: originally I planned to have extra levels beyond the ones already made. However with how little time there is this would result in a random level being the final level, rather than the boss since I originally planned for a boss every 10 levels, therefore this will not be done.
Additionally, I planned to add a credits and settings system (with the credits holding MANY eastereggs). Both of these will not be added as making a titlescreen will require things the game structure cannot handle.
Finally, I originally planned for some voice acting. However I do not have time to record my voice on the microphone, as a result the placeholder texts will have to be used instead.
1 note
·
View note
Text
Finished coding the boss, here’s all 10 levels
https://youtu.be/j0JnEohVYJU Obviously I am severely lacking in art however, since all the enemies, and jumpscare widgets are currently either not there or just differently coloured cubes (with the exception of a projectile the boss can use from time to time) so the game may appear tacky compared to others
0 notes
Text
Ammo box render
Because my box has so many polygons for some reason, they refuse to display in the Arnold render, as a result I had to use the default Maya camera angles along with some screenshots
0 notes
Text
Arnold Cargo Container render
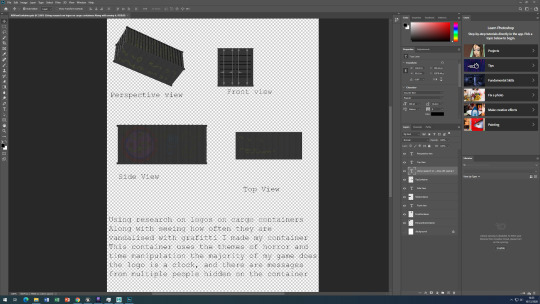
Unfortunately I cannot just outright post the photoshop as a JPEG because tumblr is weak
0 notes
Text
Using Arnold to render and show 3d models
What is Arnold Renderer? Arnold is one of a few tools in Maya which has the goal of getting good angles to take an image of a 3d model of. This one is unique from others in that it requires lighting in order to work and therefore can take lighting into account when making 2d images of said model. Some examples of my arnold renders are above.
To use it you should first select the Arnold tab from the top, go to lights and then add a skylight. This is important because Arnold takes lights into consideration when taking images Then, select “open render view” which is the icon to the right of “symmetry” which is a clackerboard with an eyeball. Once the renderview is open, click the clackerboard with the cog in order to open settings so you can change the size of the renderview.
Now you are in the view, you can use File-Save image to save the image and Render-Render ____ to change the POV of the image.
Be sure to use a photoshop document to make a collage of views
0 notes
Text
Up to date video of the game as of 9/12/20
https://youtu.be/gncPMm2PK8Q
The last level with the large expanse is a boss fight, and incomplete. The level prior is perfectly normal, I just suck because I changed the projectile speed recently.
0 notes
Text
How to record with OBS
Step 1: run the configuration wizard with recording in mind.
Step 2: right click the section called “sources”
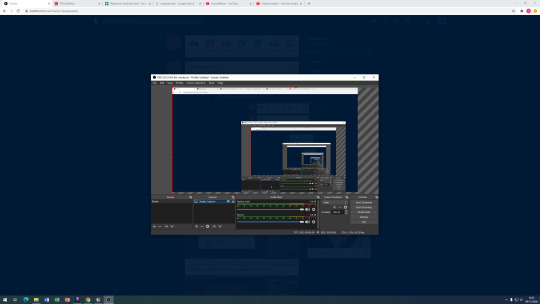
Step 3: right click, select add and then select display capture. audio should be set up automatically To post the videos to tumblr, you must first post them on youtube. I have used the wsc account to do so and will be leaving all the videos on “unlisted” so they only are shown to those with the link. Here is an old video of me playing through the game. There are some bugs such as on level 6 which have now been fixed. https://www.youtube.com/watch?v=oKrfG8XFMXs&feature=youtu.be
0 notes
Text
Photoshop tools
The marquee tool: This tool allows you to select an area using a shape such as a circle or quadrilateral. Once selected the user becomes unable to effect anything outside of that area. This is useful when combined with tools such as the gradient tool or to not colour outside of a specific area. The magic wand tool: This tool is great for cleaning things up. It selects a range of colours dictated by Tolerance and then allows you to do what you please with the colour. This is great for turning white colours into transparent when downloading a flawed image. The lasso tool is similar to the marquee tool. It has all the same functions except the user draws the area that will be effected in freehand, rather than as a shape. This is useful for not colouring outside the lines of an image.
0 notes
Text
Shipping Containers.
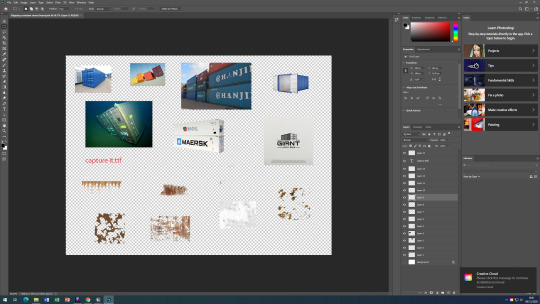
Here is my moodboard, I have used some of the rust for the container as well as getting an idea on how metallic it should be
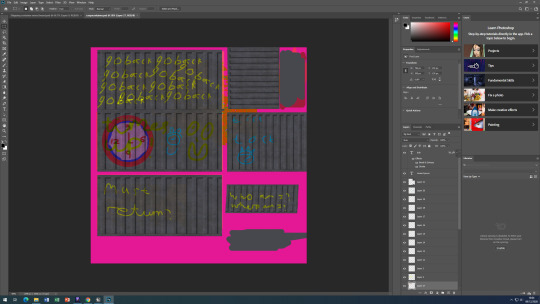
Here is the UV for the container
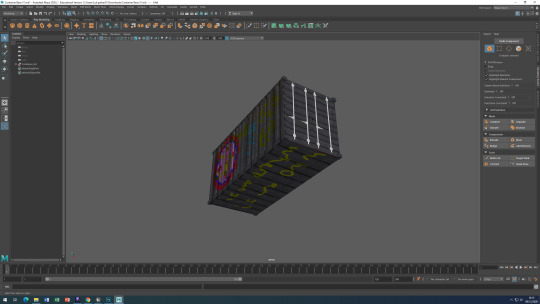
And here is the finished product!
0 notes
Text
My reset button
Quite naturally considering my game is about puzzles and time travel, the player may get stuck at times so I added a reset mechanic.
The casting to global variables is important to reset anything that would otherwise be preserved through the reset.
0 notes