
Kia Ora, I’m Kayden, a Creative Media Production student in Aotearoa. This is my blog for my coding class.
Don't wanna be here? Send us removal request.
Statistics
We looked inside some of the posts by kayden-coding and here's what we found interesting.
Average Info
Notes Per Post
69
Likes Per Post
36
Reblog Per Post
33
Reply Per Post
0
Time Between Posts
4 days
Number of Posts By Type
Text
15
Last Seen Tumblr Blogs


Fun Fact
Tumblr Inc. is using 66 technologies for its website.
Text


Some code trying to figure out what to do with my data. I used quads for the shapes.
I’m not satisfied with this code, but I do like the colours. Threw in a few extra zeros to make the colours a bit more unique from each other. The colour is based on dates (day,month,year)
The shapes are based on date, average viewers, follows, time streamed, unique viewers & unique chatters.
Canvas size is based on month by year date.
2 notes
·
View notes

Text

Working out the work flow for my summative.
I worked this out on week 9.
On week 10 we were discussing entourage & contexts where our designs might appear.
0 notes
Text
A bit behind with updating this blog & well class work as lockdown & working at home has been very distracting but I am now working on my summative.
0 notes
Text


Finally came around to do work with three.js, here’s the link to my first creation http://threejsplaygnd.brangerbriz.net/s/?id=9157
Im a little bit sad that the texture for the wireframe plane didn’t seem to want to stay, I wanted to have some acid wave/sea punk/vapor wave vibe which the water texture would’ve delivered, however on everything I’ve used to view this the texture hasn’t stayed.
It also makes the changes to the lighting I made less apparent. Where I made the hemisphere light set to a hot pink & light sky blue with an intensity of 3.1
Here’s a look at what the texture would’ve looked like

The background colour is still light here as I didn’t edit that in until I got to the code editor.
The mesh I used was a sphere, but it has 3 segments. I found the shape interesting so I wanted to use it. I positioned it above the plane as I wanted the full shape to be visible & not obscured by the plane.
When I went to the editor stage of the, I added in rotation of the mesh, forced the camera to look at the mesh as well as some slight camera movement which I slowed down to 20 as I found the initial speed a bit too intense.
I also added particles in the background, which change colours & seem to rotate specially in the background (unsure if that accurately describes the movement but that’s as best as I can manage at this moment haha)
For the code that’s stand alone I’ve copied it into google docs tho the code is also available in the sketch itself on the threejs playground.
https://docs.google.com/document/d/1p3WRDsx_MB4sHtSqBICIIlm4cQR8ztqB-j6oB2DZ_c0/edit?usp=sharing
0 notes
Text

Physical Coding Final Part 2
Unfortunately I wasn’t able to complete it within the timeframe given by completing it on the 6th by 5pm.
I revisited the second exercise where we swapped our physical coding rules.
0 notes
Text
Trying to do my final for Three.js, unfortunately the site completely changed up how it works & I am unsure I’ll be able to do anything in time.
Don’t leave your work to the last second. Though I had problems working on class stuff in general dealing with lockdown on top of it all.
0 notes
Text

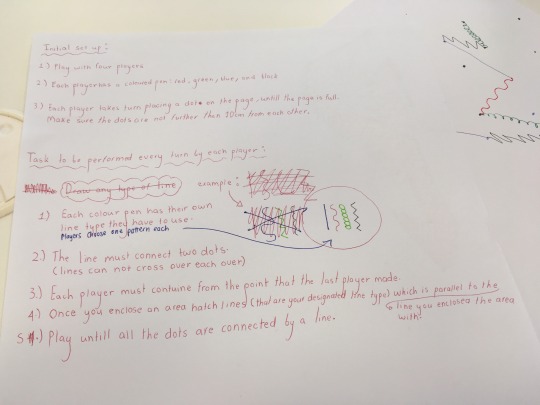
Physical Coding Final Part 1
Had to use a visual diary for paper as loose paper is difficult to obtain during lockdown.
Anyway, I revisited the circles exercise & realised there was no rule about the circles encasing each other, so I did the circles separately & to try full the page.
I still wasn’t able to fill the “perfect” circle rule, I don’t own a protractor or other guide to use, but I did tried my best to free draw perfect circles.
Each circle gets progressively larger than the last circle drawn.
0 notes
Text


Processing Final
Revisiting Processing with my own codes from scratch (haha)
This code draws a cat using ellipses, Bézier curves, some triangles & 1 straight line. It also uses fill, no fill, stroke & no stroke for the colours.
I divided the code up into parts with “//“ programming notes so I knew which part of the cat I was working on. & further indented the colouring parts of the code for clarity.
The background & the eye pupils change colour to where the mouse moves on the program’s window. The value of the eyes using the mouse’s X position for red & Y position for green. And in the case of the background the Y position for red & the X position for blue.
I had originally coded in a tail for the cat as well using Bézier curves, but ran into problems when it came to colouring, so I decided to leave it out. It’s a Manx cat now haha.
I also tried to use a different way of changing the colour for the eyes by using mouseMoved which would change the colour depending on if the mouse moves at all instead of relying on where the mouse moves in relation to the X & Y axis on the window, but I couldn’t get it to work in the way I wanted. I’m not yet quite coding literate enough for that, but here’s to learning that in the future.
0 notes

Text
Holographic Universe

Viewing a holographic image at different angles can be described as “interaction.” Observing light changes whether it appears to be a particle or a wave, but in fact this is an illusion. It is neither. Light is a stationary 2D object with the figurative “holographic film” of the 3D reality layered over it, thus changing how it appears (or appears to behave) depending on how it is interacted with.
(55)
5 notes
·
View notes
Text


Part 2 of week 2’s class.
Playing around further with the functions of Processing. I made this code following on from the lecturer, but then changed a few things around to suit myself.
In this code, there are two circles which follow the position of the cursor on the screen & change colour depending on where they are in the screen.
In the second image I went for an orange-y yellow background just for something a bit different but then went back to the black background. I tried to choose colours that look good together.
0 notes
Text

Week 2 we learned how to use the program Processing. A program which creates images, including moving images using code.
We were given an exercise to recreate an image of either a panda or mouse. I chose the panda.
I don’t think my panda was completely exact to the reference image given but I am pretty damn close.
0 notes
Text
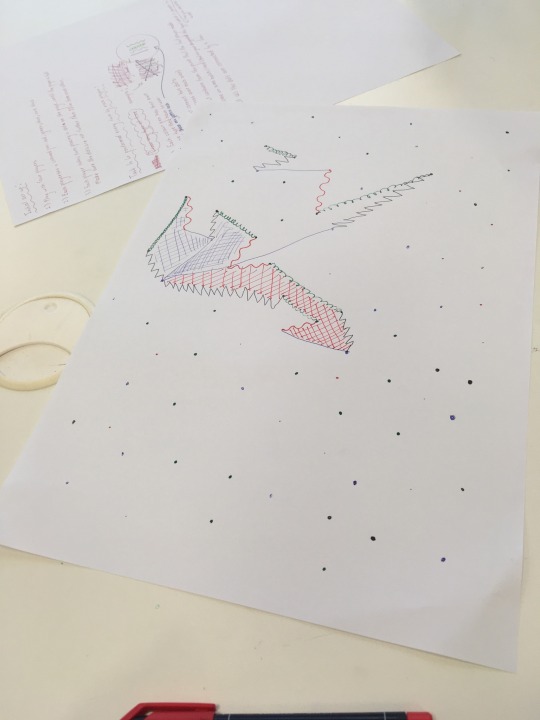
Part 2 of Physical Coding.
As we had to swap our newly written rules, we were giving new rules from another group to try.
These rules were a bit difficult to follow at first & I feel there were too many steps to follow, we didn’t manage to get very far with our art piece based on these rules.
Here are the rules;
Initial Set-Up:
Play with 4 players.
Each player has a coloured pen, red, green, blue, and black.
Each player takes turns placing a dot on the page, until the page is full. Make sure the dots are not further than 10cm from each other.
Task to be performed every turn by each player:
Each colour pen has their own line type they have to use. Players choose one pattern each (arrow pointing to diagram of line types)
The line must connect two dots. (Lines can not cross over each other)
Each player must continue from the point that the last player made.
Once you enclose an area hatch lines (that are your designated line type) which is parallel to the line you enclosed the area with.
Play until all the dots are connected by a line.
0 notes
Text
First day of my Coding for Creative Practise class at Massey. We were learning about Physical Coding, following rules to create artwork.
My group was given an exercise in which we had to draw perfect circles, each larger than the last. We had trouble with the “perfect” part of the instructions as we didn’t really have a compass we could use. We freehand drew our circles to begin with but then went to tracing circular objects. The instructions didn’t specify if the circles needed to touch.
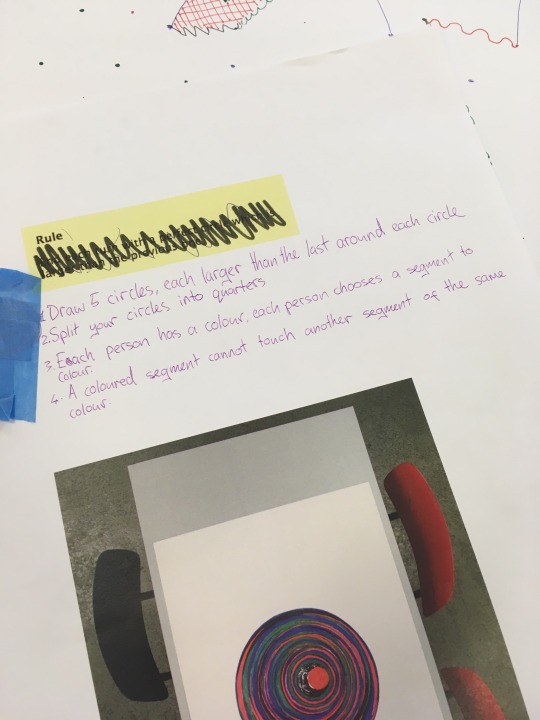
Next we were asked to edit the rules into a different physical coding exercise. The rules we came up with were;
Draw 5 circles, each larger than the last around each circle.
Split your circles into quarters.
Each person has a colour, each person chooses a segment of a circle to colour.
A coloured segment cannot touch another segment of the same colour.
We were then told to give our rules to another group.
0 notes