
Dedicated to publishing beautiful and informative cookbooks since 1915🍷Show us what you’re cooking with #KnopfCooks and follow us on instagram: @knopfcooks
Don't wanna be here? Send us removal request.
Statistics
We looked inside some of the posts by knopfcooks and here's what we found interesting.
Average Info
Notes Per Post
8
Likes Per Post
7
Reblog Per Post
1
Reply Per Post
0
Time Between Posts
2 months
Number of Posts By Type
Text
17
Last Seen Tumblr Blogs


Fun Fact
Tumblr has 4 main sources of revenue.
Text
Cold Yogurt Soup / A’ab Doogh Khiar
From SOFREH: A CONTEMPORARY APPROACH TO CLASSIC PERSIAN CUISINE by Nasim Alikhani

Similar to Spanish gazpacho, a’ab doogh khiar is a cold, blended, summer soup that uses yogurt and cucumber as a base instead of tomato. You can combine the cucumber-yogurt base with the mix-ins, as I have done here, or you can use my alternative method, which gives your guests the option of choosing those they like best. Either way, serve it with toasted bread or crackers for a snack or light lunch.
Makes 4 to 6 servings
4 to 6 pieces homemade or store-bought pita or naan bread, toasted Light olive oil for brushing 4 cups (907 grams) Homemade Yogurt or store-bought Greek yogurt Kosher salt to taste 2 garlic cloves, finely pureed 2 large good-quality cucumbers, such as Persian, English, or Japanese, skin on, finely diced 2 cups (214 grams) chopped walnuts 1 cup (160 grams) golden raisins or small red raisins 3 ounces (85 grams) fresh dill, leaves and tender stems, finely chopped 2 ounces (56 grams) fresh tarragon, leaves and tender stems, finely chopped 2 ounces (56 grams) fresh basil, leaves and tender stems, finely chopped ½ cup fresh mint leaves 2 tablespoons dried mint for garnish Rose petals for garnish
1 Preheat the oven to 375ºF. 2 Brush the bread with olive oil, place in a single layer on a baking sheet, and toast in the oven until crispy, about 10 minutes. 3 Add the yogurt, salt, and garlic to a mixing bowl and whisk well, adding a bit of water to loosen it (but don’t make it watery), then add the cucumbers, walnuts, raisins, dill, tarragon, basil, and mint leaves. Taste and adjust the seasoning. 4 Fill an 8-ounce (240-ml) glass with equal parts water and ice. Slowly add enough of the ice water to the yogurt mixture until it is the consistency of a thick soup. 5 Divide the mixture among 4 to 6 bowls, set some of the bread in each bowl, and garnish with dried mint and rose petals before serving.
Alternatively Combine the yogurt, salt, garlic, and cucumbers in a large bowl. Place a large, square ice cube in each of 4 to 6 bowls, as needed, and divide the yogurt mixture among the bowls. Garnish with the dried mint and rose petals, and set the walnuts, raisins, dill, tarragon, basil, and mint leaves on the table for your guests to add in as they wish.
From Sofreh: A Contemporary Approach to Classic Persian Cuisine: A Cookbook. © 2023 by Nasim Alikhani and Theresa Gambacorta. Excerpted by permission of Alfred A. Knopf, a division of Penguin Random House LLC. All rights reserved. No part of this excerpt may be reproduced or reprinted without permission in writing from the publisher.
1 note
·
View note
Text
Tuna with Harissa, Eggs, and Olives
From BREAD AND HOW TO EAT IT by Rick Easton and Melissa McCart

Serves 1
All the other sandwiches listed in this book are at least vaguely Italianate, if not actually classically Italian in origin. This sandwich is an exception. In Tunisia, this is pretty much the number one sandwich, and it is pretty great. Known as “fricassée” in French, the sandwich is typically served on something akin to a savory doughnut. It is basically a piece of fried bread dough that is broken open and stuffed with oil-packed tuna, a smear of harissa, a quartered hard-cooked egg, and olives. Sometimes potatoes as well; variations abound. This combination is so prevalent in Tunisia that almost all sandwiches, and many other dishes, are also topped with tuna and harissa and olives as a garnish. I suggest using a baguette, as it will be harder to find savory fried bread unless you want to make it yourself. Spring for the absolute best-quality oil-packed tuna you find; you’ll be glad you did.
Ingredients
1 egg
Salt
About 6 oil-cured black olives, or a mix of black and green
Half of a fresh, crisp baguette
Harissa
1 can excellent-quality oil-packed tuna
Finely chopped fresh flat-leaf parsley (optional)
Minced red onion (optional)
Olive oil (optional)
Instructions
Boil the egg in generously salted boiling water for exactly 8 1/2 minutes. Fill a large bowl with water and ice cubes. Plunge egg into an ice water bath. This gets you past a soft- boiled egg, but not quite all of the way to hard. It should still be a touch glossy in the middle, which will be more pleasant to eat. Peel and quarter lengthwise. Lightly salt.
Pit your olives.
Split the baguette in half lengthways down the side, but don’t cut it all the way through. Use a spoon to smear harissa on one interior side of the bread. Be generous; it should be spicy to a degree that suits your taste. Open the can of tuna and spoon all of it evenly inside of the bread, reserving some of its oil. Scatter the olives on top of the tuna, and place the egg quarters evenly along the length of the sandwich. Sprinkle with the parsley and minced red onion, if using, and drizzle the inside of the sandwich with a little oil from the tuna or some fresh olive oil. Close the sandwich and eat it.
Excerpted from Bread and How to Eat It by Rick Easton and Melissa McCart. Copyright © 2023 by Rick Easton and Melissa McCart. All rights reserved. No part of this excerpt may be reproduced or reprinted without permission in writing from the publisher.
0 notes
Text
Grilled Eggplant and Soba Noodle Salad with Nearly Nước Chấm
From TENDERHEART by Hetty Lui McKinnon

This recipe is inspired by the lively, fragrant grilled eggplant dishes in Vietnamese cuisine. Here, spongy eggplants are grilled until silky and tender, and then tossed with nearly nước chấm, my piquant vegan take on this foundational Vietnamese sauce. If you are grilling, the eggplant could also be cooked on a griddle for a smoky edge. Load this soba noodle salad with as many herbs as you can handle, for heightened vibrancy and fresh textures. As with all soba noodle salads, I recommend cooking the noodles a day ahead (or at least a few hours prior), tossing in some sesame or neutral oil and storing them in the fridge overnight, as this helps the noodles develop a firmer structure to stand up to the robust dressing.
SERVES 4
7 ounces (200 g) soba noodles
2 large eggplants (about 1 3⁄4 lb/800 g)
extra-virgin olive oil
1⁄2-inch (1.25 cm) piece of ginger, peeled and grated
1 garlic clove, grated
sea salt and black pepper
1⁄2 cup (120 ml) Nearly Nước Chấm (see below)
1 cup Asian herb leaves, such as Thai basil, Vietnamese mint, cilantro, green onions, perilla leaves, finely sliced
toasted sesame oil, for drizzling
1⁄2 cup roasted peanuts, roughly chopped
Position a rack so the food will be about 2 inches (5 cm) from the heat source and preheat the broiler to high.
Bring a large saucepan of salted water to a boil. Add the soba noodles and cook according to the package directions, until al dente. Drain immediately and run under cold water until the noodles are completely cold. Set aside to drain.
Slice the eggplants into discs 1⁄2 inch (1.25 cm) thick, then lay them flat and slice them into batons. Place the eggplant on a sheet pan, drizzle with 2–3 tablespoons of olive oil and add the ginger and garlic. Season well with sea salt and broil for 5 minutes, watching the eggplant closely so it doesn’t burn. Flip the eggplant over and broil for another 4–5 minutes, again watching closely, until the eggplant is tender and golden. Remove from the broiler and transfer to a plate. While still warm, pour over the nearly nước chấm and toss to coat.
Combine the eggplant, noodles and herbs in a large bowl and season with sea salt and black pepper. Toss well. Drizzle with sesame oil and serve with the peanuts scattered over the top.
Notes:
This dish is vegan
For gluten-free: Use rice vermicelli or mung bean vermicelli
Vegetable swap: Eggplant --> Mushrooms
Nearly Nước Chấm
MAKES ABOUT 1⁄2 CUP
1⁄3 cup (80 ml) lime juice
2 1⁄2 tablespoons brown sugar
4 teaspoons soy sauce or tamari
1 garlic clove, grated
1 fresh Thai red chile, finely sliced 1⁄2 teaspoon sea salt
To make the nearly nước chấm sauce, combine all the ingredients in a small bowl.
Excerpted from Tenderheart by Hetty Lui McKinnon. Copyright © 2022 by Hetty Lui McKinnon. All rights reserved. No part of this excerpt may be reproduced or reprinted without permission in writing from the publisher.
0 notes
Text
Mafalde con la mollica alla calabrese / Mafalde with anchovies and tomato paste and breadcrumbs
From AN A-Z OF PASTA by Rachel Roddy
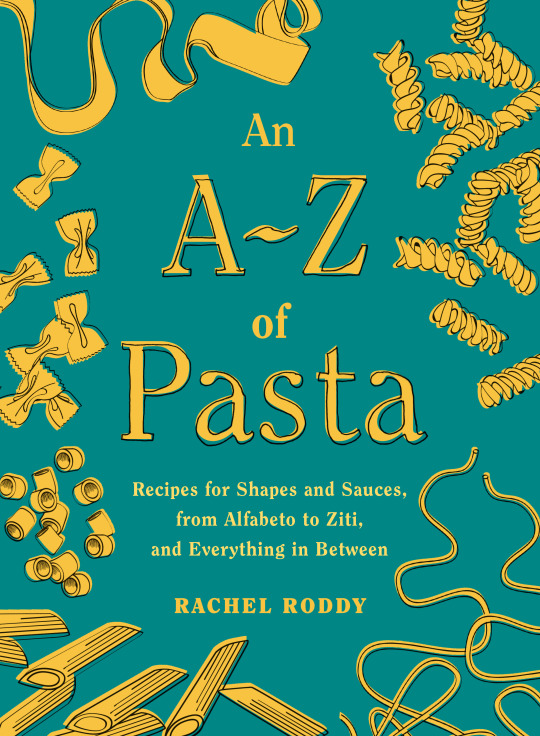
This Calabrese recipe is a symphony of umami, although it could just as well be Sicilian, for the use of tomato paste, anchovy, pine nuts, currants and breadcrumbs, or as my father-in-law likes to remind me, “Parmesan for the poor.” The chili is optional, but I think the concentration of flavors needs the heat. Pine nuts and currants are optional too.
Serves 4
¼ cup olive oil, plus extra for crumbs 3 cloves of garlic, finely chopped 8 anchovy fillets, minced 2 tablespoons tomato paste dissolved in 1¼ cups warm water 6 tablespoons (50g) pine nuts 6 tablespoons (50g) currants A small dried red chili, crumbled, or a pinch of red pepper flakes (optional) 14 oz (400g) mafalde, reginette or mafaldine, also spaghetti, linguine, fettuccine, fusilli 1 cup (112g) plain breadcrumbs
Bring a large pot of water to a boil for the pasta.
In a large skillet, warm the olive oil, garlic and anchovies over low heat, stirring so the anchovies disintegrate.
Add the tomato paste dissolved in water and stir until everything is well mixed. Add the pine nuts, currants and chili (if using) and simmer for 15 minutes, or until the sauce is rich and thick. It should not need salt.
Meanwhile, salt the pasta water, stir, add the pasta and cook until al dente.
In a small skillet, cook the breadcrumbs in a couple of tablespoonfuls of olive oil, stirring all the time until they are golden and smell deliciously toasty.
When the pasta is cooked, drain and add to the sauce, toss and divide among bowls, topping each with crumbs.
From An A-Z of Pasta: Recipes for Shapes and Sauces, from Alfabeto to Ziti, and Everything in Between: A Cookbook © 2023 by Rachel Roddy. Excerpted by permission of Alfred A. Knopf, a division of Penguin Random House LLC. All rights reserved. No part of this excerpt may be reproduced or reprinted without permission in writing from the publisher.
0 notes
Text
Reverse Martini
From DINNER WITH THE PRESIDENT by Alex Prud’homme

When is a martini not exactly a martini? When it is a reverse martini, which is sometimes called an upside-down martini or wet martini. The recipe for this tempting cocktail reverses the standard ratios by combining one part gin to five parts extra-dry (white) vermouth, garnished with an enlivening twist of lemon. Smooth, sophisticated, and only vaguely alcoholic, the reverse martini is more of a classic aperitif than a bone-dry James Bond thriller. Franklin D. Roosevelt traveled to global summits with a special martini kit and liked to add olive brine or absinthe to his cocktails. He once served a standard (two parts gin to one part vermouth) martini—garnished with both a lemon twist and an olive—to Joseph Stalin, who described it as “cold on the stomach but not unpleasant.” Curtis Roosevelt, a grandson, declared the president’s martinis “the worst” tasting, though FDR liked them so much that he was known to have more than one, and burst into college fight songs while Secret Service agents bundled him off to bed. Julia and Paul Child were also fans of the reverse martini. It was one of their favorite predinner pick-me-ups, which they sipped at all times of the year, though they didn’t sing fight songs afterward. Indeed, Julia appreciated the cocktail’s light touch, and noted, “The best thing about a reverse martini is you can have two of them.” — Ingredients — 5 parts extra-dry vermouth 1 part gin Garnish with a strip of lemon rind — Preparation — Pour the vermouth and gin over ice in a cocktail shaker. Stir well (“40 times,” some insist). Strain into a chilled cocktail glass, such as a coupe. Twist a strip of lemon over the drink and drop it into your glass. Take a sip and, as James Beard said, “feel the glow.” À votre santé! Excerpted from DINNER WITH THE PRESIDENT by Alex Prud'homme. Copyright © 2023 by Alex Prud'homme. All rights reserved. No part of this excerpt may be reproduced or reprinted without permission in writing from the publisher.
1 note
·
View note
Text
Ginger-Cilantro Chicken Noodle Soup
From THE DON’T PANIC PANTRY COOKBOOK by Noah Galuten
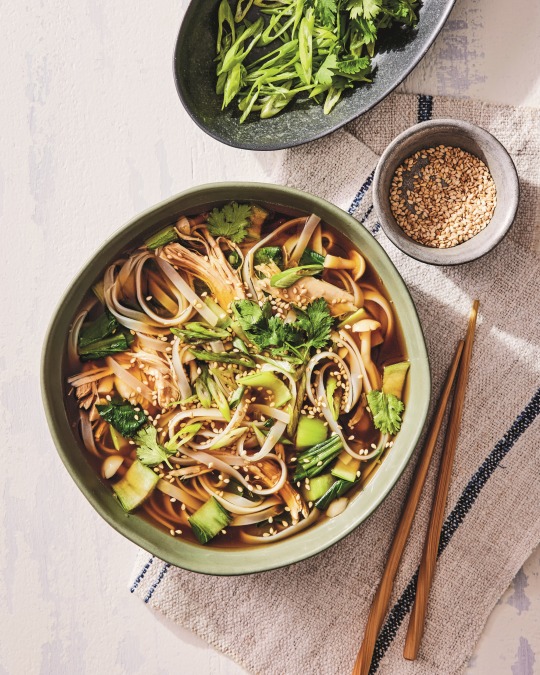
This is just another way of showing off great stock, by seasoning it with little more than fresh ginger, scallion, and tamari. It is meant to be a brothy, comforting soup that—once you have the chicken stock made—comes together in about 15 minutes. The green vegetables are intended to just barely wilt and remain bright, and the rice noodles make for a perfect accompaniment to soak up the broth and catch the mushrooms and greens on your chopsticks. Note: If you have any leftover chicken, whether from another recipe in this book or even a grocery store rotisserie chicken, this is a great way to use some last remaining scraps. But if you don't have that, you can simply buy a chicken breast from the store and poach it gently in a pot of water (or even the heated chicken stock) until just cooked. After that, you can remove the chicken, set it aside to cool, and then tear it into pieces for the soup.
Serves 4
1 (3 1/2-ounce) package bunashimeji (beech) mushrooms or 3 ounces or so of other mushrooms, such as white button, cremini, shiitake, or oyster
4 cups chicken stock
3 tablespoons tamari
3 scallions, thinly sliced, dark green tops kept separate
3-inch knob fresh ginger, grated or finely diced (about 2 ½ tablespoons)
4 ounces cooked chicken, torn into bite-size pieces
6 ounces rice noodles, such as mai fun, pad Thai, or vermicelli
Salt
2 small heads baby bok choy, very roughly chopped, or about 6 ounces spinach leaves, roughly chopped
Cilantro leaves, for garnish
White sesame seeds, freshly roasted or purchased already toasted
Equipment
Pot large enough to boil noodles and a 4-quart or so saucepan or soup pot
Prepare the mushrooms: For bunashimeji, cut off the dirty root end and discard it, then separate the mushrooms into individual pieces. For cremini or white button, brush off any dirt and thinly slice them. For shiitake or oyster, remove the stems then simply tear the caps into bite-size pieces.
Bring a pot of water to a boil for the rice noodles.
Meanwhile, in a 4-quart saucepan, bring the stock and tamari to a gentle simmer. Add the white and light green parts of the scallion, the ginger, chicken, and mushrooms. Bring the broth back to a simmer and then reduce the heat, cover, and keep at a bare simmer for about 10 minutes. Remove from the heat.
Add the noodles to the boiling water and cook according to the package directions. Drain the noodles and divide them among four bowls. Taste the soup for seasoning and add salt if it is need—it’s okay if it just on the brink of too salty, since there are still noodles and vegetables to go with it.
Add the bok choy or spinach to the pot of soup and stir them in so that they are submerged in broth. Cover the pot again and let the vegetables wilt for about 30 seconds (you want the boy choy stems to be crunchy, or the spinach to keep from going totally limp).
Divide the soup among the bowls, trying to distribute all of the components as evenly as possible. Garnish the bowls with cilantro leaves, the reserved scallion greens, and a light dusting of sesame seeds. Eat right away.
From The Don’t Panic Pantry Cookbook by Noah Galuten. Copyright © 2023 by Noah Galuten. Foreword copyright © 2023 by Iliza Shlesinger. Excerpted by permission of Alfred A. Knopf, a division of Penguin Random House LLC. All rights reserved. No part of this excerpt may be reproduced or reprinted without permission in writing from the publisher.
3 notes
·
View notes
Text
Sour Cream and Flaky Cheddar Biscuits
From SMITTEN KITCHEN KEEPERS by Deb Perelman

This is the kind of biscuit you might make once on a whim, but should you make the “mistake,” as I did, of sharing it with family, friends, or perhaps an entire pre-kindergarten classroom, do know that it will not be the last time you make them—because puddles of crispy cheddar cheese you can pick off in salty, lacy chiplike flakes make an impression on people. Initially, I’d intended to add spinach (just a handful of fresh leaves, chopped harmlessly small) for more of a breakfast-in-one-hearty-cube effect, yet, strangely, nobody in the four-year-old set seemed pleased with this when I offered to do so next time. Having tested it both ways many times since, I’ve realized they’re not wrong.
If you, like me, love an accordion-like biscuit, with layers that spring tall, begging to be pulled apart in small, buttery squares, then the quarter-then-stack technique here (which I first learned from the wonderful Claire Saffitz) is so gloriously simple, you won’t want to make breakfast biscuits another way. With no fancy folds or turns, and not even a rolling pin required, this has not-really-a-morning-person, aka me, written all over it.
Makes 9 biscuits plus 1 snack
2¼ cups (295 grams) all-purpose flour
1½ teaspoons baking powder
½ teaspoon baking soda
1½ teaspoons (4 grams) kosher salt
A few grinds of black pepper
Heaped ¼ teaspoon onion powder
12 tablespoons (170 grams, or 6 ounces) unsalted butter, diced
4 ounces (115 grams) sharp cheddar, cut into ¼-inch cubes (heaped ¾ cup)
¾ cup (180 grams) sour cream
Flaky salt, to finish
Heat the oven to 400°F (205°C), and line a baking sheet with parchment paper.
In a large bowl, whisk the flour, baking powder, baking soda, salt, black pepper, and onion powder. Add the butter to the bowl, and use your fingers or a pastry blender to squash the pieces into flatter bits, pinching and tossing until the mixture has tiny clumps throughout. Stir in the cheddar, then the sour cream. (The mixture will seem crumbly, but it will come together, I promise.)
Flour your counter, and dump the dough and any unmixed floury bits onto it, kneading it once or twice to bring it together. Pat the dough into a 1-inch-thick square. Use a knife or bench scraper to divide it into quarters; then stack the quarters. Repeat this process, patting the dough into a thick square a second time, re-flouring the counter if needed, and stuffing any loose scraps of dough between the layers.
Transfer the dough slab to the prepared baking sheet, and pat it into a ¾-inch-tall square. Place the tray in the freezer and keep it there for 7 to 10 minutes, until it’s cool and semi-firm to the touch. Remove from the freezer. Use a sharp knife to trim ¼ inch from each side, and squish these pieces into a bonus biscuit you do not need to tell anyone about. Cut the newly trimmed large square into nine approximately 2-inch-square biscuits, and space them out on the sheet. Sprinkle with flaky salt. (If you’d like to bake them another day, freeze them at this point. Let them warm up at room temperature for 15 minutes—they will not fully defrost—before baking.)
Bake the biscuits for 16 to 19 minutes, until they are deep golden brown at the edges and some cheese is melted in crisp puddles around the edges. Eat right away.
From Smitten Kitchen Keepers: New Classics for Your Forever Files by Deb Perelman. Copyright © 2022 by Deb Perelman. Excerpted by permission of Alfred A. Knopf, a division of Penguin Random House LLC. All rights reserved. No part of this excerpt may be reproduced or reprinted without permission in writing from the publisher.
0 notes
Text
Zucca in Agrodolce
From VIA CAROTA by Jody Williams and Rita Sodi

Zucca in Agrodolce
Squash Marinated with Onions and Currants
Any number of squash varieties are well suited for this uniquely Venetian marinade. Butternut is sweet and silky in texture, while red kuri has dense flesh and a subtle chestnut flavor with an edible skin. Arrange in a single layer so the marinade and spices flavor every slice.
Serves four
1 small butternut or red kuri squash (1 ¼ pounds/570 grams)
extra-virgin olive oil
salt
1 medium red onion, thinly sliced (about 1 cup sliced)
2 dried bay leaves
1 cinnamon stick
1/2 cup/120 ml aged sherry vinegar
1/2 cup/120 ml water
1/4 cup/about 30 grams currants
1 tablespoon/12 grams sugar
3 tablespoons/30 grams pine nuts, lightly toasted
Preheat the oven to 400F. Cut the squash in half lengthwise. Rub the squash halves all over with olive oil, salt them well, and set on a baking pan. Roast until the squash halves are blistered in places and soft, 35 to 40 minutes. When cool enough to handle, scrape out the seeds with a spoon.
Place a medium skillet over medium-low heat and lightly coat the bottom with olive oil (about 1 tablespoon). Add the onions, bay leaf, and cinnamon stick. Cook until the onions are beginning to soften, about 5 minutes. Stir in the vinegar, water, currants, sugar, and 1 1/2 teaspoons/4 grams salt. Raise the heat to medium-high and simmer until the liquid is reduced by half, 2 to 3 minutes. Turn off the heat and stir in the pine nuts. Slice the squash about 2 inches/5 cm thick and arrange on a platter.
Spoon the marinade over the squash, distributing onions, currants, and pine nuts over the slices. Let stand for at least 15 minutes, or refrigerate for up to 24 hours. Consider making this ahead of time to let the flavors mingle. Serve at room temperature.
From Via Carota: A Celebration of Seasonal Cooking from the Beloved Greenwich Village Restaurant by Jody Williams and Rita Sodi, with Anna Kovel. Copyright ©2022 by Jody Williams and Rita Sodi. Excerpted by permission of Alfred A. Knopf, a division of Penguin Random House LLC. All rights reserved. No part of this excerpt may be reproduced or reprinted without permission in writing from the publisher.
0 notes
Text
Amatriciana – Tomato Sauce with Pancetta and Chili Pepper
From ESSENTIALS OF CLASSIC ITALIAN COOKING by Marcella Hazan

Amatriciana
Tomato Sauce with Pancetta and Chili Pepper
The Roman town of Amatrice, with which this sauce is identified, offers a public feast in August whose principal attraction is undoubtedly the celebrated bucatini—thick, hollow spaghetti—all’Amatriciana. No visitor should pass up, however, the pear-shaped salamis called mortadelle, the pecorino—ewe’s milk cheese—or the ricotta, also made from ewe’s milk. They are among the best products of their kind in Italy. When making Amatriciana sauce, some cooks add white wine before putting in the tomatoes; I find the result too acidic, but you may want to try it.
For 4 Servings
2 tablespoons vegetable oil
1 tablespoon butter
1 medium onion chopped fine
A ¼-inch-thick slice of pancetta, cut into strips ½ inch wide and 1 inch long
1½ cups canned imported Italian plum tomatoes, drained and cut up
Chopped hot red chili pepper, to taste
Salt
3 tablespoons freshly grated parmigiano-reggiano cheese
2 tablespoons freshly grated romano cheese
1 pound pasta
Recommended pasta: It’s impossible to say “all’amatriciana” without thinking “bucatini.” The two are as indivisible as Romeo and Juliet. But other couplings of the sauce, such as with penne or rigatoni or conchiglie, can be nearly as successful.
1. Put the oil, butter, and onion in a saucepan and turn on the heat to medium. Sauté the onion until it becomes colored a pale gold, then add the pancetta. Cook for about 1 minute, stirring once or twice. Add the tomatoes, the chili pepper, and salt, and cook in the uncovered pan at a steady, gentle simmer for 25 minutes. Taste and correct for salt and hot pepper.
2. Toss the pasta with the sauce, then add both cheeses, and toss thoroughly again.
From Essentials of Classic Italian Cooking: 30th Anniversary Edition by Marcella Hazan. Copyright © 1992 by Marcella Hazan. Foreword copyright © 2022 by Victor Hazan. Excerpted by permission of Alfred A. Knopf, a division of Penguin Random House LLC. All rights reserved. No part of this excerpt may be reproduced or reprinted without permission in writing from the publisher.
0 notes
Text
Negroni Classico
From VIA CAROTA by Jody Williams and Rita Sodi

Negroni Classico
This is by far the most popular drink at our bar.
Makes 2 3 ounces/90 ml Beefeater gin 3 ounces Antica Formula vermouth 3 ounces/90 ml Campari 2 orange wedges
Stir the gin, vermouth, and Campari with ice in a tumbler or mixing glass. Strain into chilled rocks glasses filled with large ice cubes. Drop an orange wedge into each glass.
MASTER THE NEGRONI
Everyone should learn to master a spritz and a negroni. A few essential bottles like Campari, Aperol, Cocchi Americano Bianco, gin, red vermouth, and prosecco, and a mixing glass with a bartender’s long-handled spoon, are all you need. (Use Cynar instead of Campari if you are in an earthy mood.) Jody prefers vermouth, specifically Vergano Bianco, with soda and a double lemon twist, but I am a negroni fan. I have made many variations on this classic; at I Sodi, we have had a lengthy and unique negroni list for more than ten years. Stir the negroni in a mixing glass with ice. Then pour your chilled drink into a glass with ice. Squeeze an orange peel over the negroni before dropping it in. Enjoy. Rita
From Via Carota: A Celebration of Seasonal Cooking from the Beloved Greenwich Village Restaurant by Jody Williams and Rita Sodi, with Anna Kovel. Copyright ©2022 by Jody Williams and Rita Sodi. Excerpted by permission of Alfred A. Knopf, a division of Penguin Random House LLC. All rights reserved. No part of this excerpt may be reproduced or reprinted without permission in writing from the publisher.
0 notes
Text
Olive all’Ascolana
From VIA CAROTA by Jody Williams and Rita Sodi

Olive all’Ascolana
Fried Sausage-Stuffed Green Olives
We transform the traditional sausage-stuffed olives by also adding a layer of sausage on the outside, almost like a tiny Scotch egg. This makes them a substantial snack, or spuntino. It’s great to have some ready in the freezer for an aperitivo (if frozen, defrost them in the refrigerator before frying).
Makes about 48
8 sweet Italian sausages (1 ½ pounds/680 grams) 4 large eggs ½ cup (1.5 ounce/50 grams) finely grated Parmigiano Reggiano+ more for serving ½ cup (1.5 ounce/50 grams) finely grated pecorino Romano 1 cup/240 ml whole milk 3 cups (300 grams) plain breadcrumbs (or torn white bread) 1 pound/454 grams pitted, large green olives in brine, such as ascolana all-purpose flour, as needed safflower oil for frying, about 3 cups/720 ml extra-virgin olive oil for frying, about 3 cups/720 ml
Slice the sausages open lengthwise and remove the meat from the casings. Crumble it into a large bowl. Lightly beat 1 egg and add to the sausage, then stir in the parmigiano and pecorino. In a separate bowl, pour the milk into 1 cup/100 grams of breadcrumbs and let sit until the breadcrumbs have absorbed all the milk. Squeeze out any excess milk and add the soft breadcrumbs to the sausage. Mix thoroughly with your hands.
Drain the pitted olives from their brine, rinse thoroughly, and pat them dry. For each olive, take a small pinch of filling and stuff it inside the cavity. Use a spoonful of the mixture to coat the olive, pressing the olive in the palm of your hand to completely encase it in sausage. When all the olives are filled and coated, you can refrigerate them up to 1 day before breading and frying them.
Set up three bowls for breading: Pour flour into one bowl, the remaining 3 eggs, lightly beaten, into another, and the remaining breadcrumbs into a third bowl. Working in batches of about 8 olives, roll each olive lightly in the flour, then eggs, and then in breadcrumbs, pressing so they adhere. At this point the olives can be refrigerated for up to 2 days or frozen for 1 month—bring to room temperature before frying.
For frying: Combine both oils in a deep, heavy pot until 3 to 4 inches/7.5 to 10 cm deep and set over high heat. Test the oil to see if it’s ready; if you drop a breadcrumb into the pot it should sizzle and float the moment it hits the oil. A candy/deep-fry thermometer clipped on the side of the pot should read 350oF/175oC. While the oil is heating up, line a sheet pan with a few layers of paper towel and set it next to the stove.
Fry the breaded olives in batches, turning until golden brown all over, 3 to 4 minutes. Lift them out of the oil and drain briefly on the paper towels. Dust with parmigiano just before serving.
From Via Carota: A Celebration of Seasonal Cooking from the Beloved Greenwich Village Restaurant by Jody Williams and Rita Sodi, with Anna Kovel. Copyright ©2022 by Jody Williams and Rita Sodi. Excerpted by permission of Alfred A. Knopf, a division of Penguin Random House LLC. All rights reserved. No part of this excerpt may be reproduced or reprinted without permission in writing from the publisher.
0 notes
Text
Suya
From MY AMERICA by Kwame Onwuachi

Origin: Nigeria
Yield: 6 to 8 servings
Suya is the grandfather of American BBQ. In Nigeria, the spices draw out and fire up the meats, often cooked over an open flame. Here I do the same. But if you don’t have a grill, use a well-oiled cast-iron skillet over high heat in a kitchen with open windows. The open windows are very important, unless you find the blare of a smoke alarm harmonious and enjoy fits of sneezing. I find the sweetness of the char plus the heat of the spice totally irresistible. I did when I first smelled it from beyond the walls of my grandfather’s compound in Nigeria, or when we went to market when I could sneak a skewer. (Since my grandfather was an obi, or chief, there were many customs and rules around what he and his family could eat.) When I opened my second restaurant, Kith and Kin, I wanted to suya everything. The reaction from the diners, at least initially, was mixed. Many Nigerians scoffed at the idea that suya could be applied to, for instance, brussels sprouts. They were, on the whole, proud that Nigerian cuisine was being given the attention it so much deserved but arrived at the table with some strong opinions. Judging from the empty bowls that came back to the kitchen, I think I won them over. But it was always a battle.
In this recipe, I stick to the traditional proteins—steak, chicken, and shrimp. In Nigeria, suya is served with sliced tomatoes and onions, which help mellow the heat. Here that role is played by a tomato-ginger soubise and a traditional onion cream sauce from France, and I keep the tomatoes and onions in the form of pickles, whose burst of acidity rounds out the flavors.
For the suya and to assemble
1 pound large (16– 20 size) shrimp, peeled and deveined
1 pound boneless ribeye steak, excess fat trimmed, sliced into ¼- inch strips
1 pound boneless, skinless chicken thighs, sliced into ¼- inch strips
4 1/2 tablespoons Suya Spice, divided, plus more to garnish (recipe below)
1 1/2 teaspoons kosher salt, divided
¼ cup roughly chopped fresh parsley
Tomato-ginger soubise, to serve
Pickled tomatoes and onions, to serve
Lime wedges, to serve
For the tomato-ginger soubise
1 Roma tomato, roughly chopped
2 teaspoons extra-virgin olive oil
Kosher salt, to taste
2 tablespoons grapeseed oil
3 tablespoons Ginger-Garlic Purée (GGP) (recipe below)
1 yellow onion, thinly sliced
1 cup heavy cream
1 cup whole milk
For the pickled tomatoes and onions
1 cup Spice Pickling Liquid (recipe below)
1 medium red onion, large dice
1 medium ripe tomato, large dice
For the suya
Place the shrimp, steak, and chicken in three separate bowls. Season each with 11/2 tablespoons of suya spice and 1/2 teaspoon salt, mixing well to combine. Cover with plastic wrap and refrigerate for at least 1 hour. (You can marinate the shrimp for up to 12 hours, and the steak and chicken for up to 48 hours.)
For the tomato-ginger soubise
Heat the oven to 400°F. Line a sheet pan with parchment paper. Toss the tomatoes with olive oil and season with salt. Spread evenly over the sheet pan and bake for 15 minutes, until deep red and a little wrinkly.
Meanwhile, heat the grapeseed oil in a medium pot over medium heat. When it shimmers, add the GGP and cook until fragrant, 2 to 3 minutes. Add the onions and cook until translucent and soft, 7 to 10 minutes. Add the roasted tomatoes, along with the cream and milk. Bring to a simmer and cook, stirring often, until reduced to about 1 cup— watch carefully, as cream has a tendency to boil over, so reduce the heat as necessary to keep it from sputtering or burning— about 1 hour. Remove from the heat and let cool slightly, then transfer to a blender and purée until velvety smooth. Season to taste with salt and set aside. You should have 1 cup of soubise.
For the pickled tomatoes and onions
Bring the spice pickling liquid to a boil in a small pot. Place the onions and tomatoes in a nonreactive bowl and pour the hot liquid over them, stirring to combine well. Let cool to room temperature, about 1 hour before serving. You should have about 3 cups of pickled tomatoes and onions.
To assemble
When ready to cook, prepare a grill for high heat. Let it heat for 10 minutes. Grill the shrimp, steak, and chicken, turning occasionally, until deeply browned and cooked through, about 3 minutes for shrimp and steak and 4 to 5 minutes for the chicken.
In a small pot, warm the soubise over low heat. Place the grilled items on a platter, dust with extra suya spice, and sprinkle with parsley. Serve with warm soubise, pickled tomatoes and onions, lime wedges for squeezing, and jollof rice.
Note: Cooked suya shrimp will keep in an airtight container in the refrigerator for up to 1 day, chicken and beef suya for up to 4 days. Tomato-ginger soubise will keep in an airtight container in the refrigerator for up to 3 days. Pickled tomatoes and onions will keep in an airtight container in the refrigerator for up to 3 days.
Suya Spice
Origin: Nigeria
Yield: 1 pint
2 tablespoons + 1 1/2 teaspoons grains of paradise (or alligator pepper)
5 Maggi Seasoning cubes (vegetable flavor)
6 tablespoons + 1 1/2 teaspoons cayenne
1/2 cup peanut butter powder
2 tablespoons + 1 1/2 teaspoons sweet paprika
2 tablespoons + 1 1/2 teaspoons onion powder
2 tablespoons + 1 1/2 teaspoons garlic powder
2 tablespoons ground ginger
Blitz the grains of paradise in a high-powered blender or spice grinder until finely powdered, then set aside in a medium bowl. Blitz Maggi cubes until finely ground, then add to the bowl with the grains of paradise. Add all the other ingredients to the bowl and whisk well to combine.
Note: Suya spice will keep in an airtight container in a cool dark place for up to 4 months.
Ginger-Garlic Puree (GGP)
Origin: India
Yield: 1 pint
2 large stems ginger, peeled and thinly sliced
1 ½ cups garlic cloves
¾ cup grapeseed oil
Combine all the ingredients in a high-powered blender or food processor and process until smooth.
Note: Ginger-garlic puree will keep in an airtight container in the refrigerator for up to 1 week, or in the freezer for up to 6 months.
Spice Pickling Liquid
Origin: American South
Yield: 3 cups
1 ¾ cups white wine vinegar
¼ cup granulated white sugar
3 tablespoons + 1 teaspoon kosher salt
12 fresh thyme sprigs
4 teaspoons whole coriander seeds
½ habanero pepper, stemmed, seeded, and roughly chopped
2 thin slices ginger, about 2-3 inches long
2 cups water
Place all the ingredients into a medium pot and bring to a boil over high heat. As soon as it comes to a boil, remove it from the heat. Let cool completely, then strain through a fine-mesh sieve and transfer to a clean jar with a tight-fitting lid.
Note: Spice pickling liquid will keep in an airtight container in the refrigerator for up to 6 months.
From My America: Recipes from a Young Black Chef by Kwame Onwuachi with Joshua David Stein. Copyright © 2022 by Kwame Onwuachi. Excerpted by permission of Alfred A. Knopf, a division of Penguin Random House LLC. All rights reserved. No part of this excerpt may be reproduced or reprinted without permission in writing from the publisher.
2 notes
·
View notes
Text
Mom Duke’s Shrimp
From MY AMERICA by Kwame Onwuachi

Yield: 2 to 3 servings
This is an homage to my own Mom Duke’s, Jewel Robinson, and her supercharged version of the peel-and-eat shrimp I grew up with. I was inspired by that dish’s addictive flavor and silky texture as well as New Orleans’s famous barbecue shrimp. The Worcester-shire sauce, beer, white wine, and butter—so. much. butter.—yield a highly aromatic glistening sauce, hovering right on the sea side of a traditional barbecue. I like to serve it with rice and torn French bread, though anything that sops up all that good sauce works.
10 large (16– 20 size) raw Gulf shrimp, shell-on, head-on if possible
Kosher salt, to taste
1 tablespoon House Spice (recipe below), plus more to taste
2 tablespoons grapeseed oil, plus more as needed
2 garlic cloves, minced
1/2 yellow onion, finely diced
1/2 stalk celery, minced
1/2 green bell pepper, finely diced 1 teaspoon dried oregano
1 teaspoon dried oregano
1 fresh bay leaf
3 fresh thyme springs
3 tablespoons Abita Amber Lager or other amber lager
3 tablespoons freshly squeezed orange juice
3 tablespoons dry white wine, such as Pinot Grigio
3 tablespoons Shrimp Stock (recipe below)
5 teaspoons Worcestershire sauce
8 tablespoons cold unsalted butter, cubed
Freshly squeezed lemon juice, to serve
2 teaspoons finely chopped chives
Prep the shrimp: Peel and devein the shrimp, keeping the tails and heads on. (If you like, stash the shells in a ziplock bag and keep them in the freezer until you have enough to make shrimp stock.) Season the shrimp generously to taste with salt and house spice.
Sear the shrimp: Heat a large pan over medium-high heat. Add 2 tablespoons of oil and, when it shimmers, add the shrimp in a single layer. Sear the shrimp on both sides, 1 to 2 minutes total—they should be about halfway cooked. Remove from the pan and set aside.
Build the sauce: In the same pan, sauté the garlic, onions, celery, and bell peppers until translucent, about 5 minutes, adding more oil if needed. Add house spice, oregano, bay leaf, thyme, beer, orange juice, wine, stock, and Worcestershire sauce. Increase the heat to a brisk simmer and cook, stirring often. When about 80 percent reduced, after 2 to 3 minutes, return the shrimp to the pan and toss to coat. Continue to cook until the liquid is evaporated, then remove the thyme and bay leaf.
Remove the shrimp from the heat and add the cold butter a cube at a time, stirring constantly, until emulsified. Season to taste with salt and lemon juice, sprinkle with chives, and serve immediately, with additional house spice and rice and/or torn French bread.
Note: Mom Duke’s Shrimp is best served immediately.
House Spice
Nearly every kitchen I’ve been to in that stretch of Louisiana and Texas known as the Creole Coast has, somewhere in it, a jar of house spice. This mixture, made with varying degrees of heat, goes on everything: into the flour with which you fry chicken, onto a steak before it’s seared, into the eggs in the morning. Growing up in the Bronx, we had it too, made from scratch by my mom, whose roots are in the marshes of southern Louisiana. These flavors are the underpainting for my palette. House spice is as elemental in the kitchens I love as salt. This version is based on my mom’s but kicked up a notch with Worcestershire powder for a touch of acidity and umami.
Origin: American South
Yield: 3 cups
1/2 cup + 2 tablespoons kosher salt
3/4 cup + 1 tablespoon freshly ground black pepper
1/2 cup + 1 tablespoon + 2 teaspoons granulated garlic
1/4 cup + 3 tablespoons + 1 1/2 teaspoons granulated onion
1/2 cup Worcestershire powder
5 tablespoons + 2 teaspoons cayenne
5 tablespoons + 2 teaspoons sweet paprika
Combine all the ingredients in a large bowl and whisk well to combine.
House spice keeps in an airtight container in a cool dark place for up to 4 months.
Shrimp Stock
When I’m dead and gone and they cut open my body, they’ll find shrimp stock running through my veins. Though less widely used than chicken or veal stock in traditional French cuisine— where shrimp didn’t hold pride of place as they do on the shorelines of Louisiana— shrimp stock is at the base of so much of the food I love, from Shrimp Étouffée (page 133) to Seafood Gumbo (page 138) and Jambalaya (page 59). I grew up saving the shells of the shrimp we ate in order to make this stock, ziplock bags of which lined our freezer shelves, ready and willing to add its deep crustacean flavor when called upon to do so.
Origin: American South
Yield: 3 quarts
1/4 cup grapeseed oil, divided
1 pound shrimp shells (and heads, if available)
1 1/2 tablespoons tomato paste
1 medium yellow onion, roughly chopped
1 medium carrot, peeled and roughly chopped
2 stalks celery, roughly chopped
6 garlic cloves, halved
3 fresh thyme sprigs
2 fresh parsley stems
4 whole black peppercorns
In a large pot over high heat, heat 2 tablespoons of oil. When it shimmers, add the shrimp shells and sauté until deeply browned and fragrant, 7 to 10 minutes.
Add the remaining 2 tablespoons of oil and the tomato paste and cook, stirring often, until caramelized, 1 to 2 minutes. Add the onions, carrots, and celery and sauté until the onions are trans-lucent and softened, about 5 minutes. Add the remaining ingredients along with 4 quarts of water, and bring to a boil, scraping the bottom of the pot to loosen any browned bits, then reduce to a simmer. Simmer, uncovered, for 2 hours.
Strain through a fine-mesh sieve before using.
From My America: Recipes from a Young Black Chef by Kwame Onwuachi with Joshua David Stein. Copyright © 2022 by Kwame Onwuachi. Excerpted by permission of Alfred A. Knopf, a division of Penguin Random House LLC. All rights reserved. No part of this excerpt may be reproduced or reprinted without permission in writing from the publisher.
0 notes
Text
Lilly Zabar’s Chicken Soup with Matzoh Balls (Knaidlach)
From ZABAR’S by Lori Zabar

Chicken soup is the perfect balm for homesickness as well as for physical ailments. While Louis, Ada, Rose, and Lilly were acclimating to their new country, chicken soup with matzoh balls evoked memories of the childhood warmth and security that had been provided by their mothers in Ostropolia. Lilly served her chicken soup at Friday-night Shabbat dinner and on Jewish holidays. Her matzoh balls were light as a feather and her boiled chicken so moist and tender it fell off the bone. First, she served the soup and matzoh balls and then the chicken on the bone in quarters—or in eighths, if it was a large chicken. These two courses were a filling meal. Though some people shred the chicken into the soup, Grandma Lilly never did.
Chicken Soup
Makes 2 Quarts; Serves 8
Ingredients
One 4-to 5-pound chicken, cut into quarters, cleaned and washed, any visible fat removed with a small paring knife and saved for schmaltz
2 celery stalks, cut into quarters
1 large onion, cut into quarters
2 to 3 large carrots, peeled and cut in half
2-inch piece of fresh ginger
2 garlic cloves
Kosher salt
Freshly ground black pepper
Small bunch fresh parsley (tied with string)
Small bunch fresh dill (tied with string)
Bouillon cube (optional)
Directions
1. Place the chicken in a large soup pot. Pour boiling water over the chicken to cover. Let stand for 5 minutes and then drain the water.
2. Add cold water just to cover the chicken. Add the celery, onion, carrots, ginger, and garlic. Season with salt and pepper to taste.
3. Simmer until the chicken is tender, about 1 hour. Add the parsley and dill during last 20 minutes of cooking. If you prefer the chicken more done, almost falling off the bone, continue cooking to your preference. Taste, adding a bouillon cube if desired.
4. Remove the chicken and carrots. Strain the soup, mashing the juices of the vegetables through the strainer. Let cool, chill, and then skim the fat.
5. To serve, add the chicken pieces back into the strained broth. Gently reheat. Cut the carrots into disks to garnish the soup.
Matzoh Balls (Knaidlach)
Makes About 18 Matzoh Balls
Ingredients
4 large eggs
¼ cup schmaltz (rendered chicken fat), coconut oil, or vegetable oil
¼ cup seltzer, chicken stock, or vegetable stock
2 tablespoons freshly grated ginger
2 tablespoons finely chopped fresh parsley, dill, or cilantro
2 teaspoons kosher salt, plus more for cooking
Freshly ground black pepper
1 cup matzoh meal
Directions
1. Combine the eggs, schmaltz, seltzer, ginger, and parsley in a large bowl. Season with the 2 teaspoons salt and a few grinds of pepper. Gently mix with a whisk or spoon.
2. Add the matzoh meal 1/3 cup at a time. Stir to wet and absorb all the matzoh meal. (If the matzoh meal is added all at once, the mixture will turn to cement.) The mixture will be a bit loose but firmer after it chills.
3. Cover and refrigerate until chilled, about 3 hours or overnight.
4. To shape and cook the matzoh balls, fill a wide deep pan with lightly salted water and bring to a boil. With wet hands, take some of the mixture and mold it into a ball the size of a walnut. Gently drop the ball into the boiling water. Repeat until all of the mixture is used.
5. Cover the pan, reduce the heat to a lively simmer, and cook the matzoh balls for about 50 minutes. If desired, the cooked matzoh balls can be transferred to chicken or vegetable soup and served immediately. Alternatively, they may be placed on a baking sheet and frozen, then transferred to a freezer bag and kept frozen until a few hours before serving. Reheat in chicken or vegetable soup or broth.
Excerpted from Zabar’s by Lori Zabar. Copyright © 2022 by Lori Zabar. All rights reserved. No part of this excerpt may be reproduced or reprinted without permission in writing from the publisher.
Recipe edited and tested by Monita Buchwald.
1 note
·
View note
Text
Coffee-Rubbed Grilled Tri-Tip
From CHI SPACCA by Nancy Silverton with Ryan DeNicola and Carolynn Carreño

Tri-tip, a classic cut from Santa Maria, north of Santa Barbara, was one of the items in my mom’s small cooking repertoire. She prepared it in the oven, and I remember it always being a bit dry and chewy. Ryan also grew up eating tri-tip that his dad cooked on the grill, and he swore it was never chewy. When Ryan and I had the opportunity to cook for a barbecue-themed event, we decided, together, that it was time to revisit this California classic. I put Ryan to the challenge of showing me that tri-tip could be a tender cut. For once, he proved me wrong! The key, it turns out, is cooking the meat properly (in other words: not overcooking it), and, as is the case with so many tough cuts, slicing it against the grain. We wouldn’t even consider serving this without Chris Feldmeier’s Rancho Beans (page 302 in CHI SPACCA). Beans are a typical component of traditional Santa Maria barbecue, and Chris Feldmeier, a dear friend and former Mozza chef, makes the best version I’ve ever tasted.
Chipotle chiles are dried, smoked jalapeño chiles; they have a wonderful, deeply smoky flavor. If you can’t find chipotle chile powder, use smoked paprika (sweet or hot) or another quality chile powder.
Ask your butcher for a (4- to 5-pound) beef tri-tip with the fat cap trimmed to about ½ inch thick.
You will need an extra-large platter to serve the tri-tip.
Serves 4
For the Rub
· 1 heaping tablespoon black peppercorns
· 1 heaping tablespoon coriander seeds
· 1 heaping tablespoon cumin seeds
· 1 heaping teaspoon fennel seeds
· 1 heaping teaspoon yellow mustard seeds
· ½ cup ground coffee beans
· ½ cup kosher salt
· ½ cup light or dark brown sugar
· 2 tablespoons sweet smoked paprika
· 1 tablespoon ground chipotle chile (or sweet or hot smoked paprika or another chile powder)
· 1 tablespoon garlic powder
· 1 tablespoon onion powder
For the Meat
· 1 (4- to 5-pound) beef tri-tip, fat cap trimmed to about ½ inch thick
· 2 tablespoons olive oil
For the Basting Liquid
· 1½ cups apple cider vinegar
· 1 tablespoon fresh lemon juice
· 1 tablespoon double-concentrated tomato paste
For Serving
· Flaky sea salt
To make the rub, put the peppercorns, coriander seeds, cumin seeds, fennel seeds, and mustard seeds in a mortar or spice grinder and very coarsely grind them. If you’re using a spice grinder, transfer the spices to a small bowl. Add the ground coffee beans, kosher salt, brown sugar, paprika, chipotle chile powder, garlic powder, and onion powder and stir to combine.
To prepare the tri-tip, place it on a large baking sheet or in a baking dish. Pour the olive oil over the meat and massage with your hands to coat the meat with the oil. Reserve 1 tablespoon of the rub, sprinkle the remaining rub on the meat, and use your hands to press the rub into the meat. Set aside for 30 minutes to 1 hour to let the seasonings penetrate the meat and to come to room temperature.
Prepare a wood, charcoal, or gas grill for direct and indirect heat.
While the grill is heating, to make the basting liquid put the cider vinegar, lemon juice, tomato paste, and the reserved spice rub in a small saucepan and whisk to combine the ingredients. Bring the mixture to a boil over high heat. Reduce the heat and cook for 1 to 2 minutes, stirring, until the tomato paste is combined with the vinegar. Turn off the heat.
Lay the tri-tip on the direct-heat side of the grill and cook for 4 to 5 minutes, until the meat is deeply caramelized and almost black. (The coffee in the rub will cause the meat to look burned. Don’t be afraid; the deeply caramelized exterior is what makes this special.) Turn the meat and cook for 4 to 5 minutes, until the second side is deeply caramelized and almost black. Move the meat to the side of the grill where there are no coals and cook over indirect heat for 10 minutes. Begin basting the meat and continue cooking, basting often, for another 5 to 10 minutes, until an instant-read thermometer reads 120°F when inserted deep into the thickest part of the meat. Remove the meat from the grill and place it on a cutting board to rest for about 20 minutes. This resting time allows the juices to distribute in the meat, as with any large cut of meat, but in this case, it also allows the glaze to cool slightly and adhere to the steak.
Cut the tri-tip into ½-inch-thick slices against the grain. (To see the grain, press down lightly on the meat and look closely; you will see the fibers of meat running in one direction. That is the grain. By slicing the meat against the grain, you are cutting through those fibers, which makes the meat more tender.)
To serve, slide your knife under the slices of meat. Transfer the slices to an extra-large platter and fan them out to cover the surface of the platter. Lightly brush the remaining basting liquid on the meat and crush flaky sea salt between your fingertips over it.
Excerpted from Chi Spacca by Nancy Silverton with Ryan DeNicola and Carolynn Carreño. Copyright © 2020 by Nancy Silverton. Excerpted by permission of Knopf. All rights reserved. No part of this excerpt may be reproduced or reprinted without permission in writing from the publisher.
0 notes
Text
Orange, Coconut, and Poppy Seed Cake
From A GOOD BAKE by Melissa Weller

If I could have one bite of cake before I die, this, which is my spin on a “whole orange cake,” would be that cake. It differs from other citrus cakes in that it doesn’t call for the zest and juice, but for the whole orange. You boil the oranges to soften and cook the rinds, and then you put them in a blender and puree them, which makes the cake very moist, and also offers a unique flavor component and richness. It is the quintessential me cake; it has so many layers of flavor that all work together really well. Plus, it’s gluten free. It is also Passover-friendly in that it is nonleavened and contains no wheat flour.
Note You will need a 9-inch springform pan to make this.
Navel oranges 2 medium
Nonstick cooking spray
Almond flour (made from skinless almonds) 3 cups, 300 grams
Shredded unsweetened coconut 2 3/4 cups, 261 grams
Poppy seeds 1/4 cup, 35 grams
Baking powder 1 teaspoon, 5 grams
Fine sea salt 1 teaspoon, 6 grams
Large eggs 6, 300 grams
Granulated sugar 2 3/4 cups, 550 grams
Sliced almonds 1/2 cup, 50 grams
For finishing the cake
Apricot jam 1/3 cup, 95 grams
Water 1 tablespoon, 15 grams
Boil the oranges
Place the oranges in a medium saucepan and add enough water to cover them completely. Place a small heavy plate or saucepan on top of the oranges to weigh them down and keep them submerged. Bring the water to a boil over high heat. Reduce the heat to maintain a steady simmer and cook the oranges for 2 hours, replenishing the water with more boiling water to keep the oranges submerged. Turn off the heat, remove the plate, and use a slotted spoon to remove the oranges from the water and place them aside to cool to room temperature; discard the cooking water. (To cool the oranges more quickly, cut them into quarters when they come out of the cooking water.) When the oranges have cooled completely, put them in the bowl of a food processor fitted with a metal blade and puree. Measure 1 1/2 cups (365 grams) of the orange puree and stir the rest into a bowl of plain yogurt or a smoothie—along with a spoonful of honey, as the orange rind makes the puree slightly bitter. (You can make the puree up to 2 days in advance; transfer to an airtight container and refrigerate until you’re ready to use it.)
Get Prepared
Arrange the oven racks so one is in the center position. Preheat the oven to 350°F.
Spray the bottom and sides of a 9-inch springform pan with nonstick cooking spray. Cut a piece of parchment paper to fit on the bottom of the pan and place it in the pan. Spray the parchment with nonstick spray and set the pan aside.
Make the batter
Combine the almond flour, coconut, poppy seeds, baking powder, and salt in a large bowl and whisk them together.
Combine the eggs and the sugar in the bowl of a stand mixer. Fit the mixer with the paddle attachment and beat on medium speed for 2 to 3 minutes, stopping to scrape down the sides of the bowl with a rubber spatula once or twice, until the mixture is light and fluffy. Add the orange puree and beat on medium speed until it is mixed in. Add the dry ingredients and beat on low speed until no dry ingredients are visible, stopping to scrape down the sides of the bowl as needed. Remove the bowl from the mixer and use a rubber spatula to finish mixing the batter, making sure to scrape the very bottom of the bowl.
Bake and glaze the cake
Scoop the cake batter into the prepared pan and use a small offset spatula to even out the top. Sprinkle the almonds over the cake.
Place the cake on the center rack of the oven and bake for 50 minutes. Lower the oven temperature to 325°F and bake for an additional 15 to 30 minutes, until the cake is golden brown and the center springs back when touched. Remove the cake from the oven and set it on a cooling rack to cool for about 10 minutes in the pan. Run a small sharp knife around the edges of the pan to loosen the cake from the pan. Unclasp and remove the ring from the side of the pan and let the cake cool completely.
Meanwhile, place the jam and water in a small saucepan and heat over medium heat, whisking frequently, until the jam has melted. Pass the mixture through a fine-mesh strainer to remove the solids; discard the solids. Brush the glaze on the top of the warm or cooled cake.
Excerpted from A GOOD BAKE: The Art and Science of Making Perfect Pastries, Cakes, Cookies, Pies, and Breads at Home by Melissa Weller with Carolynn Carreño. Copyright © 2020 by Melissa Weller. Excerpted by permission of Alfred A. Knopf, a division of Penguin Random House LLC. All rights reserved. No part of this excerpt may be reproduced or reprinted without permission in writing from the publisher.
0 notes
Text
Bean Tamales
From THE FOOD OF OAXACA by Alejandro Ruiz

Bean Tamales
This recipe is made with good quality fresh masa, which is why it doesn’t call for much liquid. If you make the recipe from packaged masa harina, you can use chicken, beef, or vegetable stock rather than plain water. The miltomate water used here has leavening properties which result in a fluffier tamal.
If using commercially sold masa harina, follow the instructions on the packaging and then continue with shaping the tamales.
If you cannot find hoja santa, the tamales can be prepared without it.
Makes 20 tamales
Time: 3 hours
2 pounds fresh masa
½ cup agua de hoja de miltomate (tomatillo water) — see recipe, below
¾ cup whipped lard (lightly whipping the lard makes for an airy tamal)
1 tablespoon salt
30 corn husks, rinsed and soaked in warm water for 20 minutes
10 to 20 hoja santa leaves (depending on their size), stems removed (if the leaf is very large, cut it up and use one piece per tamal)
2 cups bean paste (see recipe, below)
Mix the masa with the agua de hoja de miltomate, lard, and salt and knead for 20 to 30 minutes. You can do this in a stand mixer with the paddle attachment and it will take about half the time. The purpose of kneading (or batido, whipping) the dough is to incorporate air. When the masa looks glossy and feels fluffier, take a piece of dough and drop it into a glass of cold water; if the dough floats, the masa is ready. Cover the masa with plastic wrap or a damp cloth and let it rest for an hour.
To shape the tamales, take a totomoxtle or husk, holding the base of the leaf against the palm of your hand, and leaving the pointy end toward your fingertips. Take two tablespoons of masa and spread it over the husk, from the middle downward. Cover the right side all the way to the edge, but leave about an inch clear on the left side. Take an hoja santa leaf (or a piece of a leaf if they are very large) and set it in the middle of the masa. Place a heaping tablespoon of bean paste over the hoja santa. To wrap the tamal, fold the right side of the husk over the filling, then fold the left side over to cover, and finally fold the narrow tip of the husk down. You’ll end up with a square-ish tamal. Set it aside and continue until all the tamales are shaped.
To cook the tamales, place them in a steamer forming a spiral pattern. The wide side of the totomoxtle should be facing up. Make sure to leave enough space between them so that steam can circulate freely, as this will help the tamales cook evenly. Some people like to place a coin in the bottom of the pot; this way, it rattles as the water boils. If it goes quiet, it means more hot water needs to be added.
Once all the tamales are in the steamer, cover them with a damp cloth, then cover with the lid. Cook for 30 to 35 minutes. Turn off heat, and let sit for 5 minutes before removing the lid and testing for doneness. Cooking time will depend on the size of your tamales and how they’re set up in the pot. The tamal is done when the dough has turned darker and less opaque, and the husk easily pulls away from the tamal.
For the Agua de Hoja de Miltomate (Tomatillo Water)
10 miltomate or tomatillo husks
2 cups water
To make the agua de hoja de miltomate, place the husks and 2 cups water in a small pot over medium heat. It’s okay if the water does not cover the husks completely. Bring to a boil and cook, stirring occasionally, for about 15 minutes. Strain and reserve the water.
Bean Paste
This can be made without the aromatics (avocado leaves and epazote). You will miss out on some of the distinctive flavor but still get good results.
Serves 12 (makes about 4 pounds)
Time: 30 minutes
1 onion, chopped into wedges
2 cloves garlic, smashed
1 stem of epazote, whole (or dried, if fresh is not available)
¼ cup lard
1 chile de árbol, slightly charred
3 avocado leaves, slightly charred
1 batch of frijoles de la olla (recipe below)
Salt, as desired
To make the bean paste, follow the recipe for frijoles de la olla (recipe, below) and reserve 1 cup of the cooked bean broth. Then, fry the onion, garlic, and epazote in a pan with the lard. Once the ingredients begin to caramelize and burn slightly at the edges, remove from the heat and discard all but the flavored lard, reserving it in the pan.
Transfer the beans to a blender and puree with their liquid, the chile de árbol, and the hojas de aguacate. Add water as needed in order to blend completely, and arrive at a smooth paste.
Fry the black bean puree in the pan with the flavored lard, stirring occasionally to avoid burning. The water will slowly evaporate and the beans will dry into a paste. You will know it’s done when a spoon dragged across the bottom of the pan leaves a trail. Taste for salt and adjust as desired.
Frijoles de la Olla
The fresher the beans, the faster they will cook. Soaking them overnight will also reduce the cooking time. A hard bean that was harvested some time ago can take up to 4 hours to cook. Frijoles de la olla may be refrigerated, but they turn sour easily, so should be boiled for a few minutes whenever you take them out of the fridge. I believe they improve as the days go by, as every time they are heated the liquid thickens and the flavor becomes more concentrated.
Serves 12 (makes about 4 pounds)
Time: 12 hours (or overnight) to soak and 3 hours to cook
2 pounds frijol delgado negro, or dried black beans
Water to cover plus 1⁄2 gallon water
1 medium onion, cut in half
1 head garlic, cut in half crosswise
2 stems of fresh epazote
1 tablespoon salt
To clean the beans, spread them out and discard any small stones and bits of debris. Rinse them a couple of times and allow to soak overnight, making sure they are covered with water by at least 2 inches.
Drain and rinse the beans, and place them in a pot with about 1⁄2 gallon of water, or enough to cover by 1 inch. Add the onion and garlic and bring to a boil. Reduce heat to medium-low, and let the beans simmer for approximately 2 hours, stirring occasionally. The beans should always be covered by about 1 inch of water, so add additional hot water as necessary.
The beans are ready when you can see their skin has split and a single bean can be squished between your fingers. At this point, add the epazote and salt and let them cook for another 15 to 20 minutes more.
From The Food of Oaxaca: Recipes and Stories from Mexico’s Culinary Capital by Alejandro Ruiz with Carla Altesor. English translation copyright © 2020 by Alfred A. Knopf. Excerpted by permission of Alfred A. Knopf, a division of Penguin Random House LLC. All rights reserved. No part of this excerpt may be reproduced or reprinted without permission in writing from the publisher.
0 notes