The FFXIV blog of Kodie (Sometimes NSFW) Server: Balmung (Follows from orochiserge) Discord: Kodie#4492 Residence: Mist Ward 17, Plot 14
Don't wanna be here? Send us removal request.
Statistics
We looked inside some of the posts by kodie-ffxiv and here's what we found interesting.
Average Info
Notes Per Post
17K
Likes Per Post
11K
Reblog Per Post
6K
Reply Per Post
14
Time Between Posts
7 days
Number of Posts By Type
Text
17
Last Seen Tumblr Blogs


Fun Fact
BuzzFeed published a report claiming that Tumblr was utilized as a distribution channel for Russian agents to influence American voting habits during the 2016 presidential election in Feb 2018.

Text

It didn't surprise her that Dayar's prediction proved correct and she took to the dancer's chakrams immediately.

It just delighted her that he enjoyed watching her practice.
43 notes
·
View notes

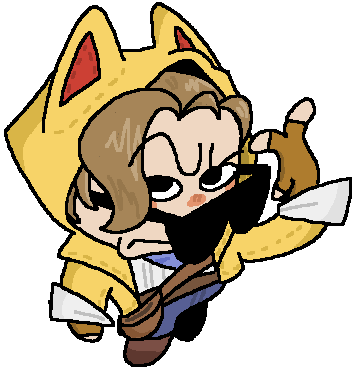
Text

i love the arcadion raids in general but dancing green is def my fav fighter so far
448 notes
·
View notes


Text


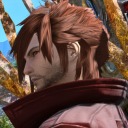
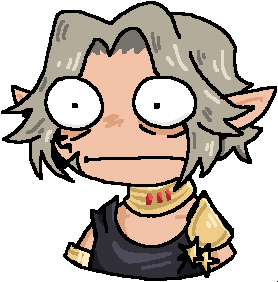
Bruh, this glamour is fire. One of my favorite "formal" outfits.
#kodie durant#ffxiv#balmung server#balming roleplay#the eorzean nightmare#always outnumbered never outgunned#reblog
8 notes
·
View notes

Text
Bruh, this glamour is fire. One of my favorite "formal" outfits.
#kodie durant#ffxiv#balmung server#balming roleplay#the eorzean nightmare#always outnumbered never outgunned
8 notes
·
View notes


Text
Tesh is taking care of her ill mother at the Peering Stones, so Kodie came to visit for a few weeks and help out his Goddess. Of course they needed some alone time.


I just adore them, your honor.
@mteshi-ffxiv
#kodie and tesh#ffxiv roleplay#ffxiv screenshots#balmung roleplay#crystal datacenter roleplay#mmotp#reblog
2 notes
·
View notes
Text
Tesh is taking care of her ill mother at the Peering Stones, so Kodie came to visit for a few weeks and help out his Goddess. Of course they needed some alone time.
I just adore them, your honor.
@mteshi-ffxiv
2 notes
·
View notes

Text
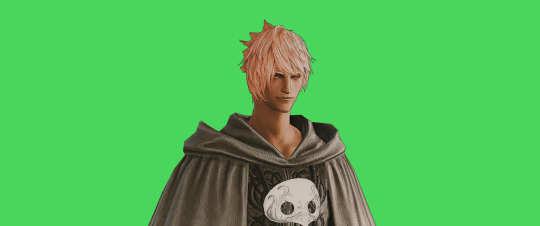
FF14 Battle Portrait Tutorial
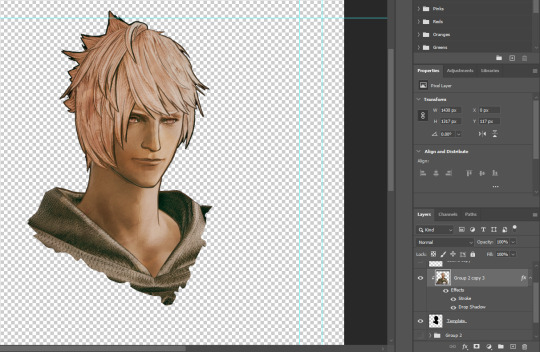
For the past few weeks I was trying to find a way to recreate the battle portrait from FF14 as there was a few characters that I want to see in that style but don't officially have one yet. I think I got it down more or less (see image below) so I thought it's a good time to share what I did.

First of all, I made a few files that would help make life a little easier. They can be grabbed here .
Note: I did use Reshade to do a bit of work at the screenshot stage to help speed up the process but the same effect can be recreated in Photoshop with a vanilla screenshot. There are a lot of tutorials on how to do comic/cartoon effect in photoshop and those would make good bases to work off of.
Step 1: Take the screenshot with the PortraitBase Shader on. I usually take two screenshots. One with "Comic" on and one with it turned off. This is so that I have more to work with if needed.

Step 2: Drag all the screenshots into photoshop and remove the background. In photoshop, arrange the layer so that the screenshot with the Comic lines visible is on top of the one with the effect off.
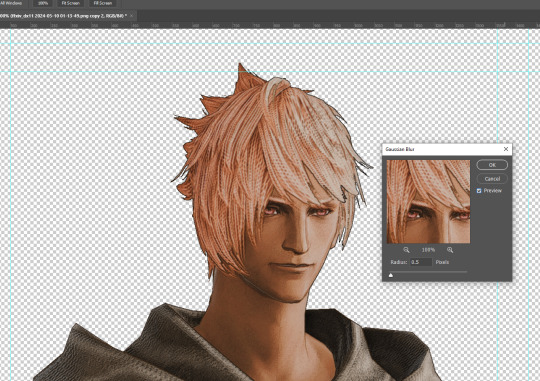
Step 3: Duplicate the the layer with the "comic" effect and apply Blur->Gaussian blur (radius 0.5)
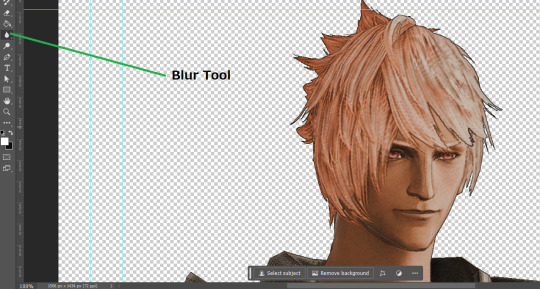
Step 4: Take a look at the hair. In Eric's case, It still doesn't look blur enough to me so I used the blur tool and blurred it a bit more
Step 5: Create a new layer above the layer in the previous step and use the brush tool to start outlining the edges. Where to outline is up to you but the idea is to make edges defined so that it looks more like a drawing.

Step 6: Duplicate the outline layer and then hide that layer. Step 7: Merge everything under the outline layer. Step 8: Drag and drop the "Texture.png" into the project and Clip it to your character layer. Set the blending of the texture to "soft light". Step 9: Drag and drop the "stroke Texture.png" into the project and Clip it to your character layer. Adjust the size till you are happy then set the blending to "overlay". Step 10: Adjust the opacity settings of both texture layers until it looks good to you.
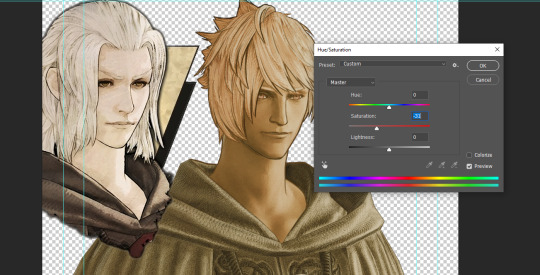
Step 11: Click on your character layer and go to image->Adjustments->Hue/Saturation (note: you will see I dragged in the official Hades portrait as a point of reference to work off of). Adjust the saturation till you are happy.
Step 12: Go to image->Adjustments->Color Balance and adjust the color till you are happy. In this example, since Eric is also wearing the Sophist robe, I tried to match that color to Hades' Sophist robe color.
Step 13: Once you are happy, drag the "Template.png" into the project and scale that to the size you want. Make sure it is completely covering the character. If it's not, you can just use paint more of it with the brush tool to extend it till it covers everything.

Step 14: Hide the "template.png" layer and select your character layer. Use the magic wand tool to select the outside of the character.
Step 15: With the selection still selected, click on the "Template.png" layer and press delete on your keyboard. You should now be left with a blank in the shape of your character.

Step 16: Drag the"Template.png" layer to be below your character layer. Then click on your character layer and clip it.
Step 17: Click on the "Template.png" layer and add a 2px stroke and shadow to it.
Step 18: Drag "Back_Deco.png" into the project and place it behind your character. Scale it till you are happy with it.
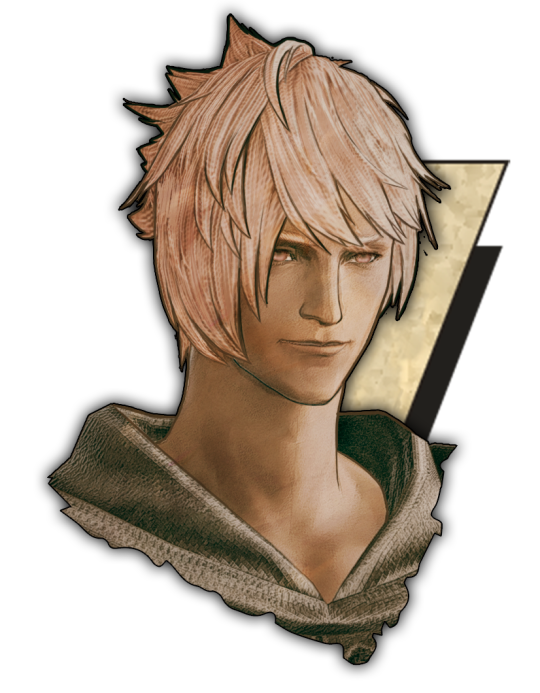
And that's it! Now you can recreate portraits for any NPCs that you want (in theory). A lot of it is also fine tuning to what you want but this should at least give you a decent base to work off of :)
2K notes
·
View notes
Text
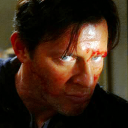
Emet-Selch every time Hythlodaeus says something vaguely cheerful or helpful to the WoL:
1K notes
·
View notes

Text

📢 Magic and Machina, A witch for the new age!
=====================
⚡️ WICKED THUNDER ⚡️
-Wickedly Divine-
=====================
🥊 "Electrope has many uses, watch and learn!"
404 notes
·
View notes