Statistics
We looked inside some of the posts by lizzbeeeeth and here's what we found interesting.
Average Info
Notes Per Post
811
Likes Per Post
626
Reblog Per Post
184
Reply Per Post
1
Time Between Posts
22 days
Number of Posts By Type
Video
1
Photo
15
Text
1
Last Seen Tumblr Blogs


Fun Fact
Kazakhstan’s Minister of Communications and Informatics has blocked the Tumblr site because it contained 60 sites of terrorism, extremism, and pornography in 2015.
Video
tumblr
How amazing is this clip of my Nidalee cosplay @CactusCanMedia made from @paxaus !? @riotgames @LeagueOfLegends
#League of Legends#leagueoflegends#league of legends cosplay#cosplay#pax#paxaus#nidalee#nidalee cosplay#prop#girl#cosplaygirl#Riot Games#Summoner Showcase#all chat#video#cosplay video#league cosplay
5 notes
·
View notes
Photo

Absolutely in LOVE with this photo of my Tier 19 Priest cosplay from World of Warcraft: Legion!
Cosplayer: Elizabethmaree Cosplay Photographer: Snap Happy Ian
@blizzard-games @worldofwarcraftthings @ohyeahworldofwarcraft
#WoW cosplay#WoW#World of Warcraft#world of warcraft cosplay#legion#cosplay#cosplayer#Worbla#blackworbla#prop#tier19#horde#alliance#ardawigs#blizzard#embroidery#armour#beading#nikon#photography#photoshoot#gems#LEDs#candle#motd#leather#warcraft#priest
6 notes
·
View notes
Text
Ysera Shoulders
Hey lovely people! I now have a bit of spare time on my hands and thought I would do some tutes/breakdowns of my two recent cosplays.
A lot of people have been asking me about my Ysera shoulders, so I thought why not show you guys how I made them!?

First of all, I collected a bunch of reference photos. I used Wowhead’s 3D model viewer - I screen capped the hell out of it for all of my reference photos. Another good reference is the Tier 8 Druid Shoulders as they are basically the same, only Ysera has paw prints on both sides inside the crescent moons :)

From there, I had to break down my reference photos and make a base for the shoulders to build up from. I had to make the shoulders as light as possible as they were going to be balancing off one another and on my bare skin. This is why I opted to using EVA.
MAKING THE BASE


For my base I needed something circular to work off so I used a styrofoam ball.I hollowed out the inside so that it can then sit snug on my shoulders and act as a cushioned base. Here the foam is all stuck down with tape so I could adjust the foam until I was happy with the shape. I then glued the foam to the styrofoam with contact cement.

Once the foam was stuck to the styrofoam, I covered the edge with expanding foam to create the sloping shape of the shoulders.
BUILDING THE SHAPE


Once the expanding foam was set, I carved it down to shape to create the slope effect. I then glued on my foam pieces at the front to the expanding foam with cement glue. I then covered the expanding foam with masking tape - this is to protect the foam as it is quite brittle and soft - it also covers all the holes.
I then added a foam strip to the underside to make the second lip/layer the shoulder have and cut the foam with a stanley to create the tree shapes.
And that’s my base done! :D
MAKING THE PAW PRINTS

On the shoulders, there is paw prints that surround the edges which are all identical to one another. Instead of sculpting 14 individual paw prints, I moulded and casted them :) I sculpted my master with Smooth On’s Free Form Sculpt. Once I had my master I moulded it with silicone and casted it with a polyurethane resin.
MAKING THE FLOATING ORBS + LIGHTS

On the shoulders there is a glowing orb on each side that appears to be “floating” amongst the branches. To give the illusion that the orb is floating, I used a thick armature wire that I wrapped around the orb to suspend it. I bent the wire into the shape of the branches, as it also be my support for the branches that will be sculpted over the top of it.
Amongst the armature wire is my wiring for the lights. There is a single bulb LED that is connected to a battery pack - the bulb sits just on the opening of the orb and the battery packs sits underneath the shoulders between the two layers of foam with a small switch to turn it on. I taped all the wires into place pulled taught, so it doesn’t move and holds shape.
The orb is a DIY Christmas bauble that I painted green with glass paint. To make the orb glow, I filled it with a sheer organza and glass beads for the light to bounce and reflect off.

Once I had the structure of my lights/branches and base of the shoulders done, I paper mache’d it all to give overall strength to the shoulders and still keep them light. I chose to paper mache as I didn’t mind having wrinkles and imperfections - it created more texture for my bark/wood appearance.
SCULPTING THE BRANCHES

Once the paper mache was dried, I began to sculpt out my branches. To keep it light, I used Smooth Ons Free Form Air. Here is a test of the light on in the orb!

Here is all of the branches completely sculpted! When the sculpt was drying I went back into them with a scalpel to create texture to the branches.
ADDING THE DETAILS

Now that I was happy with my branches, I made the crescent moon and paw prints details. The moons were sculpted our out of Free Form Air on a base of worbla. The paw prints were made with craft foam and covered in worbla. The small leaves on the branches are also made from worbla. I glued down all the decorations with a two part epoxy glue.
Once all my deco was glued down and had hardened, I cut into the paper mache (base of the shoulders) with a stanley knife to great a woodgrain texture and effect. Once I was happy with the texture, I primed my shoulders with an acrylic primer, ready for painting :)
PAINTING THE SHOULDERS

I painted the shoulders using acrylic paints and oil paints for shading. I started with a basic brown base and then built up my layers with various shades of browns, working my way up to lighter colours. Once I was happy with the base, I went back in and shaded with a dark brown and black oil paint. Using oil paint, you have the freedom to smear and and work back into the paint as it takes about a day-to two days to completely dry.
Hint: make sure you have plenty of time to wait for your paint to dry if you use oil paints!
AND THE SHOULDERS ARE COMPLETE

Here is the end results! To attach them to my body, I made a buckle and strap system that linked the shoulders together and then clipped up at the back - so I am encased in between them both. The weight of each shoulder balances it all out and the support from the styrofoam balls hold them in place on my shoulders.
I hope this tutorial helped you guys in some way or another! If you have any questions or want to see more in depth WIP shots, send me a message to my page - Elizabethmaree Cosplay!
#WoW#World of Warcraft#world of warcraft cosplay#warcraft#wow cosplay#legion#Ysera#ysera the dreamer#dragon#Dragon Aspect#cosplay#cosplayer#shoulders#armour#LEDs#tutorial#wip#Worbla#casting#lights#druid#alliance#horde
127 notes
·
View notes
Photo

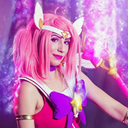
Weeb Star Guardian Lux :’)
Cosplayer: Elizabethmaree Cosplay
@leaguecosplay @leagueoflegends @league-of-legends-sexy-girls @league-cosplays
#League of Legends#leagueoflegends#league of legends cosplay#cosplay#cosplayer#Star Guardian Lux#star guardian#lux#lux cosplay#prop#vensy props#kawaii#desu#league cosplay#cosplay girl#magical girl#opl
181 notes
·
View notes
Photo

Started working on my Ysera cosplay for Oz Comic Con! Here is one of the bracers completed. I only need to cast the gem, sand, prime and then paint! ^0^ The bracer and claws are made out of Black Worbla and the details on the bracer are hand sculpted using Free Form Sculpt by Smooth-On. You can check out more of my cosplay stuff on my Facebook page - https://www.facebook.com/elizabethmareecosplay
#ysera#world of warcraft#wow#bracer#armour#worbla#blackworbla#dragon aspect#cosplay#world of warcraft cosplay#dragon
10 notes
·
View notes
Photo

Lifeguard Sivir: Elizabeth Maree Cosplay Photographer: Snap Happy Ian
5 notes
·
View notes
Photo

Slay Belle Katarina: Elizabeth Maree Cosplay
Photographer: Snap Happy Ian
@league-of-legends-sexy-girls @leaguecosplay @leaguecraft @league-cosplays
#League of Legends#league of legends cosplay#leaguecraft#slay belle katarina#katarina#props#christmas#snowdown#cosplay
4 notes
·
View notes
Photo

Christmas League of Legends style!
Slay Belle Katarina: Elizabeth Maree Cosplayy Earnest Elf Tristana: Jasmin Nora Cosplay
Photographer: Snap Happy Ian @league-of-legends-sexy-girls @leaguecosplay @leaguecraft @league-cosplays
#League of Legends#league of legends cosplay#cosplay#katarina#slay belle katarina#christmas#snowdown#earnest elf tristana#tristana#poros
1 note
·
View note
Photo

Slay Belle Katarina: Elizabeth Maree Cosplay
Photographer: Snap Happy Ian @league-of-legends-sexy-girls @leaguecosplay @leaguecraft @league-cosplays
#League of Legends#league of legends cosplay#leaguecraft#slay belle katarina#katarina#props#christmas#cosplay
2 notes
·
View notes
Photo

Christmas League of Legends style!
Slay Belle Katarina: Elizabeth Maree Cosplay Snow Bunny Nidalee: Ashleigh Laura Cosplay Candy Cane Miss Fortune: Snefasaurus Cosplay Earnest Elf Tristana: Jasmin Nora Cosplay Re-Gifted Amumu: Morgan Brent Designs
Photographer: Snap Happy Ian @league-of-legends-sexy-girls @leaguecosplay @leaguecraft @league-cosplays
#League of Legends#league of legend cosplay#cosplay#league of legends cosplay#christmas#snowdown#leaguecraft#allchat#katarina#slay belle katarina#miss fortune#candy cane miss fortune#earnest elf tristana#nidalee#snow bunny nidalee#regifted amumu#amumu
1 note
·
View note
Photo

Slay Belle Katarina: Elizabeth Maree Cosplay Candy Cane Miss Fortune: Snefasaurus Cosplay Photographer: Snap Happy Ian @leaguecraft @leaguecosplay @league-cosplays @league-of-legends-sexy-girls
#League of Legends#league of legends cosplay#slay belle katarina#katarina#miss fortune#candy cane miss fortune#leaguecraft#allchat#christmas#cosplay#props#poro
146 notes
·
View notes
Photo

Christmas League of Legends style!
Slay Belle Katarina: Elizabeth Maree Cosplay Snow Bunny Nidalee: Ashleigh Laura Cosplay Candy Cane Miss Fortune: Snefasaurus Cosplay Earnest Elf Tristana: Jasmin Nora Cosplay Re-Gifted Amumu: Morgan Brent Designs
Photographer: Snap Happy Ian @league-of-legends-sexy-girls @leaguecosplay @leaguecraft @league-cosplays
#christmas#League of Legends#league of legends cosplay#leaguecraft#allchat#Summoner Showcase#katarina#slay belle katarina#amumu#regifted amumu#nidalee#cosplay#snow bunny nidalee#Miss Fortune#candy cane miss fortune#earnest elf tristana#tristana
3 notes
·
View notes
Photo

Weooow! Here is my Slay Belle Katarina cosplay! :D Cosplayer (me): Elizabeth Maree Cosplay Photographer: Snap Happy Ian @league-of-legends-sexy-girls @leaguecosplay @leaguecraft @league-cosplays
#katarina#League of Legends#league of legends cosplay#leaguecraft#slaybellekatarina#slay belle katarina#christmas#cosplay
210 notes
·
View notes
Photo

Star Guardian Lux! Cosplayer (me): Elizabeth Maree Cosplay Photographer: Snap Happy Ian Raw prop castings: Vensy Props
#Star Guardian Lux#lux#lux cosplay#League of Legends#league of legends cosplay#leaguecraft#Summoner Showcase#cosplay#prop#paxaus
17 notes
·
View notes
Photo

Let the spam commence! I have a heap of gorgeous photos of my Star Guardian Lux cosplay that I am dying to share with you all! I really hope you guys like this cosplay, it is one of my favourites to date! The entire cosplay has been sewn entirely from scratch, created with my own patterns and templates for everything. Cosplayer (me): Elizabeth Maree Cosplay Photographer: Snap Happy Ian Raw prop castings: Vensy Props
#Star Guardian Lux#lux#cosplay#League of Legends#league of legends cosplay#leaguecraft#Summoner Showcase#Riot Games#lux cosplay#vensy#vensy props#prop
12 notes
·
View notes
Photo

MORE STAR GUARDIAN LUX! <3 See more of my work on my Facebook Page:https://www.facebook.com/elizabethmareecosplay
#cosplay#Star Guardian Lux#lux#League of Legends#league of legends cosplay#Summoner Showcase#Riot Games#selfie#lux cosplay
20 notes
·
View notes
Photo

Here is my finished Star Guardian Lux cosplay! See more of my work on my Facebook Page:https://www.facebook.com/elizabethmareecosplay
#lux#League of Legends#lol#cosplay#league of legends cosplay#lux cosplay#Star Guardian Lux#prop#led#selfie#Riot Games#supanova#all chat
61 notes
·
View notes