
Don't wanna be here? Send us removal request.
Statistics
We looked inside some of the posts by mars1-ines-soares and here's what we found interesting.
Average Info
Notes Per Post
0
Likes Per Post
0
Reblog Per Post
0
Reply Per Post
0
Time Between Posts
1 day
Number of Posts By Type
Text
17
Last Seen Tumblr Blogs


Fun Fact
Post activity is at the highest at 4:00 pm EDT; notes peak at 10:00 pm EDT.
Text
Evaluation
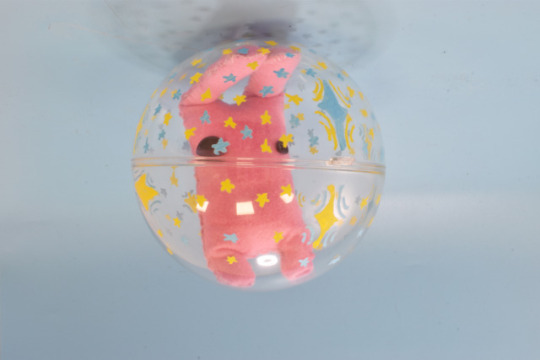
The work i have created this term is environments on maya, plushie in a ball, and an animation of a person trying to escape the ball. I used a software called maya to create the environment. I used a sewing technique to create my bunny plushie. I used Photoshop to make the animation.
The problems i had to overcome are how to use maya and how to create objects with it. So, to overcome the problems, i used YouTube tutorials on how to do it. I used two YouTube tutorials from two different channels. The YouTube channels are Digital DreamBox and Pizza Software House. This helped me do the work, and this relates to the work industry because I'm learning how to use maya even though I hate using it.
I used the project's contexts by researching what type of stitching i can use on plushies. and making mouldboards on what type of this i want in the environment. This practice suits my methods of working because it gives me an initial idea of what to do.
If someone saw my outcomes, they would probably think the starting is creating mind maps and getting all the materials together and learning how to use a new software. my journey has moved a little bit because im more into making things with my hands now. And everything i made turned out so good.
0 notes
Text
Animation work sheet and process


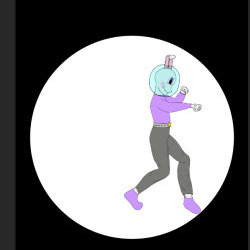
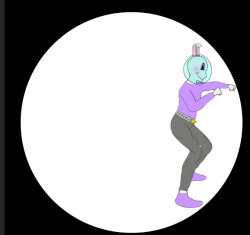
I created a work sheet of of the character i created. I created a character of a bunny in a ball. and the bunny has a space suit helmet.


I created the outline of the character. I used a model created by a website called pose.my.art. I took a screenshot of the model i created and i just added bunny ears. And i made a very smiley mouth with some blush. I made the shoes and the top purple. and the bottoms a dark grey and the skin tone a very light grey. I made the belt grey with a yellow star. And i made the bunny a helmet. And i made the bunny try to punch its way out of the bubble.

I loved how it turned out. This animation is running really smoothly.
0 notes
Text


There are square, circle and triangle on a game console and you can make characters with shapes with i think it looks so cool.
0 notes
Text

spots as art wark is very unique and you can use it in a lot of different colours and i love way how she did it.
0 notes
Text

shapes can make pixel art and QR coded you can use. and it looks cool.
0 notes
Text

There are a lot of ways to make a lot of colourful ways to make bight and unique art. for it look like the colourful squares are make the room small each time. you might even see the future.
0 notes
Text

I like this because there are so many unique ways make black and white paintings and it also could tell stores within the art work.
0 notes
Text


You can make anything out of shapes and if you set you mind to do it. you just need to think outside the box.
0 notes
Text
Maya Mash Systems
Preparing the environment models


I started, i had to have a mesh that i wanted to replicate the models in the environment. Once it has been imported. Go onto file and press import so i goes onto the environment. I need to set the base at a level or of the bottom of the mash. Press and hold D on the keyboard and this will enter into AXIS POINT mode. Once in this mode i can move the point onto the bottom and it should work on most surfaces.
Mash

The mash can be found in the top bar this will open a shelf with the tools I'm using to replicate the models in the environment. The first option is the one we will be using.


Select the object and then press the mash network button. A new panel will open on the right hand side. Then i pressed the Placer Tool option. Then add a placer node. Then i painted my mesh and once i had added the placer node and the tools will be visible in the right hand menu.


Then i added and deleted the tools that i used. and the tools i used brush radius, brush spacing, scatter density. I clicked the add button and it turns blue that means the tool id active. Now i can paint mt models onto the environment , i created. To have the best result i tick scatter and to make the models look more uniquer by changing the scale and the rotation of the models.


I deleted will remove the models that i have added again make and i had sure the icon way blue before i used it. When i first had a mash it will turn into a default to distribute and i made a line of objects. Just removed this node. I just clicked on the tab and then on the trash can icon. And to added another objects just re[eat the process again.
0 notes
Text
Digital Dream Box
This channel is quite useful if your first time using maya and you dont really know how to create object on maya.
The tutorial i used was how to make pine trees.
youtube
Pizza Software House
But i also used a different channel tutorial for a bridge but i didn't used all of the video, i improvised most of it.
youtube
These were very useful to use environment.
0 notes
Text
Circle, Square, Triangle
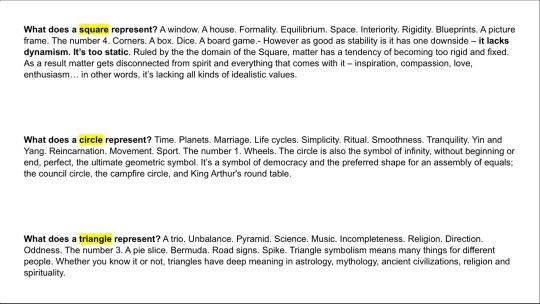
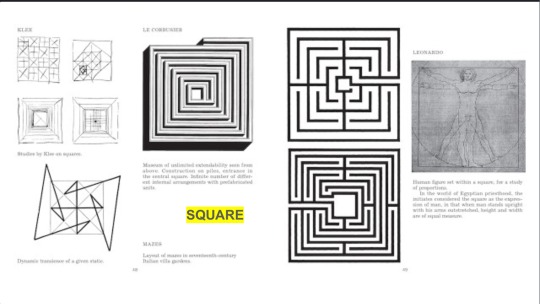
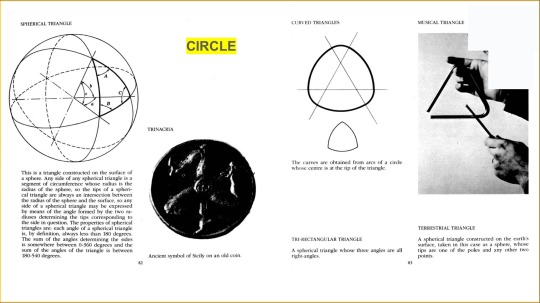

we can make circle, square and triangle shaped creature which could be pretty cool as a family of them. You could make a character that can time travel or one that can travel all the planets. Or things trapped in a ball. Or trapped in a glass cube or globe of a triangle.
0 notes
Text
Landscape maya


youtube
i used this video to make trees but changed it a bit.
youtube
I used this video but changed it a bit. I created the basic base to work on by creating a disc then i went onto the attribute editor then i went on to the PolyDisc1 and set the subdivision to 8 and the radius to a 500. And it should have a lot of faces on it.
To change the workspace, it will give you a unique and it has specialised tool to use as well. The workspace menu can be found in the top right hand corner of maya. And i selected the sculpting workspace as i will being sculpting the environment.
As now it has been changed it has gave access to new tool i can use. The tool i used the most is the sculpt tool. And tool option will appear on the right hand side. I changed the size of the brush, and the strength is how fast it lifts the surface and how high it goes. And the invert button is either lifts up that if its unticked and lower is when its ticked.
Click the surface to start sculpting and making the land of the environment and the invert is clicked to make a lake. Then i created another disc and assign a new material as the ocean to make water and coloured it a dark blue. I made tree separately and the i assign a new material as Lambert and coloured the bushes of the green and the truck brown. And i put lots on the environment. I made a bridge by using the the cube tool and stretching it and resizing it to make it look smaller. Then i copied and paste it until reached to the other land. Then i made two long cylinder things to make it look like the bridge is attached to rope. Then i made 4 post, and i made two thin cylinder things to make it look like rope and it attracted to the 4 posts. Then i assign a new material as lambert i coloured the wood and the posts as a dark brown. Then i assign a new material as lambert and i coloured it into a light brown.
After getting it look all pretty, Then do Delete by type - History Function. Then i swap the menu to a Poly Modelling and select the delete by type.
To retopologize, i went to the mesh menu then i went on the retopologize button next to it. Then a new window of the retopolgize options, Then set the face count 20,000 as it will give good detail on the environment. Then press the retopologize and delete the history.
Then go to mesh and go onto triangulate and this will turn all the squares polygons all into triangles. Then go to mesh display and go onto harden edge, it will give a more defined look then delete the history. Then go to mesh and go to reduce, then a small window will pop up, then i lowed the percentage until im happy with it.
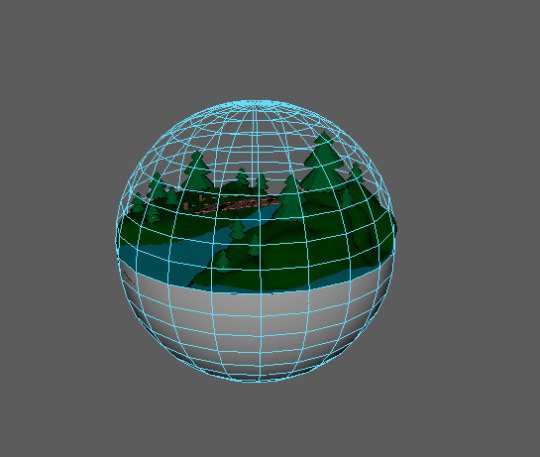
I created sphere to cover the enviroment and i went on to face mode and selected half of it, the assigned a new material as aiStandardSurface to make a globe.
0 notes
Text
Maya Tree Process from mood Board images


I got some photos off my moodboards and started blocking off shapes of the the images. By drawing shapes of them.
I opened up maya, I added a cylinder in to the scene. I opened the poly cylinder window and changed the subdivision axis to a 10. Them I went to face mode and I selected the top faces. Then I scale it down and make it shorter. Then press extrude the top faces. Then go on move tool on the bit I stretched and them scale it down and make it shorter. And extrude the top out. Then go on the move tool and make it tall and then go on edit mesh and then merge to the centre. Then scale it tool the size i want it to be. Then i moved the tree up.
Then added a cylinder to the centre, then i changes the subdivision axis to a 6 and the scale it down and i went to face mode and selected the top and scaled it down and i made small. and i made the top side ways. Then i stretch it out to make it tall and i made the trunk. I moved the tree down to the trunk to merge them together.
I selected the brushes of the tree and right clicked on it and i press assign new material as Lambert and i coloured the brushes on the tree green and i did the same exact thing for the trunk and coloured that brown.
I think it turned out good for my first time using maya.
0 notes
Text
MoodBoards
Low Poly Environment

I created this moodBoard to make a basic idea on what an environment looks like.
The Biome Aim To Create

I created this moodBoard for the basic aim for the environment i want to create.
0 notes
Text
Group Tetris Animation


I made little Tetris pieces with photoshop to make an our own group animations of Tetris game. I think the little character are very cute. The orange one one kind of looks like a chicken leg. And the other two looks like slimy creatures.
We made the group animation by using a camera and taking a photo each time we move the Tetris pieces by hand. And i think it turns out pretty cool.
0 notes
Text
Letter Q


I was given a letter out of the alphabet and the letter was Q. I used photoshop. And i used the colours black and white. I made it into a little furry creature and i made it slimy. I think it looks cool.
0 notes
Text
Frog Drawing
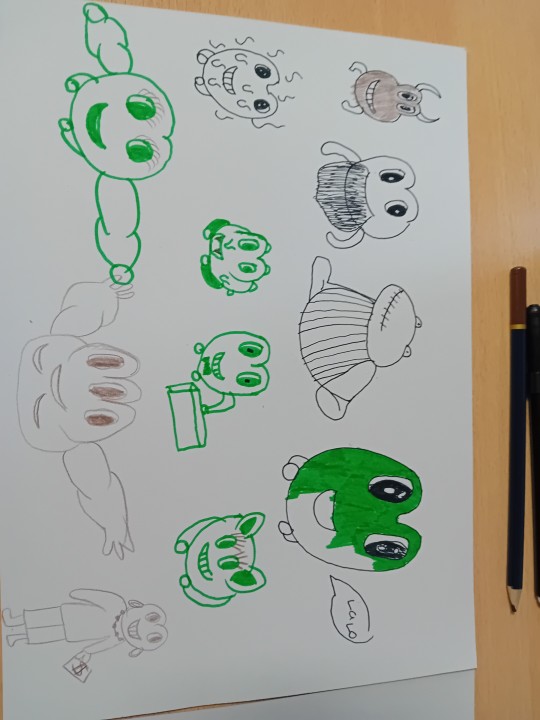
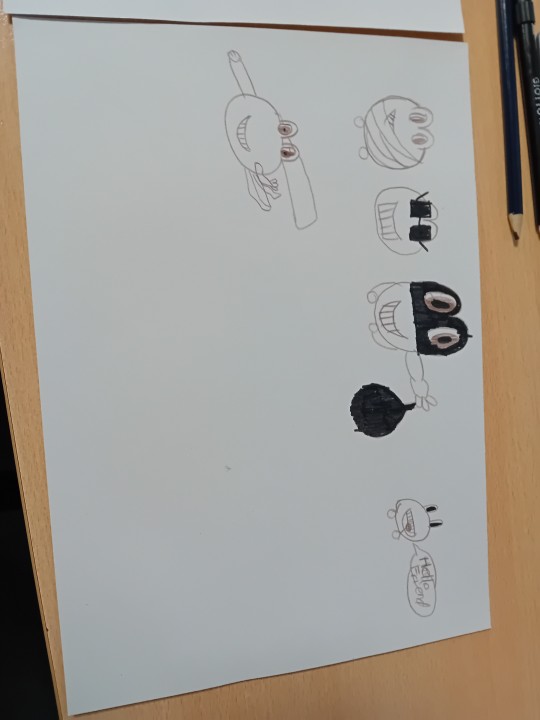
we did lots a frogs but the frog theme changed every time and you get less time to do each time. And the pens and pencil changed each round.
0 notes