
Statistics
We looked inside some of the posts by mattkinsonfilmmakerman-blog and here's what we found interesting.
Average Info
Notes Per Post
1
Likes Per Post
1
Reblog Per Post
0
Reply Per Post
0
Time Between Posts
11 days
Number of Posts By Type
Text
17
Last Seen Tumblr Blogs


Fun Fact
Tumblr has 16.74 million mobile monthly users in the US.
Text
Screencraft 201 - Final Furnishing of the set


After ages of having just dark brown walls for our set and nothing else, everything came together in a really quick series of events. Our set designers; along with helping hands from other crew members, managed to add extra detail to the dark wood and added proper benches, cushions, lamps, carpet, picture frames with era appropriate adverts and a projector outside the window meant our set was finally complete! Seeing it all come together successfully and also actually looking like a train was the best moment of this project so far. Standing inside the set you could really get a feel for how the film was going to look, and this excited me even more for our shoot.

And with the addition of lights and the great planning by our DoP, camera op and grip, we were able to get the train looking exactly as it would on an early morning service, which also gave us plenty of shadows to use for creating suggestive effects on our characters.


And, we also created an ingenious and budget effective way of creating the sliding doors we required for the set: buying a set of toy cars for £1 and gluing them to the bottom of our doors and putting blocks in place to ensure the doors would stay put. Overall, I’m incredibly pleased with how the set has come together over the last few weeks and I hope once we have the actors in, the film will come to life.
0 notes
Text
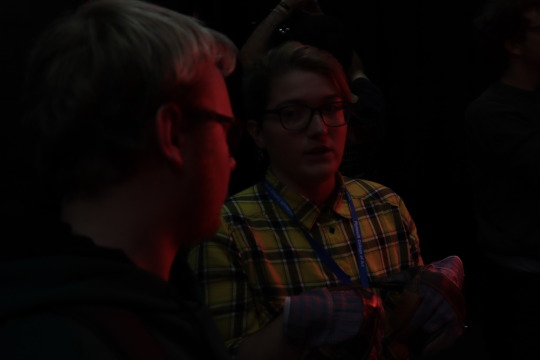
Screencraft 201 - Lighting and Cinematography Tests on set and Rehersals


We spent two days rehearsing with the actors for our piece, using the two days to test shots, lighting and blocking where actors would go. The atmosphere was really friendly and relaxed with the actors, and although a couple of disputes arose over how the set should be lit, we talked it out and tested the different options put forward and as the director I made the final decision on how the set should be lit, making sure everyone involved knew and that it wasn’t a ‘personal attack’ on someone’s opinion. A fun couple of days and it was nice to see how the set looked under lights.
1 note
·
View note
Text
Screencraft 201 - Painting set baselayer


After applying an initial extra layer of white paint to make the application of paint easier at later stages, we started adding the dark brown colour our set designers had wanted the set to be covered in. After the paint dried, it definitely started to create the dark, claustrophobic feel we were intending to create.
0 notes
Text
Screencraft 201 - Introduction to built set


With the sets finally completing construction, we were able to get into the warehouse and inspect the sets we would be shooting our films on. This was a first for me as I’d never built a set before, and it was exciting to start working on building a train carriage completely from scratch! I spent most of my time there discussing with our grip and DoP about where we wanted the cameras and lights, so we could plan ahead and decorate the set around where our equipment would be. I also spoke to the first A/D and set designers, and we came to the decision to fully dress one of the compartments and give the other one a simple basecoat to match but not dress it as intricately. This would mean that the set designers would have less of a work load, and also meant that on shoot days we wouldn’t have to move equipment from compartment to compartment getting shots.
0 notes
Text
Screencraft 201 - Lighting Workshop


A play around with lighting equipment such as diffusers and coloured LEDs to see how we can create interesting subtle lighting effects for our film. The Camera Op and I were both very keen to use a low red light on the conductor, keeping a sense of danger throughout the film. However after a bit of deliberate thinking, I felt it was too abstract to have a red light in a film where everything seems just... ‘normal’ contrasting the tone with what the viewers were seeing. So we decided to test out what early morning light would look like with the lights we had, and to also see if we could create it effectively. Our grip excelled at this point and sure enough, we found a lighting scheme that fitted the time of day; and one which also fitted the tone I had intended to create through writing the script.
0 notes
Text
Screencraft 201 - Second Table Read of New Draft of ‘The Conductor’ (16/10/18)


The second table read went much more smoothly than the first. Having members of the group reading out characters dialogue helped me with developing and shaping it for the third draft, as hearing the lines being spoken was much nicer than just reading it in my head. This draft got the most approval from the crew so far, and I took this positive feedback into the third draft and also sent out copies to potential actors we had in mind for the roles, in preparation for auditions and screentests.
0 notes
Text
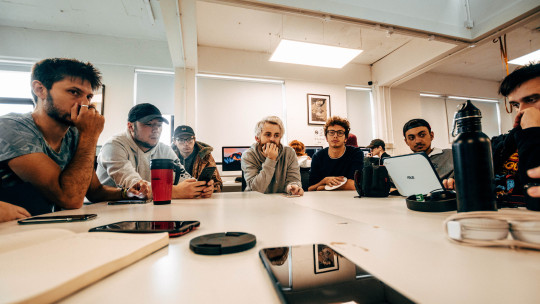
Screencraft 201 Crit Review 12/10/18

What was the first ‘official’ table read of the first draft of the script. Third year students and tutors were present during this meeting, offering advice and helping us outline problems with the structure of the script. This was an incredibly useful session, and changed pretty much the entire structure of the film for the better in my opinion. Having an ‘outside’ opinion was by far the best thing which could’ve happened, seeing as everyone in our group had already heard of the idea and what we were going to attempt to make, having people who hadn’t heard of the project comment on it was a massive help. I took all the ideas and problems down and then wrote a second draft accommodating these changes.
0 notes
Text
Screencraft 201 - First Group Meeting 3/10/18


In this meeting as a group we discussed ideas for the script we had, and finished with a total of 8 different ideas, some of which were created through mixing other people’s ideas. All the ideas were given their own synopsis's, and then as a group we voted for the idea we liked the most. My idea called ‘The Conductor’ was chosen as the story we liked the most, and I began drafting it straight away.


0 notes
Text
Film 201 - RAD003 Brief and first impressions
So. A new year and a new challenge at university, and this first module we were introduced to got me really excited. It was clear this year was going to be much more challenging, and hopefully more enjoyable than the last. We found out our brief was to make an 8-10 minute film set on a train, with a maximum of 3 characters. No pressure. I was fine with that, until I realised that it would be pretty hard to actually shoot on a train. And then the bombshell was dropped. We would be building the train sets instead. And that was the best part for me. I never had the opportunity to build sets purely for one film I was shooting and I was eager to get things... on track. (I apologise, this entire module is going to be making train puns)
Another new challenge was discovering that instead of working in crews of sizes we were used to last year (of anywhere between 3-6 people) we found out that the class had been split in half, giving around 15 people in a crew. Which was awesome, meaning I had again the new experience of working in a larger group and getting a feel of what a more ‘professional’ production would feel like. We started divvying out our roles as you do, and these were our original roles:
Producer: Santiago
Writer/Director: Sarah
First A/D: Louisa
DoP: Barbara
Camera Op: Zara (RIP)
Clapper: Me
Grip: Alex and Marek
Location Sound: Sam
Sound Designer: Andy
Editor: Connor and Jacob
Now, everything was fine with these or so we thought, until our producer raised the issue that everyone got their first choice of a role apart from me. Now I wouldn’t have minded at all, but the group felt the roles should’ve been given out fairly and for one person to not get their first or second choice when everyone else did just wasn’t fair. So after much debating, some rather unnecessary drama, and Zara leaving the course, our final roles were sorted and given out. They were as follows:
Producer: Lousia
Writer/Director: Me
First A/D: Jacob
DoP: Barbara
Camera Op: Connor
Clapper: Santiago
Grip: Alex and Marek
Location Sound: Sam and Sarah
Sound Designer: Andy
Editor: Connor and Jacob
I’d never worked as a writer/director on this scale before, so this was a massive undertaking on my part. I was eager to relish the challenge and got stuck in immediately, writing up ideas I had which I would bring to our group meeting later in the week. I also wanted to challenge myself further by writing in a different genre and tone than the comedy ones I normally use, so bearing that in mind, I got to work writing ideas.
0 notes
Text
Year 2 Robotic Boogaloo - Going Dutch and The Year Ahead
So as of Monday October 1st 2018, I am now a second year film student! A strange thing, as I thought I wouldn’t last this long. But after a break which was admittedly longer than I would’ve liked, and some hefty changes in my life (my family moved to the Netherlands over the summer so you could say I’ve gone Dutch??) it’s nice to be back and working on films again. I’ve missed all my classmates and the creative energy everyone seems to have, and it’s kinda made me want to push even further this year. Everyone seems to know me now as the writer/director who does comedy and makes people laugh. Little do they know that it’s all a front for my poor mental health, borderline personality disorder and my general suckiness at being a human being. But hey! Someone’s gotta make them laugh. But there’s an advantage to having this shitstorm going around in my head, and that’s the dark shit.
I hate sounding like a pretentious arsehole cause I really don’t want to be one, but looking at the attempts at Drama films last year by my fellow filmmakers were typical ‘student films’(I’m not insulting them or saying that I disliked them. I just noticed a narrative trend). Most ended with a character killing themselves, as their situation got ‘too much to bear’. That’s understandable, and a good driving point for a film; it makes the audience sad and regret seeing life being taken away, as suicide affects more people personally nowadays than ever before. Over the summer holidays I was determined to try and break the reputation I’d built for myself over the first year at university. I had never done a ‘serious’ film throughout the entire year, I’d acted in them, but hadn’t written or directed one. Normally I try to avoid things I’m not good at or don’t feel comfortable doing, but if there’s one thing first year taught me it’s to push yourself.
So filled with all these angsty teen thoughts I started trying to pen a basic idea for a film I could try shoot when I got back to university. Writing about the shit in your head is great, except you then can’t find a way to translate it into film. Everyone experiences depression differently, so if I was going to have a driving focus for my film I needed someone to focus on. Luckily I knew a guy. Me. I won’t bullshit or lie, this is public and is basically ranting but this is me putting my thoughts out there. But I have to get these thoughts down and the process behind making this film a reality and that’s why this film will be so personal to me. In July and August this year, I was incredibly suicidal. Sure some of it may have come from the stress of moving to a whole new country, but I felt like these thoughts had been there for a long time and I’d kept them bottled up until I couldn’t hold them back anymore. Most days I felt numb, I had no discernible reactions to anything and I hid myself away. Those days were better than the days where I was feeling only one emotion. Some days I was incredibly sad, lacked motivation and my house could’ve caught fire and honestly I wouldn’t have moved. Another emotion I felt was anger. I was angry at everything. Any little thing set me off. My family wanted to go to the beach? Nope not happening. Most tragically I was angry at my parents. I kept on telling myself that they weren’t supporting me, that they just didn’t get it. In truth my parents are nothing but supportive, although since also coming out as Bisexual things changed. A lot of things changed early this year but I won’t go into that.
Essentially I’ve been trying to take these emotions I can’t exactly describe and turn them into visuals. Originally my first plot was going to be me if I wasn’t too scared to kill myself - This whole struggle and then ending with the main character killing them self. When I opened up to my Dad about this idea, he said I should try look at it from a positive viewpoint - something I never really do. So I thought and then realised a lot of these films with mental health issues never end with hope or the promise of getting better. So that’s what I decided to do. Hope. The film wouldn’t end with the character’s death but instead start with a failed suicide attempt and the whole emotional shitstorm that entails. Sure it won’t have the typical everything is solved at the end, and it sure as hell won’t be happy, but I know that the character won’t try to kill themselves again and they have a slight hope that the future can get better. So that’s what I’m trying to take on with me to each day. Days like today where I’ve been borderline suicidal. There’s hope if you hold on. And if I can spread that message with my film, then I’ll be happy. I’m nowhere near finishing a first draft or even a script. I’m too scared to do it badly. But with help from my friends who I have so much respect for, I hope one day hope will become a reality.
0 notes
Text
Film 103 - French New Wave and Hip Hop Editing
*insert French coughing and baguettes being sharpened*
Bonjour my petite croissants! It’s time to learn about a wave, the newset of waves, and it’s French too! Isn’t it exciting?! Let’s have another gander at French New Wave.
French New Wave
1950s-60s
Handheld, on location shoots
Allowed Filmmakers to be more expressive
Sociopolitical commentary
‘They deal with today’s problems, not those of the past’
The young cinema, Jean Luc Goddard
Francois Truffaut ‘The 400 Blows’
Lack of establishing shots
Hip Hop Editing
Hip Hop is a cultural shift
Edgar Wright uses the fast cuts associated with Hip Hop Editing (Something I’m hoping to utilise in my final film)
Dynamic action of scenes cut together with fast cuts and getting rid of ‘the meat’
French New Wave jump cuts comes under this, as does Jawa filmmaking.
0 notes
Text
Film 103 - Boom Operating and Long Take
Boom Operators are the hidden heroes of the film making world, rarely seen as they can’t be caught in front of camera, and so fast on their feet to avoid being shot you miss them, they bring the quality sound recordings to post production. So we learnt a little more about these mysterious crew members today.
The Boom Operator is responsible for positioning of sound recording on location, which is especially crucial for dialogue recording. They need to ensure the dialogue is as perfect as possible to avoid lots of work to be done in post. Keep mic pointed at subjects mouth.
When booming more than one person, gently twisting the boom pole and mic to each person as they speak can help get the best recordings.
Mic Patterns
- Hyper Poliod: Best for interior audio as it has a wide range and could pick up background noise if used outside.
- Directional: Narrow short pick up band, but it’ll pick up more sound from the front than either side. Best to aim for diaphragm as that’s where the most voice vibrations come from.
Long Take
There are 4 types of long take we learnt about in today’s session:
Tracking Shot - Used in Tarchovsky’s ‘Stalker’ (1979)
Locked off Shot - ‘Jaws’ (1975)
Steadicam - The opening scene of ‘Hugo’
Pan
When organising a long take, you use blocking to figure out where each character will be positioned during the take. We were then tasked with making our own long take, using a boom operator as well and seeing if we could keep them out of the shot whilst doing some challenging manoeuvres. You can see our attempt down below, and we did manage to pull off some difficult manoeuvres and managed to keep the boom operator out of the shot too.
youtube
0 notes
Text
Film 103 - Sound Design
A very, very basic post, but sound is quintessentially basic in film. Sound is literally everything that can be heard in a scene, so sorry deaf readers this may not apply to you. (I’m sorry please come back I need more friends) These sounds can be:
- Location Sound (Important for ambience and realism!)
- Musical Score/ Soundtrack (Gives scenes and actions extra meaning)
- Dialogue (FUCKING IMPORTANT I DON’T NEED TO EXPLAIN WHY YOU NEED DIALOGUE)
- Sound Effects (Or Foley if you can’t find any on set)
- Voice Over
The absence of sound however can also be impactful. Films such as ‘Elephant’ by Gus Van Sant and ‘Animal Kingdom’ By David Michod are excellent examples of sound design and absence of sound.
Sound motif - A sound effect or combination of sounds that are associated with a particular character, setting, situation or idea throughout the film. There are many famous sound motifs in cinema, such as ‘Jaws’ theme and Darth Vader’s breathing and accompanying soundtrack in ‘Star Wars’.
Essentially sound is an important factor in editing a film and can be used to manipulate feelings and emotions from the audience.
0 notes
Text
Film 103 - Introduction to camera movement!
Nowadays, camera movement is something we see in every movie we watch, as it’s the best way to keep the audience from getting bored. But can you believe there was a time when camera movement never existed? Most early films were shot statically, so it would have been like watching a stage performance on screen. However, thanks to a gentleman called Edwin Porter, we were given an idea of moving the camera! In his film ‘The Great Train Robbery’ it was the first film to ever use a panning shot, and once other filmmakers saw this and filming equipment got lighter and easier to use, they went nuts with it. So let’s delve into the thrilling world of camera movement!
To give a good idea of different movements and how they’re used, I’ve listed them and an example from a film where the movement is done particularly well.
Aerial Shots
Opening title scene of ‘The Shining’ by Kubrick is an excellent example of an aerial shot being used effectively.
Long Shot/ Full Shot
‘North by North West’
Medium Shot
Bathroom scene from ‘The Shining’
Close Up
Opening scene from ‘A Clockwork Orange’
Extreme Close Up
‘Citizen Kane’
Tilt
The opening shot of ‘Star Wars: A New Hope’
As well as these shots, there’s also:
Pan Shot
Tracking Shot
Crane Shot
Steadicam Shot
Locked Off Shot
- Carefully composed shot letting the action move within it, theatre based and how all movies used to be shot.
Handheld/PoV/Kinetic
- Looser shooting style with subtle movement.
Tracking in and Tracking out
Dolly/Zoom
Dolly the camera moves, zoom the lens moves. Zoom focuses on one thing, Dolly focuses on entire shot.
0 notes
Text
Film 103 - START THE MONTAGE!
So, a new module and new terrifying things to get worried about! In this session we learnt about the different types of edit and montage we can use when making our final films. So prepare for an information overload as we look at a montage of montages.
Soviet Montage
Soviet Montage is all about understanding structure, so it’s very formalist. It came about as a result of a number of reasons after the 1917 Russian revolution, where Lenin and the communist government realised film was ‘A powerful tool for social and political influence’. So they did a number of things to ensure this worked.
1. The communist government centralised the Russian film industry into a company called ‘Narkompous’. The government therefore controlled what was made.
2. The government stopped the import of raw film stock to control the content.
3. Experimentation, re-arranging and reordered films meant the filmmakers learnt how to manipulate the audience. Since filmmakers couldn’t make films, they studied them and learnt how to edit to influence.
4. 1919 opened the state institute of cinematography, the world’s first film school.
Lev Kuleshov - Creator of the Kuleshov Effect (no shit)
- Also known as Intellectual Montage, Kuleshov discovered that viewers drew more meaning from two images together rather than one on it’s own, something no other art can do! (Suck it Illustration). The juxtaposition of two unrelated images to create a third meaning. I had a go at creating my own image of the Kuleshov effect and I think it’s pretty ‘neato burrito’.

- Film is an illusion of reality, and therefore creative geography can construct ‘Artificial Landscape’; two segments of film shot in entirely different locations but cut together to create continuous space.
Soviet Montage Filmmakers
Sergei Eisenstein
‘Battleship Potemkin’ (1925) - The Odessa steps sequence used montage to bring life to the chaos and violence of a scene.
Dziga Vertov
‘KINOKI’ was a group of documentaries. ‘The film drama is the opium of the people... down with the fairy-tale scenarios long live life as it is!’
‘As a filmmaker I am a mechanical eye and you can see the world how I see it’
To Summarise
- Order, Duration, Repetition
- ‘The way the film is cut together is its power’
- For film to reach its true potential, the cuts themselves should be obvious, so that the audience are aware of them. The illusion should be obviously constructed and not hidden - discontinuity editing.
- Political Idea, the artist as an engineer, just another worker assembling shots like factory workers. The process is a political statement as well as the film.
Continuity Editing - Hollywood
- Establishing Shot: Sets up scenes and locations
- Shot Reverse Shot: Singular character in frame appears to be communicating with another
- Match cut: Visual Edit to transport you to a different location/shot
- Z/L cuts: Introduce the next scene with audio only while the previous shot lingers
- Accelerated Montage: Cut away from the scene/character to a fast moving shot then return to scene/character to show a passing of time. One of my favourite directors Edgar Wright uses this method a lot and extremely well, such as the train scene in ‘Hot Fuzz’ where the main character takes multiple trains to a new location.
- Parallel Action Edit: Two scenes are woven together to show passing of time and blurring the lines between which scene we’re in.
Tonal Montage
- Putting together two or more shots with similar tonal or thematic qualities
- These shots build on each other and reinforce the emotional or psychological meaning of the film
Metric Montage
- Dictates that shots will be cut after a specific number of frames regardless of what is happening in the shot. Alfred Hitchcock used this form of montage in the infamous shower scene from 1960s ‘Psycho’.
Rhythmic Montage
- Matches cuts to music, sound effects or actions on screen
Overtonal Montage
- Combination of Metric, Rhythmic and Tonal montage. The final duel scene from 1966s ‘The Good, The Bad, The Ugly’ is an excellent example of this type of montage.
And that does it for all these montage styles! Hasn’t it been a spectacular montage of montages?
0 notes
Text
BAIS300: A summary
Now I know what it looks like: I only have one blog post for this module so I must have done no work. I wish it were as simple as that but alas, it’s not. I decided that instead of uploading every week, I would compile all of each weeks work in Interdisciplinary into one huge blog post to make it easier for you, the reader to find all the information about the creative process here. Interdisciplinary has been an interesting experience. After starting it without much interest from myself and other students, as the weeks have developed so have friendships and projects. I chose Film at university purely because I can’t do what fine artists can do with clay or foam. Already going into the module with respect for one of the courses we were working with helped me to develop friendships quicker. I knew this module would be challenging, getting me to work outside of my typical craft and it was as frustrating as it was enjoyable. Enjoy this summary of each weeks session.
First Few Weeks
The first few weeks were spent learning about what it truly meant to create ‘total art’ or ‘Gesamtkunstwerk’ (Yes that is a real word, although all spell checkers on my computer think otherwise). We spent these weeks looking at what each subject could bring to their exhibition piece. My only comment is that this could’ve been condensed immensely down to just a couple of weeks so we could’ve been given the brief sooner and therefore had more time to work on it and generate ideas. The ideas we were introduced to were interesting but honestly felt like a waste of time (which would explain why barely anyone showed up until the brief and groups were given).
The Brief, Groups and Idea Generation
We were finally told that we were to be exhibiting a piece based on the theme of public, and as a filmmaker I already knew what sort of footage I wanted to use, and this was echoed by the other filmmaker and DMP student in my group. However, with no background in fine art or even DT, I struggled to come up with a feasible idea for the artefact we had to create. After brainstorming for a while, our group decided that we wanted to create a figure, one which showed our individuality, even if we hide it when we’re in public. An initial sketch was drawn up and we decided to make it out of wire mesh and paper mache, although this eventually changed to cardboard due to time constraints and being unable to source the necessary amount of materials we needed. By this point in the process, we had filmed and made field recordings with our group, so the artefact became the main focus of our efforts.
The Final 2 Weeks and the Exhibition
It’s picture time folks! So here’s our lovely man (I called him Mini Derick) having his post it notes written and put on him by members of our class.

And here he is from the front when we hung him up after his legs couldn’t support him
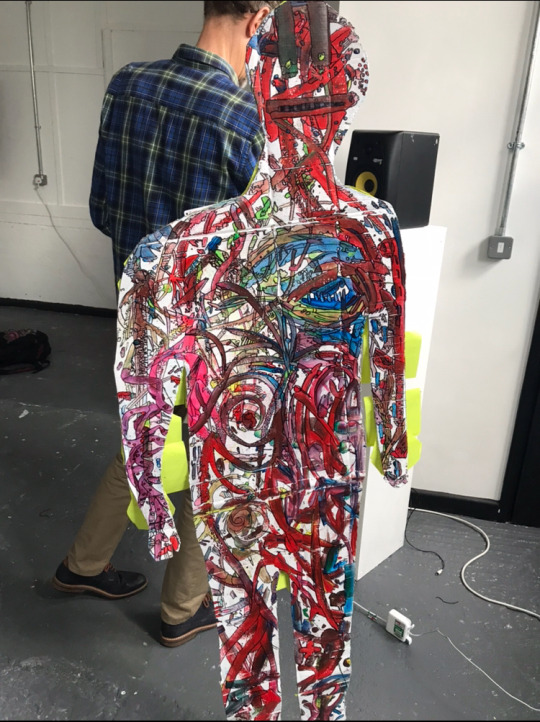
And here’s his back after he spun around for a bit

A collaborative effort created this quite rough but true version of how the public sees people, and I couldn’t be prouder. I just hope that next time Mini Derick will be able to stand by himself!
0 notes
Text
BCOP 100: A final farewell
What a year it’s been. I can honestly say I was terrified of theory at the beginning of the year, yet I’ve found it can be as interesting (and painful). The monsters part of the semester has by far been my favourite of this year, it’s been so intriguing and exciting to learn how classic monsters have been created, and it’s opened my eyes to how certain monsters are made, even today! (And today being one of the scariest times to be alive since the cold war I’m glad I can at least recognise the monsters before they’re created). You’ll find attached down below my critical evaluation and research of my group and I’s seminar, and the presentation pack we put together for it. Although I’ve already attached my poster from December in a post back early on my blog, I’ve added a download link to it again if it’s needed. I’ve found this module thoroughly frustrating, exciting, insightful and many other adjectives I can’t be bothered to say here. Thank you for putting up with the poor puns, irregular blog posts and my sheer incompetence at being intelligent.
Presentation Pack: https://drive.google.com/file/d/1kT5leNE4F-GF_mnRodtj3aqLKk8QtZmE/view?usp=sharing
Critical Evaluation: https://drive.google.com/file/d/1V_BbigSQzvXKry8YPggb7WAcr6H7KRfa/view?usp=sharing
Poster from December: https://drive.google.com/file/d/12mDboc1xd0sjvxfpw3lfsK5DLrURDDLW/view?usp=sharing
0 notes