
Statistics
We looked inside some of the posts by miriamdesign and here's what we found interesting.
Average Info
Notes Per Post
17
Likes Per Post
0
Reblog Per Post
17
Reply Per Post
0
Time Between Posts
4 days
Number of Posts By Type
Text
17
Last Seen Tumblr Blogs


Fun Fact
Celebrities use Tumblr as well.
Text
Term 1 Reflection
Overall I’m really happy with everything I’ve learned in such a small time. I’m a lot faster and more confident using all three programs covered in this course. Illustrator, Photoshop, and In-Design
There’s a few excercises and class tasks in my workbook that are unfinished. I’ve tried really hard to not obsess over the output and prioritise getting things finished in time over having them perfect but am still finding that really hard. I’m confiident however, that the knowledge is there, I’m just not sure the evidence is all there.
It’s great having all the tutorials accesable online.
At the start of the year I did well at keeping up with the work each week, but in the second semester, I started to fall behind. Because of the nature of this class being all workbook, no handins, it kind of became the subject I choose to fall behind in so I could use the homework time for hand-in projects like Graphic Design and Photography.
I think now, practise, practise with new projects ius how I’ll sharpen up my skills.
I also need to sit down with Tumblr and really get my head around how it works. I’ve used the reblog option instead of edit when i go back to add things onto posts, and this has made my page pretty chaotic. I’m not sure if its the site or me just not knowing how to use it, but ii find it pretty annoying. Good for the input stage, that’s been really good for quickly taking notes in class, but not so good for going back and using my notes to help me.
The penguin tutorial was rad. I didn’t quite finish it, but the skills I learnt in that helped me really up my vector art game
0 notes
Text
Finished book spread
I couldn’t get the class excercise book template to work so here they are just as a pdf style spread (for sending to the printer, I gave all of my spreads a 3mm bleed)


0 notes
Text
Children’s Song Booklet
A The Breakdown
SOooooooooo I just realised the colour of the screen I’ve been designing on isn’t set to standard colours... Basically I just designed a kid’s book the colour of puke....yay for me.
(edit.... or is it!?! I don’t know what correct colour is anymoooorrreeee....apparently the puke screen was just set to muted colours.....ach)
It’s too late in the game for me to worry about changing it all so ill just post a shitty screen-on screen photo here from my cellphone of what I’m seeing on this stupid dumb wrong screen so that you can see that my colour scheme is just 70′s Caravan Diner Menu, not puke/baby shit.
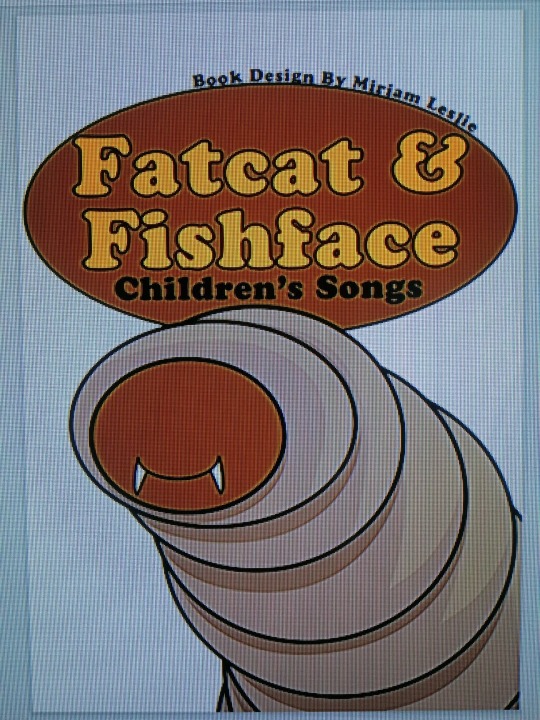
You get the idea.
Book Setup
Pages 1-16
Parent Pages
A- Parents (only appliued to page 14
Page numbers applied
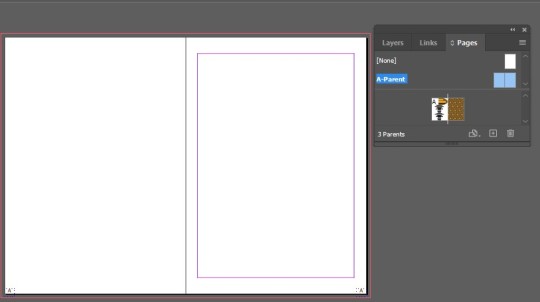
B-Parents
Applied to pages 4,5,10,11,12 and 12
Page numbers applied

C Parents
applied to pages 8 and 9
page numbers applied

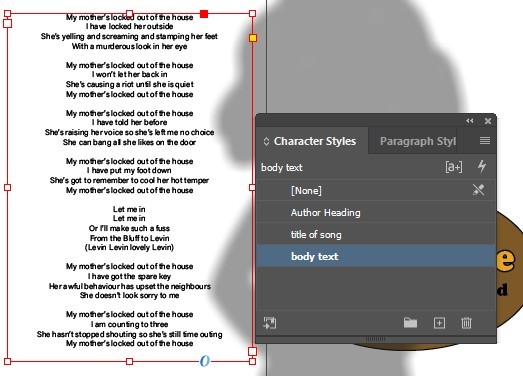
Character Styles
Author Heading
Title Of Song

Body Text
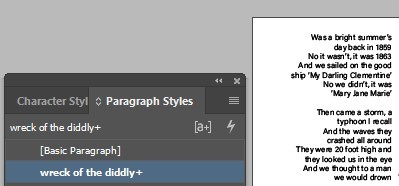
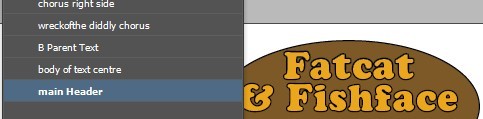
Paragraph Styles (There are Six Of These Used Throughout)
Wreck Of The Diddley
There are two toher paragraph styles on this page :
Wreck Of The DIddly CHorus (for the chorus on the left page)
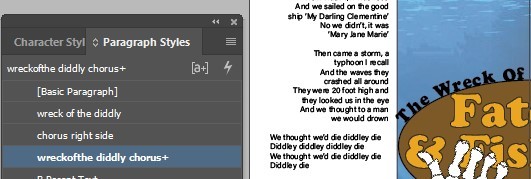
and Chorus Right Side For the right hand page
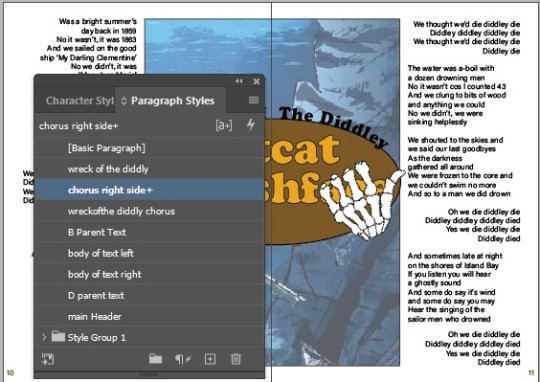
Body Of Text Centered

B Parent Text (not actually all in B-Parents so this is a bit confusing)
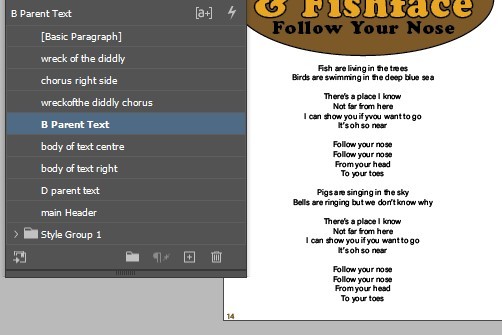
Main Header
Vector Images Made In Illustrator
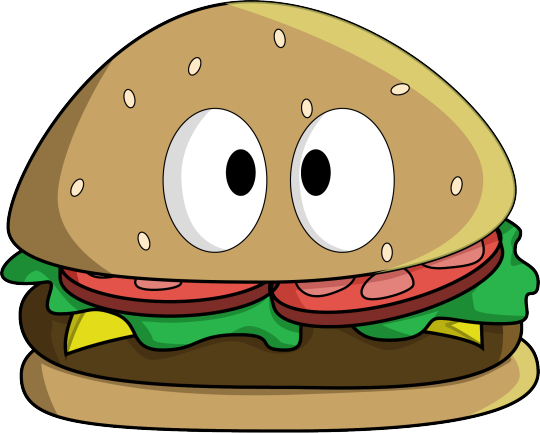
I’m a bit shit at drawing from my head so I started with an Image borrowed (stolen) from KellerAC on DeviantArt as a bottom layer (low opacity) to trace over with the Pen Tool
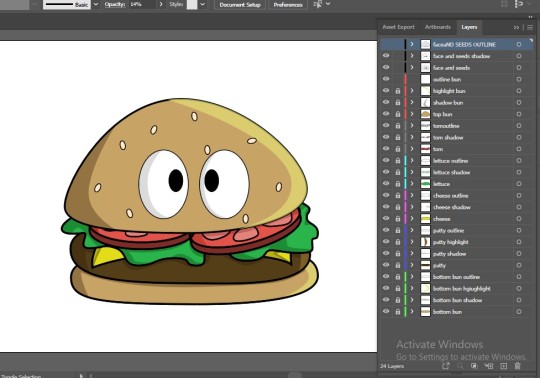
I start with one layer for eavch component of the burger
Untill I have all by burg layers drawn in simplke form. (Stroke is 2, and I’vew used that over the whole booklet to keep things flowing)

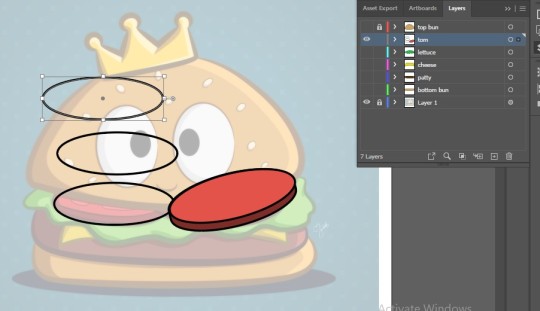
Next I duplicate each food layer so I have four of each. And I can rename them all based on what they will be
Outline
Base Image
Shadow
Highlight
For the shadow, I use the techniques recorded in the Penguin Tutorial Blog.
Pentool
Intersect Pathfinder Tool
make new swatch colour by adjusting fill colour of object to a darker shade
Change Oppacity to Muultiply, and slide down to around 30%
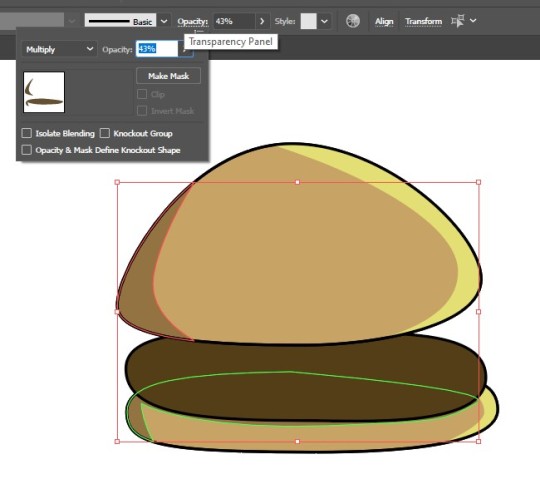
For the Highlight layer, It’s a similar process except the colour needs to be lighter, and the opacity to around 20% (normal opacity settings, not multiply)
I do this to all of my foodie layers
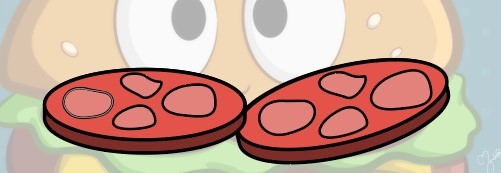
I add a face with eyes and sesemi seeds (I meant to shade and highlight the seeds too but ran out of time)
My Layers look like this untill i collapse them doiwn
Pretty chuffed with this little guy, I’ve never nailed shadow and highlight before so woohoo!
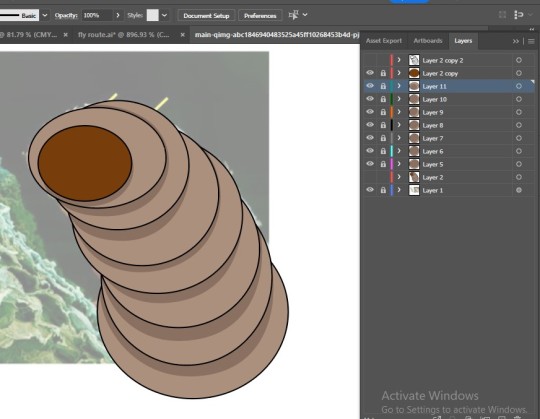
Oh god these colours are truly horrible But I love my maggot. They cute.

I start with a Stunning Photo from the Science Photo Library and again, open it up as a baSE LAYER WITH LOW OPACITY
FFor my outline layer I have all the eclipses on the same layer and use the Pathfinder TRIM tool
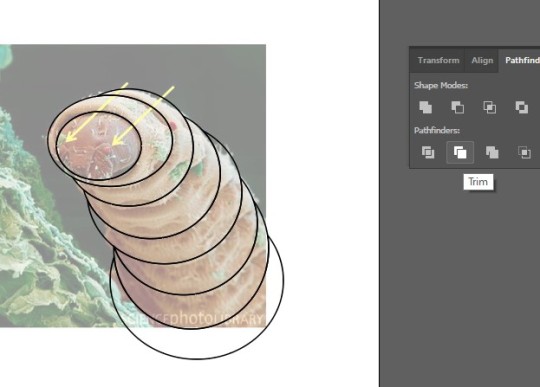
Then each eclipse has iit’s own layer to make it easier...it’s probably not easier...
Chuck on the shadow and highlights by locking all the other layers as i work
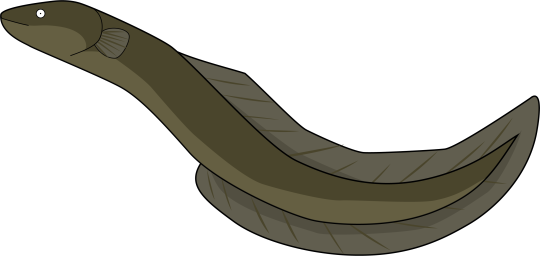
Again I start with an image as a bottom layer to trace from
This one is from and Article called Eel At Home wreitten by Akil Ravi at https://www.snipettemag.com/eel-at-home/
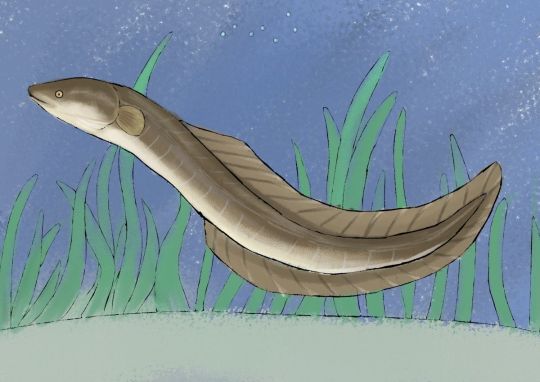

Pretty terrible trace really, but I ran out of time to tidy it up and it was going to be made way smaller anyway
Traced from this picture
https://www.freepik.com/premium-vector/skeleton-link-thumbs-up-hand-line-art-vintage-tattoo-print-design-vector-illustratio_24168568.htm


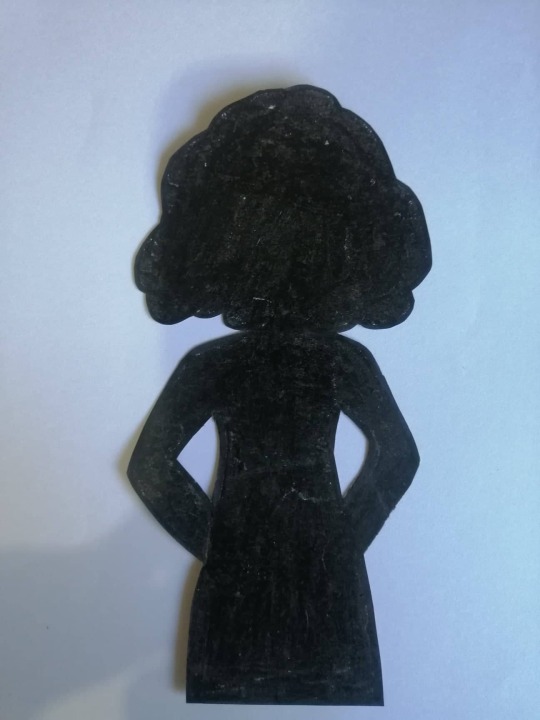
Made from bellow image of a cutout I made with paper when I was a teenager.
Made Greyscale in Photoshow, and Levels adjusted for high contrast black and white image.
Then magic wand tool sequence for getting rid of the background
PHotoshop Box Blur applied and exported as png
Again I have a small rage about the colours....and don’t do anything about it

See Previous blog for stepo by step instructions on how I made my pattern


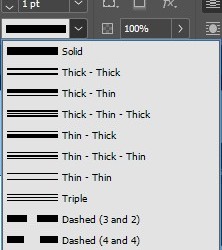
Dotted line made using Pentool in InDesign and choosing the dashed line option
Fly is too ugly to comment on
0 notes
Text
Indesign Book continuation
End Papers
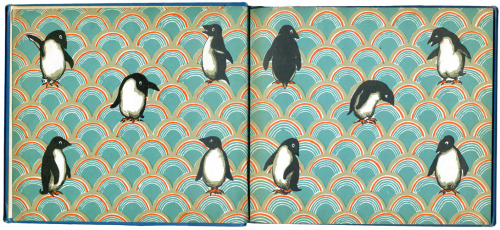
There to have a serpeartion between cover and content. Huge evolution of design visable through end papers from books.
Learning how to make Patterns In Illutrator
First Make a colour fill square, and a shape to go inside it

colour how you want and move into place ontop of square

Now just group the selection and drag into your Swatched Folder

make a shape and click your pattern to fill it

Now if you double click on you pattern swatch to get to Pattern Options

Here you can adjust the pattern’s properties, like Tile Types and Brick Offset
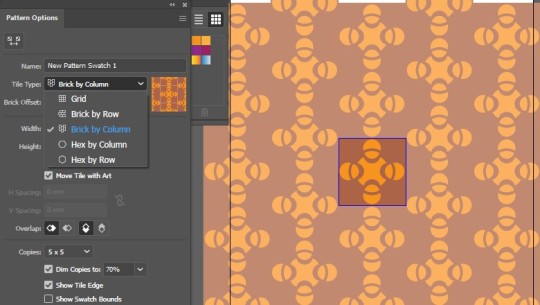
THe highlighted centre box is editable. Editing this will update your pattern in real time


Now we’ll try a hexagonal pattern by making our swatch image inside a hexigan (polygon tool)
Then copy your previous image into it

Group togther and drag into swatches

change the hexagon pattern options to sit properly togther by double clicking on swatch again

FOr making Endpapers in an A5 spread, make a Landscape A4 to cover whole A5 spread in In Design
0 notes
Text
reate Layers and Add colours
I you want to select only particular things, select everything, hold SHIFT and click the things you dont want to include
Start things off in a tidy way and create some layers. Double Clicking to rename.

The little coloured box next to the layer shows us what is selcted

we can then click and drag that little coloured box to the layer we want those things to be on

Test the layer is correct by clicking the eye icon and making sure those elements dissapear

Do the same with the feet.
Locking the layer ( padlock icon next to the eye) makes it so you can’t edit anything on that layer. This is good if you have to move something around in an image with lots of details.
Make a copy (by dragging layer down to plus icon) of your body lfilled layer so that there’s four layers with the same body shape, and turn off visability of face and wing layer and lfeet layer.
Body filled
Body Stroke
Check colour
4. Body shadow

Body filled
with only BODY filled layer visable, make the stroke, zero, the fill white.
Makle sure the fill is at the front in Swatches and click the plus icon to create a new colour.
In this case we change the color mode to HSB and use the sliders to find a new colour


No in CHEST COLOUR layer use the pen tool P to draw this shape

With both the new shape and the body outline on that layer selected, on the PATHFINDER dialogue box, select the INTERSECT tool

make new colour for the fill on chest colour

BODY SHADOW LAYER
select and SHIFT X to fill with black
Red stroke pen tool, draw this type of shape

THen a rotated eclypse on the head.
OPTIONS, PATH, ADD ANCHOR POINTS a couple of times untill there are many around the circle


move anchor points around to make a feathered(ish) look

select all and DIVIDE then UNGROUP

delete outer line and body

new colour of a dark shadow shade to previous
ok whoops, actually make the top shape white.
next i change the opacity first by clicking multiply to make it darken the coilours underneath

, make the bottom colour 30% opacity, and the top white shape, 20%
Body Stroke Layer
make invisable all other layers except this one and Face and Wing and turn off fill for this body outline

fill wing with main penguin colour
bring all the layers back, and add coloured fill, stroke and shadow to beak

Illustrator Character Tutorial
Reflect tool
joining anchor points
smart guides
broken handles
path finder tool to create 3d shapes from 2d shapes, and shading
Penguin (bought to in workbook form today by accesable recorded online tutorials and incredbile PRJ file saving of past Miriam. Woo!)

1. with eclipse tool selected, hold down SHIFT and draw a cirlce.
2. with select tool A selected, draw a rectangle over the lower section of your circle and hit CTRL/CMMND X to cut this section, and CTRL/CMMND V to paste it

Turn on smart guides by hitting CTRL/CMMND U this will help you easily align your half circles with each other.

now turn off smart guides again.
To select to end points together we can use two methods. 1. is to use A selection tool and draw a box 2. is to click one anchor point, hold SHIFT and click the other

Once selected, press CTRL/CMMND J and that will join them together.
DO this on both sides.

Press + which is your add anchor point tool and add a new anchor point onto the bottom right curve. With A selection tool, we can click and drag this new anchor point out to begin our tail.

Next we are going to ajust the anchor points and their handles to get a nice shape.
Select end anchor point to show handles. With the upper handle selected, hold down SHIFT to help move it to a perfectly verticle poisition, and snap that handle into the anchor point so that there is only a lower handle left.

Now clean up our curves by adjusting anchor point positions and handle lengths whilst holding down SHIFT (so that we stick to a verticle or horizontal direction)
From this

To this

Holding down SHIFT and C to use the anchor point tool we can add the top handle back into the tail end. This time instead of snapping it into the anchor point we will hold down OPTION/ALT (after first clicking V and tapping anywhere, and then A to select the anchor) and bring the handle down to a 90 degree angle to the lower one.

Add in three more anchor points using + tool onto the top right curve of your shape

V select and click anywhere, A select the middle of the three new anchor points and drag it out. THen holding OPTION/ALT you can ajust the handles on that, and the surrounding two anchor points to get this shape:

Back dwon on the tail, add in three more anchor points and drag out the middle one like so:

using OPTION/ALT to break handles, we can turn our end curves into points.
Adjust handles untill you hjave a nice shape. (In this case I ended up taking out the top added anchor point that i put in, and adjusting the handle on the original placed anchor that was above it to create the curve I wanted.
It’s best to take out any redundant anchor points.)

Now we have a slightly penguinish outline

SHIFT X swaps the fill and the stroke colours around (no stroke and black fill)
Draw a beak with the pen tool
Draw an eye with the eclipse tool.
if you hold SPACE while dragging out your eclipse tool, you can reposition your circle before you commit to placing it down.
Hold down OPTION/ALT and click and drag the eye to make a duplicate. Let go of your click first.

Now for the foot.
Just like you did in sdtep one, create an eclipse, (this time with a stroke and no fill) ,
A select the bottom half, CTRL/CMMND X cut, and CTRL/CMMND V paste

CMMND/CTRL U to turn on smart guides and allighn, select both ends and join like before also:

Drag her down. Now she’s a leg

Click and drag Pen tool holding down SHIFT to create handles, and draw this shape, making sure you have your smart guides on so that your first and last anchor point are runniong the same horizontal

ajust if you want..
V select, and click O for reflect tool. click once in the bottom left anchor point to place the reflect guide (thats the little blue guy bellow)

Holding down OPTION/ALT tap once on the anchor point on the other side and this will duplicate and reflectso you have a whole foot. Now it’ll be fairly obvious if your shape is shit.

With A select tool, highlight and join your unjoined anchor points by hitting CMMND/CTRL J

squash its and move over to leg

3 notes
·
View notes
Text
Highlight your duplicate deletey foot and click UNITE


Now move your third foot into place and bring to front


Highlight everything and hit SHIFT X to flip the stroke and fill so that we’re on black fill and no stroke
Duplicate whole foot
select bottom half of foot and choose an orange from Colour Swatches

and then a lighter orange for the top
Now select your top foot and UNITE

Press CMND/CTRL Y to get into wire frame mode so we can delete unwanted lines from our shape


CMMND/CTRL Y back out of wire mode, highlight your shape and SHIFT X so we retuirn to having a stroke and no fill

right click and bring to front then move onto our solid foot to uswe as an outline.
select all and CMMND/CTRL G group everything together so we can move it as one foot

chuck some colour in you leg piece, bring it into place, right click, arange, bring to front
group together

Duplicate, rotate, put in place

Now we’ll make the wing
Pen Tool

Select all of the pengui except for the legs and rotate to make it look like he’s taking a stride (you can use cursor keys to move up and down also)

Next Ungroup the feet so we can get to all the pieces.
Highlight the whole penguin and change the stroke to 3 all round.

Open up Stroke Dialogue Box
highlight everything on penmguin except for beak and eyes and select ROUND CAPS and ROUND CORNERS

Makes everything a bit cute and friendly

Illustrator Character Tutorial
Reflect tool
joining anchor points
smart guides
broken handles
path finder tool to create 3d shapes from 2d shapes, and shading
Penguin (bought to in workbook form today by accesable recorded online tutorials and incredbile PRJ file saving of past Miriam. Woo!)
1. with eclipse tool selected, hold down SHIFT and draw a cirlce.
2. with select tool A selected, draw a rectangle over the lower section of your circle and hit CTRL/CMMND X to cut this section, and CTRL/CMMND V to paste it
Turn on smart guides by hitting CTRL/CMMND U this will help you easily align your half circles with each other.
now turn off smart guides again.
To select to end points together we can use two methods. 1. is to use A selection tool and draw a box 2. is to click one anchor point, hold SHIFT and click the other
Once selected, press CTRL/CMMND J and that will join them together.
DO this on both sides.
Press + which is your add anchor point tool and add a new anchor point onto the bottom right curve. With A selection tool, we can click and drag this new anchor point out to begin our tail.
Next we are going to ajust the anchor points and their handles to get a nice shape.
Select end anchor point to show handles. With the upper handle selected, hold down SHIFT to help move it to a perfectly verticle poisition, and snap that handle into the anchor point so that there is only a lower handle left.
Now clean up our curves by adjusting anchor point positions and handle lengths whilst holding down SHIFT (so that we stick to a verticle or horizontal direction)
From this
To this
Holding down SHIFT and C to use the anchor point tool we can add the top handle back into the tail end. This time instead of snapping it into the anchor point we will hold down OPTION/ALT (after first clicking V and tapping anywhere, and then A to select the anchor) and bring the handle down to a 90 degree angle to the lower one.
Add in three more anchor points using + tool onto the top right curve of your shape
V select and click anywhere, A select the middle of the three new anchor points and drag it out. THen holding OPTION/ALT you can ajust the handles on that, and the surrounding two anchor points to get this shape:
Back dwon on the tail, add in three more anchor points and drag out the middle one like so:
using OPTION/ALT to break handles, we can turn our end curves into points.
Adjust handles untill you hjave a nice shape. (In this case I ended up taking out the top added anchor point that i put in, and adjusting the handle on the original placed anchor that was above it to create the curve I wanted.
It’s best to take out any redundant anchor points.)
Now we have a slightly penguinish outline
SHIFT X swaps the fill and the stroke colours around (no stroke and black fill)
Draw a beak with the pen tool
Draw an eye with the eclipse tool.
if you hold SPACE while dragging out your eclipse tool, you can reposition your circle before you commit to placing it down.
Hold down OPTION/ALT and click and drag the eye to make a duplicate. Let go of your click first.
Now for the foot.
Just like you did in sdtep one, create an eclipse, (this time with a stroke and no fill) ,
A select the bottom half, CTRL/CMMND X cut, and CTRL/CMMND V paste
CMMND/CTRL U to turn on smart guides and allighn, select both ends and join like before also:
Drag her down. Now she’s a leg
Click and drag Pen tool holding down SHIFT to create handles, and draw this shape, making sure you have your smart guides on so that your first and last anchor point are runniong the same horizontal
ajust if you want..
V select, and click O for reflect tool. click once in the bottom left anchor point to place the reflect guide (thats the little blue guy bellow)
Holding down OPTION/ALT tap once on the anchor point on the other side and this will duplicate and reflectso you have a whole foot. Now it’ll be fairly obvious if your shape is shit.
With A select tool, highlight and join your unjoined anchor points by hitting CMMND/CTRL J
squash its and move over to leg
3 notes
·
View notes
Text
To stop stroke anmd effects from changing size when you’re adjusting the scale of your shape, open Preferences Box in the Edit Menue and unclick “Scale Strokes & Effects”

Now lets make the foot 3D.
Make more copies of your foot (hold OPTION/ALT and drag)
Now we want to delete all the top path sections. using A selection, click on the path/anchor you want to delete and push DELETE


Select all, and duplicate directly bellow

Use SHIIFT CLICK and CTRL/CMMND J to join anchor points with vertical lines

Open up your Pathfinder Dialogue Box (through Windows menue)
Here’s what the different path finder, Shape Mode tools do:
original shape combo, no effect

Unite Tool


Minus Front Tool


Intersect Tool


Exclude Tool

Once you’ve clicked this option, you need to select both shapes and RIGHT CLICK to UNGROUP

then you can seperate into two shapes at the intersection.

Then there’s this guy! Which is fucking siiick and I wish I did this part of the tutorial earlier cause...waw...
DIvide Tool


SHIFT CMMND/CTRL G (is officially ungroup but that didnt work for me so i just right clicked)
now you can sepperate all the pieces away.

raaaaaaaaaadddd! what the heck. I wanna make a robot.
ANYWAY! foot!
Illustrator Character Tutorial
Reflect tool
joining anchor points
smart guides
broken handles
path finder tool to create 3d shapes from 2d shapes, and shading
Penguin (bought to in workbook form today by accesable recorded online tutorials and incredbile PRJ file saving of past Miriam. Woo!)
1. with eclipse tool selected, hold down SHIFT and draw a cirlce.
2. with select tool A selected, draw a rectangle over the lower section of your circle and hit CTRL/CMMND X to cut this section, and CTRL/CMMND V to paste it
Turn on smart guides by hitting CTRL/CMMND U this will help you easily align your half circles with each other.
now turn off smart guides again.
To select to end points together we can use two methods. 1. is to use A selection tool and draw a box 2. is to click one anchor point, hold SHIFT and click the other
Once selected, press CTRL/CMMND J and that will join them together.
DO this on both sides.
Press + which is your add anchor point tool and add a new anchor point onto the bottom right curve. With A selection tool, we can click and drag this new anchor point out to begin our tail.
Next we are going to ajust the anchor points and their handles to get a nice shape.
Select end anchor point to show handles. With the upper handle selected, hold down SHIFT to help move it to a perfectly verticle poisition, and snap that handle into the anchor point so that there is only a lower handle left.
Now clean up our curves by adjusting anchor point positions and handle lengths whilst holding down SHIFT (so that we stick to a verticle or horizontal direction)
From this
To this
Holding down SHIFT and C to use the anchor point tool we can add the top handle back into the tail end. This time instead of snapping it into the anchor point we will hold down OPTION/ALT (after first clicking V and tapping anywhere, and then A to select the anchor) and bring the handle down to a 90 degree angle to the lower one.
Add in three more anchor points using + tool onto the top right curve of your shape
V select and click anywhere, A select the middle of the three new anchor points and drag it out. THen holding OPTION/ALT you can ajust the handles on that, and the surrounding two anchor points to get this shape:
Back dwon on the tail, add in three more anchor points and drag out the middle one like so:
using OPTION/ALT to break handles, we can turn our end curves into points.
Adjust handles untill you hjave a nice shape. (In this case I ended up taking out the top added anchor point that i put in, and adjusting the handle on the original placed anchor that was above it to create the curve I wanted.
It’s best to take out any redundant anchor points.)
Now we have a slightly penguinish outline
SHIFT X swaps the fill and the stroke colours around (no stroke and black fill)
Draw a beak with the pen tool
Draw an eye with the eclipse tool.
if you hold SPACE while dragging out your eclipse tool, you can reposition your circle before you commit to placing it down.
Hold down OPTION/ALT and click and drag the eye to make a duplicate. Let go of your click first.
Now for the foot.
Just like you did in sdtep one, create an eclipse, (this time with a stroke and no fill) ,
A select the bottom half, CTRL/CMMND X cut, and CTRL/CMMND V paste
CMMND/CTRL U to turn on smart guides and allighn, select both ends and join like before also:
Drag her down. Now she’s a leg
Click and drag Pen tool holding down SHIFT to create handles, and draw this shape, making sure you have your smart guides on so that your first and last anchor point are runniong the same horizontal
ajust if you want..
V select, and click O for reflect tool. click once in the bottom left anchor point to place the reflect guide (thats the little blue guy bellow)
Holding down OPTION/ALT tap once on the anchor point on the other side and this will duplicate and reflectso you have a whole foot. Now it’ll be fairly obvious if your shape is shit.
With A select tool, highlight and join your unjoined anchor points by hitting CMMND/CTRL J
squash its and move over to leg
3 notes
·
View notes
Text
In Design Class Exercise
12 A5 pages (3 sheets of A4)
Each song should have illustrations. (Two of these should be self made vector illustrations)
1. cover (Name of Book and other stuff)
2. 3. End Papers
4. Contents
5. Song 01
6. 7. Song 02 and 03
8. 9. Song 04 and 05
10. 11. End Papers
12. Back Cover (created by)
0 notes
Text
In Design
Collumn Grids
select both parent pages by click, shift click and open the collumns and margins dyalog box
(if your book is thicker, you’ll want a bigger inside margin)
With the little chain icon unlcicked you can alter the margen widths sepperatly

Having many collums gives you many options. You don’t have to use all your colums all the time but it means you can get a nice stepped effect with images and text if you have lots there as an option.

Gutter is the width of the gaps between collumns.
0 notes
Text
In Design
SHIFT and CMMND is resizing an image AND it’s bounding box
SHIFT OPTION CMMND V is paste in place
Parent Pages
This style book

looks like this in In Design

Parent Pages are another style type template but using whole page asthetics like column grids
If we double click on the parent page and make a change, it will then make that change to all the pages using this as a parent
This is the parent Pages

This is the changes made to everything

If you want to disassociate a page with the Parent pages, drag the [NONE] page onto those pages
You can also make other parent pages by clicking the plus option on the pages window.
You can get In Design to number sequence pages for you.
make text box on the parent page (make sure your text box is nice and big at the beggining)

highlight the number 1 and

it should then change it’s appearance to look like this

All actual pages following the left parent now will be correctly numbered

To get it to number the right hand pages, just go to your parent page again and copy and paste your page number (or A at this point) box into the right hand page and it’ll work for the rest of the pages.
0 notes
Text
it now looks like this (after hitting W to stop seeing the workspace view)

hold down OPTION and clikc and drag the frog to the side to duplicate the image.
Draw a circle around the frog. Drawing from the centre of the circle by using OPTION and SHIIFT
select frog inside of it’s bounding box and press CTRL X
delete bounding box
right click circle and choose PASTE INTO

with your frog selected, chose Wrap Around Object Shape


move frog into position and use the one available text wrap around object adjustment bar to change the distance between object and tex. the thin line around the frog is showing where this distance ends.
Here is the finished page:

Adobe In Design
Good for integrating text and images within a page layout.
Books, pamphlets, web ads…
In design does have shape making tools but generally it’s better to use Photoshop and illustrator to form images and then bring them INTO In design.
Head in and click the Control option to get the right controls available on your In Design screen

Shortcuts
SHIFT RETURN/ENTER means you can move words down to the next line without anything else changing. (soft move)
hold SHIFT and CMMND while scaling an image sellects the frame AND the image
Hold CMMND and click outside of text box to stop editing text (if you just click V it will just write a v in your text box)
With V pressed, press SPACE to navigate around the page, hold Z and move mouse form side-to-side to zoom in and out
W clicks in between print view and technical view which shows you all your columns and grids.
(with T selected) CMMND A select all (text)
Styles allow designers to apply settings to objects and text and save the settings to use later (like a template for similar pages)
Linked files if you’ve got several version of the same document all with embedded images, it’s going to take up a lot of space. If you save those image files as linked files instead, then there will be just one set of images available to all versions of the same project files
A paragraph is a divided section of a whole body of text which makes the body of text easy for the eye to read.
Sealing frame and sealing image & frame Scaling images and moving them around with the knowledge that there is a frame AND an image
Class Exercise:
1. draw Text Box covering page within Margins and fill with Placeholder Text. (Type- fill with Placeholder Text)
2. by hitting return after some start points of a paragraph, we’ll separate off some text to make into headings

3. Create new paragraph style by opening paragraph style dialog box


This is the window that will open. Notice Character Settings is also available in this box.
4. highlight text and change text and paragraph settings to the settings you’d like to continue to use and click the “add new paragraph style button“

This will load all these settings into your new paragraph style which you can rename. Double clicking on this will open up this window

you can alter your paragraph style settings from in here OR you can edit them within the paragraph and text tools.
for example I unclicked the hyphenate option.

it can also be done here

Altering the SPACE AFTER in lines and spacing options box will alter the spaces between the paragraphs
Before changing spaces

After changing spaces

5. Now we’ll create some heading paragraph styles

Now you can click you curser within your other heading lines and click on the paragraph style to change them to those settings also

Character Styles
So we can seperate out particular words and alter them within a paragrapgh without changing the whole paragraph.
Use the same method as above but within the charactyre style box

if you make a change to your text within the character style it will override the rule and there’ll be a little pluss next to it

you can add this change into your character style rule by right clicking and choosing redefine style.
here i highlighted my italic text and made it bold within the character tool window.

now all the italics using this character style will also be bold.
This kinda of editing styles can be done within the paragraph styles also.
Bullet Points
(One of the worst user experience parts of In Design)
1. first change you text box into two columns with V selection on box


If you’re copying text into In Design from somewhere else it can adopt weird styles from whence it came. Chuck it into TEXT EDIT, highlight and make plain text.

2. Paste copied text into your paragraph
highlight and create new Paragraphy style, name it Bullet Points

in order to make them look a bit nicer alter the LEFT indent and make the FIRST LINE indent, to be minus the number of the left indent. ?? dunno. just cause.

Using SHIFT RETURN we can do a soft move of the words and make sure there aren’t any “orphans“ (words sitting by themselves on a line at the end of a paragraph) or “widows“ (words sitting by themselves on a line a the start of a paragraph) WITHOUT fucking up the rest of the words or adding more bullet points.

Adding In Pictures
1. Open up image in Photoshop
2. Also within In Design, PLACE your image

In In Design, when you load in an image, there’s two things. A frame and an Image.
moving both is clocking anywhere except the circle in the middle.
if you click and move using the circles, you’re moving just the image inside of the frame.

if you try and adjust the scale at the moment, it will only resize the FRAME

Unless you hold SHIFT and CMMND while you’re doing it which scales the frame and the image. (if you hold OPTION/ALT at the same time it will scale from the middle)
3. In Design open Links dialogue in Windows
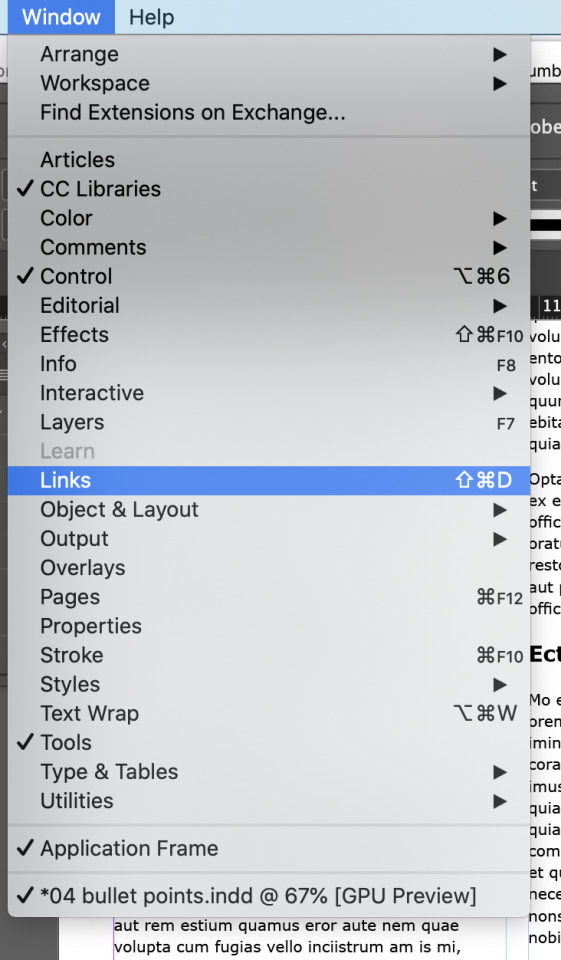
This shows us our image properties. where it’s stored and rah rah.

4. make some changes to your image in Photoshop and save to image file

But when we make changes to out Photoshop frog and save them to the image, a little alert icon will show in our link dialogue in In Design telling us a change has been made.

Click the little circular arrows to reset the link to accept changes made


Yay. Froggy image changes have also been altered within In Design.
6. With your Frog sitting on top of where it wants to be within your page, click the frog with V selection and open up our properties dialogue box.

7. within properties when you ahve your image selected, you can then adjust your text wrap options to get it sitting nice within the text.
before

after

1 note
·
View note
Text
Adobe In Design
Good for integrating text and images within a page layout.
Books, pamphlets, web ads...
In design does have shape making tools but generally it’s better to use Photoshop and illustrator to form images and then bring them INTO In design.
Head in and click the Control option to get the right controls available on your In Design screen
Shortcuts
SHIFT RETURN/ENTER means you can move words down to the next line without anything else changing. (soft move)
hold SHIFT and CMMND while scaling an image sellects the frame AND the image
Hold CMMND and click outside of text box to stop editing text (if you just click V it will just write a v in your text box)
With V pressed, press SPACE to navigate around the page, hold Z and move mouse form side-to-side to zoom in and out
W clicks in between print view and technical view which shows you all your columns and grids.
(with T selected) CMMND A select all (text)
Styles allow designers to apply settings to objects and text and save the settings to use later (like a template for similar pages)
Linked files if you’ve got several version of the same document all with embedded images, it’s going to take up a lot of space. If you save those image files as linked files instead, then there will be just one set of images available to all versions of the same project files
A paragraph is a divided section of a whole body of text which makes the body of text easy for the eye to read.
Sealing frame and sealing image & frame Scaling images and moving them around with the knowledge that there is a frame AND an image
Class Exercise:
1. draw Text Box covering page within Margins and fill with Placeholder Text. (Type- fill with Placeholder Text)
2. by hitting return after some start points of a paragraph, we’ll separate off some text to make into headings
3. Create new paragraph style by opening paragraph style dialog box
This is the window that will open. Notice Character Settings is also available in this box.
4. highlight text and change text and paragraph settings to the settings you’d like to continue to use and click the “add new paragraph style button“
This will load all these settings into your new paragraph style which you can rename. Double clicking on this will open up this window
you can alter your paragraph style settings from in here OR you can edit them within the paragraph and text tools.
for example I unclicked the hyphenate option.
it can also be done here
Altering the SPACE AFTER in lines and spacing options box will alter the spaces between the paragraphs
Before changing spaces
After changing spaces
5. Now we’ll create some heading paragraph styles
Now you can click you curser within your other heading lines and click on the paragraph style to change them to those settings also
Character Styles
So we can seperate out particular words and alter them within a paragrapgh without changing the whole paragraph.
Use the same method as above but within the charactyre style box
if you make a change to your text within the character style it will override the rule and there’ll be a little pluss next to it
you can add this change into your character style rule by right clicking and choosing redefine style.
here i highlighted my italic text and made it bold within the character tool window.
now all the italics using this character style will also be bold.
This kinda of editing styles can be done within the paragraph styles also.
Bullet Points
(One of the worst user experience parts of In Design)
1. first change you text box into two columns with V selection on box
If you’re copying text into In Design from somewhere else it can adopt weird styles from whence it came. Chuck it into TEXT EDIT, highlight and make plain text.
2. Paste copied text into your paragraph
highlight and create new Paragraphy style, name it Bullet Points
in order to make them look a bit nicer alter the LEFT indent and make the FIRST LINE indent, to be minus the number of the left indent. ?? dunno. just cause.
Using SHIFT RETURN we can do a soft move of the words and make sure there aren’t any “orphans“ (words sitting by themselves on a line at the end of a paragraph) or “widows“ (words sitting by themselves on a line a the start of a paragraph) WITHOUT fucking up the rest of the words or adding more bullet points.
Adding In Pictures
1. Open up image in Photoshop
2. Also within In Design, PLACE your image
In In Design, when you load in an image, there’s two things. A frame and an Image.
moving both is clocking anywhere except the circle in the middle.
if you click and move using the circles, you’re moving just the image inside of the frame.
if you try and adjust the scale at the moment, it will only resize the FRAME
Unless you hold SHIFT and CMMND while you’re doing it which scales the frame and the image. (if you hold OPTION/ALT at the same time it will scale from the middle)
3. In Design open Links dialogue in Windows
This shows us our image properties. where it’s stored and rah rah.
4. make some changes to your image in Photoshop and save to image file
But when we make changes to out Photoshop frog and save them to the image, a little alert icon will show in our link dialogue in In Design telling us a change has been made.
Click the little circular arrows to reset the link to accept changes made
Yay. Froggy image changes have also been altered within In Design.
6. With your Frog sitting on top of where it wants to be within your page, click the frog with V selection and open up our properties dialogue box.
7. within properties when you ahve your image selected, you can then adjust your text wrap options to get it sitting nice within the text.
before
after
1 note
·
View note
Text
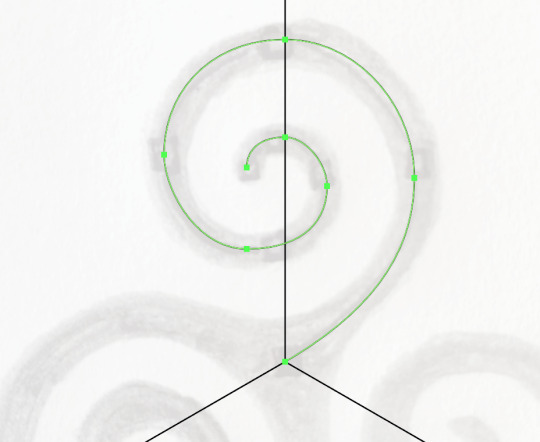
Illustrator drawing skills
1. Draw a silhouette style image to transfer into Illustrator

Celtic spiral knot – One of the earliest designs, the spiral knot represents eternal life, oneness, and the spirit of unity. It features three spirals connected by a single, continuous line. A more Pagan interpretation is that the three spirals represent water, fire, and earth.
I chose this image because I find it quite challenging to execute curved images in a clean symmetrical way.
2. Add anchor points onto your drawing to use as a guide

I plan on using a single stroke, thickening it, and then transforming it into a outline path. I will also only draw one of the spirals, and then use the copy and rotate functions.

Each of my spirals is at an angle of 120 degrees which will be important to keep in mind.
3. Load your image into Illustrator as a layer.
Lock that layer and turn down the opacity

Here I’ve added another layer with guide lines. For this i drew one line coming from (a vague) centre point.
Then rotate tool (R) and holding down OPTION to copy, i dragged the line down untill the degrees popup was at 120.
I can already see how inaccurate my placement of the anchor points are on my drawing.

I made my first spiral and dulicated it at points incase I completely fucked it up, and played the adjust adjust adjust game untill i was happy. (at this point i should have thickened the stroke to make it easier to see ugly shapes)
There are tutorials online on how to do linear spirals though which would make it more acurate.
you can see that my original handdrawn placements of the anchor points are a little off.
Because of the spiral getting smaller as it goes in, the inside length of the handles on a curve are a little shorter than the outsides.
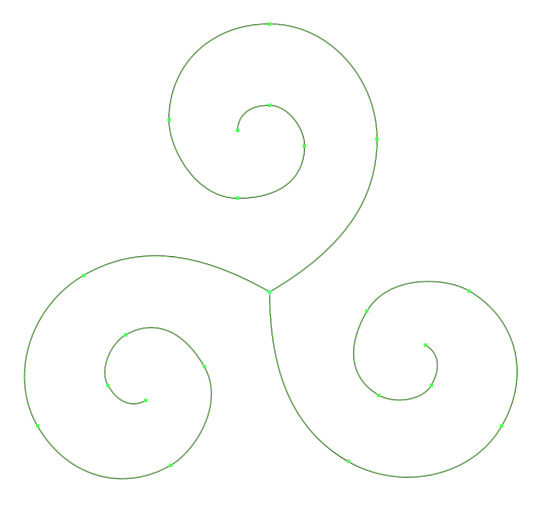
Rotate on a 120 angle and copy from the end of the tail anchor

Change stroke cap to be rounded.
With a thicker stroke it’s also easier to see where the lines can be cleaned up. So i adjust my spiral curves on one of the spirals again, delete the others and repeat the rotate and copy step.
GODAAAAMMMMMMMM my brain....
0 notes
Text
Side Quest
Autumnal gig poster for my band Human Confusion from a pumpkin in my garden using clipping masks


0 notes
Text
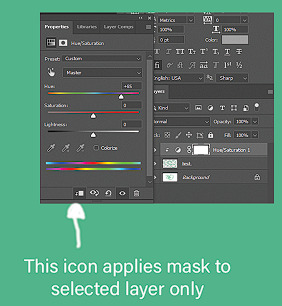
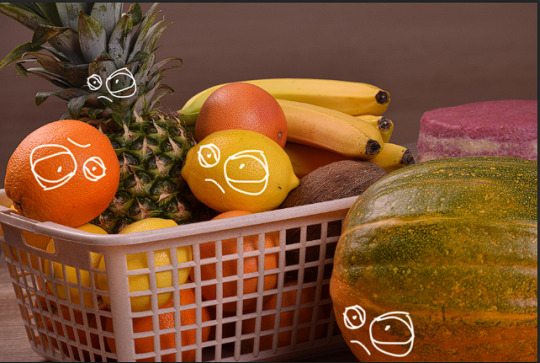
Selection, Masks, Layers Revisited
X swaps background and foreground colour
OPTION DELETE changes background colour to selected colour
hold option and click mask to get the mask sillouette
1.start with image and duplicate layer

2. make bright colour layer using OPTION DELETE to make cutout obvious

3. option select tool to get vague image selection

4. with image selected, click the mask icon and create mask

5. with the mask selected, draw loose unit polyagonal selcetion around unwanted object. Then use the brush tool (black and white are the two options of colour in a mask) and paint black to make the unwanted image within the selection dissapear.(itd be white to add more in)

0 notes
Text
z
Layers Masks and Selecting


uncheck auto select to make it so you only move whats on your selected layer when you use the move (v) tool


Using SHIFT in between different Marque selcts (M) means when you move (V) them, all selected will move together.
holding down SPACE whilst drawing marque will move it’s poisition
CMMND/CTRL D drop selection
hold down OPTION and use marque after another marque will remove the selection of the OPTIND selection
CMMND/CTRL J copies selected onto new layer
SHIFT CMMND/CTRL I inverse selection
SHIFT ALT/OPTION is duplicate within layer
CNTRL/CMMND T scale that selection
CNTRL/CMMND select will select whatever pixles are under the pointer

Lasso tool (L)
free form, polygonal, and magnetic to choose from. magnetic smart senses the edges but there needs to be quite a sharp contrast
RETURN to close shape
3 notes
·
View notes