
Don't wanna be here? Send us removal request.
Statistics
We looked inside some of the posts by mitchellwallaardmaker and here's what we found interesting.
Average Info
Notes Per Post
0
Likes Per Post
0
Reblog Per Post
0
Reply Per Post
0
Time Between Posts
6 hours
Number of Posts By Type
Text
17
Last Seen Tumblr Blogs


Fun Fact
Tumblr has 4 main sources of revenue.


Text
desiccation with academic
After looking at my work that the academics found something quite fun and playful about it with a small archers and patterns with the blocking shapes and tones. That the work will be much preshaped it being surprises individual objects work together and into installation. At first I was not with this idea much as I created this piece to be unit people can use after playing around and moving the work to see what potentially look like I came around to that idea as a start at focus on different aspects of the work and not a a whole. Bringing it into a new light and making it more free and alive.
0 notes
Text
Wall and bench


The whole effect of the herringbone parquet pattering works really well,together with the constant of the materials and the pattern with the clean edges. As for the bench feel you get a good perspective on the are though the four legs and the the sharp contrast from the time just works well together.
0 notes
Text
Table legs


I feel that the table legs are one of the best individual part of this whole piece with the clean crisp look from the vinyl to the wood, with the clean shape from the decor of the pillar, with a really nice perspective when looking at it from its central point.
0 notes
Text
Stool in the space.


I'm pleased with the visual aspect of this piece. I think the arch comparisons work well with the three perspectives from the old and the new arch ways. The Cladding on the top haves a really nice effect with people not realising what the grid is made of and having this nice contrast from the stools to the wall works well.
0 notes
Text
Laser cut tests for the table top


So I decided to take a photo of Margaret Street from 1996 with a deck of fresh streets were clean and laser etch this so it will be embedded into the wood. These were example pieces that I did before I went onto the table top. But after showing some academics we came to the conclusion that the weight does it need this as everything is done And a certain style and this distracts itself away from the rest the work with no added context to the work itself or the visualisation of the audience and that this book would just be enough to help the audience make the connections and see the context of my work.
0 notes
Text
Tabletop


For the tables have my idea was to create a information board of Margaret Street history in architecture and interior design including the refurbishment of the building in 1996. But I was able to find the book that inspired me out of the library what I can place within my work so there's no need for that information to be displayed on the table but I still wanted to make sure there is a clear connection towards market Street and it's amazing architecture And deciding image of Margret Street would be best suited for this.
0 notes
Text
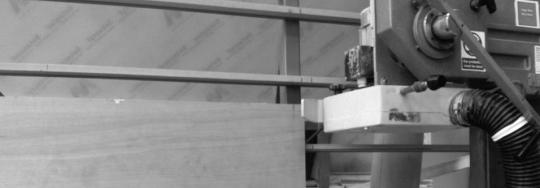
Cutting straight edge


Having to cut three edges on one of my boards on the top edge by 4 cm, bottom by around 3 mm and one of the size edges about 5 mm. to make sure the pattern was flush to the edge with no hang off or gaps. This was A nervous moment as each wall took about six hours of cladding. Looking at me dividable kept its shape as did the rest the world with a clean enough edge to me be happy, there was only one mishap at the end where I had to chisel off one of the clodded pieces sanded back and replace it.
0 notes
Text
First Board the second board

After glueing each section of around 20 to 30 pieces I have to weigh it down with a metal weight and a stone weight using spare pieces of plywood just so I won't damage any of the cladding. This was to hold down the warping wood and allow the glue to set. First board came out the best way for a clean out all the way round have a nice finish. As for the second board the whole Parquet pattern went a bit off the edgeI needed cutting straight on the panel saw.
0 notes
Text
Assembling my herringbone Parquet wall


once I have gathered all 600 pieces of mixed cladding I was ready to start dragging the herringbone pattern onto my wall making sure the first few pieces were up against 45° angle so it will slip flush against the board. Because of the high temperatures within the studios I began big to have some problems with the woods and the glue setting so within the glue I had to start adding a few drops of water to make it last longer and I have a thick layer of glue with the heat some of the laser ply started to warped and expand because the heat and the the moisture in the air. Which meant I had to keep sending back some edges to make sure this it in flush but I know it wasn't guaranteed it will be a 100% perfect herringbone park at pattern wall but I know if I put the time and effort into creating this and Doing it one by one I can make it look the best I can.
0 notes
Text
Assembling the top of the bench and stools


With assembling the top of the stools on the bench startimg off by adding the grid down first to make sure the is pieces exactly fit when the squares will be suddenly added. On the Birch ply squares the laser had left some rising residue so I decided to sand each Birch plywoodSquare I will just lightly sand down until it's near enough not noticeable. at the end of this process I've put a spare piece of ply with a heavy stone on top to weight it down until the glue sets
0 notes
Text
Applying glue

For applying the strong wood PVA glue are use a sponge roller to make sure I get a even coat all the way through, decreases the chances of overspills slips and mess ups. Making sure the glue is evenly coated with a though layer of the wood PVA would ensure that each piece was firmly stuck down.
0 notes
Text
Assemberling the bench


When assembling the bench I noticed the wood was slightly warped so when attaching the legs are used stone block to weight down and left it over the weekend to straighten it out once I attach the legs making sure the top was flush by sanding it all back. I feel that this is exciting stage for me as all my elements of segments are coming together to create this piece of furniture and my ideas come to life.
0 notes
Text
problems with bad sorted plywood


the problem with this wood where it is splitting on it self can use stuctual problems and the visual aspect is much lower. so it had to be sent back it set the contrition of the wall back five-days
0 notes
Text
Last minuet birch laser ply wood


Ordering last minute laser plywood and managed to get it in small seats so if need be I can put one on Wye and cladding the rest by the time I finish cladding it will be time to put another sheet on. Each sheet can fit on 14 pieces at 4 cm x 28cm with around 1 cm Llywel and each edge as The laser ply wood is 60 cm x 30 cm each file take about 15 minutes on the laser .
0 notes
Text
checking calder amount


After doing a test with the Cladding doing the herringbone Parquet pattern I realised I was very quite short a lot I thought I needed to what I actually did. I was only short mainly on the vinyl pieces and the birch plys that same day and managed to get most of my vinyl MDF pieces cut ready to apply for vinyl over the weekend. As for the birch laser ply I need to order more material and as soon as possible. But with doing this gave me a look into how the visual impact of the work would reflect and I was happy and how it was coming along with the contrast of the materials The herringbone pattern.
List of what was needed.
- 100 Matt black vinyl 4 cm x 28 cm
- 100 Matt grey vinyl 4 cm x 28 cm
- 100 Birch ply 4 cm x 28 cm
- 100 ash ply 4 cm x 28 cm
- 25 mixed 4 cm x 24 cm
- 25 mixed 4 cm x 20 cm
- 25 mixed 4 cm x 16 cm
- 25 mixed 4 cm x 12 cm
- 25 mixed 4 cm x 8 cm
- 25 mixed 4 cm x 4 cm
0 notes
Text
asenbling stool


Attaching the stools together i've used five screws which has all been predrilled in countersunk to get a flush top and good support. Making sure the top was flush and that was vital as there is a mess and squares are going to be assembled on top to get the most even layer and effect it needed to be perfect.
0 notes