
Don't wanna be here? Send us removal request.
Statistics
We looked inside some of the posts by mtnp0410 and here's what we found interesting.
Average Info
Notes Per Post
6
Likes Per Post
5
Reblog Per Post
1
Reply Per Post
0
Time Between Posts
1 day
Number of Posts By Type
Photo
17
Last Seen Tumblr Blogs


Fun Fact
Tumblr’s reach among the 26-to-35-year-olds in the US is 11%.
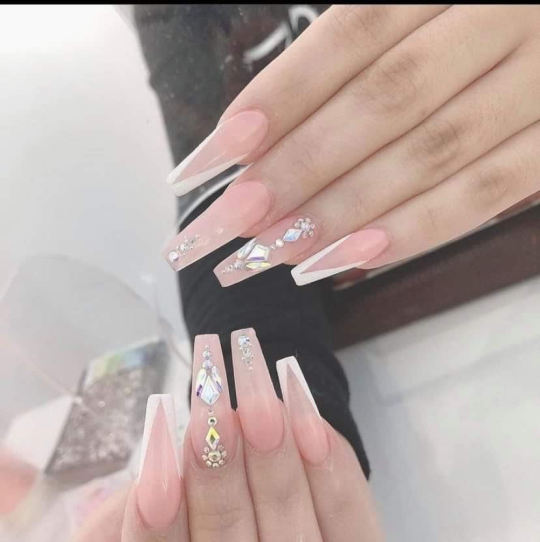
Photo
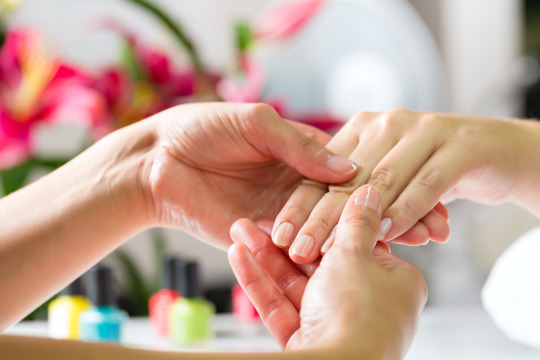
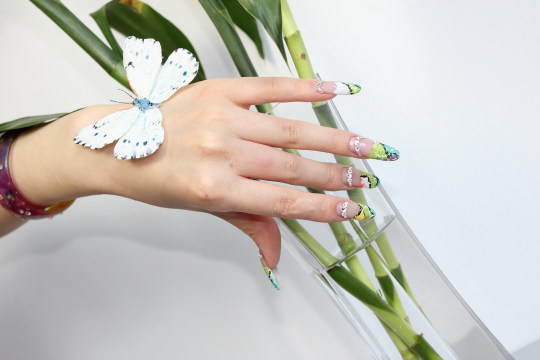
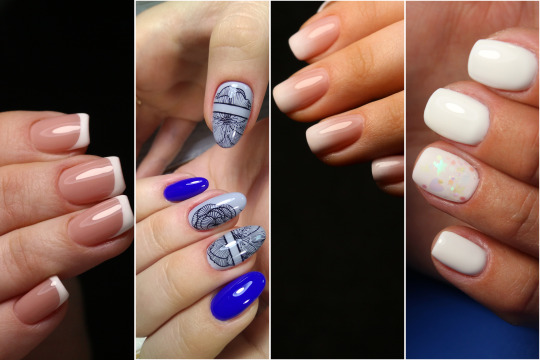
Why is nail care important? | Nail salon 23464
1. Why is it important to take care of your nails?
Taking care of your hands and nails is as important as taking care of the skin on your face. It is often said that your hands reveal your true age, and that's because the skin on your hands loses its firmness over time, leaving them susceptible to wrinkles, sun spots other signs of aging.
2. Why is nail care important?
Keep fingernails dry and clean. This prevents bacteria from growing under your fingernails. Repeated or prolonged contact with water can contribute to split fingernails. Wear cotton-lined rubber gloves when washing dishes, cleaning or using harsh chemicals.
3. Why is it important to take care of your skin hair and nails?
It's important to pay attention to the health of your skin, hair, and nails so you can prevent problems like an ingrown nail, a rash, or a life-threatening problem like melanoma (skin cancer). ... Protecting Your Skin From the Sun. Nail Problems and Injuries.
4. What can fingernails tell about your health?
Did you know your nails can reveal clues to your overall health? A touch of white here, a rosy tinge there, or some rippling or bumps may be a sign of disease in the body. Problems in the liver, lungs, and heart can show up in your nails.
5. What are the signs of unhealthy nails?
See your doctor if you have any of these symptoms:
Discoloration (dark streaks, white streaks, or changes in nail color)
Changes in nail shape (curling or clubbing)
Changes in nail thickness (thickening or thinning)
Nails that become brittle.
Nails that are pitted.
Bleeding around nails.
Swelling or redness around nails.
6. How can make nails stronger and thicker?
Use A Cuticle Oil Daily. ...
Consider Taking A Biotin Supplement. ...
Invest In A 'Soft' Nail File. ...
Up Your Vitamin B9 Intake. ...
Swap Out Your Acetone-Packed Nail Polish Remover. ...
Pick A Nail Strengthener Packed With Keratin.
---------------

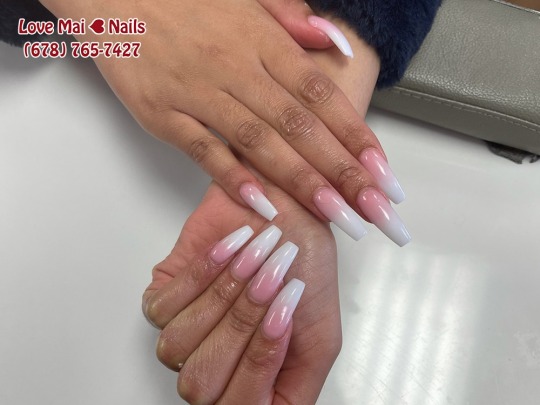
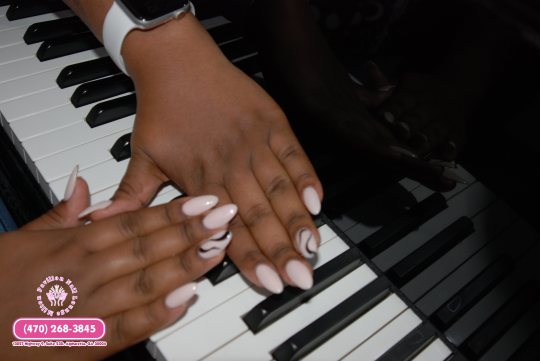
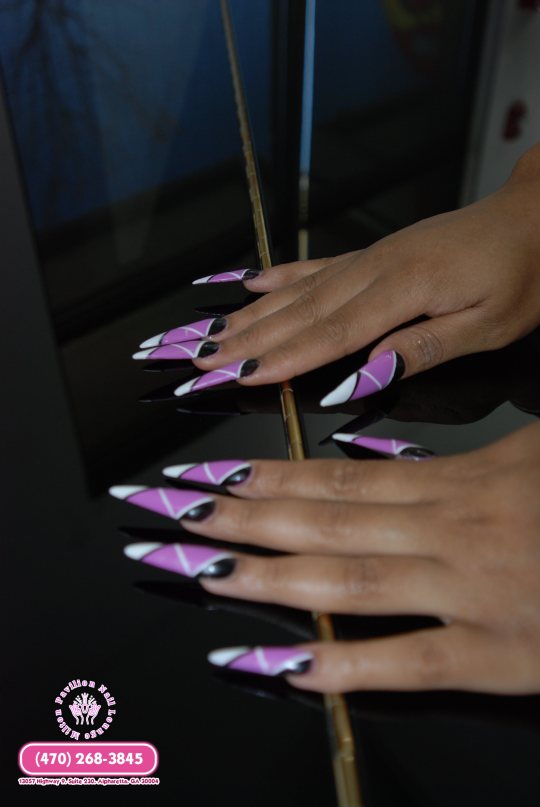
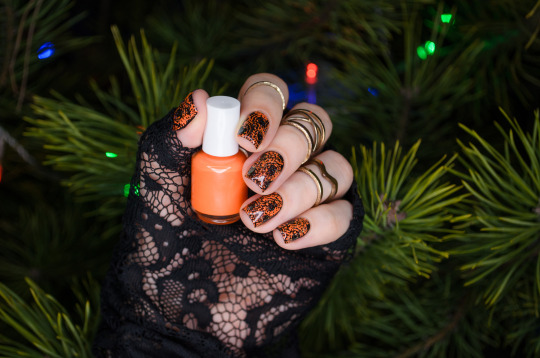
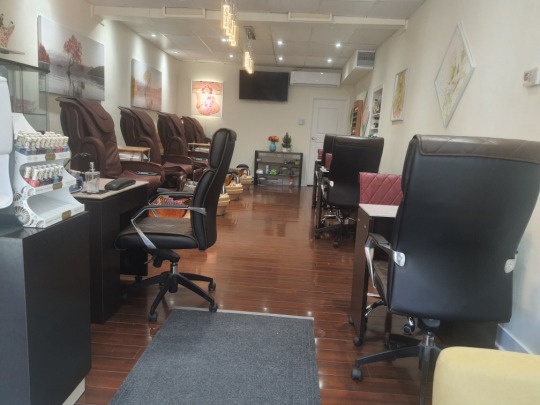
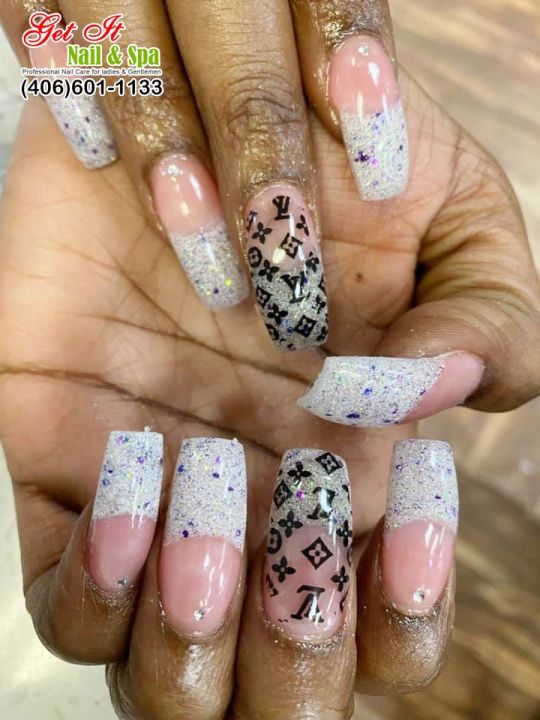
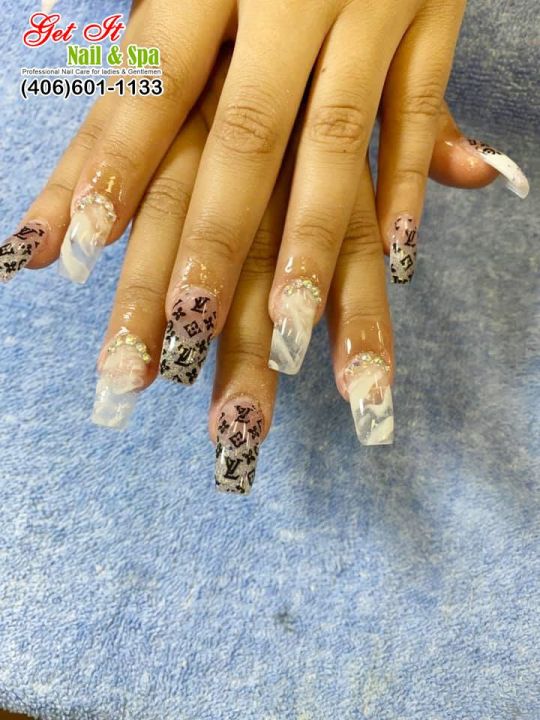
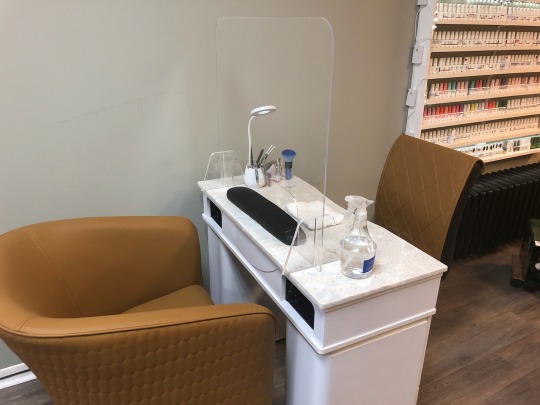
Nail Image 2 | Nail salon 23464
6549 College Park SQ,Virginia Beach, VA 23464
757-523-5491
0 notes
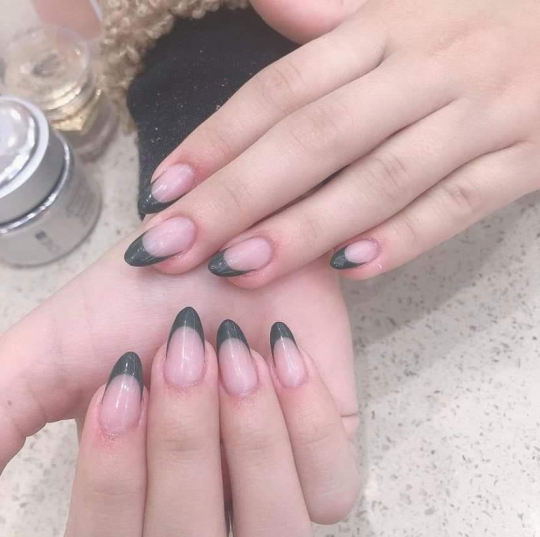
Photo
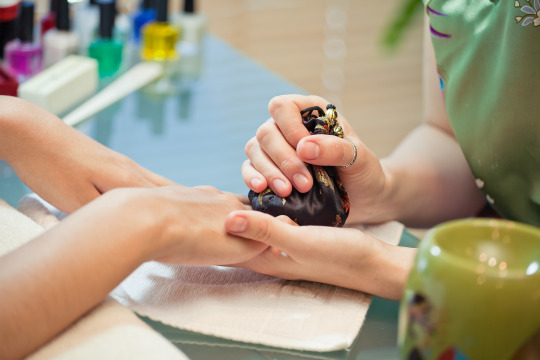
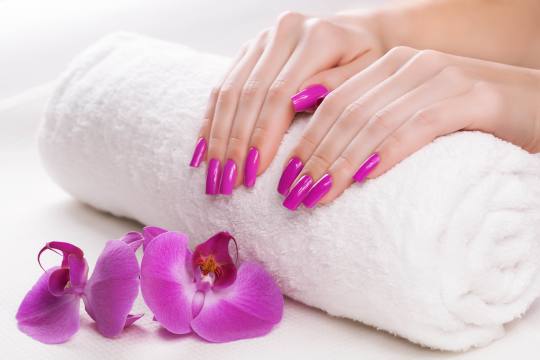
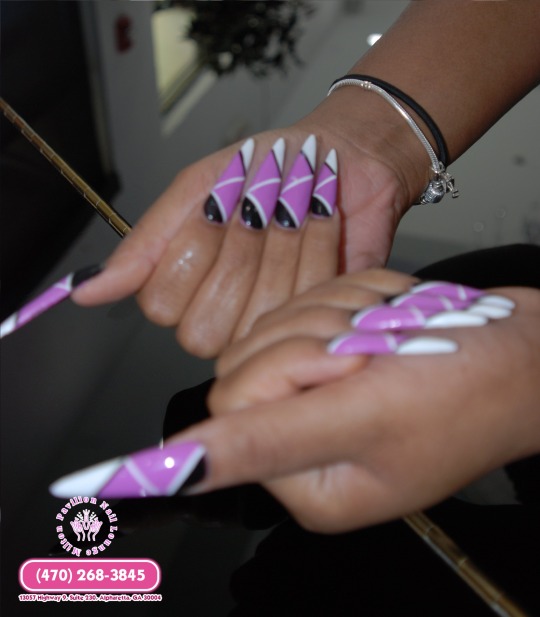
FOUR PROPER WAYS TO PAMPER | NAIL SALON CIVIC PLAZA
1.GIVE YOURSELF A MASSAGE
Let’s give your muscles some attention with a hand massage done by an expert in a top quality day spa. Small things like giving yourself hand and foot massages can go a long way in helping you relax. Do it on your own or have the technicians in the professional beauty salon done it for you.
2.GIVE YOURSELF A MANICURE AND PEDICURE
Save a few dollars by giving yourself a good manicure and pedicure. You only need a few tools to get the job done. So grab your nail clippers, a nail file, and polish and have yourself a paint party! You can even find an at-home foot spa for as little as $20 to really get the nail salon feel. Press on nails are also an option if you want more of a professional look. But believe me, do-it-yourself manicures can not make you satisfied like get it done in the first-class nail salon near you.
3.GIVE YOURSELF A FACIAL
Facials can be expensive, so doing it yourself can make them budget-friendly. You can create your own DIY facial product with a few items in your kitchen. And let me tell you this, an organic and high quality facial treatment at the top ranked nail salon or day spa is still the best option to choose.
4.COZY UP TO A BOOK AND TEA
Reading a great book is always relaxing. Couple that with some nice, warm tea and you will be in for a calming night. You can grab a book on Kindle or for free from your local library. ---------------

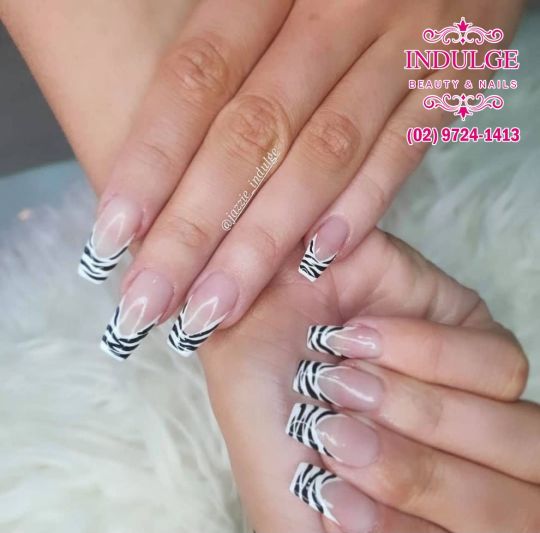
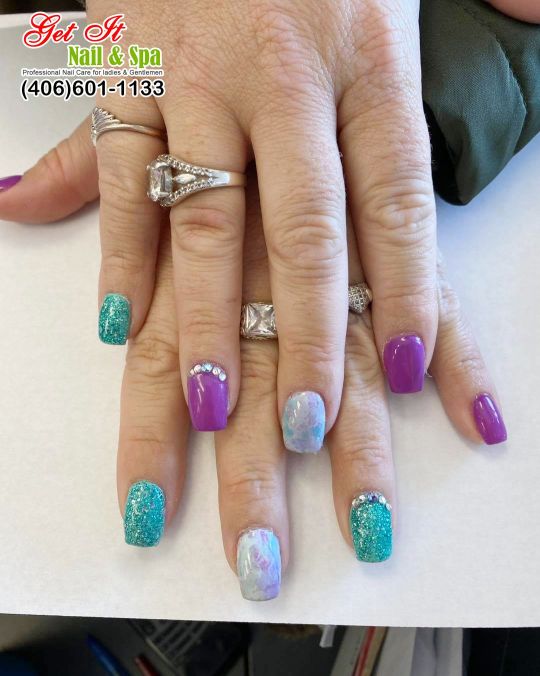
INDULGE BEAUTY & NAILS | NAIL SALON CIVIC PLAZA
43 Ware St,Fairfield NSW 2165
(02)9724-1413
6 notes
·
View notes
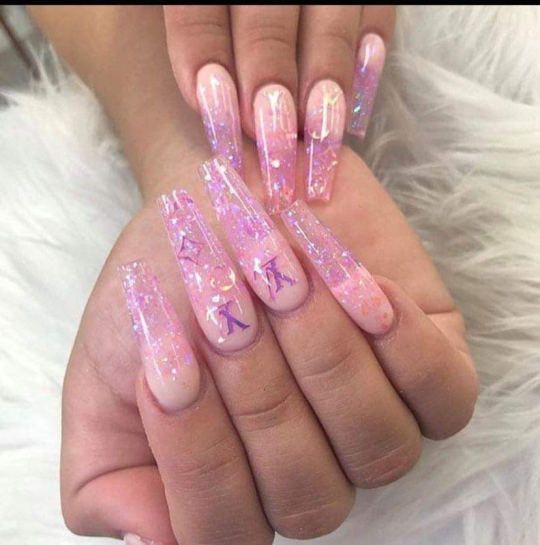
Photo
4 WAYS TO PREVENT NAIL POLISH FROM PEELING | Nail salon 30519
Sometimes, you do not need a breathtaking design on your nails to captivate anyone's gaze, just painting your nails a charming color is all you need to get a nice manicure. Can you feel that those nail polish colors are too pretty to chip off quickly? So, in today's article, I will show you 4 ways to prevent your new nail polish from peeling and chipping. If you have ever experienced the frustration of perfecting your manicure, only for it to be chipped within hours, keep reading below!
1.Avoid these actions to keep your nail polish smooth
To make your nail polish smooth and, of course, be far away from cracking, please DO NOT
Shake your nail polish bottles: Simply roll your nail polish bottle between the palms of your hands instead of shaking it. If you shake the bottle, you are more likely to get air bubbles on application.
Take a shower straight after you have painted your nails: Your nail beds expand in the hot water, making the nail polish move with it. This causes cracks and can make your polish chip when your nail beds return to their normal size. Likewise, do not paint your nails straight after a shower.
Continuously apply thick layers of nail polish on your nails: If you apply your nail varnish in thick layers, it won’t dry on to the nail properly. On the opposite side, the thinner the coats, and the longer you let them dry in-between coats, the longer the nail polish will last.
Wash your hands too harshly: This rough action might hurt your nails and discomfort your manicured nails.
Direct contact with cleaning chemicals: Chemicals are absolutely not good for your skin and nails. Remember to wear gloves in case you have to do the dish washing.
2.Always Use The Right Basecoat And Topcoat
While starting and ending with base and topcoat tacks extra time onto a manicure, they are important steps that should not be skipped. Applying base and topcoat is critical to preventing chipping or cracking for a lasting manicure. By using a grippy, strong basecoat, you will significantly extend the life and look of your manicure. Basecoat is what allows the coats to adhere to your nails and topcoat is what seals it all in. For best results and preservation of your manicure, I recommend reapplying your topcoat every two to three days. You will want to opt for a formula that boasts chip-resistance, protection, and strengthening, and bonus points if there is a hydrating component, too.
You can go to some top-rated nail salons and ask the experienced nail technicians about which brands of their base coat and top coat.
3.Take Care Of Chips Right Away
Ever look at a chipped nail, roll your eyes, get annoyed and then totally forget about it? Yep, me too. But tackling chips when they first happen will help to preserve your manicure in a few ways and the sooner you restore your nails back to a cohesive, flaw-free look, the better. Odds are if you let the chip sit, you just might peel and pick your way into mani-destruction. Also, fixing the chip will prevent it from spreading and getting worse on it's own.
If you have no idea about how to fix the chip correctly, then making an appointment with a professional nail salon near you is not a bad decision.
4.Leave Your Nails To The Nail Expert
It is said that nail designs are not only about beauty trends but they are the work of art. So, leave it to the licensed nail artist when it comes to nail art. I understand that it is not cheap to get your nails done professionally, but the good results everyone can get after a salon manicure are worth the price. To keep your manicure lasting longer and stop your nail polish peeling so soon, paying a visit to those top-quality nail salons in your city is the best choice. Remember to build a proper manicure routine so that your nails will always look ready!
I would love to share my tips about nails and other beauty trends for you. Follow my blog and stay happy, stay healthy!
---------------
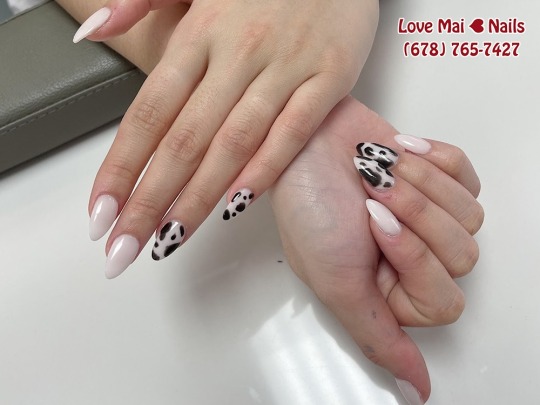
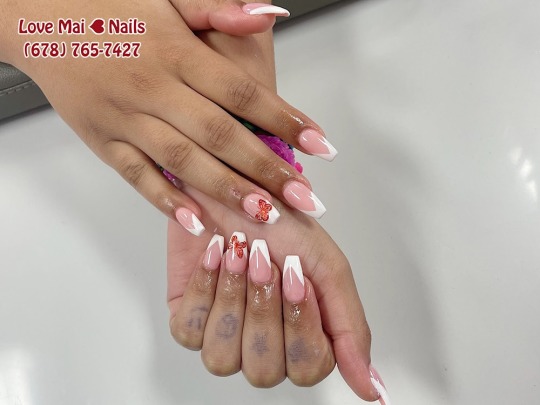
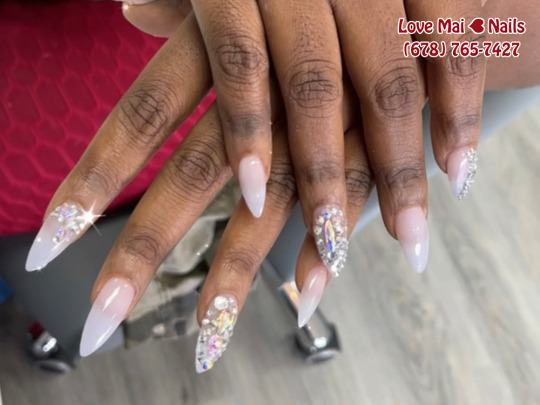
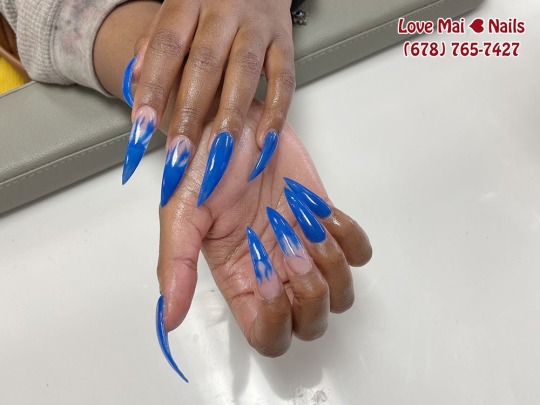
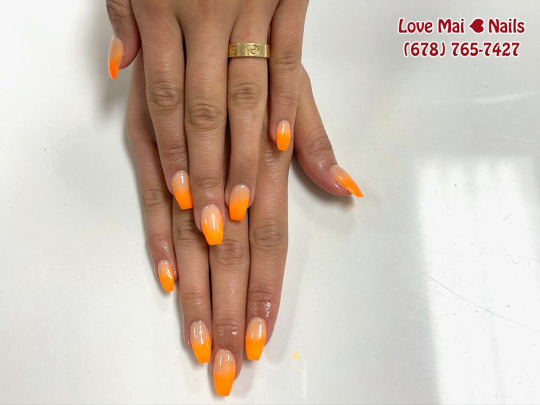
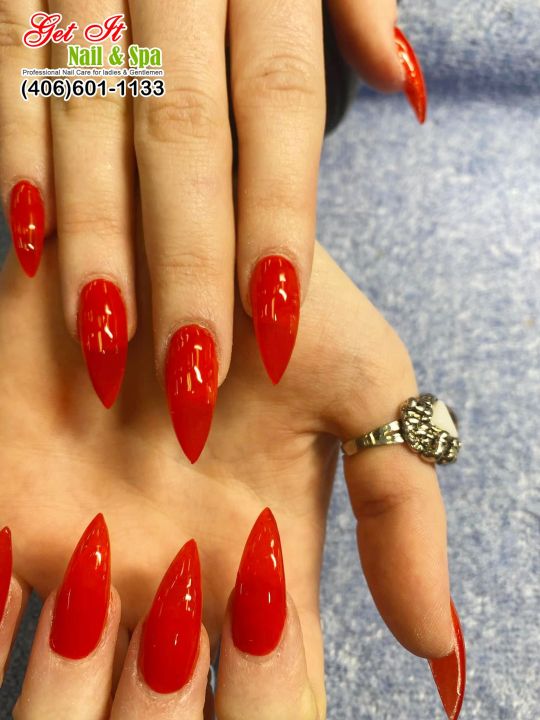
Love Mai Nails | Nail salon 30519
1935 Buford Mill Drive, Suite L,Buford, GA 305193
678-765-7427
0 notes
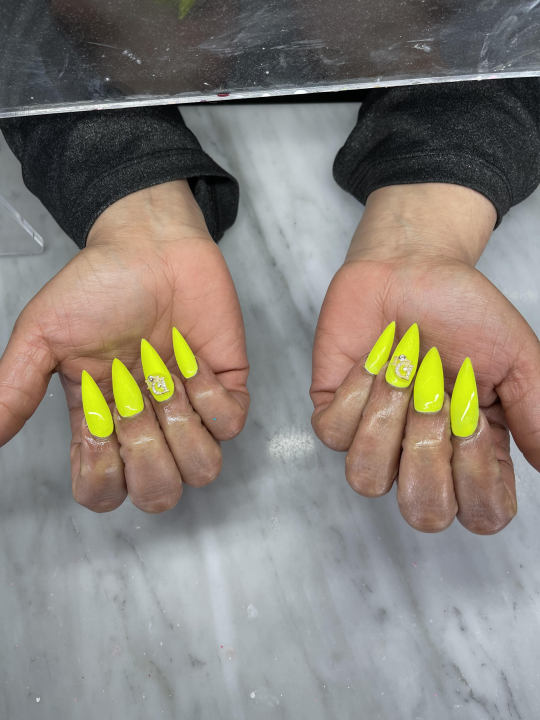
Photo


READ THIS BEFORE GETTING EYELASH EXTENSIONS | Eyelashes 95138
Everything in life has two sides, so do eyelash extensions. The lash industry has exploded in the past couple of years. There are more lash artists, more lash brands, and more lash products on the market. We have heard a lot of compliments and positive thoughts about eyelash extensions. It’s also necessary to acknowledge the downsides of eyelash extensions so that each lady can make a decision about whether lash extensions are right for her, and have proper preparation and aftercare, as well as not to be surprised so much while going for this worth-to-try beauty trend. The technicians in nail salons rarely inform their customers of the advantages and disadvantages of eyelash extensions, they just tend to praise how amazing lash extensions are. That is the reason why we have this article. Let’s spill all the beans on lash extensions — the good, and the bad! Keep scrolling down and you can learn of the negatives of eyelash extensions beside the benefits of getting this popular service among so many good services on a salon menu.
EYELASH EXTENSION PROS
Before understanding clearly what are the side effects of eyelash extension procedures at a beauty salon, take a quick look at some great things that lash extensions can do for you. Below are the benefits of eyelash extensions, according to the expert and those who have tried this trendy technique.
Your lashes aren’t naturally long and curly. Eyelash extensions can glam-up your face without you having to lift a finger.
Your makeup routine is cut in half. Lash extensions alleviate the need for wearing fake eyelashes, curling lashes, applying mascara, or wearing eye makeup altogether.
First thing in the morning to be expected after getting lashes done? Glamourous right at the moment you’re waking up! After a long day of travel? Still looking good! After a long workout? Crushing it.
Extensions take mascara smudges, clumps, and flakes totally out of the equation.
With the growing interest in extensions, the process of application had become so advanced, the look is now completely customizable. You can choose the length, type of curl, and thickness of the extensions you want.
Because of these good points, it’s no surprise that lash extensions have become increasingly famous in recent years.
EYELASH EXTENSION CONS
Get to the point now! What are the risks of lash extensions? You should know about those bad points before making the decision. Being informed is important, so keep reading! We’ve asked a lot of lash technicians in professional nail salons, as well as searched through the internet. Even though permanent lashes—if done by a skillful stylist—are generally low-risk, some risks are still there. Following are some side effects of getting a permanent eyelash enhancement procedure.
The main hidden dangers associated with lash enhancement are: swelling, infection of the eyelid, stinging and burning in the eye, and rash.
If you experience any burning or discomfort during the procedure, causing your eyes to tear or making you cry, this is a huge red flag and you should certainly speak up.
Depending on the lash tech, sometimes the application process did hurt. Not extremely painful, but more like a few tugs here and there.
With the lashes in place, it's difficult to clean around the eyes, allowing bacteria to build up under the glue and on the lashes themselves when worn for an extended period of time.
You may experience an allergic reaction to extension materials or chemicals used in the glue adhesive.
Wearing lashes too long or too thick can cause stress to the hair follicle, which makes your natural lashes fall out prematurely.
Extensions are a luxury service that do require maintenance. It's a financial decision you have to be ready to make. An eyelash extension treatment and several refills cost you a lot. Depending on where you go your initial full set can cost anywhere from $80-$300. Also, getting a refill every month is super time-consuming.
You’ll realize how often you rub your eyes, or how aggressively you wipe your face with the towel after a shower or workout – little things like that! If you have allergies and really can't kick the habit of eye rubbing, lash extensions might not be for you.
Feeling a bit apprehensive about trying this beauty treatment? We’ve helped you answer the question that eyelash extensions are good or bad. Please take note all about this lash trend before heading to a lash studio.
THE BOTTOM LINE
Now that you have discovered the pros and cons of eyelash extensions, we hope you can be fully prepared for this lash enhancement service. No need to emphasize the importance of getting your lashes treated at a top-notch beauty salon which is a clean, established place, ensures hygienic performance and high-quality products. Due to the sensitive nature of eyelashes and the surrounding area, finding someone who is certified to apply the lashes is definitely a must. It’s important to have a skilled, properly-trained cosmetologist attach your extensions. A licensed and experienced lash tech won’t let an infection occur (but if you’re allergic to the glue, you’re still going to be allergic).
Remember this: extensions are not low-maintenance. Keeping up with your eyelash refill appointments is a must. We recommend the touch-ups should be made every three weeks and be performed by the lash expert, in case you ask us “how often should I get eyelash refills”. If you wait too long your extensions will fall out, which leads to a situation where you have to require a new, full set. Good news that most nail salons in your city offer professional eyelash services of your choice, do your research and find a good spot for you. We highly recommend looking at before-and-after photos, and reading the reviews of those places.
---------------
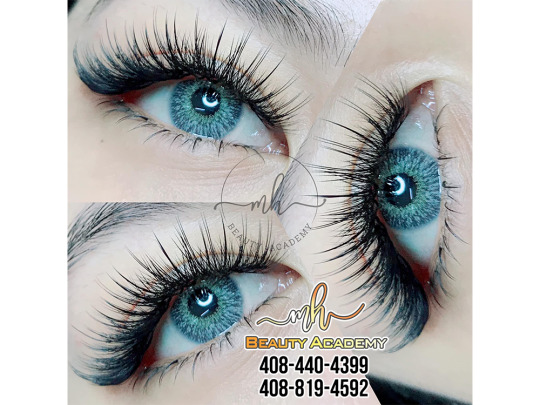
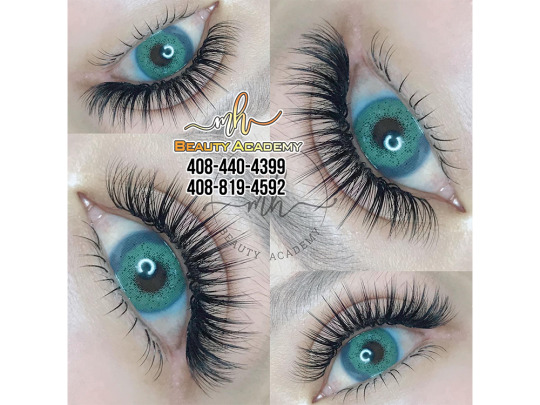
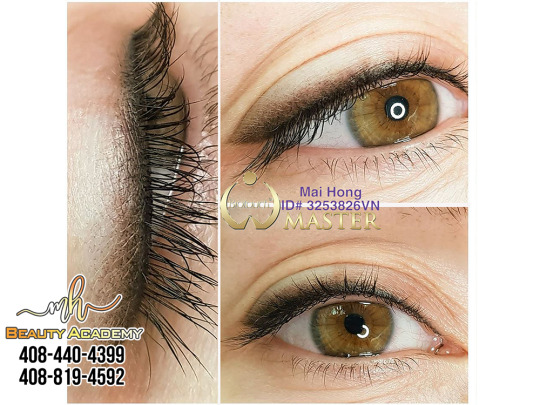
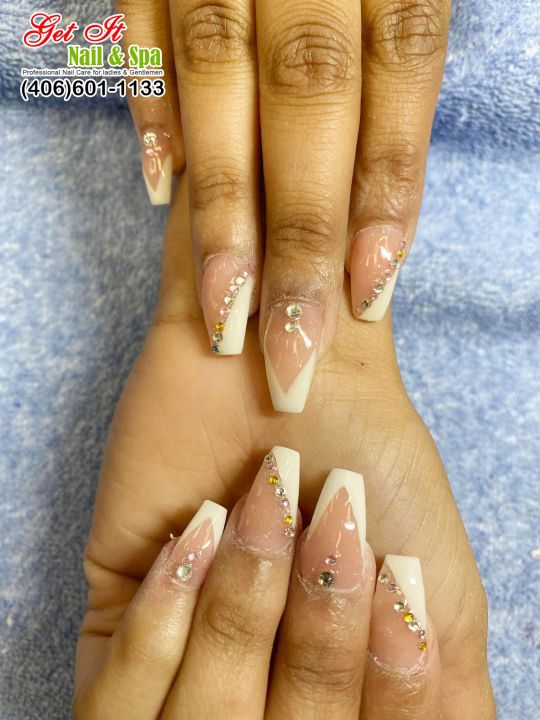
MH BEAUTY | Eyelashes 95138 | Microblading 95138
5528 Monterey Hwy.San Jose, CA 95138
408-440-4399
0 notes
Photo

4 WAYS TO PREVENT NAIL POLISH FROM PEELING | Nail salon 42104
Sometimes, you do not need a breathtaking design on your nails to captivate anyone's gaze, just painting your nails a charming color is all you need to get a nice manicure. Can you feel that those nail polish colors are too pretty to chip off quickly? So, in today's article, I will show you 4 ways to prevent your new nail polish from peeling and chipping. If you have ever experienced the frustration of perfecting your manicure, only for it to be chipped within hours, keep reading below!
1.Avoid these actions to keep your nail polish smooth
To make your nail polish smooth and, of course, be far away from cracking, please DO NOT
Shake your nail polish bottles: Simply roll your nail polish bottle between the palms of your hands instead of shaking it. If you shake the bottle, you are more likely to get air bubbles on application.
Take a shower straight after you have painted your nails: Your nail beds expand in the hot water, making the nail polish move with it. This causes cracks and can make your polish chip when your nail beds return to their normal size. Likewise, do not paint your nails straight after a shower.
Continuously apply thick layers of nail polish on your nails: If you apply your nail varnish in thick layers, it won’t dry on to the nail properly. On the opposite side, the thinner the coats, and the longer you let them dry in-between coats, the longer the nail polish will last.
Wash your hands too harshly: This rough action might hurt your nails and discomfort your manicured nails.
Direct contact with cleaning chemicals: Chemicals are absolutely not good for your skin and nails. Remember to wear gloves in case you have to do the dish washing.
2.Always Use The Right Basecoat And Topcoat
While starting and ending with base and topcoat tacks extra time onto a manicure, they are important steps that should not be skipped. Applying base and topcoat is critical to preventing chipping or cracking for a lasting manicure. By using a grippy, strong basecoat, you will significantly extend the life and look of your manicure. Basecoat is what allows the coats to adhere to your nails and topcoat is what seals it all in. For best results and preservation of your manicure, I recommend reapplying your topcoat every two to three days. You will want to opt for a formula that boasts chip-resistance, protection, and strengthening, and bonus points if there is a hydrating component, too.
You can go to some top-rated nail salons and ask the experienced nail technicians about which brands of their base coat and top coat.
3.Take Care Of Chips Right Away
Ever look at a chipped nail, roll your eyes, get annoyed and then totally forget about it? Yep, me too. But tackling chips when they first happen will help to preserve your manicure in a few ways and the sooner you restore your nails back to a cohesive, flaw-free look, the better. Odds are if you let the chip sit, you just might peel and pick your way into mani-destruction. Also, fixing the chip will prevent it from spreading and getting worse on it's own.
If you have no idea about how to fix the chip correctly, then making an appointment with a professional nail salon near you is not a bad decision.
4.Leave Your Nails To The Nail Expert
It is said that nail designs are not only about beauty trends but they are the work of art. So, leave it to the licensed nail artist when it comes to nail art. I understand that it is not cheap to get your nails done professionally, but the good results everyone can get after a salon manicure are worth the price. To keep your manicure lasting longer and stop your nail polish peeling so soon, paying a visit to those top-quality nail salons in your city is the best choice. Remember to build a proper manicure routine so that your nails will always look ready!
I would love to share my tips about nails and other beauty trends for you. Follow my blog and stay happy, stay healthy!
---------------
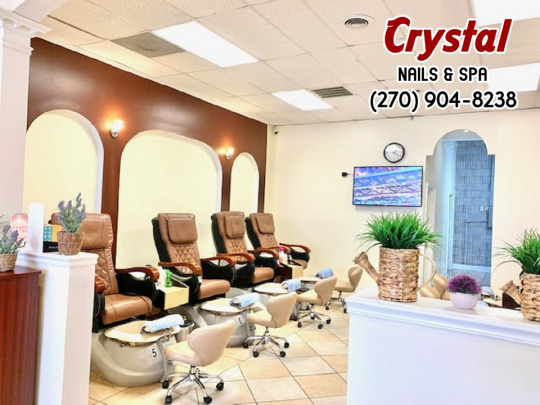
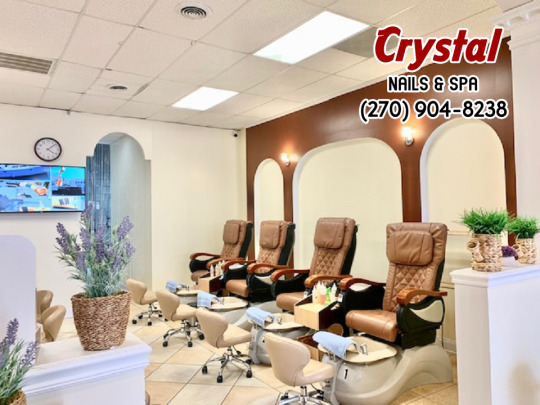
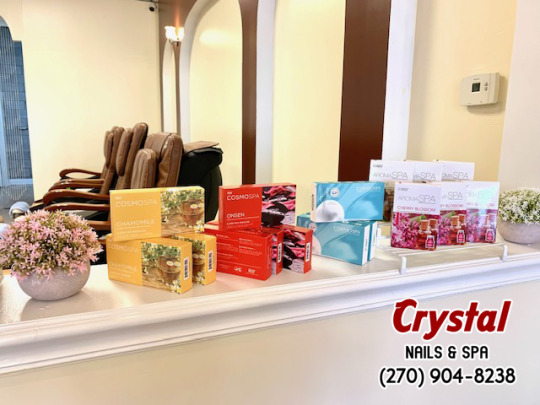
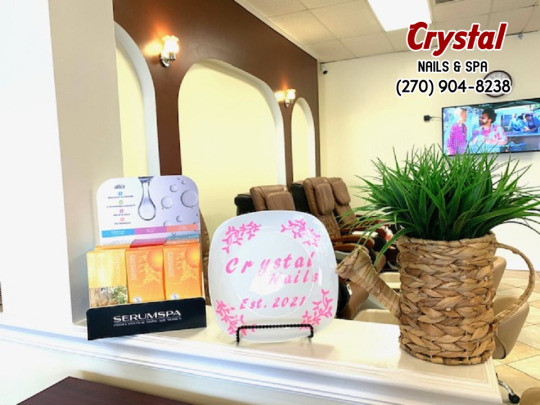
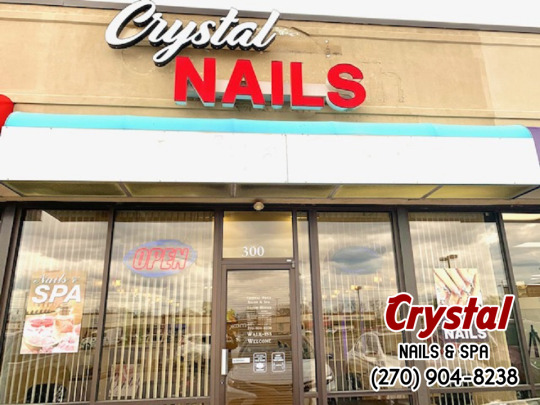
Crystal Nails & Spa | Nail salon 42104
1689 Campbell Ln Suite 300,Bowling Green, KY 42104
270-904-8238
0 notes
Photo
4 WAYS TO PREVENT NAIL POLISH FROM PEELING | Nail salon 95403
Sometimes, you do not need a breathtaking design on your nails to captivate anyone's gaze, just painting your nails a charming color is all you need to get a nice manicure. Can you feel that those nail polish colors are too pretty to chip off quickly? So, in today's article, I will show you 4 ways to prevent your new nail polish from peeling and chipping. If you have ever experienced the frustration of perfecting your manicure, only for it to be chipped within hours, keep reading below!
1.Avoid these actions to keep your nail polish smooth
To make your nail polish smooth and, of course, be far away from cracking, please DO NOT
Shake your nail polish bottles: Simply roll your nail polish bottle between the palms of your hands instead of shaking it. If you shake the bottle, you are more likely to get air bubbles on application.
Take a shower straight after you have painted your nails: Your nail beds expand in the hot water, making the nail polish move with it. This causes cracks and can make your polish chip when your nail beds return to their normal size. Likewise, do not paint your nails straight after a shower.
Continuously apply thick layers of nail polish on your nails: If you apply your nail varnish in thick layers, it won’t dry on to the nail properly. On the opposite side, the thinner the coats, and the longer you let them dry in-between coats, the longer the nail polish will last.
Wash your hands too harshly: This rough action might hurt your nails and discomfort your manicured nails.
Direct contact with cleaning chemicals: Chemicals are absolutely not good for your skin and nails. Remember to wear gloves in case you have to do the dish washing.
2.Always Use The Right Basecoat And Topcoat
While starting and ending with base and topcoat tacks extra time onto a manicure, they are important steps that should not be skipped. Applying base and topcoat is critical to preventing chipping or cracking for a lasting manicure. By using a grippy, strong basecoat, you will significantly extend the life and look of your manicure. Basecoat is what allows the coats to adhere to your nails and topcoat is what seals it all in. For best results and preservation of your manicure, I recommend reapplying your topcoat every two to three days. You will want to opt for a formula that boasts chip-resistance, protection, and strengthening, and bonus points if there is a hydrating component, too.
You can go to some top-rated nail salons and ask the experienced nail technicians about which brands of their base coat and top coat.
3.Take Care Of Chips Right Away
Ever look at a chipped nail, roll your eyes, get annoyed and then totally forget about it? Yep, me too. But tackling chips when they first happen will help to preserve your manicure in a few ways and the sooner you restore your nails back to a cohesive, flaw-free look, the better. Odds are if you let the chip sit, you just might peel and pick your way into mani-destruction. Also, fixing the chip will prevent it from spreading and getting worse on it's own.
If you have no idea about how to fix the chip correctly, then making an appointment with a professional nail salon near you is not a bad decision.
4.Leave Your Nails To The Nail Expert
It is said that nail designs are not only about beauty trends but they are the work of art. So, leave it to the licensed nail artist when it comes to nail art. I understand that it is not cheap to get your nails done professionally, but the good results everyone can get after a salon manicure are worth the price. To keep your manicure lasting longer and stop your nail polish peeling so soon, paying a visit to those top-quality nail salons in your city is the best choice. Remember to build a proper manicure routine so that your nails will always look ready!
I would love to share my tips about nails and other beauty trends for you. Follow my blog and stay happy, stay healthy!
---------------
Avalon Nails | Nail salon 95403
2360 Mendocino Ave # A3,Santa Rosa, CA 95403
707-527-5567
0 notes
Photo
✨ These nail colors are great to wear. However, when you add those sparkling glitters, you will transform your everyday nails into perfect prom ones. 💯 Effortless and chic, right?! Try it, call us now.
https://pavilionnailloungemilton.com/
0 notes
Photo
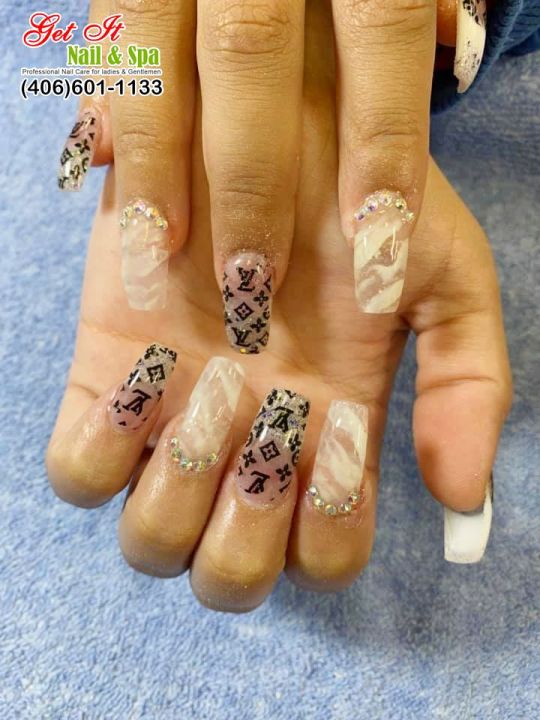
This accent nail design is something that you can create or have the professionals at the local nail salon do for you. This will look cute as an accent nail on the thumb finger. The thumb is rarely used as an accent nail, but I feel people who rock accents on this finger do it for themselves. When you type, write and even drive your thumbnail is facing you. Imagine it facing you with a creative stripe design on it. Fabulous! --------------------------------------- Nail salon 13214 | BV NAILS & LOUNGE
0 notes
Photo
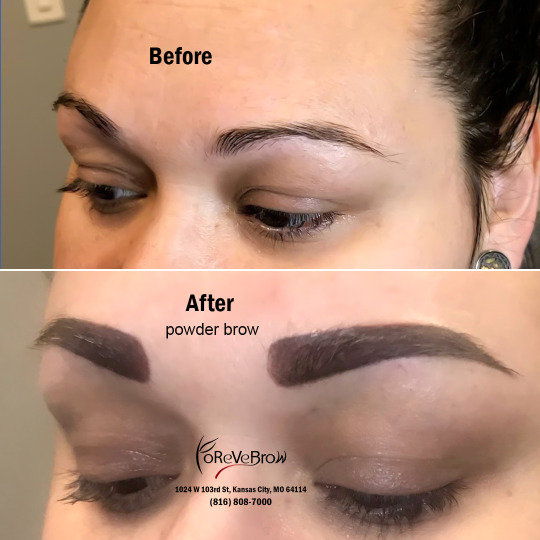
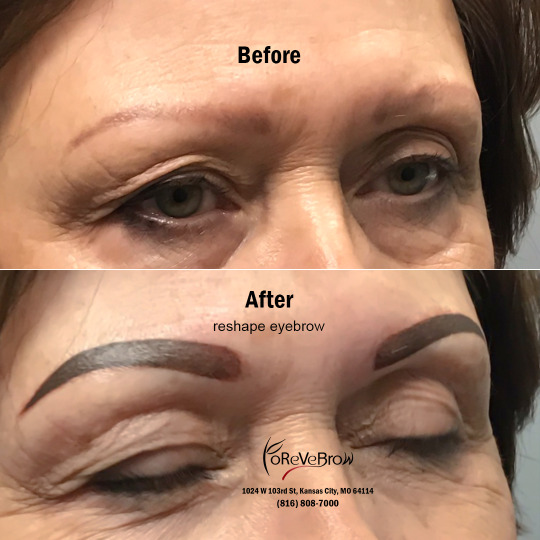
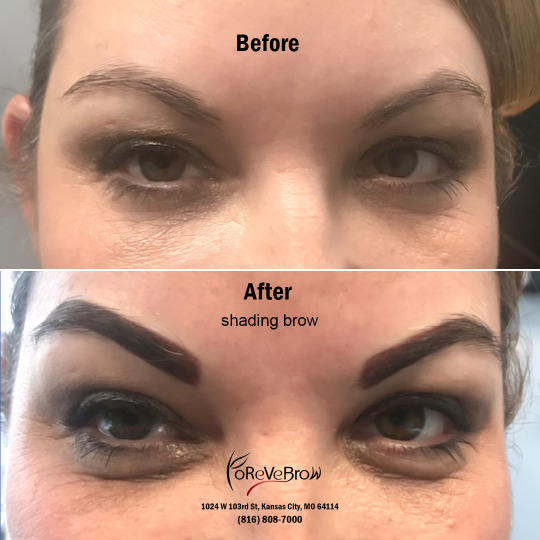
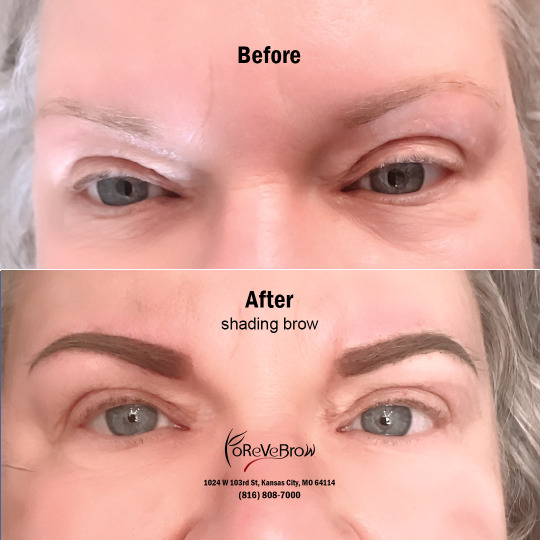
FLAWLESS EYEBROWS IN 4 EASY STEPS | EYEBROW 64114
It’s the 21st century and I don’t think I have to explain so much about the importance of eyebrows to your appearance. Take a look at any red carpet and you will see hundreds of celebrities who had their eyebrows either microbladed or tattooed. Our brows have an unmatched ability to bring proportion to our face, highlight our overall facial structures and frame our eyes beautifully. Unfortunately, not everyone is blessed with luscious brow hair to enhance their natural features and balance them out. If you weren’t born with beautiful eyebrows, makeup can transform the look of even the sparsest set into thicker looking, bolder looking beauties. But with busy mornings and long days leaving no time for touch-ups, wouldn’t it be great if there was a more permanent solution? You’re at the right place! The steps to incredible brows are now revealed in this article.
HOW ARE EYEBROWS DEFINED TO BE PERFECT?
The best eyebrows should be the ones that suit your face the most! You have to consider the shape, thickness, definition, length, and color when it comes to brows. Just surfing the internet to find those tips, or consulting with an expert for advice. Nowadays, most nail salons provide eyebrow services from simple to complex, such as threading, waxing, tinting, microblading, etc. Filling in your brows is the quickest and easiest way to instantly make you look more polished and put together. Before going to a permanent makeup clinic, conducting an investigation on the top-reviewed beauty salons near you is recommended. With the help of a specialist, your eyebrows will always be on point. Take a deep look at these guidelines to find out how brows can flatter your face and make your selfies pop!
STEP 1: EYEBROW HAIR REMOVAL
Permanent hair-free solutions these days are tweezing, waxing, threading, and laser hair removal technology. Each comes with its own set of pros and cons.
Threading allows for a detailed definition of the brow shape. If you're looking to add an arch or let your brows grow wild for a bit, threading can be a fast way to amp up your shape. The technique requires a threading expert to roll two cotton pieces of thread over the surface of the skin, driving unwanted hair out of the follicle. Sadly, threading breaks the hair, which could cause it to grow in different directions. The hair will grow back in faster, because hair is broken instead of fully removed.
Preparation: Be sure to call your threading salon ahead of time and inquire about their practice before making your appointment.
For those who favor efficiency, waxing might be for you. Waxing, if performed correctly, is much more gentle on hair follicles and skin. Waxing eyebrows is a longer-lasting method of brow shaping in-salon hair removal technique. Waxing pulls off the waxed strips in the direction of hair growth, but the biggest downside of this process is the pain. If you have thicker, coarser hair that grows back quickly, waxing is the best option for shaping. It also encourages thinner, softer regrowth.
Preparation: Before waxing, it is important to review the different types of wax available and investigate their ingredients for potential allergic reactions. With the proper product, waxing can be easy, but it is also vital to use the proper method to avoid catastrophic results.
Tweezing removes hair from the root and trimming is done after brushing through the brow thoroughly. With tweezing, you can pencil your eyebrows in their desired shape, and then tweeze around that, using it as a guideline. This method has an edge in that it appears to be the easiest one to do it yourself. If you don't trust yourself with a tweezer and scissors, visit a professional for a brow-shaping session every four to six weeks.
Preparation: A good pair of tweezers is a solid investment. And say no to magnifying mirrors–you will be more prone to over-plucking or messing up your arch.
If you're not happy with shaving, tweezing, or waxing to remove unwanted hair, laser treatment may be worth considering. It beams highly concentrated light into hair follicles. Pigment in the follicles absorb the light. That destroys the hair. While lasers are becoming more common and effective as technology advances, they're not exactly sensible for all types of hair removal.
Preparation: Make sure your skin is clean before every treatment. One more thing, trends come and go, and we recommend proceeding with true caution if you are planning on taking a permanent laser to your eyebrows.
Now before you go reaching for the best way to change the shape of your eyebrows, it would be best to seek the help of a brow expert. The method means a lot, but it’s really about the person doing your brows. You need to make sure that person understands the shape, and that comes from experience. The specialists are able to map out the shape that you want and can help you identify areas you may need to thicken up or grow in in order to achieve the desired shape. A good brow stylist doesn’t only shape but can lighten, darken, shape and even lift your brows.
STEP 2: EYEBROW SHAPING
When it comes to achieving the perfect brow shape, it is not as easy as it looks. Well-sculpted eyebrows complement your face and help you look younger. But, like everything in life, one size doesn’t fit all, and it’s insane how finding the right brow shape to flatter your face can improve symmetry and even knock years off. Just continue reading below to see how to take your brow game to the next level, and make sure you take what I shared with you to your next appointment
Your perfect brows depend on your unique face shape and dimensions. Firstly you need to establish which face shape you have. This will help you start to identify what eyebrow shape suits you best.
Heart faces: Try rounded brows to soften your face shape.
Square faces: Try thick, flat brows with a soft arch to soften the angles of your face and add depth.
Rectangular faces: Try slightly curved brows
Round faces: Try high arched brows to lengthen your face.
Oval faces: Try soft, angled brows to help balance your facial features.
Long faces: Try straight brows to add width to your face.
Diamond faces: Try curved brows to shorten your face.
Shaping your eyebrows is a major skill: it’s kinda like art and geometry combined because to find the perfect arch, it’s all about the angles and proportions of your face shape. When you shape your brows, they should be balanced and as symmetrical as possible. Find your ideal brow shape, accentuate your best features, and minimize makeup use. Eyebrows can be hard to get right, and figuring out the best look definitely isn’t easy, but don’t worry, the expert technicians will consult with you and offer their advice if needed.
STEP 3: PERMANENT EYEBROWS
Over a decade ago, tattooed eyebrows brought the pretty and natural looking result. However, the “tattoos” of today are a whole different game than the aforementioned brow pigmentation. Over the last few years, since bold, full brows have come back into fashion and microblading has exploded in popularity, a number of new tools and techniques have been introduced to the market offering polished-looking brows on a semi-permanent and short-term basis. From tinting and threading to microblading and lamination, the beauty industry has caught up with the demand for contemporary eyebrow treatments. It’s a lot easier now for both men and women to get the look of fuller, or more defined brows every day without having to fuss with eye pencils, gels and powders.
Nowadays, permanent brow makeup focuses on mimicking real brow hairs. That’s why microblading technique (also known as 3D eyebrow embroidery) has completely revolutionized eyebrow tattooing, and this trend shows no signs of slowing down. Unlike traditional tattoos that last forever, microblading gives you semi permanent eyebrows and helps to add the appearance of hairs to create a natural-looking, fuller brow effect. Microblading uses a pen-like hand tool with a blade made up of needles to etch hair strokes into the skin. Needles are drug across the skin, creating a fine cut where pigment can be placed in the skin. You draw the outline with a brow pencil, and then you use a specialized needle tool to fill inside the shape with strokes. The brow effect is comprised of many thin, crisp lines that are meant to mimic the natural look and texture of hair. It won't have any borders. A unique combination of dye is mixed to closely mimic the natural brow color of each client. Though the procedure sounds a bit uncomfortable, a numbing solution is applied beforehand to minimize any pain. Once done, the outcome will last up to 18 months. To prevent pigment wearing off, a retouching of the eyebrows is suggested once a year, to keep the color and shape of brows.
Someone who likes dark, full brows, and fills them in everyday, probably won’t be satisfied by microblading. Ahead, there is another brow technique which is usually a good idea if you want to create fullness and thickness in the middle of your brow.
A popular eyebrow system from ancient days is eyebrow tattooing. The most traditional tattooing methods involve the insertion of a needle or needles into the skin in a tapping motion. Tattooed brows are usually done by a handpiece machine, with much greater injury to the skin. This movement forces a lot of pigment into the skin, causing the tattoo to last. Eyebrow tattoo offers a permanent makeup solution for those who want stunning brows. This form of cosmetic tattooing, known also as derma-pigmentation or micro-pigmentation. With brow pigmentation, a regular tattoo needle is used, meaning the final product is composed of many tiny dots of pigments that create the illusion of a completely filled-in brow. Because of this, the finished tattoo is pretty much permanent, like a regular tattoo, with only a few touch-ups needed to maintain it, which saves many people money in the long run, and makes the maintenance of brows so much easier. Tattoo artists use ink while they are performing eyebrow tattoo procedure. With brow tattooing, the range of shades is limited to normal tattoo inks, whereas in the microblading technique, a blend of red, green, and other dye pigments are used to create an infinite variety of shades based on the client’s preference. There are a wide variety of eyebrows that can be produced with traditional tattooing, the most common being the following: Hair-Stroke or Feathered Brows, Soft or Powdered Eyebrow, Hard or Crisp Eyebrow.
Eyebrow tattoos are permanent. Once the ink is tattooed onto the skin it is there for life unless you go for removal procedures which can be costly. The semi-permanent nature of microblading allows patients the ability to alter the shape, color, and the size of their brows depending on what they desire. With microbladed brows, clients can change the appearance of their brow as trends change. Beauty trends aren't for women only, men can follow the trends too. Men traditionally don't get eyebrow tattooing, but men do get microblading.
Preparation: Listen up because if you decide to get your brows done, this part is very important:
Two weeks prior to your appointment stop using any skin thinners (vitamin A, glycolic acids, exfoliation) on the brow area.
Try not to take fish oil for a few days prior as it thins your blood which can tend to push out the pigment.
If you tint your eyebrows, tint it at least one week prior to the procedure.
Don't drink the night before, your pain threshold will be low if you are hungover. It’s not fun having your brows tattooed with a pounding headache.
Brow tattoo specialists will not be able to tattoo over any blemishes, sores, and moles in or around the brow area.
Getting a tattoo can be relatively painful, especially if they are placed in a sensitive area like the face. The microblading technique involves much less discomfort, especially if the brow area is numbed with lidocaine prior to treatment.
Besides the possible injuries, it is also very important to set your budget and to know your preference.
STEP 4: AFTERCARE FOR EYEBROW TREATMENT
It is normal for your eyebrows to appear very dark after the procedure. They will fade 10-50% in the first 1-3 weeks following.
Do not touch the tattooed area with your fingers right after your treatment at the salon. This increases your risk of infection. Cosmetic tattoos take between 4-6 weeks to fully heal. At this time you may receive your touch-up if any color has faded, or if you would simply like to add more definition to your tattoo.
Depending on your skin type, you may need to apply a protective and soothing balm across the brows when dry or itchy.
If you have oily skin, the wound will “self-heal” and not require any further nourishment. I suggest avoiding creamy moisturisers, serums with active ingredients and oils near the brow line as the more dry the skin is kept, the better the retention of the pigment in the skin. Anything oily will blur the crisp lines which were created during the procedure.
It’s best to avoid vigorous sports or exposure to moisture, which means protection in the shower is vital for roughly five to seven days. You should also stay out of direct sunlight. Do not scrub or pick at the tattooed area. Doing so can cause the pigment underneath to be pulled out. Allow the epithelial skin to flake off by itself. Stay away from dying or bleaching eyebrows, the chemicals could cause damage to face skin too.
Remember to schedule a touch up appointment within 2-3 months. Permanent makeup is an art and not a science. Everyone’s results will vary and you may still need to use pencil or powder.
CONCLUSION:
Eyebrows play a vital role in everyone’s faces so do not mess them up. An eyebrow studio is rated as good when it meets these requirements: certified technicians, hygienic conditions, authentic products, and smooth performances. Any tattoo, whether artistic or cosmetic, requires skill with the needles in use. Poor ability to use these tools increases the risk of scarring, migration of the tattoo, and excessive trauma to the skin. Because of the nature of the technique, microblading has a higher risk of negative side effects in the hands of an inexperienced technician. When done correctly, a permanent cosmetic treatment can be a safe and wonderful option to ease your daily make-up routine. Don’t hesitate to make an appointment with a professional beauty spa that offers high-quality permanent makeup procedures.
---------------
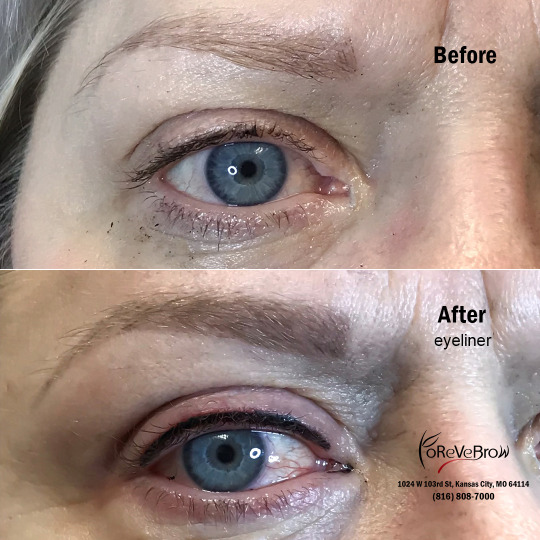
FOREVER BROW | EYEBROW 64114
1024 W 103rd St Kansas City, MO 64114
816-808-7000
0 notes
Photo


4 WAYS TO PREVENT NAIL POLISH FROM PEELING | Nail salon Montréal
Sometimes, you do not need a breathtaking design on your nails to captivate anyone's gaze, just painting your nails a charming color is all you need to get a nice manicure. Can you feel that those nail polish colors are too pretty to chip off quickly? So, in today's article, I will show you 4 ways to prevent your new nail polish from peeling and chipping. If you have ever experienced the frustration of perfecting your manicure, only for it to be chipped within hours, keep reading below!
1.Avoid these actions to keep your nail polish smooth
To make your nail polish smooth and, of course, be far away from cracking, please DO NOT
Shake your nail polish bottles: Simply roll your nail polish bottle between the palms of your hands instead of shaking it. If you shake the bottle, you are more likely to get air bubbles on application.
Take a shower straight after you have painted your nails: Your nail beds expand in the hot water, making the nail polish move with it. This causes cracks and can make your polish chip when your nail beds return to their normal size. Likewise, do not paint your nails straight after a shower.
Continuously apply thick layers of nail polish on your nails: If you apply your nail varnish in thick layers, it won’t dry on to the nail properly. On the opposite side, the thinner the coats, and the longer you let them dry in-between coats, the longer the nail polish will last.
Wash your hands too harshly: This rough action might hurt your nails and discomfort your manicured nails.
Direct contact with cleaning chemicals: Chemicals are absolutely not good for your skin and nails. Remember to wear gloves in case you have to do the dish washing.
2.Always Use The Right Basecoat And Topcoat
While starting and ending with base and topcoat tacks extra time onto a manicure, they are important steps that should not be skipped. Applying base and topcoat is critical to preventing chipping or cracking for a lasting manicure. By using a grippy, strong basecoat, you will significantly extend the life and look of your manicure. Basecoat is what allows the coats to adhere to your nails and topcoat is what seals it all in. For best results and preservation of your manicure, I recommend reapplying your topcoat every two to three days. You will want to opt for a formula that boasts chip-resistance, protection, and strengthening, and bonus points if there is a hydrating component, too.
You can go to some top-rated nail salons and ask the experienced nail technicians about which brands of their base coat and top coat.
3.Take Care Of Chips Right Away
Ever look at a chipped nail, roll your eyes, get annoyed and then totally forget about it? Yep, me too. But tackling chips when they first happen will help to preserve your manicure in a few ways and the sooner you restore your nails back to a cohesive, flaw-free look, the better. Odds are if you let the chip sit, you just might peel and pick your way into mani-destruction. Also, fixing the chip will prevent it from spreading and getting worse on it's own.
If you have no idea about how to fix the chip correctly, then making an appointment with a professional nail salon near you is not a bad decision.
4.Leave Your Nails To The Nail Expert
It is said that nail designs are not only about beauty trends but they are the work of art. So, leave it to the licensed nail artist when it comes to nail art. I understand that it is not cheap to get your nails done professionally, but the good results everyone can get after a salon manicure are worth the price. To keep your manicure lasting longer and stop your nail polish peeling so soon, paying a visit to those top-quality nail salons in your city is the best choice. Remember to build a proper manicure routine so that your nails will always look ready!
I would love to share my tips about nails and other beauty trends for you. Follow my blog and stay happy, stay healthy!
---------------
Salon Vong | Nail salon Montréal
4541 Boul, St-Laurent,Montréal, QC H2T 1R2
514-842-2525
0 notes
Photo
Our mission is to enrich your life and nourish your spirit with the power of nature and beauty. At Get It Nails & Spa we share your passion for beauty and respect your desire for quality products. --------------------------------------------------- Nail salon 59102 | Get It Nails & Spa
0 notes
Photo
FOUR PROPER WAYS TO PAMPER | Nail salon Aurora
1.Give Yourself A Massage
Let’s give your muscles some attention with a hand massage done by an expert in a top quality day spa. Small things like giving yourself hand and foot massages can go a long way in helping you relax. Do it on your own or have the technicians in the professional beauty salon done it for you.
2.Give Yourself A Manicure And Pedicure
Save a few dollars by giving yourself a good manicure and pedicure. You only need a few tools to get the job done. So grab your nail clippers, a nail file, and polish and have yourself a paint party!
You can even find an at-home foot spa for as little as $20 to really get the nail salon feel. Press on nails are also an option if you want more of a professional look.
But believe me, do-it-yourself manicures can not make you satisfied like get it done in the first-class nail salon near you.
3.Give Yourself A Facial
Facials can be expensive, so doing it yourself can make them budget-friendly. You can create your own DIY facial product with a few items in your kitchen.
And let me tell you this, an organic and high quality facial treatment at the top ranked nail salon or day spa is still the best option to choose.
4.Cozy Up To A Book And Tea
Reading a great book is always relaxing. Couple that with some nice, warm tea and you will be in for a calming night. You can grab a book on Kindle or for free from your local library.
---------------
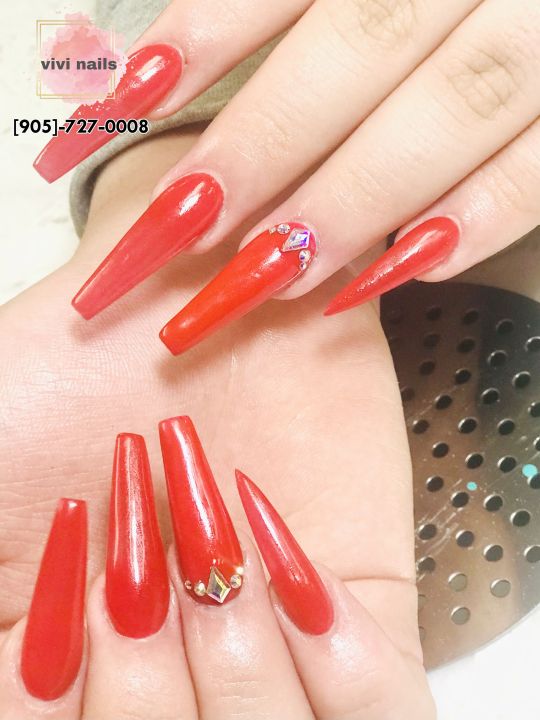
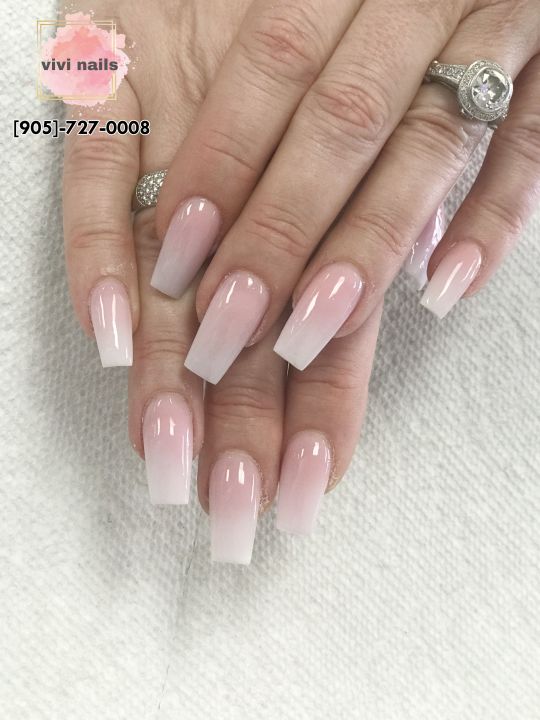
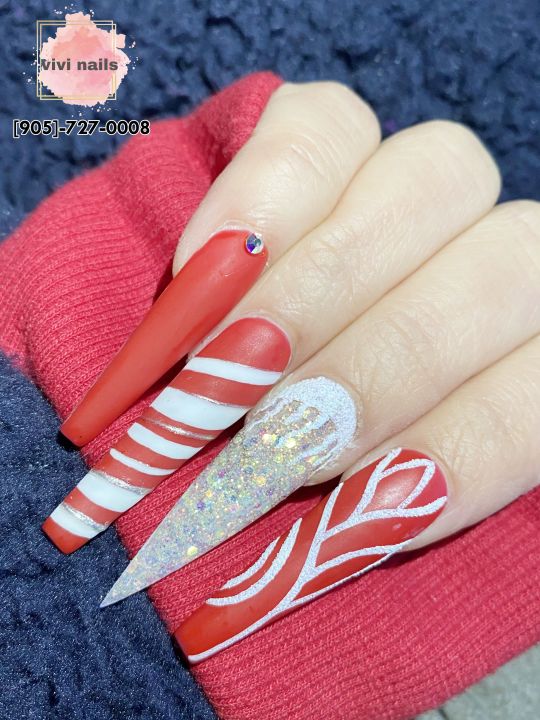
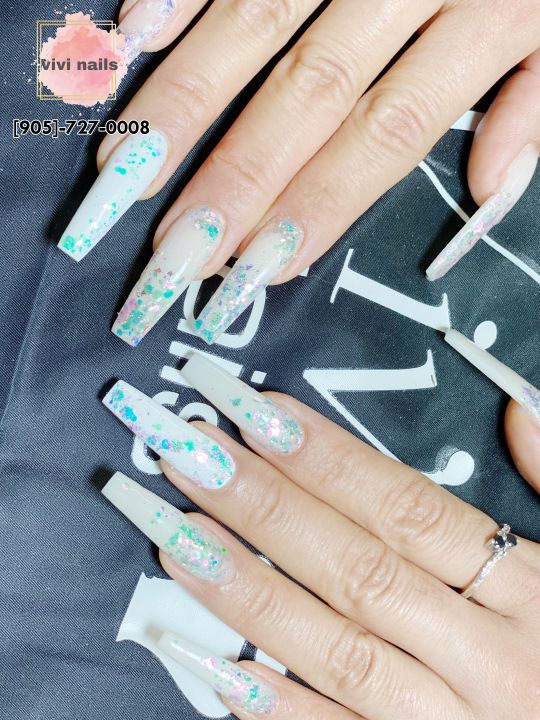
Vivi nails | Nail salon in Street West, Aurora
112-126 Wellington Street West,Aurora, ON L4G 2N9
905-727-0008
0 notes
Photo

SALON PEDICURES AND THINGS YOU SHOULD REMEMBER BEFORE A PEDICURE | Nail salon Regina
Women love to pamper themselves. It is the reason they regularly visit local beauty salons. While the steady-handed among us could give ourselves pedicures, the simple fact is that it is hard to stretch out and trim and paint your toenails. If you are going to roam around socks-free with your tootsies out for the world to see, you really want them to be professionally pedicured. Plan a pedicure at a top-rated nail salon near you soon.
Things You Should Do Before Your Pedicure
What’s the most important thing to do before you get a pedicure? Make sure you choose a professional nail salon that feels right!
You should ensure that the technician sanitizes every foot bath basin after every client. You should make sure your technician is using fresh nail files, too.
Make sure your salon is well-lit and well-ventilated.
After your pedicure, be sure to spend 10 minutes in the blow-dry booth to make sure your toes are completely dry. Dab them with some cuticle oil and gently wrap them in plastic wrap or plastic bags before putting on loose socks and shoes. Be sure you are wearing flats, not heels, because added height places added pressure on your toes.
Consider a soakless pedicure: Most pedicures begin with a nice, long soak for your feet in warm water. But some high-quality nail salons near me will wrap your feet in hot steamed towels instead. Diabetics need to avoid soaking their feet. If you have a weak immune system, you probably should avoid foot baths and ask for heated moist towels.
Things You Should Not Do Before Your Pedicure
Do not shave your legs for at least three days before you have a pedicure.
Don’t leave toenail polish on your toes forever. After about two weeks, it begins to flake and leave little white spots. It’s best to remove toenail polish before that happens. It’s okay to remove toenail polish just before your pedicure but you don’t have to.
Do not leave moisture between your toes when you bathe or shower.
It is also important to avoid callous peelers.
Don’t let your technician share emery boards. They cannot be sterilized. Make sure your technician is treating you with a new emery board, or, better yet, bring your own.
Every pedicure should be a luxurious experience. Taking care of your hands and feet is important for your personal hygiene and also enhances your looks. Every pedicure should also be safe. Don’t be afraid to discuss anything you have learned from this article with the experienced staff of any good nail salon in your local area. Treat yourself at least once every two weeks and enjoy your healthy feet!
Nowadays, modern and top-notch beauty salons offer a great range of services in order to keep your body, face to toe, looking beautiful and healthy. You may be busy to any extent but never forget the importance of being a beauty at all times. Choose the right salon and have the habit of visiting there as the right times.
----------------------
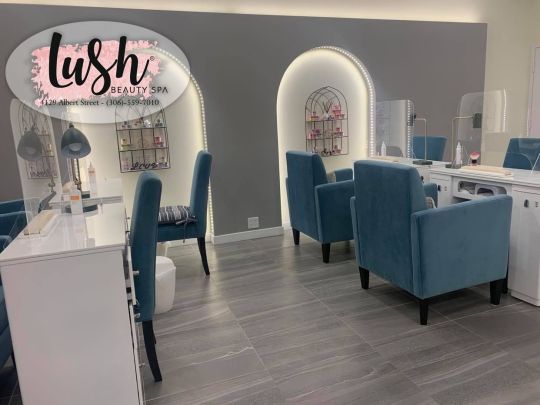
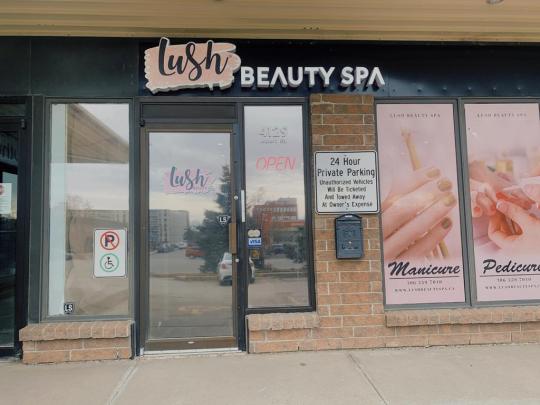
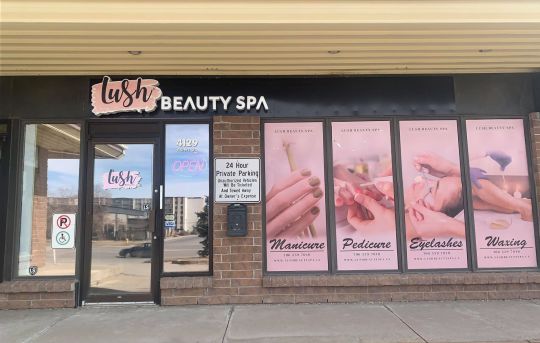
Lush Beauty Spa Albert | Nail salon Regina
4129 Albert St,Regina, SK S4S 3R6
306-559-7010
0 notes
Photo

4 WAYS TO PREVENT NAIL POLISH FROM PEELING | Nail salon 23235
Sometimes, you do not need a breathtaking design on your nails to captivate anyone's gaze, just painting your nails a charming color is all you need to get a nice manicure. Can you feel that those nail polish colors are too pretty to chip off quickly? So, in today's article, I will show you 4 ways to prevent your new nail polish from peeling and chipping. If you have ever experienced the frustration of perfecting your manicure, only for it to be chipped within hours, keep reading below!
1.Avoid these actions to keep your nail polish smooth
To make your nail polish smooth and, of course, be far away from cracking, please DO NOT
Shake your nail polish bottles: Simply roll your nail polish bottle between the palms of your hands instead of shaking it. If you shake the bottle, you are more likely to get air bubbles on application.
Take a shower straight after you have painted your nails: Your nail beds expand in the hot water, making the nail polish move with it. This causes cracks and can make your polish chip when your nail beds return to their normal size. Likewise, do not paint your nails straight after a shower.
Continuously apply thick layers of nail polish on your nails: If you apply your nail varnish in thick layers, it won’t dry on to the nail properly. On the opposite side, the thinner the coats, and the longer you let them dry in-between coats, the longer the nail polish will last.
Wash your hands too harshly: This rough action might hurt your nails and discomfort your manicured nails.
Direct contact with cleaning chemicals: Chemicals are absolutely not good for your skin and nails. Remember to wear gloves in case you have to do the dish washing.
2.Always Use The Right Basecoat And Topcoat
While starting and ending with base and topcoat tacks extra time onto a manicure, they are important steps that should not be skipped. Applying base and topcoat is critical to preventing chipping or cracking for a lasting manicure. By using a grippy, strong basecoat, you will significantly extend the life and look of your manicure. Basecoat is what allows the coats to adhere to your nails and topcoat is what seals it all in. For best results and preservation of your manicure, I recommend reapplying your topcoat every two to three days. You will want to opt for a formula that boasts chip-resistance, protection, and strengthening, and bonus points if there is a hydrating component, too.
You can go to some top-rated nail salons and ask the experienced nail technicians about which brands of their base coat and top coat.
3.Take Care Of Chips Right Away
Ever look at a chipped nail, roll your eyes, get annoyed and then totally forget about it? Yep, me too. But tackling chips when they first happen will help to preserve your manicure in a few ways and the sooner you restore your nails back to a cohesive, flaw-free look, the better. Odds are if you let the chip sit, you just might peel and pick your way into mani-destruction.
Also, fixing the chip will prevent it from spreading and getting worse on it's own.
If you have no idea about how to fix the chip correctly, then making an appointment with a professional nail salon near you is not a bad decision.
4.Leave Your Nails To The Nail Expert
It is said that nail designs are not only about beauty trends but they are the work of art. So, leave it to the licensed nail artist when it comes to nail art. I understand that it is not cheap to get your nails done professionally, but the good results everyone can get after a salon manicure are worth the price. To keep your manicure lasting longer and stop your nail polish peeling so soon, paying a visit to those top-quality nail salons in your city is the best choice. Remember to build a proper manicure routine so that your nails will always look ready!
I would love to share my tips about nails and other beauty trends for you. Follow my blog and stay happy, stay healthy!
---------------
Luxury Nail Spa | Nail salon 23235
11374 Midlothian Turnpike,North Chesterfield, VA 23235
804-794-6951
0 notes
Photo

Artificial Nails: Dermatologists' Tips For Reducing Nail Damage | Nail salon Yarmouth
Artificial nails can lengthen short nails, making your fingers look long and slender. They can also be hard on your nails.
To get acrylic nails (a type of artificial nail) to stick, the surface of your natural nails must be filed until they feel rough. This thins your natural nails, making them weaker. Chemicals in the products used to apply artificial nails can irritate the skin around your nails and elsewhere.
The list of health risks doesn’t end here. To remove artificial nails, you often need to soak in acetone or file them off. If you want to wear artificial nails for more than a few weeks, you’ll need touch-ups every 2 to 3 weeks to fill in the gaps that appear as your nails grow. Frequent touch-ups can seriously damage your natural nails.
In short, artificial nails can leave your nails thin, brittle, and parched.
Still, some people love the look of artificial nails. If you’re one of them, these tips from dermatologists can help you reduce the damage:
Choose soak-off gel nails instead of acrylic nails. Gel nails are a little easier on your nails because they’re more flexible. This means your own nails are less likely to crack.
You’ll want to ask for gel nails that soak off rather than ones that must be filed off.
Go to a salon that uses an LED curing light rather than a UV curing light. Gel nails require ultraviolet (UV) light to harden. LED emits lower levels of UV radiation than a UV curing light. An LED light also cures more quickly, which reduces your UV exposure.
Ask your nail technician to skip the cuticle trimming. Cuticles are often trimmed when you get any type of manicure. That’s a problem. Cuticles protect your nails and the surrounding skin from infection. When you trim or cut your cuticles, it’s easier for bacteria and other germs to get inside your body and cause an infection. Nail infections can take a long time to clear.
Cut cuticles also tend to feel rough when they grow back, so a nail technician may continue to trim your cuticles to keep them smooth.
Reserve artificial nails for special occasions. If you love the look of artificial nails, getting them only for a special occasion can reduce nail problems. Time without artificial nails gives your nails a chance to repair themselves.
When you’re not wearing artificial nails, a regular or French manicure can leave your nails looking fabulous.
---------------
Rosa Le's Nail Spa | Nail salon Yarmouth
298 Main Street,Yarmouth, NS B5A 1E4
902-742-8850
0 notes
Photo
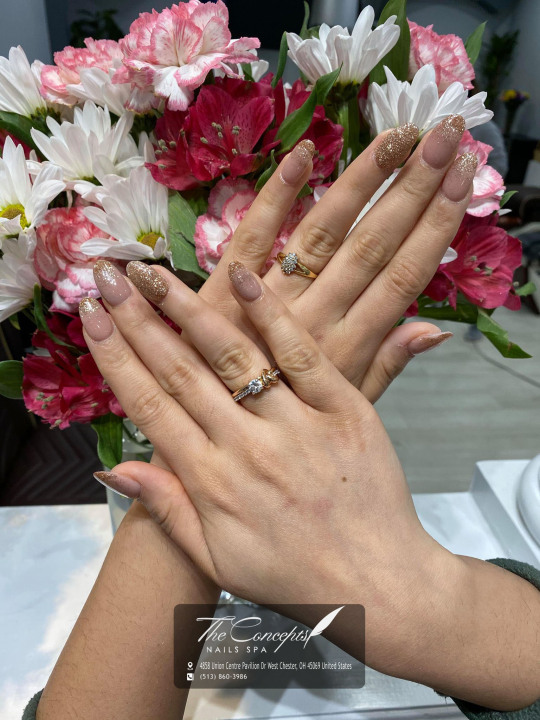
Effective Nail Care | Nail salon 45069
Most of the times we tend to overlook our nails when looking at our personal hygiene. This is however a very big mistake. The nails are just as important as any other part of the body and failing to take care of them can actually pose a health risk to you. Just like all other parts of the body, a healthy diet is essential to getting good nails but this is just the beginning.
When it comes to proper nail care, cleanliness is one of the most important factors. It is vital that you take the time to ensure that your nails are well cleaned. You could choose to clean them by yourself. Simply wash your hands using water and a gentle soap then gently scrub your nails using a nail scrub. Apart from ensuring that your nails remain beautiful and clean, this will also serve to ensure that your nails are rid of any and all bacteria.
You can also choose to have your nails cleaned by a professional. This is most probably the best idea as you can be sure that nothing will be left to chance. You can visit any of nail salons and have them professionally clean your nails for you.
Trimming your nails is also another very important aspect of nail care. Prior to trimming, warm some water and soak your nails for approximately five minutes. This will work very well to ensure that your nails and soft and it will in turn make it healthier, safer and less messy to trim the nails. Again, the option of visiting a Sarasota nails salon to have your nails professionally trimmed is a viable one.
After soaking your nails, you should definitely take the time to take care of your cuticles. This is because at this point they will be yielding and soft and it will be very easy to do so. You should however not completely remove the cuticles from the nails. The main purpose of the cuticles is to keep bacteria from getting into your body. Completely removing them exposes your body to a lot of risk.
Get a cuticle stick and slowly and gently push back your cuticles. Having your cuticles remain pushed back also works very well to ensure that you never have to deal with any ragged cutting. This will eventually enhance the appearance of your cuticles. If you are not really sure about the best thing to do with your cuticles, it would be advisable for you to visit a professional Sarasota nails salon to get further guidance.
---------------
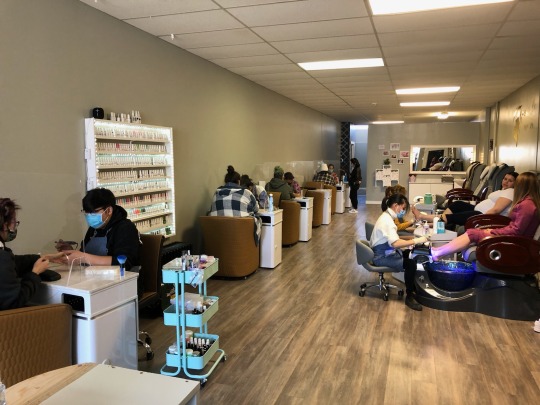
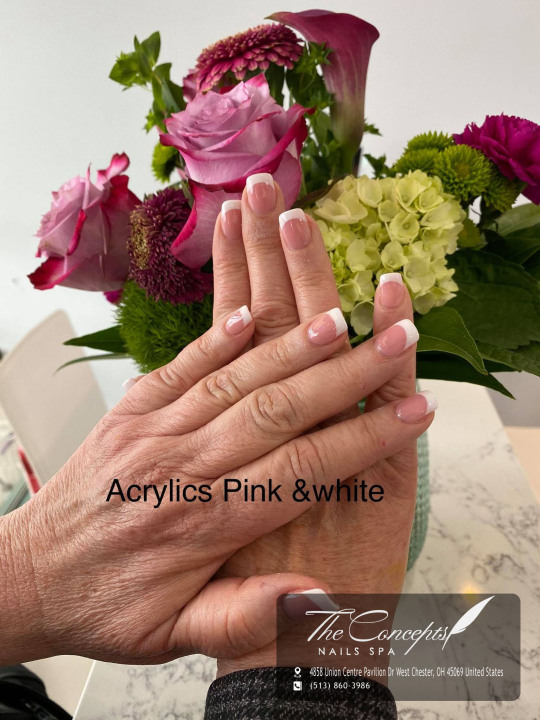
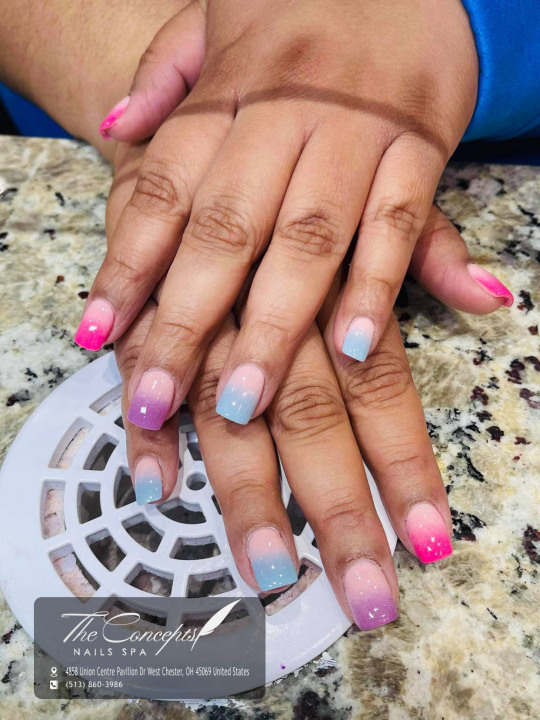
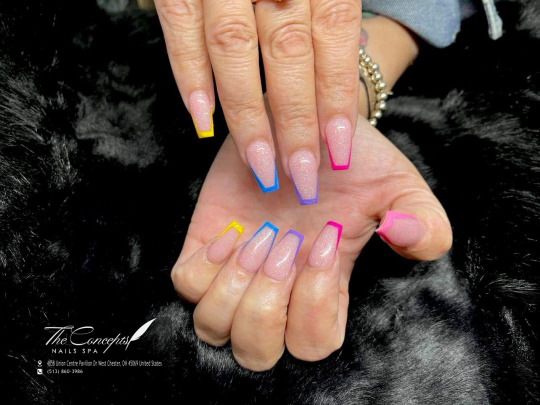
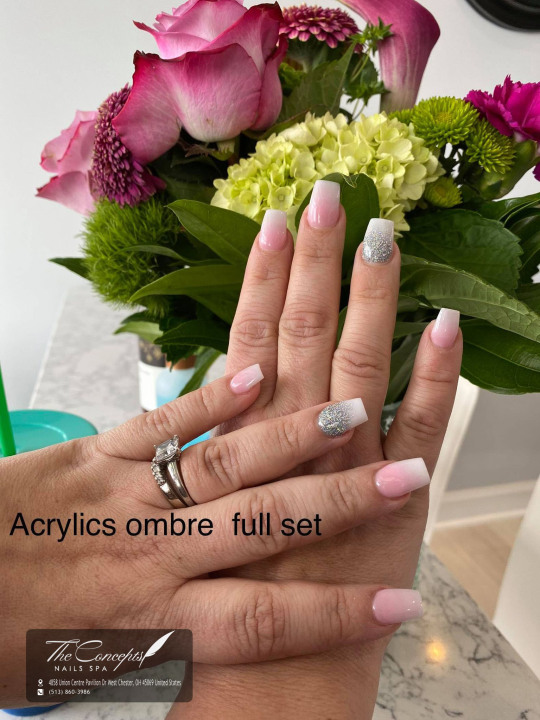
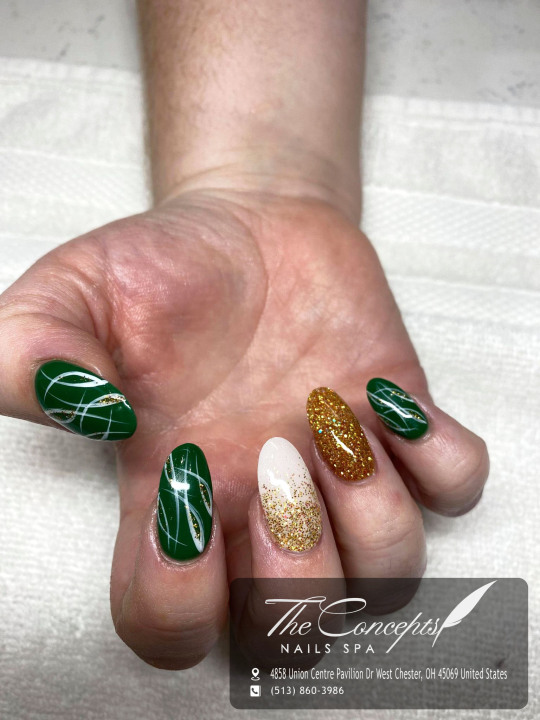
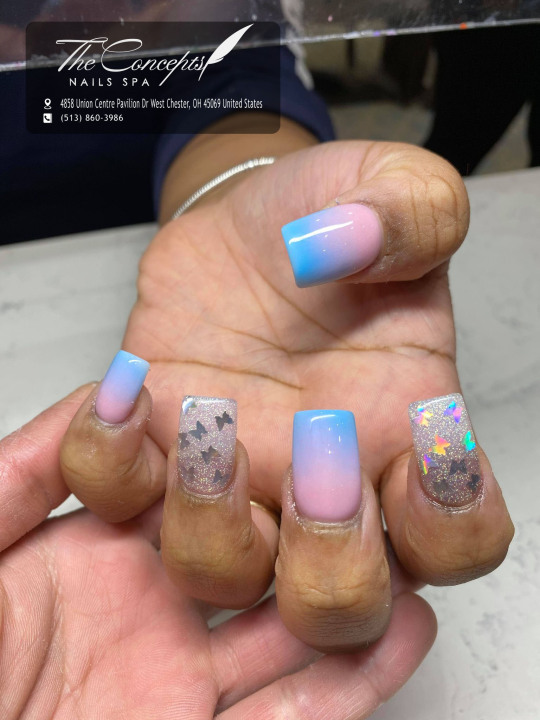
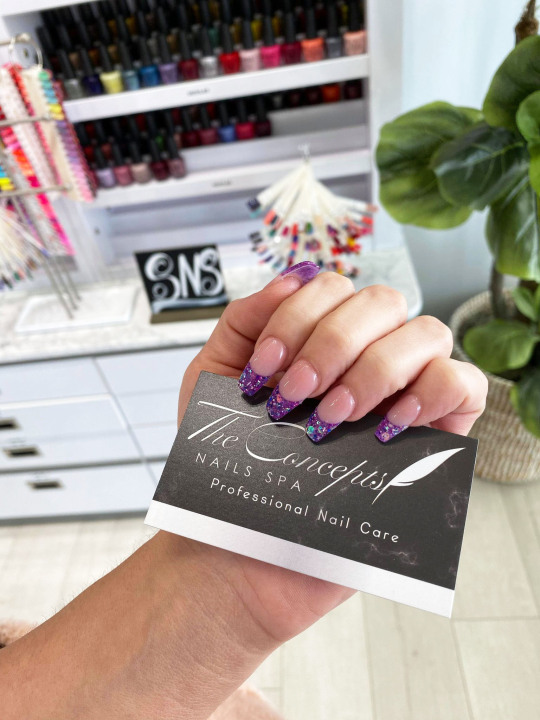
The Concepts Nails & Spa Salon | Nail salon 45069
4858 Union Centre Pavilion,West Chester Township, OH 45069
513-860-3986
0 notes
Photo
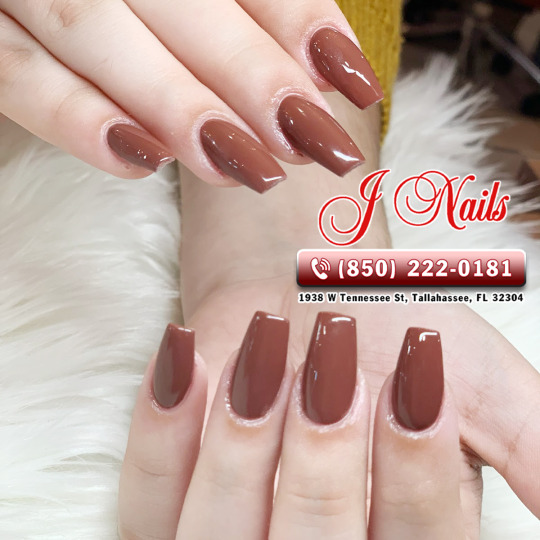

What are the differences between Manicure and Full Set?
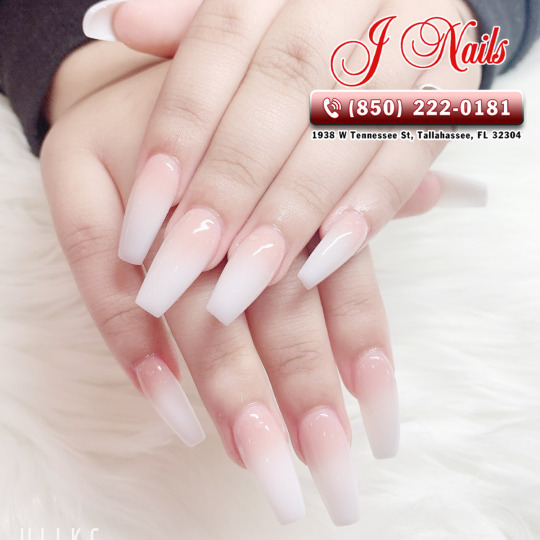
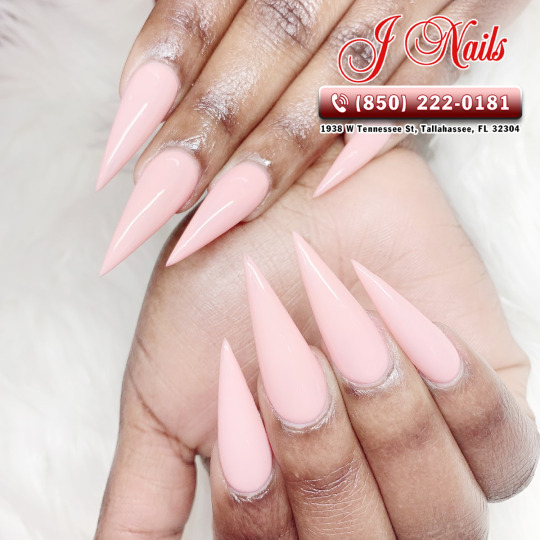
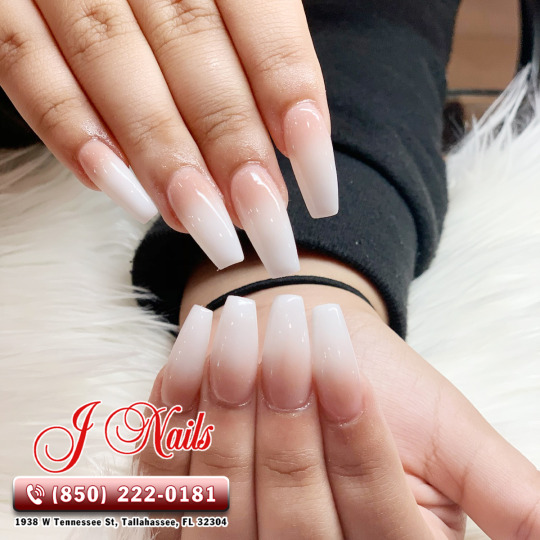
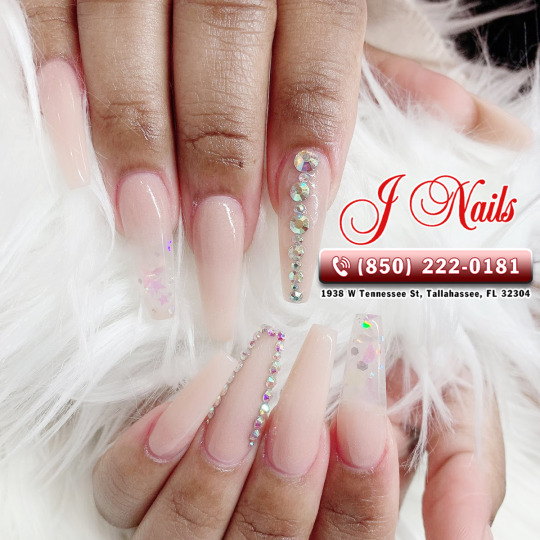
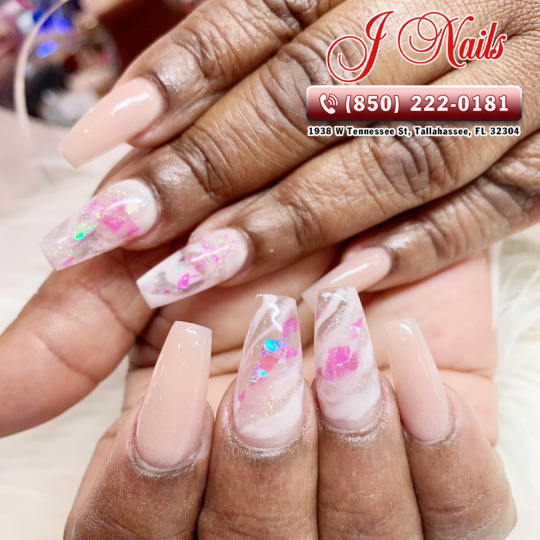
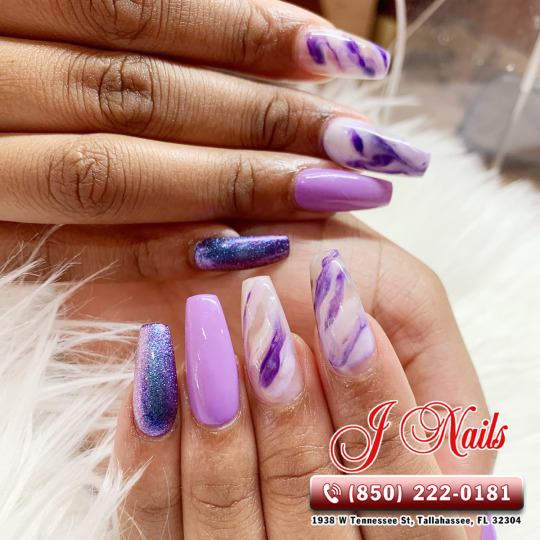
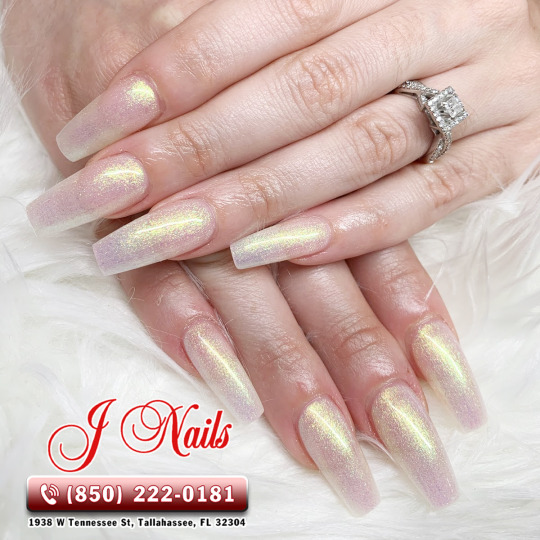
A manicure and/or gel manicure is where we concentrate on your “actual/real” nails; trimming and shaping your nails, the cuticles, and polishing on polish or gel polish on your nails. A full set, also known as artificial set, is where we apply solar powder and liquid onto your “actual/real” nails in order to extend your nail length and/or make it stronger using the powder, depending on your needs and wants for your nails. Manicure = dealing with your real nails Full Set = applying artificial nails and/or solar powder to your existing nails. ----------------------- Nail salon 32304 | J Nails salon | Tallahassee, Florida 32304 | Nail salon near me | The best nail salon in Tallahassee, Florida 32304
0 notes