
Don't wanna be here? Send us removal request.
Statistics
We looked inside some of the posts by mywifiextender11-blog and here's what we found interesting.
Average Info
Notes Per Post
0
Likes Per Post
0
Reblog Per Post
0
Reply Per Post
0
Time Between Posts
2 days
Number of Posts By Type
Photo
6
Link
10
Video
1
Last Seen Tumblr Blogs


Fun Fact
There are dozens of funny blogs to kill time on Tumblr.

Link
With mywifiext, you can connect to the internet on your wired or wireless devices. Today, we need internet access to do many tasks. With the help of wifi boost, you can enjoy the seamless internet connectivity throughout the home or office, all you need is to visit the wwwmywifiexxt.net and complete your wifi setup. Just unbox your device and connect it to the mywifiext.net setup wizard. Once the configuration is done, you can place the extender anywhere you want to boost the wireless network range and connect your devices to the network. In this post, we are sharing the simple instructions that will let you complete the wireless extender setup and enjoy the internet services without any hassle.
Complete the Wireless Setup through Manual Method: Steps to Follow
If your wireless range extender have network port, you can follow the below-mentioned steps to complete the setup:
Connect the extender to the internet.
Login to mywifiext.net. This will ask you to provide the details like username and password. Enter the details.
If you have not created the account yet, create the one now using your email and password.
On mywifiext login page, choose your router network.
Type the password and tap to continue.
Save the settings.
Complete the Wireless Setup through WPS Method: Steps to Follow
Turn on your extender.
The WPS light will blink which means that your extender is all set for the configuration with the router.
The solid green light on your extender will show that your extender is configured with your router.
Once you are done with the setup, your extender will boost the wifi range and let you use the internet services in any corner of your home or office.
That’s All! Follow these simple guidelines and complete the www.mywifiext.net setup for your device. The mentioned setup instructions are simple. But, if you have any doubt or concern, you can contact the professionals and seek their assistance to figure out the problem and troubleshoot it.
0 notes
Link
Netgear Extender is one of the most amazing devices that captures the attention of many people. The Internet has become a basic necessity for many people throughout the world. The speed of the internet is the major issue, if you want to enhance the performance of your internet, then you may use the Netgear Extender. It is well-known for its remarkable performance, still people may face technical glitches while using it. If you will face any issue while setting up the Netgear Extender, then visit www.mywifiext.net setup for instant solutions.
Important steps to Setup Netgear Extender
If you want help for setup the Netgear Extender, then follow the below-mentioned steps carefully and proceed:
The first step is to Plug in the Netgear Extender and then wait for some time till the power LED glows.
On the wireless networking device, you need to connect to the wireless network.
Now go to the web browser, it will directly take you to the onscreen Extender Setup.
It will now display you the list of existing wireless networks. As soon as your search gets completed, you will see a list that is displaying the names of all the wireless networks. Choose the new one which is not the existing wireless network that you wish to extend.
If your newest wireless network is enabled with security, then you will see a pop-up box where you will be asked to enter the passphrase.
In case the router supports the dual-band, then you need to choose two networks. Then click on the continue button.
Now you will be asked to change the wireless settings of the Extender. Follow the instructions carefully. If you don't want to make any changes then click on the continue.
Now you must connect your devices with the available network.
After the successful connection, navigate your cursor to the extender screen and there you will see the Recheck option.
Thus, wireless devices are successfully connected to the Extender network.
Finally, click on the finish button in order to close the setup process.
For more information regarding the Netgear Extender, visit www.mywifiext.net setup website. We have experts who always put all their efforts to meet the exact demands of the customers. Our experts are available 24/7 hours; do not hesitate to contact us. They are known to most of the issues that customers may face while the Extender is set up. They will surely assist you with easy guiding steps to set up the Netgear Extender. Are you still looking for help? Then choose the right professionals and get the best possible solutions from us right away!
0 notes

Link

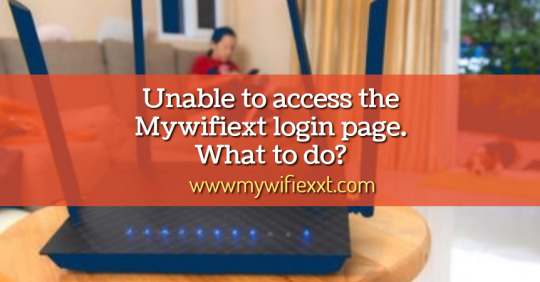
If you are facing the troubles with your Netgear Extender connection and unable to access the mywifiext login page, then the following guide can help you. Here, we have discussed some easy troubleshooting guidelines that will help you to fix the login issues. After implementing these troubleshooting steps, you will be able to login to mywifiext login page of your Netgear Extender.
After setting up the mywifiext login connection, you need to place the Netgear Extender at some specific location for your choice where you face the connectivity or poor signal strength issues. The guidelines will help you to troubleshoot the login troubles:
Try opening the same page using an alternate web browser installed on your device. After that, enter the login details in the address field.
Now, you need to connect the router to your extender. For this, you can use the Ethernet cable you got with the box.
In case, you do not get the ethernet cable, you can buy it online.
Type the default IP address of your extender i.e 192.168.1.250 in the address field and hit the enter button. If this address does not work, refer the manual for help.
Try to connect your extender.
Now, you will see a steady green light on your device’s front panel.
Restart the browser and type mywifiext.net login in the address bar to establish the connection.
For Mywifiext login, you need to:
Make sure that you have entered the correct address in the address field.
The web browser you are using must be up to date.
Delete the Cache filed and coolies of the web browser.
Your internet connection must be active and stable.
Reboot the networking devices.
Update the router firmware.
Hopefully, these troubleshooting guidelines will help you to fix mywifiext login
issues. After following these steps try to login to mywifiext.net again. For that, you can follow the guidelines below:
Plugin your Netgear Range Extender to the power outlet and turn it on.
Turn on your PC.
Get connected to the internet.
Now, open the web browser and enter the extender’s URL in the address bar.
Wait and let the page gets loaded.
After this, you can log in using the default username and password. If you still face trouble, do not hesitate to contact the experts and seek their assistance to figure out the most reliable solution to this problem.
0 notes

Link

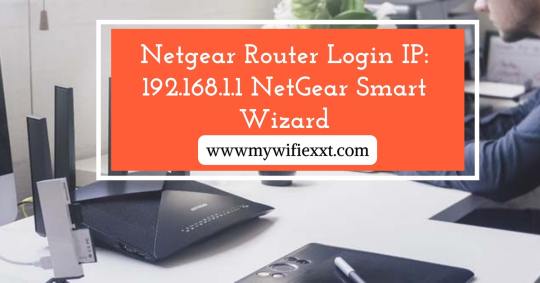
If you want to know about the Netgear Router, visit 192.168.1.1 Netgear Smart Wizard. You can also contact the experts for help as they are available 24/7 hours to help the customers. Get instant and one-stop solution from us right away!
0 notes

Link
If you are using the Netgear Extender and facing the connectivity issues then you have landed on the right page. Here, we are going to share some simple and easy steps that can help you to fix the mywifiext login page issues. After implementing these troubleshooting steps, you will be able to fix the problem and complete mywifiext login issues.
After setting-up the mywifiext.net login connection, you can place your extender at some specific location or the location with poor signal strength. Before proceeding further with the troubleshooting process, have a look at the common troubles associated with mywifiext login.
Unable to open the extender page.
WPS is not working.
Unable to open the website.
Mywifiext login is not working.
Unable to open the MAC Address settings.
Connectivity issues.
Server not found.
The extender setup asking for the default password.
To troubleshoot the login issues, follow given guidelines:
Try to open the same page by using an alternative web browser available on your device. After that, type the login address in the address field.
Use the Ethernet cable and connect the router with your range extender.
Now, you need to enter the default Ip address to the Netgear Extender. The default address is 192.168.1.250. In case you are unable to use this IP address, you can take expert help.
Try to connect your extender again.
If your extender is getting a proper power supply, you will see the steady green light on the front panel.
Restart the browser and type mywifiext.net in the address bar and check for the connection.
Some Useful Tips You Can Consider to Troubleshoot mywifiext login issues:
Check for the typing error in the address you have entered and if there is any, correct it.
Update your web browser to the latest available version.
Delete the cache files and cookies from your web browser.
Make sure you have an active and stable internet connection.
U[date the extender firmware online.
Reboot the networking devices.
Simple Login Steps for mywifiext login:
Plugin your extender to the power outlet.
Turn on your laptop or computer.
Get connected to the internet.
Open the web browser and type the extender URL.
Hit the Enter button once you have entered the address.
Wait and let the page load.
Now, log in using the default username and password. In case, you are still unable to complete the Mywifiext login process, take help from experts to fix the problem. The experts will share the best advice and make sure that you do not face any trouble with the extender setup and login process.
0 notes

Link
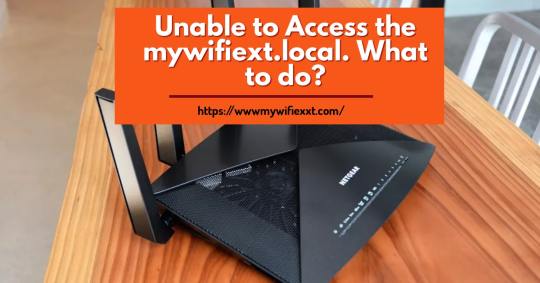
By accessing the default web-browser, you can easily set up the extender. You may get an error saying that ‘can’t connect to the site’. This error message may vary according to the web browser you are using. The reason behind being unable to access the mywifiext.local issue is that mywifiext is not a regular website. Instead, this is a local web address provided to the Netgear for helping the users to access the Netgear Genie Smart Wizard. Before we set up the extender, you need to make sure that it is properly connected to your device.
By using the mywifiext.net address, users can configure their wifi extender. With mywifiext.local address can help you to set up our Mac and iOS devices with the Netgear Extender. But, sometimes, this address shows an error message and denies the users from proceeding further.
If these issues and creating hurdles in your process, and you want to troubleshoot the issue, then follow the guidelines below and proceed with the process.
Troubleshoot Mywifiext. local: Netgear
If you are unable to access the setup wizard, you need to follow the below-mentioned troubleshooting guidelines to fix the issue:
First of all, check and make sure that your device is properly connected to the Netgear Extender.
For the mywifiext.local setup procedure, it is important to cross-check whether your extender is present in the close proximity of the wireless router or not.
Now, you have to check the Default Extension (Netgear-ext) whether your Netgear Wireless Extender uses the Netgear Range ext or not.
Now, check and make sure that your web browser is up to date with the latest available version. If there is any trouble, you must try to access some other browser.
Clean the cookies and cache from the web browser to fix the issue.
Try to use the Static IP address for the network.
Hopefully, with the help of these troubleshooting guidelines, you will be able to resolve the mywifiext.local issues. In case, the problem is still not fixed, we recommend you to contact the experts and seek their assistance to troubleshoot the problem. The expert will give you the best advice to fix the problem and also make sure that the same trouble does not occur again and hamper your experience.
0 notes
Link
Wireless Internet has become a very important part of your day to day life. It is quite rare to find a dial-up connection nowadays in homes or offices. We cannot deny the fact that wireless internet has made our life a lot easier, from booking flights to banking, everything can be done without any stress. Good wifi connectivity depending upon its range. In some parts of the home or office, wifi may work excellent, but in the other parts, it may not. To get rid of this annoying issue, one can set up the Wifi Range Extender for their home or office. Yes!
Click Here:- https://wwwmywifiexxt.com/
0 notes

Link

The guidelines to change Router Password varies according to the router model. Before making any modification, check the router manual. You can follow the guidelines mentioned in the router manual for changing the password of your router.
Below are the general steps that will help you to remove all the router configuration settings and change the password for your router. So, follow the mentioned guidelines carefully and change the password of your router without any hassle.
Press and hold the reset button on the router
Firstly, press and hold the reset button for about 30 seconds. If you hold the button for less than 30 seconds, it may reset your router but will not revert to the router’s factory default. You can use the Pin or paper clip to press the reset button on your router.
Connect your system to any of the router’s ethernet port
Most of the routers support browser-accessible administrator pages that a user needs to login to access the configuration settings of the router. Some of the routers even disable the administration via a wireless connection. Thus, connect the router with the help of Ethernet cable. Also, do not connect to the router port saying (Internet or WAN) - before you try to access the configuration page of the router.
Enter the Router Administrative Interface IP Address in the browser’s address bar
Now, you need to open the web browser and enter the IP address of the router in the address bar. Some Standard IP addresses include:
Apple: 10.0.1.1
Netgear: 192.168.0.1 or 192.168.0.227
ASUS: 192.168.1.1
Linksys: 192.168.1.1 or 192.168.0.1
Belkin: 192.168.1.1 or 192.168.2.1
DLink: 192.168.0.1 or 10.0.0.1
Buffalo: 192.168.11.1.
You need to follow the router manual to know about the right Ip address of the router.
Enter the Default Username and Password of the Administrator
You can visit the manufacturer website to know about the default username and password. Use the default details to log in.
Change Router Password for Admin
Now you can change the Admin login credentials. Make sure you enter the strong password to maintain the security of the expert advice, with the help of these guidelines, you can Change Router Password. The steps are pretty simple and easy to follow. If you still have a doubt, you can take expert advice to fix the problem.
0 notes
Link
Netgear has a long list of routers ( including the basic and advanced models). A user can select the router according to his needs. Almost all the router models are capable of fulfilling the networking requirements of the users. Now, it is easy to setup the Netgear Router using the 192.168.1.1 NetGear Smart Wizard. There is no need for Installation CD or software download for your router setup, you just need to navigate to the Netgear Setup Wizard and you can set up the router without any hassle.
Netgear router comes with a setup wizard which helps the users to complete the setup without any hassle. A user can also manage the different features and settings of the router using the smart wizard.
In this guide, we are going to share the initial guidelines to complete the router setup. For this, you will need the router IP address or the default web address, and Netgear Router Login password to access the router with the user-friendly interface.
The following are the step by step instructions for the Netgear Router setup using the 192.168.1.1 NetGear Smart Wizard.
Connect the Router or Modem to Computer
Connect the router with a modem and after that with the computer. To connect the router, use Ethernet cable.
Plugin the one end of the cable to the router and another end to modem.
Use another ethernet cable to connect the PC to Router.
Access the 192.168.1.1 NetGear Smart Wizard.
Open any web browser on your computer and in the address bar, type 192.168.1.1, hit the enter button.
When the login screen appears, enter the username and password.
Enter the username and password for your Netgear router and hit the login button.
In case you do not remember the password, reset the router to its factory settings. Click the ‘Reset’ button present on the backside of your router and hold the button for 10 seconds.
Netgear Router Setup
Once you click on the Netgear Setup Wizard, it will take you to the wizard page.
After accessing the smart wizard page, you have to follow the on-screen guidelines to proceed with the setup process.
Click ‘Wireless Settings’ to set up the wifi network security for the router.
Now, go to the ‘Security Settings’ and set the SSID ( Network Work), WEP/WPA key (Network Key). After that, click on the ‘Save’ button to save the settings.
If you want you can also change the router settings or configure the different router features as per your need.
We hope by following this 192.168.1.1 NetGear smart wizard, you can complete the router setup without any hassle. Follow the guidelines carefully to avoid any mistakes. In case of trouble, feel free to take expert assistance or contact the professionals for help. After you complete the router setup, you can enjoy interruption-free internet connectivity throughout your home or office.
0 notes
Link
Netgear has introduced a wide range of basic and wireless routers to enhance the internet experience of the customer. A user can select their router from various available options according to the requirements. It is easy to complete the router setup using the 192.168.1.1 Netgear smart wizard. You do not need a CD to install the router setup. Netgear router always comes with a simple 192.168.1.1 Netgear smart wizard which allows the users to manage the various router settings and the other features. In this guide, we are going to share the simple instructions that will let you complete the router wireless setup without any hassle.
0 notes