
Statistics
We looked inside some of the posts by nevecadmanfmp and here's what we found interesting.
Average Info
Notes Per Post
0
Likes Per Post
0
Reblog Per Post
0
Reply Per Post
0
Time Between Posts
1 day
Number of Posts By Type
Text
17
Last Seen Tumblr Blogs


Fun Fact
Tumblr Inc. is using 66 technologies for its website.
Text
PRESS RELEASE

This is my finished press release promoting my collection. In my press release I wanted to make a reference to the collection name itself, “Collision ” which in reference to the colliding themes found in London which when brought together highlight a city bursting of culture and history which I wanted to show through my designs.
0 notes
Text
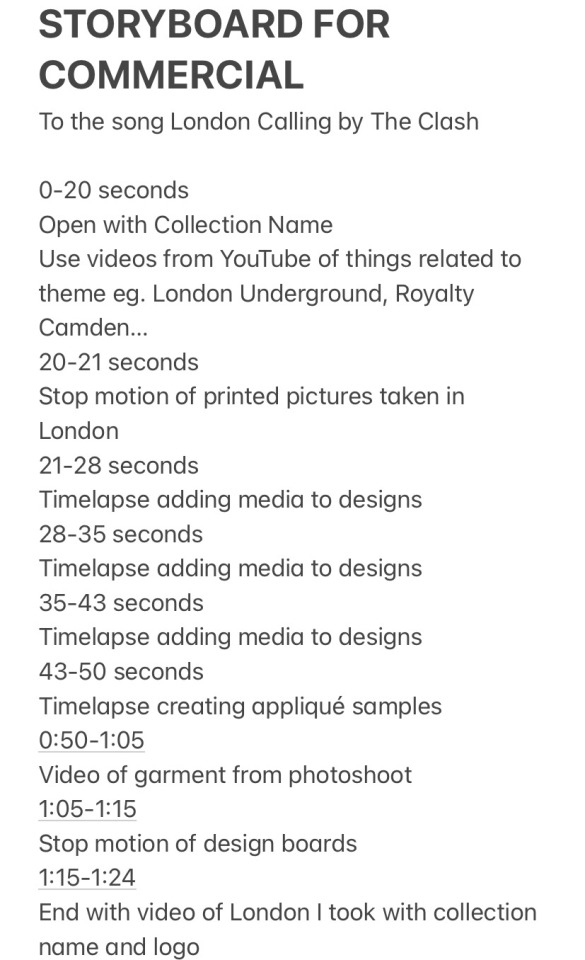
COMMERCIAL
youtube
This is the commercial I created to support my collection. To create the commercial I used IMovie on my iPad and included various videos of London I found on YouTube, Timelapse’s of the behind the scenes of my collection and videos taken from my photoshoot. I am really happy with how my commercial turned out and I think it is a good advert for my collection.
HARVARD REFERENCING FOR CLIPS USED:
Kinolibary. (2021). Late 1980s London, Piccadilly Circus At Night, Neon Signs, 35mm. Available: https://youtu.be/d1Xr8swy4Fk. Last accessed 3rd June 2022.
Kinolibary. (2013). Riding the London Underground Tube in the late 1960s. Available: https://youtu.be/KdfXjmfhc6s. Last accessed 3rd June 2022.
Kinolibary. (2021). 1970s London, The Mall, Royal Coldstream Guards, Household Cavalry, 35mm. Available: https://youtu.be/iODsX8BcgXA. Last accessed 3rd June 2022.
Kinolibary. (2018). 1970s London Underground, Tube at Pimlico, Businessmen, HD from 35mm. Available: https://youtu.be/qkJ8mbNLxSg. Last accessed 3rd June 2022.
Kinolibary. (2019). Drive Through 1990s London at Night, HD from 35mm. Available: https://youtu.be/vOP9LtF5X_4. Last accessed 3rd June 2022.
Kinolibary. (2019). 1980s, 1990s London Sunset, Big Ben, Thames, 35mm. Available: https://youtu.be/5J0dYy7NGsM. Last accessed 3rd June 2022.
Kinolibary. (2016). 2012 London, Camden Market, filmed on 8mm. Available: https://youtu.be/RpP3riHmxE8. Last accessed 3rd June 2022.
0 notes
Text
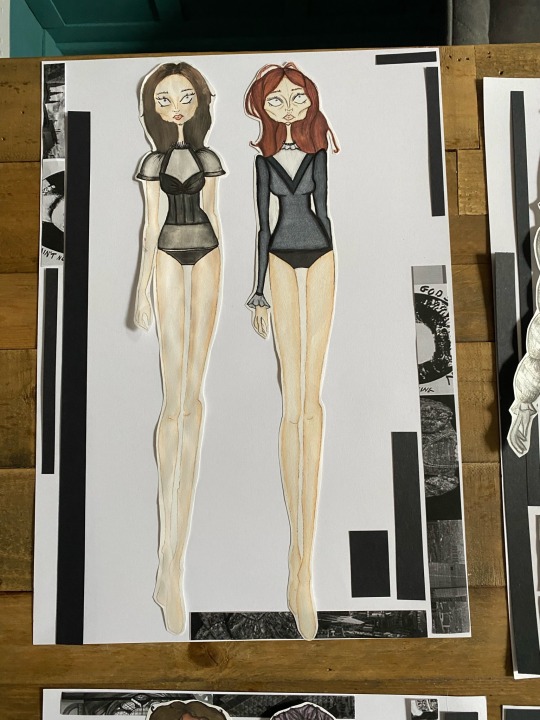
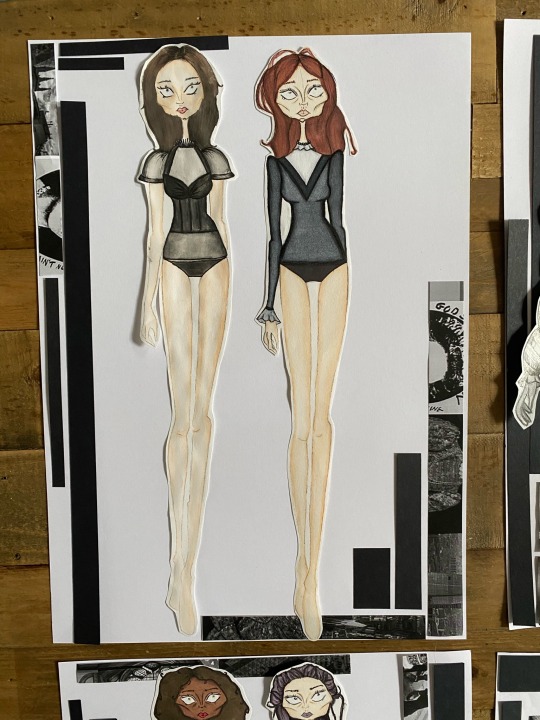
FINAL DESIGN BOARDS


These are my final design boards I created after experimenting with different layouts. I decided on using black card and a black and white version of my collection mood board as the background for the design boards and I’m happy with the outcome as I think it is simple but effective in terms of not distracting too much from the actual designs.
0 notes
Text
FINISHED GARMENT

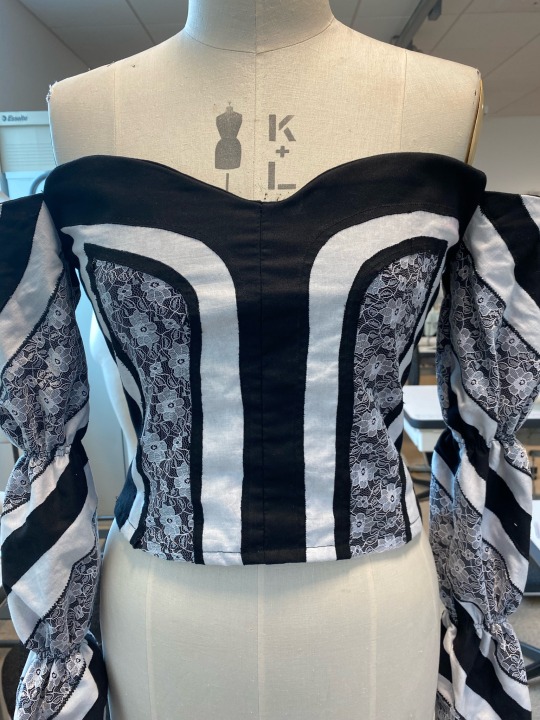
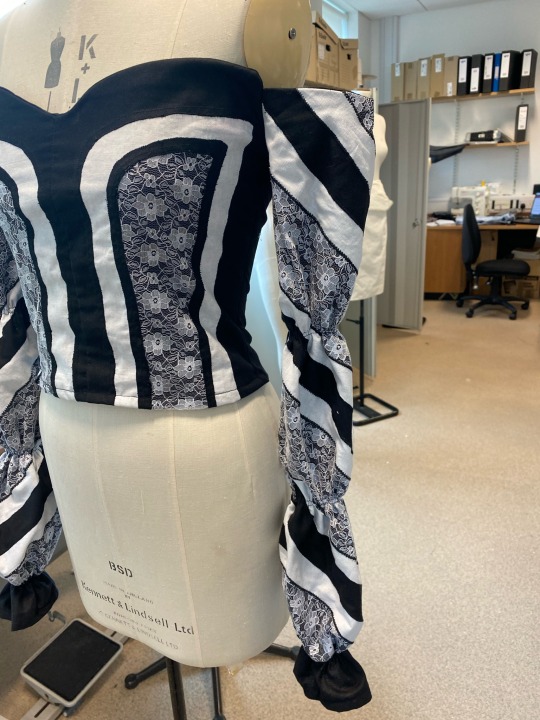
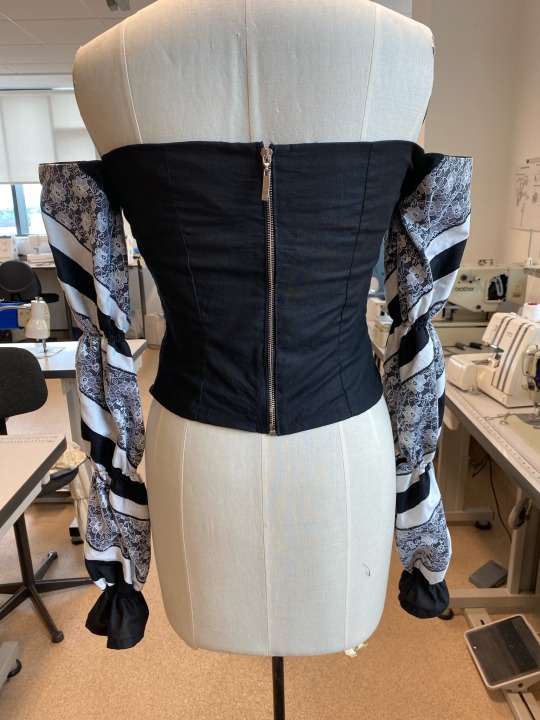
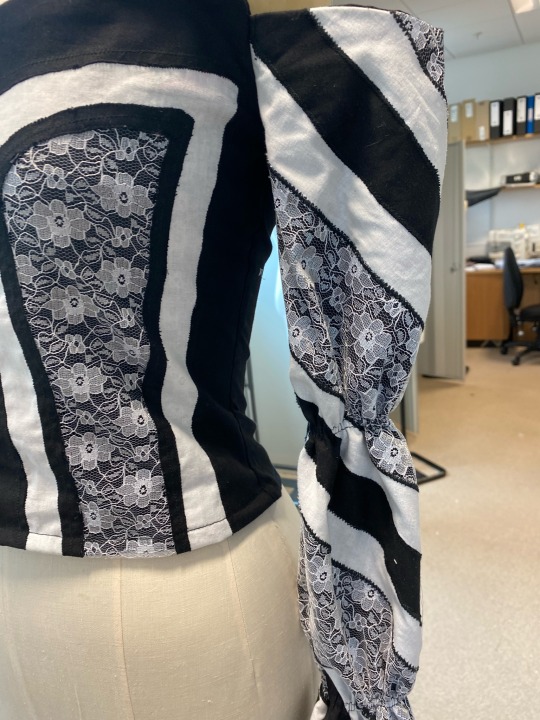
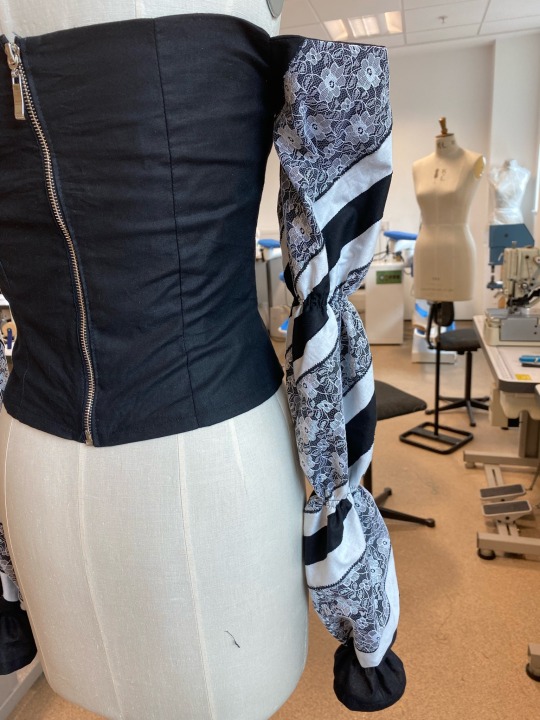
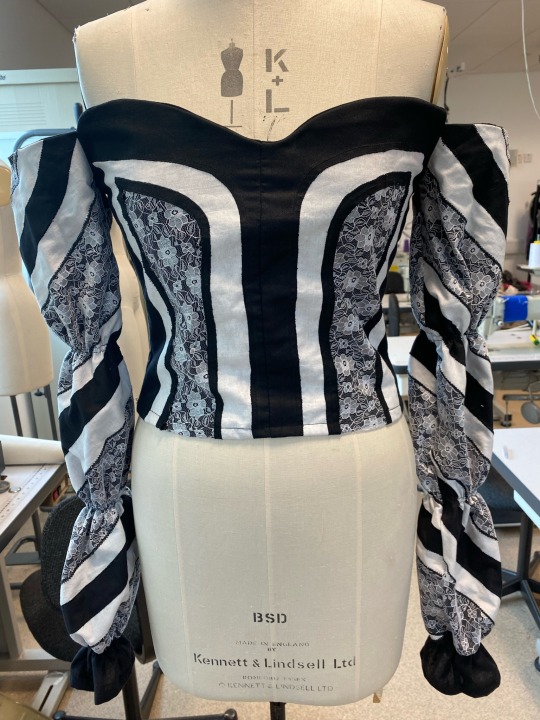
This is my finished garment on a mannequin. I am really happy with the outcome. For the bodice I create two reverse appliqué panels using black and white cotton and white lace which were then separately sewn on. For the sleeves I created appliqué panels using black and white cotton and white lace and sewed them onto the black cotton. I used shirring elastic to create the puffy effect in the sleeves. Overall I’m really happy with the final outcome.
MACHINES USED:
Domestic Sewing Machine: Construction of garment, reverse appliqué and appliqué
Industrial overlocker: Overlocking hems
Industrial Sewing Machine: Adding shirring elastic, adding zip
METHOD OF CONSTRUCTION:
Cut out all pattern pieces on black cotton, marking wrong sides, snipping in notches, marking drill holes
Sew in darts at 1cm and press them
Create reverse appliqué panels using black and white cotton and white lace
Sew the side seams together and overlock them
To attach the two reverse appliqué panels to bodice, attach them at same time as side seams and the create seam down middle of bodice attaching both panels together
Cut out interfacing
Place the bumpy side of interfacing on wrong side of fabric and attach to fabric
Place interfacing pieces right sides together and make sure they meet each other at the top point
Sew down the outer edge and then overlock
Overlock the entire bottom edge
Overlock the two centre backs
Attach appliqué panels to sleeves using black and white cotton and white lace
On right side of fabric using tailors chalk mark a straight line across sleeve matching them up to notches
Using shirring elastic create 2 rows on industrial machine with wrong side facing the machine bed, use the line we created using tailors chalk as a guide and for the second row use the foot of a machine and the line we created before as a guide
Pull the shirring elastic to make the puff details more structured
Place right sides together and sew down seam of sleeves make sure to go over the shirring elastic rows a few times when sewing seams
Overlock these seams
Overlock the bottom of the sleeves and then hem them
For the sleeve facings overlock the bottom edge
With right sides together sew the top edge of the sleeve facing to the sleeve
Attach the sleeves to the bodice leaving 1cm at the top of the bodice
Overlock the entire outer edge of the bodice and then hem it
Change the foot on industrial machine to add zip
To attach the zip place the zip right side to the right side of the bodice
When attaching the zip make sure to keep the teeth of the zip at the edge of the machine foot
Attach the facings to the bodice with right sides together
Cut the facing down by half
Sew the entire facing to the bodice using the machine foot as a guide (make sure wrong side is on the machine bed)
Press the facings
Sew underneath the sleeve on the seam
Fold the facing over the zip and sew the facing to the zip by hand sewing making sure the thread cannot be seen on right side of garment
NOTES IN MORE DETAIL FOUND FURTHER DOWN BLOG
0 notes
Text
USING DIGITAL SOFTWARES
ILLUSTRATOR

Using Illustrator, we digitally added media to our spec drawing. We had previously used this software in unit 1, when adding media to our alien heads so I didn't find it too difficult to do this time around and I think it created a crisp refined finish.
INDESIGN


Using InDesign, we learnt how to create magazine pages and leaflets which we could use to support our work. This is something which I would like to explore further going into my second year as I think it is important to consider the digital side of the fashion industry.
0 notes
Text
DESIGN BOARD IDEAS PT.3
WATERCOLOUR AND PRO MARKER DESIGN BOARD

0 notes
Text
DESIGN BOARD IDEAS PT. 2
DESIGN BOARD IDEAS FOR WATERCOLOUR DESIGNS


DESIGN BOARD IDEAS FOR PRO MARKER DESIGNS


0 notes
Text
DESIGN BOARD IDEAS
DESIGN BOARD IDEAS FOR FINAL DESIGN
For my final design board which has my design which I chose to make on I designed to enlarge my final design and include a back view also as well as pictures from my photoshoot. For these design board ideas I didn’t want to make them look too cluttered as the enlarged design took up more space on the page and I didn’t want to include too much in the background as it could potentially take the focus off my design.


DESIGN BOARD IDEAS FOR PENCIL DESIGNS
For my first design board I played around with different layout ideas using my collection mood board and black card cut into strips to create a background. I also played around with the idea of using my collection mood board printed in both colour and black and white to see which one I think worked better. Personally I think the black and white mood board looks better as it blends better with the black and white theme of my collection and doesn’t take any attention anyway from the actual designs.

0 notes
Text
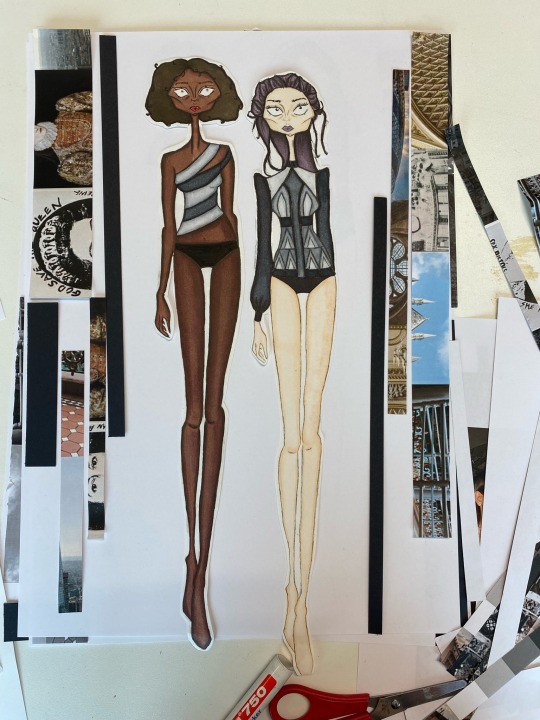
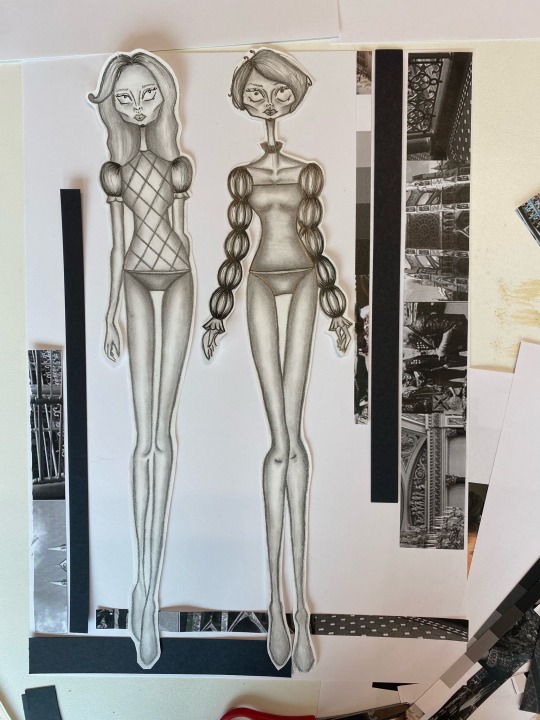
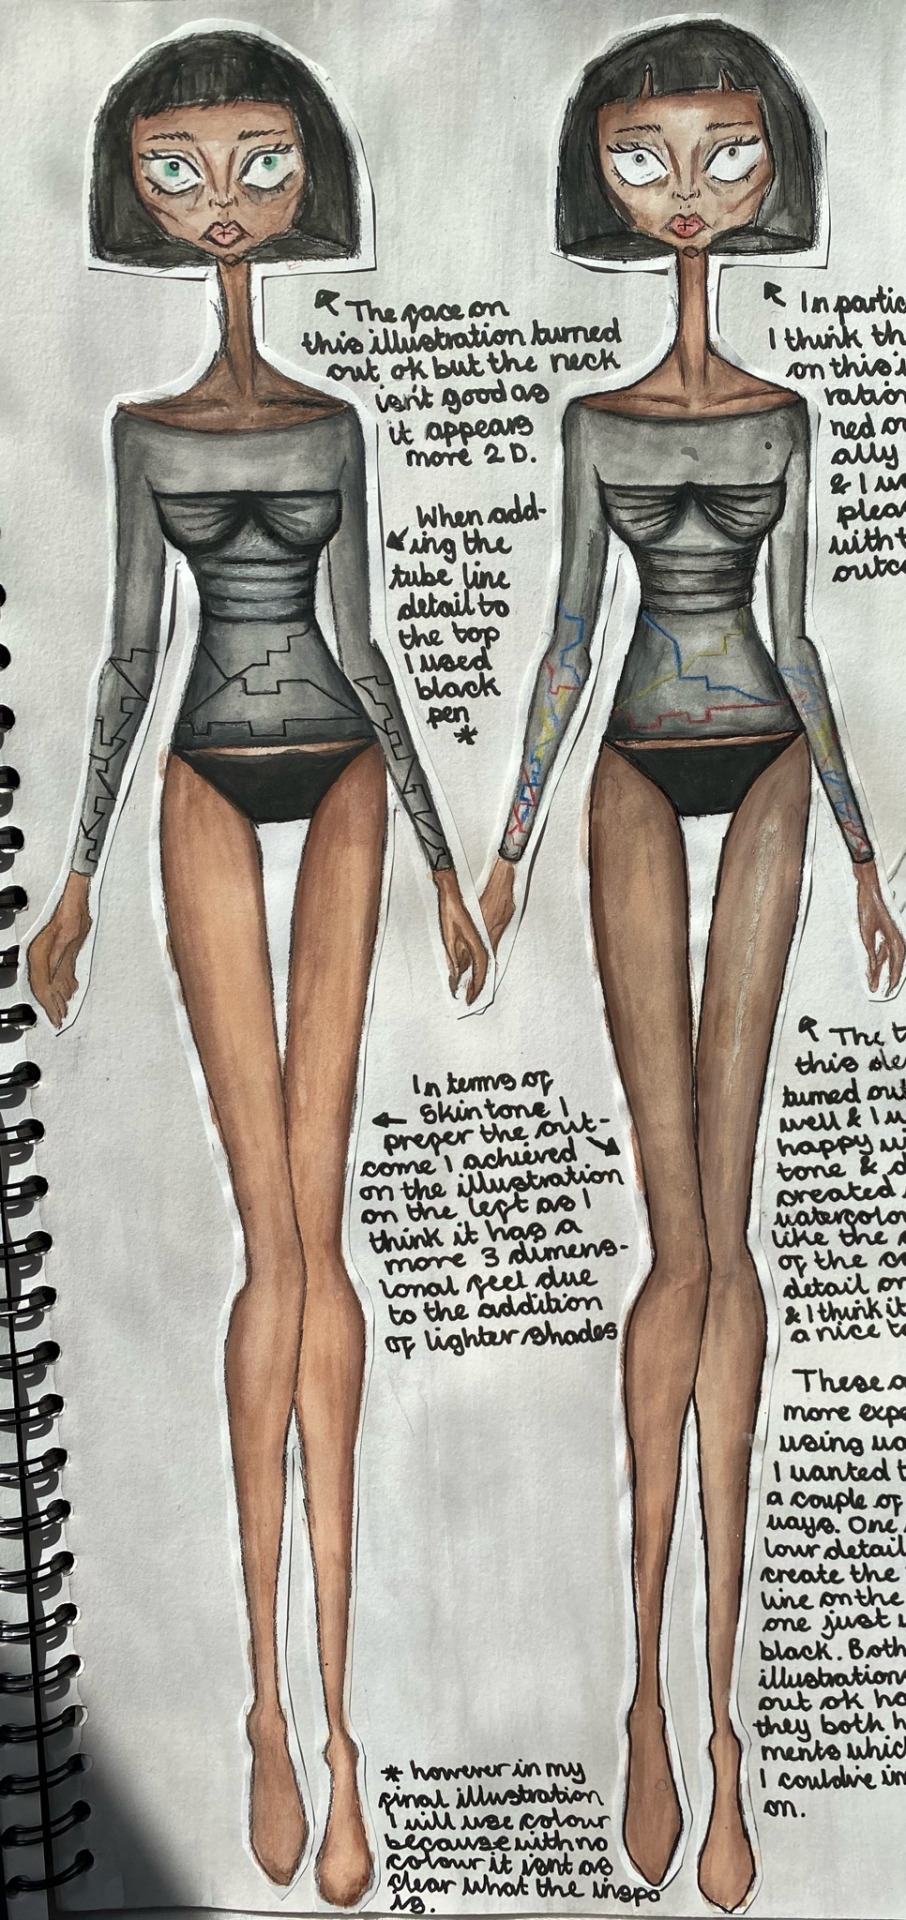
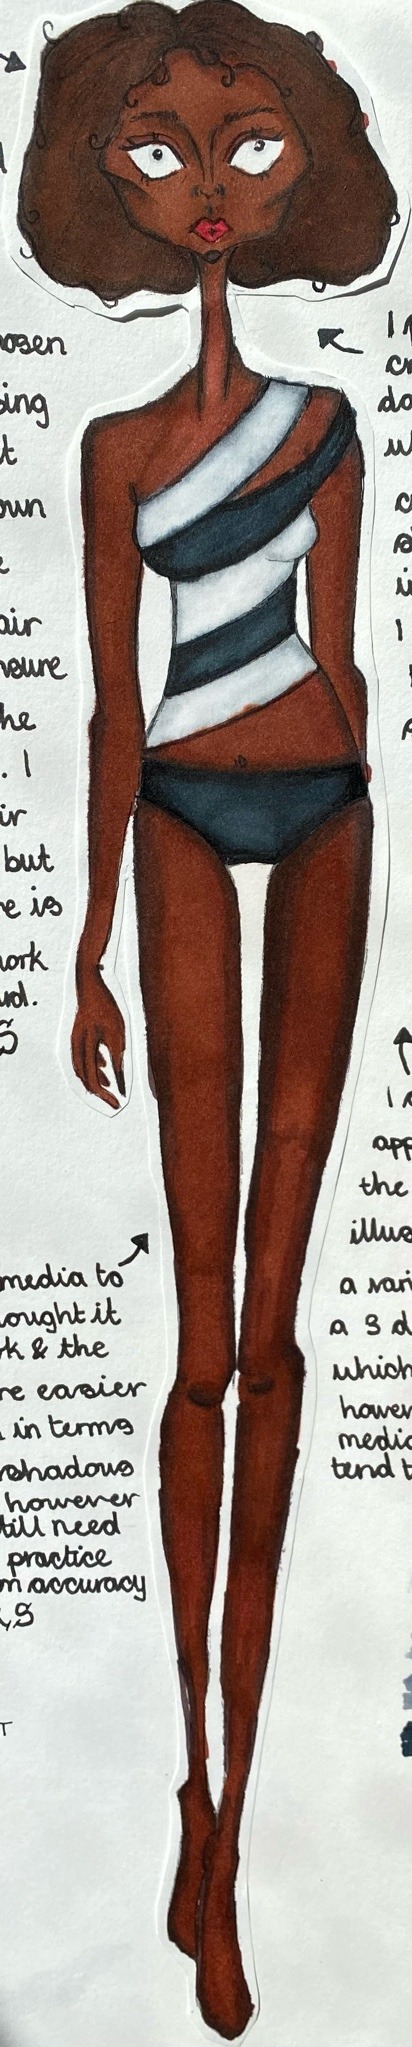
EXPERIMENTING WITH MEDIA- WATERCOLOURS
Watercolour is a media I tend to struggle with so going into this I wanted to try and improve my skills to produce work that I was happy with. Sticking with the black and white theme of the collection I wanted to use only monochromatic colours for these illustrations but for the design which takes inspiration from the London Underground I wanted to experiment with incorporating some element of colour into my designs. Overall I am happy with how these experiments turned out but creating accurate and better skin tones is something I want to work on as I wasn’t entirely happy with how this element of my illustrations turned out.
0 notes
Text
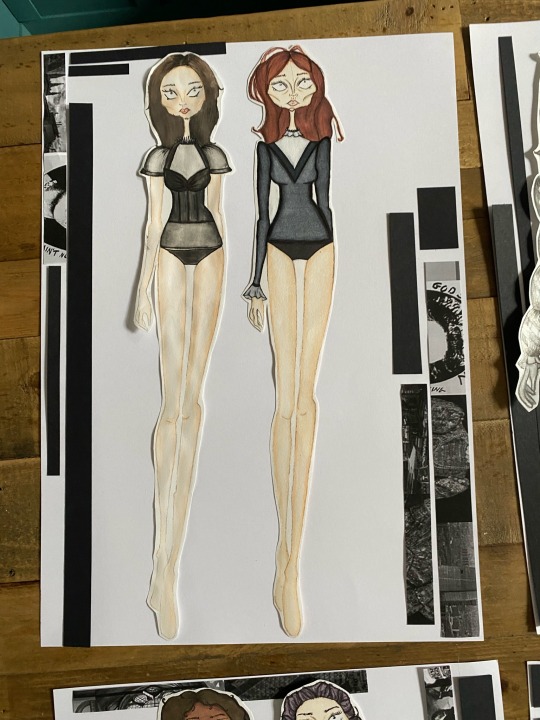
APPLYING FINAL MEDIA- PRO MARKERS
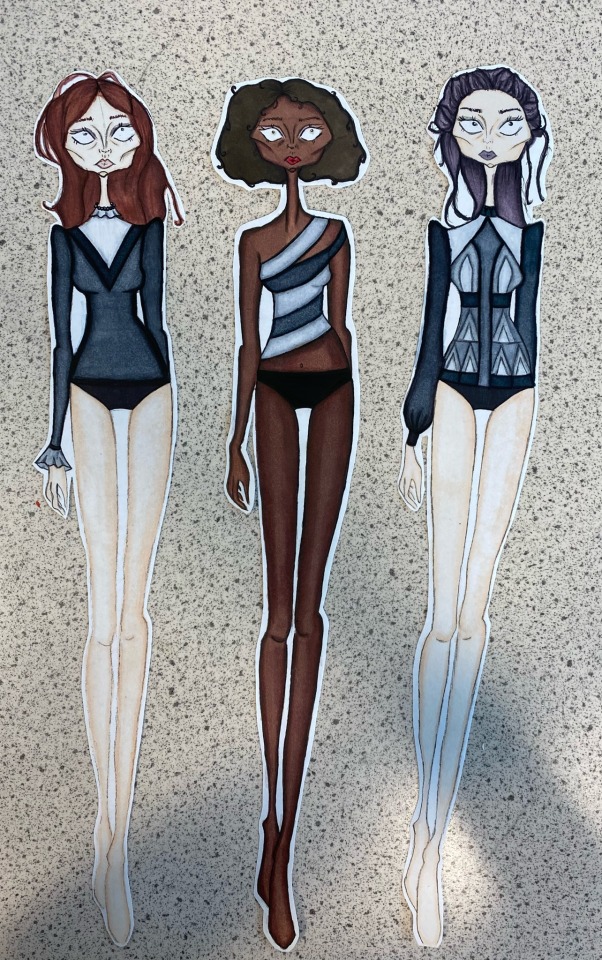
Following my media experiments something I wanted to work on was my application of media to create accurate skin tones. I am really happy with the improvements I made and think I successfully achieved skin tones which I am happy with. I am also happy with the overall application of media on these illustrations.
0 notes
Text
APPLYING FINAL MEDIA- WATERCOLOUR
Following my media experiments something I wanted to work on was the application of the watercolour to portray more realistic and better looking skin tones. During the experimentation process I found it hard to blend the colours together and achieve an outcome which I liked and looked good with both tone and depth creating a more 3d look. However when applying media to my final illustrations I was really proud of the outcome I achieved and think it is an improvement from that of my media experiments.
0 notes
Text
COLLECTION MOOD BOARD
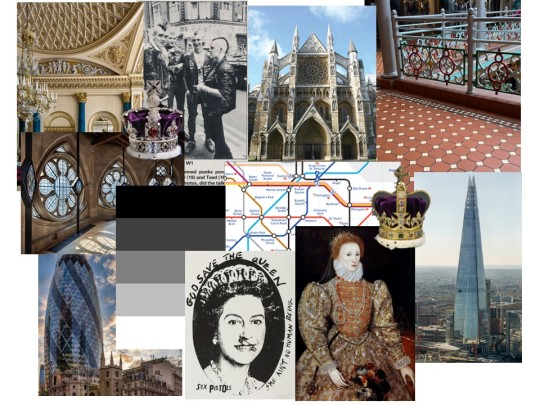
This is the mood board for my collection. I wanted to show the colour pallet of my collection as well as relevant inspirations such as architecture, royalty and punk which inspired both the silhouettes and details in my collection. The mood board includes both primary and secondary research sources which i used in the designing process.
0 notes
Text
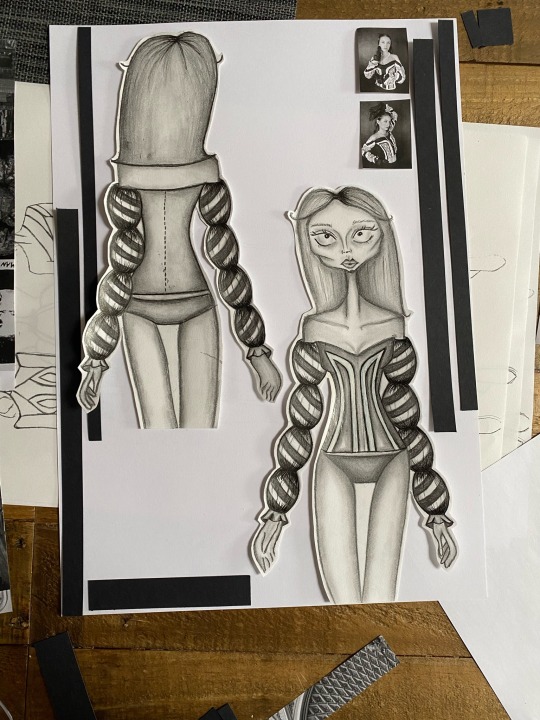
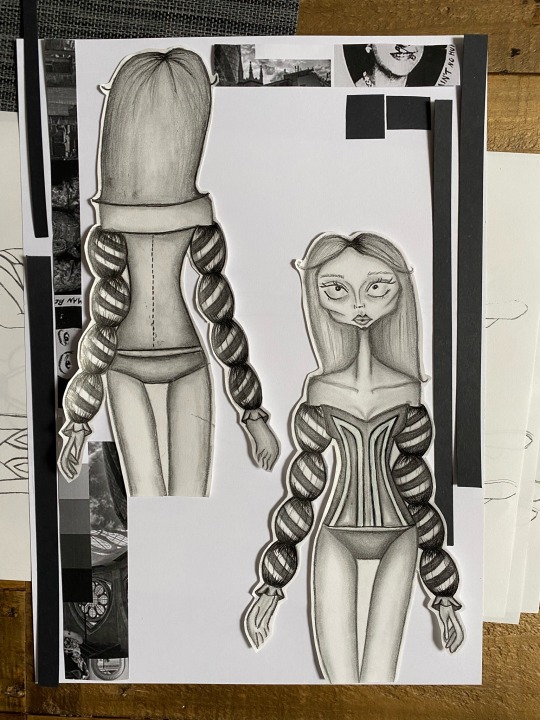
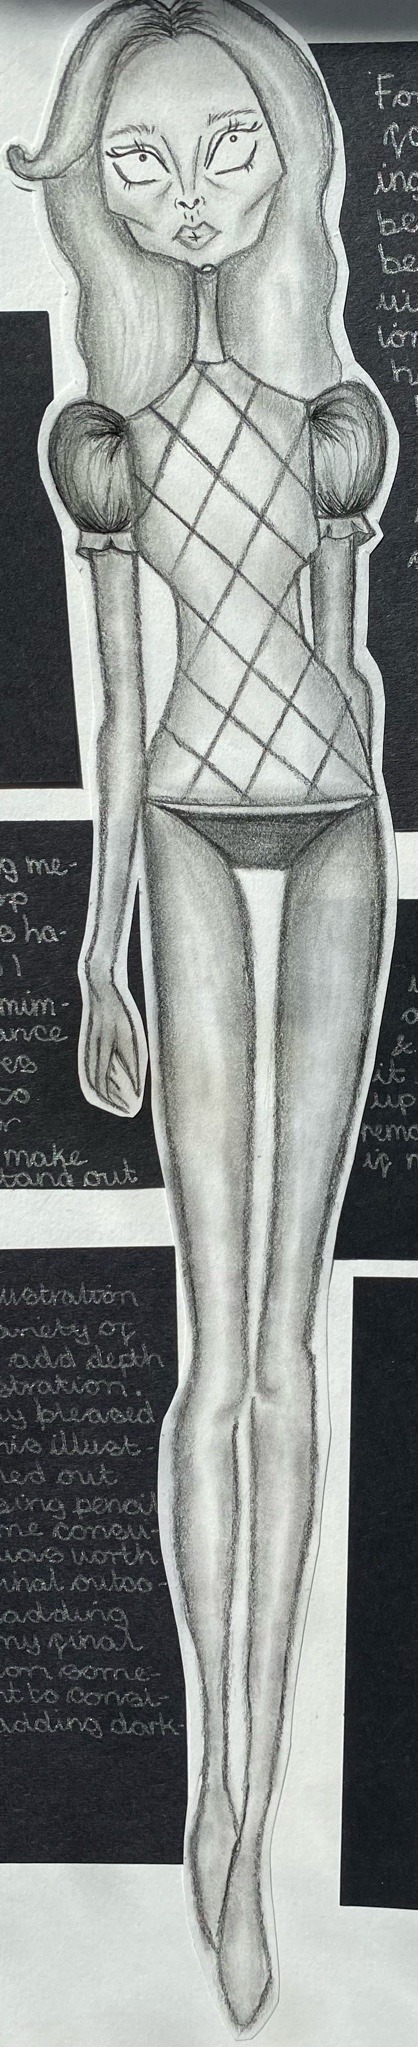
APPLYING FINAL MEDIA- PENCIL
For this particular design, inspired by St. Paul’s Cathedral, I chose to use pencil as my final media as I think with this particular media I was able to portray the detail in the sleeves well by adding dimension with the highlights and dark tones. When adding my final media I looked at the illustration I created during the experiment stage and thought about what worked well in it and what I think I could improve on. In particular for my final illustration I wanted to add more depth to the illustration, mainly in the sleeves, so by adding more darker tones I think I was able to successfully do this. After completing the illustration I think by adding darker details to the sleeves it puts more attention on them as these are the main focal point of this collection piece.
0 notes
Text
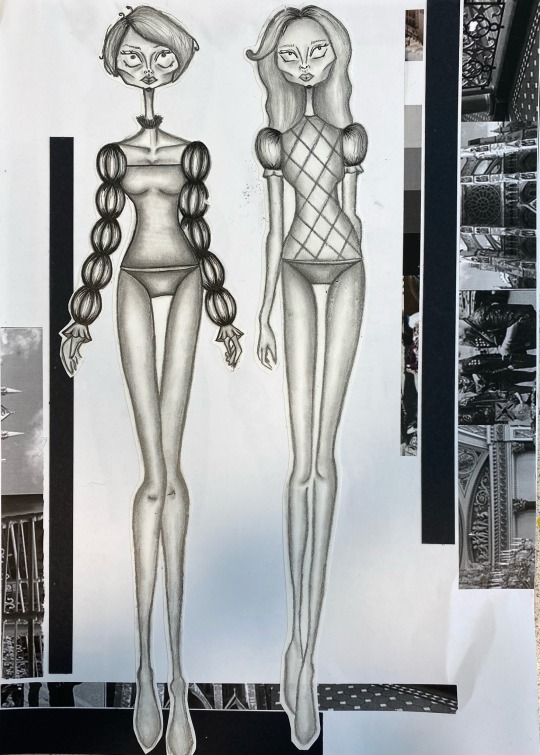
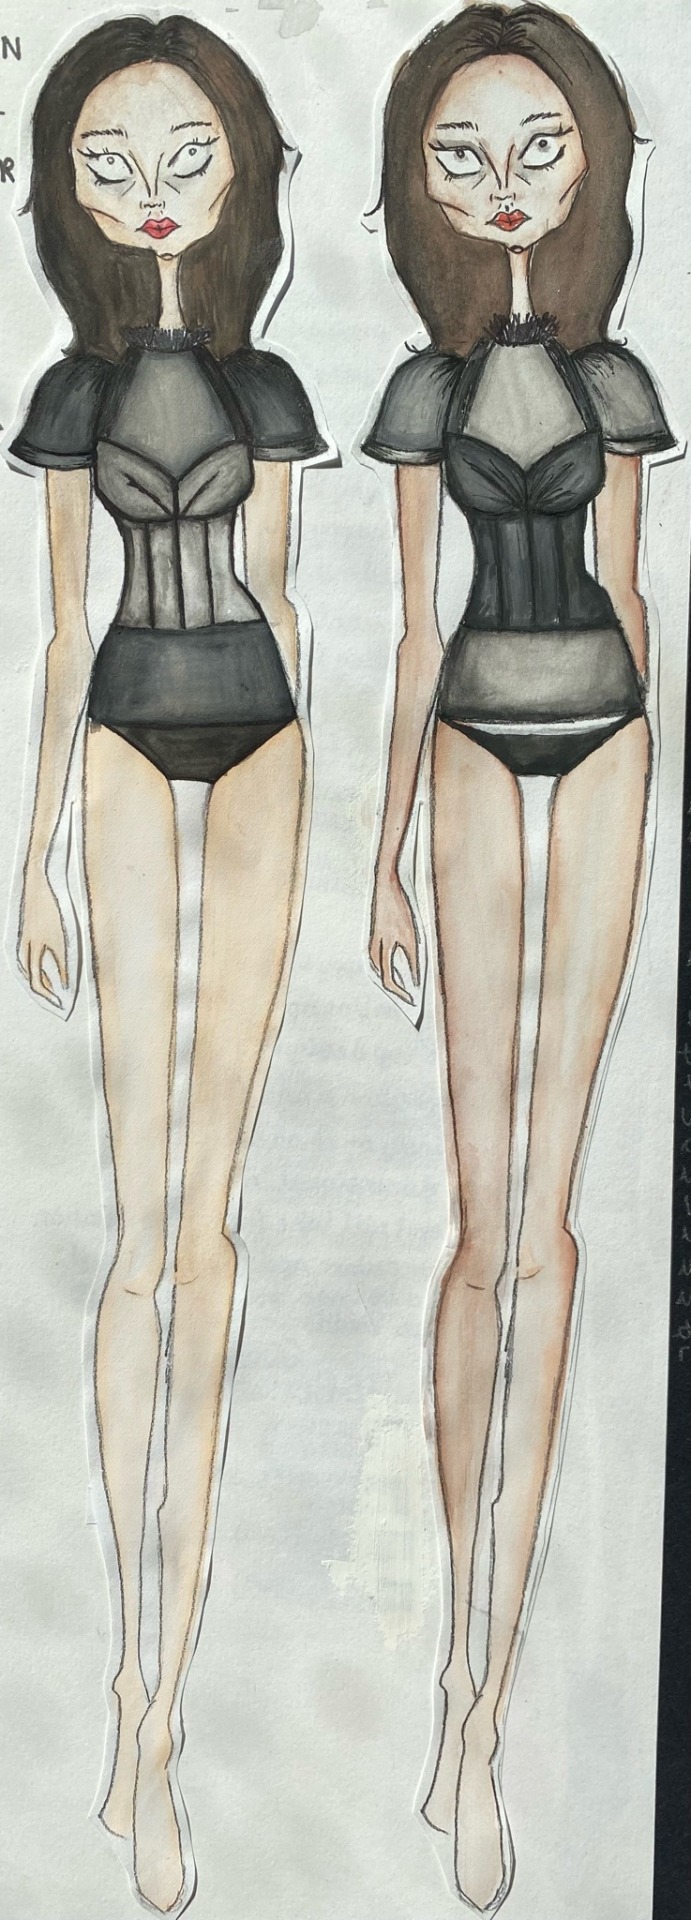
EXPERIMENTING WITH MEDIA- PENCIL
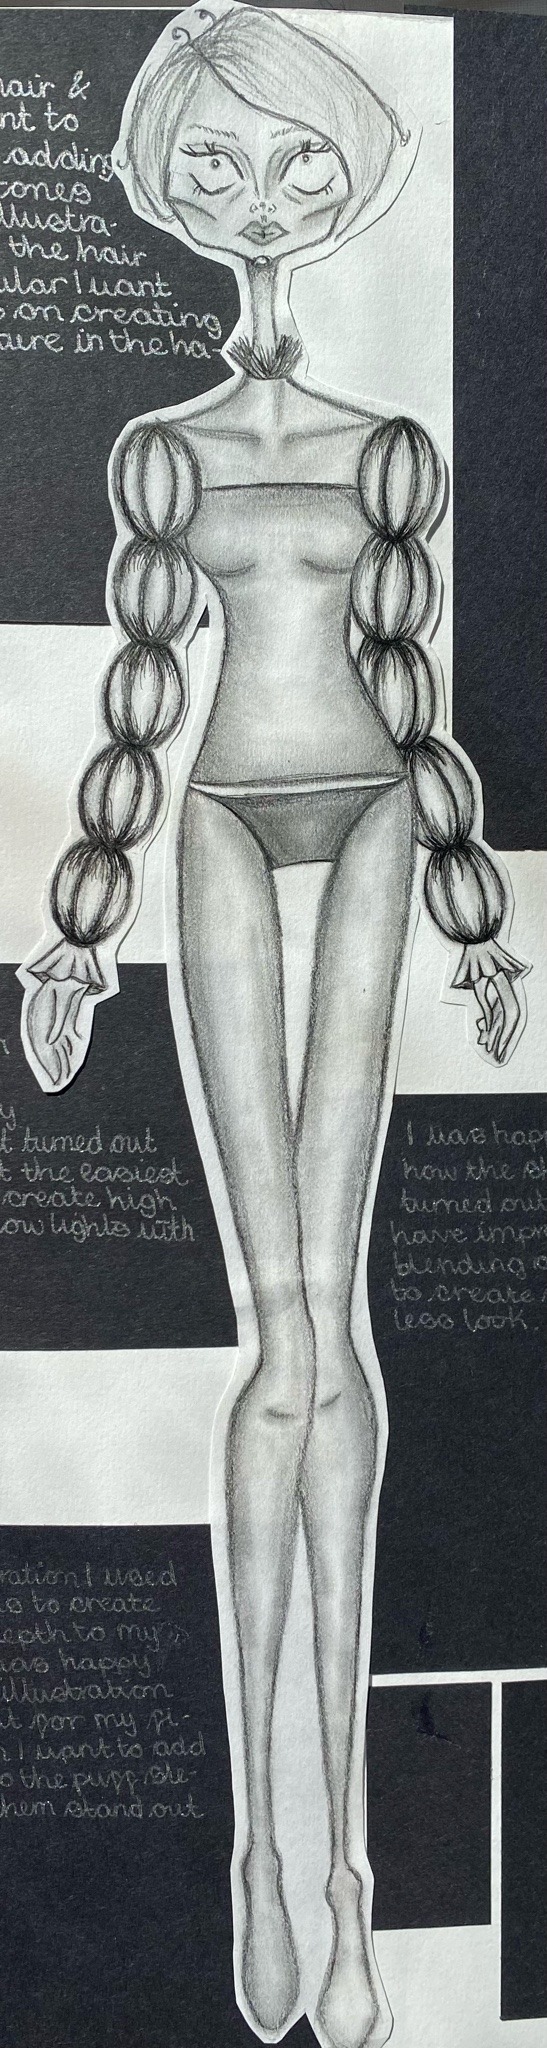
These are my media experiments using pencils, I haven’t used pencils before in any of my previous design boards however this was something I wanted to experiment with as I like using pencils as a media as it find I can create tone and depth well however using pencils can be quite time consuming but I think it has a good end result. I also wanted to try and experiment with pencils on my design board to reference the fact this was a black and white project. I liked how they turned out however I think I might also try and experiment with coloured pencils to see which looks better.
0 notes
Text
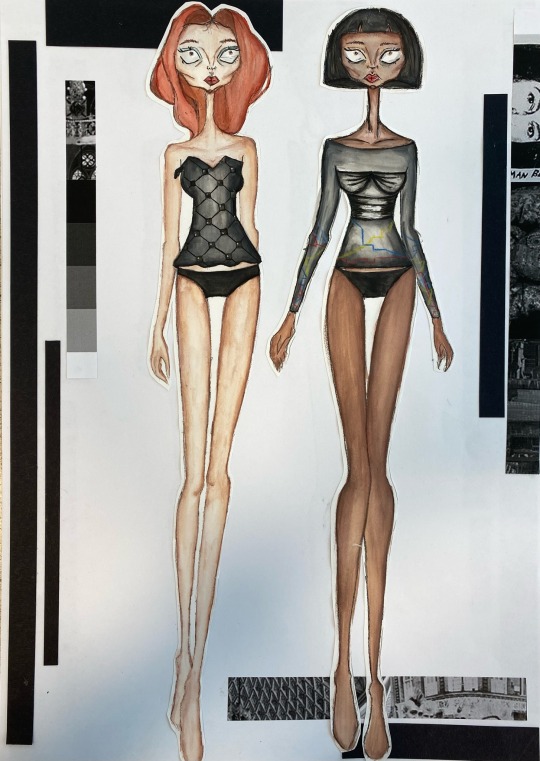
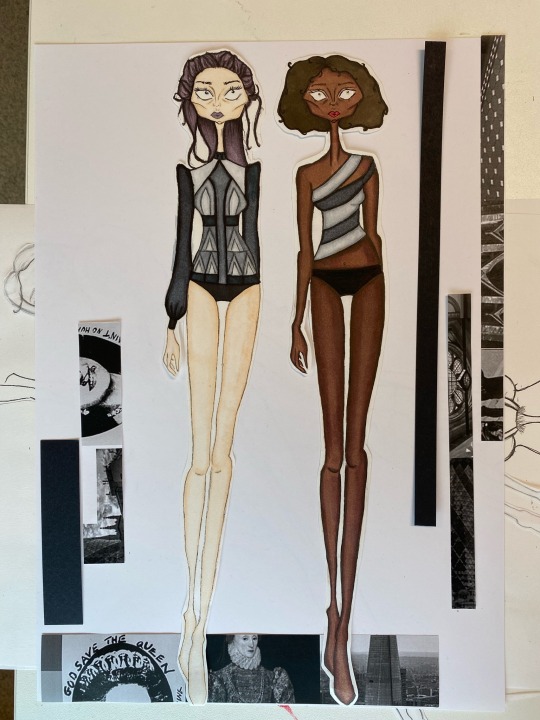
EXPERIMENTING WITH MEDIA- PRO MARKERS
For my media experiments I wanted to use a range of medias to show how my skills have improved over the duration of the year. These are the 3 designs I have used pro markers for and I am happy with how the media applied to the garments turned out however when it came to adding skin tones I found it difficult working with the markers as the colour was really intense and I wasn’t able to achieve extremely accurate skin tones. Before applying media to my final designs for my design boards I want to work on creating accurate skin tones.


0 notes
Text
PHOTOSHOOT FOR FINAL GARMENT


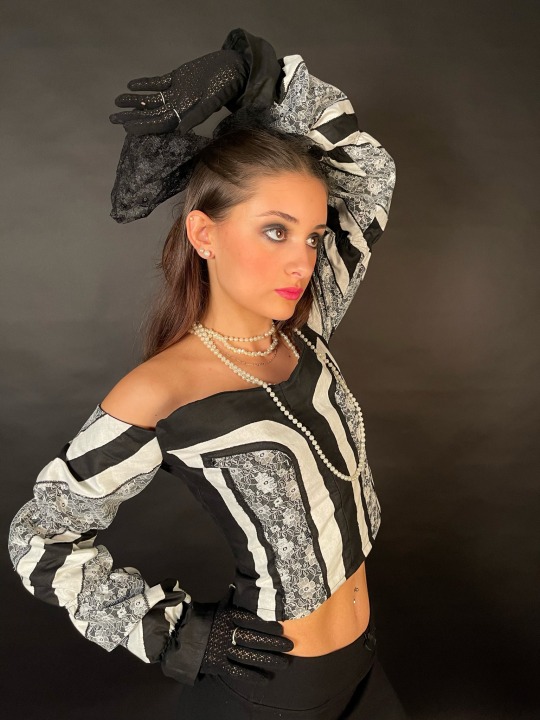

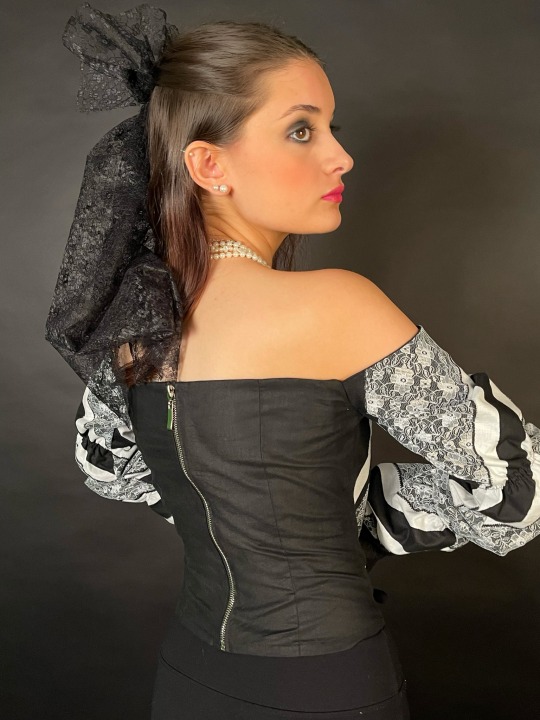
After completing my garment I had my photoshoot, before taking the photoshoot I wanted to think about how I would style my garment to make it coherent with the theme behind my collection. I wanted to wear pearl necklaces, lace gloves and a lace detail in my hair to give it a regal feel but then contrast with a mini skirt and big chunky boots to give it a punk edge which I tried to reference also in my designs. I was really happy with how the pictures turned out as the process was something out of my comfort zone as I had never done it before however I think it has also given me on confidence boost going forward.
0 notes
Text
CONSTRUCTION OF THE TOILÈ PT.3
MAKING THE SLEEVES
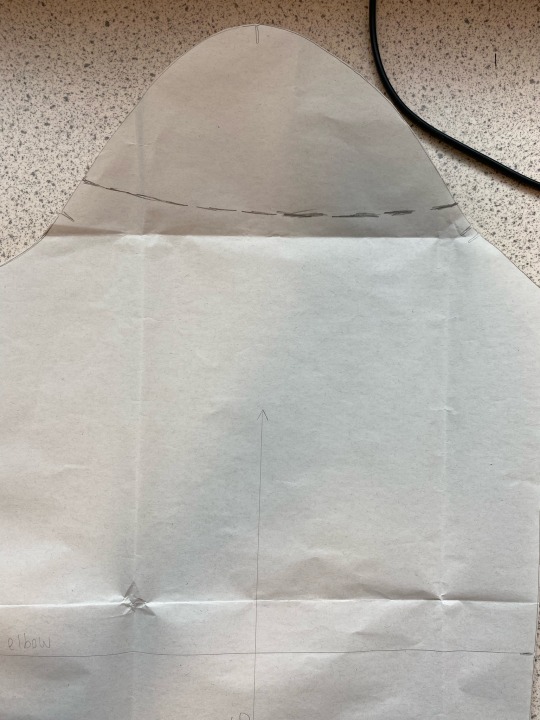
To create the desired sleeves for my garment we had to made a few modifications to the sleeve block. First to create the open shoulder we had to remove the top of the sleeve.
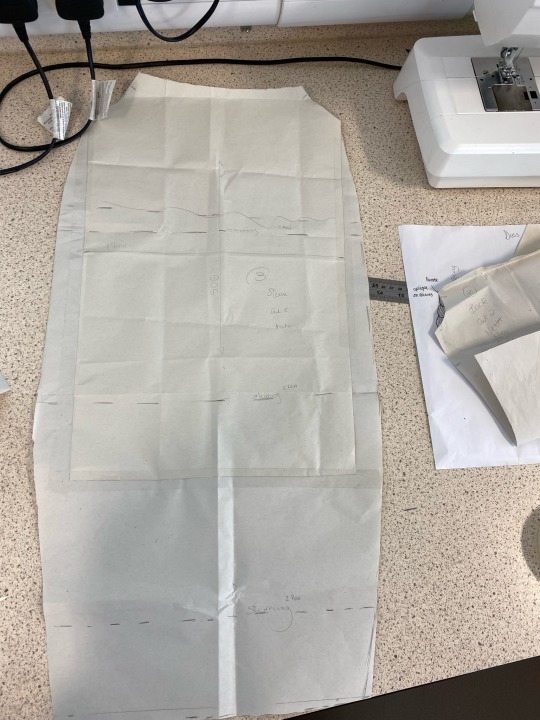
Then in order to achieve the puff sleeve effect I wanted, we added 20cm to the bottom of the pattern piece so that when the shirring elastic was sewed to the fabric the puffy details would be created and the sleeves would still be a normal length. As well as this we added a curved hem on both the bottom and sides of the pattern piece so that again the circular puffy effect would be achieved as well as the rounded edge at the bottom of the sleeve. We also marked on where I would sew the shirring elastic onto the fabric, first we measured the length of the sleeve then divided it by 3 to create 3 equal sections.
When creating my actual final garment, before I can make up the sleeves this is the stage I will add all the appliqué panels to my sleeves to create the appliqué panels I sketched out the pattern I wanted to create onto the sleeve then traced around this using layout paper, cut this out on the fabric I was using then finally attached it to the sleeves
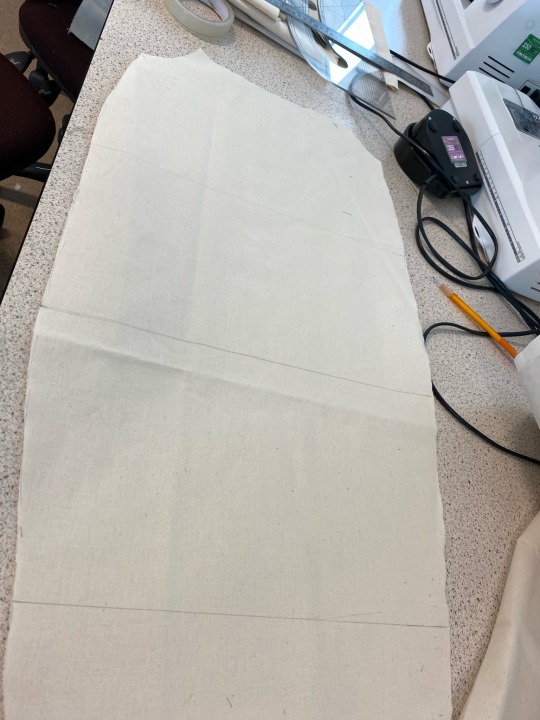
After we had made all the necessary changes to the original sleeve block and I had added all the relevant information to the pattern piece I cut it out and then cut it out onto calico adding 1cm seam allowance as well as snipping in the notches, marking the wrong sides and drawing a straight line joining up the notches on both sides to make sure that when I was sewing in the shirring elastic it would be in a straight line. When marking this line on make sure to do it in tailors chalk and do it on the right side of the fabric.

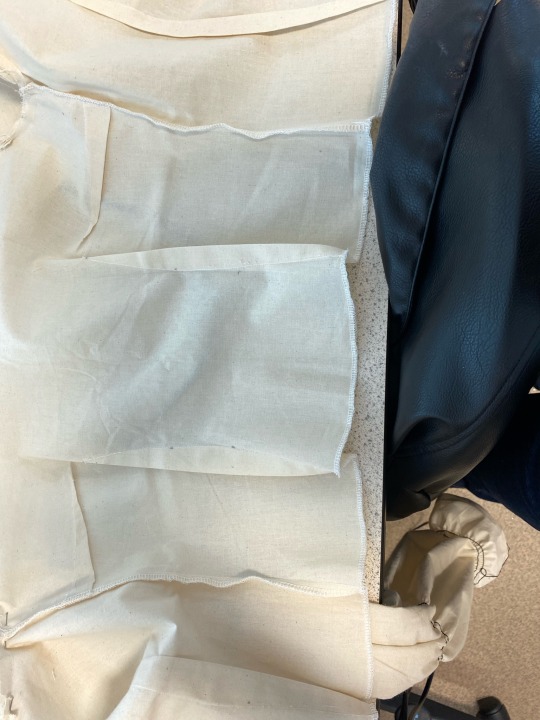
When sewing using the shirring elastic make sure to sew with the wrong side facing the machine bed so that the shirring elastic is on the inside of the sleeve when it is sewn up. In order to add more structure to the sleeve I did two rows of shirring elastic and to create the second row I using the machine foot as a guide against the row I created before. Once all the shirring elastic was added with right sides together I sewed up the seam making sure to go over the shirring elastic a few times and then overlocked this. Then I overlocked the bottom of the sleeve, folded the bottom of the sleeve up by 1cm then using the overlocking I did before as a guide when sewing in a circle, to create a hem for the bottom of the sleeve.
SLEEVE FACINGS
I added interfacing to both of the sleeve facings with the bumpy side of the interfacing down on the wrong side of the facing.
On both of the sleeve facings I overlocked the bottom edge and then with right sides together sewed them to the top of the sleeve around the entire top edge
ATTACHING THE SLEEVES

To attach the sleeves I placed the right side of the sleeve to the right side of the bodice and correctly matched up the notches and seams leaving 1cm at the top of the bodice
ATTACHING THE ZIP
Before adding the zip I overlocked the entire bottom edge and then hemmed it at 1cm
To add the zip I had to change the foot on the domestic machine, to do this all I had to do was pull the previous foot off and push on the specific foot I needed to add the zip.


First I pressed the centre back of the bodice to the inside of the bodice before placing the zip right side to the right side of the fabric. Using the teeth of the zip at the edge of the foot as a guide I attached the zip to the bodice.
ATTACHING FACINGS
With right side of the facing attached to the right side of the bodice I sewed the facing to the bodice along the top. After I had sewed the facing to the bodice I cut the top edge down by half and then created a retaining stitch using the foot of my machine as a guide. When doing this it has to be done in sections as you can’t sew all the way around and get in all the corners. After this flip the facings inside the bodice and press them down.
FINAL STEPS
To make sure the facing stays down in the front of the bodice I sewed a small row down the seam just above the dart. Finally I hand sewed the facing to the zip by folding the facing down and then on top of the zip just before the teeth of the zip. To make sure the thread cannot be seen, I made sure to only see through the zip and not the fabric of my garment and when going through the facing fabric I only went through the folded edge.
FINISHED TOILÈ


This is my finished toilè, I am happy with the outcome and I think it reflects my design. A few things to keep in mind when creating my final garment however are:
When adding the shirring elastic make sure the wrong side of the fabric is facing the machine bed so the shirring elastic is on the inside of the sleeve
Make sure the notches are lined up on the bodice and sleeves because there should be a small gap at the top of the bodice between the sleeves
0 notes