
Don't wanna be here? Send us removal request.
Statistics
We looked inside some of the posts by nigel-mocap-blog and here's what we found interesting.
Average Info
Notes Per Post
0
Likes Per Post
0
Reblog Per Post
0
Reply Per Post
0
Time Between Posts
5 days
Number of Posts By Type
Text
17
Last Seen Tumblr Blogs


Fun Fact
Tumblr was the first site to host the blog for President Barack Obama in 2011.
Text
Recap
I'm all around quite happy with my end product. I tried to show the progression of starting slow in picking up the ball and progressively doing more complicated moves to get to the end goal of the shot going in.
I had some technical difficulties of using the trail particles so it wasn't present in as much scenes as I wanted to but I'm happy that it was still able to come out in some scenes.
0 notes
Text
Colour Grading/SFX

After rendering my scenes. I edited it in Premiere Pro. I added royalty free music I found online which matches the vibe. I then added SFX of a basketball bouncing to add a sense of realism to my sequence.
I then colour graded to adjust to the aesthetic of my liking. I'm very happy with my end result and I hope it does well :)
0 notes
Text
I changed the colour of the particles to a blueish tint which I preferred as I felt like it fit in well with the background and vibe
0 notes
Text
Floor + HDRI
I created a ground plane for the character to stand on. I wanted this plane to be reflective and glossy. I did this by assigning a ss material to the plane. I then increased the specular and metallic values by a lot to make it shiny and reflective.
I also found this hdri online which fits the vibe I was going for so I added it into my scene
0 notes
Text
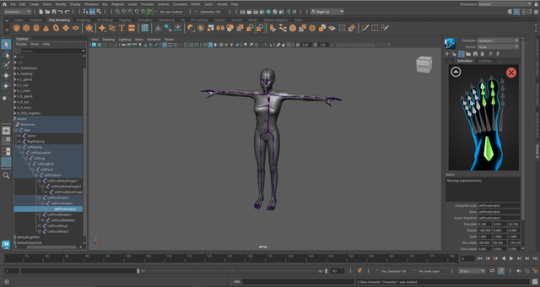
NMash Particles
I added Particles to my models body by hiding the mesh and using the scatter node on cubes I created. I coloured the cube and then used the colour node to randomize the colour of the particles.
This resulted in my characters body being multiple colours which is the vibe I wanted to go for.
0 notes
Text
I imported my ball and Actor into a scene. The first thing I did was animate the ball according to the movements of my actor. I found this really difficult as I had to add a lot of keyframes to animate for the Ball.
I wasn't able to make it look perfect, however with my first time doing this I'm quite happy with the result
0 notes
Text
Model Basketball
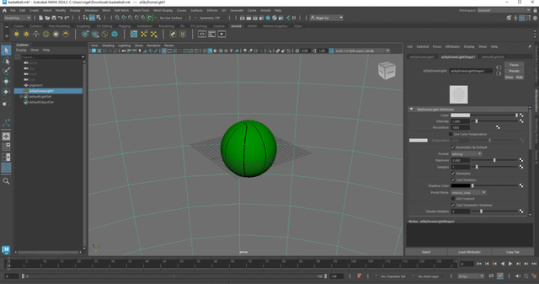
Next I had to model a basketball which would be the prop in my sequence. I did this by making a sphere and then extruding the middle edges on opposing sides around the ball.
I then textured the grooves and ball different so it gave off the appearance of a basketball.
0 notes
Text
Control Rig
(This was supposed to be posted before the last post) -
I imported the model I created on Autodesk character generator into Maya. I followed the tutorial on Canvas on how to create a control rig. It was a straightforward but tedious process. With this I could use this in Motion Builder.
0 notes
Text
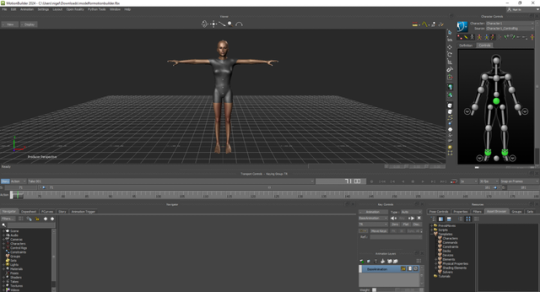
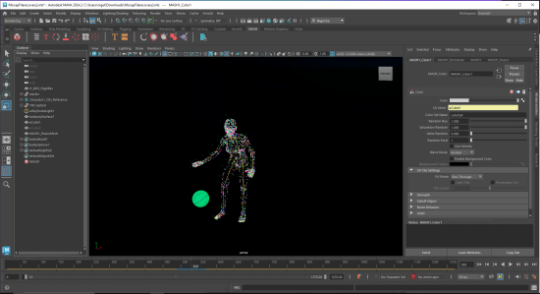
Linking Model to Actor + Mocap Information in Motion Builder
I followed the tutorial in Canvas. I created my own model in the Autodesk Character Generator. I then merged it with the actor and mocap information in Motion Builder. This brought the information from the actor to my model. Now I could use this model in Maya. The process was fairly easy and straightforward thanks to the tutorial.
0 notes
Text
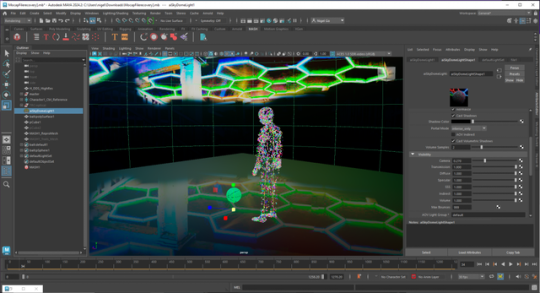
Relocating Motion Builder
I went onto this next step. This was also my first time using motion builder so I went through the tutorials on Canvas which helped me understand how to relocate the markers and attach them to specific parts of the actors body.
I was able to successfully do it, some attached screenshots of my Motion Builder session.


0 notes
Text
Cortex Clean-up
I went to Uni during the mid-semester break to do my Cortex Clean-up. It was my first time using Cortex so I went through the canvas tutorials on how to clean-up my motion capture.
After going through the tutorials. It was easier to understand and I was able to clean-up my motion capture without much struggle (however it took quite a while). I was able to finish it by the end of the day.
Some screenshots of my Cortex Session.


0 notes
Text
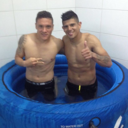
Motion Capture Session
I went to my Motion Capture Lab for the first time to perform my mocap session. It was a fun and unique experience as I learnt how to calibrate myself and used the motion capture suit.
I was able to perform my Basketball choreography that I will use as the basis for my Mocap Project. Attached are some screenshots from the session.


0 notes
Text
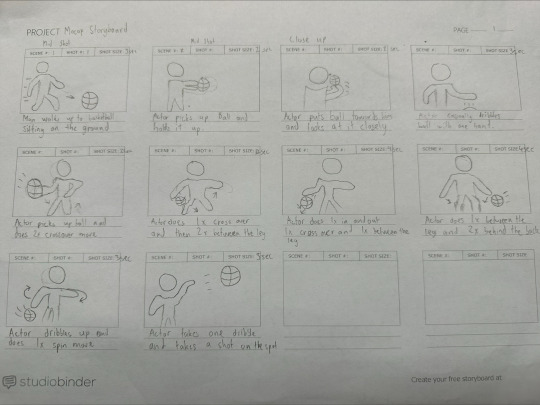
Storyboard
I made a simple storyboard of what my Film sequence will look like. I made a simple diagram of what it might look like with short captions to annotate the actions of the actor.
0 notes


