This is the official Tumblr blog of Kiba Walker: voice actor & musician! Avatar by Bluest Blue
Don't wanna be here? Send us removal request.
Statistics
We looked inside some of the posts by officialkibavoices and here's what we found interesting.
Average Info
Notes Per Post
3M
Likes Per Post
2M
Reblog Per Post
2M
Reply Per Post
2K
Time Between Posts
3 days
Number of Posts By Type
Photo
11
Video
3
Text
3
Last Seen Tumblr Blogs


Fun Fact
Premium Tumblr themes are available from anywhere between $9 to $49.

Video
A museum in Japan spends most of its day refusing entry to 2 cats trying to get in @bijutsu1 https://twitter.com/jiffington/status/1062471505496469504/video/1
164K notes
·
View notes
Video
I AM DECEASED 😭😭
for the love of god UNMUTE this
191K notes
·
View notes


Text

[Absolutely!! I’ll start with a walkthrough on drawing basic torsos.

So to start, a torso consists of 3 main shapes: the chest, the waist, and the hips. The chest and hips are the solid parts of the torso while the waist is more fluid and meant to connect the other two.
On the chest, the back is flat and typically angles inwards, the shoulders will have a slight downward slant whether from a ¾ths or from the front, and the front of the chest will have a slight outward curve. The bottom line is curved upwards to emulate the ribcage. On a drawing manikin, being structured like that also makes it more poseable.
The hips consist of a couple of major shapes- those being the groin, the butt, and the actual hips themselves. They combine to form a big shape kind of like a basic pair of underwear. Hips will typically be the same width as the chest, although they may sometimes be more or less depending on the body type of the figure.
Waists can vary vastly in shape and size since they’re the soft, bendy part of the torso. They are typically narrower than both the chest and hips, although a more heavyset build will often have more of a tummy poking out in the front. Usually they’re always set farther inwards in the back, though!
So! To start drawing a figure, I’ll usually start with a head and a gesture line, like so. Sorta looks like a balloon floating around, doesn’t it?

Then, I add on the chest and hips, like so, leaving an equal amount of space in-between for the waist.

Then I start adding connecting lines like the waist and neck, as well as things like shoulders and legs!

And finally, I start going into detail with things like arms, hands, faces, and sometimes objects!

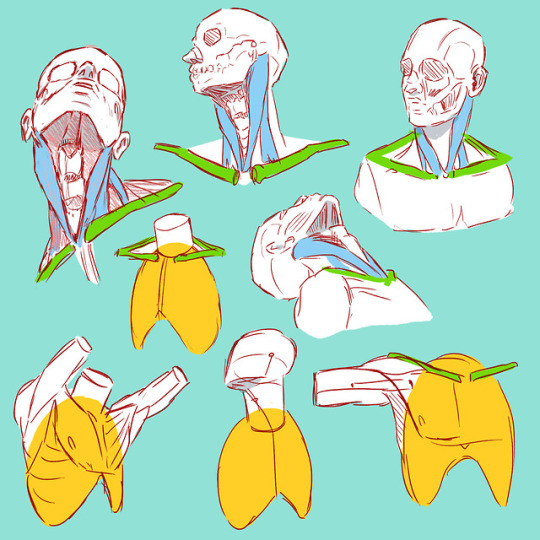
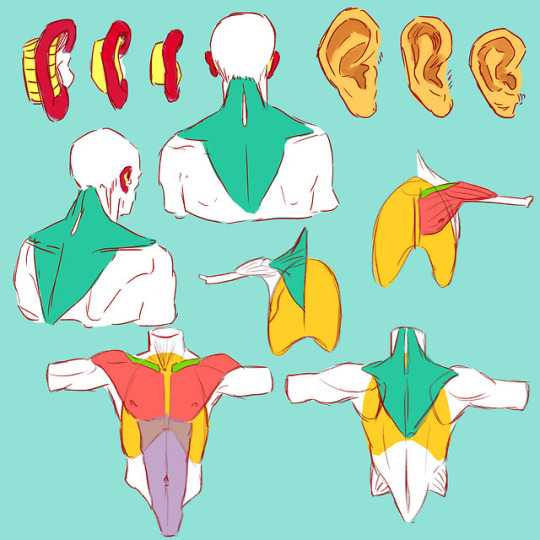
Ok, now on to muscles! This kind of stuff can be tricky to explain, but I’ll do my best!

So first of all, it’s essential to put a center line down the middle of the figure. Otherwise your muscles are gonna end up looking lopsided and weird.
Next step is to define where your ribcage is. Draw that out. The pecs will only come about halfway down between the shoulders and the ribcage, so mark a line across that point.

Now add the collarbone/jugulars/ shoulder details. The collarbones should point out towards the top of the shoulder joints. The collarbone also defines the top line for your pecs. The pecs should also be fairly round on the bottom. Add the nip-nops and you’re all set up there! (unless you’re drawing Nick cuz he doesn’t have ‘em lol)

Then we move on to abs! They’ll start just under the pecs and stop at the bellybutton. Pretty much just think of a carton of 6 eggs- that’s how you draw ‘em. There might also be pronounced hip bones that start about halfway up the lowermost row of abs.

…Aaand voila! You have your shredded torso! Now just add whatever other details you wanna add and you’re all set! Look, I turned mine into Goku!

Anyways, I hope this helped you guys out!!
Lemme know if you want me to do any more of these! They’re fun!]
666 notes
·
View notes
Photo

a small tutorial on how I color and shade on things.
852 notes
·
View notes
Photo
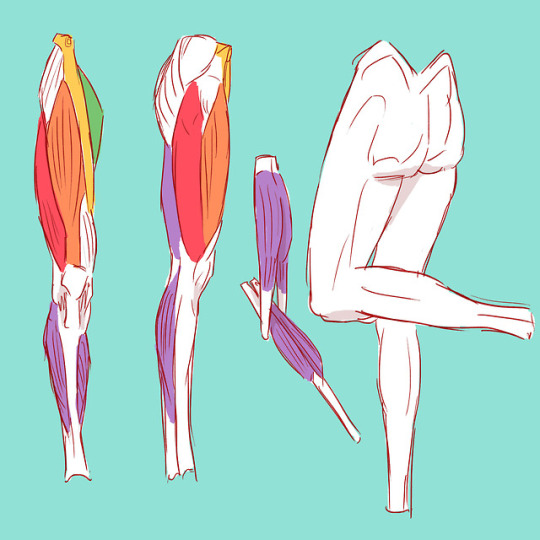
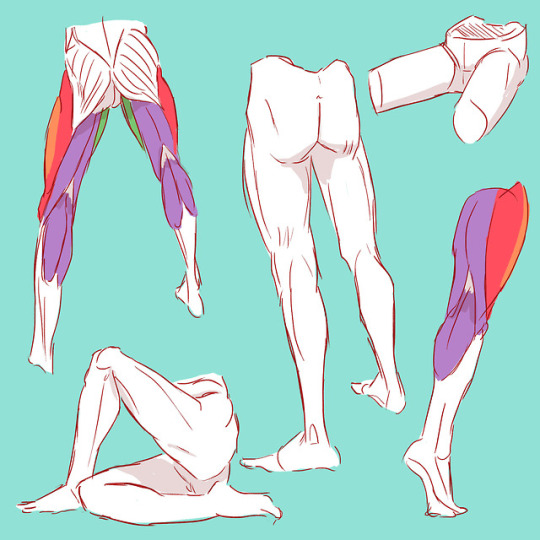
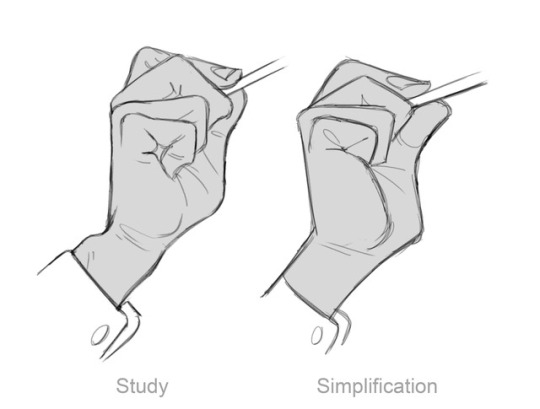
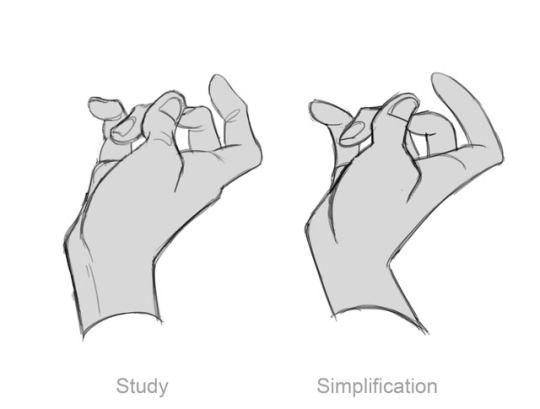
some studies from the book Morpho: Anatomy for artists by Michel Lauricella 💕
8K notes
·
View notes
Photo

my personal version,and yes i have a fetish for long ears elves
17K notes
·
View notes


Photo

Muhammad Ali requested that his star not to be put on the sidewalk, because he didn’t want people to walk on him. They honored his request.
192K notes
·
View notes
Photo

Welcome to Episode: your home for interactive, visual stories, where as the player YOU choose what path your character takes!
314K notes
·
View notes
Photo


#he was cool for about ten seconds | captain america: civil war (2016)
3K notes
·
View notes