
As a Gold Coast plumber, DCM Plumbing has been servicing residential properties and commercial buildings since 2002. With Gold Coast traffic growing by the day, we use our extensive local knowledge to apply a systematic approach to plumber job scheduling.
Don't wanna be here? Send us removal request.
Statistics
We looked inside some of the posts by plumberagent and here's what we found interesting.
Average Info
Notes Per Post
0
Likes Per Post
0
Reblog Per Post
0
Reply Per Post
0
Time Between Posts
1 month
Number of Posts By Type
Text
17
Last Seen Tumblr Blogs


Fun Fact
In 2020, 27% of US Tumblr users had an annual household income of over $100,000.
Text
Blocked Drains in Ashmore: Causes, Solutions & When to Call a Plumber

Blocked drains are a common yet frustrating plumbing issue that many Ashmore residents encounter. Whether it’s a slow-draining sink or a foul smell wafting from your pipes, blocked drains can disrupt your daily routine and, if left untreated, lead to costly damage.
In this blog, we’ll explore the most common causes of blocked drains Ashmore, how to prevent them, and when to call a local professional plumber.
Common Causes of Blocked Drains in Ashmore
Ashmore, located in the heart of the Gold Coast, has a mix of residential and commercial properties, many with older plumbing systems. Here are the most frequent culprits behind drain blockages:
Tree Roots
Tree roots are naturally drawn to the moisture in underground pipes. Over time, they can crack into the drainage system, causing blockages and serious damage.
Grease and Fat Build-Up
Pouring cooking oil or grease down the kitchen sink may seem harmless, but these substances can solidify in your pipes and cause stubborn blockages.
Hair and Soap Scum
Bathroom drains often get clogged due to hair, soap, and other debris that build up over time.
Foreign Objects
Items like wipes, sanitary products, and children’s toys can accidentally be flushed or washed down the drain, causing instant blockages.
Aging Pipes
Older properties in Ashmore may have corroded or collapsed pipes, making them more susceptible to blockages and restricted water flow.
Signs You Have a Blocked Drain
Water draining slowly from sinks, tubs, or showers
Gurgling sounds in pipes
Unpleasant odours coming from drains
Water backing up or overflowing
Wet patches or lush spots in your yard (if the blockage is in the sewer line)
DIY Tips to Clear Minor Blockages
Before calling in a plumber, there are a few simple methods you can try:
Boiling Water – Great for clearing grease build-up in kitchen drains.
Plunger – Can dislodge minor blockages in sinks or toilets.
Baking Soda & Vinegar – A natural solution that can help break down debris and reduce odours.
Important: Avoid using harsh chemical drain cleaners as they can damage your pipes over time.
When to Call a Professional Plumber in Ashmore
If the blockage is recurring, affects multiple drains, or you notice signs of a serious issue (like overflowing sewage), it’s time to contact a licensed plumber.
Professional plumbers in Ashmore have the tools and experience to handle:
CCTV drain inspections
Hydro-jet drain cleaning
Pipe relining or repairs
Root removal
By addressing the issue early, you can avoid long-term damage and costly repairs.
Preventing Future Blocked Drains
Don’t pour grease, coffee grounds, or food scraps down the sink.
Install drain guards in bathroom sinks and showers to catch hair.
Only flush toilet paper—no wipes, sanitary items, or foreign objects.
Schedule regular plumbing maintenance, especially in older homes.
0 notes
Text
7 Ways to Unblock a Toilet Without a Plunger
Unblocking a toilet can feel daunting, especially if you don't have a plunger at hand. Fortunately, several common household items can come to the rescue. Here's a guide to seven effective methods for unblocking your toilet without using a plunger.
1. Hot Water and Dish Soap
One of the simplest methods involves a bit of dish soap and hot water.
What you’ll need: Dish soap, a bucket, and hot (but not boiling) water.
Steps:
Squeeze a generous amount of dish soap into the toilet bowl.
Heat water until it’s very warm but not boiling (boiling water can crack porcelain).
Pour the hot water into the bowl from a height to create pressure.
Wait 10-15 minutes. The soap should lubricate the clog, helping it move through the pipes.
2. Use a Wire Hanger
If the clog is within reach, a wire hanger can help.
What you’ll need: A wire coat hanger and rubber gloves.
Steps:
Unwind the hanger, leaving a small hook at one end.
Wear gloves for hygiene.
Insert the hooked end into the toilet and gently push it toward the clog.
Twist and maneuver to break up the blockage.
3. Baking Soda and Vinegar
This method combines chemistry and pressure to dissolve clogs.
What you’ll need: 1 cup of baking soda, 1 cup of vinegar, and hot water.
Steps:
Pour baking soda into the toilet.
Add vinegar and let the mixture fizz for a few minutes.
Follow up with hot water to flush the clog.
4. Plastic Bottle Trick
If you need to create suction, a plastic bottle can act as a makeshift plunger.
What you’ll need: A sturdy plastic bottle with the bottom cut off.
Steps:
Wear gloves for protection.
Fill the bottle partially with water and cover the opening tightly with your thumb.
Insert the cut-off end into the toilet bowl.
Release your thumb and press the bottle down to create suction, dislodging the clog.
5. Toilet Brush Maneuver
A toilet brush can double as a clog-buster in a pinch.
What you’ll need: A toilet brush.
Steps:
Angle the brush into the bowl.
Use a vigorous up-and-down motion to loosen the blockage.
Flush the toilet to check if the clog is cleared.
6. Wet/Dry Vacuum
If you have access to a wet/dry vacuum, it can be a powerful tool for unclogging toilets.
What you’ll need: A wet/dry vacuum and a towel or cloth.
Steps:
Use the vacuum to remove excess water from the bowl.
Wrap the hose end with a cloth to form a tight seal.
Insert the hose into the toilet and turn on the vacuum to suck out the clog.
7. Epsom Salt or Bath Bombs
These can help break down minor clogs by softening the materials.
What you’ll need: Epsom salt or a bath bomb and hot water.
Steps:
Drop a generous amount of Epsom salt or a bath bomb into the toilet.
Let it sit for 20-30 minutes to work its magic.
Add hot water and flush.
0 notes
Text
Noisy Water Pipes: Causes and Solutions for a Quieter Home
Do your water pipes rattle, bang, or whistle when in use? Noisy water pipes can be more than just an annoyance—they may indicate underlying issues in your plumbing system. Understanding the causes and solutions can save you from costly repairs and ensure a peaceful home environment.
Common Causes of Noisy Water Pipes
1. Water Hammer
This is a loud banging noise caused by a sudden stop in water flow. It often occurs when you turn off a tap or when an appliance like a dishwasher shuts off water abruptly.
Cause: Excess pressure in the pipes.
Solution: Installing a water hammer arrestor or air chamber can absorb the shock.
2. High Water Pressure
If your water pressure is too high, it can create a humming or vibrating noise in the pipes.
Cause: Excessive pressure forces water through the pipes too quickly.
Solution: A pressure-reducing valve can regulate water pressure to a safe level.
3. Loose Pipes
Rattling or clanging noises may indicate that your pipes are not securely fastened.
Cause: Loose pipe fittings allow movement when water flows.
Solution: Securing the pipes with brackets or clamps can eliminate the noise.
4. Whistling or Squealing
This high-pitched noise often comes from worn-out or faulty components like valves, washers, or faucets.
Cause: Water struggling to pass through a restricted area.
Solution: Replacing the faulty parts can stop the noise.
5. Air in the Pipes
Gurgling or bubbling sounds can indicate air trapped in your water lines.
Cause: Improper bleeding of air from the system.
Solution: Flushing your plumbing system can release the trapped air.
Why Addressing Noisy Water Pipes is Important
Ignoring noisy water pipes can lead to:
Increased Damage: Loose pipes or high pressure can weaken joints and cause leaks.
Higher Water Bills: Faulty components may waste water, increasing costs.
Plumbing System Failure: Persistent issues may escalate, requiring expensive repairs.
How to Fix Noisy Water Pipes
1. Inspect Your Plumbing
Check for visible issues like loose pipes or worn-out components. Tighten fittings and replace parts as needed.
2. Call a Professional
If the problem persists, a licensed plumber can diagnose and fix complex issues like water hammer or pressure imbalances.
3. Regular Maintenance
Schedule routine plumbing inspections to identify and address potential problems early.
Preventing Noisy Water Pipes
Install a Pressure Regulator: Maintain safe water pressure levels to avoid strain on your pipes.
Secure Your Pipes: Ensure all pipes are properly fastened to prevent movement and vibrations.
Flush Your System Regularly: Clear out trapped air and debris for smooth water flow.
Say Goodbye to Noisy Pipes
Noisy water pipes are a common yet fixable issue. By identifying the cause and implementing the right solution, you can restore peace to your home and protect your plumbing system.
If you're struggling with noisy pipes, contact a professional plumber today and enjoy a quieter, more efficient water system!
0 notes
Text
How to Unblock a Stormwater Drain

Blocked stormwater drains are a common issue, particularly after heavy rainfall or when leaves and debris accumulate in the system. A clogged drain can lead to flooding, property damage, and erosion. Knowing how to unblock a stormwater drain is essential for maintaining a well-functioning drainage system. In this guide, we’ll cover the tools you’ll need, key steps to clear the blockage, and when to call in professional help.
Common Causes of Blocked Stormwater Drains
Stormwater drains can become blocked due to a variety of reasons, including:
Leaves and Debris: Fallen leaves, branches, and general yard debris are among the most common culprits, especially in autumn.
Sediment Build-Up: Over time, sediment, mud, and silt can settle in the pipes, reducing water flow and leading to blockages.
Tree Roots: Tree roots can infiltrate pipes in search of water, causing cracks and blockages that worsen over time.
Foreign Objects: Items like stones, plastic, or other debris can enter the drainage system, especially if drain covers are damaged or missing.
Understanding what’s causing the blockage is key to determining the most effective way to clear it.
Tools You’ll Need
Before starting the unblocking process, gather the necessary tools to make the job easier. You may need:
Gloves and Safety Goggles: Essential for safety, as clearing blockages can expose you to debris and dirty water.
Drain Rods: Extendable rods designed to push or dislodge blockages deep within pipes.
Plunger: A plunger can create pressure in the pipe, helping to dislodge minor blockages.
High-Pressure Hose: A hose with a pressure nozzle can flush out debris in smaller pipes.
Drain Camera (Optional): If the blockage is severe or hard to locate, a drain camera can provide visibility inside the pipe.
Step-by-Step Guide to Unblock a Stormwater Drain
Step 1: Identify the Location of the Blockage
Check around your property to locate the point where water is backing up. Look for visible signs of overflow near downpipes or drain grates. Identifying where the blockage begins can save time and help you choose the right approach.
Step 2: Remove Surface Debris
Clear away any visible debris, such as leaves or branches, that may be covering the stormwater grate. In many cases, this simple action can allow water to flow freely again.
Step 3: Use a Plunger on the Drain
Place a plunger over the drain opening, ensuring a good seal. Move the plunger up and down forcefully to create pressure in the pipe. This can help dislodge minor blockages near the opening of the drain.
Step 4: Insert a Drain Rod into the Pipe
If the plunger isn’t effective, use a drain rod. Insert the rod carefully into the drain, moving it slowly to avoid damaging the pipe. Rotate the rod as you push it forward, attempting to reach and dislodge the blockage. Drain rods are particularly useful for clearing out leaves and small debris trapped further inside the pipe.
Step 5: Flush with a High-Pressure Hose
Once you’ve broken up the blockage, use a high-pressure hose to flush out any remaining debris. Place the hose inside the pipe and turn on the water, allowing the force to push loose debris down the line. Be cautious not to use excessive pressure if the pipes are older or fragile.
Step 6: Use a Drain Camera (if Necessary)
If you still encounter issues after following the steps above, a drain camera can help identify any deeper blockages or structural issues. Some homeowners choose to hire professionals with specialized equipment to conduct this inspection.
Step 7: Clean and Maintain the Drain
After unblocking, it’s essential to clean out the drain and consider regular maintenance. Remove any additional debris around the drain grate and clear gutters and downpipes to prevent future clogs. Regular maintenance can significantly reduce the chance of repeat blockages.
When to Call a Professional
In some cases, a blockage may require professional expertise. Consider contacting a licensed plumber or drain specialist if:
The blockage persists despite your efforts.
Tree roots are involved, as this often requires specialized cutting tools or pipe replacement.
Structural damage to the pipes is evident, such as cracks or severe clogs.
Recurrent blockages are happening, which may indicate a larger problem within the drainage system.
Professionals have the equipment and experience to handle more complex issues, ensuring that your stormwater system functions correctly.
Preventive Tips to Avoid Stormwater Drain Blockages
Taking proactive steps to maintain your stormwater drains can save time, money, and prevent future issues:
Regularly Clear Debris: Routinely clean leaves, branches, and dirt from your gutters, downpipes, and stormwater grates.
Install Drain Covers: Consider installing grate covers to prevent debris from entering the drain in the first place.
Trim Nearby Trees: Regularly prune trees and bushes near the drainage system to reduce the risk of leaves and roots infiltrating the pipes.
Inspect Drains Seasonally: After major storms or during seasonal changes, check your stormwater drains for any signs of blockage.
Flush Drains Annually: Use a hose to flush out sediment build-up, keeping pipes clear and preventing sediment accumulation.
Conclusion
Unblocking a stormwater drain can be straightforward with the right tools and steps, helping you avoid the inconvenience and damage caused by water overflow. By following these steps and performing regular maintenance, you can keep your stormwater drainage system in top shape. For more serious or persistent issues, don’t hesitate to call a professional to ensure your drainage system remains safe and effective.
0 notes
Text
Understanding the Role of a Blocked Toilet Plumber

Blocked toilets are a common household issue that can cause significant inconvenience and discomfort. When a toilet becomes clogged, it can lead to unpleasant odors, unsanitary conditions, and even potential water damage. This is where a blocked toilet plumber comes in—a professional dedicated to diagnosing and resolving toilet blockages efficiently. In this blog post, we'll delve into the role of a blocked toilet plumber, explore common topics, discuss challenges, provide a step-by-step guide, present a case study, and conclude with essential takeaways.
Common Topics: Unveiling the World of Blocked Toilet Plumbers
1. Common Causes of Toilet Blockages
Toilet blockages can arise from various sources. Some of the most common causes include:
Flushing Non-Flushable Items: Items like wet wipes, sanitary products, and excessive toilet paper can cause clogs.
Foreign Objects: Toys, toothbrushes, and other foreign objects accidentally flushed can lead to blockages.
Pipe Build-Up: Over time, pipes can accumulate mineral deposits, grease, and debris, narrowing the passage and causing blockages.
2. Signs Your Toilet is Blocked
Recognizing the early signs of a blocked toilet can help prevent more severe issues. Look out for:
Slow Draining: If the water takes longer than usual to drain after flushing, there might be a blockage.
Gurgling Noises: Unusual sounds coming from the toilet or other drains can indicate a blockage.
Rising Water Levels: Water rising towards the rim when flushing is a clear sign of a blockage.
3. Preventive Measures to Avoid Blockages
Preventing toilet blockages is possible with some simple practices:
Educate Household Members: Ensure everyone knows what can and cannot be flushed.
Regular Maintenance: Periodically inspect and clean your toilet and plumbing system.
Install Drain Screens: These can catch hair and other debris before they enter the plumbing system.
Challenges Faced by Blocked Toilet Plumbers
1. Identifying the Root Cause
Determining the exact cause of a blockage can be challenging. Plumbers often need to use specialized equipment, like cameras, to inspect the pipes and identify the obstruction.
2. Accessing the Blockage
Blockages can occur deep within the plumbing system, making them difficult to reach. Plumbers may need to dismantle parts of the toilet or access pipes from different points to resolve the issue.
3. Dealing with Hazardous Materials
Blocked toilets can contain hazardous waste, making the job unpleasant and potentially dangerous. Plumbers must take precautions to protect themselves from exposure to harmful substances.
4. Customer Expectations
Clients often expect quick and inexpensive solutions. Managing these expectations while providing quality service can be a significant challenge for plumbers.
Step-by-Step Guide: How a Blocked Toilet Plumber Resolves a Blockage
Step 1: Initial Assessment
The plumber begins by assessing the situation. They will ask the homeowner about the symptoms and inspect the toilet and surrounding area for obvious signs of blockage.
Step 2: Using a Plunger
In many cases, a plunger is the first tool used. The plumber will create a seal over the toilet drain and use forceful thrusts to try and dislodge the blockage.
Step 3: Auger or Snake
If the plunger is ineffective, the plumber may use an auger or plumbing snake. This tool can reach deeper into the pipes to break up or retrieve the blockage.
Step 4: Chemical Cleaners
For certain types of blockages, the plumber might use a chemical cleaner. These chemicals can dissolve organic materials that are causing the clog.
Step 5: Inspection with a Camera
If the blockage persists, a camera inspection may be necessary. This allows the plumber to visually inspect the inside of the pipes and locate the blockage precisely.
Step 6: Hydro Jetting
In severe cases, hydro jetting might be employed. This involves using high-pressure water jets to clear out the pipes and remove the blockage.
Step 7: Repair and Prevention
Once the blockage is cleared, the plumber may repair any damaged pipes and offer advice on how to prevent future blockages. This might include recommending specific toilet paper brands, installing water softeners, or suggesting regular maintenance schedules.
Case Study: Resolving a Severe Toilet Blockage
Background: A homeowner in a suburban area experienced a severe toilet blockage. Despite attempting to use a plunger and over-the-counter chemical cleaners, the blockage persisted. The homeowner contacted a professional blocked toilet plumber for assistance.
Assessment: Upon arrival, the plumber conducted a thorough assessment. They noticed that the water level in the toilet rose dangerously close to the rim and heard gurgling noises from other drains in the house, indicating a potential main line blockage.
Action Taken:
Initial Attempts: The plumber first tried using a plunger, but it was ineffective due to the severity of the blockage.
Using an Auger: Next, the plumber used an auger to reach deeper into the pipes. They encountered resistance approximately two feet in, suggesting a solid obstruction.
Camera Inspection: To gain a clearer understanding, the plumber used a camera inspection tool. They discovered that a large accumulation of wet wipes and grease had clogged the main sewer line.
Hydro Jetting: Given the nature of the blockage, the plumber decided to use hydro jetting. The high-pressure water jets effectively broke up the blockage and cleared the pipes.
Final Inspection: After the blockage was cleared, a follow-up camera inspection confirmed that the pipes were clean and free of obstructions.
Outcome: The homeowner was advised to avoid flushing wet wipes and to periodically use enzyme-based cleaners to maintain clear pipes. The plumber also recommended regular professional inspections to prevent future issues.
Conclusion: The Importance of Professional Help
Blocked toilets are more than just a minor inconvenience—they can lead to significant discomfort and potential damage if not addressed promptly and effectively. While DIY methods can sometimes resolve minor blockages, severe or recurring issues require the expertise of a professional blocked toilet plumber. These professionals have the tools, knowledge, and experience to diagnose and resolve blockages efficiently, ensuring your plumbing system remains functional and safe.
By understanding the common causes of toilet blockages, recognizing the signs, and taking preventive measures, homeowners can minimize the risk of encountering such issues. However, when a blockage does occur, it's essential to seek the assistance of a professional plumber to avoid exacerbating the problem and to ensure a long-term solution.
In summary, a blocked toilet plumber plays a crucial role in maintaining the health and functionality of your plumbing system. Their expertise and dedication help keep your home comfortable and hygienic, preventing the headaches and hassles that come with blocked toilets.
Remember, when facing a blocked toilet, don't hesitate to contact a professional blocked toilet plumber. Their skills and knowledge can save you time, money, and stress, ensuring your plumbing system is in top condition.
0 notes
Text
The Plumber's Snake: A Handy Tool for Unclogging Drains
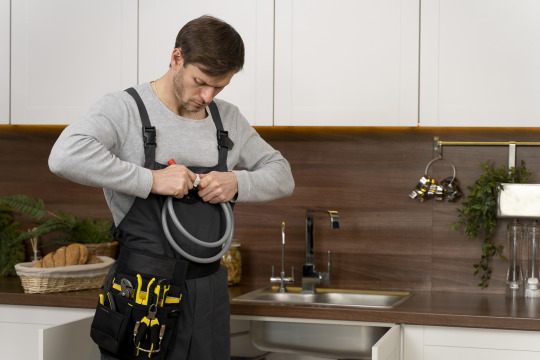
When dealing with stubborn clogs in your plumbing system, a plumber's snake is often the unsung hero that comes to the rescue. This simple yet effective tool can save you from expensive plumbing bills and keep your drains flowing smoothly. In this blog post, we'll explore what a plumber's snake is, how it works, the different types available, and tips for using one effectively.
What is a Plumber's Snake?
A plumber's snake, also known as a drain snake or auger, is a flexible, slender, and long tool used to remove clogs in pipes. It is typically made of metal and can extend several feet into a pipe to reach and dislodge blockages that are too deep or stubborn for plungers to handle.
How Does a Plumber's Snake Work?
The design of a plumber's snake allows it to navigate through the twists and turns of plumbing pipes. Here’s a step-by-step look at how it works:
Insertion: The snake is inserted into the drain opening.
Extension: It is then fed into the pipe, either manually or using a crank, to extend deeper into the plumbing system.
Dislodging: Once the snake reaches the clog, its coiled end can break up or hook onto the obstruction, allowing it to be pulled out or pushed through the pipe.
Retrieval: The snake is then withdrawn, ideally bringing the clog with it or having broken it up enough to clear the pipe.
Types of Plumber's Snakes
Plumber's snakes come in several varieties, each suited to different types of clogs and plumbing systems:
Hand Auger: A basic, manually operated snake ideal for minor clogs in sinks, bathtubs, and showers. It typically has a flexible metal wire with a crank handle.
Drum Auger: Similar to a hand auger but with a drum that houses the cable. It provides more leverage and can reach deeper clogs.
Closet Auger: Specifically designed for toilets, featuring a shorter, more rigid cable to navigate the bends of a toilet trap.
Power Auger: An electrically powered snake used for severe blockages or larger pipes. It’s often used by professional plumbers for its ability to tackle the toughest clogs.
Flat Tape Auger: Made with a flat metal ribbon, it’s used for clearing smaller pipes and is effective in situations where flexibility is crucial.
Tips for Using a Plumber's Snake
Using a plumber's snake can be straightforward, but following these tips can help ensure success and prevent damage to your pipes:
Wear Protective Gear: Gloves and safety glasses can protect you from debris and chemicals.
Start Slowly: Feed the snake into the pipe slowly to avoid kinking or damaging the cable.
Use Gentle Pressure: Apply gentle pressure when turning the crank to avoid forcing the snake, which could damage pipes.
Retract Carefully: Once the clog is cleared, slowly retract the snake to avoid splashing or spreading debris.
Clean After Use: Clean the snake thoroughly after use to prevent rust and maintain its longevity.
When to Call a Professional
While a plumber's snake is an excellent tool for DIY enthusiasts, some clogs might be beyond its capabilities. If you encounter persistent blockages, foul odors, or multiple clogged drains, it might be time to call a professional plumber. They have the expertise and advanced equipment to diagnose and resolve more complex plumbing issues.
0 notes
Text
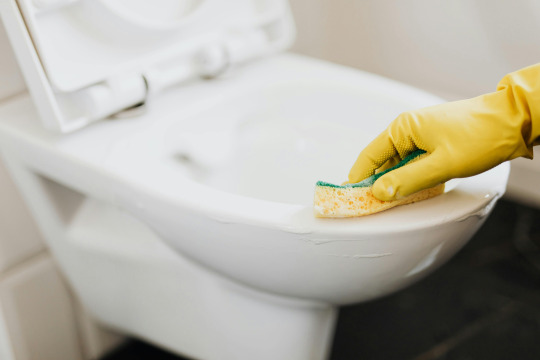
Say Goodbye to Stubborn Stains: How to Remove Toilet Bowl Stains Like a Pro

Toilet bowl stains are an inevitable nuisance in every household. Despite regular cleaning efforts, those stubborn marks seem to cling to the porcelain surface, refusing to budge. However, fear not! With the right tools, techniques, and a bit of elbow grease, you can restore your toilet bowl to its sparkling clean glory. In this article, we'll explore various methods to effectively remove toilet bowl stains and leave your bathroom looking pristine.
Understanding Toilet Bowl Stains
Before diving into the cleaning process, it's essential to understand the different types of stains you might encounter in your toilet bowl. Common culprits include:
Hard Water Stains: These are caused by minerals like calcium and magnesium present in your water supply. Over time, they can leave unsightly white or brownish deposits.
Rust Stains: Often caused by iron particles in the water, rust stains appear as reddish-brown streaks or spots.
Organic Stains: These stains result from the buildup of bacteria, mold, mildew, or other organic matter. They typically manifest as dark rings or patches in the bowl.
Now that we've identified the adversaries, let's move on to the battle plan.
Methods to Remove Toilet Bowl Stains
Baking Soda and Vinegar: This dynamic duo is renowned for its cleaning prowess. Start by pouring a cup of vinegar into the toilet bowl and letting it sit for several minutes. Then, sprinkle baking soda onto the stains and scrub the bowl with a toilet brush. The fizzy reaction between the two ingredients helps break down deposits and lift stains effectively.
Commercial Cleaners: There are plenty of commercial toilet bowl cleaners available, each formulated to tackle specific types of stains. Look for products containing hydrochloric acid or other active ingredients designed to dissolve mineral deposits and rust. Remember to follow the manufacturer's instructions carefully and use protective gloves and adequate ventilation when handling these chemicals.
Pumice Stone: For stubborn stains that resist conventional cleaners, a pumice stone can work wonders. Wet the stone and gently rub it against the stains, taking care not to scratch the porcelain surface. This method requires patience and a gentle touch but can be highly effective at removing tough buildup.
Lemon Juice and Borax: Create a paste by mixing lemon juice and borax powder to form a thick consistency. Apply the paste to the stained areas and let it sit for a few hours or overnight. The acidic properties of lemon juice combined with the cleaning power of borax can help dissolve stains and eliminate odor-causing bacteria.
Enzyme Cleaners: If organic stains are the primary concern, consider using enzyme-based cleaners. These products contain specialized enzymes that break down organic matter, such as bacteria and mold, without the need for harsh chemicals. Simply apply the cleaner to the affected areas and allow it to work its magic before flushing.
Preventive Maintenance
Once you've successfully removed the stains, it's essential to implement preventive measures to keep your toilet bowl clean and pristine:
Regular Cleaning: Make it a habit to clean your toilet bowl at least once a week to prevent stains from building up.
Use a Toilet Bowl Cleaner: Invest in a quality toilet bowl cleaner and use it regularly to maintain cleanliness and freshness.
Install a Water Softener: If hard water stains are a recurring issue, consider installing a water softener to reduce mineral buildup and prolong the lifespan of your plumbing fixtures.
0 notes
Text
Mastering the Art of Leak Detection: A Comprehensive Guide

In the realm of plumbing, leak detection is both an art and a science. Whether it's a tiny drip or a major burst, leaks can wreak havoc on your property, leading to water damage, mold growth, and costly repairs. However, with the right tools and techniques, detecting leaks early can save you from a world of trouble. In this blog post, we'll delve into the world of leak detection, exploring common types of leaks, methods for detection, and tips for prevention.
Types of Leaks
Leaks can occur in various forms and locations throughout your property. Understanding the different types of leaks can help you identify and address them more effectively:
Water Supply Line Leaks: These leaks occur in the pipes that bring water into your home. They can be caused by corrosion, high water pressure, or physical damage to the pipes.
Drain Leaks: Drain leaks typically occur in the pipes that carry wastewater away from your sinks, showers, and toilets. They can be caused by loose connections, corrosion, or blockages.
Appliance Leaks: Appliances such as water heaters, dishwashers, and washing machines can develop leaks over time. These leaks are often due to worn-out seals or faulty components.
Roof Leaks: Roof leaks can result from damaged shingles, flashing, or seals around vents and chimneys. They can cause water to seep into your home, leading to water damage and mold growth.
Methods for Leak Detection
Detecting leaks early requires a combination of observation, testing, and the use of specialized equipment. Here are some common methods for leak detection:
Visual Inspection: Start by visually inspecting your property for signs of leaks, such as water stains, mold growth, or damp spots on walls, ceilings, and floors.
Pressure Testing: Pressure testing involves pressurizing the plumbing system to detect any drops in pressure, which could indicate a leak. This method is especially useful for detecting hidden leaks within walls or underground pipes.
Meter Testing: Meter testing involves monitoring your water meter for any unexpected increases in water usage, which could signal a hidden leak.
Thermal Imaging: Thermal imaging cameras can detect temperature differences caused by water leaks behind walls or under floors. This non-invasive method allows for early detection of hidden leaks.
Acoustic Detection: Acoustic leak detection involves using specialized equipment to listen for the sound of water escaping from pipes underground or within walls. This method is particularly useful for locating leaks in hard-to-reach areas.
Tips for Prevention
While detecting leaks is important, preventing them in the first place is even better. Here are some tips for preventing leaks and maintaining your plumbing system:
Regular Maintenance: Schedule regular inspections and maintenance for your plumbing system to catch any potential issues before they escalate into major leaks.
Monitor Water Usage: Keep an eye on your water bill and be vigilant for any unexplained increases in water usage, which could indicate a leak.
Repair Plumbing Fixtures Promptly: If you notice any dripping faucets, running toilets, or other plumbing issues, address them promptly to prevent leaks from worsening.
Insulate Pipes: Insulate exposed pipes to protect them from freezing during cold weather, which can lead to burst pipes and water damage.
Upgrade Appliances: Consider upgrading older appliances, such as water heaters and washing machines, to more efficient models that are less prone to leaks.
0 notes
Text
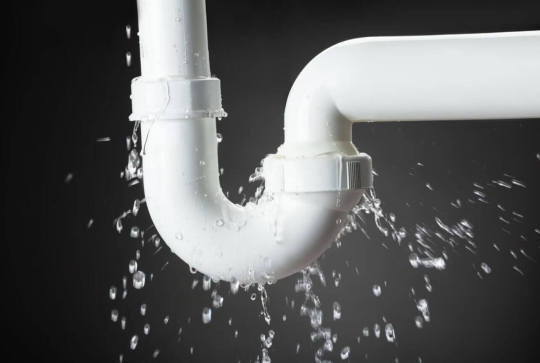
Burst Pipes: Causes, Prevention, and Remedies
Burst pipes are a homeowner's nightmare, capable of causing extensive damage and disruption. Whether due to freezing temperatures, corrosion, or other factors, burst pipes can lead to costly repairs and inconvenience. In this article, we'll explore the causes behind burst pipes, effective prevention measures, and what to do if you find yourself facing this plumbing disaster.
Causes of Burst Pipes:
Freezing Temperatures: One of the most common causes of burst pipes is freezing temperatures. When water inside pipes freezes, it expands, putting immense pressure on the pipe walls and eventually causing them to rupture.
Corrosion: Over time, pipes can corrode due to chemical reactions with water or other substances flowing through them. This corrosion weakens the pipe walls, making them more susceptible to bursting.
High Water Pressure: Excessively high water pressure can strain pipes, leading to leaks and ultimately bursts.
Physical Damage: Accidental damage from construction work, shifting soil, or even simple wear and tear can compromise the integrity of pipes, making them prone to bursting.
Poor Installation: Improper installation of pipes, such as using substandard materials or techniques, can increase the likelihood of leaks and bursts.
Prevention Measures:
Insulate Pipes: To prevent pipes from freezing during cold weather, insulate them with foam sleeves or wrapping. Focus on pipes in unheated areas such as attics, basements, and crawl spaces.
Maintain Heating: Keep your home heated, especially during winter months, to ensure that pipes remain above freezing temperatures.
Drip Faucets: Allow faucets connected to vulnerable pipes to drip slightly during freezing weather to relieve pressure and prevent freezing.
Regular Inspections: Conduct routine inspections of your plumbing system, looking for signs of corrosion, leaks, or other damage. Address any issues promptly to prevent them from worsening.
Monitor Water Pressure: Install a pressure gauge on your plumbing system to monitor water pressure. If pressure is consistently high, consider installing a pressure-reducing valve to protect your pipes.
Proper Installation and Maintenance: Hire qualified professionals for the installation and maintenance of your plumbing system. Ensure that pipes are installed correctly and use high-quality materials to minimize the risk of bursts.
What to Do If a Pipe Bursts:
Shut Off Water: Immediately shut off the main water supply to prevent further flooding and damage.
Drain Faucets: Open all faucets to drain the remaining water from the plumbing system.
Call a Plumber: Contact a licensed plumber to assess the damage and make necessary repairs. Do not attempt to fix the burst pipe yourself unless you have the necessary skills and experience.
Address Water Damage: Clean up any water and moisture to prevent mold growth and further damage to your home. Consider contacting a professional water damage restoration service for thorough cleanup and drying.
0 notes
Text
Why You Need an Emergency Plumber: A Guide to Handling Plumbing Disasters
Plumbing emergencies can strike at any moment, often catching us off guard and leaving us scrambling for a solution. Whether it's a burst pipe, a malfunctioning water heater, or a clogged drain, these situations can quickly escalate, causing extensive damage to your home and disrupting your daily life. In times like these, having access to a reliable emergency plumber is crucial. In this guide, we'll explore the importance of emergency plumbers and how they can help you navigate plumbing disasters with ease.
The Importance of Emergency Plumbers:
Immediate Response: Unlike regular plumbing services that operate within standard business hours, emergency plumbers are available 24/7. This means that no matter when a plumbing disaster strikes, you can count on them to respond promptly to your call for help. Their quick response time can make all the difference in minimizing damage to your property.
Expertise and Experience: Dealing with plumbing emergencies requires specialized skills and knowledge that only trained professionals possess. Emergency plumbers undergo rigorous training to handle a wide range of issues, from simple repairs to complex installations. Their expertise allows them to accurately diagnose the problem and implement effective solutions, restoring your plumbing system to working order in no time.
Advanced Equipment and Tools: Emergency plumbers are equipped with state-of-the-art tools and equipment designed to tackle even the toughest plumbing challenges. From high-pressure water jetting machines to advanced leak detection devices, they have everything needed to address emergencies swiftly and efficiently. This not only ensures a faster resolution to your plumbing issues but also reduces the risk of further damage occurring.
Common Plumbing Emergencies:
Burst Pipes: Burst pipes can cause extensive water damage to your home within minutes. An emergency plumber can quickly locate the source of the leak, repair or replace the damaged pipe, and prevent water from causing further destruction.
Clogged Drains: A clogged drain may seem like a minor inconvenience, but if left untreated, it can lead to overflowing sinks or toilets. Emergency plumbers have the tools and expertise to clear even the most stubborn clogs, restoring proper drainage to your plumbing system.
Water Heater Malfunctions: A malfunctioning water heater can leave you without hot water when you need it most. Emergency plumbers can diagnose the issue, whether it's a faulty heating element or a leaky tank, and provide timely repairs or replacements to ensure your comfort and convenience.
Tips for Dealing with Plumbing Emergencies:
Shut Off the Water: In the event of a plumbing emergency, the first step is to shut off the main water supply to your home to prevent further damage. Familiarize yourself with the location of the shut-off valve beforehand so that you can act quickly when needed.
Contact an Emergency Plumber: Once the water is turned off, contact an emergency plumber immediately to assess the situation and provide assistance. Provide them with as much information as possible about the nature of the problem to help expedite the repair process.
Take Preventive Measures: While you wait for the plumber to arrive, take any necessary preventive measures to contain the damage, such as mopping up excess water or placing buckets under leaks. Avoid attempting DIY repairs unless you have the necessary skills and experience to do so safely.
0 notes
Text
The Essential Guide to Gas Fitters: Keeping Your Home Safe and Sound

When it comes to the comfort and safety of your home, few things are as crucial as a properly functioning gas system. Whether you're a homeowner or a business owner, understanding the role of a gas fitter is essential. In this article, we'll explore the responsibilities of gas fitters, the importance of their work, and how they contribute to the safety and efficiency of your property.
What is a Gas Fitter? Gas fitters are skilled professionals responsible for the installation, maintenance, and repair of gas systems in residential, commercial, and industrial settings. Their expertise lies in working with gas appliances, pipelines, and fixtures to ensure everything operates efficiently and, most importantly, safely.
Key Responsibilities:
Installation of Gas Appliances: Gas fitters play a pivotal role in installing various gas-powered appliances such as stoves, water heaters, furnaces, and boilers. Proper installation is crucial to prevent gas leaks and ensure optimal performance.
Pipeline Maintenance: Gas pipelines are the arteries of your gas system. Gas fitters are trained to inspect, repair, and replace pipelines to prevent leaks and ensure a steady flow of gas to your appliances.
Appliance Repairs: When gas appliances malfunction, it's not only inconvenient but can also pose safety risks. Gas fitters are skilled in diagnosing and repairing issues with appliances to restore their functionality safely.
Gas Leak Detection: Gas leaks are emergencies that require immediate attention. Gas fitters are trained to detect and repair leaks promptly, preventing potential hazards such as fires or explosions.
Compliance with Regulations: Gas fitters are well-versed in local and national regulations governing gas installations. They ensure that all work is compliant, meeting safety standards and legal requirements.
Importance of Hiring a Qualified Gas Fitter:
Safety First: Gas is a highly flammable and potentially dangerous substance. Hiring a qualified gas fitter ensures that all installations and repairs are carried out safely, reducing the risk of accidents.
Efficiency and Performance: Properly installed and maintained gas systems operate more efficiently. This not only saves you money on energy bills but also extends the lifespan of your appliances.
Compliance with Regulations: Non-compliance with gas safety regulations can lead to fines and legal issues. Hiring a certified gas fitter ensures that your property meets all the necessary standards.
0 notes
Text
Stepping into Comfort: A Guide to Hot Water Systems on the Gold Coast

In the coastal haven of the Gold Coast, where sunny days and seaside living define the lifestyle, a reliable hot water system is a cornerstone of comfort and convenience. Whether you're building a new home, renovating, or considering an upgrade, choosing the right hot water system is a key decision. In this blog post, we'll dive into the considerations, types, and benefits of hot water systems on the Gold Coast, ensuring you can make an informed choice that aligns with your lifestyle and environmental consciousness.
Considerations for Hot Water Systems on the Gold Coast:
Climate and Usage Patterns:
The warm climate of the Gold Coast influences the demand for hot water. Consider your household's hot water usage patterns and whether a system with quick recovery, such as a continuous flow (tankless) system, is more suitable.
Energy Efficiency:
Given the environmental consciousness of the region, energy efficiency is a crucial consideration. Look for hot water systems gold coast with high energy efficiency ratings to minimize your ecological footprint and reduce energy bills.
Space Requirements:
Evaluate the available space for the installation of your hot water system. Tankless systems are often more compact and can be wall-mounted, saving valuable floor space compared to traditional storage tank systems.
Budget Constraints:
Establish a budget for your hot water system, factoring in both the upfront cost and ongoing operational expenses. While some systems may have higher initial costs, their energy-efficient operation can lead to long-term savings.
Installation and Maintenance:
Consider the ease of installation and maintenance. Tankless systems may require less frequent maintenance, but it's essential to have a professional technician conduct any necessary servicing to ensure optimal performance.
Types of Hot Water Systems:
Solar Hot Water Systems:
Leverage the abundant sunshine on the Gold Coast with solar hot water systems. These systems use solar collectors to harness sunlight, providing an environmentally friendly and cost-effective solution.
Gas Hot Water Systems:
Gas hot water systems are known for their quick recovery times and efficient operation. They can run on natural gas or LPG and are suitable for households with moderate to high hot water demand.
Electric Hot Water Systems:
Electric systems are a common choice for their simplicity and ease of installation. They are suitable for smaller households with lower hot water demand, but they may have higher operational costs compared to other options.
Heat Pump Hot Water Systems:
Heat pump systems extract heat from the air or ground and use it to heat water. They are energy-efficient and can be a suitable choice for Gold Coast homes, providing both heating and cooling functions.
Continuous Flow (Tankless) Hot Water Systems:
Tankless systems heat water on demand, eliminating the need for a storage tank. They are energy-efficient, compact, and provide an endless supply of hot water, making them suitable for Gold Coast living.
Benefits of Hot Water Systems on the Gold Coast:
Energy Efficiency:
Many modern hot water systems boast high energy efficiency, contributing to reduced energy consumption and lower utility bills.
Year-Round Comfort:
A reliable hot water system ensures year-round comfort, whether you're rinsing off after a day at the beach or enjoying a warm shower during the cooler winter months.
Environmental Sustainability:
Choosing a solar or energy-efficient system aligns with the Gold Coast's commitment to environmental sustainability. Reduce your carbon footprint and contribute to a greener lifestyle.
Quick Recovery Times:
Gas and tankless systems offer quick recovery times, ensuring a constant and reliable supply of hot water even during periods of high demand.
Customized Solutions:
With a variety of hot water system types available, you can choose a solution that aligns with your household's specific needs, ensuring optimal comfort and efficiency.
Professional Installation and Maintenance:
Consultation with Experts:
Seek consultation with hot water system experts who understand the unique considerations of the Gold Coast. They can assess your needs and recommend the most suitable system for your home.
Professional Installation:
Ensure that your chosen hot water system is installed by qualified professionals. Professional installation guarantees optimal performance and efficiency while minimizing the risk of issues.
Regular Maintenance:
Schedule regular maintenance checks for your hot water system to address any potential issues promptly. Routine inspections and servicing by professionals contribute to the longevity and efficiency of the system.
Choosing the right hot water system on the Gold Coast is more than a functional decision; it's an investment in comfort, sustainability, and the overall well-being of your household. Whether you opt for the eco-friendly benefits of solar, the quick recovery times of gas, or the space-saving advantages of tankless systems, the Gold Coast offers a range of solutions tailored to your needs. So, step into a world of comfort and efficiency by selecting the perfect hot water system for your coastal home, and experience the joy of warm showers and seamless functionality throughout the year!
0 notes
Text
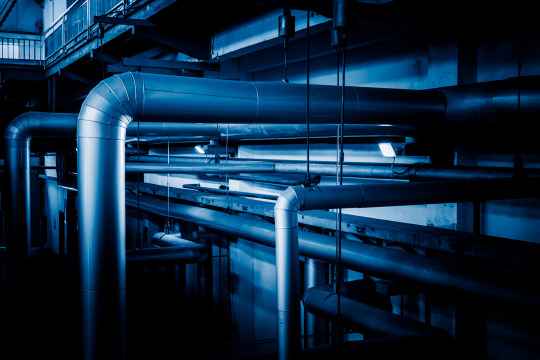
Understanding and Preventing Water Hammer in Plumbing Systems

Water hammer, a common but often overlooked issue in plumbing systems, can lead to serious problems if not addressed promptly. This phenomenon occurs when a sudden change in water flow creates a shockwave within the pipes, resulting in a loud banging or hammering noise. While the noise itself may be bothersome, water hammer can also cause significant damage to pipes, fittings, and even appliances over time. In this article, we'll delve into the causes, effects, and preventive measures to help you better understand and mitigate the risks associated with water hammer.
Causes of Water Hammer:
Rapid Valve Closure: One of the primary causes of water hammer is the sudden closure of a valve. When a faucet or valve is closed abruptly, the inertia of the flowing water generates a pressure spike that travels through the pipes, creating the characteristic banging sound.
High Water Velocity: Excessive water velocity within the plumbing system can contribute to water hammer. High-speed water flow, especially in long or narrow pipes, can create turbulence and increase the likelihood of pressure fluctuations.
Improper Pipe Sloping: Inadequate pipe slope or improper installation can lead to the accumulation of air pockets. As water flows through the pipes, these air pockets can compress and expand, amplifying the effects of water hammer.
Effects of Water Hammer:
Pipe Damage: The repetitive shockwaves from water hammer can weaken and damage pipes, joints, and fittings over time. This may result in leaks, cracks, or even burst pipes, leading to costly repairs.
Appliance Wear and Tear: Water hammer can also take a toll on appliances connected to the plumbing system, such as washing machines and dishwashers. The constant jarring effect may lead to premature wear and malfunction.
Noise Disturbance: While not as detrimental as physical damage, the loud banging or hammering noise associated with water hammer can be disruptive and annoying, particularly in residential settings.
Preventive Measures:
Install Water Hammer Arrestors: Water hammer arrestors, also known as shock absorbers, can be installed near fixtures and appliances prone to water hammer. These devices absorb the shockwaves, preventing them from traveling through the plumbing system.
Adjust Valve Closure Rates: Avoid abruptly closing valves and faucets. Instead, close them gradually to minimize the impact of sudden pressure changes.
Reduce Water Velocity: Install water-saving devices or flow restrictors to reduce water velocity within the plumbing system. This can help minimize turbulence and the risk of water hammer.
Maintain Proper Pipe Slope: Ensure that pipes are correctly sloped to allow for the proper drainage of air pockets. Adequate pipe slope can help prevent the accumulation of air and mitigate the effects of water hammer.
0 notes
Text
Unveiling the Importance of Leak Detection Services: Safeguarding Your Property and Finances

Water is a precious resource, but when it goes unnoticed and leaks within the confines of our homes or businesses, it can lead to significant damage and financial losses. Leak detection services have emerged as essential guardians against the silent and often hidden threats that water leaks pose. In this article, we'll delve into the significance of leak detection services, their benefits, and why investing in such services is a wise decision for both residential and commercial property owners.
The Hidden Culprits:
Water leaks can stem from various sources, ranging from burst pipes and faulty appliances to deteriorating infrastructure. One of the challenges with water leaks is that they are not always apparent, often occurring behind walls, beneath floors, or in concealed spaces. This hidden nature makes them particularly dangerous, as they can cause extensive damage before their presence is detected.
The Costly Consequences:
Undetected water leaks can wreak havoc on your property and finances. Structural damage, mold growth, and damage to personal belongings are just a few of the potential consequences. Moreover, the cost of water bills can skyrocket if leaks persist over an extended period. To mitigate these risks, proactive leak detection becomes crucial.
The Role of Leak Detection Services:
Leak detection services utilize advanced technologies to identify and locate leaks in a non-intrusive manner. Here are some key methods employed by these services:
Acoustic Leak Detection: This method involves using sensitive listening devices to detect the sound of water escaping from pipes. Even the smallest leaks can be identified through the unique sound patterns they produce.
Infrared Thermography: This technology allows professionals to identify temperature anomalies associated with water leaks. It is particularly effective in detecting hidden leaks within walls and ceilings.
Ground Penetrating Radar (GPR): GPR uses electromagnetic waves to create subsurface images, helping technicians identify leaks in underground pipes without the need for excavation.
Benefits of Leak Detection Services:
Early Detection: By identifying leaks at their earliest stages, these services prevent small issues from escalating into major problems, saving both property and money.
Cost Savings: Timely detection and repair of leaks can significantly reduce water bills and prevent the need for costly structural repairs.
Preservation of Property Value: Regular leak detection and maintenance contribute to the longevity and value of your property by preventing water-related damage.
Environmental Conservation: Conserving water is an integral part of sustainable living. Leak detection services aid in minimizing water wastage, contributing to environmental conservation efforts.
Visit here>>
0 notes
Text
Plumbing Solutions on the Gold Coast: Your Go-To Guide for Finding the Right Plumber

The Gold Coast, renowned for its stunning beaches and vibrant lifestyle, is also home to a diverse range of residential and commercial properties. Maintaining the plumbing systems in these properties is essential to ensure a comfortable and hassle-free living or working environment. Whether it's a pesky leak, a blocked drain, or a full-scale plumbing emergency, finding a reliable plumber on the Gold Coast is crucial. In this article, we'll explore the importance of having a trustworthy plumber and provide guidance on how to find the right one for your needs.
Local Expertise:
One of the most significant advantages of hiring a plumber on the Gold Coast is their local expertise. They understand the unique plumbing challenges posed by the coastal environment, which includes issues related to saltwater corrosion, sand buildup, and weather conditions. This local knowledge allows them to provide tailored solutions that work best for the region.
Licensing and Certification:
When searching for a plumber on the Gold Coast, ensure they are licensed and certified. Licensed plumbers have undergone the necessary training and have met the required standards to perform plumbing work safely and effectively. Certification guarantees that they stay up to date with the latest industry practices and technologies.
Range of Services:
Gold Coast plumbers typically offer a comprehensive range of services, including but not limited to:
Emergency plumbing repairs
Routine maintenance
Leak detection and repair
Drain cleaning and unblocking
Hot water system installation and repair
Bathroom and kitchen renovations
Pipe repair and replacement
Gas fitting services
Backflow prevention and testing
A plumber who can handle various tasks ensures you won't have to engage multiple professionals for different plumbing issues, saving you time and money.
Quality Workmanship:
Quality workmanship is a hallmark of a reliable plumber on the Gold Coast. They use high-quality materials and state-of-the-art tools to ensure the longevity and reliability of their services. This commitment to quality is often backed by warranties, giving you confidence in the durability of the work done.
Prompt and Reliable Service:
Plumbing issues can happen at any time. Reliable Gold Coast plumbers offer prompt and dependable service. Whether it's a burst pipe at 2 am or a water heater malfunction during a weekend gathering, you can count on their rapid response to your plumbing emergencies.
Transparent Pricing:
A trustworthy plumber on the Gold Coast will provide transparent pricing. They'll offer detailed quotes and explanations of the work to be carried out, ensuring you're well-informed and that there are no hidden costs or unpleasant surprises.
Customer Reviews and Recommendations:
Before choosing a plumber, it's wise to check customer reviews and ask for recommendations from friends, family, or colleagues. These firsthand experiences can provide valuable insights into the plumber's reputation and quality of service.
Visit here>>
0 notes
Text
The Heart of Home Comfort: Understanding Hot Water Systems
Hot water is a modern-day convenience that many of us take for granted. From the invigorating morning shower to the soothing bath before bedtime, hot water plays a central role in our daily lives. It's the unsung hero of home comfort, and the key to ensuring you have a consistent supply of hot water lies in choosing the right hot water system for your needs. In this article, we'll delve into the world of hot water systems, exploring the different types, their advantages, and how to make an informed choice.
Why Hot Water Systems Matter
Hot water systems are at the heart of modern homes, providing us with hot water for various daily tasks, including:
Comfortable Showers and Baths: A warm shower or bath is a great way to unwind and rejuvenate. A reliable hot water system ensures you can enjoy this luxury every day.
Clean Dishes and Laundry: Hot water is essential for efficient dishwashing and laundry, ensuring your clothes and dishes come out spotless.
Hygienic Handwashing: Hot water is crucial for maintaining proper hand hygiene, especially during cold and flu seasons.
Home Heating: Some hot water systems are integrated with heating systems, providing warmth to your home.
Types of Hot Water Systems
Electric Storage Systems: These systems store hot water in a tank, which is continuously heated by an electric element. They are cost-effective but may have higher energy consumption.
Gas Storage Systems: Similar to electric storage systems, these use a gas burner to heat the water in a tank. They offer a continuous supply of hot water and are often more energy-efficient.
Gas Continuous Flow (Tankless) Systems: Tankless systems heat water on demand as it flows through the unit. They are energy-efficient and provide unlimited hot water.
Solar Hot Water Systems: These systems use solar panels to capture energy from the sun and heat the water. They are eco-friendly and can substantially reduce energy bills.
Heat Pump Hot Water Systems: Heat pumps extract heat from the surrounding air and use it to warm the water. They are highly efficient and environmentally friendly.
Choosing the Right Hot Water System
To select the right hot water system for your home, consider the following factors:
Hot Water Demand: Evaluate your household's hot water usage to determine the system size and capacity you need. Larger households with higher demand may require larger systems.
Energy Efficiency: Consider the energy source (electricity, gas, solar, or heat pump) and the system's energy efficiency rating. Energy-efficient systems can help reduce long-term operating costs.
Budget: Determine your budget for the initial purchase and installation. Remember to factor in ongoing operating costs, as energy-efficient systems may have higher upfront costs but lower running expenses.
Environmental Impact: If reducing your carbon footprint is a priority, opt for eco-friendly options like solar or heat pump systems.
Professional Advice: Consult with a qualified plumber or hot water specialist who can assess your specific needs and recommend the most suitable system for your home.
Visit here
0 notes
Text
Dealing with a Leaking Tap: Causes, Fixes, and Prevention
A leaking tap is a common household nuisance that can lead to water wastage, higher utility bills, and even potential damage to your plumbing fixtures and surrounding areas. Ignoring a leaking tap might seem like a minor issue, but it can have long-term consequences. In this article, we'll explore the causes of a leaking tap, discuss effective fixes, and provide tips to prevent such issues in the future.
Causes of a Leaking Tap
Worn-out Washers: One of the most common reasons for a leaking tap is a worn-out or damaged washer. Washers experience friction each time you turn the tap on or off, leading to deterioration over time. This can result in water seeping through the gaps, causing the leak.
Loose Parts: The components inside a tap can become loose due to regular use, causing water to escape through gaps between these parts.
Corroded Valve Seat: The valve seat, which connects the faucet and the spout, can corrode over time due to the minerals present in water. Corrosion can cause leaks around the spout area.
Faulty O-rings: O-rings, small rubber rings that prevent water from seeping out, can deteriorate and cause leaks. They are usually located near the base of the tap handle.
High Water Pressure: Excessively high water pressure can strain the internal components of the tap, leading to leaks. A pressure regulator can help mitigate this issue.
Improper Installation: Poor installation or improper sealing during faucet installation can lead to leaks. It's essential to ensure proper installation to prevent future problems.
Fixing a Leaking Tap
Replacing the Washer: If the washer is the culprit, turning off the water supply, disassembling the tap, and replacing the worn-out washer can often solve the issue.
O-ring Replacement: For leaks near the handle, replacing the O-ring can be an effective solution. It's important to match the new O-ring's size and type with the old one.
Valve Seat Resurfacing: If corrosion is causing the leak, the valve seat might need resurfacing. This task is best handled by a professional plumber.
Tightening Loose Parts: Gently tightening any loose components can sometimes stop the leak. However, be cautious not to overtighten, as this can cause further damage.
Professional Help: If the issue is complex or requires specialized tools, it's advisable to seek help from a professional plumber. Attempting complex repairs without proper knowledge can worsen the problem.
Preventing Leaking Taps
Regular Maintenance: Perform routine checks on your taps to identify and fix any minor issues before they escalate into major leaks.
Avoid Excessive Force: Turn the tap on and off gently. Applying excessive force can damage internal components over time.
Install Pressure Regulators: If your water pressure is high, consider installing pressure regulators to prevent strain on your plumbing system.
Use High-Quality Taps: Invest in good-quality taps and faucets that are less likely to develop leaks due to wear and tear.
Soft Water Treatment: If you have hard water, consider installing a water softener to reduce mineral buildup that can contribute to leaks.
0 notes