
Don't wanna be here? Send us removal request.
Statistics
We looked inside some of the posts by setupwindows145 and here's what we found interesting.
Average Info
Notes Per Post
1
Likes Per Post
1
Reblog Per Post
0
Reply Per Post
0
Time Between Posts
7 days
Number of Posts By Type
Text
13
Last Seen Tumblr Blogs


Fun Fact
In 2020, 44% of users from Denmark used Tumblr daily.
Text
7 Profitable Cricut Projects to Sell: Easy Way to Earn Money
Jacob, my younger cousin, is just visiting me and wants to set up an online store. He plans to open a store on Etsy or Shopify. But he was a little unsure about the product he wanted to sell there. Therefore, he asked me which Cricut projects to sell online are better.
Since I was already selling many Cricut items on my Shopify store, I guided him and explained to him what kinds of DIY projects to sell. Luckily, he just started his own shopify business, where he gets a commission on selling some of my items. Sounds interesting, No?
You can also start the same business, and you will get good profits. Creating projects without using them is a waste of time. Now, it’s time to make and sell. Therefore, I have written this blog in which I have provided 7 Cricut project ideas to sell. Want to try? Let’s get into this blog to explore more!
1. Coffee Mugs
Who doesn’t love buying a customized or personalized mug? You can also sell a mug custom-made according to customers’ demands. Also, I often made and sold this monogram coffee mug on Shopify.
Besides, the mug is mainly demanded by gifts or women for their birthdays; they find it really helpful and useful at the same time. So, what are you waiting for? Give it a thought for such Cricut projects to sell!
2. Personalized Shirts

My favorite crafting tool, the Cricut machine, is a great device when it comes to making a personalized shirt. Besides, shirts with catchy quotes are very popular among youths. So, find the latest trendy quotes and add them to the T-shirts. Then, let the quotes do their magic.
I assure you this is going to be on top of the selling products whether you want to sell it on Etsy, Shopify, or other e-commerce websites.
3. Leather Keychains
Looking for useful Cricut projects to sell? Here are the leather keychains, which are the most valuable projects that people would love to buy. I cannot wait for more such keychains.
Recently, I also made some keychains using acrylic, which looks amazing. However, you can’t underestimate the leather key chains, too. They look really great if they are created with love and patience. Thus, you must give it a thought!
4. Coasters
Create vibrant and permanent pro-quality-based coasters with Cricut. These coasters are useful accessories for the home, and you should give them a try. This coaster is made with infusible ink and round ceramic coaster blanks, which are already available on Cricut websites. You can get these blank coasters from there.
The results are really bright and beautiful, looking like seamless, smooth transfers. They are also waterproof, which is essential so that we can keep bottles and water glasses without worrying about them peeling.
5. Leather Earrings

Earrings and other jewelry are always highly sought after. Especially when made with leather, they give the item a fantastic look that everyone wants to buy. In my Shopify store, I have listed many such items on sale. Therefore, if you want a huge crowd of buyers (especially women), then you need to explore various Cricut project ideas to sell.
6. Wall Decals

Want to beautify your wall with decals? Try selling this amazing wall decal made with a Cricut machine. Wall decals are always in high demand and are sold widely on e-commerce websites. When I was selling it, it was the most sold item ever.
Festive seasons are the best time to sell these Cricut projects to sell (wall decals). Thus, create different types of wall decals and sell them online quickly. Cricut handles everything easily and quickly.
7. Custom Bottles
How about this sleek body and personalized bottle? I made this using vinyl and saw the result. See how vibrant the color and look are. In addition, you can add some quotes on bottles that will attract people to buy them more.
Besides, this would be a great idea if you want to sell it online. Additionally, today’s gym rats are also buying many bottles to consume supplements; hence, you can customize those bottles so that they will be sold high.
Conclusion
I have set up many online stores, including Shopify and Etsy. These two are my favorites, and I love them because they are easy to set up and manage. In contrast, Cricut is a great tool that creates amazing Cricut projects to sell. So, I have provided seven projects in this write-up. Make sure you go through each of them and start selling them today if you find something exciting.
FAQs
Question 1: Which Cricut projects sell the most?
Answer: According to my past experience, I have sold many Cricut projects, and the most sold-out items were as follows. You can try them out if you want to make something that sells the most.
Apparel
Jewelry
Wall decals
Framed signs
Throw pillows
Party supplies
Custom gifts
Stickers and labels
Home décor
Stationery and cards
Personalized T-shirts
Customized mugs
Tumblers
Question 2: Which place is the best to sell Cricut projects?
Answer: I made several Cricut projects, and when it came to selling them, I relied on various online e-commerce platforms. So, these platforms are as follows:
Etsy and Shopify: It is a popular and easy option to use and has a huge number of customers.
Social Media: I also try to sell them through social media like Instagram, Facebook, and so on.
Question 3: What are the pros of selling Cricut projects on Shopify?
Answer: The pros of selling Cricut projects on Shopify are as follows:
Customize your store as you want
Setting up a store online is easy
Sell socially, including Instagram, Facebook, Amazon, and But Buttons
Set up a 14-day free trial to use shopify
Sell products in person or online
Track detailed analytics
Source :- Cricut projects to sell
#Cricut projects to sell#CRICUT DESIGN SPACE LOG IN#CRICUT MACHINE SETUP#CRICUT PROJECTS#INSTALL CRICUT DESIGN SPACE#PROFITABLE CRICUT PROJECTS#crict design space#cricut.com/setup#design.cricut.com/setup#cricut.com#cricut.com/setup maker 3#cricut.com/setup app#cricut design space login#help.cricut.com
0 notes
Text

DIY Delight: Getting Started with the Best Cricut Machine
Are you interested in the world of crafting and eager to bring your creative vision to life? Explore the possibilities with the Cricut machine. This smart tool is a game-changer for those who are curious about crafting and eager to unlock their creativity skills. With the Cricut machine, you can easily cut symbols, images, text, and vibrant sticker designs from various materials, from paper to HTV, fabric, and balsa wood. Also, making your DIY projects is possible with the free software provided by Cricut, available at cricut.com/setup.
Visit here for more Information :- https://setupwindowsmachine.com/
0 notes
Text

10 Elegant Cricut Wedding Projects to Make Your Special Day
Make your D-day one of a kind by using various Cricut wedding projects. Read the blog to learn about wedding crafts that can be made out of a Cricut machine.
Visit here for more Information :- Cricut wedding projects
0 notes
Text
10 Elegant Cricut Wedding Projects to Make Your Special Day
My best friend Anne Roberts surprised me a week ago by telling me that she was getting married next month. The moment I was about to digest this news, she gave me another bombshell and told me that I would be her maid of honor. She had many ideas to make her wedding memorable and loved by all. After listening to her, I told her about my Cricut wedding projects, which instantly released her stress.
From bachelorette parties to wedding invitations, I have them all, and I am sure everyone will love them. With the help of my crafting machine, I can create any project out of any material that will add a personal touch to the wedding. Besides, it also saves money and time. This blog will explore some fun and creative crafts you can make.
1. Ice Bucket
Pull up your pajamas, turn on your music, and attend the bachelorette party full of games, drinks, and gossip. You invite your friends to jump into the pool and enjoy the sunbath with drinks inside the customized ice bucket. To make this DIY project themselves, the crafter needs a bucket blank, a cutting machine, materials, and a mat.
2. Blanket Box

3. Wedding Ring Box
The wedding can’t happen without exchanging rings, so keeping the boxes safe and secure is essential. Among the various DIY Cricut wedding projects, it is one of my favorite and cutest crafts, as I can customize it by choosing the materials of my choice and the Cricut Heat Press.
4. Wine Bags
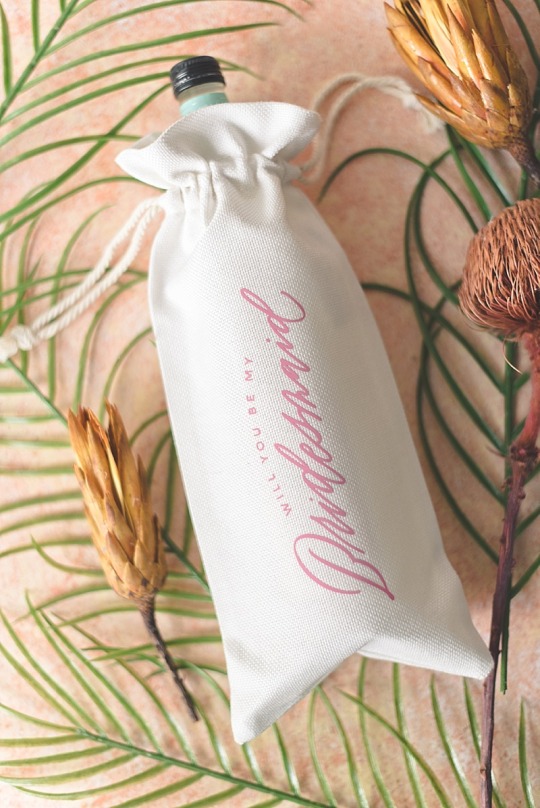
5. Vow Books
At this point, you can also add DIY vow books that can also be added to the Cricut wedding projects. These simple and easy-to-make vow books are beautiful items that can be gifted to guests. You can easily make these books out of a Cricut cutting machine or materials & in any shape or size.
6. Cupcake Toppers
In addition to the blog, make your dessert look more tasty by placing a cute customized cupcake topper above it. Like other crafts, you can make them in different shapes, sizes, and textures. It would be best to have a craft machine, material, and cutting mat to make your DIY topper.
7. Bar Menu
A party feels complete once a few bottles of wine and champagne are over. Let your guests know what you are serving on your D-day with the customized bar menu. You can make this personalized craft with a Cricut cutting machine, wooden blank, and vinyl.
8. Welcome Sign

Among the several Cricut project ideas for weddings, your guests will feel welcome with your photo & custom welcome signboard on the venue. Besides, you can make a welcome sign for the floor or a table. You can make this DIY project with wood board, vinyl, or an adhesive foil.
9. Tissue Box

It isn’t easy for parents to see their daughter going to a new house and living the rest of her life with them as their daughter-in-law. Following the circle of life, bid her farewell with a smile and happy tears flowing from your eyes. The DIYer can do this project using a Cricut machine, materials, and a Cricut cutting mat.
10. Memorial Chair Decor
Lastly, the famous Cricut wedding projects also include the wedding memorial chair. The one who said goodbye to the world early shouldn’t be forgotten, so a DIY memorial chair is the best thing. You can make this project by designing an acrylic blank with color and sticking the photograph on the blank.
Conclusion
In conclusion, with the post, didn’t you find these ideas simple, cute, and fun in their respective places? Adding them to your D-day will impress your guests with your choices and combinations. Apart from the earlier-said DIY crafts, you can also do projects like cushions, jacket patches, seating charts, and table numbers.
Source Url :- Cricut wedding projects
0 notes
Text
Windows Machine Mastery: cricut design space download
Have you ever wondered what you can do with a Cricut cutting machine? This robust machine is manufactured by a highly experienced team of engineers, encouraging crafters to get the most out of it. Cricut’s lineup has various cutting machines, such as Cricut Explore, Maker, Joy series, and Venture. All of them are designed for different purposes and project types. But before you use them, you will need to set it up. To set up, you can simply navigate to cricut.com/setup. Rest assured, screen prompts will guide you in setting up your machine with your compatible devices.
Visit here for more Information :- https://setupwindowsmachine.com/
#designcricutcomsetup#cricutcom#cricutcomsetup#cricutdesignspace#cricutdesignspacedownload#cricut design space login#design.cricut.com/setup explore air 2#cricut.com/setup maker 3#cricut.com/setup app
0 notes
Text
How to Make Custom Shirts With Cricut: A Step-by-Step Guide
I am obsessed with my Cricut machine and create projects on it every day. You can call it my hobby or my big passion for crafting. Recently, I have made dozens of custom shirts with my Cricut Maker machine, and you can create some on your own, too. Following this guide, your guesswork will be reduced to zero, as I will share some of the easiest steps on how to make custom shirts with Cricut.
If you are interested in my tutorial, I would recommend you continue it till the end so as not to miss anything important. I have been creating unique stuff with my Cricut for more than 6 years now; it has been a beautiful journey for me.
Whether you are a beginner or a well-trained Cricut user, this post will help you get some ideas for starting something new. I hope you found this blog helpful and that you will come back for more Cricut-related blogs like this one. Let’s start learning how to design shirts with Cricut for beginners.
Which Is the Best Cricut for Making Shirts?
When you are making a custom shirt, you will have this doubt about which machine to choose. My answer would be to choose anyone you have. Whether you have Cricut Maker, Joy, or Explore, you can choose anyone with your iron-on vinyl to make a perfect custom shirt.
However, you will need to insert the fine point blades to cut this type of vinyl. I hope you got an answer to it. Let’s move forward with this guide on making your custom shirt.
How to Make Custom Shirts With Cricut Machine?
When you are clear about which machine to use and what design you wanna make, let’s get started with my steps. Well, you will need a few things before you move your hands on the desktop. So, gather up all the listed things here.
Cricut Explore Air 2
EasyPress 2
EasyPress mat
Shirt apparel
Weeding tool
Brayer tool
Scissors
Standard mat
Premium vinyl
Are you ready with all these? So you’re good to go. When you are ready, head to your Cricut Design Space and show some of your creativity. And follow all the steps carefully.
Step 1: Go to the Cricut Design Space App
In the first step, you should go to your Design Space and pick a design to print on your shirt. As the Cricut app is full of ready-to-make designs, fonts, images, and templates, you won’t have to hustle to make a design. I am using my Explore Air 2 machine; you can use a machine you’re familiar with.
Step 2: Adjust Your Design
Once you are ready with your final design, you can take some time to make that fit for you. For example, you can change the design’s color. On the Cricut Design Space canvas, you will get a few options on the right-hand side, from where you can choose your favorite color for the shirt.
Step 3: Change Vinyl Color
Here, you need to change your vinyl color as your shirt’s color may not be a good match with the vinyl’s color. In order to keep the color vibrant and not blend them, you have an option to change the color of your iron-on vinyl. To do this, you should click on the Layers option on the canvas. After that, you can click on the white box with the Layer option and pick a color for your vinyl.
Step 4: Final Your Design
If you find the color combo not as expected, you can change it. Once you have done all the updates, you are ready to save your design. You need to hit the Save button along with the name of your project to remember what this design is about. I am making a design that says “Cutest Bachelor.” Let’s check more steps on how to make custom shirts with Cricut.
Step 5: Load Your Material (Iron-on Vinyl)
In this step, you are ready to cut your project with your special Cricut machine. Don’t forget to load your vinyl on a Cricut cutting mat and then into the Cricut machine. Once you are done, you can start the cutting. Also, select the correct size of your mat on your machine so that your design fits the cutting mat. And the most important thing is to align the iron-on vinyl correctly to get an expected cut.
Step 6: Cut Your Design
When your design is ready, and you have checked all the settings, you can allow your Cricut machine to perform a cut for you. Once you hit the Go button on your machine, it will show you a preview of your final design. If you are satisfied with it, click the Continue button to get a cut. Once the design is fully cut, unload your cutting mat.
Step 7: Weed Out the Excess Vinyl
When you have a cut in your hand, take a weeding tool and take out excess vinyl to make the design clear and ready to be ironed. You can use your hands too, but a weeding tool is more convenient. Now, you have finally come to the main part of how to make custom shirts with Cricut.
Step 8: Ready Your EasyPress
When your design is ready, you can set your Cricut EasyPress to cotton or linen to get the desired results. So, now you need to put your weeded design on the shirt apparel and use a Cricut EasyPress 2 to heat it. However, before that, you must use a brayer tool to remove lint and fibers from the shirt’s fabric. Once you do that, for the next steps.
Step 9: Preheat Your Shirt
When your apparel is ready, use your EasyPress to preheat it for 15 seconds with moderate pressure to remove the moisture and wrinkling. For the final heating, you should consider a Cricut Heat Guide that will help you find the best setting for your design. After that, use the temperature and pressure accordingly.
Step 10: Apply Heat to Your Shirt
And the last step is to just apply the heat as the Cricut guide suggests. Use a towel to place on your vinyl design, and apply heat for 30 seconds. Using a towel will prevent your iron-on from getting damaged. Viola, you have just designed a perfect custom shirt with your Cricut.
Conclusion
You were all wondering how to make custom shirts with Cricut. And with my blog, you might have found this process a bit easier than before, I guess. Don’t worry; if you follow the instructions carefully, I can bet you can make a fabulous shirt.
However, be mindful of the heating setting as it can ruin your project and waste everything. It’s always better to use a household iron while making your first project. When you get familiar with the process, you can take one step ahead with an EasyPress.
Source Url :- how to make custom shirts with Cricut
Visit here for more Information:- · cricut design space log in
· cricut machine
· cricut machine setup
· how to make custom shirts
· step-by-step guide
· install cricut design space
#how to make custom shirts with Cricut#CRICUT DESIGN SPACE LOG IN#CRICUT MACHINE#CRICUT MACHINE SETUP#STEP-BY-STEP GUIDE#INSTALL CRICUT DESIGN SPACE
0 notes
Text
Is Cricut AutoPress Right for You in 2024?
You’ve heard of the Cricut AutoPress if you want to focus more on crafting and less on heat transfer. But if you’re concerned about whether this machine is right for you, this helpful guide is for you. I have tested various projects and researched this machine in detail. Then, I prepared this easy guide to help you decide whether you need to buy it.
Read my guide and learn about the features, performance, price, setup, specifications, security measures, and design of AutoPress, and I will share my personal experience. As soon as you’ve completed this guide, you’ll know if it suits your crafting style or not. So, let’s get started; follow this guide until the end; otherwise, you will only have half of the confusing information.
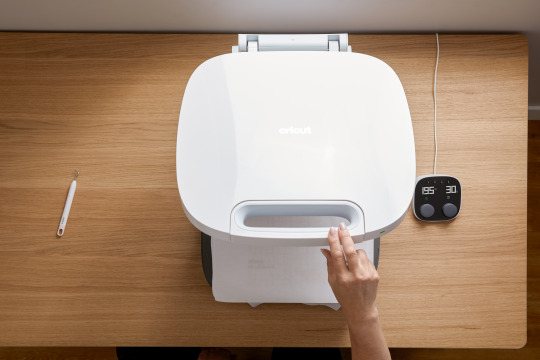
What Is Cricut AutoPress?
The first thing you need to do is know what an auto press is. If you already know about it, then you can skip it. “The AutoPress is a Cricut heat press machine that can automatically apply pressure and heat up to 2 inches thick simultaneously. Its ceramic-coated heat plate covers 15 inches by 12 inches and can heat up to 400 degrees.” It is used for adhering iron-on vinyl, infusible ink, or sublimation print to various flat blanks, such as T-shirts, tote bags, coasters, and more.
Cricut AutoPress Design & Build Quality
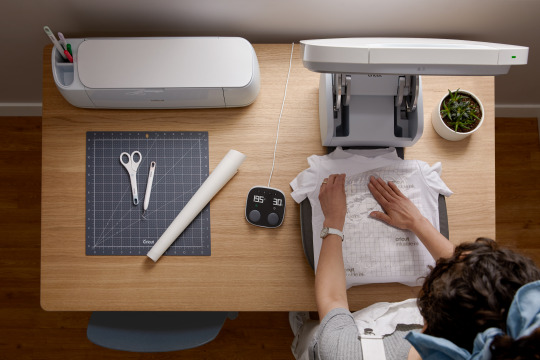
I know you’re curious about the design, build quality, and how it differs from the Cricut EasyPress and other heat presses. In fact, every Cricut heat press machine is different and is used according to the need. However, AutoPress shines when we want to do a large number of projects and large surface projects with consistency and ease.
Additionally, it uses a hinge system when moving the heat plate and applies pressure autonomously depending on the thickness of the material, making it the easiest heat press on the market.
Features & Performance of Cricut AutoPress
I’m a full-time crafter and have done different projects with this machine. I found the heat press to be the easiest to close because it applies pressure automatically. As far as the project outcome is concerned, you will get visually attractive results.
First, this machine offers a zero-effort system that allows us to close the iron with just two fingers.
Moreover, it has an Intelligent pressure system that adjusts the pressure simultaneously to heat according to materials.
Subsequently, an AutoPress has a ceramic-coated heat plate that ensures clean results and heats up to 205°C.
Next, we will get an Automation power-off function to ensure safety.
Last but not least, it offers a large opening angle and fan-assisted ventilation for larger projects.
Cricut Auto Heat Press Safety Measures
As we know, it is a heat press, so it is important to know the safety measures before investing in the Cricut AutoPress heat press machine.
Firstly, an LED indicator on the machine informs us what is going on.
Secondly, the press will turn off automatically after 13 minutes
Third, the AutoPress has an internal fan that keeps the handle cool.
Fourth, it is made with certified temperature plastics that resist heat.
Cricut AutoPress Setup
Trust me, as I mentioned below, setting up AutoPress after purchasing it is very easy.
First and foremost, remove the machine from the box and place it on the table.
After that, we will plug the power cord into the power outlet and turn it on.
Then, connect one end of the USB to the computer and the other end to AutoPress.
Moreover, download and install the Cricut Design Space from cricut.com/setup.
Finally, select the heat press> AutoPress and complete the on-screen prompts.
Finally, select the heat press> AutoPress and complete the on-screen prompts.
Cricut AutoPress Price: Should You Buy or Not
Frequently Asked Questions
HTVRONT auto heat press vs Cricut, which one is best?
So, both the Cricut and the HTVRONT are heat press machines, but the HTVRONT is lighter and can reach higher temperatures than the Cricut. However, the Cricut is perfect and better for those who like manual controls and customer support, like me. Additionally, we also produce stunning results on the Cricut Machine and can offer the Cricut Heat App and the Cricut Heat Site.
How to use Cricut AutoPress?
Below, I have mentioned a brief step on how to use Auto Press Cricut easily.
Initially, set the machine and cut the design on HTV or infusible ink sheet.
Then, position the base material on the heat mat, follow the Cricut Heat Guide, and adjust the time and temperature.
Moreover, apply the heat on the surface until the design is infused.
Finally, switch off AutoPress and leave the project to leave cool down.
What is the heat setting on the Cricut AutoPress?
A Cricut auto heat press machine can heat from 170° to 400°F (75° to 205°C), and it is mostly used to transfer heat on big projects. The following are the steps to get exact time and temperature information.
First, go to the cricut.com/heatguide and select this machine.
After that, we will select the heat transfer material & also choose your base material.
Finally, select the Apply option; detailed information will appear on the screen.
Final Thoughts
If you do many HTV, sublimation, and infusible ink projects with Cricut, you will face difficulties as it takes time and more energy. Cricut has introduced the Cricut AutoPress machine, a perfect machine made for home use. Above, I have told you everything about this machine that you will need to know. If your budget and project requirement match this machine, then you should invest in this machine.
Source Url :- Cricut heat press machine
Visit here for more Information:- Cricut AutoPress
cricut autopress machine
cricut autopress machine 2024
Cricut heat press machine
#Cricut AutoPress#CRICUT AUTOPRESS MACHINE#cricut design space#cricut design space login#cricut.com/setup#help.cricut.com#cricut.com/register#cricut machine setup
0 notes
Text

Have you ever wondered what you can do with a Cricut cutting machine? This robust machine is manufactured by a highly experienced team of engineers, encouraging crafters to get the most out of it. Cricut’s lineup has various cutting machines, such as Cricut Explore, Maker, Joy series, and Venture. All of them are designed for different purposes and project types. But before you use them, you will need to set it up. To set up, you can simply navigate to cricut.com/setup. Rest assured, screen prompts will guide you in setting up your machine with your compatible devices.
Visit here for more Information :- https://setupwindowsmachine.com/
#cricut.com/setup#design.cricut.com/setup#cricut.com#cricut design space#cricut design space download#cricut design space login
0 notes
Text
6 Cricut Ideas for Valentine's Day: Express Your Love
Hey crafters! Are you looking for some unique Cricut ideas forValentine’s Day? Look no further than this blog! In this blog post, I have covered several projects I made with my best friend, Olivia. She was one of my best friends who was my college mate. She is an amazing crafter and loves creating beautiful DIY crafts. Since we have similar interests, we intend to work on this project.
Hence, we made many Cricut projects for Valentine’s Day, and I will share some of them in this guide. However, these project ideas are easy to make with your Cricut cutting machine. So, let’s get started and learn about 6 projects I made using my Cricut Maker, Explore 3, and EasyPress.
1. Gift Card Holder
The gift holder can be the best thing to make this Valentine’s Day. I made this gift card holder using colorful cardstock. Add the sweet surprise and message to this card and insert it into your holder. With the Cricut Explore series, these projects can be made quickly, giving you the desired pro result. So, give this gift card holder to your lover to make their day special this Valentine’s Day.
2. Valentine’s Day Stickers
I created these beautiful pink stickers to paste on the envelope I want to send my boyfriend. Making such stickers is easy using the Print Then Cut features of Cricut. However, Cricut Joy doesn’t support this feature, so opt for other cutting machines like Cricut Maker or Explore series. Besides, these stickers can be customized anywhere on your gifts. So, if you want to spread the vibes of Valentine’s, such Cricut ideas for Valentine's Day are a must.
3. Shadow Box
These shadow boxes will elevate your Galentine’s Day craft party! You can also use them for Valentine’s Day. However, I recently made this Shadow box for Galentine’s Day using my Cricut Maker cutting machine and Premium Glitter Vinyl. With this machine and materials, you can easily craft your shadow box to add the spark of Valentine's Day.
4. Banner
Looking for decor-related Cricut ideas for Valentine's Day? Here’s the banner that I’ve made on my Cricut. This year, I will arrange a small dinner party for my partner. I needed some kind of decor for this, so I decided to make this BE MINE banner. Also, you can place some gifts you’ve created with the help of Cricut. So, what do you like about this banner? To me, the combination of colors was chosen by my friend Olivia! Her choice of colors is superb, so I always consider her opinion regarding colors.
5. Heart T-shirt
If you want to give a T-shirt to your lover as a gift, this could be your great choice. I added the red heart-shaped design to this T-shirt. Just drag the shape and add it to your design canvas. After that, you must send the design to your Cricut machine, which will cut it into the desired shapes. Also, you will need a Cricut EasyPress to transfer the vinyl onto the blank shirt. So, I have already made this. Now it's your turn to try similar Cricut ideas for Valentine's Day.
6. Heart Keychain
I created this colorful keychain using leather and cut it all on my Cricut Joy. This design seems so easy, and it is actually simple to create. Thus, you don’t need much effort to make this keychain. Just take the required size of leather and place it on your Cricut mat. Before that, you will need to create a desirable shape for your keychain. After that, hit the Go button, and it will be ready to assemble. Then, give it to your loved one as a Valentine’s gift.
Final Words
In this blog, I share 6 types of Valentine's Day Cricut projects I made this year with my friend Olivia. In addition, I have also included some Cricut Valentine gift ideas such as gift card holders, keychains, T-shirts, and shadow boxes. Apart from these things, you can also make banners to decorate the personal space where you and your lover will have dinner together. So, make something extraordinary with your Cricut, and do not let this special moment be missed!
FAQs
Question 1: What can I make on Valentine’s Day using my Cricut?
Answer: I have recently made several Cricut projects for Valentine’s Day. Here, I will share the most exciting and crafty ideas to make your loved one’s day special. So, here’s the list of Cricut ideas forValentine’s Day:
Love cards
Valentine bookmarks
L-O-V-E T-shirts
Heart-shaped earrings
Pillows printed with I Love You
Banner for Valentine’s Day celebration
Question 2: What are the Cricut Valentine shirt ideas?
Answer: If you want to give your lover a T-shirt, try adding catchy lines or illustrations to make it beautiful. Below is a sample of text you can add to your blank T-shirts. Here are the examples of texts that you can add to T-shirts:
LOVE
Love Always
Mr. Steal Your Heart
Hugs, Kisses, and Valentine’s Wishes
Love Bites
Love at First Bite
Filled With Loves
Love More
Question 3: What can I make for Valentine’s Day using a paper and Cricut machine?
Answer: With paper, there are endless possibilities to make your Valentine’s Day special. Be it Cricut Maker or Explore series, all Cricut machines can easily cut paper. Here are the paper-made projects on the Cricut cutting machine:
I Love You a Latte Cup Sleeve
Paper Plate Valentine Wreath
Valentine's Day Countdown
Valentine Hearts Art
Love Jar
Valentine's Pinwheels
Heart Stamp Painting
I Love You To Pieces Valentine Card
Source Url :- Cricut ideas for Valentine's Day
0 notes
Text
Discover Endless Creativity: Navigate Artistic Adventures with Cricut
The most popular Cricut-cutting machines are Joy, Explore, and Maker. These ultimate cutting machines are a must-have companion to create a compelling craft. Whether you are running a small business or following your passion, Cricut machines meet everyone's demands. So, what are you waiting for? Set up the machine with your devices by simply navigating to cricut.com/setup. Post setup, you can start cutting your created designs on Cricut.
Visit here for more Information :- https://sites.google.com/view/setupwindowsmachine/home
0 notes
Text
Cricut Design Space Wonders: Unleashing Creative Potential with Precision and Ease
The most popular Cricut-cutting machines are Joy, Explore, and Maker. These ultimate cutting machines are a must-have companion to create a compelling craft. Whether you are running a small business or following your passion, Cricut machines meet everyone's demands. So, what are you waiting for? Set up the machine with your devices by simply navigating to cricut.com/setup. Post setup, you can start cutting your created designs on Cricut.
Visit here for more Information :- https://setupwindowsmachine.com/
0 notes
Text
cricut design space - cricut design space download
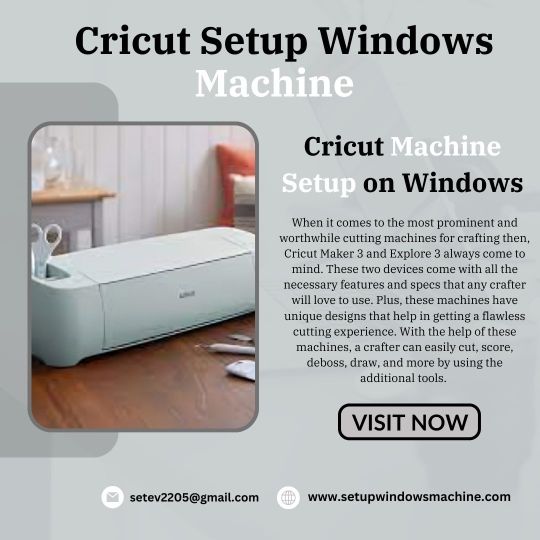
When it comes to the most prominent and worthwhile cutting machines for crafting then, Cricut Maker 3 and Explore 3 always come to mind. These two devices come with all the necessary features and specs that any crafter will love to use. Plus, these machines have unique designs that help in getting a flawless cutting experience. With the help of these machines, a crafter can easily cut, score, deboss, draw, and more by using the additional tools. These machines come in different price ranges due to some differences in features, as Maker 3 has some extra features. On the website Cricut Design Space Software you can learn about the differences between them and choose which suits you best.
Visit here for more Information :- https://setupwindowsmachine.com/
0 notes