
sinfinitih
17 posts
Sweet lil Character Rigger / TD @PlayStation , a bit of a workaholic but I hope you enjoy my work! Prev: Steamroller
Don't wanna be here? Send us removal request.
Statistics
We looked inside some of the posts by sinfinitih and here's what we found interesting.
Average Info
Notes Per Post
2K
Likes Per Post
1K
Reblog Per Post
459
Reply Per Post
19
Time Between Posts
13 hours
Number of Posts By Type
Video
6
Text
11
Last Seen Tumblr Blogs


Fun Fact
Tumblr was attacked by a cross-site scripting worm deployed by the Internet troll group GNAA on Dec 3, 2012.
Video
In Cavern of Dreams (my n64 style adventure game), swimming is fast, fluid, and fun! build up speed then dolphin jump out of the water to reach new areas!
(if you like how the game looks, please wishlist it on steam!: https://store.steampowered.com/app/2059660/Cavern_of_Dreams/ it will also be coming to Switch)
829 notes
·
View notes


Video
youtube
There are many, many tutorials showing “how” to retarget in Blender with the Rokoko and Rigify rig and they continue to perpetuate common errors and misunderstandings of how to use the tools without a destructive workflow or adding extra steps or simply being wrong from the start (retarget to the metarig for example) so we hope this helps clear up some of the common mistakes and helps you get your work done.
Pose your target character in a pose to match the source animation and use the “current” not rest pose button for better retarget. Don’t edit the rest pose destructively.
Build a custom name map for Rigify controls, don’t build the Bone list and leave it as is, it maps wrong bones like MCH, ORG, DEF bones, map the controls only.
Use the new extra item options to drive both IK and FK during the retarget instead of baking /switching one limb at a time after the FK retarget.
Fixing offsets after retarget is fastest with Animateaide animation offset mode. Don’t want to use it? Use NLA animation Layer to fix it instead. https://github.com/aresdevo/animaide
Happy retargeting.
9 notes
·
View notes


Video
some old crystals that I’ve recently updated to unreal 5. shader has a better material read and the glow is less crazy I think
119 notes
·
View notes
Text


its so cool when teachers refactor code to be so simple and clean! I hope to get like this one day!
3 notes
·
View notes
Text

face rig time..those giant eyes are gonna be a nightmare!
6 notes
·
View notes
Text
Road to Cream64 v1 Part 2: All in the Family

With the main player model ready to go, it was finally time to get to everything else. Starting with Peach herself, it was time to get Vanilla into the game.
To start, I had to get an idea on how Peach was rigged and this was something I had to mostly do on my own. Fast64 has an import tool to grab models and their rigs straight from the game itself, so you can (kind of) easily swap models out without having to change anything else, so long as everything was put back that is.
Mario 64's T-Poses are not traditional ones but rather they come imported as a crumpled mess, like so.
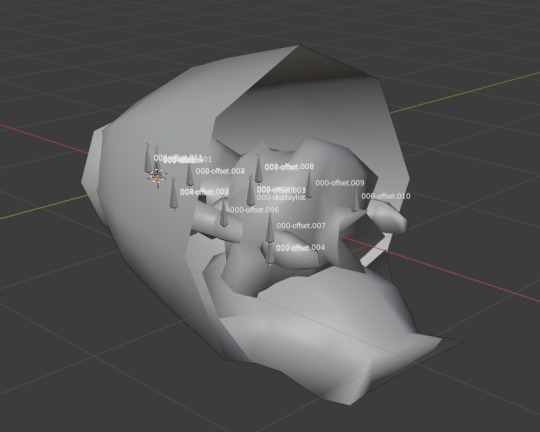
Here's Peach's for example. Mario is just about the same, as well as a bunch of other enemies and stuff. Don't get me started on Bowser, we'll get to him much later. But generally once you have it imported, most people would uncrumple the T-Pose to get an idea on where everything else. This is very intimidating at first, so you make a save where it's already uncrumpled. There's another method that you can use to guide you but, again, I'll get to that later.
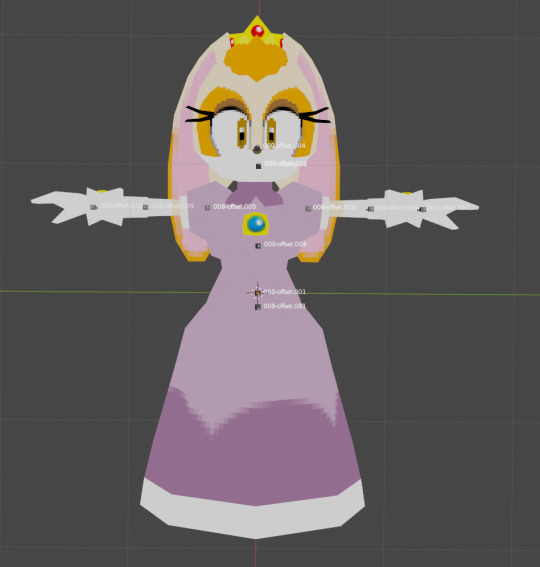
So here we are, after going back and adding her proper "Princess" textures. Stuff like the crown and the jewel on her chest are taken straight from Peach's model, but everything else was remade from scratch. Get it as close as her original outfit but still keep it very princess-y. Now to get her back in that crumpled state we saw earlier.
And there we go, she's ready to be imported in-game. The Fast64 tool has a little button that lets you keep a model's default rest position to however you like, which makes editing the more complicated models easier since going back to edit mode shifts the bones back to rest position.
And you can do the same method to get it back to its normal position. Just be careful on how you rotate things cause you can accidently rotate two bones on the wrong axis and it'll mess up everything. Lost too many good Mario rigs that way...
Some code given to me by the simpleflips' romhack discord, I can easily warp to the ending to see my results. Took a few tries actually but once it was all done, everything looked great! However, there was still one last thing left: the blinking.
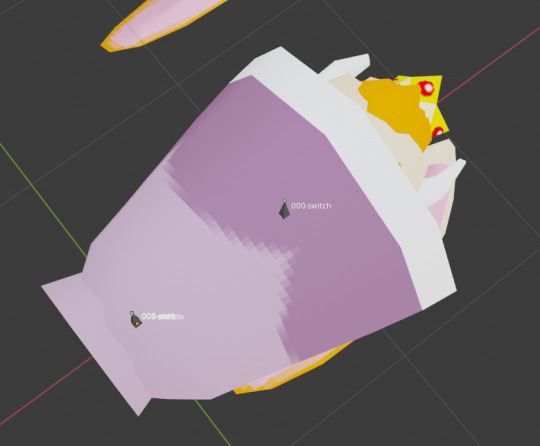
Most models have blinking, which uses a switch bone usually where it would happen, so the head in this case. The Mario rig that comes with fast64 already has it set, so it's just a matter of swapping textures. For anything you import, it doesn't come with textures so you have to fill in the blanks (it does come with its UVs so it's not super hard if you know what you're doing).
For the blinking, you have to find the specific bone that does it and then manually add the textures that way. Peach is somehow unique in that she has seven states, all but one are a repeat of another. Here's the first three from the most recent version I got of her as an example.
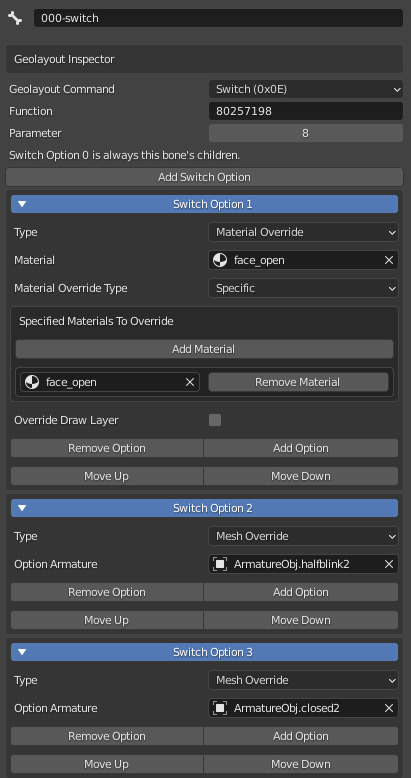
So a lot of the early importing was a lot of trial and error till just figuring out which bone does it and in which order, using the Mario switch states as an idea. You could prolly dig around the code and see how its laid out but I sure didn't know how at the time! Anyway, Princess Vanilla was done. She showed up properly in all the spot Peach usually does and that means I'm ready to continue.
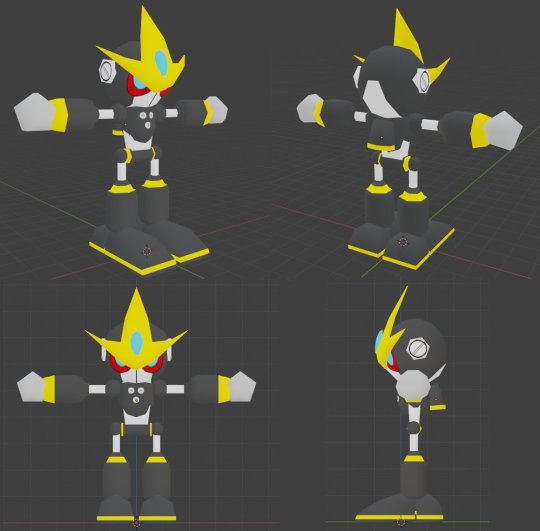
Next is the unappreciated boi, Gemerl. Former Eggman goon turned protector of small and large bunnies. The plan for him was simple: he's the new Koopa the Quick. Sounds easy enough, and honestly it was mostly (after some help) but man just trying to get him rigged was uhh...something.
The original idea was to rig him to the existing Koopa model and go from there but as you can see, it was not the greatest looking thing. Koopa the Quick's model and animations are obviously shared with the normal Koopa model so I had to be careful when modifying the animations, if I did. In the end, I scrapped this idea and went with a suggestion: using Mario's rig.
Huge feet aside, it did work out though actually using the Mario rig was a bit of a hassle cause when importing the Mario rig, it also includes the bones that are handle by the game's code such as telling which hand holds things or scaling certain limbs when attacking, etc etc. And since Cream also shared that same rig now, whatever Cream did, so did Gemerl. The solution was to go through the rig and delete all those bones so that nothing gets mirrored to whatever the player was doing.
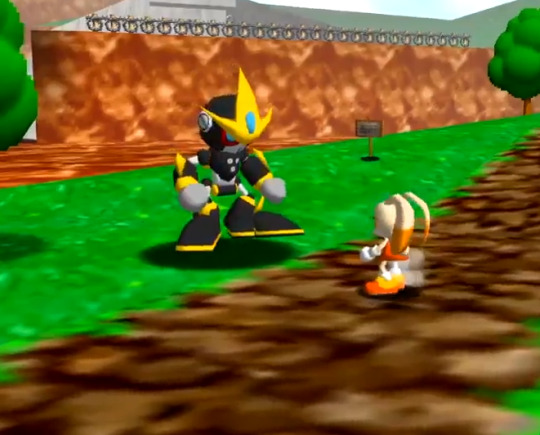
Look at him go! The added benefit of using Mario's rig was that I could reuse his animations for Gemerl. The next thing was to import certain animations and export them in a certain order so that it lined up with Koopa's animations, so that once I edited some code, it would just know which animations to pick from without much effort.
Also for why he looked so big is cause I forgot Koopa the Quick has a unique scale of 4 (vs the normal Koopa being a scale of .8) so just had to adjust that as well as shrinking the trigger to talk to him and Gemerl was set! Two down, a couple more to go.
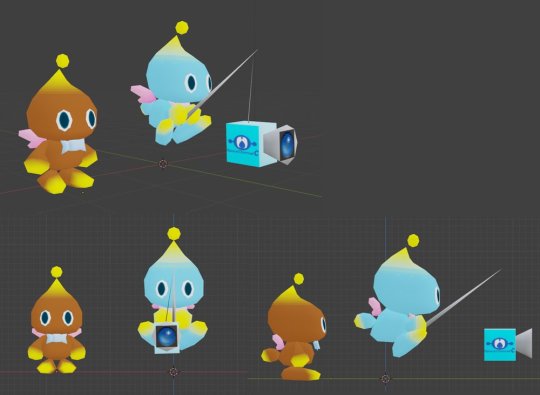
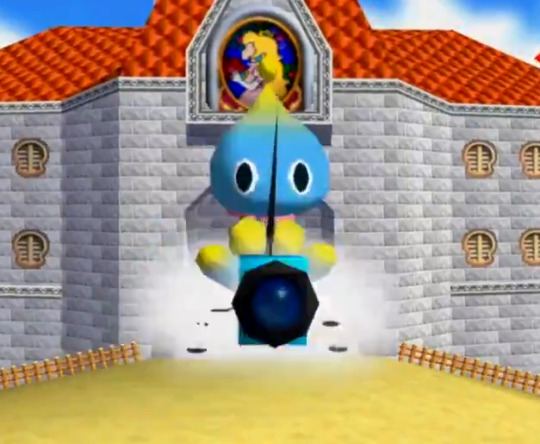
Last but not least were Cheese and Chocola. These would be the first model I just took from an existing source, in this case it's from Shadow the Hedgehog. Bunch of chao in a single room...
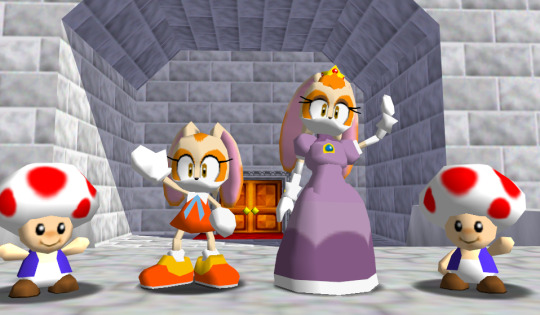
Normal chao would replace all the toads in the castle, while chocola would be replacing a single chao in the main lobby and cheese would follow you around as the cameraman lakitu.
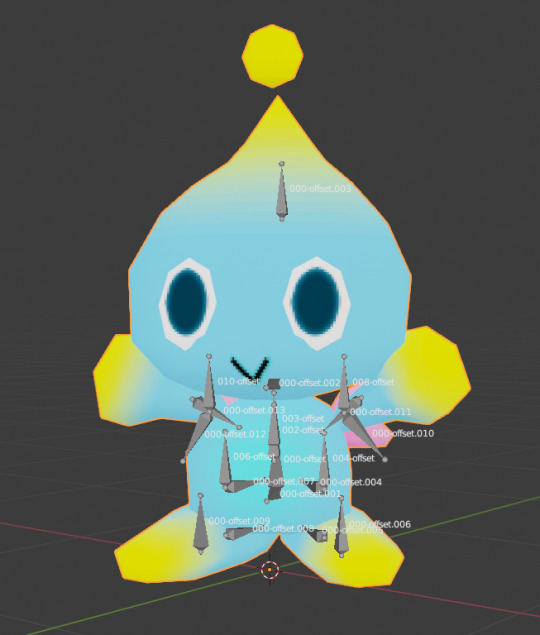
Starting with the toads, their rig was mostly simple if needlessly full of extra bones, which is a common issue with most of the rigs. Would be nice to get of them if I had an idea on which one didn't completely break animations. Oh well.
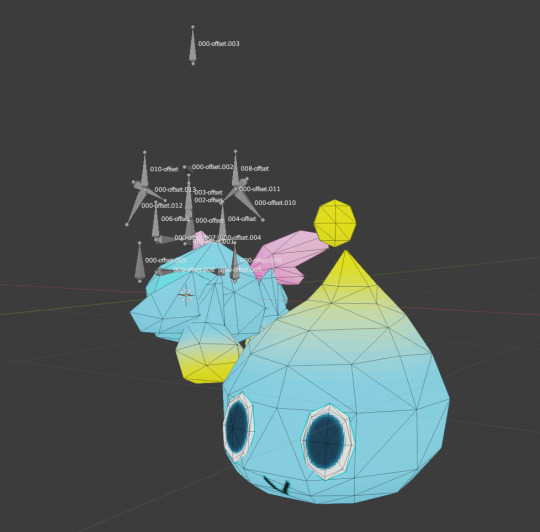
Same rules applies to this rig and any future rigs but one thing that did help was the ability to import animations and use them as a reference while placing the new model in the same slot. Course, you could still use the model that came with the rig but you get an idea on how it'll move before it's fully in-game.
Best part is since Chocola will also be sharing the same model and rig, I just had to swap out some textures and add his cute lil' bowtie. This also meant I had to make a new actor just for him and then tell the game to pull his unique model id to replace one of the normal chao in the castle. Now onto Cheese.
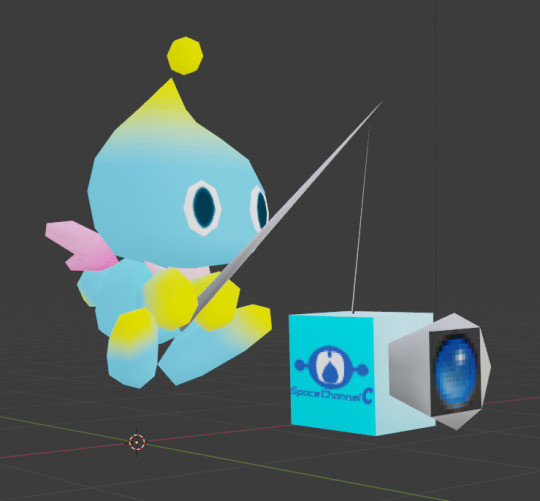
Before following you around like normal, Cheese was meant to be the Camera. While not shown, he does have his own little cloud to sit on. Thankfully, Lakitu doesn't have many animations so he was easier to swap out compared to Toad. The Space Channel 5 logo was a suggestion and just having a little fun with the model. You'll rarely see it but hey it's there!
Slow and steady but the entire bun family is now fully in-game. There's still a few other NPCs I would add to v1 but I'll get to them later, this blog post is dragging on. Next one should focus on stuff like the UI changes and finally the enemy choices, ooooo.
46 notes
·
View notes
Text
WIP of my current work! Artist: BeanniVT Model: Seleneniite Rigging: Bogiewogi(me)
13 notes
·
View notes
Text
Tutorial bliss
nothing more satisfying than going back to a tutorial that didn't make any sense to you a year ago for it to make total sense now ;.; I am watching this tutorial and last year it was ROUGH https://www.youtube.com/watch?v=u4GKx8JvMOo
1 note
·
View note
Text
First post on Tumblr 😁 I’m Brendan, a 3d animator and artist.
13 notes
·
View notes

Video
I animated the person! character by @mueller_akiko on twitter sword by FedeOde on sketchfab https://t.co/iITv4eYmbN
6 notes
·
View notes
Video
I animated the person! character by @mueller_akiko on twitter sword by FedeOde on sketchfab https://t.co/iITv4eYmbN
6 notes
·
View notes
Text


Haiiii my name is Sirrena Holmes and I am a character rigger! This is my first post on here as a professional and not an edgy pre teen haha I hope you enjoy my work!!
4 notes
·
View notes