
Stitches, Strings, and Other Things is an in-progress archive of my 2019 crafting resolution to make at least one thing a week, hopefully more! I'm also an aspiring author and hopeful letsplayer, because I enjoy biting off more than I can chew.
Don't wanna be here? Send us removal request.
Statistics
We looked inside some of the posts by stitchesstringsandotherthings and here's what we found interesting.
Average Info
Notes Per Post
4
Likes Per Post
3
Reblog Per Post
1
Reply Per Post
0
Time Between Posts
16 days
Number of Posts By Type
Text
11
Last Seen Tumblr Blogs


Fun Fact
In Q3 of 2020, 31% of US users access the Tumblr app daily.
Text
Project 9: Pink Ombre Domino Nails
The Craft: Nail Art
What I Made: Pink ombre nails with silver accents!

The Reasoning: I’ve recently gotten into wearing a lot of coral, and someone who noticed this picked up some nail polish for me! I got really excited and wanted to do some nail art to show them I was grateful. Plus it also meant I could use a dark pink I hadn’t used in aaaaages.
How I Made It: Gonna be light on the description here because it’s not that dissimilar to the last nail art post I made. First I put down peel off base coat, which I don’t actually recommend because of the step after that, which was liquid latex around my cuticle. (When I pulled off the latex, it took the nail art with it multiple times.) I skipped the step where I laid down a base coat of color and went straight into painting strips of the coral color and dark pink color onto a dollar store ‘cosmetic wedge’, and then dabbed it into the nail.

After that came peeling off the latex, cleaning up the cuticle, and doing a coat of top coat.

I’d intended to only go this far, but it didn’t quite feel done to me yet, so I decided to add some dots of silver!

The problem here was I do not have any dotting tools. What I do have, however, is sewing pins. This one was valiantly sacrificed in the name of beauty, but I’m sure it’s a worthwhile cost.

After that was just another coat of top coat, and then it was lovely and finished!
Conclusion: I love this new coral color, and would even call the person who gave it to me an angel. They definitely added to my nail collection in a wonderful way. Next I think I’ll pair this pink color with a dark forest-y green!

0 notes
Text
Project 8: Ace Heart Earrings
The Craft: Perler Beads
What I Made: Earrings! Specifically earrings using a set of perler bead hearts in a very specific set of colors. You might’ve noticed they match a perler pendant I made earlier.

The Reasoning: Well for one, I wanted earrings to match the pendant. Plus I got the idea for these while I made the heart pendant itself (They were made on the same, board, as you’ll see in a moment. Fun fact though! I went through ALL of my perler bead stuff trying to find that board, with no luck. I looked through literally every craft storage I had, finding it after a couple hours of looking.

This is my bookshelf. You’ll note the flax seed container, seed bead container, a container that used to hold perler beads but now holds glittter, a label maker, and even some vaseline for some reason I forget.
As well as a little silver toy pot I use for sorting beads, sitting nearly flush with the top of the inside of the bookshelf. This is where the board was hiding.

Be better than me, folks. Don’t hide your supplies from yourself.
How I Made It: I started by mocking up one of the colors on the board, making one tiny heart. I started with black, but this process basically worked the same for all four colors (and all eight hearts). Lay out the beads,

Then I used the iron and wax paper to carefully melt them, inserting a toothpick into one of the holes to make sure it’d be large enough for a jump ring later on. This was not only a pain, but done insufficiently as I’d find out later. Also I did it on the side for an angled heart look, but I should have done it one hole over, on the top corner, so that it wasn’t just sideways.

Then I took the eight hearts and laid them out how (I thought) they’d lay out on the earrings. I did alternating sides for the holes to try and conserve space, and tried to use the most attractive side of each one, though that bottom right purple was simply hopeless, and I was running out of that color so I couldn’t do a second attempt. I caaaarefully spent way too long sliding jump rings onto these. I actually had to do this over a couple days, it was so hard.

Next was selecting the chain I wanted to hang them on and the earring hooks I wanted to hang the chain. I made two terrible decisions here, and ended up sticking with one of them. First, I had only two chains, this one of a big brass colored one. This looked better with the colors, I thought, but I discovered that the chains are WAY too small. I’d spent up to ten minutes on each jump ring trying to get it on and closed without dislodging it from either the chain or the heart. I also picked out some earring hooks that supposedly closed, but when I tried them on and trying closing them, they were such shoddy quality that my ears stung for two days afterwards from pinching and prying and trying to get them on.

So once I’d managed to fight all eight of the hearts onto the chain, it came time to put the chain onto a jump ring to slide that onto the newly selected, much less painful hooks. That didn’t work. At all. In the end I opened up the hooks themselves and slide the chain onto that, somehow managing to get it closed again. I’m sorry there aren’t any pictures of this, at this point I was basically in tears losing my mind trying to work with this chain. Never. Again.
Conclusion: Literally no step of this process was as easy as I’d thought it’d be, I even sort of burned them on the perler bead step. I still like them, though, even if they don’t quite look how I’d envisoned. Plus, like when I made the pendant and got the idea for these, I got an idea for a new set of earrings while making these! Spoilers for that since it might not happen if I can’t find the stuff, but image card suit earrings like this?

Anyway, now all that’s left is to find a chain for the pendant. Probably won’t actually wear them at the same time, but at least they look cute together anyway!
0 notes
Text
Project 7: Blast of Cass Art
The Craft: Digital Art
What I Made: I made an endcard and thumbnail art for the Annual Blast of Cass, my letsplay channels anniversary event. There’s not many progress shots of this one, since I sort of made it in a late night, soda-fueled rush.

The Reasoning: Well every year I go with a firework theme for my channel anniversary, as a sort of new years vibe. This year was no exception.
How I Made It: I started with a watercolor brush, painting lines and swirls of a bunch of high saturation colors, going over themselves and blurring them with the blurring tool.

Once this background was set, I went on a layer on top of it and filled the whole screen with dark purple. (This specific shade is one of the cornerstone colors of my channels brand!) I switched to the eraser tool and in multiple sizes, shapes, and textures I erased lines to make the ‘fireworks’. After that I clicked ‘preserve opacity’ so that the erased parts stay erased. I then added lighter blues and purples around the edges of the erased fireworks, and blurred it in. This helped them look like they were glowing, adding a light effect.

After this it was just a matter of taking the twitter and discord symbols and words from my paint.net program and copying them into this one. (The empty spaces will be filled in with links on the actual video).
I also made a thumbnail base for the videos in a very similar style! (Bastion is the game I played, and that logo is not my work).

Conclusion: I needed to make this art for my channel but I’m glad I did, and I’m really glad to be able to see how my art has changed from the last two years. Hopefully I’ll see an even greater improvement in next years Annual Blast of Cass art!

0 notes
Text
Week: Weak
I’ve finally missed a week, and looking at the last two weeks, I barely scraped by there. I caught a cold, had lots of work, and only seem to have more stretching out in front of me. I haven’t been able to work on anything substantial cause I’m so focused on finishing things in a certain time frame. Instead I’m adjusting the goal: no longer by week, but 52 projects in the year. Some will take longer than a week, some won’t, and I may not finish by the end. That’s all okay.
I hope no one minds the adjustment, but I’m burning out instead of tapping into inner creativity, and that’s not how I wanted this to work. The past posts will remain unedited but from now on it’ll say ‘project’ instead of ‘week’ at the top. And hopefully, we won’t see anymore ‘weak’s up there.
0 notes
Text
Week 6: Ombre Nails
The Craft: Nail Art
What I Made: Ombre nails with accent striped nail.

The Reasoning: I wanted to try and dabble in something a little less long-form than my usual crafts. Usually once I make something I have to find it a home or a use to justify it’s space. With nail art it’s here until it wears off and then it’s gone again! Plus I do my nails so infrequently I might as well throw em up here. ((Also I’ve had a cold so my creative abilities have diminished. Hence why this weeks post is also late, though you’ll have to take me at my word that I finished the craft on time.))
How I Made It: The first step was putting on some lotion, because it’s winter here and my hands are comically dry even without nail nonsense. This is the one I used, I found it recently and it’s pretty in your face mint. Just how I like it.

Next was painting down the base coat on each nail. I decided to do my left hand in purple and my right in green. For the base coat I chose the pastel version of both. This is because I wanted it underneath, as the stripes through the darker polish, on the accent nails.


After the base coats were down it was time to do the accent nails. I cut off several strips of striping tape, really really thin tape specifically for nail art, and laid them on a diagonal on my nail. If I did it again I’d probably go for a suns rays radiating outward look instead.

Quick pause to talk about the fact that at this point I couldn’t get the nail polish bottle open! A trick I’ve found that works for this is taking a hair band or rubber band and wrapping it around the top a few times, for that small bit of extra resistance. It does wonders.

After the striping tape was in place and the nail polish was actually open, it came time to put down a coat of the dark color. I did one thick coat, since I couldn’t wait for it to dry and put down a second coat.

Now the trick is pulling the striping tape off while the top coat is still wet, to get neater edges. The problem I found was that I forgot to put a top coat down between the base polish and the dark one. This meant when I pulled up I actually lost some of the under polish. I fixed this by dipping a toothpick into the polish and carefully dabbing it on where it should have been.

Then I did the same thing on the other side for the green nail!

Then I put down a protective covering over my cuticles and fingertips so that when I did the ombre it wouldn’t get all over them. Usually you’d use liquid latex for this but since I didn’t have any on hand, I used my peel off base coat. This works since it’s glue based. I’ve also just flat out used elmers glue for this before. Really though of all of those the liquid latex performs the best.

Drying times sure took a while with this though so I did it one hand at a time. For the ombre I used a makeup sponge, the little wedge kind, and painted a stripe of dark and light nail polish. The stripes were thin but heavy on the polish, because the sponge absorbs a lot. Then, to paraphrase Simplynailogical, it was time to dab dab dab. I repeated this process until I got coverage that I liked. It was surprisingly hard, the pastel purple was trying to overpower the dark one.

Then I just did the same thing to the green hand!

After that all that was left was to peel off the glue from my fingers and add a top coat once the ombre dried.
Conclusion: This was definitely a lot of fun and I enjoyed doing it, but it took a lot longer than I expected. I really like pairing these pastels with their dark metallic counterparts though and will definitely be doing that again sometime soon.

0 notes
Text
Week 5: Pendant
The Craft: Perler Beading
What I Made: I made a pendant this week, hopefully to be used in something later on but for now just a nice stand alone project. Using perler beads to make a pendant was a neat touch and something I’m hoping to do more often. You might notice that this is being posted late but I made the project on time! Cutting myself a little slack here because I had a busy week.

The Reasoning: As I said, this week was really busy, and I wasn’t feeling too well. I didn’t want to bite off anything too difficult, so I decided to make some earrings from perler beads. I’ve done this before and really liked it because of how lightweight they are. When I sat down to make the earrings though, I found myself making this instead. When I tried to force it into something earring sized I just didn’t like it.
How I Made It: The first step in anything perler bead is going through all my beads and picking out the colors I wanted to use. This process actually happened a few times, I just couldn’t decide what colors to use. I even tried getting suggestions for inspiration but it only blocked me in farther. Eventually I found the colors I liked and decided on a perler board, in this case a heart. Then came putting the beads down until I liked what I had.

After I had the pattern planned out I used my iron on a medium low heat and melted the top down, covering the beads with a bit of wax paper. I peeled it off of the board while it was still warm and carefully used a toothpick to poke a hole through one of the currently melted closed holes. After all, this is a pendant, I’ll need something to fit a jump ring through later.


Then I melted the other side and repeated the toothpick trick. This didn’t quite make the hole as wide as I’d like, but I didn’t have anything else on hand and I’m pretty sure it’ll still be big enough to do the job.

And as simple as that, I had a pendant! The real time sucker for this project is definitely the first two steps, picking the beads and placing them. Once you finally have something you’re happy with it only takes a few minutes to melt it into permanence!
Conclusion: I’m pretty happy with the pendant, and part way through I thought of a way to make some matching earrings, which I might do as a project later on. If I make this into a necklace I’ll count that as a separate project, after all, this took me a couple hours all on it’s own!
Also, if any of you eagle-eyed folks out there noticed the theme I used with the colors, let me know!
0 notes
Text
Week 4: Ear Warmers
The Craft: Crochet
What I Made: For week four I wanted to whip up something quick, and decided to make an ear warmer! Seemed simple enough. Oh, if I only knew...
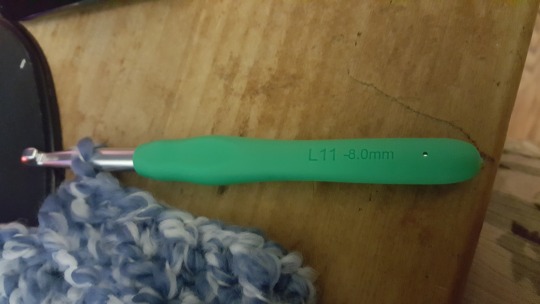
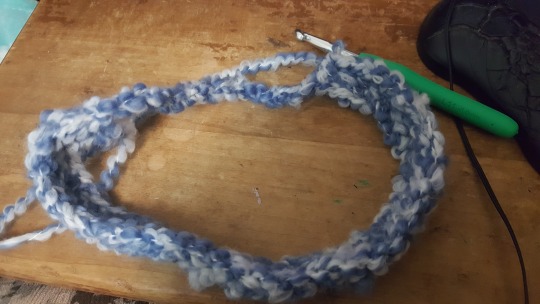
The Reasoning: Well this week I have several shifts later at night than usual, and walking through January weather isn’t the warmest thing. Plus I had some yarn that I couldn’t fit in the suitcase where I currently keep my stash, and I bought new crochet hook meaning I finally had one big enough for the super bulky yarn! Use up the excess yarn I hadn’t been able to yet, and get a useful accessory in the process. Seemed like a win win!
How I Made It: Well lets be honest here. It actually took me several tries.
Attempt #1: I took the super bulky yarn and chained it to the width I wanted, using a size L crochet hook, then double crocheted down until I had the length I needed for it to fit my head. I wanted a twist in it, so I twisted it once before I joined up the sides with slip stitches.
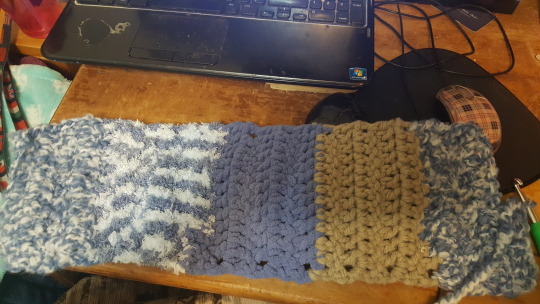
Trying it on I expected it to be done at this point, quick, simple, soft, warm. Unfortunately I not only didn’t like how it looked in general with the twist, but because I decided to crochet it width onwards, the way this yarn changed textures meant the different kinds of yarn didn’t really flow into each other well here. So I unwound all of it and started again.
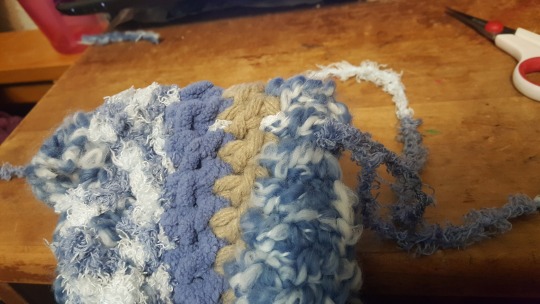
Attempt #2: This time I decided to chain a loop to the size for it to go around my head comfortably, and then double crochet in the round until it was the width I wanted. I gave up on the twist idea entirely, in favor of another thought I’ll explain in a moment.
Once I had it wide enough to cover my ears I really was glad I’d changed my style, because this pattern of the changing textures not only looked better but it felt more uniformly warm.
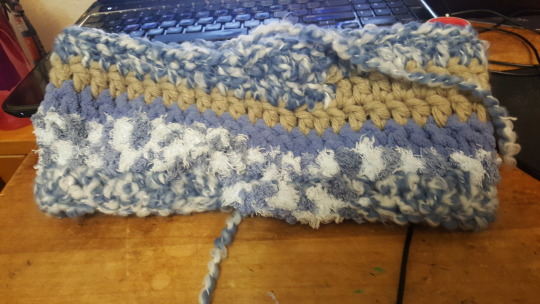
I took a moment to weave in the ends of this larger part of the ear warmer. Next I chained only a few, and single crocheted several rows to make a long but skinny rectangle. I intended to use this to cinch in the front of the ear warmer, instead of putting in a twist.

I wrapped it around the large circular part of the ear warmer, matched the short ends, and slip stitched them together. I chained one, pulled through, trimmed it off, and weaved in my ends. I then carefully turned this little ring inside out so that the slip stitches were hidden between it and the larger ring.
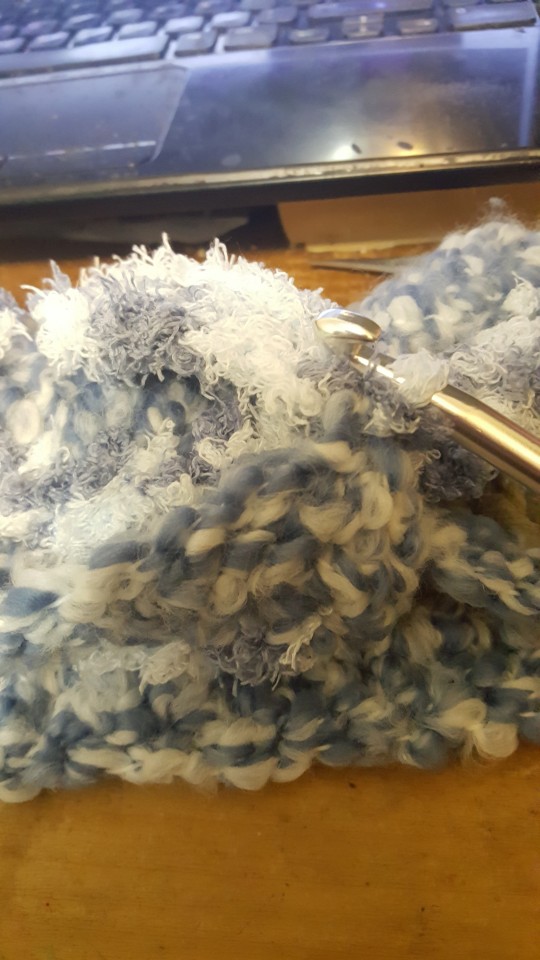
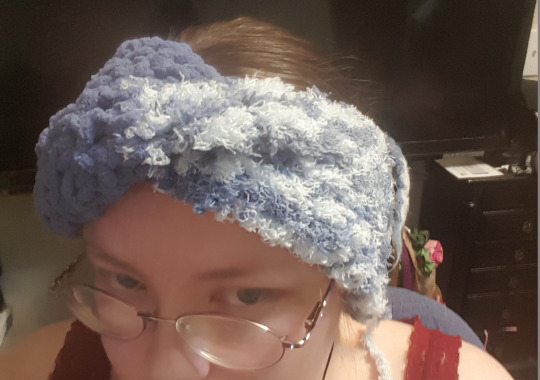
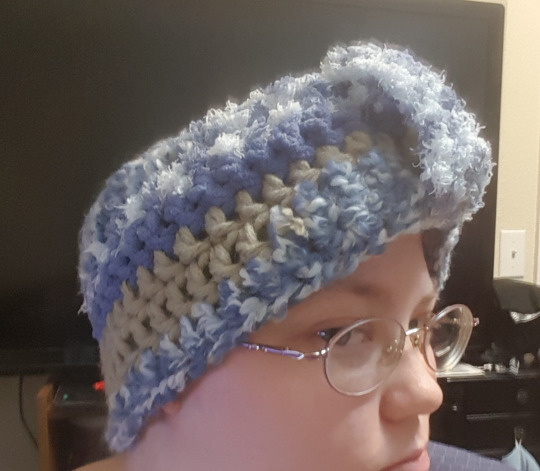
It was at this moment that I took second to try on my ear warmer. It looked decent, though the front bit didn’t do very much cinching, instead stretching far more than I hoped. And speaking of stretching more than I hoped...
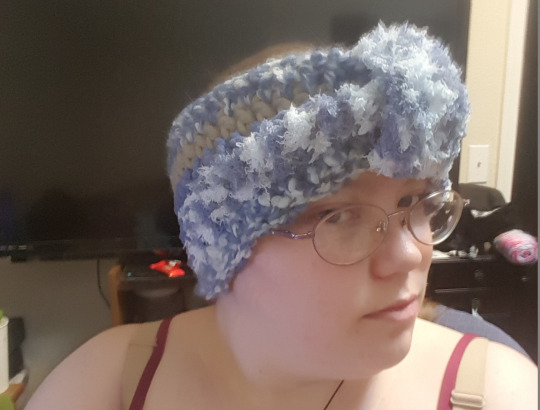
When I took off my glasses, the whole thing slid very easily over my eyes. Despite checking the fit multiple times while making it, I somehow ended up making it way too big. In basically every way.

But surely, not all is lost! It’s time for:
A Patch Job!
So I attempted to just sew a line down, making the ring smaller. I then folded this excess ‘fabric’ over and slid the cinching cuff over it to hide the fix. I did this three times, testing the fit before I tied off any ends. The first time, it was too loose still. The second I actually made it too tight and the cinching cuff couldn’t hold the excess. The third I found a nice medium. Truly, a goldilocks situation for sure.
Surely, SURELY I had fixed it. My quick ‘whip it up and use it’ project had now taken two days, and much of my sanity to fix. I had a late shift that night and was hoping to finish this before work so I could actually use it. I tried it on, hopeful.
And discovered I had what my brain can only refer to as ‘a rhino horn’. Plus it wasn’t even covering all of my ears without falling into my eyes STILL. At this point I assumed my failure to success was the fault of the super bulky weight yarn, and threw the whole thing to the side and headed to work, my ears still chilly. The next day it was time for
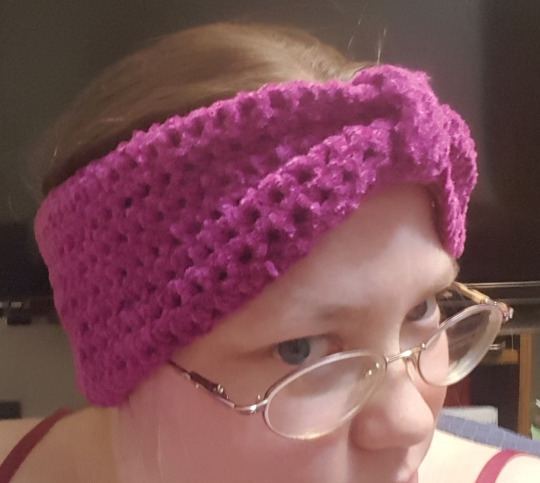
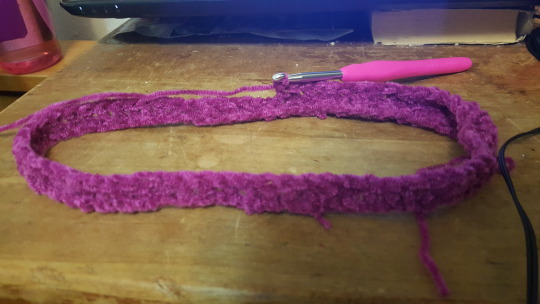
Attempt #3: Which, spoilers, is the magenta yarn you might’ve noticed in the ‘what I made’ portion of this post. Same as last time, since it did work in theory but turned out too large, I made a chain, slip stitched to the first chain, and double crocheted in the round. For a WHILE. Since this yarn was much smaller it took a lot longer to get the width I wanted.
Not as many pictures this time since it’s essentially the same as last time. Crocheted a large circle, and then a tiny rectangle to cinch in the front. Wrapped the small around the large, slip stitched it shut, turned the small one inside out, and tried it on!
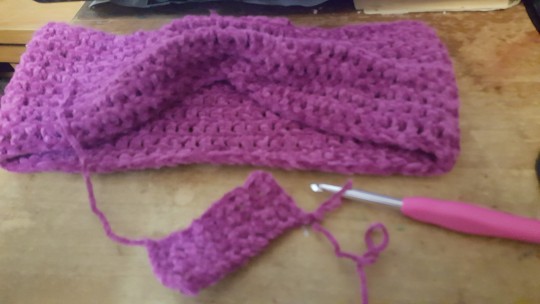
At this point I’d finished two, unraveled one and altered the other, other attempts. I was ready to be done, even if it wasn’t perfect.
Conclusion: I made it just wide enough to cover my ears, but the cinching bit either wasn’t wide enough itself, or it just didn’t work right. If I have the ear warmer at an angle that covers my ears, it falls into my eyes. Plus this yarn was way less soft than the first, some weird yarn I got in a bag at a thrift store for cheap. It sort of like a pipe cleaner without the wire, to be honest. My conclusion is that this craft? Didn’t work out for me. I stored the first one (in the multi-textured yarn) away to unravel to use for something else, maybe a soft scarf. The second one, I actually gave to a coworker on an impulse. (since I DID wear it on my walk to work to give it a genuine attempt, before dismissing it). It looked REALLY cute on them, and so I’m glad I made it, but I’m even more glad it’s not still floating around my stuff. I think this yarn would be better for a bag than something I wear.

1 note
·
View note
Text
Week 3: Three String Necklace
The Craft: Beading
What I Made: For week three I actually started a different project and then realized I’d run out of time before finishing and cranked this out in a day instead! It took me longer than I thought it would since I have to finish beading in one sitting.
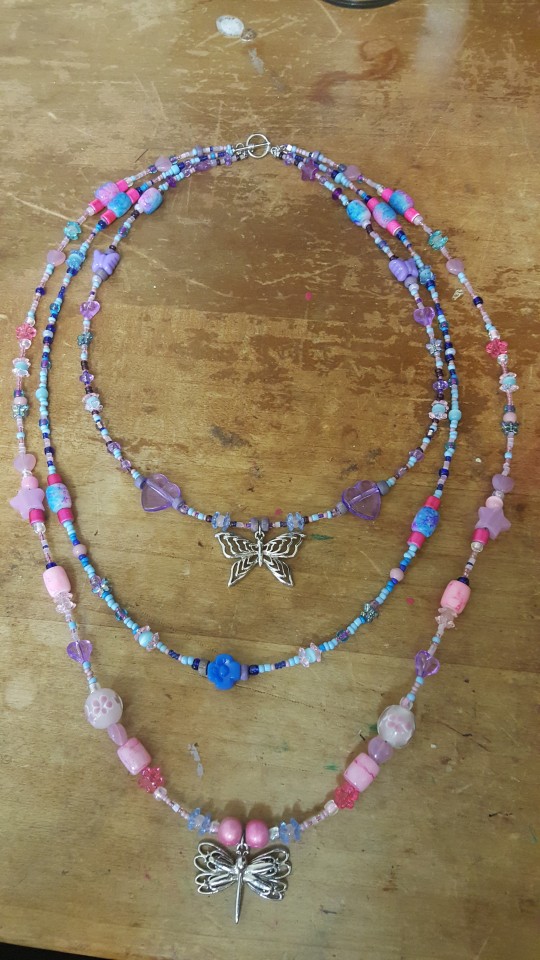
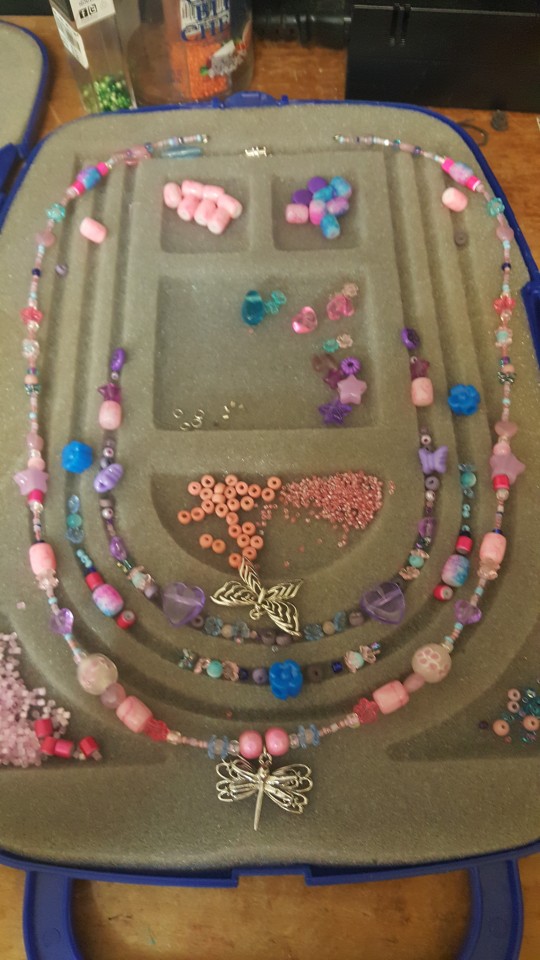
The Reasoning: I’ve actually got a LOT of beads that I hold onto for ages and ages without using, and I wanted to try and use some of them. Specifically, I wanted to use the butterfly and dragonfly centerpieces in some way together. I’ve always really liked them, but couldn’t commit to an idea. I decided to make it a three string necklace because I don’t have any, and I liked how many different colors I could use.
How I Made It: First I had to actually get out all the beads that fit the color scheme and style that I was after — specifically Pink, blue and purple. I’m only now as I’m typing this realizing that’s the colors of the bi flag, even though I put them in the wrong order. I’m not bi, but my best friend is! I’m glad that wearing this necklace will remind me of her now.
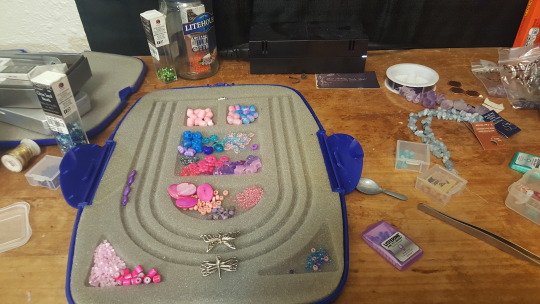
After I had all the beads I wanted to use either on my desk or near at hand— I actually ended up digging out a few more shortly after I took this photo— I had to start planning out what strings would be which colors. You might notice I’m using old containers for Listerine strips to hold beads I only have a small amount of together! I really like this and recommend it to anyone who beads.
At this moment I realized I didn’t have nearly as many purple beads as I thought I did, so I had to change purple to be the shortest strand with the butterfly. I had a LOT of pink beads, so that decided which went with the dragonfly, and left blue in the middle. The hardest part of that was finding a bead I liked for the center piece that went with the dragonfly and butterfly but didn’t outshine them. I’m pretty sure the blue flower does that.
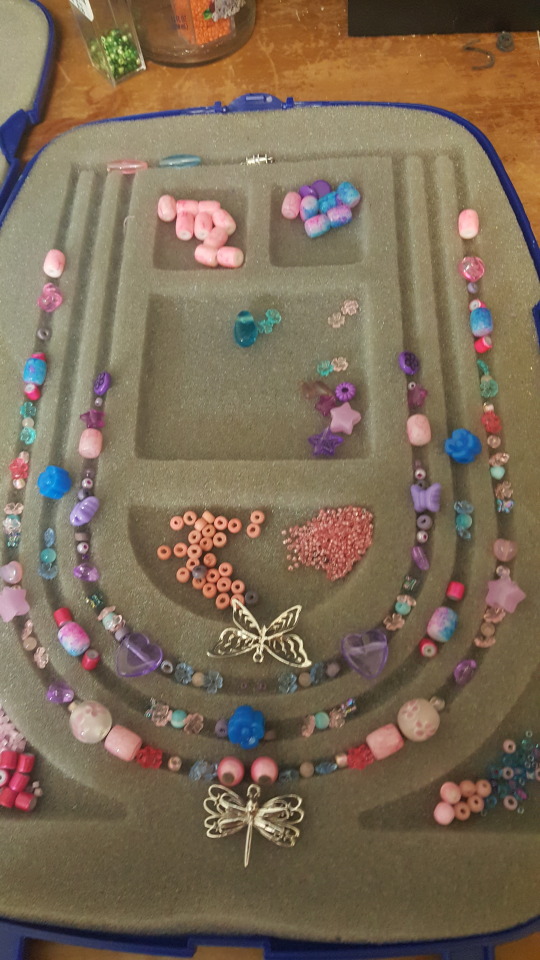
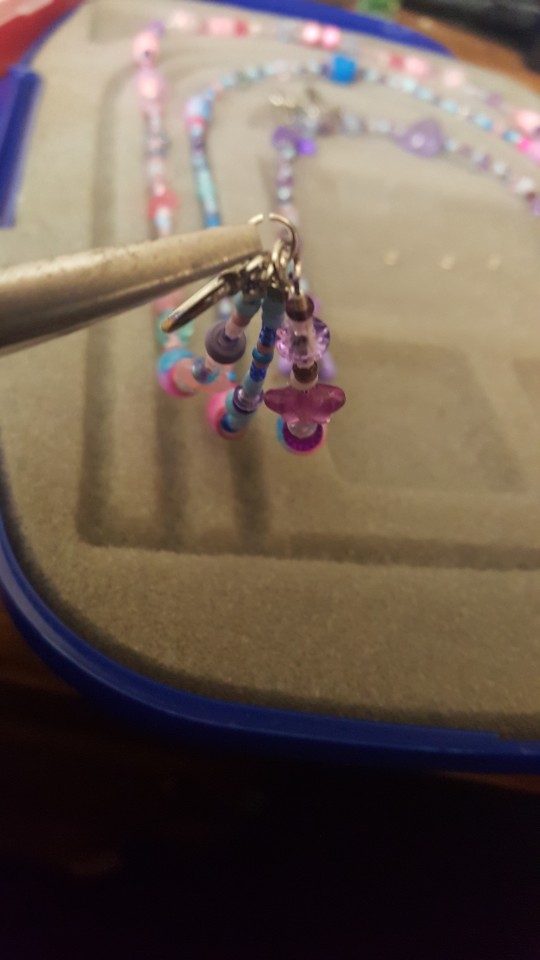
Once I had all the bigger beads planned out I got a long strip of my purple jewelry wire and started threading beads on, starting with the center bead and putting the mirroring ones onto both ends at the same time. I actually did something new this time, and didn’t pre-plan all the tiny seed beads that I used to but space between the large ones I wanted to shine. It gave me more wiggle room as I created and is definitely something I’ll do again. With the colors I decided that each strand would have some of all three but a clear primary color. I’m not sure how well that worked with the blue or purple strands in the end though, as I discovered I didn’t have nearly so many options with those seed beads.
At the very end I put on a crimp bead — a small metal bead that you flatten with pliers to hold the ends of jewelry wire together or keep beads from moving out of place— and a jump ring. I threaded the wire back through the crimp bead and a few of the beads on the end, pulling it tight and clamping the crimp bead down, and trimming off the excess. I did this to both ends!
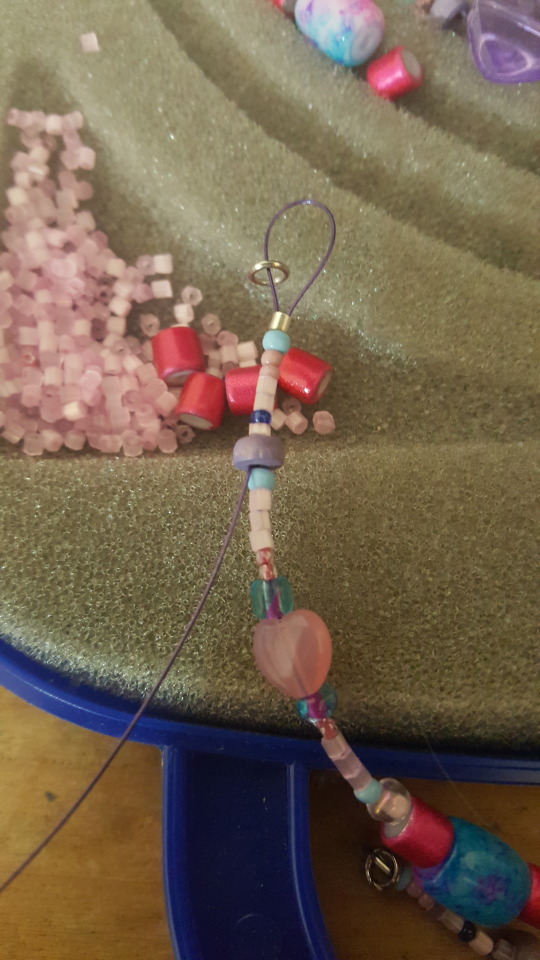
That meant one strand was finished!
At this point I realized I didn’t really like those two big pink beads being RIGHT next to the dragonfly but it was way too late to change it and I really like the rest of the necklace, so that’s one hiccup. Always look at the beading work very critically the entire time, so you don’t feel locked into an early decision! I actually took a food break here because I’d already worked for several hours to get this far, but the next two strings were shorter and hopefully quicker, right? Well... they were shorter.
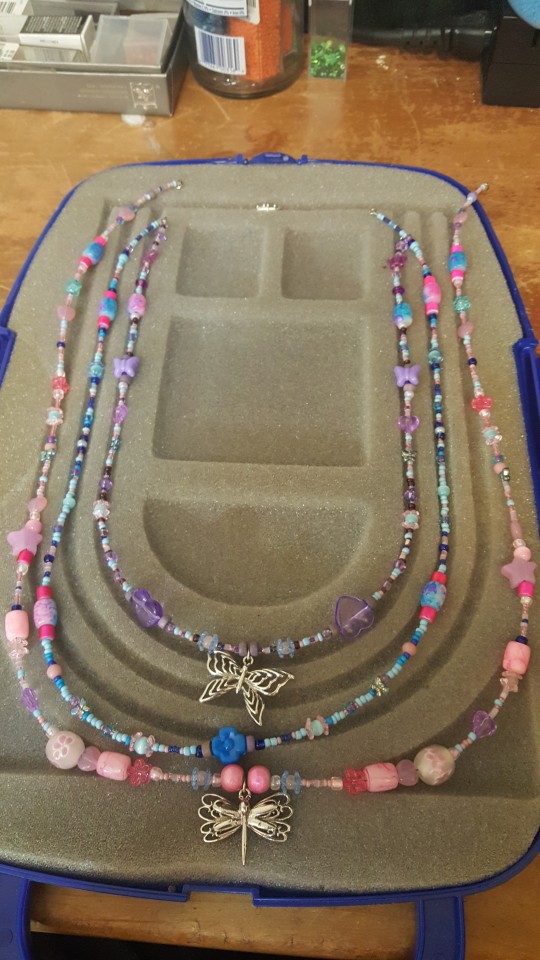
So now I had three necklaces without a clasp, waiting to be combined together into one mega necklace. I opened a jump ring, slid one half of the clasp — an x and o clasp that I find really easy to manipulate— and then one end of each of the three strands onto, in order of length. Then I closed the jump ring and did the same to the other side with the other half of the clasp.
Conclusion: I really liked making this, even if it took longer than I thought and doesn’t perhaps look quite like I imagined! It’s heavier than the jewelry I’m used to, and I’m not sure what I’ll wear with it, but it’s waiting in my jewelry case to be used! If I don’t end up wearing it as is I can still open that last jump ring and give each necklace it’s own clasp, meaning I could choose to wear just pink or blue or purple instead of all three! I definitely missed beading, but remembered why I don’t do it very much. It’s an all or nothing sort of project— once you start you can’t really stop or you lose your progress and carefully selected bead pattern.
1 note
·
View note
Text
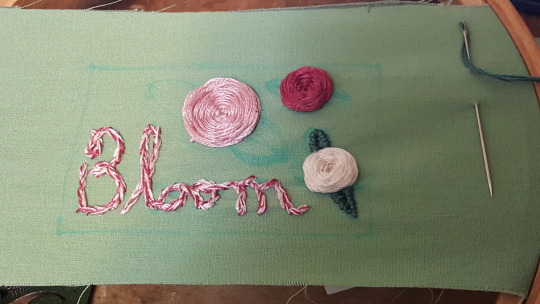
Week 2: Bloom Embroidery!
The Craft: Embroidery.
What I Made: For the second week I wanted to try out something new and easy, so I made decorative embroidery with ‘Bloom’ and three roses. I’m not yet sure if I’ll keep this and display it somewhere, or give it to someone else who also needs the reminder like I do.

The Reasoning: I had stumbled across a new tutorial for rosebuds a few weeks ago, and really wanted to try it out. I wasn’t ready to commit to embroidering them onto something in use a lot, or onto something a lot, so I dug out a frame I’ve ALSO been trying to find a use for for quite some time. It’s only 2″ by 3″ so it never seemed large enough to use for my more ambitious embroidery presents, and always got ignored. It’s pretty heavy duty quality though, and I got it from goodwill pretty cheap in a bag with some candles I’d actually wanted. I’m super content not just with the embroidery, which turned out SO much nicer than I’d hoped, but also with using something I’d never intended to buy.
How I Made It: Firstly I went through my embroidery floss and picked out a green and three colors for the roses. I debated using variegated floss that would change colors, but in the end settled on colors I thought suited the silver of the frame. Then I dug through my fabric for entirely too long to find every green fabric I had— and some blue contenders as I considered using that instead— and compared them to the frame and the floss. In the end I wound up using a scrap of light green fabric that was still sitting on the top from when I made Christmas presents. Go figures, right?

I actually also splurged using some Christmas money from my Aunt to buy something I’d wanted for a while, a water soluble marker! It really was a godsend on this particular project, and I wish I’d had it for so many embroideries of the past. Oh well, live and learn.
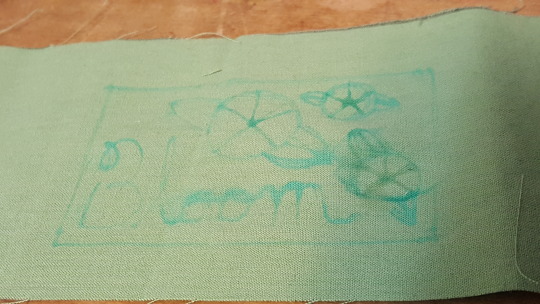
Once I had the fabric picked out, I traced the opening of the frame onto it using the marker, so I knew how much space I had to work with. I then took the little paper inside the frame (the one that had the stock photo in it), flipped it over and sketched my general idea onto it in pencil. Once I finalized this, I did my best to mark it down on the fabric using my fancy new pen. ((Note: I did test the pen before this to make sure it actually came off with water. Handy dandy spray bottle go!))
Then I popped the fabric into my smallest embroidery hoop, tight as I could get it, and using the tutorial referenced by Annika Victoria in this video I did the three rosebuds. When intitally sketched the red was supposed to be the smallest but in the end it turned out only slightly smaller than the white. I think the smaller rosebuds turned out better but I still quite like them. ((Can you guess the order I embroidered them in?))

Next came Bloom, where I decided on an impulse to use the three colors of the roses woven together. I threaded one strand of each color and doubled it over, knotting the end. (Like Annika does in her video) This left me with six strings, two in each color. Oddly the white got sort of overshadowed. This is the only part of the project I’m not sure I’m happy with? I’m glad I did it, and I like the effect, but I wonder if it wouldn’t have looked better with solid green like the leaves, like I originally intended. Either way, for Bloom I used a split stitch, my favorite stitch for words because it lends itself to cursive very well.

I got as far as one set of leaves— done with a satin stitch and the previously mentioned green thread— before my body finally reminded me that not only did I have a cold but it was also late at night and I hadn’t eaten yet. So I made myself stop here, quite remarkable since I tend to try and do projects in as close to one sitting as possible.
The next day all that was left was the two other sets of leaves, and then using water to remove all the marks. As someone who used to use faint pencil marks, and then tried to embroider over them as much as possible to hide them from view, this part was basically magic. It also meant I could change my vision halfway through without leaving pencil marks of shame.

All that was left after that was popping it into the picture frame and cutting off the excess fabric! I actually put it fabric first, glass behind fabric, and then the back of the picture frame. Typically I’ll put the glass in first to protect the embroidery, but the adorable 3-D effect of the rosebuds could NOT be diminished. It was not to be allowed.

Conclusion:
I used a picture frame I liked but never loved, a fabric scrap that might’ve just ended up as stuffing, and got not just a beautiful little inspirational message but also practice at a new technique I can definitely see myself using more! It’s currently hanging out on my bookshelf with my craft supplies, but it might graduate to my decoration shelf if I dig out my step stool. It looks very sweet and regal and I’m content with it. Especially considering how much dayquil I was on while I made it!
0 notes
Text
Week 1: Face Scrubbies!
The Craft: Crochet!
What I Made: So for the first project of my Crafty Resolution, and thus the first week, I crocheted a set of face scrubbies, which are essentially tiny wash cloths specifically for washing your face. I’ve been having trouble remembering to wash my face, and I thought these might help, and might be a cute little addition. Plus, it meant I didn’t need to buy wash cloths, so it saved me money and used a craft supply I already had!

The Reasoning: I decided to make circular scrubbies, slightly harder but immensely cuter to me. I started off making two large ones but by the time I finished the second one I thought they were maybe TOO large, and instead made a tiny one. This seemed a lot more like what I was after, so I made four more, for a total of seven. With two large scrubbies and five small ones I figure this is a great sample to see if this works for me, and if it does, I may make a large batch later on!

How I Made It: I used 100% cotton yarn because that’s supposed to be softer on the face, easier to wash, and I had a butt-ton of it from a bag of yarn I got from goodwill. The specific yarn I used is Peaches and Creme in the color Limeade. I used a us size H (5mm) crochet hook, and started with a magic circle. For the first three rounds on the large scrubbies and the first two rounds on the small I followed Bella Cocos Tutorial on a flat circle .

For the first round I chained three, did eleven double crochet (treble by her UK terms), slip stitched into the top of the chain three, and then for the second I chained three and did two double crochet into each of the 12 stitches, counting the original chain three, until I had 24 stitches, then slip stitched into the top of the second chain three. (She really does explain this better.)
For the large size I chained three and then did a second double crochet into the same stitch, one into the next, then two double crochet, alternating until I had 36, then slip stitched to the top of the chain three again, and this time I changed up from Bella Coco’s tutorial. I chained two and did single crochet stitches, two in the first stitch, then two stitches with only one, then two in the third stitch, repeating the pattern of 2 single crochet, crochet single crochet twice, until I had 48 stitches, slip stitched into the top of the chain two, chained one, snipped the yarn, pulled through, and tied it off. Then I threaded in the ends.

For the smaller size I instead did single crochet for the third round, where it alternated 2 single crochet and 1 single crochet every other stitch, and then chained one and pulled through like at the end of the large one.

Conclusion: I now have seven face scrubbies that are soft and nice to touch! I haven’t tested them with soap yet but I did give one go with water a try once I finished. And oh MY GOD. They’re gentle while you use them but left me with a tingling faintly scrubbed feeling afterwards that left me feeling SO damn clean.

And even after scrubbing vigorously, there was no sign of wear or tear on the cotton yet!

All in all, I’m really happy with these. And so far, with my crafty resolution! I’ve been wanting to try making face scrubbies for a while but hadn’t had the chance or the energy, and this prompted me to find the time and energy. It’s also got me excited thinking about what to make next— Guess we’ll have to wait and see!
1 note
·
View note
Text
An Introduction!
Hello! If you’re here, you’re probably curious what Stitches, Strings, and Other Things actually is. Long story short? It’s my new years resolution. Short story long? Last year my new years resolution was to get rid of, use up, or give away at least one item a day. I kept track of this in a bullet point on a google doc, and not only met, but exceeded my resolution! Since I focused on having less last year, for 2019 I wanted to focus on using what I already own, but better.
In general I do a lot of different kinds of crafts, but I tend to switch to one and stick to it for months, ignoring all others. I’m trying to break that habit with— you guessed it!— this years resolution! The goal for 2019 is to finish at least one crafty thing a week, and not to repeat the same craft two weeks in a row. I could have kept track of this in a fancy google doc excel sheet, but I decided I wanted to make it more fun, and have a photo documentation of my journey!
And that brings us to Stitches, Strings, and Other Things, the blog to archive my crafty 2019 New Years Resolution. Since it’s up and running, I might be throwing up other crafty things on here- like progress photos of crafts that take more than one week, or goal lists, or maybe throw back Thursday posts to crafts I’ve already made before! Let me know if there’s anything you’d actively like to see! The general plan right now is to have a post up by every Saturday with what I made that week, as I consider weeks to start on Sundays. Some weeks it’ll be early! Some I might squeak by by the skin of my teeth. We’ll see, and thank you for hanging around for it!
1 note
·
View note