
We're SEW glad you're here! The Stitch Lab is a creative haven, for anyone interested in sewing and the textile arts, offering: • A fantastic array of classes for all skill levels, ages and interests; • Dedication to providing the ideal learning experiences with patient, fun, and highly knowledgeable instructors; • Three comfy and inspiring classrooms, fully tricked out with great equipment; • And, a retail shop of fabulous fabric and notions staffed by experienced seamsters who can actually answer all of your questions!
Don't wanna be here? Send us removal request.
Statistics
We looked inside some of the posts by stitchlab and here's what we found interesting.
Average Info
Notes Per Post
52
Likes Per Post
47
Reblog Per Post
4
Reply Per Post
1
Time Between Posts
22 days
Number of Posts By Type
Text
12
Photo
5
Last Seen Tumblr Blogs


Fun Fact
28.6 is the average number of monthly visits per US mobile user.
Text
Holiday Confetti!
Hola Stitching Babes! Happy New Year!
This is shop gal Emily Jean here to share a quick little tutorial so you can upcycle left over holiday tissue, newspapers or stacks of the Austin Chronicle you find laying around a coffee shop. 2017 is just around the corner and I don’t know about you, but I could use a little more confetti in my life.
For this project you will need:

- Whatever paper you want to reuse. I went with some left over tissue. You can fold them to cut more at a time
- A rotary cutter. I would start with a dull blade as to not wear out a freshie.
-An acrylic ruler
-a self healing mat, or a cutting board could work.
1. First you are going to want to line up the marks on your ruler with your paper. For this round, I chose to go with one inch. Cut along the right side and move along until you finish your stack.

2. Next you are going to want to complete your cross cuts. Line up your one inch stacks and again, cut at the right of the ruler.

3. Done! You know have a stack of holiday cheer you can throw while you say goodbye to 2016.

Have fun!
Love,
Emily Jean
3 notes
·
View notes
Text
Holiday Sprinkle Dot Pillow
Here’s a home decor project that I made as a holiday accent cushion (I love these colors for holiday) but they could be made for any holiday or in your favorite colors!

Supplies:

- wool felt in various colors - background fabric in a neutral or contrast (I used the Robert Kaufman linen/cotton Essex because I love the texture and the contrast with the felt and the bright colors) - sharp scissors - tracing pen - round objects in a couple different sizes - coffee (well, that’s always part of my crafting) Also your sewing machine with neutral thread, pillow form for whatever size you’d like to make, and any materials you need for the pillow finishing technique of your choice**
**I didn’t include instructions for completing the pillow; we’re just making the front of it here. For this one I used the technique we do in our classes for the centered zipper. If you haven’t done that one before you could do an easy envelope back - here’s a tutorial I came across: http://www.craftaholicsanonymous.net/how-to-sew-envelope-pillow-tutorial
Here we go!
1. Trace circles onto felt

2. Cut circles out.

I cut two layers at a time, and cut 20 of each size. Depending on how big your circles are, or if you’re doing 3 or 4 different sizes of circles, you might need more or less circles total. Lay them out and play with layout as you go to get an idea of how many you’ll need.
3. Cut your pillow front fabric. I did mine 16x16″.

4. Mark a border around all four sides equeal to your seam allowance + 1/4-1/2″ extra (to make sure your dots don’t accidentally wander into your seam allowance area).

5. Arrange your large dots in vertical columns with smaller dots on top. Smaller ones don’t need to be perfectly centered.

Pin each pair into place.

6. Using a longer stitch length, begin at the top edge and stitch all the way to the bottom edge, through the center (ish) of each dot pair. Beginning and ending at the edges will allow you to sew the ends of your topstitch lines into your seams to secure them.

7. Finish pillow back using your preferred method, add your pillow form, and sit back and enjoy the festive polka dot sprinkles!
XOXO Niku

4 notes
·
View notes
Text
*Halloween Bunting*

I’m a fan of celebrating Halloween all month long, and my favorite part is decorating my house with festive Halloween themed decor.
I made this half-circle bunting using leftover scraps from all the other projects I’d made last year; advent calendar, quilt, throw pillows, etc.
Supplies:
- festive fabric - sewing machine - bias tape or binding - fabric scissors and craft scissors - small plate or bowl - light cardboard (like a cereal box) or template plastic - pins or wonder clips - fabric marker or pen

1. Create template Trace half of the bowl or plate onto your thin cardboard or template plastic. I used a ruler to mark a 1/2″ seam allowance at the top to account for the top of the fabric piece that will be hidden inside the binding.
Tool tip: I like to use template plastic because I can center and fussy cut images in my fabric prints.

2. Trace template onto fabric and cut out your half-circles I made my bunting reversible, so I cut out a front and a back for each half circle.


3. Sew each half-circle
Place two pieces right sides together. Sew at a 1/4″ seam allowance.
Tool tip: use washi tape or masking tape to mark your seam allowance directly across from your needle to sew an even curved seam allowance.


4. Notch curves Using just the tip of your fabric scissors, cut out triangles around the curve to reduce bulk and allow the curved seam to lay flat. Turn right side out and press flat with your iron.
Optional: to keep the top edge in place, top stitch a basting stitch about 1/8″ from the top edge.

5. Sandwich half circles into binding Starting 4-5″ from the end, slide the top edge of the half circles between the binding layers. Pin into place about 1/2″ between half circles.
Tool tip: wonder clips work, well, wonders, keeping all the layers together, preventing them from shifting.


6. Stitch binding Top stitch close to the open edge of the binding, making sure to catch the under layer of the binding and the half circle. Stitch from beginning to end.


Hang up and enjoy!

15 notes
·
View notes
Text
Laptop Case Tutorial

Hey, it’s Lindsay here with a tutorial about how to make a zippered pouch for your laptop (or anything else)!
Start by measuring the circumference of your laptop (all the way around the bottom, sides, and top) both lengthwise and widthwise. Divide those measurements in half since we’ll be making two pieces. Then add about 1.5″ back to the width and length for seam allowances and ease. For my 11″ laptop I ended up with a pattern piece that was 9.5″ x 13″. You can either leave the corners square or use a circular object to round them, as I did.
Cut out two each of outer fabric, lining fabric, and batting.

Next we’ll be quilting the outer fabric to the batting. You can choose any quilting design you want - I just did straight-line quilting using the edge of my presser foot as a guide.

Now it’s time to sew in the zipper! You want it to be at least as long as the top of your case, but it can curve down the sides as much as you like. Mark the center point of all your fabric pieces on the top edge, as well as the center of the zipper on both sides of the zipper tape. This will help keep everything lined up for the next few steps.

Now, matching up the center points, pin your zipper to one of your main fabric pieces, right sides together. You can cut little snips into the zipper tape to help it bend around the curves. Using a zipper foot, baste the zipper in place.

Next, lay one of your lining pieces, right side facing down, on top of the zipper and the main fabric piece. Again using your zipper foot, sew close to the teeth of the zipper to attach everything together.

After you press your fabrics down and away from the zipper, it should look like this. Now we’ll repeat this process with the other side of the zipper. Double-check to make sure you haven’t twisted your zipper before you sew down the other side!


Your zipper should now be attached to both sides of the laptop case. For the next step make sure to leave your zipper about halfway zipped.

Open up the case so that both the main fabrics and lining fabrics are right sides together. Pin all the way around, leaving a hole of about 5″ in the center bottom of the lining. We’ll use this hole to turn the case right-side-out at the end.
Sew all the way around. Be careful near the zipper to only sew over the zipper tape, and not the zipper stops or teeth.
Trim your seam allowances at the corners.

Now you can turn everything right side out and edge-stitch the hole in the lining closed. Stuff the lining into the bag, give everything a good press, and you’re finished!


Although the metal zipper looks nice, I’d actually recommend using a plastic one. I could hear the metal scraping along the edge of my laptop when I zipped it up. *sad trombone* So in reality I’ll be using my pouch for other things: planner, laptop charger, pens, etc. Learn from my mistake!


Also keep in mind this isn’t a heavy-duty case, so still be careful with your laptop in it! If you wanted to make it cushier you could try adding fusible foam or more layers of batting (and make your dimensions a bit bigger to accommodate the extra bulk).
I hope this inspires you to make your own zippered pouches for anything and everything!
-Lindsay
5 notes
·
View notes
Text
Mending An Old Favorite

That’s me on the far right. This is one of my favorite dresses that I’ve made for many reasons--it is made from one of the first bolts of fabric I received when I opened Stitch Lab, it is a print that reminds me of childhood, I wore it to the very first QuiltCon, which was magical, and I wore it in this wonderful picture of all the gorgeous and talented Stitch Lab Gals, which makes me grin ear to ear every time I look at it!
BUT, this dress has been out of rotation for almost a year because of a rip. I was running back to the stock room at the Lab and caught the pocket on the door knob. RIIIIIIIIIIIIP! Ugh, the most awful sound! So, nearly a year later, when I spied it on top of my mending pile, I grabbed it and headed over to the Lab.

Back in my theatre costume days, I repaired tears like this constantly. This is a quick-and-dirty method, but it is really strong, fairly inconspicuous, and last and lasts.
You can’t just zig-zag the torn edges together and expect it to hold. The repair needs to happen over some supporting fabric. We’re going to make our own iron-on patch for this. You may have seen iron-on patches at the chain store for jeans, but that is wayyyy too stiff and bulky. We’re making our own so that it supports the repair, but won’t affect the drape of the fabric.
Materials needed: iron & ironing board, a small piece of fabric that matches your garment closely in color and weight, LITE Steam-A-Seam fusible web, sewing machine and matching thread.

1. Lay your mending fabric on the ironing board. Cut a piece of the Steam-A-Seam fusible webbing and lay it web side down/paper backing side up on the mending fabric. Cover the whole thing with a piece of muslin or white scrap fabric. With the iron set on “cotton”, iron the webbing to the fabric, holding it down about 10 seconds. Let it cool.

2. Cut out your patch--cut a piece of the fused fabric (leave paper backing on) that is about 1.5″ wider and 1.5″ taller than your tear. Peel off the paper backing and your patch is ready to adhere to the garment!
TIP: if you’re having trouble removing the paper backing, you can score the paper with a pin and tear it from the center.

3. Fusible web will heat up and become liquid before it cools, so you don’t want that on your ironing board or iron. Protect your ironing board with a piece of muslin or scrap white cloth. Next, lay your garment, wrong side up, on the muslin so that the tear is flat and the torn edges are brought together, but not overlapping. Now, center the patch over the tear and cover with another piece of muslin. Hold the iron down over the patch for about 10-15 seconds until adhered.


Here’s what it looks like from the front side after the patch has been ironed on:

4. Let’s head over to the sewing machine!
a. Pop the satin-stitch foot on your machine. It has a hollowed out groove on the underside that will glide easily over the “hump” created by the stitching we’re about to do.
b. Set the machine to that zig-zag stitch that stitches between each zig and zag instead of just swinging left to right. I can’t remember the name of it but it looks like #09 on my machine.
c. Set the stitch length to about 1 or 1.5, and the width to the widest width possible. We want a dense, wide stitch.

5. Starting about 3/8″ before the start of your tear, stitch down the center of the tear. End about 3/8″ past the end of the tear. Now stitch to the right and left of this center row, overlapping slightly to blend. Continue out another row if needed. You’ll want the repair to cover about 3/8″ above and below the tear.


BAM! We’re done. Again, this is a quick and dirty, but in this case it runs right along the top edge of the pocket and is barely visible unless you’re super up close, which HEY! back OFF, BUSTER!
I could have swapped out thread colors for all the different stripes, but for me, life is truly too short for that!
Afterthought: When you wash/dry this garment after the repair, sometimes the edges of the patch will release from the garment. If this bugs you, cut out your patch with pinking shears instead of regular scissors, to keep the edges from fraying in the wash. But, don’t worry if the edges of the patch come up in the washer and dryer–it won’t affect the repair and the stitches will hold firm.
I hope this inspires you to mend a few old favorites in your own stash. Please share your repairs with us at [email protected] so we can share them and inspire more stitchers!
xo
Leslie
2 notes
·
View notes
Text
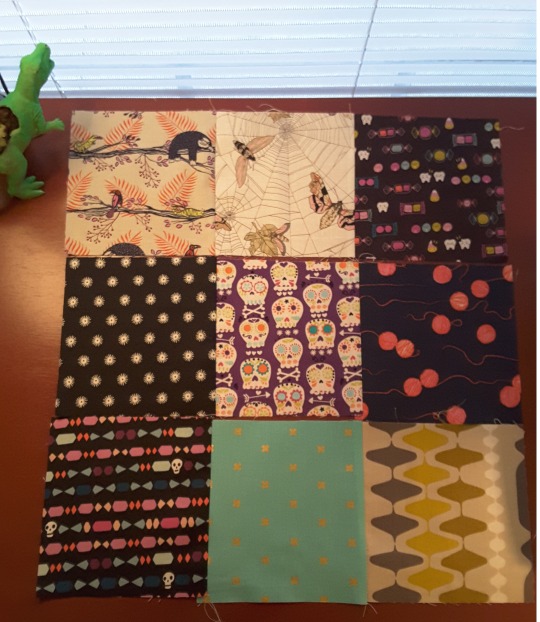
Sudoku Quilt


The idea for this quilt came to me while doing a Sudoku puzzle one evening. Sudoku puzzles are a great way to relax and exercise your brain at the same time. This pattern is a perfect for a beginners or to do with kids and can be made in a weekend! Perfect for starting those early Christmas presents!

The finished size is 48 in X 49.5 in, this would make a nice baby quilt or a nice couch throw. If you want to make it bigger consider adding sashing between the blocks or the rows.

If you don’t know how to play Sudoku not a problem check out this link!
Supplies needed:
-9 fat quarters ( I recommend that at least 3 of the fat quarters should be directional this will help you know which way your blocks go)
- rotary cutter, mat and large ruler
- Sudoku puzzle
- thread
- sewing machine
1) Find and print out a Sudoku pattern. There are many free puzzles online as well as solvers if you get stuck or want to make sure you did the puzzle correctly.
http://www.websudoku.com/
http://sudokukingdom.com/
http://dailysudoku.com/sudoku/
http://www.sudukopuzzles.org/sudoku-printables.html
After you solver the puzzle it helps to color the puzzle, label the horizontal rows 1-3 and the vertical rows A-C.

2) Stack your fat quarters in stacks of 3, make sure they are lined up.

3) Cut the stacks into 6 inch strips.

4) Then cut the strips into 6 inch squares, so you ended up with a total of nine 6 inch squares from the fabrics you cut.


5) Repeat steps 2-4 until all of the fat quarters have been cut into 6in X6in squares
6) Once all of your squares are cut separate the squares into like stacks and with a sticky notes label the squares 1-9
- I recommend taking a picture of the order with you phone because those sticky notes have a tendency to fall off.

7) Fold your sudoku paper so you are only looking at one block of the puzzle at a time. It helps to lay out the fabric in the pattern of the block you are working on.

- Start with the top row of the block and work your way down.

- Once all three rows of your block are done then piece them together. Make sure that you keep the directional fabrics going the correct way!
7) Repeat steps seven working your way horizontally until you complete the horizontal row.
8) Sew block A1 to block A2 and block A2 to block A3.

-optional: you can add sashing between the blocks to make your quilt wider.
9) repeat steps 7-9 until you’ve complete the all of the horizontal rows.
11) sew row A to row B and row B to row C. And you’re done with the top of your quilt!

Send us pictures of your quilt to [email protected] and it maybe featured in our news letter or our Instagram!
Be sure to follow us on Instagram: stitchlabatx and me : hope2getitdone.
Happy Quilting!
-Hope
5 notes
·
View notes
Text
DIY Tassel
Hey Guys! Leslie here--I have been making tons of pillows for my newly renovated home. I don’t exactly have tons of time to make my own trim, but I wasn’t finding the right color/size/style tassel to finish off these bolsters. What can a gal do, but DIY that thing? I thought I’d share how I made these swank tassels from bullion fringe trim in case you find yourself in the same dilemma. :)

You’ll need:
• about 6″ of bullion fringe for each tassel
• a large eye needle and coordinating polyester thread
• scissors
• ribbon (I started with the one pictured, but ended up with a narrower velvet)
• large-hole beads
• a few pins
• some fabric glue

The bullion fringe is made up of twisted strands of chainette. When you unravel the bullion twists, you’ll see each single strand. Just use your snips to undo the thread that holds the fringe together and it will start to unravel easily.


Give yourself about 24″ of untwisted chainette strands and thread three strands into your large-eye needle. Make sure your needle will fit through the bead holes with a little room to spare. No need to tie a knot. Bring the needle up through the bead.

Now go back through the bead, but loop the tail around your little finger as above. With the loop still around your finger, pull the needle all the way through the bead until the tail of the chainette threads come through. Set the needle down and slide the bead down the chainette a bit, so that you can tie a knot under the loop, just above the bead. It’s a little tricky, but you can do it! Just don’t let the bead slide all the way off. This is why I used such a long length of chainette to start with.


Tie another knot snugly up against the bottom of the bead. Trim the remaining chainette tail about 4″ long.

Cut about 6″ of intact bullion fringe. You can make your tassel as skinny or chubby as you like, but 6″ is good place to start on the chubby side and you can trim it off as your tassel reaches it’s desired size.
Thread a sewing needle with regular polyester thread, or whatever you have on hand. Tie a knot in the end of your thread. Insert your needle through the knot at the bottom of the bead and pull through.
Next, take your bullion fringe and begin to stitch it to the knot under the bead.

Now you’ll just swirl the top edge of the fringe tightly around the knot--about an inch at a time and slide your needle through the fringe, into the knot and out the other side of the fringe. You’ll keep that top edge of the fringe snug under the bead as you twirl. Keep stitching the fringe through the knot as you turn around and around. Don’t worry too much about how it looks, because your stitches will be covered with the ribbon.


Tie a knot when you’ve finished your desired tassel thickness. You can cut your original chainette single strands short. At first I was just going to leave them the same length as the fringe, but I didn’t like seeing them, so I just trimmed them down to about 1/2″ below the bottom knot.
Cut about 2″ of ribbon--mine was 3/8″ wide. I used fabric glue to glue my trim to the top of the tassel, covering all my stitching. You could also just stitch the ribbon on by hand.
I put a few pins in to hold the ribbon while the glue dried.


After the glue dried, I was ready to attach my custom-made tassels! I used a curved needle, tucked the tassel top loop into the center gathers of the bolster end, and stitched the top knot of the tassel into the center folds of the fabric.
I love my new window seat, and the tassels give me the Liberace glam I was going for in this 21st century take on a 1960′s take on 18th century decor. So. Meta. Let me know if you make some tassels!

0 notes
Text
DIY Rainbow Ombre
Hey Internet! It’s your friendly Lab Gal Stephanie :) When I’m not helping customers pick out the perfect fabric for their next project you can find me dreaming about rainbow zebra unicorns. I wanted to stitch up a special, breezy summer dress in my favorite color - RAINBOW - so I took to dying my own fabric for an extra special unique look. With only three colors you can get a complete ROYGBIV rainbow of colors, it is super fun to play around with, I chose to use all three, but if you love cool cool colors you could do a yellow -> turq ombre or yellow->fuschia ombre for those that love the warmer range.
Project List:
Procion dye in Turquoise,Lemon Yellow, Fuschia
Synthrapol
Soda Ash
Test Fabric
Final Yardage
Rubber Kitchen Gloves
4 tubs (I found some really nice flexible tubs at the $1 store!)
drop cloth/old shower curtain/etc
The process:
IMPORTANT NOTE - I went through the dye process a few times with TEST material, fabric similar to what I was using. I started with small strips to get the color down then moved to yardage to get the process down, I highly recommend doing this before using any “final fabric” as dye is permanent and the learning curve is steep.

I had a seersucker 100% cotton fabric and a pattern I knew I wanted to use, so I sketched out the pattern and laid out how I wanted the ombre, the “pucker” note is a reminder for me when dying on how I want the seersucker lines to be oriented; get creative here by cutting your pattern on the bias, adding style lines, etc.
In my test dyes I found it easier to work with smaller pieces of fabric so I laid out my material & pattern to get a rough idea of how much to cut for each pattern piece.
Then I prepped the material by washing it with Synthrapol and then letting it soak in 1C Soda Ash:1 Gallon of warm water. Soak for at least 20 minutes and wring out hard before moving onto dying; fabric should be wet but not dripping. WEAR GLOVES when using soda ash and be careful about inhaling the dust. In my test dyes I found it easier to work with smaller pieces of fabric so I laid out my material & pattern to get a rough idea of how much to cut for each pattern piece.

While your fabric is soaking I set up my dye station outside with an old shower curtain, clothes I didn’t care if I got dye on, shoes that are easy to hose off---I’m messy so I prep a lot so I don’t dye my house rainbow ombre.
Once you’re all prepped it is time to dye- work with one dye at a time and have a water bucket nearby to dip your hands in.

I started with yellow dye in the center so I folded the outer edges together then rolled a little floret so I could easily dip center into the dye. You want a concentrated center that fades out softly. give the fabric a good wring once you're satisfied with placement so it doesn't drip into unwanted territory.

After yellow I freshened the clean water and moved to blue, blue will go on either side of the yellow, fading into the yellow to make green and violet towards the edge. Give another good wringing of the fabric.
The liquid dye will naturally creep together to blend colors, but I encouraged it as well. To do this, I gently laid out my fabric on a drop cloth and with clean gloves “squeeged” the dye, this could also be done with a sponge or paintbrush more easily, but I didn’t have any on hand. ¯\_(ツ)_/¯ Warning, be careful about dye drips on your drop cloth, I prefer a shower curtain b/c I can rinse off between if necessary.
Repeat this process with the pink dye... dipping, wringing, squeegeeing on the undyed side and also along the edge of the blue (to create the violet).

From here you can carefully wrap in plastic (making sure the fabric doesn't roll onto itself) and leave in a warm spot for 24 hours for full rich hues or to get a softer sherbet effect air dry before rinsing.
TO RINSE:
rinse several times in water moving gradually from cool to warm to touch (not scalding), soak with 1 Tbsp of Synthrapol for ten minutes, give a good wring then wash & dry in your machine. Voila (!) you now have a rainbow for even the rainiest of Austin springs. Follow me on Insta @vividvoltage to see the finished dress soon!

3 notes
·
View notes


Photo


Crafting It Up For Mom!
Hey y’all, Becky here! Nothing says Mother’s Day like something that is pampering and handmade, so I am sharing one of my favorite gifts to make and give..organic cotton crochet washcloths and Lavender Rose Sugar Scrub.
Sugar Scrubs are easy to make and really are fabulous for your skin. Sugar is a gentle exfoliant and will almost melt into your skin in the shower, and you can customize base oils and essentials oils for a myriad of uses. My mom happens to like pinks and florals, so I went for a Lavendar Rose recipe.
Supplies:
Mason Jar
White Sugar
Refined Coconut Oil (odorless, which I prefer for non-tropical scents)
Grapeseed Oil
Dried Lavender
Essential Oils of Lavender and Rose Absolute
I do love refined coconut oil because it is essentially odorless, but feel free to use what you like. Take your coconut oil and heat it up just until it becomes a liquid, and add grapeseed oil at about a 1:1 ratio. The amount of oil you’ll need really depends on how large of a jar you are trying to fill, but don’t worry, you can’t mess it up. I added 6 drops of Lavender essential oil and 3 drops Rose Absolute into the warm oil mixture, then I started added the white sugar until my mixture had the texture of wet sand. Add a tablespoon or two of dried lavender flowers and mix together, and that’s it! Easy-peasy! Other beautiful scent combinations are: Peppermint/Lavender, Rosemary/Peppermint, Orange/Coffee (grounds are fab for cellulite)
For the Crochet washcloths, I used an organic cotton yarn which feels so soft and luxe. Mom deserves a treat! The pattern is so simple, and is as follows:
With an H hook and worsted weight yarn, chain 41sts.
R1: hdc into 2nd ch from hook, *ch1, skip 1 st, hdc into next st. Repeat from *to end. Chain 3 and turn,
R2 and all following rows: *hdc into chain 1 space from the previous row, ch1. Repeat from * to end of row, chain 3 and turn. Repeat this row until square measures aprox 10″.
Single Crochet Border
In last chain space, sc twice to turn corner and continue making single crochet stitches around side. When you get to the next corner stitch, make 2 sc stitches into same space to turn. Slip stitch to first sc when you’ve made it all the way around.
To make a hanging loop, ch 12 stitches and join with a slip stitch at base of chain, cut yarn, weave in ends.
I hope you enjoy this little gift idea, and I bet your Mom would too!
xo, Becky
1 note
·
View note
Photo

I love using old clothes to make something new and fabulous. Check out my new blouse that I made from an XL men’s button up that I found from the thrift store. I took apart the seams so I could lay the pieces flat and then used one of my own blouse patterns on the fabric. For the front, I put the center front of my pattern along the original button placket.
5 notes
·
View notes
Text
Did you know that “yarn bombing” was added to the Oxford English dictionary in 2015?
yarn bombing, noun.
The action of activity of covering objects or structures in public places with decorative knitted or crotched materials, as a form of street art. Also called guerrilla knitting.
To use in a sentence: “Yarn bombing has become increasingly popular as a way to brighten up our surroundings.”
Check out this eye candy:


1 note
·
View note
Text
Valentine Twig Arrow Tutorial!

I made these as my valentines a few years ago and thought I’d share it. I love sharing valentines with friends in whatever form! Share the love!
Supplies:

- felt
- craft glue (I like the fabric fusion for working with felt
- scissors
- twigs
Optional:
- cardstock for making tags or little premade tags
- hold punch for tags
- ribbon or baker’s twine for tags
- template shapes (you can also freehand these and they’ll look great)
- marking pens for tracing shapes
1. Trace/draw shapes

2. Fold felt in half and cut two layers of each shape


3. Place glue on felt, spreading around evenly, and on the stick


4. Place the other half of the felt and sandwich the twig end in between. Press closed.

5. Repeat with the other end.

6. Make tags however you’d like. I cut out hearts, stamped and wrote messages, punched holes and added twine.

7. Once all the glue has dried, snip little slits in the feather ends of the arrows.

8. Tie your tags on and you’re done!

Happy Valentine’s Day, friends! XOXO Niku
2 notes
·
View notes
Text
Random Test Post!
Cute sewing related photo. Just testing.

2 notes
·
View notes
Photo

Happy New Year
Another creative year has gone by. I have stuck to my goal of making all of my own clothes and not purchasing clothes from the store. A personal goal for me in 2015 was to make undergarments and jeans. I've made the undergarments but am still trying to make the jeans. 2016 will be all about the jeans!!!
I thought I would share what I made in 2015. The above picture is just a little taste of what I’ve done. Click the link below to view my entire gallery.
https://www.facebook.com/media/set/?set=a.10153712316572631.1073741830.110836132630&type=3&uploaded=20
Here's to a creative 2016!!
1 note
·
View note
Photo

Our Dream Embroidery Kit!
We’ve assembled a list of items in our ideal starter kit for embroiderers. It’s a great gift. Add a gift certificate for a Stitch Lab Embroidery I class, and delight your special stitcher-to-be right into the crafty stratosphere!
The Dream Kit includes:
A No-Slip Embroidery hoop (the Ferrari of hoops, it holds your fabric snugly no matter what.)

DMC embroidery needles in an assortment of sizes
Durable, dependable metal needle threaders
Classic stork embroidery scissors
Thread Heaven thread conditioner, to keep stitching smooth

DMC embroidery floss in a rainbow of colors
DMC floss bobbins, to keep that rainbow organized

Sublime Stitching embroidery patterns and floss kit

To make the kit SUPER deluxe, consider including:
Large Eye #1 Size needles
Chenille needles, for crewel or ribbon work
Bead embroidery needles, for those times you want to add a touch of bling
Sublime Stitching woven labels for that finished piece

Bundle all the goodies in a high-quality cotton tea towel – it’s stitchable gift wrapping! Tie with a length of grosgrain ribbon, and you’ve got a present that will inspire glee in any crafter.


All these items are available for last-minute shoppers at Stitch Lab, of course!
© Tumblr, Inc
0 notes