
An information website dedicated to the finest stringed instruments including Guitar, Ukulele, Banjo and Fiddles Stringed Instrument Blog
Don't wanna be here? Send us removal request.
Statistics
We looked inside some of the posts by stringvibemusic and here's what we found interesting.
Average Info
Notes Per Post
0
Likes Per Post
0
Reblog Per Post
0
Reply Per Post
0
Time Between Posts
22 days
Number of Posts By Type
Text
17
Last Seen Tumblr Blogs


Fun Fact
70% of Tumblr users say the Dashboard is their favorite place to spend time online.
Text
4 Clawhammer Banjo Exercises to Improve Your Picking
Like most things worth doing, playing the banjo takes practice. To help you with that, this article walks through some basic clawhammer banjo exercises to get you started and help you focus during your practice time!
In this article, we aren’t going to focus too much on what a clawhammer banjo is, or Scruggs Style banjo playing. We’ve written a separate article specific to that playing style to learn bluegrass banjo roll exercises!
Clawhammer Banjo Basics
The clawhammer style of the banjo is also known as the old-time banjo and produces a distinctive sound compared to the other styles. Typically, clawhammer banjos are classed as “upright with a pick”.
It’s important to note that we will only be talking about your strumming hand in this article, the right hand for most of us. The chords don’t change between clawhammer and bluegrass banjo and can be used interchangeably.
The clawhammer rhythm is made up of a single picked note, followed by a down strum, and another picked note. This gives the “claw-ham-er” rhythm to this strumming pattern, and thus its name. The clawhammer banjo exercises we’ve included in this article all center around developing this rhythm.
The first picked note is played with either the index or middle finger. Most people will also strum the 2nd part of the pattern using the same finger to strike the strings on the down strum. Finally, the last picked note, always plucking the 5th string (drone string), is done with the thumb.
Using a Metronome
Anytime you are practicing strumming we recommend you use a metronome. Staying in time is a critical aspect of solid banjo playing, and practicing with a metronome will help you develop the timing skills necessary to become a great banjo player!
For now, set the metronome at a slow speed and start to work on the basic clawhammer strum pattern. You’ll want to start slowly at first so you don’t accidentally develop bad habits or miss notes.
All of the drills we list below can be started very slow, maybe at 60bpm, and increased in speed as you gain confidence and accuracy.
Clawhammer Banjo Exercises
Learning the clawhammer banjo technique can be difficult due to the complexity of the pattern. We’ve broken it down into 4 simple patterns to get you started. These exercises will work to build confidence with the pattern before combining everything for the clawhammer sound you crave!
Pick and Pluck
The first clawhammer banjo exercise gets is the most basic and gets you used to pick out notes with both your middle or index finger quickly followed by plucking the 5th string. Play the 1st string with your index finger, then pluck the 5th string, play the 2nd string with your index, and pluck the 5th string.
By picking the four full strings with your chosen finger, followed by plucking the drone string, you’ll complete one full bar of 4/4. This is a great first exercise to get your fingers moving and accurately hitting strings.
Strum and Pluck
This drill follows the same pattern as the first one, except this time you will be strumming all four strings before plucking the 5th. Strum, pluck, strum, pluck.
Make sure that your strums are consistent and that you are hitting each string so the notes ring out true before speeding up!
The Drop Thumb Exercise
The drop thumb exercise is popular to build dexterity and accuracy with your thumb. With this pattern, you’ll be picking out the first string with your index or middle finger each time. Following each of these down strums you’ll pick out a note with the thumb.
After the first down strum, you’ll pick the 2nd string with your thumb, after the 2nd you’ll pick the fifth. By completing this pattern you’ll play a single bar.
You can change this up by down strumming a different string each time. When you do this the thumb should pluck one string lower than the down strum alternating with the 5th string.
Thumb Drop Banjo Exercise
Out of all of the clawhammer banjo exercises we know, this is one of the more challenging ones because you can’t just plant your thumb on the drone string. That being said, it has some of the best long-term paybacks as your skills and versatility will increase quite a bit after getting good at this!
The Clawhammer Strum
Finally, we put the different pieces together to get the classic clawhammer strumming pattern!
You start this pattern by playing a single note on the first, 2nd, 3rd, or 4th string, followed by a down strum on all strings and finally picking the 5th string with the thumb.
If this is too tough, focus on only picking one note, let’s say the first string, with your middle or index finger each time. This will keep you from having to move around the strings as much and make the pattern slightly easier to start with.
As with all these drills, start slow and only speed up your metronome gradually over time.
The Final Note
The clawhammer strumming style is a staple of the banjo world and definitely something worth learning! By following the exercises in this article, you’ll be playing the material in no time and on your way to amazing banjo sounds!
If you want to learn the details of the traditional clawhammer banjo style, check out our quick guide here!
0 notes
Text
11 Famous Banjo Players Who Influenced Music Forever!
If the guitar is the most popular instrument in America, the Banjo might be the most iconic. Modern bluegrass is one of the few styles of music that arguably started here, and the best and most famous banjo players are the ones that brought it to mainstream America.
While bluegrass and Scruggs Style banjo exploded into mainstream culture in the late 60s, the modern clawhammer banjo style has been played in America for decades before that. With the banjo having roots in Africa, the instrument has a long and storied history dating all the way back to West Africa.
While most of the best banjo players in the world can play both styles, many are known for one or the other. Many of the clawhammer players on this list never played Scruggs Style, cause it wasn’t popularized or invented yet!
In this article, we break down the best musicians to play both bluegrass and old-time banjo. If you are going to emulate someone as a young or beginner banjo player, these are the greats!
Famous Bluegrass Banjo Players
As with any rankings list, these musicians are in an order that I feel is fairly accurate both to the quality of the player and the contribution to both banjo playing and bluegrass music. I’m sure some will disagree with my order, but I’m always up for a good debate!
1. Earl Scruggs
It’s hard to put anyone else number 1 on any Banjo list. The modern form of bluegrass banjo is often called “Scruggs Style” because it uses a three-finger picking style that is commonly referred to as rolls. Before he popularized this style of fingerpicking the banjo was mostly played with a clawhammer style.
Scruggs became a professional musician at 21 and played in numerous bands including “Bill Monroe and the Blue Grass Boys”, “Foggy Mountain Boys”, “Flatt and Scruggs”, and “Earl Scruggs Revue”.
The song “Foggy Mountain Breakdown” was featured in the Bonnie and Clyde movie and went a long way to bringing bluegrass banjo to the mainstream. Scruggs has a star on the Hollywood Walk of Fame and received numerous awards in his lifetime.
The banjo and music communities lost this legend at the age of 88 in 2012 to natural causes.
youtube
2. Tony Trischka
If Scruggs is the most famous banjo player of all time, Trischka just might be the best. He is undoubtedly top 5. Often called the father of Contemporary bluegrass, Trischka has won a slew of awards and his name pops up pretty much anytime you are researching the banjo online, such a great influence on the community he’s had.
After releasing three albums in the early 80s with his band, Skyline, Tony went on to perform worldwide, work on Broadway musicals, have his music in movies, and even produce other great banjo acts like Steve Martin.
After all that, Trischka continues to contribute greatly to the banjo community through his teaching and lessons. He has a phenomenal course through Artistworks that we’ve reviewed and highly recommend to those looking to learn to play banjo!
youtube
3. Bela Fleck
Not only is Bela Fleck one of the most famous banjo players in the world, but he’s also responsible for pushing the limits of what is believed to be possible with the instrument more than maybe any other bluegrass banjo player.
He often plays with other amazing musicians such as Tony Rice, Mark O’Connor, and his wife Abigail, but when he’s not combining with other bluegrass musicians he’s push the boundaries of style for banjo.
Fleck has brought a fusion to the banjo, combining it and molding it to folk, jazz, fusion, and rock music in a way no other musician has. I’m fairly confident I’ve seen everything on YouTube involving Fleck, and each time I rewatch his performances I’m blown away all over again!
4. Steve Martin
Most people that I’ve talked to in the past think I’m joking when I talk about how great of a musician Steve Martin was. Most people think of him as an actor and a comedian, but that was only a slice of his talent.
Martin actually combined banjo into many of his standup comedy acts, and released several bluegrass albums professionally. His cover of “Foggy Mountian Breakdown” is still to this day one of the best you’ll ever hear.
Unfortunately, Martin’s musical career was broken up and ultimately cut short by tinnitus, a constant ringing in the ears that made playing and performing quite difficult.
youtube
5. Alison Brown
Compass Records has been the biggest independent record label for many styles of Banjo and bluegrass music since 1995, and Alison Brown and her husband Gary West are at the head of it. A lifetime of banjo genius award winner, Brown is quite a banjo player herself.
More lyrical than many other banjo players, her style and technique have led to a Grammy along with appearances and influence in a wide range of musical genres and films.
6. Noam Pikelny
By far the youngest player on our list, Noam has gained a lot of attention for his work with the Punch Brothers, which have had several hits on popular pops charts in the last few years. Before Punch Brothers Noam played with Leftover Salmon and the John Cowan Band.
Noam won the banjo player of the year award from the International Bluegrass Association in both 2014 and 2017 and we are excited to see where he takes the banjo in the years to come!
youtube
7. Alan Munde
A personal favorite, Munde played with the band the Sunny Mountain Boys in the 70s and was my first taste into the bluegrass world when my father introduced them. Munde is a world-class banjo player by all rights and has continued to blaze an innovative trail throughout his career.
Alan has also gone on to teach at several important music schools, including South Plains College.
Famous Clawhammer Banjo Players
Clawhammer banjo also referred to as old-time banjo, is a style that has lost some popularity since the fast pace of Scruggs style was introduced. Make no mistake though, some of the most famous and groundbreaking banjo players of all time were clawhammer players!
8. Allison de Groot
The only current artist on our list of famous clawhammer banjo players, Allison is inspired by old-time and traditional music and draws much of her inspiration from it. Even if the name doesn’t ring a bell, you’ve likely heard her play in one of her many collaborations with Tatiana Hargreaves, Molsky’s Mountian Drifters, The Goodbye Girls, and Nic Gareiss.
As someone who has always enjoyed classic bluegrass and the boom-chic-a of the clawhammer style, it’s a joy to hear de Groot continue to broaden the sound and possibilities of old-time music!
youtube
9. Pete Seeger
Pete Seegar was playing the banjo long before most musicians on this list and even published a book before some were born. Pete Seeger gained popularity with the Weavers in the buildup to the 2nd World War when he introduced the long neck banjo to the public, a style of the instrument still used today.
In 1948 he published “The Way to Perform the Five-String Banjo“, which numerous banjo players have cited since as being huge in their development. it was also the first time terms like “hammer-on” and “pull-off” were used!
10. Don Reno
While Don Reno was mostly known as a clawhammer player, he did popularize a style of banjo playing known as the single-string style. The results produced a style of bluegrass banjo that is quite distinct but never caught popularity the way Scruggs Style did.
Reno and Authur Smith made up the first Dueling Banjos duo as well, forever earning himself a place in Banjo’s rich history.
11. Ralph Stanley
A member of both the Grand Ole Opry and the Bluegrass Hall of Fame, Ralph Stanley earned his reputation as an old-time bluegrass player before Scruggs made fingerstyle popular, yet he still had some of the most popular bluegrass music of the 60s and 70s.
Ralph was quite a skilled singer as well, being able to go acapella during breaks and carry the tune with even the fastest bluegrass melodies.
Famous Banjo Players – The Final Note
While you may not have heard of some of these names, they are all in their own right legends in the bluegrass and banjo world. This list isn’t all-inclusive, and there are plenty of great banjo players you may not have heard about that weren’t mentioned.
For anyone who has enjoyed the instrument’s music before, there are plenty of great videos on YouTube that feature these famous banjo players demonstrating their masterful talents in addition to the ones linked here!
0 notes
Text
The Best Clawhammer Banjo – Complete Buyers Guide!
The best clawhammer banjo is a thing of beauty. It’s one of the more expressive instruments you can buy, and for good reason! It’s got a bright, clear tone with lively projection. The workmanship is top-notch, and the attention to detail is amazing.
Many beginner banjo players, or even ones looking for their second or third instrument, don’t know what separates a good banjo from a bad one and can easily be duped into purchasing something they won’t be happy with.
My friends and I played a ton of banjos to come up with our four best clawhammer banjo choices for you. We picked our favorite, but all of the ones on this list are great choices depending on your skill level, budget, and experience!
The Best Clawhammer Banjo
After reviewing, playing, and handling quite a few open-back banjos we’ve narrowed down our picks for the best clawhammer banjo to four. From there, you’ll have to pick through the pros and cons of each to find the instrument for you!
Top Pick!


Product
Deering Goodtime 5-String Banjo
Gold Tone, 5-String Banjo (AC-1)
Washburn Americana Series B7-A 5-string Open Back Banjo
Recording King RK-OT25-BR Madison Open Back Banjo, Scooped Fretboard
Reviews
181 Reviews
42 Reviews
14 Reviews
12 Reviews
Stars
Price
$529.00
$249.99
$349.00
$679.99
-
Buy on Amazon
Buy on Amazon
Buy on Amazon
Buy on Amazon
Top Pick!
Product
Deering Goodtime 5-String Banjo
Reviews
181 Reviews
Stars
Price
$529.00
Buy on Amazon
Product
Gold Tone, 5-String Banjo (AC-1)
Reviews
42 Reviews
Stars
Price
$249.99
Buy on Amazon
Product
Washburn Americana Series B7-A 5-string Open Back Banjo
Reviews
14 Reviews
Stars
Price
$349.00
-
Buy on Amazon
Product
Recording King RK-OT25-BR Madison Open Back Banjo, Scooped Fretboard
Reviews
12 Reviews
Stars
Price
$679.99
Buy on Amazon
Deering Goodtime 5-String Banjo
181 Reviews
Deering Goodtime 5-String Banjo
Low-profile, 22-fret rock maple neck with hardwood bow tie inlays
Sealed, geared tuning machines, including fifth string
5/8-Inch maple/ebony Goodtime bridge with adjustable Deering tailpiece
Six-year warranty
Three-ply, 11-inch maple rim with steel tension hoop and high crown head
$529.00
Buy on Amazon
If there were an old faithful of the banjo world for beginner and intermediate players, the Deering Goodtime banjo would be it! This banjo plays like a much more expensive instrument and sounds amazing.
The low-profile neck is also good while you get your feel for the fretboard, and the 11-inch maple rim and steel tension hoop are a setup you find on banjos that cost three times what the Goodtime does.
PROS
Sealed, Gearing Tuning Pegs
Maple Rim and Neck
Goodtime Bridge and Deering Tailpiece
Extremely Lightweight
CONS
Due to weight, it won’t project as much as heavier models
Gold Tone AC-1 5 String Banjo
42 Reviews
Gold Tone, 5-String Banjo (AC-1)
Composite rim open back
Zero-glide nut system
Includes Gig Bag
Gold Tone 12-point set-up
$249.99
Buy on Amazon
The best budget clawhammer banjo goes to the Gold Tone AC-1, and it wasn’t even close. You can find quite a few models on Amazon for less than $250, but most of them have plastic rims, poor neck setups, and just don’t play or sound right.
The AC-1 pairs a mahogany back with a composite rim that actually sounds really good together. The composite is something that Gold Tone uses even on some of their nicer models, so you really aren’t sacrificing much by going that route.
While the other banjos on this list all have something going for them the Gold Tone doesn’t, you will not find a better banjo for clawhammer at a similar price! If you like the Gold Tone setup but want to invest in a better instrument, they do make much better models tuned for intermediate and advanced players!
PROS
Mahogany Body
Ultra-Light at just over 1lbs
Gold Tone 12-pt Set up
Best Budget Option
CONS
Composite Rim
Washburn Americana Series B7-A 5-String Open Back Banjo
14 Reviews
Washburn Americana Series B7-A 5-string Open Back Banjo
Open back 5 string natural finish banjo
D'addario J60+light Gauge nickel strings
Chrome die Cast tuners
Ebony tipped Maple Bridge for pristine articulation and an engraved Gold armrest adds to playing comfort
Authentic Remo head
$349.00
Buy on Amazon
There are few companies who have been building banjos as long as Washburn, and their experience and expertise shows! The Americana series is equipped with a nice Remo head and mahogany body and backing.
This instrument is quite a bit louder than the Goodtime and is about 5 lbs heavier which plays a huge part in that. A full-grown adult won’t notice the weight difference much between the two instruments, but this could be too much instrument for children.
PROS
Authentic Remo Head
Mahogany Back
Great, Loud Projection
Great Value
CONS
Heavier than other options
Recording King RK-OT25 Madison Open Back Banjo
12 Reviews
Recording King RK-OT25-BR Madison Open Back Banjo, Scooped Fretboard
Maple Neck with Adjustable Truss Rod
3-Ply Steam Bent Maple Rim
Scooped Rosewood Fretboard
Recording King Compound Angle Peghead
Remo FiberSkyn Head
$679.99
Buy on Amazon
While this is the most expensive instrument on the list, it is the only one specifically designed for old-time, better known as clawhammer, banjo playing style. The scooped fretboard, the Presto tailpiece, and the Remo FiberSkyn head all scream clawhammer!
The 3-ply Maple Rim is paired with a maple neck and a rosewood scooped fretboard for high-quality construction, material, and build. If you know that you won’t be playing any Scruggs-style banjo anytime soon, this is a clear winner! If you may fall into bluegrass at some point then the Deering is probably a better bet!
PROS
Maple Neck w/ Truss Rod
Scooped Rosewood Fretboard
Remo FiberSkyn Head
3-Ply Maple Rim
Great Intermediate Banjo
CONS
Might be out of some beginners price range
What is Clawhammer Banjo?
Before buying a clawhammer banjo, it probably would help to understand exactly what is clawhammer banjo? Clawhammer actually refers to a style of playing the banjo, rather than a type of instrument. That being said, open-back banjos are almost always used for clawhammer. The other option is bluegrass or Scruggs-style banjo. We discuss clawhammer vs bluegrass in more detail in the article linked!
Clawhammer Banjo Buying Guide
While these four banjos are a great starting point, there are plenty out there that we didn’t test or we didn’t choose for this list for one reason or another. That doesn’t mean they aren’t good-quality instruments.
To help you pick out the best clawhammer banjo for you, we’ve put together this guide for many of the things that we look for when buying a banjo!
Rim Material
Most of the best clawhammer banjos have rims that are made from 3-ply maple. This isn’t the only construction, but it is often the most cost-effective and quality-minded. 3-ply is still a big name, and it’s clear that you’re paying more for quality.
The more plies you have an instrument, the thicker the rim will be. For an instrument to be lightweight, you probably won’t see more than 5 layers.
Some composite materials are being used for rims and backings nowadays. The Gold Tone is a great example of this. That being said, if it’s not real wood then we’d test it out and check the sound quality before buying!
Neck and Wood Material
Maple has always been the choice wood for Banjos. The projection and durability are what give the instrument its characteristic sound. That being said, some other woods, like mahogany, can be a great substitution depending on your style and what you’re looking for.
Necks can be made from maple or mahogany as well. Mahogany necks have a very different feel than maple necks, but it depends on your personal preference!
Fretboard Material
This will really come down to personal preference. Rosewood is a common wood, but mahogany and ebony are quite common as well. This comes down to the sound and feel of the instrument, so you’ll have to test them out yourself!
Bridge and Tailpiece
A banjo’s bridge supports the weight of strings and produces the sound you’re looking for. You can purchase some cheap bridges that will do the job at first, but they won’t last long!
The tailpiece is a little bit different. This is what connects the strings to the head of the banjo. It’s a very important piece because it can make or break the sound of your instrument.
Even models that have a good bridge could have a bad tailpiece and vice versa! The good news is that you can replace and upgrade these two pieces fairly easily and inexpensively!
Tuning Pegs
Geared tuning pegs are pretty much the top-of-the-line option for tuning. They make tuning your banjo a breeze, they last a long time, and they are highly reliable in comparison to others!
If you see a banjo that has friction pegs, be prepared to spend more time learning how to tune it and keeping it tuned!
The Final Note
There you have it, the Deering Goodtime Open Back Banjo is our top pick for the best clawhammer banjo! We think that it offers a good combination of value and quality for beginner to intermediate players. If you’re looking for a more experienced or advanced player, then our higher-end pick will be a better choice!
0 notes
Text
What Guitar Does Your Favorite Musician Play?
For many of us, picking up an instrument is inspired by watching a musician we admire or whose music resonant with us to our very core. For me, it was John Frusciante of Red Hot Chilli Peppers. For you, it might be Slash, Ed Sheeren, or Taylor Swift.
It’s also fun to think about what guitar does your favorite musician play as you practice and dream about stardom of your own one day.
While there is no way for us to cover the instruments that all of our favorite guitarists play, we’ve assembled a list of some of the most popular musicians of today. These are people we’ve been asked about multiple times and have huge followings.
These are also mostly current musicians. If you are looking for some of the most famous guitars in history, we have an article for that too!
What Guitar Does Ed Sheeran Use?
Ed Sheeran’s favorite guitar has long been the Martin LX1 Series acoustic guitar. In fact, the guitar got so much attention thanks to Sheeran’s use that Martin collaborated with the artist for a Signature Edition lineup that included the “Divide’s” album logo.
Interestingly, Sheeran has always preferred the 3/4s size guitar to a full-size dreadnought or jumbo guitar. The sound from a smaller guitar is more focused and matches both the style and sound of Ed’s music.
While Sheeran doesn’t play the electric guitar often, he has been spotted on stage playing both a Fender Stratocaster and a Paul Reed Smith Hollowbody II.
What Guitar Does John Mayer Play?
John Mayer currently plays a Martin OMJM signature acoustic guitar, which is an adaptation from his first signature line, the OM-28. Unlike many pro models, there is no cutaway at the bottom of this guitar which would change the resonance of the spruce top John prefers.
When going electric Mayer has played a fairly wide range of Fender Stratocasters over the years. Currently, he is with PRS guitars, where he plays the PRS Silver Sky, which is very similar to the Stratocaster body and setup, with a headstock that screams PRS.
John Mayer with a Fender Stratocaster
What Guitar does Dave Grohl Play?
While you might think of Grohl as the other guy in Nirvana (their drummer), or even the lead man from Foo Fighters, he has been influential in the last 20 years of rock music and quite a good guitar player.
Grohl has played a number of different guitars over the years, but most of them fit the size and shape of the Gibson ES-335. His most common guitars are a 1967 Gibson Trini Lopez Signature ES-335 and a black Gibson DG-335. Since 2007 he’s been playing his signature DG-335 in either a light blue or an ebony black model.
What Guitar Does Slash Play?
Slash has almost always played a Les Paul guitar, both for performances and in the studio. One of the first Les Pauls he played was custom-made by luthier Kris Derrig with Seymour Duncan Alnico II Pro pickups.
In the years following this guitar Gibson has teamed up with Slash to make an entire collection of Les Pauls with his name on them. While there are some variations between the models, all of them carry the Les Paul feel and sound that Slash fell in love with recording his first album with Guns ‘n Roses.
What Guitar Does Angus Young Play?
AC/DC’s lead guitarist has been playing a Gibson SG and was a huge fan of the original 1968 model which brought the world many of the band’s hits, including “Thunderstruck”. As with many other famous guitarists, Young has gone on to work with Gibson to produce a custom SG.
The Angus Young SG offers the lightning bolt pearl inlays that have become something of a calling card for Young. In addition to that, the model features a custom bridge pickup paired with a vintage neck pickup.
Angus Young and is 1968 Gibson SG
What Guitar does Jimmy Page Play?
Jimmy Page, aka Led Zeppelin’s lead guitarist, has often been quoted as saying his “Number 1” guitar was his 1959 Gibson Les Paul. That didn’t stop him from playing a wide range of instruments on stage though, including a Danelectro 3021, several Fender Telecasters, and a Gibson Les Paul Deluxe.
Possibly Page’s most famous guitar is the double-neck Gibson EDS-1275 that was used to play and record “Stairway To Heaven.”
What Guitar does Billy Strings Play?
Unlike some of the other rock legends on this list, Billy Strings is a bluegrass legend with a great following, yet someone not as well known in mainstream culture. Take nothing away from his music though as I dare you to try to pick half as fast as he does!
Billy Strings plays his signature Preston Thompson Dreadnought Acoustic Guitar. This Oregon-based guitar company specializes in higher-end, dreadnought-sized guitars that have long been the choice of many top bluegrass musicians. After playing the Mahogany model for years, Strings recently switched to the Indian Rosewood model from Thompson.
What Guitar Does Your Favorite Musician Play? – Summary
When researching these amazing guitarists and the instruments they played, one thing stood out to me. They all play different instruments, and yet, very few break from their signature sound.
It’s important that you find the instrument that inspires you, but it also needs to fit your personality, which unique approach to music, and your hands. They’re what get in between you and the strings so having comfort is a must!
0 notes
Text
What is the Most Famous Guitar? 12 Legendary Guitars
Answering the question “What is the Most Famous Guitar?” in a straightforward way might get me in a little hot water with more than a few musicians. Just like debates about the best guitarist, many people will have different opinions when it comes to famous guitars.
That being said, there are instruments that have gone down in folklore for the songs that they produced and the guitarists who played them. Instruments that are responsible for some of the most iconic songs ever written have created a bit of controversy about which is the most famous.
In this article, we’ll dive into 12 legendary guitars and the musicians who played them!
What is the Most Famous Guitar?
I’m still not going to put my hat in the ring and say any one of the following is “THE” absolute, hands down, most famous guitar ever. Instead, I’m going to say that all guitars on this list are notable and amazing in their own right and deserve at least a mention!
Prince’s Cloud
Prince actually had two guitars that could have been added to this list. The cloud was featured in the “Purple Rain” video and is a custom-built guitar that most people can picture thanks to the widespread success of that video.
I almost added Prince’s symbol guitar to this list, but the fact I had to look up a picture of it to remember what it looked like made me think it was better left off in favor of the iconic “Cloud”.
Jimi Hendrix’s Upside Down Fender Stratocaster
In the 60’s left-handed guitars weren’t nearly as easy to find in the Amazon and Guitar Center world we live in today. Hendrix was left-handed and played a Fender Stratocaster upside down! If you look at the pictures it’s clear to see the pic guard and smaller “horn” facing up. In addition, the tuning pegs, normally face up, but not in most Hendrix pictures!
With Hendrix being the guitarist he was, most people believed he could play the guitar right-handed. He definitely preferred restringing his guitars to a left-handed setup and playing them that way though, especially early in his career.
Neil Young’s “Old Black”
“Old Black” is a vintage Gibson Les Paul Goldtop from the 50’s that has been upgraded and modified multiple times over the years. While Young plays a lot of music on acoustic when he’s playing electric “Old Black” is probably in use!
Eric Clapton’s “Blackie”
Up until the mid-80s when “Blackie” was retired this was Clapton’s go-to guitar and you can see it on performances of many of his most famous tracks including Layla, All Along the Watchtower, and Tears in Heaven.
This guitar was sold at an auction in 2004 supporting Clapton’s rehab center, “Crossroads“. It almost brought in 1 million at that time!
Brian May’s “Red Special”
While many might not know Brian May by name, you’ve undoubtedly heard his music. The lead guitarist for Queen, Brian played this handmade guitar throughout his time with the legendary rock band.
Amazingly this was a homemade instrument from the start, being built from oak from a table and a fireplace mantel in the family home. It has been restored a few times over the year, but this instrument has yet to be put on the shelf and retired.
Willie Nelson’s “Trigger”
This Martin N-20 nylon-string guitar was named after a horse and is about as well worn of an instrument as we can think of! The guitar never had a pickguard and over the years developed an iconic hole in the body.
Nelson played other guitars, but Trigger was always his favorite. When asked about retirement at one point he was quoted as saying “When Trigger goes, I’ll Quit.”
Jimmy Page’s Double-Neck Gibson
There was no way we could make this list and leave off the guitar that brought “Stairway to Heaven” to us. Led Zeppelin’s lead guitarist Jimmy Page played a double-neck Gibson for that recording and many live performances.
The 12-string top and 6-string bottom are still to this day how many double-neck guitars are designed thanks to this instrument and the music it created!
Angus Young’s “Jaydee SG”
The Jaydee SG was created specifically to suit the constant thrashing that Angus Young put his instruments through as guitarist for AC/DC. The SG guitar was later brought to Gibson and mass-produced, but “Jaydee” will always be the original.
Angus Young with “Jaydee SG”
George Harrison’s Rickenbacker 12-String
When the Beatles hit the scene the music world went electric, and the Rickenbacker 12-string was a big part of it. Harrison played a Gretsch for much of his early touring days, but once the Rickenbacker was given to him he played it almost exclusively after that.
B.B King’s “Lucille”
While King played many Gibson semi-hollow body guitars over his long and celebrated career, they all were named “Lucille”.
When King was young a woman named Lucille sparked a fire at a club where he was playing at. King had to rush back into the fire to save his Gibson, and thereafter his guitars always shared the name of that girl.
Gene Simmons’ “Axe Bass”
Kiss was larger than life. They had big hair, big costumes, made big sounds, and had big, original instruments. Gene Simmons Bass guitar was designed with a serrated ax head below the body of the guitar and kept the cosmetic look for every performance the band played, even though he switch bass guitars several times.
Kurt Cobain’s “Jag-Stang”
When Cobain wasn’t smashing guitars, he was combining them, changing parts, and modifying them to his liking. Always a Fender fan, two of his favorite models were the Jaguar and the Mustang.
The custom-built “Jag-Stang” was played on the 1994 “In Utero” tour with Cobain and later was given to Peter Buck from R.E.M and featured in their video for “What’s The Frequency, Kenneth”.
–
12 Of The Most Famous Guitars – Summary
The music world is full of amazing musicians and legendary instruments, so answering the question of what is the most famous guitar is no easy feat! With this list, I tried to touch on a few amazing instruments that graced a broad range of musical genres and tastes.
I’m sure there will be plenty of instruments I left off here and maybe some I didn’t know about to begin with, but it’s pretty hard to deny the impact that these 12 made on the world of music. What do you think? Any glaring omissions or hidden gems? Let us know in the comments below!
0 notes
Text
5 Guitar Finger Exercises For Beginners to Improve Your Playing!
When I started playing guitar the last thing I ever thought about was guitar finger exercises. Much to my surprise, I found out that not only are they helpful for those who want to become advanced players, but they are also a great way of improving your dexterity.
Finger exercises help you get faster and more accurate with your fingers so that when playing you can pick up on the beat more easily. They can also make chord shapes that require extra flexibility or dexterity easier to accomplish over time.
Finger exercises are something that I like to throw into my daily practice routine and are great as a warm-up. While chords, songs, and riffs are all more exciting, few things will help your playing as much as guitar finger exercises!
Why Should You Do Guitar Finger Exercises
While no one will ever compliment you on your finger exercise routine, few things will help your guitar playing more. Finger exercises help you get faster, more accurate with your fingers, and can make chord shapes that require extra dexterity easier to accomplish over time.
The great thing about guitar finger exercises is there are so many ways to do them. I usually change it up every few days but I am almost always working on some sort of guitar finger exercise, even after years of playing!
The Metronome
The metronome is a crucial part of most of this type of training, it will help keep you in time and allow you to track your progress. While all of these can technically be done without, I always suggest having a metronome going while doing them.
Guitar Finger Exercises for Beginners
Now that you understand what a guitar finger exercise is and why they are important, here are a few of the favorites that I give players when I start working with them! Use these as a warm-up before you start working on chords, songs, or strumming patterns!
1. 1234 Exercise
Probably the most common and basic of all finger exercises, the 1234 method is a great place to start! It’s also easy to explain and start, so you don’t need to spend much time learning it!
Start by picking a string. You’ll just be playing one string for this exercise. Use your index finger on the first fret to play that note. Then use your middle finger to play the 2nd fret, your ring finger to play the 3rd, and finally your pinky to play the fourth.
Keep your fingers down as you play each note so that it forces you to stretch and reach for the pinky finger. If this is too difficult, start higher up the fretboard, maybe on the 7th fret, and play 7-10.
2. 4321 Exercise
It’s almost funny how hard this can be the first time you try it. For whatever reason, guitarists are more comfortable working down the fretboard. If you ask them to move backward, or up, the fretboard, it causes confusion and slows them way down!
This is the same as the 1234 exercise, except you’ll be starting with your pinky on the 4th fret and ending with your index on the first.
3. Skipping Frets
Also called a wide stretch, I call this skipping frets because it is as simple and descriptive a name as possible!
In this variation, you’ll be playing the first fret with your index finger, the third fret with your middle finger, and the fifth fret with your pinky. As with the 1234 exercise, if this is too difficult, start on the 7th fret and do 7,9,11.
With many chords, you’ll need to skip frets and this is the perfect way to get your fingers used to stretching while continuing to hold down far away frets!
4. Pattern Mixing
Up until this exercise, everything has been in order, 1234, 4321, or 1,3,5. Now it’s time to complicate things once again! What if you played 1342? Or 3241? This is the next step in improving your dexterity and coordination!
I wouldn’t recommend this until you’re playing the first three exercises with confidence and at speeds greater than 120bpm. That being said, this is a great way to spice up an old exercise while working on improving your finger strength!
youtube
5. Scales
Practicing guitar scales is the final finger exercise I would recommend, and the one that will have the most transition into your day-to-day playing. There are plenty of scales for you to learn and play, so this is often what I do to warm up each day!
Just with all the other guitar finger exercises, start with your metronome set at a slow pace and only increase the tempo when you can play a scale several times through without any mistakes!
How do I Improve my Finger Dexterity on Guitar?
Improving finger dexterity on guitar is a slow process but one that anyone can achieve. Moving smoothly between chords and notes is more of an exercise in repetition than anything else. That being said, here are a few things to help you along the way:
Practice slowly – Practice things with a metronome and only go as fast as you can error-free
Exercise Daily – Even if you are not able to pick up your guitar, stretch and move your fingers daily
Play Challenging Things – Many guitarists get to a point of comfort. They can play a few songs or a cool riff or two, and they stop playing difficult things. The only way to improve your finger dexterity is to continue to challenge yourself!
Repeat, Repeat, Repeat! – Practice makes perfect and guitar is no exception. Rome wasn’t built in a day, powerlifters don’t get strong in a day, you aren’t going to learn guitar in a day!
How Do Guitarists Play So Fast?
Most guitarists who play extremely fast have years of muscle memory built up in their fretting hand. They are able to play fast because they don’t have to think about it. Most players believe you can only play as fast as you can fret, so a lot of time is dedicated to scales and guitar finger exercises to improve dexterity and accuracy.
The Final Note
If you want to play guitar as quickly and efficiently as possible, it’s important to practice these exercises until they become automatic. As with anything, the more you do it, the better you’ll get! The best way to learn guitar and be a better player is to practice, practice, practice!
0 notes
Text
How Do Guitar Pickups Work? 3 Types of Pickups, Magnets, and Differences
Most electric guitarists know how important the pickups on their guitar are to the overall sound of the instrument. But how do guitar pickups work? Why do humbuckers sound different than single coils?
For most electric guitars, pickups define the sound of the instrument as a whole, so it’s fun and important to have a little knowledge of the science behind these important pieces of your instrument! So let’s answer the question, how do guitar pickups work!
What is a Guitar Pickup?
Simply put, a guitar pickup is a device that turns the vibrations of the strings on your guitar into an electrical signal. This signal travels through a chord into your guitar amp, where it is outputted as sound.
The construction of a guitar pickup consists of a pin, often called a bobbin, wrapped with conductive wire. Inside of the bobbin, you have one or more magnets depending on the type of pickup.
How do Guitar Pickups Work? Electromagnetic Induction
Guitar pickups work thanks to something called electromagnetic induction. Electromagnetic Induction is based on the scientific principle that electricity can be generated from magnetism. Magnetism is the force of attraction or repulsion when two objects come together. Each magnet creates a small field around it, which is the reason that pickups contain magnets!
So, when a guitar string is plucked they produce a vibration in the wire and coil, this vibration disrupts the magnetic field from the magnets, generating an electrical signal. This electrical signal is later what we hear as sound after passing through an amplifier.
The difference in where a string is struck, the thickness of the string, and the length of it will all create different electrical signals, thus creating different notes when transformed into sound from the amplifier!
If you want to really dive into the science, the pickup building community has long been in a debate over how exactly the magnetic field is being affected. One community believes in a magnet-centric model, while the other a string-centric one.
Why do Different Pickups Produce Different Tones?
Maybe the most interesting part of pickups arent the components, but the nearly endless options you have for the number and types of magnets, the windings on the coil, the spacing between those windings, and differences in the bobbin.
Magnet Types
Alnico is the most common magnet used for guitar pickups, but even that isn’t as simple as it sounds. There are four different compounds of alnico magnet all used for guitar pickups. Alnico, 2, 3, 4, and 5 are all used today, with 5 being the most common and traditional for many Fender models.
Ceramic magnets are the 2nd most common on electric guitars. These pickups tend to run hotter than their alnico counterparts, resulting in powerful, clear notes that really ring out. Many punk, hard rock, and metal guitarists opt for ceramic magnets. Ceramics also have the benefit of being cheaper than alnico.
Single Coil vs. Humbucker vs. P90
The original pickups were developed by Fender in the early 50’s and were all single coil by design. As the name would suggest, these pickups only had one bobbin wrapped in wire. Many household names have played these pickups and to this day they are popular for their bright, crisp sound.
In 1955 Gibson came out with the Seth Lover humbuckers. The first true competitor to the single-coil, these pickups were the answer to the lower output and hum that the single coils were susceptible to.
Somewhere between these two styles of pickup sits the P-90. A pickup that shares the size of the humbucker with the single-coil design of the original.
We’ve written a full article comparing the Single Coil vs. P90 vs. Humbucker if you want to dig deeper into the differences in sound, style, and design of the three main types of pickup!
How do Acoustic Guitar Pickups Work?
For those of us who love acoustic guitars, we understand the struggle that can come with trying to amplify these instruments. One solution is to buy a good acoustic-electric, which solves the problem instantly.
If you already have an acoustic guitar that you love, there are three options for adding a pickup to it: magnetic, piezoelectric, or microphone.
Magnetic
This type of pickup is most similar to those found on a true electric guitar. They are built in the same exact way, the difference is that they are clipped onto the guitar near the soundhole, rather than being mounted directly to the instrument.
This is a nice option since they can be removed just as easily as a capo, but they tend to sound the least like an acoustic guitar and won’t work with nylon strings.
Piezoelectric Pickups
This is basically a single-coil pickup that you mount near the bridge of the guitar using super glue or something similar. These pickups have very low output and will need a preamp.
I normally stay away from piezoelectric pickups, I hate the idea of gluing something to my guitar and have had big problems with feedback at higher volumes while using this type of pickup.
Microphones
The third type of pickup is probably the best, and most accurate sounding one, but also the hardest to install. They will also likely be the most expensive option, but if you really like your guitar and want the best solution possible, this is it.
What Does Raising the Pickups on a Guitar do?
Simply put, there is a correct height that your pickups need to be mounted at for them to generate the correct sound. Pickups mounted either too close to the strings, or too far away, will cause problems.
If set too high (close to the strings), the magnets will actually push and pull your strings out of tune. In fact, if you find yourself constantly having to tune your instrument, you likely either need to get new strings or you need to adjust your pickup.
When your pickups are too far away from the strings the magnetic field is not optimized and at best you’ll get lower output than expected, at worst you can get strange distortions.
The Final Note
With the information in this article you should be able to not only answer the question “how do guitar pickups work?” but know the basic differences between different models and materials!
Unfortunately, that’s the easy part! With tons of options out there for pickups, and tons of variables to consider for what you want in your sound, this is only the first step. So, while you now know how to answer the question: “how do guitar pickups work?”, you still have to figure out which one makes the best sound for your needs, playing style, and ear!
0 notes
Text
Are Guitar Lessons Worth the Money?
One of the fastest ways to learn many new skills is to pay a teacher, coach, or professional to help you learn. In most cases, this will help you shorten the learning curve to the desired skill you want to improve at. Does guitar fall into this category? Are guitar lessons worth the money?
Guitar lessons are definitely worth the money if you can afford them. A guitar teacher will be able to spot the flaws that are individual to you and help you correct them. They can also give you planned exercises to help you improve on your weaknesses.
With the internet, though you have plenty of options for learning, so what makes in-person guitar lessons the way to go?
Types of Guitar Lessons
Let’s first look at the different ways that you can learn guitar and the types of guitar lessons you can get so we can clarify this from the start.
Self Taught
Many people will pick up a guitar and start strumming, picking at individual notes, and pressing down on individual strings. This is the definition of a self-taught guitarist. Teaching yourself to play is a great way to start out and is something that many guitars do – That being said, most serious players will opt to take lessons sooner or later.
Online Lessons
Online guitar lessons come in two forms, free and paid courses. Free online lessons can be found all over YouTube. The good news is that there is no shortage of these videos, but they don’t really give you a path to follow or address your individual needs.
JustinGuitar has a free beginners course that I’ve looked through, if you want to go the free online lessons route this is what I’d recommend. He does a great job breaking down topics into easy lessons and giving you a practice schedule.
Even better than that are places like FenderPlay and Artistworks. These are paid subscription-like programs but the content quality and depth are the next best thing to having an in-person teacher.
In-Person Guitar Lessons
When I say guitar lessons, I am talking about in-person guitar lessons unless I say otherwise!
The best part of guitar lessons is that they will give you some structure and help to steer you in the right direction. A private lesson will usually have a curriculum to follow defined by your teacher. A good teacher will be able to analyze your playing style, assess your strengths and weaknesses, and develop a plan for you to follow.
If you are serious about learning the guitar, and especially if you have aspirations to play as more than just a hobby, finding a good guitar teacher is absolutely worth it and the route I recommend.
Are Guitar Lessons Worth the Money?
In the end, the only person who can actually answer the question of are guitar lessons worth the money is you.
I personally can’t see what we gain from not having a guitar teacher or coach. Me, I started to learn to play the guitar on my own but decided that if I was ever going to get as good as I wanted to I would need a professional to help me refine my technique and really bring out the very best in my playing.
Now, there is definitely a case for going the free route and not spending money on guitar lessons. If playing the guitar is just a hobby for you and you play because you enjoy it and don’t care too much about improving or playing for others then maybe the cost of the lessons isn’t worth it.
How Much Do Guitar Lessons Cost?
Most guitar teachers set their own hourly rates so costs can vary quite a bit. A fair price for guitar lessons ranges between $25 and $100 per hour. Much of this price will depend on the credentials of the teacher, the geographic location, and the teacher’s experience.
It is often expected that you sign up for a set number of lessons so in some places it’s not uncommon to have to pay for a month of lessons at a time. I’ve done this in the past where I monthly charge a lump sum for 8-10 lessons.
What Should I look for in a Guitar Teacher?
When paying for a guitar teacher the cost is not always equivalent to the quality of the teacher. Sometimes you’ll find super expensive teachers that either has too many students, are too busy with other things, or you simply don’t mesh well with them.
The first thing to look for is credentials. Here are a few questions you can ask a potential instructor:
Have they played professionally?
Did they go to music school?
Have they written any original music?
Do they have references from past students?
Not only should a guitar teacher have some of these qualifications, but I’ve also always felt it was important for you to like your guitar teacher. There have been instructors in the past that whom I just didn’t get along with. This takes some of the joy out of playing and practicing.
Find an instructor that is in your price range, has decent credentials or reviews from past students, and that whom you get along with. You will see your guitar playing improve quickly after that!
Are Online Guitar Lessons Worth It?
When someone tells me they want to learn to play guitar I’ll often tell them to start with online lessons. On paper, it seems like the best way to start learning guitar, and as someone who has spent years teaching, I would never discourage anyone from learning through an online service.
I also know that if someone spends a few months paying $10-20 a month for online guitar lessons, they are likely going to stick with it long-term. This means that the cost of in-person guitar lessons will be of greater value to someone who already knows they want to continue playing and has a solid foundation of knowledge.
Is it Better to Take Guitar Lessons or Teach Yourself?
While you can teach yourself to play guitar, if you want to learn quickly and efficiently there is no better way than to invest in guitar lessons. This is especially true if you are interested in playing a certain style or genre of music.
You will find learning to play guitar can be difficult and take time. The best way to learn in this case is to invest in a teacher that knows what they are doing.
While there are many great resources online, nothing beats the hands-on, one on one attention that a guitar teacher can give you. They will spot flaws in your playing you may not even notice and be able to quickly fix them before you develop bad habits while playing.
How Long do Most People Take Guitar Lessons
Most people will stick with guitar lessons for about 6 months, especially if they learn as adults. Kids tend to stick with lessons longer, but often that is thanks mostly to their parent’s interest.
If you practice for 15-30 minutes a day, for 3-5 days a week, then add in a lesson on top of that, you should be able to play a fairly good selection of beginner and intermediate songs after six months. You will have also learned most of the skills you need to continue to improve without a teacher.
That being said, I know several people who play in bands and are what I would consider advanced guitarists who still have teachers. These are really solid musicians that simply want to continue to improve. So, while many people will quit paying for guitar lessons after 6 months to a year, there is no reason to stop if you are still learning and enjoying them!
The Final Note
Are guitar lessons worth the money? I sure think so, but I hope this has helped you in your decision about what to do about guitar lessons. There is nothing that can beat in-person lessons, but the quality of those lessons is important. Never pay for guitar lessons that are subpar!
So, if you’re looking to start learning guitar, and you want to get the best value on your investment, then look at in-person guitar lessons. If the price is too steep, or you’re not sure you will stick with it, there are some solid online courses that can get you started as well!
0 notes
Text
When Should You Change Your Guitar Strings? 5 Signs It’s Time!
As a new guitarist, you have plenty of things on your mind. When should you change your guitar strings is probably not one of them. Guitar notes, chords, strumming patterns, and gear are all important and often take up much more of a priority for a new player.
While there is no one answer that applies to all guitars, certain indicators can help you determine when it is time to change your guitar strings. There are also different factors that play a part in how quickly your strings will wear down.
Oftentimes, adding a new set of strings is the first step in playing better and bringing out the sound you want. In this article, we’ll cover everything you need to know about when you should change your guitar strings!
When Should You Change Your Guitar Strings?
A good rule of thumb to know if it’s time to change your guitar strings is every 100 hours of playing your guitar or every three months. If either of these conditions is met, your strings are likely past their prime, and to avoid dull notes, breaking, or problems tuning, they should be changed.
When your strings have been played for 100 hours or so, they’ve had plenty of wear and tear on them. The pic can wear them down, and even more so the frets take their toll. We’ve seen strings last far past the 100 hours rule, but this is often where you see a dip in performance.
Likewise, after three months the strings have accumulated oils from your hands and dust, dirt, and moisture from the environment. Over time, this can cause the strings to go out of tune, and start to stick all over.
To avoid these problems, you should change your guitar strings around every three months – even if you didn’t notice any changes in sound or performance!
Now, both of these rules apply to players who are learning to play guitar or casual players. Serious players or touring professionals might change strings monthly or even weekly. On the other hand, if you simply play for yourself and for fun, you really don’t have to change strings until they break!
Why do you Need to Change Strings on a Guitar?
The first reason you need to change strings is the sad fact that eventually, they will break. It really isn’t a matter of if, it’s a matter of when. Thanks to the tension, movement, and fretting required of strings, they have a shelf life.
Many players will change strings before they break, though. Old strings often sound dull or off-key, they won’t stay in tune, or they build up grime and feel dirty when you slide your fingers on them.
5 Signs That It’s Time To Restring Your Guitar
As you learn your guitar better and the type of strings you prefer, you’ll also learn what a string sounds like or looks like when they need to be changed. In case you’re not sure, here are some things I always look for:
1. Poor Tone
Often the first sign your strings need changing is you notice a change in tone. Instead of the notes ringing out crisp and clear, you’ll have dull fuzzy notes. The first time I experienced this I was trying to learn a new chord and thought I was muting strings on accident. Nope! my B and e strings were simply shot.
2. Dirty or Grooved Feel
A new string has a crisp, smooth feel to it. When you play guitar the oils and sweat from your fingers are left on the strings. Over time, this will leave the strings feeling dirty, and before they break you may start to feel small grooves in them.
While you can continue to play with strings that sound a little dull, a dirty or grooved string will often soon break and should really be changed!
3. Discoloration
The same oils, sweat, and dirt that often make the strings feel different will cause them to change color over time. This can be a little difficult to see in dull light, but in a well-lit room, it becomes apparent.
Look at the color of the strings near the bridge (where they don’t often get played) and compare that to the area in question. A change in coloration is fairly obvious when it happens!
4. Won’t Stay In Tune
Older strings tend to loosen quickly and have stretched past the point where they can hold the correct tension to stay in tune. This will lead to strange sound notes and you having to repetitively tune your guitar.
While some of the other signs are easy to ignore and continue to play through, having to tune your guitar multiple times a session is simply annoying. Change your strings!
5. Stiff Strings
This can often feel like dirty strings, but corrosion on your strings will leave them stiff and hard to move around. Strings should have some flex and bendability to them. If not they are probably past their prime!
How Much Does it Cost to Restring Your Guitar?
The cost of restringing your guitar depends on the type of strings you use and who does it. If you restring your own guitar and use the cheapest strings you can find, you can likely do it for as little as $5. A decent set of strings will cost more like $15-30 though, so that’s what I’d expect to pay. Bass guitar strings also tend to be slightly more expensive, but not by much.
If you take your guitar to a professional many of them will charge a little for the labor involved. Guitar Center charges around $20, so having a professional restring your guitar is likely to cost you between $30-$50.
The Final Note
It is important to note that restringing your guitar should be done as soon as it becomes apparent that the strings have outlived their usefulness. This could be due to any of the five signs, though not every sign may apply and should be taken into consideration.
While you don’t have to restring your guitar until the strings break, this is a fairly unpleasant experience, especially the first time, and is something I recommend you avoid!
0 notes
Text
Are Guitar Chords the Same as Piano Chords? Definitive Answer!
I recently had a student switching from the piano to the guitar. One of their first questions was “are guitar chords the same as piano chords?”. He struggled to learn the chords on the piano and was concerned about it on the guitar.
On one hand, the guitar and piano are very different instruments. On the other, they are both considered stringed instruments. So what’s the answer?
In this article, we’ll look at both guitar and piano chords, and establish the similarities and differences. By the end, you’ll know everything you need to in order to answer the question “Are guitar chords the same as piano chords?”
Are Guitar Chords the Same as Piano Chords?
Unfortunately, this is not a cut-and-dry yes or no type question.
Guitar and Piano chords are the same, but they are played differently. If you take the chords from a guitar song they will match the chords you need to play on the piano, but the shape, tone, and placement of these chords will differ.
Each string and each fret on the neck of a guitar represents an individual note. Each key on a piano also represents an individual note. But a guitar has notes that repeat, while a piano doesn’t. For example, the 7th fret of the A string is the exact same note as the 2nd fret of the E string.
On the piano, each note is only assigned to one key. Now, you will have multiple keys that play the C note, but each one will have a different pitch and be a different octave than the other keys of the same note.
Notes of Chords
The key similarity between guitar chords and piano chords is the notes. A, C chord, regardless of the instrument it is played on, will always contain the notes C, E, and G. Likewise, a G7 chord will always contain the G, B, D, and F notes.
By knowing a little bit of music theory, especially the 12 unique notes in music, you will be able to identify the different notes in each chord. This will help when playing both guitar chords and piano chords. If you understand guitar scales then this should make pretty good sense to you. If you don’t know a few guitar scales, it may be better to learn a few and come back to this concept!
Translating Guitar Chords to Piano
If you know how to play a C chord in open position you can really pick any C chord that you know on piano and you’ve translated a guitar chord into a piano chord. Pretty simple right?
Now, the pitch and the octave of the chord will likely be off, but you technically will have accomplished your goal!
Because guitar tabs are more accurate as to location on the fretboard, and notes of the chord being played, they can be easier and more accurate when translating them into piano chords. In both cases, you’ll need to know the different notes and pitches assigned to the different piano keys.
The same chord on the two instruments will never sound exactly the same. The color and tone of the instruments are different and therefore even the same chords will sound slightly different.
To go over this topic in more detail, we’ve included the following video from the YouTube Channel, musicwithnopain. This video does a good job giving a rather detailed explanation of how to translate guitar chords into piano chords and shows the process in action!
youtube
The Final Note
So, in summary… Are guitar chords and piano chords the same?
Guitar and Piano chords are the same in that they contain the same notes, but they are played differently and even sound slightly different on the two instruments. To understand the intricacies you’ll need to freshen up on your music theory, which explains it in more detail!
0 notes
Text
Guitar vs. Bass: Which Instrument Should You Choose?
When picking a stringed instrument, the choice between guitar vs. bass might not be as simple or as clear-cut as you may think. As with many things, much of this decision comes down to personal preference.
If your hero is Flea from the Red Hot Chili Peppers, it’s likely that you’ll want to play the bass. A Clapton fan, on the other hand, should probably pick up a six-string. Many of us, like myself, are simply fans of music, so both are appealing.
Either way, in this article we’ll cover the difference between the bass and the six-string guitar so you can make an educated decision as to which you want to learn (first!).
Guitar vs. Bass: Differences
The basic difference between the guitar and the bass is that the guitar has six strings, while a bass has four. This means the guitar will have a much wider tonal range than a bass, while a bass guitar will hit lower notes. In addition to this, guitars and bass differ in size, tuning, string size, and sound.
While the bass is often called a bass guitar, and it belongs to the guitar family of stringed instruments, it has some qualities that separate it from the six-string guitar. Let’s look more at these.
Size
The first difference between the guitar vs. bass is the scale length. The scale length of a six-string guitar is commonly between 24” and 25.5”. The short-scale bass guitar is normally 30” with a long-scale, often called a standard scale, which is 34”.
Most bassists use the standard because they are easier to play. To get the deeper sounds iconic to a bass the strings need to be thicker. This makes them a little tougher on the fingers and a little more difficult to fret.
The longer neck on the bass guitar leads to it having more frets than a standard 6-string as well. Bass guitars commonly have 24 frets, while guitar necks normally have 20 frets.
Strings
Six-string guitars have, you guessed it, 6 strings. Bass guitars on the other hand only have four. While both styles of the guitar have some variation (you can get 8 and twelve-string guitars and four, five, and six-string bass), six and four are the standard.
String Thickness
Bass guitar strings are thicker and longer than a 6-string. This helps them ring out with the lower notes, but can also make them a little less forgiving than standard guitar strings.
We’ve covered both bass guitar strings and six-string guitar strings in much greater detail if you want to read more!
Tuning
The standard tuning for a bass guitar matches the lowest four notes for the standard tuning on a six-string guitar. This means that the lowest four notes on both are E, A, D, G, The six-string extra two notes are B and e.
While these two instruments share the same notes, the bass guitar is tuned one octave lower than the standard guitar. This allows the bass to ring out lower notes even when playing the same notes.
Role of the Guitar vs. Bass in a Band
Along with the drums, the bass guitar provides the backbone and the rhythm for the song. If you are looking for a specific sound in a band without needing to be front and center, choose the bass guitar. The bass is what gives the band its rhythm, and without it, there would be no song.
The guitarist can either play and support the rhythm or they can venture off and embellish with solo riffs. While the lead guitar player and lead singer generally get the glory, the band would be nothing without the bassist and drummer!
Is Guitar Easier than Bass?
The guitar and the bass are two different instruments that require different skill sets and knowledge bases to play so neither is necessarily easier to learn than the other.
For instance, a guitarist generally will be playing chords while a bassist plays individual notes. Learning and remembering the different chord shapes can be more challenging than learning individual notes, especially for beginners.
Individuals with smaller hands may struggle with the wider, longer neck of the bass and the thicker strings. Both can be difficult to navigate, especially for the first few months while playing the bass.
In the end, it’s all a matter of personal preference and comfort. If you want to learn to play a 6-string guitar, or if you want to be able to play either instrument, there’s no need to hesitate; just get out there and start playing!
Which Instrument Should I Choose?
In the end, the choice between playing the bass and the guitar comes completely down to preference. Both instruments will give you the feeling of being a musician, and both will get your heart racing as you shred away on your favorite song.
Here are a few questions that might help you choose:
Do you like being in the spotlight? Yes – pick a guitar
Do you like thumping the bass of a song while driving? – Yes – pick bass
What do you find yourself humming, the rhythm of a song or guitar solos?
Do you look up to any musicians? What instrument do they play?
Do you like solo projects or being part of a team?
While none of these questions definitely answer the question of which instrument you should choose, they do get you thinking about which might fit your personality.
I played guitar for almost 5 years before learning the bass and while a guitar will always be my instrument, there are plenty of times when I have more fun laying down basslines. Also, I enjoy playing some genres more on a bass guitar, like when I’m playing jazz or funk nothing beats playing the bass!
Bass vs. Guitar: The Final Note
As you can see, the bass is not necessarily harder to play than the guitar. It all comes down to what your goals are as a musician and what instrument best suits your playing style.
Both will take time to learn, but if you’re willing to work hard enough, doing both will always do wonders for your playing – but ultimately it’s up to you! So if you have been wondering whether guitar or bass is easier for you, the answer is: it depends on what your goals are and what you enjoy!
0 notes
Text
Ukulele vs. Mandolin: Which Instrument is for You?
From appearances, alone many people assume that the ukulele and the mandolin are quite similar as they are both small stringed instruments. In many ways that are as far as the similarities go! The differences in ukulele vs. mandolin are actually quite numerous.
In this article, we’ll discuss the differences between the ukulele and mandolin as well as answer a few common questions we get when comparing the two!
Differences between the Ukulele and Mandolin
As we already hinted at, other than their approximate size these two instruments actually don’t have much in common.
The differences between the Ukulele vs. Mandolin include the size and shape of the body, the places of origin, tuning, instrument family, and even the number of strings. Both instruments have closer stringed instrument relatives than each other.
Let’s look at each of these factors in more detail.
Sizes and Types
The Ukulele generally comes in four sizes, the soprano, which is actually the smallest; next is the Concert or Standard Ukulele, Tenor, and then finally the Baritone. The smaller the size the higher pitch a ukulele tends to be, with concerts and sopranos living up to the true ukulele pitch.
For comparison, the Mandolin comes in three main variations, which differ in body shape rather than size.
The Neopolitan Mandolin is a bowl-backed instrument that is possibly the oldest and original style of mandolin. Due to the extra area of the sound chamber, these instruments produce a deeper sound than other options and will often be found being played by classical musicians.
The A-Style is a tear-drop-shaped instrument is probably the most popular shape, partially due to the fact it’s often the cheapest. The sound is very similar to the F-style Mandolin, but A-Styles are seen far more often in Celtic, Irish, and folk music.
Lastly, the F-Style is widely considered the bluegrass mandolin. The main difference between the A-style and F-style is cosmetic, with the F-style adding points, a scroll, and different headstock to the tear-shaped body of an A-style. Bluegrass musicians tend to this style due to more treble attack and percussive “chop” than the other body shapes.
Tuning
The standard tuning for these two instruments is different as well. Mandolins normally are tuned GDAE, whereas a ukulele is tuned GCEA. Even the common baritone ukulele is tuned DGBE rather than the Mandolin tuning.
The tuning on the Mandolin is actually the same as the fiddle, and just like the fiddle, a properly tuned Mandolin will have each string be a Perfect Fifth interval.
Ukuleles also often employ reentrant tuning, meaning the C string is a higher pitch than that of the G. This is different than Mandolin tuning because on a mandolin the pitch of the strings goes in order.
Strings and Tension
Mandolins have 8 strings, 4 main and 4 minor, similar to how a 12 string guitar duplicates the 6 notes of a 6 string guitar. The Ukulele simply has four strings total.
Mandolins also normally use metal strings that are strung at higher tensions than the nylon strings often found on ukuleles. The softer feel of the nylon strings is one of the reasons many beginners prefer the ukulele vs mandolin.
Music Styles
As with many stringed instruments, both the Mandolin and Ukulele fit well into many types of music. The mandolin, due to its metal strings, is generally louder and can compete with the sound of a bluegrass band easier than and uke will though.
Along with Bluegrass, mandolins can commonly be found in Irish, Celtic, Classical European, and American folk music.
While the Ukulele has almost invented its own style of music, the tropical, light sound we associate with islands in the Pacific and Caribbean, musicians like Eddie Vedder and Vance Joy have brought it to the mainstream with pop hits in the last decade.
Instrument Family
The Ukulele belongs to the guitar family of instruments and is considered a plucked lute. The mandolin on the other hand belongs to the soprano section of the lute family.
Origins
The Mandolin traces its roots to Italy and Germany as early as the 18th century. Like many stringed instruments from Europe, an earlier version of this instrument goes back even further and Mandolin like instruments evolved around the 14th century.
The Ukulele in its current form originated in Hawaii in the 20th century after Portuguese immigrants brought it to the Hawaiian islands in the early 19th century. Not until travel to mainland America became more common did the instrument gain popularity outside of Hawaii.
Mandolin vs Ukulele: Which is Easier to Learn?
I consider the Ukulele a lot easier to play than the mandolin, especially for someone who hasn’t played a stringed instrument before. The nylon strings are more forgiving, the music styles are generally slower and more relaxed, and the tuning is more intuitive.
That being said, the Mandolin isn’t impossible to learn as your first instrument. You just need to go into it knowing it might take a little longer and require a bit more practice!
Which is Cheaper, Ukulele or Mandolin?
There really isn’t a comparison here, Mandolins are significantly more expensive than ukuleles for similar quality instruments. While this isn’t the most important factor for which instrument you should choose, it can come into play.
A good ukulele can easily be found starting around $75 -$100, the same quality Mandolin will easily cost you $300 or more. For children, I often recommend the Ukulele over the fiddle, banjo, or guitar due to its cost. A kid who shows interest in music can quickly switch to a more expensive instrument after they show they will play and practice with a uke!
Final Thoughts on Ukulele vs Mandolin
If you’re new to stringed instruments and trying to decide what’s right for you, I recommend the Ukulele. The sound is light and happy, and it’s simple enough to learn on without struggling with technique or difficult tunings.
For someone more experienced looking for a stringed instrument that can hold its own in a bluegrass band, the Mandolin is a perfect choice. With 8 strings at higher tensions mandolins can keep up with faster music styles than ukuleles can manage.
Either way, have fun playing… that is really the most important thing!
0 notes
Text
What is Clawhammer Banjo? The Complete Guide!
In the world of banjo, clawhammer is something that is a word that is often heard, yet many beginners and people new to the instrument will have little experience with. The good news is that the question “what is clawhammer banjo” is easily answered.
Clawhammer banjo is a style of playing that is otherwise known as old-time banjo. When playing the banjo in a clawhammer fashion you use either the back of your index or middle finger to strum the strings and alternate this with plucking with your thumb.
Clawhammer players have a distinct way of holding their hands to play this style. The shape of the hand resembles a claw which lends the name to the style. The other reason it’s called clawhammer is that the resulting rhythm sounds like “boom -chick -a” or… how it got its name… “Claw-ham-mer”.
Can You Play Clawhammer on any Banjo?
You can play clawhammer on any 5 string banjo! Resonator or open back, because it’s a strumming style it is not instrument dependant. Traditionally most people only played clawhammer on open-backed banjo, but the belief it can “only” be played open-backed is a myth.
Resonator banjos were not invented until later, but they are still commonly used with Clawhammer. In fact, many of the best clawhammer banjoists like Wade Ward, Ralph Stanley, J.D Wilkes, Mike Seegar, and String Bean all played clawhammer on a resonator banjo.
Is it Hard to Play Clawhammer Banjo?
Most people consider clawhammer style banjo to be easier to learn to play than Scruggs style. With clawhammer banjo, you have the basic stroke and once you master it you can play anything.
Scruggs style, with the different rolls and picking patterns, tends to be more complicated! Both styles have their advantages, but for most people, we recommend learning clawhammer first.
What is the First Step to Learning How to Play Clawhammer?
The first step to learning how to play clawhammer banjo is picking a good instrument! If you have no idea what you’re looking for, we recommend checking out our beginner banjo buying guide.
Next, you want to practice the downstrum with the nail of your index or middle finger. Make sure you are hitting each string with equal pressure and the sound is smooth. We usually will do this without worrying about chord changes at first.
After the downstrum you’ll pick out the bass note, usually the drone string (5th string) with your thumb. Alternate between the strum of the fingers and the pick of the thumb.
Start slow and only increase speed as you get better! Practice with a metronome and try to keep a steady tempo. As you get better, slowly start adding more chords or strumming patterns.
youtube
Where did Clawhammer Banjo Originate
The banjo has roots dating back to many people in West Africa. The instrument, or early versions of it, was brought to America with black slaves, and from everything, historians know the clawhammer style of play was indigenous to them.
This is why clawhammer is often referred to as old-time banjo. Scruggs style was not invented or popularized until much more recently.
What is Clawhammer Banjo – The Final Note
Clawhammer banjo is a style of playing that is otherwise known as old-time banjo. When playing the banjo in a clawhammer fashion you use either the back of your index or middle finger to strum the strings and alternate this with plucking with your thumb.
Most people consider clawhammer style banjo to be easier to learn to play than Scruggs style. With clawhammer, you have the basic stroke and once you master it, you can play anything!
Either way, we love playing the banjo and recommend beginners work on both clawhammer and Scruggs. It may take you a little longer to learn at first but will make you a much more versatile player in the long run!
0 notes
Text
Banjo Roll Exercises to Make Practice Better!
Getting your picking hand moving and performing rolls is one of the most important pieces to giving your playing the distinct banjo sound. Banjo roll exercises are designed to get your right-hand muscles moving and make sure your fingers are ready for playing.
This article will give you a few different banjo roll exercises that will loosen up your fingers and get you playing your favorite tune!
Banjo Roll Exercises – Picking a Warm-Up Routine
Playing the banjo, and especially performing complex rolls, requires a lot of agility and dexterity. Trying to just pick up your banjo and play will not help your overall ability to play. Anytime I pick up my banjo I have a sequence of warm-up exercises I do to get ready to play.
Finger stretching
Before I even pick up my instrument I start stretching my fingers. This is a key step in making sure my fingers are ready to go. Getting the blood flowing to the fingers and loosening up the joints before playing, or even as you’re sitting around during the day, is a great way to keep your hands loose and agile.
Here is a great video with a sample finger stretching routine you can do before you begin even beginner banjo roll exercises.
youtube
Play A Beginner Banjo Roll
The next step is to slowly walk through a beginner banjo roll just to get my fingers moving and to practice playing in time. I will often spend a few minutes playing something like the forward roll, then switch to a slightly more complicated alternating thumb roll.
By doing this both my fingers and my thumbs will get some work. I always use a metronome for this step too. If I need to I’ll start as slow as something like 50 bpm and only progress when I’m hitting each note flawlessly!
How Do You Practice Banjo Rolls?
When people ask me how to practice banjo rolls my advice is almost always the same. Slow down!!!
Most players try to play too fast to start with. This leads to sloppy practice and eventually sloppy playing, and nobody wants that!
I use a metronome every time I pick up the banjo, but if you don’t have one don’t fret. Just make sure you aren’t pushing yourself too much. If you’re pushing yourself to be faster than normal it will become harder for your muscles to respond and move quickly when it’s time to do so.
If you don’t have a metronome, you can get one for cheap or you can download a bunch of different apps for your phone. There is also a great resource at metronome online that you can use from your computer! Either way, find a speed that you can pick perfectly. Do 10 rolls and then speed up just a few beats per minute. If you make a mistake at this new speed slow back down.
By taking your time and really drilling home the picking pattern you are getting valuable banjo roll exercise and creating the muscle memory you need to perform these skills at faster speeds!
youtube
How Do I Speed Up my Banjo Rolls?
Speeding up your banjo rolls mostly takes time and practice. Make sure you focus on playing at the speed where you can hit each note perfectly, then you can gradually speed up your rolls.
Speed really just comes with time. I don’t know a single banjo player who could rip through a forward roll on their first time. Practice, practice, practice!
The Final Note
If you’re a beginner, make sure you take your time with your banjo roll exercises and don’t push yourself too much. Speed will come with practice and patience! I hope this article was helpful and I hope you find it easier to get started.
Remember, practice makes perfect!
0 notes
Text
6 Essential Beginner Banjo Rolls on the 5-String
Many beginner banjo rolls are new banjo players’ first experience doing anything with their dominant hand. Most courses and teachers will focus on chords and simple strumming patterns, which I understand and can get behind.
That being said, to make the banjo sound like most people expect a banjo to sound, you must learn banjo rolls. This picking pattern is unique to the banjo and leads to the fast, wide range of notes a banjo is able to quickly produce.
While there are a TON of different rolls you can learn, we’ve picked out six to begin with before expanding to other versions!
What is a Banjo Roll?
A banjo roll is a pattern of eight notes picked out repeatedly with the thumb, index finger, and middle finger on the player’s dominant hand. A roll combined with the different chords creates a stream of chords and single notes that weave together to create the banjo’s distinctive sound.
If you’ve ever heard the term “3 finger banjo” this is what they are referring to. You will always be using a combination of your thumb, middle, and index finger in different orders and on different strings.
The more advanced you get the more you can combine different roles and customize patterns to suit the sound you want. For beginners, we want you to stick to a few simple rolls to get your fingers used to the movement!
When you are learning roll patterns, I also want you to set a metronome to a very slow beat per minute. Pluck strings in time with the metronome. Slow the metronome down until you are able to do this and only speed up when you aren’t missing any notes in a pattern!
Easy Beginner Banjo Rolls
On to the beginner banjo rolls! We are going to look at six different patterns in this article. This is more than enough for a new banjo player but by no means a complete list of your options!
Pick a roll or two to practice, and stick with those until they start to really show some improvement before picking up any of the others.
One quick note, when we talk about string numbers on roll patterns. The fifth string is the short g string, closest to the player. The first string is furthest from the player and is the D string!
The Forward Roll
This is the roll I recommend beginners start with, it is the most simple as your fingers work down the strings in a pattern that makes fairly good sense and isn’t too difficult to remember!
To use the forward roll pattern pluck the strings in this order:
Pluck the 2nd string with your index finger.
Pluck the 1st string with your middle finger.
Pluck the 5th string with your thumb.
Pluck the 2nd string with your index finger.
Pluck the 1st string with your middle finger.
Pluck the 5th string with your thumb.
Pluck the 2nd string with your index finger.
Pluck the 1st string with your middle finger.
As you get more advanced you can actually change the strings that your index and middle play, as long as the index stays one string above the middle. In this example, we used the 2nd and 1st strings, but it could just as easily be played 3rd and 2nd.
The Backwards Roll
The backward roll, often called the reverse, uses the same pattern as the forward roll except you switch the order that your middle and index fingers pluck their strings:
Pluck the 1st string with your middle finger.
Pluck the 2nd string with your index finger.
Pluck the 5th string with your thumb.
Pluck the 1st string with your middle finger.
Pluck the 2nd string with your index finger.
Pluck the 5th string with your thumb.
Pluck the 1st string with your middle finger.
Pluck the 2nd string with your index finger.
In the forward roll it is index then middle, the reverse roll goes middle then index finger. Many times the forward roll will create an uplifting and fun sound while the reverse roll is almost melancholy.
The Forward-Reverse Roll
The Forward-Reverse roll is the first time we’ll get our thumb in action moving to different strings. We recommend that you get good with the first two rolls before you start trying to add the extra complexity of moving your thumb!
Pluck the 3rd string with your thumb.
Pluck the 2nd string with your index finger.
Pluck the 1st string with your middle finger.
Pluck the 5th string with your thumb.
Pluck the 1st string with your middle finger.
Pluck the 2nd string with your index finger.
Pluck the 3rd string with your thumb.
Pluck the 1st string with your middle finger.
When I play a Forward-Reverse roll I will hover my thumb over the fourth string and move it down to pluck the third and up to play the fifth.
This pattern is also a great one for beginners because even though your thumb just plays two notes differently the sound is shockingly different. The octave of the root note in this pattern is a full octave lower than in the forward.
The Alternating Thumb Roll (Mixed Roll)
You can call this roll more than a few things. The mixed roll, the alternating thumb roll, or even the thumb-in-and-out roll. This pattern is the first we cover that hits on all five strings, and is the 2nd reason I recommended hovering your thumb over the fourth string on the previous roll!
Pluck the 3rd string with your thumb.
Pluck the 2nd string with your index finger.
Pluck the 5th string with your thumb.
Pluck the 1st string with your middle finger.
Pluck the 4th string with your thumb.
Pluck the 2nd string with your index finger.
Pluck the 5th string with your thumb.
Pluck the 1st string with your middle finger.
This might be the single most popular banjo roll that we’ve covered, and learning this will open up a wide number of bluegrass hits for you to play! Some of the best easy banjo songs, including both “Cripple Creek” and “I’ll Fly Away” used the mixed roll.
Middle-Leading Roll
While the last two patterns required you to learn to move your thumb around to pluck different strings, the Middle-Leading roll goes back to only using three strings in the pattern.
The difference here is that your middle finger will play every other note, and your thumb and index rotate around in the order in which they are played.
Pluck the 1st string with your middle finger.
Pluck the 2nd string with your index finger.
Pluck the 1st string with your middle finger.
Pluck the 5th string with your thumb.
Pluck the 1st string with your middle finger.
Pluck the 2nd string with your index finger.
Pluck the 1st string with your middle finger.
Pluck the 5th string with your thumb.
Sonny Osborne made this roll famous and you might hear it referred to as the “Osborne Roll”. This is a personal favorite of mine as it brings a very distinctive sound to the instrument. People know you’re playing the banjo, but often are trying to figure out how!
Index-Leading Roll
Just like the middle-roll, the index-roll you’ll be plucking all the odd beats on the same string, this time with the index finger rather than the middle.
Because you won’t be moving much, both the middle-leading and index-leading can be sped up a lot if you get good at them!
Pluck the 2nd string with your index finger.
Pluck the 3rd string with your thumb.
Pluck the 2nd string with your index finger.
Pluck the 1st string with your middle finger.
Pluck the 2nd string with your index finger.
Pluck the 3rd string with your thumb.
Pluck the 2nd string with your index finger.
Pluck the 1st string with your middle finger.
This tends to be a fairly high-sounding roll since the bass notes and drone string are completely left out of the pattern.
What is the Most Common Banjo Roll?
The “lick” roll is one that is often used in choruses and fill-in spots during songs, making it the most common roll overall. It is also a nice one to learn after the basic rolls are done since it’s the mix of two of them, the forward roll and the forward-reverse rolls.
If you play the first four notes of the forward roll, the T-M-T-I, and combine that with the last four of the forward-reverse: M-I-T-M, you get the “lick” roll. So the full eight-note pattern is T-M-T-I-M-I-T-M.
The Final Note
Beginner banjo rolls are a great means to get started on learning to play the banjo, but they are not the end of your journey! These rolls just crack the tip of the iceberg and you can really get complicated in your roll patterns as you get better!
As a beginner though, stick with a few roll patterns, learn your chords and easy banjo songs, and more importantly than anything, have fun!
0 notes
Text
Is It Hard To Learn Banjo? How Hard?
Picking up any new hobby can be difficult, you just know there is some learning time and effort involved in something new. A common question I hear all the time; is it hard to learn banjo? It’s a good question, and not quite a simple one to answer.
Every instrument has a different learning curve but the factors that weigh into these differences aren’t always obvious. The goal of this article is to answer many of the common questions and help a beginner understand that the banjo is actually a fairly easy instrument to learn!
Is it Hard To Learn Banjo?
No! Banjo is generally considered the easiest stringed instrument to learn! Because of the open G tuning and the lighter gauge strings, beginner banjo players are able to play a variety of songs within a month or two.
Open G Tuning: Banjos in standard tuning is what is called open G tuning. This means that when you strum the instrument without any frets pressed down, the resulting note is a G chord. This is one of the most popular chords in the world!
By pushing down all the strings in the fifth fret you’ll play a C chord, and pressing them all in the 7th fret results in a D chord. These three chords open up thousands of song possibilities and make the learning curve to your first song much shorter than a ukulele, guitar, or fiddle.
String Gauge: Banjo strings are much thinner than a six-string guitar, and about the same as most sizes of ukulele. This makes them much easier for beginner players to press down and fret.
I’m not saying it won’t take any time to learn at all, but learning banjo is done much quicker than other instruments because of these factors. Learning any musical instrument is a challenge, so I would be lying if I said it was easy to learn banjo, but it’s better than other options!
Is Banjo Easier to Learn Than Guitar?
Yes! Most people consider the standard banjo tuning and string gauge easier on beginners than the guitar. It may seem almost too easy to be a real instrument, but that’s why Banjo is considered the easiest stringed instrument to learn how to play!
The guitar is much more difficult for beginners because you have to press down on all six strings at once, which requires much more strength in your fingers. Playing simple chords like the G, C, and D are also more difficult.
Is Banjo a Good Beginner Instrument
The open-back banjo is a great beginner banjo. It is easier to learn than many others and if you decide to switch to a guitar or ukulele, many of the things you learned playing banjo will apply in one way or another on your new instrument.
How Long Does it Take to Learn to Play The Banjo?
Learning to play the banjo is not a quick endeavor. Like most other pursuits, especially musical ones, it will take a lot of practice before you can consider yourself to have ‘learned’ to play the banjo. If learning to play the banjo means one easy song, that can be done in a month or two though!
We like to tell people that it will take longer than you think. When I get a new banjo student I will often have them set smaller goals that are less arbitrary. Things like playing different chords, or switching between chords, or strumming at a certain beat per minute (bpm).
For years I have heard that banjo players who want to be proficient should plan on spending about 2000 hours, about 416 days, practicing before they should expect to play more or less anything they want on the instrument.
2000 hours will put you at a performance level, possibly a professional level if you are talented.
Other factors can affect the length of the learning process greatly. Getting a good course to help you learn banjo online or getting yourself a teacher and in-person lesson will probably help you learn to play banjo much quicker than if you try to teach yourself!
Malcolm Gladwell has promoted the theory that it takes 10,000 hours of practice to become World Class at any skill. But between that 2000 hours and then 10,000 hours, you will only make minute improvements that most people will never understand.
Which Banjo Style is Easiest to Learn?
There are basically two styles of the banjo. Bluegrass banjo is often called Scruggs Style, and Clawhammer, also known as old-time banjo.
Clawhammer banjo is easier to learn than Scruggs Style for several reasons. Clawhammer is similar to a strumming pattern if you are familiar with the guitar. Once you have the clawhammer rhythm and stroke, it doesn’t change. All you have to do is make sure you’re playing in time and the chords are correct.
Scruggs Style banjo is generally played much faster than old-time music and uses picking patterns often called rolls. These rolls are made up of four to eight notes and produce the complicated, complex sounds that banjos have become known for.
While the bluegrass style of banjo can sound amazing, the speed and complexity of the rolls make it much harder to learn than clawhammer.
The Final Note
Banjo is a good instrument for beginners because it requires less strength than the guitar and has fewer strings, making it easier to pick up quickly. Even knowing it’s a fairly easy instrument to learn, beginner banjo players who want to become professional should plan on spending about 2000 hours, about 416 days, practicing before they’re fully proficient.
0 notes
Text
The Best Left Handed Electric Guitars for Beginners – Buying Guide!
Lefties have it a bit rough, don’t they? The world is dominantly right handed after all. To help our friends out who want to learn the guitar left handed, we’ve put together a quick list of the four best left handed electric guitars for beginners!
There were quite a few more options than we expected, so picking four wasn’t easy, but boy was playing all those instruments fun!
After we give you the details on all four of our picks we will run down a buyers guide that will help you shop for a guitar if you want to browse a bit more before choosing!
The Best Left Handed Electric Guitars

Top Pick!
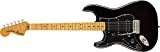
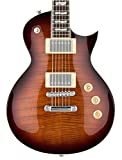
Product
Ibanez GRX 6 String Solid-Body Electric Guitar, Left, Transparent Blue Burst,...
Squier by Fender Classic Vibe 70's Stratocaster Left Hand Electric Guitar - HSS...
ESP LTD EC-256FM Electric Guitar, Dark Brown Sunburst
Donner 39 Inch Telecaster Left Handed Electric Guitar Full Size Tele Style Solid...
Reviews
-
-
-
128 Reviews
Stars
-
-
-
Price
$249.99
$429.99
$429.00
$129.99
-
Buy on Amazon
Buy on Amazon
Buy on Amazon
Buy on Amazon
Product
Ibanez GRX 6 String Solid-Body Electric Guitar, Left, Transparent Blue Burst,...
Reviews
-
Stars
-
Price
$249.99
Buy on Amazon
Top Pick!
Product
Squier by Fender Classic Vibe 70's Stratocaster Left Hand Electric Guitar - HSS...
Reviews
-
Stars
-
Price
$429.99
-
Buy on Amazon
Product
ESP LTD EC-256FM Electric Guitar, Dark Brown Sunburst
Reviews
-
Stars
-
Price
$429.00
Buy on Amazon
Product
Donner 39 Inch Telecaster Left Handed Electric Guitar Full Size Tele Style Solid...
Reviews
128 Reviews
Stars
Price
$129.99
Buy on Amazon
We did our best to pick out at least one option for each type of player. Gibson humbucker lovers will have an option right along with those who love the classic Stratocaster.
Ibanez GRX 6 String Solid-Body Electric Guitar
The first guitar on our list is the Ibanez GRX 6 String Solid-Body Electric Guitar in blue burst. This stylish guitar looks nice and it plays great too! The Ibanez guitar features a poplar body with a very special New Zealand Pine fretboard and maple neck, a standard 25.5″ scale (626 mm) with 22 medium frets.
The GRX series is equipped with the awesome Infinity R humbucker pickups, including an Infinity R neck pickup and an Infinity R bridge pickup for sound versatility. A standard tremolo bridge and a fixed nut provide smooth action and accurate intonation.
Ibanez GRX 6 String Solid-Body Electric Guitar, Left, Transparent Blue Burst,...
$249.99
Buy on Amazon
I played a number of Ibanez styled guitars before I picked up this one. The blue pops and if you like the shredding sound of a Ibanez, you cannot go wrong with this guitar!
PRO
Poplar Body and Maple Top
T106 Tremolo Bridge
Infinity R Humbucker Pickups
Phenomenal look and finish
Amazing sound for metal/rock
CONS
Middle pickup is somewhat poorly located.
Shop Ibanez GRX 6
Squier by Fender Classic Vibe 70’s Stratocaster Left Hand Electric Guitar
Our top pick is the Squier by Fender Classic Vibe 70’s Stratocaster Left Hand Electric Guitar. I’ve always been a little biased towards Stratocasters ever since Marty McFly in back to the future ripped up the gym with one!
This guitar is very comfortable to hold, the body has a bit of weight to it. The neck is maple which seems to me like what I prefer as far as necks go. The Classic Vibe series is dedicated to the authentic sounds that made this instruments so popular in the first place.
Squier by Fender Classic Vibe 70's Stratocaster Left Hand Electric Guitar - HSS...
$429.99
Buy on Amazon
As all Strats should, this guitar has a neck/middle/bridge single coil pickup configuration with custom Fender pickups. There is not another guitar on this list, and especially for under $500, that I’d rather play!
PRO
Classic Fender Sound
Poplar Body, Maple Neck
Fender Alnico Pickups
Vintage Tremolo Bridge
Slim C Shaped Extra Playable Neck
CONS
LH is limited on color options
Shop Squier Classic Vibe 70’s
ESP LTD EC-256FM Electric Guitar, Dark Brown Sunburst
I actually played more Gibson and Epiphone models than any other style guitar before going with the ESP LTD EC-256FM Electric Guitar, Dark Brown Sunburst. The humbucker sound rang true on this guitar and I came to love the tone!
The finish is a very classic looking sunburst. The neck has a standard 22 fret size but it gives it a bit of a retro look and feel. The electronics are all genuine ESP passive pickups and you have a Vol/Vol/Tone toggle switch for control.
ESP LTD EC-256FM Electric Guitar, Dark Brown Sunburst
$429.00
Buy on Amazon
The ESP LTD series is one of the guitars that every serious guitarist should have in their collection. If you are a beginner, there are a LOT worse choices you could go with for your first instrument!
PRO
Passive, Covered Humbucker Pickups
Classic Gibson Sound
Super Low Hum
Beautiful Instrument
Amazing Value – Worth Twice the Price
CONS
Plastic Nuts
Shop ESP LTD EC-256 Sunburst
Donner 39 Inch Telecaster Left Handed Electric Guitar
Beginners don’t always want to spend a bunch on their first instrument. We get that. For those of you in that category the best budget left handed electric guitar goes to the Donner 39 Inch Telecaster Left Handed Electric Guitar.
In true telecaster style this guitar has everything you’d expect from a timeless classic. A Telecaster’s body is made of ash wood with a maple neck, the fretboard and bridge are made of rosewood. The pickups are arranged in the neck/bridge style, these are the first component you’ll want to upgrade if you keep this instrument long term!
128 Reviews
Donner 39 Inch Telecaster Left Handed Electric Guitar Full Size Tele Style Solid...
$129.99
Buy on Amazon
I was surprised by the sound and quality that this instrument produced! You can spend a lot more on instruments that don’t sound half as good!
PRO
Authentic Telecaster Look and Feel
Poplar Body
Maple Neck and Top
Low Action – No Buzz
Great Budget Instrument!
CONS
Pickups will need upgraded – lots of hum at high volume
Shop Donner DTC 100SL Telecaster
Left Handed Electric Guitar Buying Guide
Let’s say we didn’t list out an instrument that you’ve been looking at, how do you make your choices? In this section we’ll talk about everything we look for when shopping left handed electric guitars!
The Style of Electric Guitar
Acoustic guitars pretty much all look the same. Not so with electrics. Each of the traditional guitar makers has their own style of electric guitar. Ibanez, Gibson and Fender are the most well known. Each of these makes a great instrument.
I have a soft spot in my heart for the Fender Stratocaster, but everyone is different and the genre of your favorite music heavily weighs in on which style will be best for you!
Quality Components
The more you spend on a guitar, the better quality electronics you will find in it. That’s true for all guitars as well. The pickups are the most crucial component in an electric guitar.
The pickup is where the majority of the tone is produced, by that I mean what you hear out of your guitar. It also includes the effect on it as well. The electric guitars above are all equipped with a genuine original Fender component!
Tuners, strings, frets, the bridge, and the tone/volume switches or knobs all play a part as well. On beginner level instruments you’re not going to find anything special in these components, but they shouldn’t feel or look cheap (if they do, they probably are).
Weight and Size (Guitar Weight)
I’m not saying that these instruments weigh tons, but I have been a bit spoiled by my other guitars having a more “lightweight” quality to them. Electric guitars are mostly solid body, so they will weigh a lot more than acoustics.
This may or may not be an issue, if you normally wear a guitar strap or play seated the weight of your instrument is less of a concern than if you’re standing for long periods of playing time.
The Final Note
There you have it! The best left handed electric guitar is the Squier by Fender Classic Vibe 70’s Stratocaster, although you can’t go wrong with any of these instruments! Any one of these guitars will make a great addition to your arsenal and go great as a beginners first instrument or an upgrade for a poor or cheap first purchase!
0 notes