
StructoTech covers construction technology, materials, green buildings, safety, and project management, keeping you updated on innovations.
Don't wanna be here? Send us removal request.
Statistics
We looked inside some of the posts by structo-tech and here's what we found interesting.
Average Info
Notes Per Post
1
Likes Per Post
1
Reblog Per Post
0
Reply Per Post
0
Time Between Posts
20 hours
Number of Posts By Type
Text
17
Last Seen Tumblr Blogs


Fun Fact
The most popular pages on Tumblr are about Minecraft, GIFs, and David J. Peterson.
Text
Fixing Drywall Imperfections After Priming: A Simple Guide
**Fixing Drywall Imperfections After Priming: A Simple Guide** No matter how skilled you are, drywall will almost always have minor flaws like ridges, dents, or pits — and frustratingly, many only become noticeable after applying primer. Ignoring them can make your finished paint job look uneven or sloppy. So, if you want smooth, polished walls, these imperfections should be addressed before painting. ### Step-by-Step: How to Fix Post-Primer Drywall Flaws **1. Gather What You Need** You’ll need fine-grit sandpaper (150–220), a dust mask, clean rags, a putty knife, and spackle. Avoid coarse sandpaper — it can damage the surface. **2. Sand the Imperfections** Wear your dust mask, then gently sand the problem areas to smooth them out. Wipe away dust with a rag to see if any defects remain. **3. Scrape Loose Primer** After sanding, some primer might peel up. Use a putty knife to remove loose flakes without digging too deep. **4. Apply Spackle** Use a putty knife to spread a thin layer of spackle over any pits or dents. Smooth it out evenly. Let it dry fully — ideally overnight. **5. Wipe Off Excess** Use a damp cloth to clean up any spackle that spread beyond the repair area. **6. Check Your Work** Once dry, inspect the patched areas. If they’re not perfectly flush, sand lightly and repeat spackling as needed. **7. Reapply Primer and Paint** Because some primer was removed during sanding, spot-prime the repaired areas before painting. Then apply two coats of paint for a clean finish. --- ### Common Questions **Is it okay to fix drywall after priming?** Yes — it’s actually very common. Primer often reveals flaws you didn’t notice earlier. **How can you spot imperfections?** Stand a few feet away and scan for uneven areas. Or use your hand to feel the surface. A bright light at an angle can also help highlight flaws. **Can primer hide flaws?** Not really. Primer is meant to help paint stick, not conceal surface imperfections. **Why sand after priming?** To remove defects and clear away dust or debris that may have settled on the primer. If your wall is flawless, sanding isn’t necessary. **Can you use mud instead of spackle?** Yes, joint compound (mud) works, but spackle is easier to apply and sand for small touch-ups. **Is there a primer that hides flaws?** Some brands claim to hide imperfections, but most don’t actually mask anything beyond very minor issues. You’ll still need to patch and smooth major flaws. Read the full article
0 notes
Text
Why T1-11 Isn’t a Practical Replacement for Drywall

Between the 1960s and 1980s, T1-11 siding was a popular choice for exterior walls, thanks to its natural wood appearance. Made from plywood or OSB, it could be stained or painted for a clean, rustic look. Because of its durable structure, some have wondered whether it could work indoors as a drywall alternative. ### Can You Use T1-11 Instead of Drywall? Technically, you *can*—but it’s not recommended. T1-11 is siding, designed specifically for exteriors. Drywall, on the other hand, is made for interior walls and ceilings. Using materials outside their intended function often leads to practical and safety issues. ### Why T1-11 Falls Short Indoors 1. **Too Rough for Interiors**: T1-11 has a coarse surface that doesn't suit the smooth look people prefer inside their homes. 2. **Not Up to Code**: Most building codes don’t allow siding to be used in place of drywall. Typically, drywall is required first, with sheathing and siding on the exterior. 3. **Moisture Risk**: Since T1-11 is wood-based, it can absorb moisture, leading to warping or rot—unlike moisture-resistant drywall varieties. 4. **Potential Health Concerns**: Some reports have linked indoor T1-11 use to respiratory issues, possibly due to certain finishes or adhesives. 5. **Fire Hazard**: T1-11 is not fire-resistant. In a fire, it can ignite quickly and worsen the spread—unlike drywall, which offers a degree of protection. ### Why Drywall Remains the Best Choice Drywall is affordable, widely available, and easy to finish. It also helps insulate your home, reduces noise, and can be painted, tiled, or wallpapered. There are even types made for high-moisture areas like bathrooms and kitchens. Overall, it's more versatile, safer, and better suited for interior use than T1-11. ### Any Exceptions? T1-11 can be acceptable in unheated, detached structures like tool sheds or garages—especially if you already have some leftover. But buying it new for interior use still doesn’t make much sense when more suitable, moisture-resistant, and fire-safe options exist. ### Can You Install Drywall Over T1-11? Yes, you can screw drywall directly over T1-11 if it’s in good condition. Just be aware that the added thickness may affect windows, doors, and electrical fittings. In some cases, removing the siding first is the better option—though it’s more work. ### Are There Any Pros to T1-11 Over Drywall? If used correctly, T1-11 has a few advantages: * It can act as both siding and a structural wall layer. * It’s durable and can handle more impact than drywall. * If you already have it, using it can save money. Still, these benefits rarely outweigh the downsides when used indoors. Read the full article
0 notes
Text
Mesh Drywall Tape: Pros, Cons, and What You Should Know Before You Use It
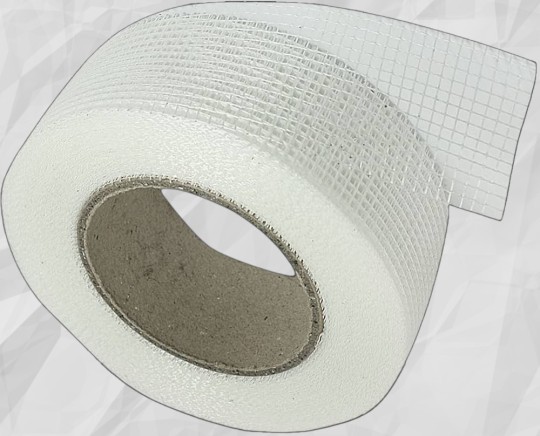
### **Mesh Drywall Tape: Pros, Cons, and What You Should Know Before You Use It** Mesh tape is a go-to tool in many drywall installation projects. Known for its simplicity and ease of use, it’s often applied to join drywall panels—especially along seams, corners, and joints—to help reinforce and stabilize the surface. However, as useful as mesh tape is, it comes with its own set of challenges. If you're considering using it on your next drywall job, it's important to understand both its strengths and the potential problems it may cause. --- ### **Common Issues with Mesh Drywall Tape** #### 1. **Prone to Cracking** One of the biggest downsides of mesh tape is that it cracks easily. While its self-adhesive nature makes it a favorite among beginners, many professionals still prefer paper tape for its durability. Mesh tape stretches slightly, and since drywall naturally shifts over time, the flexible tape moves with it—leading to surface cracks. **Solution:** Use a *setting compound* instead of regular joint compound. Setting compounds harden faster and bond better with mesh tape, reducing the likelihood of cracking. Alternatively, switch to paper tape, which is more rigid and crack-resistant. --- #### 2. **Lacks Strength** Despite the assumption that its woven design makes it stronger, mesh tape is actually one of the weaker options. The very flexibility that makes it easy to apply also means it lacks structural stiffness. **Recommendation:** If you're aiming for a more solid, long-lasting joint, consider using paper tape instead. --- #### 3. **May Peel Off If Left Uncovered** Mesh tape needs to be covered with compound fairly quickly after application. While it has adhesive backing, it doesn't stick well for long on its own. **What to do:** Apply a layer of joint compound shortly after placing the tape. Don’t leave mesh tape exposed for hours, as it may detach, requiring you to reapply. --- #### 4. **Difficult to Repair** Repairs on mesh-taped joints are often more time-consuming. The tape doesn’t tear easily, so when removing it during repairs, you might have to scrape off more drywall compound than you'd like—especially in tight spots. **Impact:** This not only increases labor but also means using more compound to patch things back up. --- #### 5. **Visible After Sanding or Drying** Another common complaint is that mesh tape can become visible after sanding or once the compound dries and shrinks. Unlike paper tape, which blends in more smoothly, mesh has a tendency to show through. **How to fix it:** Apply at least three coats of compound, ensuring the tape is well embedded. Sand lightly—just enough to smooth the ridges, not the tape itself. --- ### **Can a Professional Contractor Solve These Problems?** Absolutely. Experienced drywall installers are familiar with the limitations of mesh tape and know how to work around them. They’ll likely use setting compound, apply multiple coats, and can even opt for paper tape when needed. Hiring a qualified contractor can save you the frustration of dealing with cracking, peeling, or visible tape—especially if you're not experienced in drywall work. --- ### **What Are the Benefits of Mesh Tape?** While it has its flaws, mesh tape does have some clear advantages: * **Easy to Apply:** It’s self-adhesive and simple to use, which makes it a solid choice for beginners. * **Mold Resistant:** Great for high-moisture areas like bathrooms and kitchens, as it doesn’t support mold growth. * **No Bubbling:** Mesh tape allows air to escape when applied, so you’re less likely to end up with unsightly bubbles—something paper tape is notorious for. --- ### **Alternatives: Paper Drywall Tape** If you’re not sold on mesh tape, paper tape is the traditional and more robust option. **Advantages:** * Stronger and less prone to cracking. * Works with all drywall compounds. * Ideal for corners and tighter spaces. **Drawbacks:** * Doesn’t have adhesive backing. * Can dissolve in moisture-heavy environments. * More prone to bubbling if applied incorrectly. --- ### **Is There a Learning Curve with Mesh Tape?** Yes, like most tools, mesh tape requires a bit of practice to master. Novices may find it easier to apply, but without proper technique, they might run into the issues listed above. The good news? With the right approach—and a little guidance—you can avoid most of these problems. Understanding how mesh tape behaves and knowing when (or when not) to use it makes all the difference. --- ### **Final Thoughts** Mesh drywall tape is a helpful tool—but only if used correctly. While it's quick to install and offers benefits like mold resistance, it can also lead to cracking, peeling, or visibility issues without the proper materials and techniques. Whether you decide to stick with mesh tape or switch to paper tape, being aware of the pros and cons can help ensure your next drywall project is a smooth one. Read the full article
0 notes
Text
How to Join a Tapered Edge to a Non-Tapered Edge in Drywall

### How to Join a Tapered Edge to a Non-Tapered Edge in Drywall Drywall would be easy to install if there were no seams—but joints are always part of the process, no matter how big the sheet. Tapered edges make for clean, easy joins, but what if you're working with a tapered edge on one side and a flat (non-tapered) edge on the other? This guide will walk you through how to join those mismatched edges and still get a smooth finish. --- ### Tapered vs. Non-Tapered Drywall Edges Tapered edges are slightly thinner along the long sides of drywall sheets. When joined, they create a shallow "V" that holds joint compound and tape well. Non-tapered edges, on the other hand, are flat and just as thick as the rest of the sheet—usually found on the cut ends. Joining two tapered edges is ideal, but it’s common to end up with a tapered edge meeting a non-tapered one, especially when sheets are cut to size. --- ### How to Join a Tapered Edge to a Non-Tapered Edge #### Step 1: Gather Your Tools You’ll need: * Drywall compound * Tape * Sanding screen * Drywall knife * Utility knife * Respirator or mask (sanding gets dusty) #### Step 2: Trim the Non-Tapered Edge Cut the non-tapered edge at a 45-degree angle. This isn’t to mimic a tapered edge but to remove loose paper that can bubble under compound. #### Step 3: Tape and Apply Compound Spread a thin layer of joint compound along the seam. Press drywall tape into the compound, smoothing out any bubbles or wrinkles. Let it dry for at least 24 hours. #### Step 4: Add Another Coat Apply a second, wider layer of compound over the tape, extending it an inch or two past the seam. Smooth it out with your knife. #### Step 5: Sand the Seam Once dry, lightly sand any bumps. Avoid sanding too much—you don’t want to damage the tape. #### Step 6: Final Coat and Sand Apply a final, wider coat of compound using a larger knife to blend the seam into the wall. After it dries, do a light sanding for a smooth, even finish. --- ### Common Questions **How much compound should I use?** Use just enough to cover the seam. Too much will create a bulky joint that needs excessive sanding. **Can I do this myself, or should I hire a pro?** If you’ve worked with drywall before, you can handle this. If you're a beginner, it might be worth hiring help—joining different edge types is a bit trickier. **Does a flat edge weaken the joint?** Not if you apply tape and compound correctly. The paper facing gives drywall its strength, so as long as that’s intact and covered, your joint will be solid. **Can’t I just replace the board with one that has tapered edges?** You could, but it’s often wasteful. It's more efficient and cost-effective to just work with what you have using the steps above. **Can you buy drywall without tapered edges?** Most drywall sheets have tapered sides. Non-tapered edges usually result from cuts. Full sheets with flat edges are rare and impractical to work with for joints. Read the full article
0 notes
Text
Floating Drywall Corners Made Easy: Tips, Tricks, and Techniques

### **Floating Drywall Corners: A Simple Guide** **What Is Floating a Drywall Corner?** Floating drywall corners means hiding the seams at the corners of drywall using tape and a thin coat of joint compound (mud). Most people expect to deal with only flat seams when hanging drywall, but corners—especially inside and outside ones—need special attention for a smooth finish. --- ### **Floating Inside Corners** **What Are Inside Corners?** These are the angles formed where two walls meet in a room, often at a 90-degree angle. Floating inside corners is tricky because you also work with the ceiling joint. It takes some practice but becomes easier over time. #### **Steps:** 1. **Gather Tools** You'll need: paper tape, mud, a drywall knife, a pole sander, 150-grit sandpaper, and a dust mask. 2. **Clean the Corner** Remove any dust or debris to ensure the mud sticks well. 3. **Apply a Bed of Mud** Spread about 1/8 inch of mud into the corner with your knife. 4. **Fold and Place the Tape** Fold paper tape lengthwise and press it into the mud from top to bottom, making sure it sticks well. 5. **Cover the Tape** Apply a thin coat of mud over the tape without tearing it. Also, blend into the ceiling joint. 6. **Apply First Coat** Let the first coat dry (or use hot mud for quicker drying) and apply mud to both sides of the corner without overlapping. 7. **Apply Finish Coat** After 24 hours, add a second coat. Avoid buildup and feather out the edges. 8. **Sand Smooth** Use a pole sander and 150-grit sandpaper to smooth out rough spots. --- ### **Floating Outside Corners** **What Are Outside Corners?** These are where two walls meet to form a point that sticks outward. They’re less common but still important to float properly. #### **Steps:** 1. **Gather Materials** Same tools as inside corners, plus corner bead and corner tape. 2. **Install Corner Bead** Measure, cut, and attach the bead with screws. This reinforces the corner. 3. **Apply Corner Tape** Place special tape over the bead from top to bottom, ensuring it covers the seam completely. 4. **Prepare the Mud** Mix compound until it reaches a paste-like consistency. 5. **Apply the Mud** Spread a thin layer (¼ inch) over the tape using a drywall knife, smoothing and feathering it out. 6. **Sand After Drying** Lightly sand to avoid damaging the corner bead or paper. 7. **Apply Two Finish Coats** Let the mud dry between coats. Feather out edges for a smooth finish. --- ### **Tips to Avoid Mud Buildup** Apply thin coats and sand between layers. Don’t overload the corners with mud or double up on tape. Proper feathering helps keep buildup under control. --- ### **Why It Matters** Floating drywall corners isn’t just about looks—it also reinforces the structure. Poorly done corners are more prone to cracks and damage over time. If you're unsure or short on time, hiring a professional is always a good option. Read the full article
0 notes
Text
What's the Metal Behind Drywall? Purpose and Types Explained

**What Does It Mean When You Find Metal Behind Drywall?** When opening up a wall, it’s common to find **wooden studs**, **fiberglass or foam insulation**, **window or door headers**, **electrical wiring**, and **plumbing pipes**. You may also come across **fire blocks** or the occasional bit of leftover **construction debris**. But what happens when you find **metal** behind drywall? That might come as a surprise, but it’s not unusual—and it often serves an important purpose. In this post, we’ll explore the **reasons metal is used behind drywall**, what types you might encounter, and how to work around it safely. --- ### **What Type of Metal Is Used Behind Drywall?** There are two common types of metal you might find behind drywall: --- #### **1. Metal Studs** If you assumed all studs were made from wood, you're not alone. But in both commercial and modern residential construction, **metal studs** are often used as an alternative. **Why use metal studs?** * They're **more durable** than wood. * They’re **resistant to mold**, **fire**, and **insect damage**. * Galvanized versions are **rust-resistant**. * They don’t warp or split over time. Metal studs are usually **vertical**, **2x4 inches in size**, and spaced **16 to 24 inches apart**. If you're seeing evenly spaced vertical metal behind drywall, chances are you’re looking at framing studs. --- #### **2. Metal Protection Plates** Metal sheets or plates might also be installed behind drywall—not to frame the wall, but to **protect plumbing pipes or electrical wiring**. Drywall isn’t strong enough on its own to shield these components from damage. So, builders sometimes add **thin metal plates** over areas where wires or pipes run through studs. These plates are typically wider and flatter than studs and span a small section of the wall. --- ### **Why Is Metal Used Behind Drywall?** There are two main reasons for installing metal beneath drywall: * **Support for drywall installation:** Drywall needs to be screwed into something solid—like a metal or wooden stud. That’s why studs are evenly spaced behind walls. * **Protection for wires or pipes:** If cables or plumbing lines pass through a stud or frame, a metal plate may be added to prevent accidental punctures from nails or screws during renovations or installations. --- ### **How Can You Tell If There’s Metal Behind Drywall?** You don’t always have to open the wall to detect metal. Here are a few signs: * **Drilling resistance:** If you’re trying to drill and it’s unusually difficult, you may be hitting metal. * **Visual confirmation during repairs:** If you’ve cut into the wall before, you might have seen metal components. * **Magnet test:** A strong magnet will stick to both metal studs and protective plates (much more than it would to a nail or screw). * **Electronic stud finder:** Many modern stud finders have settings to detect both wood and metal. --- ### **Can You Drill or Install Over Metal Behind Drywall?** Yes, but it depends on **what kind of metal** you're dealing with: * If it's a **metal stud**, you're in luck. You can drill into it just like wood (with appropriate screws) and mount your item—whether it’s a **TV**, **microwave**, or **wall cabinet**. * If it's a **protective plate**, you’ll want to **proceed with caution**. These plates often cover wiring or plumbing. Drilling here could be dangerous or costly. If you absolutely need to install something in that area: * **Identify what’s behind the metal.** * If it's covering pipes or wires, you may need to **relocate the installation**. * In rare cases, you can cut out a section, **reroute what’s behind**, and reinforce the wall with **plywood or new framing**—but this is best left to a professional. --- ### **Is It Safe to Interact with Metal Behind Drywall?** Generally, yes—but **always with caution**. Metal behind drywall may be protecting high-voltage electrical wires or water lines. Accidentally drilling into one of these can lead to **serious damage**, **injury**, or **expensive repairs**. If you're renting, you might even face **liability issues**. **Rule of thumb:** Never drill through metal unless you know exactly what it’s for. --- ### **Do You Always Have to Drill to Detect Metal?** Not at all. There are safer, non-invasive ways to check: * **Use a strong magnet**: It’ll easily detect hidden metal studs or plates. * **Try a multi-sensor stud finder**: Many advanced models can differentiate between wood, metal, and even live wires behind drywall. These methods are quick, affordable, and eliminate the guesswork. --- ### **Can Metal Behind Drywall Be Repaired or Replaced?** It’s rare that you’ll need to repair metal behind drywall. **Metal doesn’t rot, warp, or grow mold** like wood might. However, if you ever do need to replace it (e.g., due to rust or damage), you’ll have to: 1. **Cut out a section of the drywall**. 2. **Access and repair the metal**. 3. **Reinstall and patch the wall**. This can be time-consuming, so unless you have solid DIY experience, it’s best to call a **professional contractor**. --- ### **Is Metal Behind Drywall Common?** Not particularly. Most homes use **wooden studs** as the standard. That said, **metal studs** are more common in: * **Commercial buildings** * **Multi-family housing** * **Modern or high-end custom homes** * **Basements** (for moisture resistance) You’re also more likely to find **metal plates** in areas where plumbing and wiring are concentrated. --- ### **Which Rooms Are Most Likely to Have Metal Behind the Walls?** If you're going to run into metal behind drywall, it’s most likely in: * **Kitchens** * **Bathrooms** * **Living rooms** These are the spaces where homeowners tend to hang heavy items, install appliances, or make frequent updates. Builders often add **extra protection** in these rooms to guard important systems. If you're unsure, it’s always a good idea to check with your **landlord**, **builder**, or **home inspection report** before drilling. --- **Final Thoughts** Finding metal behind drywall isn’t necessarily a problem—it’s often there for a good reason. Whether it's part of the wall’s structure or there to protect something valuable, it's important to understand **why it's there** and how to safely work around it. When in doubt, use a magnet, a stud finder, or consult a pro before picking up the drill. Read the full article
0 notes
Text
Drywall Mud Not Drying Properly? Solve It with This Guide

Why Is My Drywall Mud Not Drying? Causes and Fixes Drywall mud—often called joint compound—usually takes 12 to 24 hours to dry fully. However, some fast-setting types can dry in as little as 5 to 90 minutes. If your drywall mud is still wet after a full day, something's likely gone wrong. In this post, I’ll break down why drywall mud may dry slowly and share a few tips to help speed things up. Why Isn’t My Drywall Mud Drying? Here are some common reasons why joint compound might still be wet after 24 hours: 1. High Humidity This is especially common in new buildings or moisture-prone areas like kitchens and bathrooms. When the air holds too much moisture, it slows down evaporation—so the mud can take days to dry. 2. Water Leaks or Moisture Exposure Drywall and joint compound should never be exposed to water leaks. Whether it’s from plumbing or rain, moisture in the environment can prevent the mud from drying properly—and even ruin it over time. 3. Expired Drywall Mud If you're using leftover drywall mud from an old project, check the date. Like many other materials, joint compound can break down over time. If it’s more than a year old, it may not dry well—or may crack once it does. 4. Applying Too-Thick Coats Beginners often think applying thick layers is faster. Unfortunately, thick coats take much longer to dry—especially in humid conditions—and can lead to cracking or uneven surfaces. 5. Too Much Water in the Mix Over-watering the compound during mixing can delay drying. Always follow the manufacturer's instructions to get the right consistency. How to Make Drywall Mud Dry Faster If your drywall mud is drying slowly, try these proven methods to speed up the process: Use Thinner Coats Thin layers dry faster and create a smoother finish. Just don’t go too thin—otherwise, the mud won’t do its job. Set Up a Dehumidifier This is a go-to solution in the industry. A dehumidifier reduces moisture in the air, helping the mud dry in as little as 6 hours. Improve Airflow If you're working in a tight space (like a bathroom), airflow can be limited. Open windows or vents to help fresh air circulate and speed up drying. Turn Up the Heat If you have an HVAC system, increase the temperature slightly. Since drying is based on evaporation, a bit of warmth can go a long way. Use a Blow Dryer or Portable Heater No HVAC? A hair dryer or small space heater can help. Just don’t get too close—too much direct heat can cause the mud to crack. Try Hot Mud (Fast-Setting Compound) If slow drying is a recurring issue, consider switching to hot mud. It’s a quick-setting version of joint compound that hardens in under 90 minutes. Should You Start Over If It Doesn't Dry? That depends. If it’s still moist after 24 hours, try using a dehumidifier or heat source first. But if several days pass and it still hasn’t dried, it’s best to remove it and start fresh—this time with thinner coats and better airflow. Just make sure the room’s humidity isn’t the main issue before reapplying. Can You Work on Wet Drywall Mud? No—you should never sand or paint over wet joint compound. If it’s still wet, paint won’t adhere properly and sanding could ruin the surface. Always wait until it’s fully dry, then proceed. Can You Use a Product to Make It Harden Faster? Unfortunately, no. There’s no special chemical or product that speeds up drying. Your best bet is to adjust the environment—lower humidity, improve airflow, and raise the temperature if needed. How Can You Tell When It’s Dry? Dry drywall mud feels dry to the touch and slightly dusty. Its color will lighten—dry mud appears pale white or off-white. If it's darker and feels damp, it still needs time. Does Low-Quality Joint Compound Take Longer to Dry? Yes, it can. Cheaper mud often takes longer to cure—even under ideal conditions. It may also be harder to sand and more prone to cracking. Investing in a higher-quality product usually leads to better, faster results. Can a Fan Help Dry It Faster? Absolutely. Fans help circulate air, which promotes evaporation. If you’re working in a space without much airflow, a fan can make a noticeable difference. Read the full article
0 notes
Text
Plaster to Drywall: Seamless Transition Guide + Pro Tips

Switching from Plaster to Drywall: A Practical Guide for Homeowners If your home was built sometime around the mid-1900s, chances are the walls were made using plaster. While there’s nothing inherently wrong with plaster walls, many homeowners eventually consider making the switch to drywall—and for good reason. In this guide, I’ll walk you through the process of replacing plaster with drywall, and I’ll also cover how to smoothly connect sections where plaster and drywall meet on the same wall. Let’s get started. Can You Replace Plaster with Drywall? Absolutely. Many older homes have successfully undergone this type of renovation. And here’s the best part—you don’t necessarily have to tear out the existing plaster entirely. There’s a more straightforward way to install drywall over plaster that avoids the mess and labor of full removal. Let’s take a look at how it works. Step-by-Step: Converting Plaster to Drywall Step 1: Examine the condition of the wall Old plaster can often be cracked or weakened, so before doing anything else, inspect the surface carefully. Check whether the plaster is still firmly attached to the wall. If not, installing drywall over it could lead to problems later on. If any sections are damaged, remove them. Also, inspect the framing behind the wall to ensure it's solid and not in need of repair. Step 2: Secure drywall sheets to the wall Once the wall has been prepped, you can begin attaching drywall. Cut the sheets to size and fasten them directly to the wall using screws that reach into the underlying studs. This provides a strong base and ensures the drywall won’t shift. If large areas of plaster were removed, you can attach drywall directly to the exposed framing instead. For added strength, you can apply a bonding agent like Durabond between the surfaces. This helps ensure the drywall stays in place and prevents future separation. Step 3: Finish with joint compound and sanding Once your drywall is secured, it’s time to smooth out the surface. Apply a layer of joint compound over the seams and screw holes, then let it dry fully. After that, sand the area to achieve a smooth, even finish. When you’re satisfied with the texture, you can paint the wall. With that, your plaster-to-drywall conversion is complete. Why Make the Switch? Beyond updating the look of your home, drywall offers several practical benefits: Drywall can be finished with paint or wallpaper and generally looks more modern. Installing drywall is faster and less expensive than reapplying fresh plaster. It’s easier to repair if damaged, especially for those who prefer DIY projects. Drywall meets current building standards and tends to be lighter and more adaptable. Tips for a Smooth Transition Although the process is manageable, it’s important to avoid common mistakes. Here are a few tips to help: Plan ahead—measure your walls and gather materials before you begin. Always check the condition of the existing wall to determine if repairs are needed. If you're unsure about your skills, don’t hesitate to call in a professional. It might save you time and money in the long run. Make sure the drywall is firmly anchored into the studs behind the wall. Take your time when finishing the surface to get the best final result. Aftercare and Maintenance Even after the transition is complete, some upkeep is essential to keep your new walls looking their best: Keep the area dry—both plaster and drywall are sensitive to moisture. Avoid placing heavy loads on areas where plaster was replaced with drywall. Watch for any signs of damage and address them early. Don’t neglect touch-ups and repainting when needed. Connecting Plaster and Drywall on the Same Wall If you're only replacing part of a wall, you’ll need to blend the new drywall with the remaining plaster. This is easier than it sounds. Start by cutting the drywall to fit as close as possible to the existing plaster. Use joint compound to fill the gap, apply drywall tape, then add another layer of compound. Feather it out on both sides for a smooth transition. Once it’s dry, sand the area and paint over it. As long as the gap between materials is small, you won’t need any extra trim or transition pieces. Read the full article
0 notes
Text
Forgot to Tape Drywall Seams? Here's How to Fix It Fast

You must always use drywall tape while mudding drywall joints. Whether you prefer paper tape or fiberglass mesh tape is irrelevant. However, if you do use tape, you can be sure that your joints will look smooth and last for many years. But it's common to make mistakes like forgetting to tape a drywall junction because we are only human. I aimed to provide a comprehensive tutorial on what to do if you forgot to tape your drywall joints.What Happens If You Don’t Remember to Tape the Drywall Joint?Step 1: Determine which joints you neglected to tape. You need to find all the drywall seams that haven’t been taped.Step 2: Sand or scrape the existing joint compound so you can apply the tape. If it’s dry, sand it down; if it’s wet, carefully scrape it with a putty knife.Step 3: Apply the drywall tape over the exposed joint. Fiberglass tape is easier to use if you're not skilled. Make sure it fully covers the joint!Step 4: Re-mud the taped seam with joint compound and feather it smooth.Step 5: Let it dry, then sand for a flawless finish.If you forget to tape your joint, you cannot shortcut the process - you must repeat the steps above!Why Use Drywall Tape?Without tape, your joints are prone to cracking, moisture problems may arise, and repairs would be more challenging. Joints without tape are structurally weak, and they can significantly impact your home's resale value!Common Reasons for Forgetting to TapeInexperience in drywall installation.Hurrying to finish the job.Overconfidence in joint strength.Relying on incorrect instructions found online.Distractions while working.Remember, taping is crucial! If you’re planning to sell your home, taped joints ensure a polished look. Taping drywall joints might be a tedious process, but it will save you from expensive repairs down the line and offers peace of mind! 🏡👌 Read the full article
0 notes
Text
Greenboard on Ceilings: Helpful Solution or Big Mistake?

Greenboard is well-known for its water-resistant properties, making it a popular choice in areas with high moisture, like bathrooms and kitchens. But can it be used on ceilings? The answer is yes, though it's not without challenges. In this post, we'll dive into the viability of installing greenboard on ceilings, the associated risks, step-by-step installation instructions, and better alternatives for high-moisture areas.Understanding Greenboard's Viability on CeilingsWhile you can use greenboard on ceilings, it requires extra care during installation. Unlike standard drywall, greenboard is heavier and somewhat weaker, increasing the risk of failure. Mostly, it's used in moisture-laden environments like showers or kitchen ceilings.Installation Risks to Keep in MindBefore you start installing greenboard, it's vital to understand the potential issues:Not Waterproof: Greenboard is water-resistant but not waterproof. Continuous exposure to moisture can lead to damage over time—especially in showers.Heavy Weight: The weight of greenboard puts added pressure on ceiling joists, making it crucial to ensure the ceiling's structure can handle it.Prone to Sagging: Improper installation might lead to sagging, a common complaint among homeowners.Challenging to Paint: The paper layer makes it challenging to paint or finish the surface effectively.Not Fireproof: If fire safety is a concern, note that greenboard is not fire-resistant.Step-by-Step Installation GuidePrepare the Ceiling: Ensure the ceiling can support the weight of greenboard before starting.Use Lumber to Strap the Ceiling: Strengthen joists using 1" x 3" lumber to securely attach greenboard and prevent sagging.Cut the Greenboard into Panels: Measure and slice the greenboard to fit your ceiling dimensions.Secure the Greenboard: Fasten the panels using drywall screws without damaging the paper layer.Is it Code Compliant?Most local building inspectors advise against using greenboard on ceilings due to its shortcomings. Always check local building codes to avoid any potential issues.Better Alternatives for High-Moisture AreasIf you're concerned about the drawbacks of greenboard, here are some alternatives to consider:Fiberglass-Reinforced Gypsum Panels: Water-resistant and durable.PVC Ceilings: Waterproof and can withstand high moisture for years.Cement Board: Excellent water resistance with minimal deterioration over time.Metal Tiles: Easy to clean, durable, and ideal for industrial spaces.Lifespan of Greenboard on CeilingsTypically, greenboard lasts between two to five years on ceilings, depending on installation quality. However, you may start to notice sagging within a few years, potentially leading to a full ceiling replacement.Why Do Homeowners Choose Greenboard?Despite its disadvantages, many homeowners still opt for greenboard due to its benefits:Moisture Resistance: Prevents leaks in high-moisture areas.Limited Mold Growth: Helps restrict mold proliferation.Easy Installation: Cuts seamlessly, making installation straightforward.Versatility: Suitable for various indoor applications, but not for outdoor use.In summary, while greenboard can be used in specific scenarios, it’s essential to weigh the risks and consider alternatives for high-moisture environments. Make sure to explore your options thoroughly! 🔧💧 Read the full article
0 notes
Text
Can You Apply Stucco Over Slump Block? A Complete Guide

Slump blocks are a popular building material due to their structural complexity and attractiveness. Usually taken from the mold before it hardens, slump blocks are a kind of concrete. The drooping shape is attractive and simple to mix with different wall systems. Slump blocks come in a wide spectrum of weights and hues. The slump block style is slowly waning, though, even if it offers several advantages to homeowners. If your slump block walls need renovation, stucco is a great choice. Once a hallmark finish for Spanish architecture, stucco has been modified over the years. Stucco is made of water, Portland cement, lime, and sand. It's applied as the final layer on walls and is both strong and visually appealing. But can you cover slump blocks with it? Yes! Let's explore how to do this effectively. Read the full article
0 notes
Text
Can You Stucco Over Spalling Brick? What You Need to Know

bricks might seem like a cosmetic issue, but ignoring them can lead to major structural problems! Water infiltration and freeze-thaw cycles are common culprits. Before even thinking about stucco, investigate the underlying issues. 🕵️♂️ Read the full article
0 notes
Text
8 Common Stucco Over Foam Problems and How to Fix Them

Stuccoing over foam board may seem appealing for its low-maintenance and long-lasting finish, but be cautious! 📉 The Exterior Insulated Finish System (EIFS) might save on insulation, but it comes with significant risks including weight problems, adhesion issues, and potential for extensive mold growth. 🌧️ Mold can thrive if water seeps through, and you risk significant damage to your home's structure if done improperly. Remember, it's wise to hire a licensed contractor for such jobs rather than risk a DIY disaster! 🚫🛠️ Discover more about the implications of this controversial building method. Read the full article
0 notes
Text
Stucco Without Sheathing: A Complete Guide

Without a doubt, stucco is among the most long-lasting and aesthetically pleasing external wall treatments available. It requires little upkeep, is inexpensive, and can withstand fires. But is sheathing really necessary when installing stucco? Let's explore why sheathing is important for a proper stucco installation!
What is Sheathing?
Sheathing serves as a backing material for stucco, enabling it to bond properly. While it's technically possible to apply stucco without sheathing, it is not advisable. Many homes built in the 1960s used this layout, but as building standards have evolved, stucco without sheathing has become rare in modern construction.
The Risks of Not Using Sheathing
1. Weak WallsStucco applied directly to internal studs and lath is structurally unstable, making your home susceptible to damage.2. Complicated RepairsWithout sheathing, remodeling and repairs become a real challenge. If you need to address damaged stucco, a proper construction allows for easier removal and replacement.3. Issues with Water IntrusionWithout proper barriers like felt paper, moisture can penetrate the walls, leading to mold and structural damage.
Recommendations for Proper Stucco Installation
If you're considering stucco, choose appropriate sheathing materials:Wood Sheathing: Affordable and easy to find, with options like OSB (Oriented Strand Board) and plywood.Cement Board: A modern favorite, water-resistant and durable.Exterior Gypsum: Cost-effective for certain projects, but less commonly available.
Final Thoughts
In conclusion, investing time and resources into proper sheathing can save you from significant headaches down the line. Consult your contractor, keep these tips in mind, and always opt for the highest quality materials for your home’s exterior.For more interesting home improvement tips, follow our blog! Read the full article
0 notes
Text
Board and Batten Over Stucco: Easy Installation Guide

Changing Your Home's Look with Board and Batten 🌟
As a homeowner, updating the exterior finish of your house can enhance its curb appeal. If you're thinking about transitioning from stucco to board and batten siding, you’re in the right place! This guide will walk you through the process of covering stucco with board and batten while highlighting crucial considerations before you get started.Is Board and Batten Installation Over Stucco Possible? 🛠️Put simply, yes! You can successfully install board and batten over stucco. However, preparing properly is key. Installing without adherence to safety measures could lead to complications like water damage.Step-by-Step Instructions 📋Repair the Stucco First: Start by fixing any cracks in the stucco. This step is crucial in preventing moisture issues later on, even if you're going to cover it.Install Furring Strips: Check the structure by drilling pressure-treated furring strips into place. Post-stucco repairs, ensure 16-inch spacing for durability.Consider Insulation: Place rigid foam insulation between the furring strips. This step is vital for energy efficiency.Install the Board and Batten: Finally, set up drip edges, skirting boards, and securely fit your battens. Starting from a corner will help everything fit snugly.Important Considerations 🔍Humidity: If your stucco has cracks, moisture may lead to rotting of your new boards and furring strips. Always ensure the stucco is in good condition.Window Depth: Keep in mind that furring strips might push windows deeper into your walls. If aesthetics are a concern, consider cladding them for a seamless look.Should You Remove the Stucco?: While some professionals recommend it, removing stucco can be cumbersome. Installing over it using furring strips is frequently the preferred option.Benefits of Board and Batten Over Stucco 🌼Revives your home's exterior, making it look fresh and timeless.Board and batten can easily cover deteriorating stucco while requiring minimal upkeep.Final Thoughts 💡If you're handy, this project could be a great DIY challenge! If technical aspects intimidate you, don't hesitate to consider enlisting a professional.Happy renovating! 🎉 Read the full article
0 notes
Text
Stucco Over Asbestos Siding: Safety & Tips

Asbestos siding was a common material used in homes built between 1940 and 1980. While it offers strength and fire resistance, the health risks of asbestos exposure are serious and cannot be ignored. If you’re considering stucco as an alternative, you might wonder, 'Is this process safe?' Let’s dive into the details!Can Stucco Be Installed Over Asbestos Siding?Yes, stucco can indeed be installed over asbestos siding, but it’s not always advisable! Inhalation of asbestos fibers poses serious health risks, and stucco adhesion can be a concern as well. Over the years, asbestos sidings may deteriorate, and stucco application could exacerbate this.Steps to Safely Apply StuccoIf you must proceed, here’s a brief guideline:Assess the Condition: Inspect the asbestos siding for damages. If it's severely damaged, stucco should not be applied.Clean Thoroughly: Use a hose to wash off dust and dirt—safety gear (like a respiratory mask) is a must!Scuff the Surface: To enhance the adhesion, gently roughen the surface, ideally using a bonding agent to minimize fiber release.Scratch Coat: Apply a thin scratch coat as your base layer for better adherence.Brown and Finish Coat: Follow up with a brown coat, then finish with your desired top coat.Should You Remove Asbestos First?It depends! If the asbestos is in good condition, covering it with stucco may be an option. However, for deteriorating siding, removal may be necessary. Check your local building codes, as asbestos regulations can vary widely.Metal Lath for Better Adhesion?Using a metal lath can improve adhesion but comes with its own challenges, as puncturing the asbestos can lead to damage. Weighing professional help is critical.Hire a Contractor?When it comes to installation or removal, it’s highly recommended to hire a licensed contractor. They will prioritize safety and adhere to regulations, ensuring both a smooth and compliant project.Impact on Home ValueAdding stucco over asbestos may lower your home’s market value. Removing asbestos can significantly enhance your property's worth. If budget allows, consider professional asbestos removal for a higher return down the road! Read the full article
0 notes
Text
Stucco Over CMU Walls: Benefits, Risks & Application Techniques

The acronym for concrete masonry units is CMU. Contractors frequently call it concrete block, cinder block, and other names. A rectangular block of standard size used in construction is referred to as a CMU. Usually, it consists of fillers, water, and Portland cement. If you're planning to use CMU in your construction, you might want to consider using stucco for the finishing touches. 🌟 In this guide, we’ll cover how to apply stucco over CMU and weigh the pros and cons.Can stucco be applied over CMU? Absolutely! If you ensure a solid bond between the stucco and CMU, it can last for many years. While CMUs are strong, they can lack aesthetic appeal, making stucco an ideal choice for a beautiful finish.How to Cover CMU with Stucco? There are two primary techniques:Straightforward Use: This method applies stucco directly onto CMU. The water absorption from the CMU creates a bond; add a bonding agent for enhanced adhesion. Quick and easy, but ensure a good bond for durability!Application by Lathe: For those who want more security, using a metal lath is an option. While enhancing the bond, keep in mind that metal can corrode over time, potentially leading to issues.Step-by-Step Guide to Applying Stucco on CMU: Step 1: Clean the CMU: Remove debris using a pressure washer for optimal adherence. Step 2: Rough up the surface: Create texture using sandpaper to help the stucco grip. Step 3: Apply a bonding agent: Products like DRYLOK or Quikrete can significantly aid in bonding. Step 4: Apply the stucco: A scratch coat first (allow to dry fully), followed by a brown coat and then the final coat. Step 5: Let it dry: Ensure it sets well, and engage in regular maintenance to prevent cracking.Benefits of Using Stucco:Aesthetic Appeal: Wide range of colors and textures improves visuals.Insulation: Reduces heat transfer, thus cutting energy bills. 💡Durability Protection: Shields CMU from damage and potentially extends its lifespan.Cost-effective: Low-maintenance and lasting finish.Dangers of Using Stucco Over CMU:Cracking: Caused by wall movement or insufficient adhesion. Ensure you prepare the CMU properly!Moisture Penetration: Stucco is porous; proper flashing can prevent trapped moisture.Delamination: Weak bonding can lead to stucco peeling off; follow the application steps to avoid this.If you're uncertain about handling stucco application, consider hiring a professional. But with the right knowledge, even DIY enthusiasts can take this project on! Alternatively, for diverse aesthetics, ponder finishes like paint, plaster, or cladding panels. 🌈 Read the full article
1 note
·
View note