
I go by Xerophi! I do clay things, and I'm whatever you make of me!
Don't wanna be here? Send us removal request.
Statistics
We looked inside some of the posts by symphonyofeternity and here's what we found interesting.
Average Info
Notes Per Post
3K
Likes Per Post
3K
Reblog Per Post
618
Reply Per Post
43
Time Between Posts
27 days
Number of Posts By Type
Text
16
Photo
1
Last Seen Tumblr Blogs


Fun Fact
The total number of visits Tumblr.com received during January 2021 is 327 million.
Text

Back in 2015, I used to play a mobile game released in Japan only, called Melpharia March, a spin off of Fantasy Earth Zero. Of course nearly a decade later I find it wonderfully nostalgic to go plumbing the depths of Twitter and Google to try and find anything left behind about it.
Fafnir is the last boss! Or so they probably planned... since the game shut down in like two years. Instead, for lack of a better resolution, someone even higher up disbanded the MC's platoon and sent them to hopefully get killed off in battle. Still, I can never forget the trauma of this chapter of the first book and the sheer impossibility for new players to beat it... Play to win, as is typical for Square Enix.
All of that aside, I haven't touched a tablet in a decade either. I straddle this odd sort of balance between being a programmer and a craftsperson, so all this talk about AI art made me want to revisit some old roots of mine and recall what it was like to compose for a character I truly cared about.
6 notes
·
View notes
Text
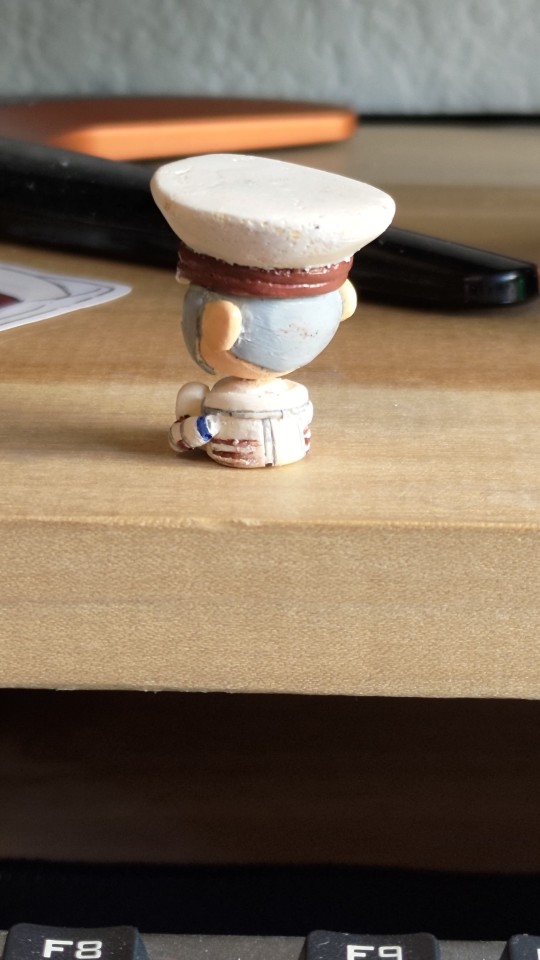
Aaand they're on Etsy too. Gonna stock 5 for now, just to test out the waters with my production ability. 0_0
Aaaand Ingo!
I'm too self conscious to go tromping around with the plushies of them but sticking these two in my pocket I just asdfjdlfjas;lk about my day. XD
About half way through my orders for the blanks so far. Hopefully I can finish casting in a day or two. My dumbass two weeks ago accidentally came into contact with the two part liquid and earned an allergic reaction for my troubles. =_= Now I only dare pour while covered in basically full body armor and a respirator.
47 notes
·
View notes
Text

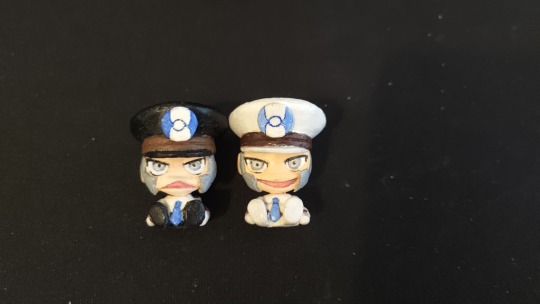
Emmet's easy to paint it's Ingo with all that black that's not so easy to just airbrush wildly around.
47 notes
·
View notes
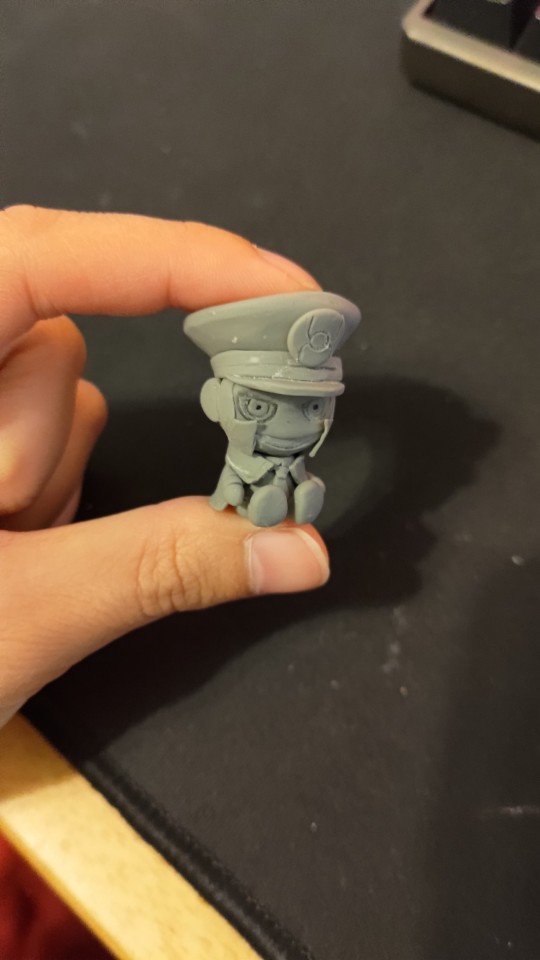
Photo
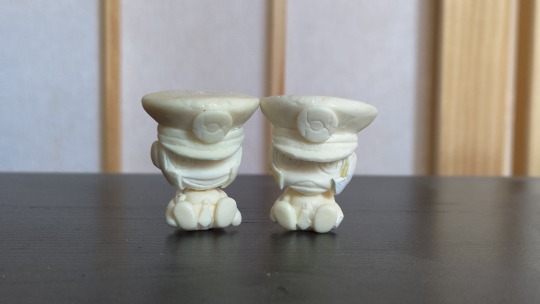
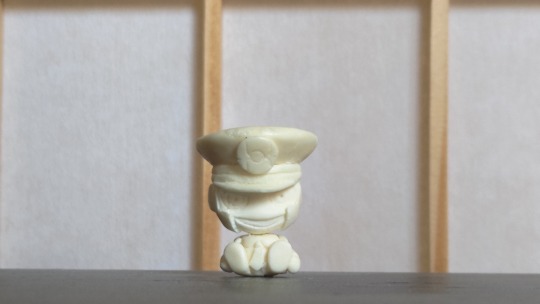
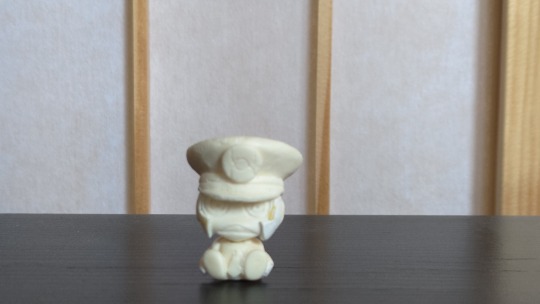
Eyyo pre-orders for these dweebs are up!
These are BLANKS by the way. I’m still working on painting my own pair before I decide how many painted versions I can deal with at a time.
Etsy
24 notes
·
View notes
Text

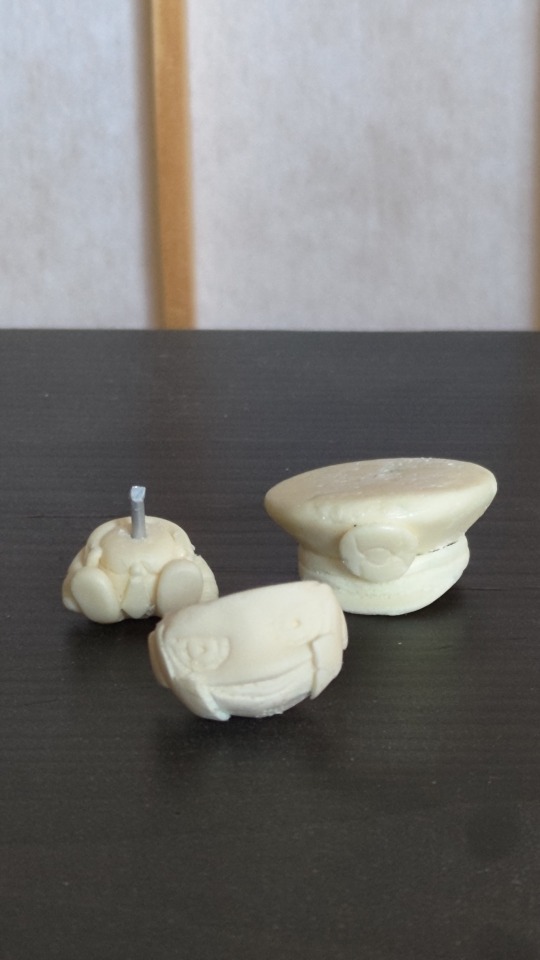
Alright! Finally got the molds good enough haha. They're just so tiny I'm having a hard time getting their sideburns cast well.
I'll get preorders going on Etsy this weekend it's late I've been messing with resin all day in between work 💤
PRE ORDERS UP~!
47 notes
·
View notes
Text
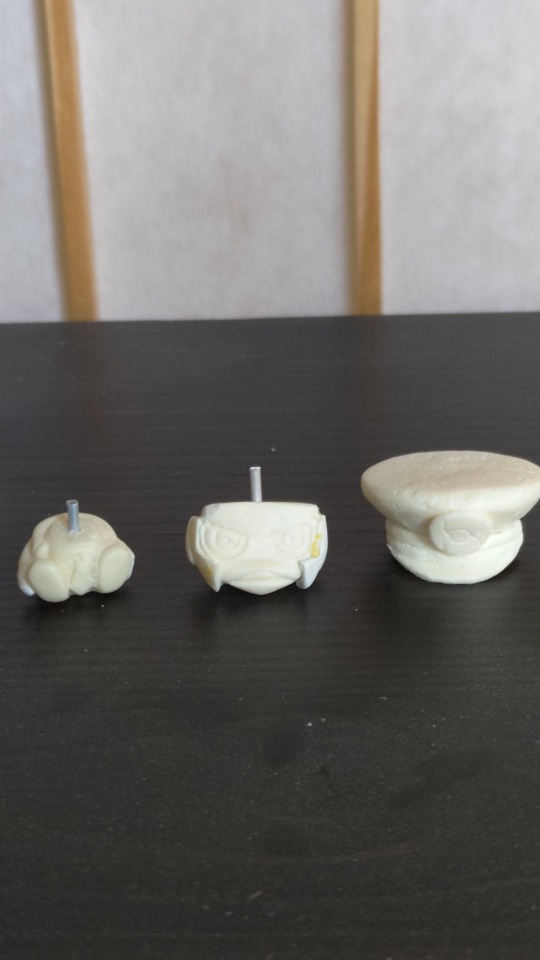
I’m currently cleaning up the models a bit, more sanding and carving, on top of fiddling with their sideburns so they cast better, but afterwards I’m planning on making new molds, with better hole location to inject the plastic with to hopefully minimize bubbles.
For those of you interested in blanks, I could get those up and running pretty quickly after I’m done with the above! I’ll keep you all posted when I put them up on Etsy.
... As for fully painted ones, I’ll probably open a veeerry limited number of slots at a time. ^^; I was painting these the other day and suddenly remembered I don’t like painting LOL.
PRE-ORDERS UP!

Plastic casts! Plus clay where I couldn't get the bubbles out 😭 Still working on learning how to cast well without a vacuum to get air out. Next up is priming and painting!
.... That being said, if I sold these on Etsy would anyone be interested?
91 notes
·
View notes
Text
Plastic casts! Plus clay where I couldn't get the bubbles out 😭 Still working on learning how to cast well without a vacuum to get air out. Next up is priming and painting!
.... That being said, if I sold these on Etsy would anyone be interested?
91 notes
·
View notes
Text
Some truly menacing energy...
218 notes
·
View notes
Text
I want to be Chandelure lol 🥲
#pokemon#ingo#polymerclay#submas#subway boss#subway master#sygna suit#gib plz dena#special costume was nice but iwANtMORE
84 notes
·
View notes
Text
Hii, Xerophi here, and I sculpt things for fun. I don’t post much in general, but I’m flattered some of you want to follow me and I’m super blown away that people thought it looked official?! I’m into clay these days, so if you don’t mind seeing some clay art floating around every now and then, welcome aboard!
This is a making-of post, and I’m mostly putting this out there to encourage people to try their own hand at making figurines! It’s also not really a tutorial, though if anyone’s curious I gratuitously watched some Youtube videos that cover most of the way a figurine gets sculpted and put together.
Tl;dr!
Materials:
Super Sculpey Firm (Gray) (about 95% of the project) + Premier Air Dry Clay for patch jobs (when I deemed the polymer would suffer brittleness from further baking)
Tamiya Polyester Putty for patching over cracks, imperfections on the surface
Armature wire- Gotta have a skeleton!
Various Tamiya Acrylic paints
A block of wood to mount figurine to (lol)
Tools:
Pretty typical clay sculpting tools
Airbrush
Paintbrush
Sandpaper
Long post ahead!
To be honest I’ve always been really interested in how anime figurine garage kits (unofficial, unassembled, unpainted figurines) are produced, but unfortunately, most of the details are in Japanese, so I settled for following a bunch of makers on Twitter and did my best to piece together steps from their postings. Unfortunately I’m not skilled enough yet to go the full way of making molds and resin casts for a piece like this but I think I can say I’ve finally leveled up with sculpting figurines in general with this project! I learned a lot along the way.
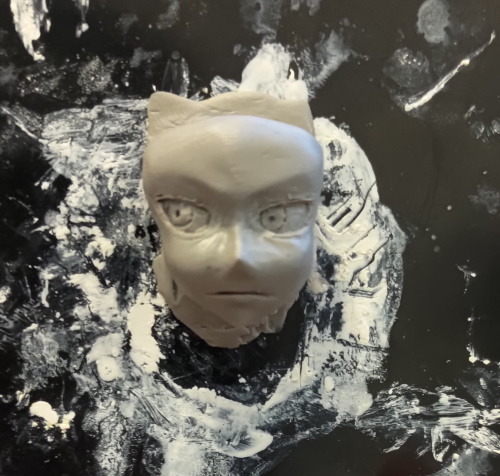
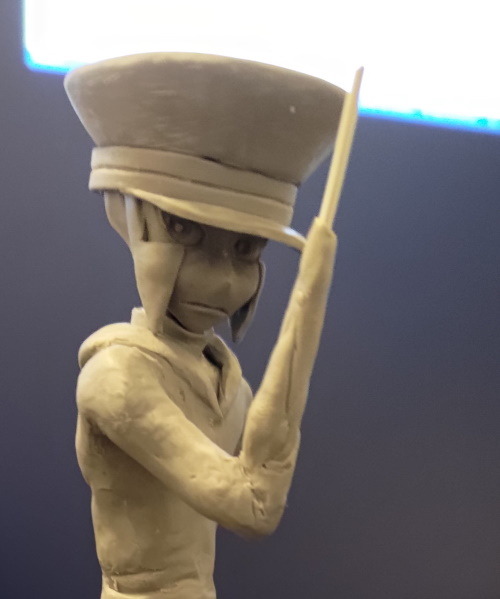
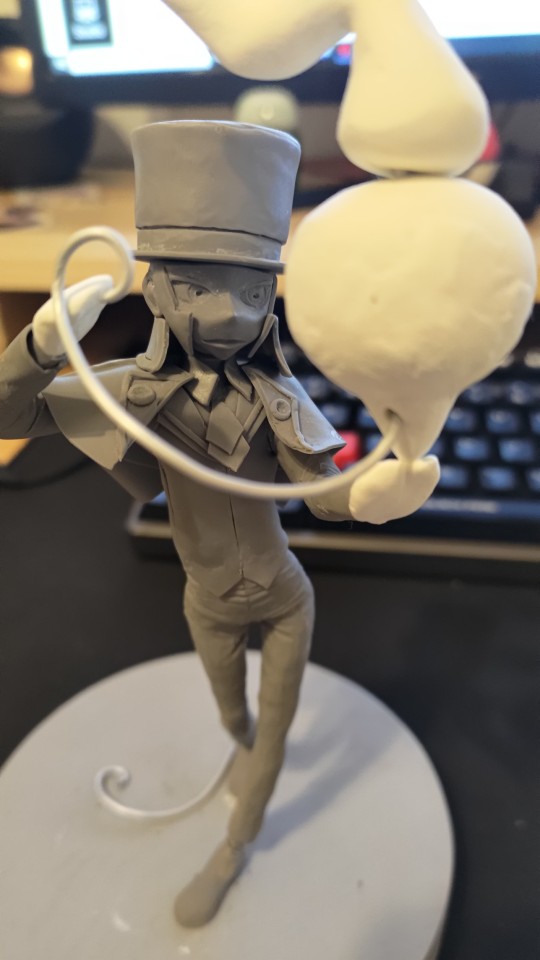
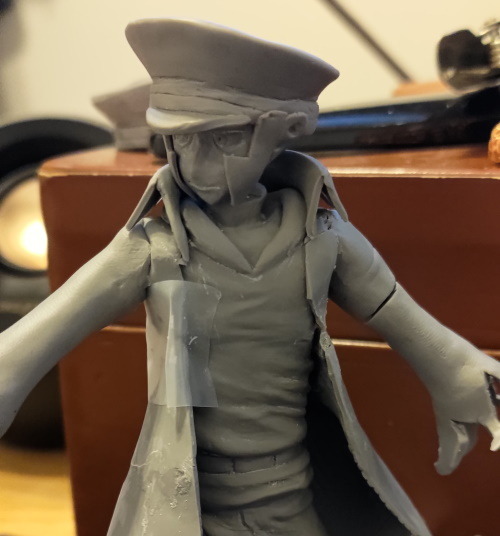
I started with his face. And it was not good. The hat too. Proportions were a bit difficult to maintain when I approached it from such a piece-wise method, so I tossed them both and just... completely redid them the next day using the body as reference.
I pondered a lot about what expression I wanted him to have. Since Legends Arceus gave us the brilliant gem of seeing him smile after battle, I thought it was a largely bittersweet thing to be able to witness. I wanted to preserve the intensity of his expression, but also allow the joy of battle to shine through. So... at certain angles, he does appear to have a bit of a smile!
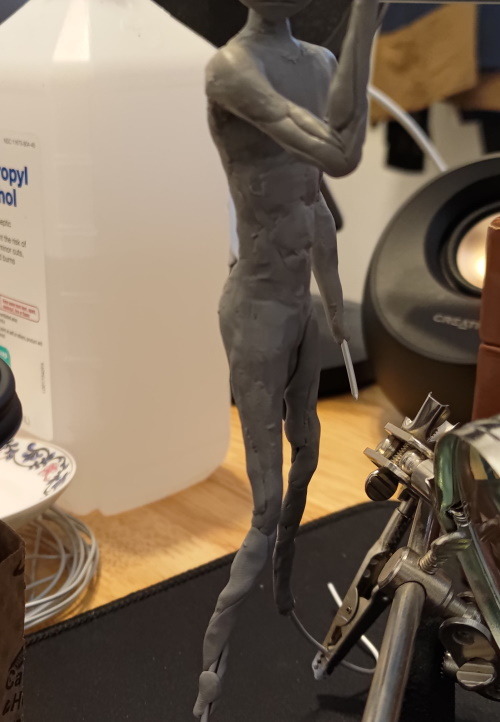
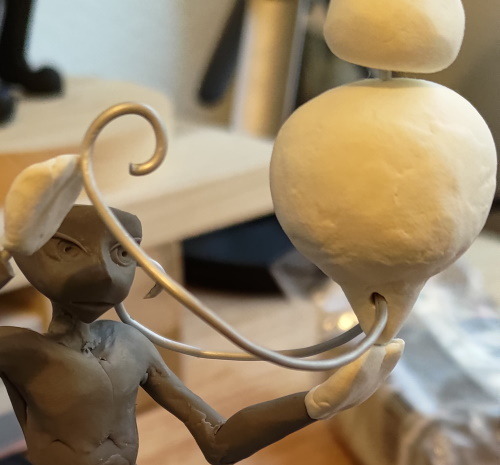
A rough addition of muscles to the armature. Clay works remarkably like skin and muscle too, stretching and flexing as I pose him. This let me envision the way his tunic would flow over the torso. Made it look a biiiit tight on him…;) Once the tunic was done, used some 91% alcohol to smooth surface imperfections over the clay, then I tossed it sans arms into the oven. Wasn’t sure how I wanted the arms yet. Legs were easier, Ingo’s pants are a little looser at the bottom now than they were in BW.
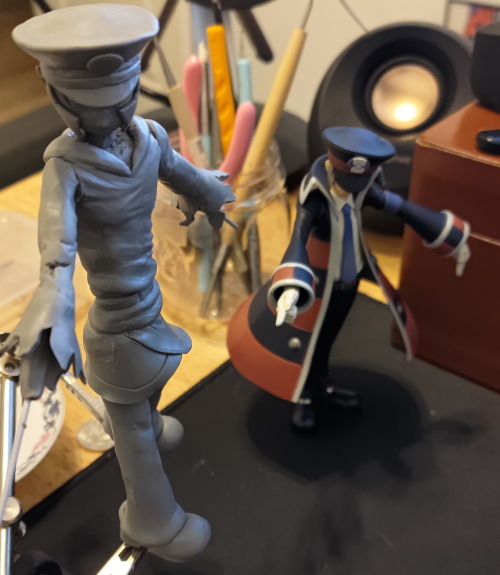
Grew a brain and remembered I had perfectly good reference material to size and proportion against and wouldn’t it be cool if my figurine matched the same scale as the Best Wishes Partners series?
Dunno what BW Ingo thinks of his raggedy counterpart though. Prolly nothing good?!?!
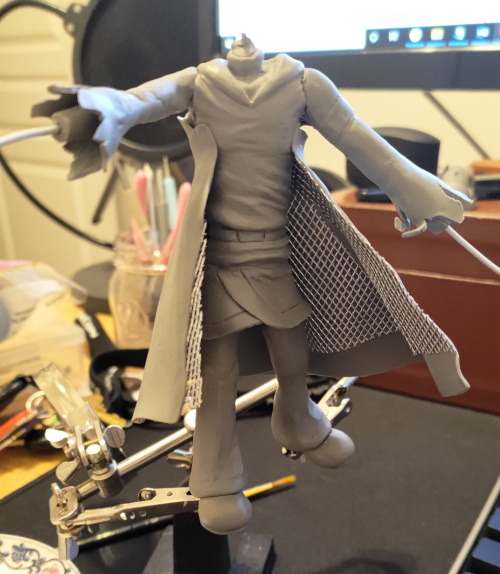
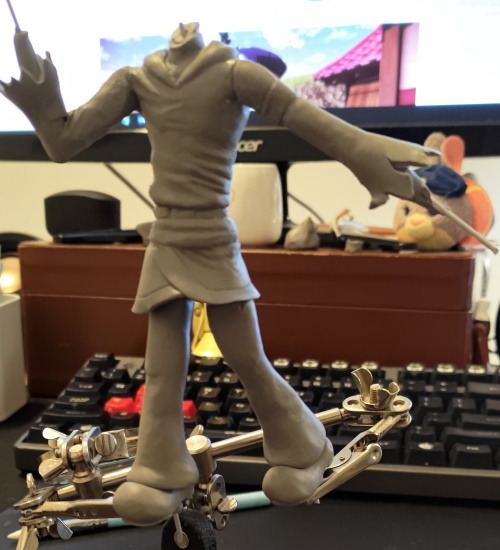
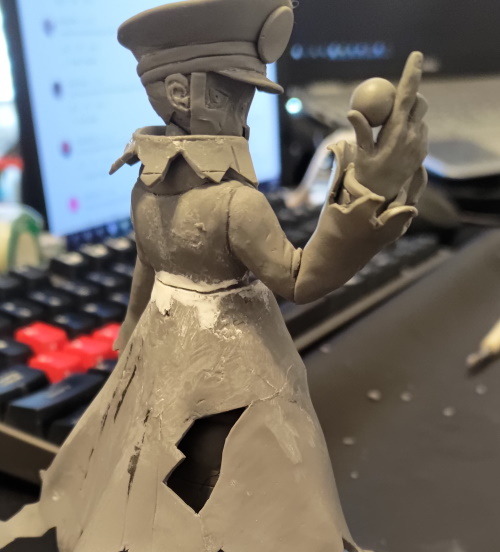
Got some sculpting mesh wire and cut and formed it in approximation of how I wanted the coat to be shaped, temporarily stuck it to the body, and then carved the rips and tears in before baking. Removed the mesh after its job was done, you can see the diamond grid pattern it left at the bottom of the coat. No worries, there’s magic for that later.
Top of the coat is sculpted directly over the tunic, and the collar is done in a similar fashion to the coat, clay over mesh wire, mesh removed, then the piece is glued on.
He gained a small metal peg at the back to help temporarily hold up the bottom half of the coat along with some helper tape.
The coat was the main reason why I decided I wasn’t experienced enough yet to attempt making a mold and resin cast. I have no idea how I’d even cast such a thin piece to begin with.

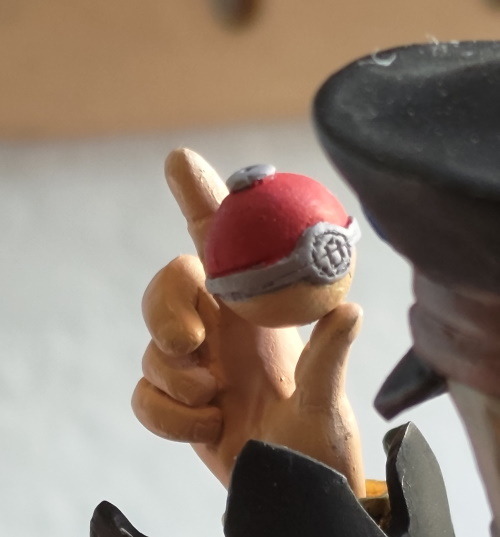
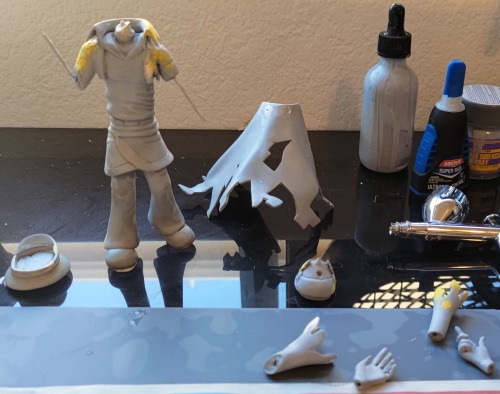
Hands! I took a small piece of clay, flattened it into a square for a palm, and sculpted the fingers individually with a piece of metal in each to stick to the palm with. Damn the Best Wishes figurines for the gloves- meanwhile I’m here trying to get knuckles, bones, and nails to show up because they went hard on his hands in his design so I decide to as well. I also finally settled on paying homage to his iconic over the shoulder pose, finally baking the arms into place.
The first iteration of the Sneaseler warden bracelet got added. It turned out far too thick to fit in his sleeve with the hand attached, so I wound up having to make a second one (pictured) to replace it. The base of a Hisuian Pokeball got added and later touched up to stupid levels of detail. (You can’t even see most of the damn bracelet in his sleeve >:( why did I work so hard)
I struggled with getting the coat to meet smoothly across the seam, but turned out I didn’t need to. Tamiya putty turned out to be an insanely good filler and masker, I could have done fine after gluing the pieces together but I only realized this at the end. Of course if I were making a proper garage kit, it’d be bad form for me to send people something they’d have to work so hard to attach properly.
At this point I didn’t want to bake the polymer any more, too much baking and it gets brittle, and I was already working at a tiny scale and with really thin pieces, so I brought in air dry clay (Premier brand), which is reasonably capable of sticking to polymer with a little water, and sands very smoothly later, to help fill in too large gaps.
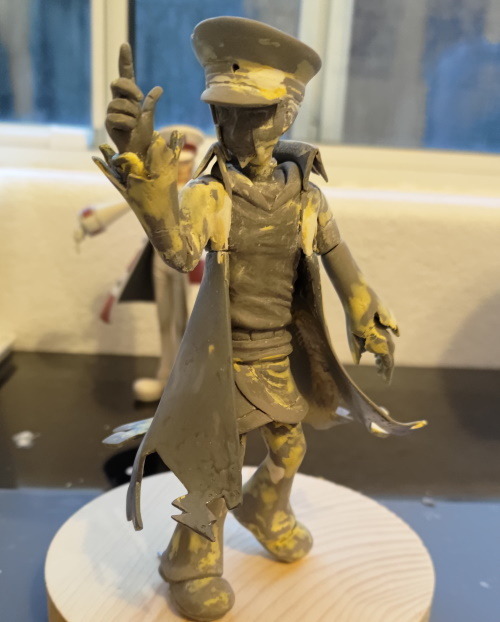
Lowest point of the project visually- I’ve never used Tamiya putty (the yellow stuff) to this extent, but I’ve seen some Japanese artists literally slather their whole project in it before seemingly sanding or carving it back down to detail. I have no idea how they manage that except what must be a shit ton of patience, but I tentatively went with the leap of faith, using it wherever I felt imperfections. The underside of the coat, marred by the mesh, got filled in at this point.
Tamiya polyester putty is a two part putty that cures in roughly an hour and is sandable to nearly a polish. It cures to a hard surface that is easy to carve and incredibly easy to sand, hence why it gets used to fill in imperfections and cracks. It works its way into these places very nicely too, as it basically starts in a cream form.

I sanded everything until it got smooth and flat again, then airbrush sprayed over it with Mr. Finishing Surfacer 1500 gray. This primer has the nice additional feature of settling into small areas of imperfections and smoothing them over as it dries. Places where imperfections show up were continuously patched with the Tamiya putty, sanded, and primed over until I was satisfied.
Still wasn’t happy with the length of the legs or the tilt of the head since I messed up the neck by making the wire connection too tiny to rely on, so his head kept wobbling or turning (or fALlING-). Fortunately nothing’s glued, not even the legs, so I can adjust his height and add/subtract clay to my liking until the pose is good.

Drew in guidelines to the pattern on his coat. Added the buttons, realized he had too much of his coat still to warrant subtracting the lost button, so I shrugged my shoulders and rolled with it.
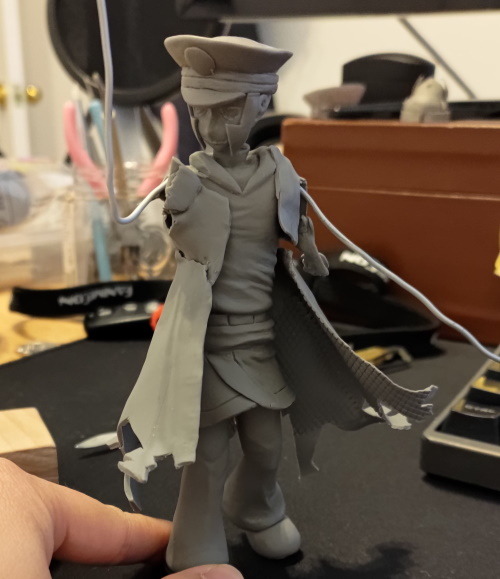
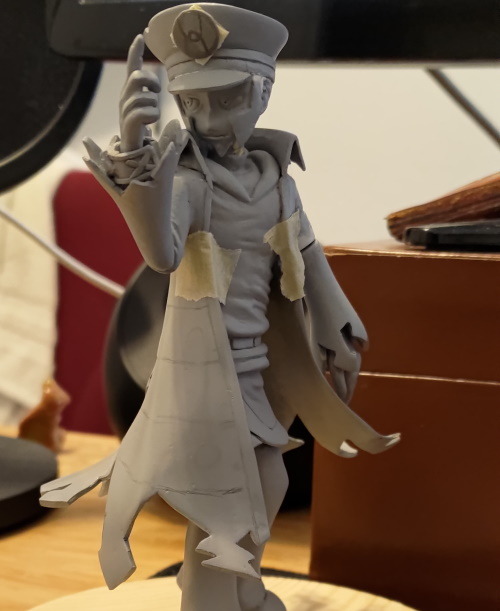
Using painter’s tape, I masked anywhere I didn’t want to spray, then airbrushed in the black, then brown. The primer turns out to be the perfect shade of gray for his palette, so I just masked over it to keep it in the places I want. Skin got a bit of realism added to it by shading it in lightly with dust ground from a pastel, then sprayed over with finisher to seal it in.

Printed out the Pearl Clan symbol, cut it out with an xacto knife, and glued it on. My printer sucks, so I darkened it with some paint. It helps at this point the paper juts up just a bit so I could carefully paint over it without touching the tunic below. Added some finisher spray over it to make sure it sticks.
Nuked the left leg last second, and replaced it with a longer version, because I was unable to stand (haha) the poor positioning of the original.
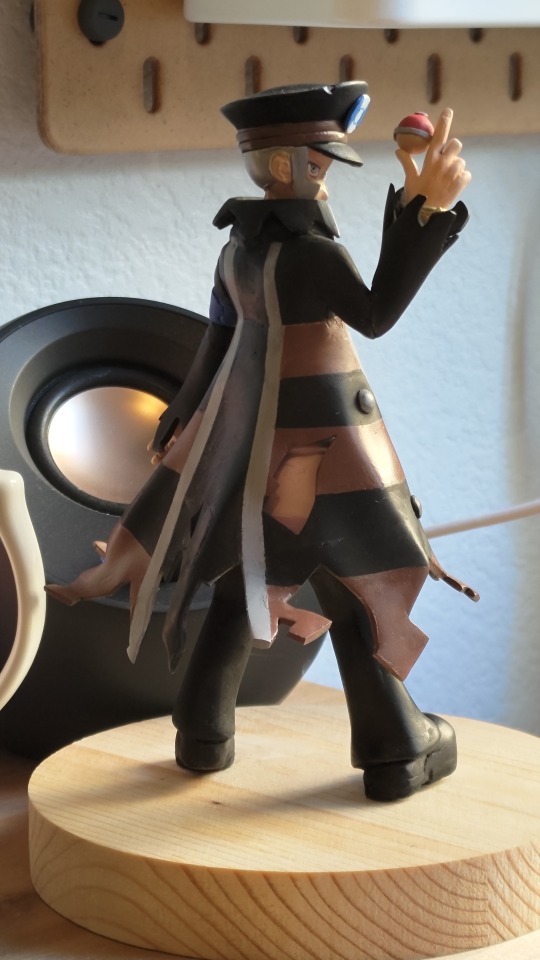
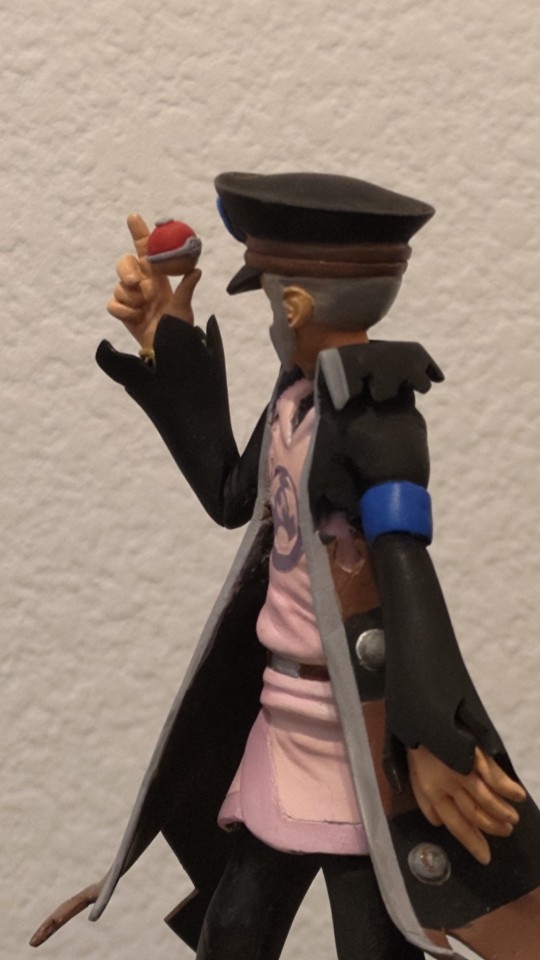
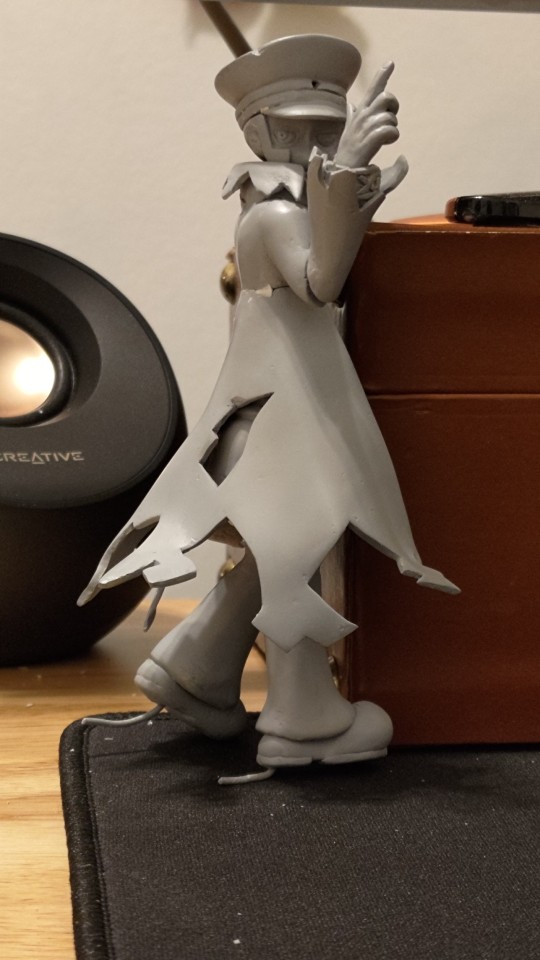
Aaaand he’s done!
One of the most important lessons I learned during this was not to over do it. If I started struggling, started making more mistakes than usual, I just straight up stopped then and there. I wanted to make a piece I could be proud of and forcing myself when I was clearly done mentally wouldn’t be good for me or the end result.
I’m happy to answer any questions or talk about figurines and sculpting! I’m entirely a hobbyist but I felt like it was difficult finding good information on how to sculpt anime figurines in general so if anyone’s curious about this stuff, I’d love to bounce some thoughts on the topic.
Iiiin the meanwhile I want to work on a Sygna Suit idea for Ingo and Chandelure next! Maybe finally give Emmet some love too after xD, Now that we have the butler bros I feel like we’re not gonna see anything else for them for a while longer =A=
40 notes
·
View notes
Text

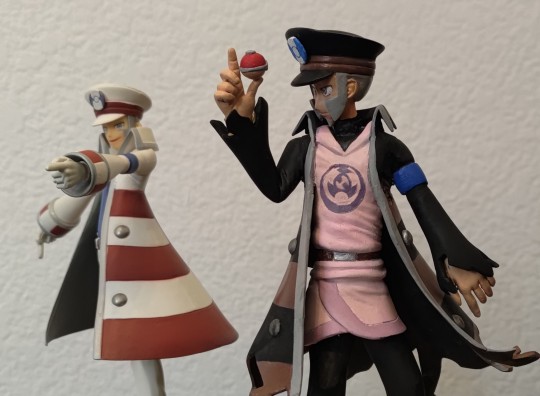

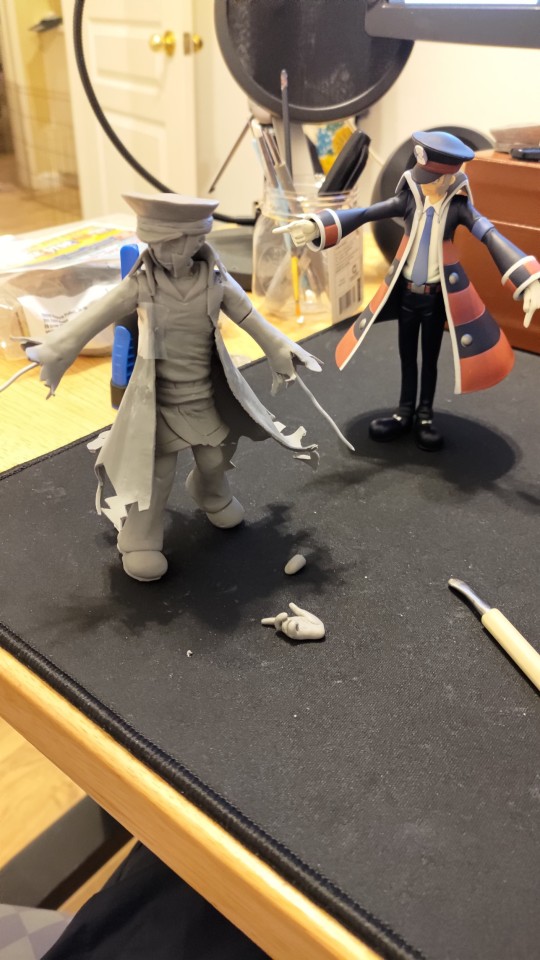
Bonus: I'll unite them my damn self 😤
#pokemon#ingo#polymerclay#submas#subway boss#subway master#pla ingo#warden ingo#subway boss emmet#emmet
721 notes
·
View notes
Text

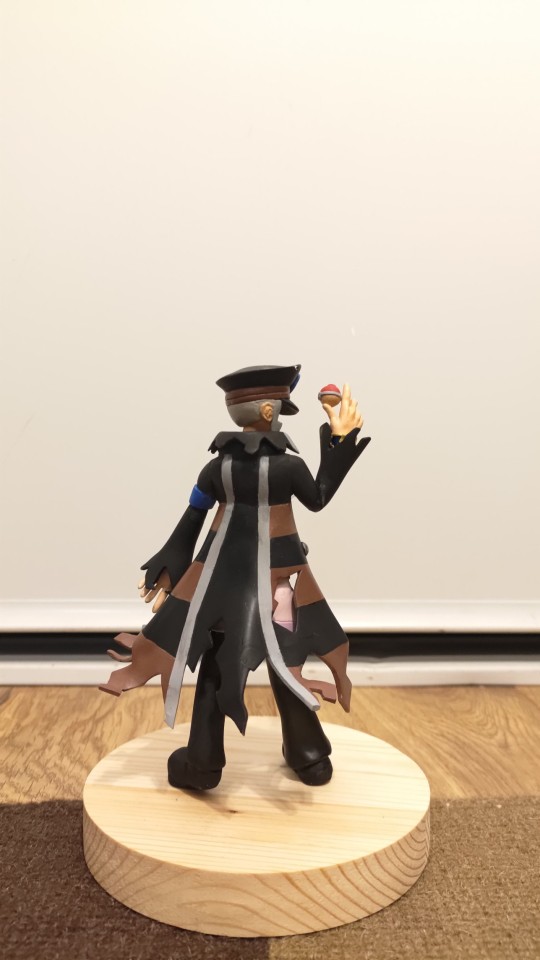
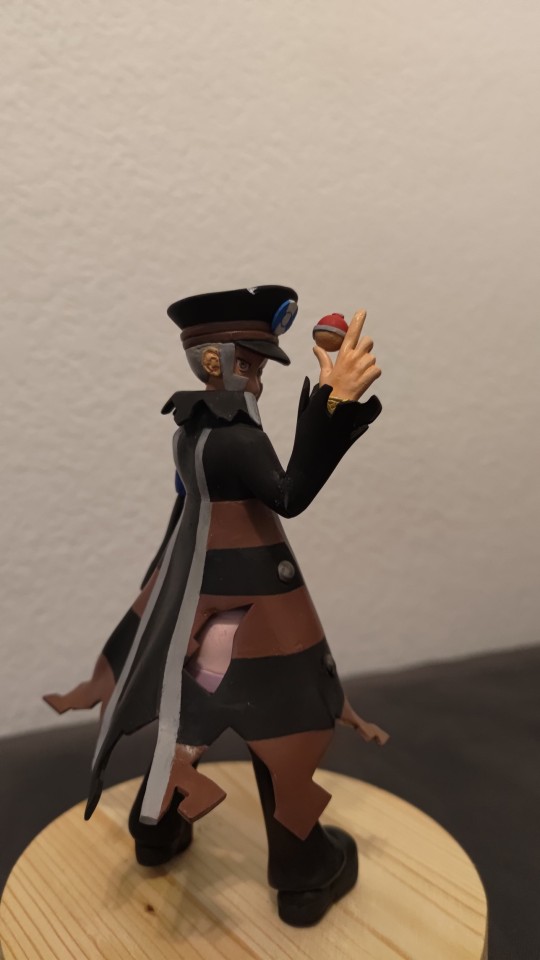
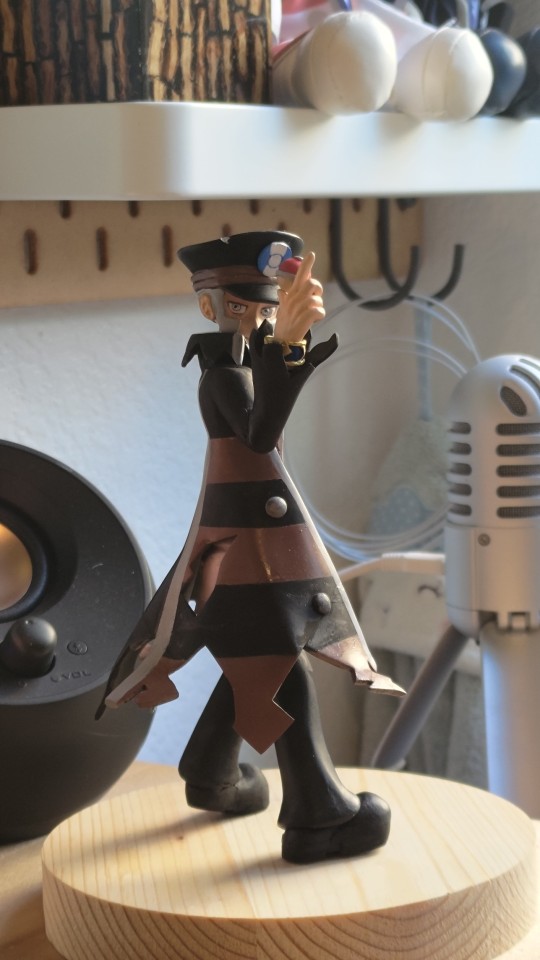
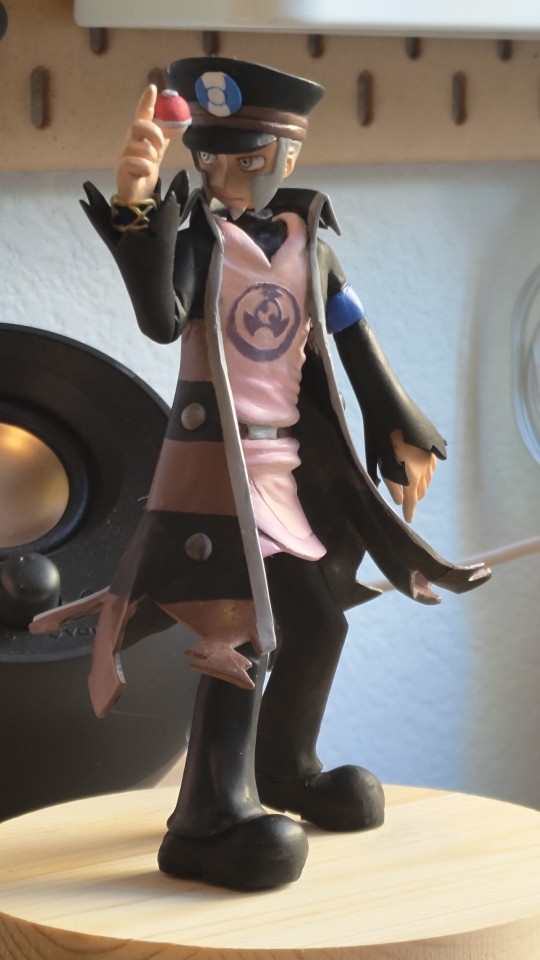
This has been a journey :p (look clay is almost all about breaking and patching shit up but it hurts worse when it's a character you love and then you fat finger something 😭)
Uhm. I have many emotions about Ingo. Like I said before, I've loved his and Emmet's designs since I met them in BW, and I was so excited to see Ingo before gen V remakes. (At what cost send the man home plz)
So here's my little piece in honor of our favorite warden. Hope y'all like it.
(Now with better lighting :p)
778 notes
·
View notes
Text
I wiLL PrOTecc tHIs MAn
154 notes
·
View notes
Text
After a butt-ton of sanding, patching, priming, more patching, he's finally approximating smooth like properties. Also I need to get him to stand on something soon or I will suffer more tragedies.
Aka I'm going insane with the number of times I've broken or dropped something, patched it back, sanded it back down, sprayed over it again.
I can feel the end drawing closer though 😭
329 notes
·
View notes
Text
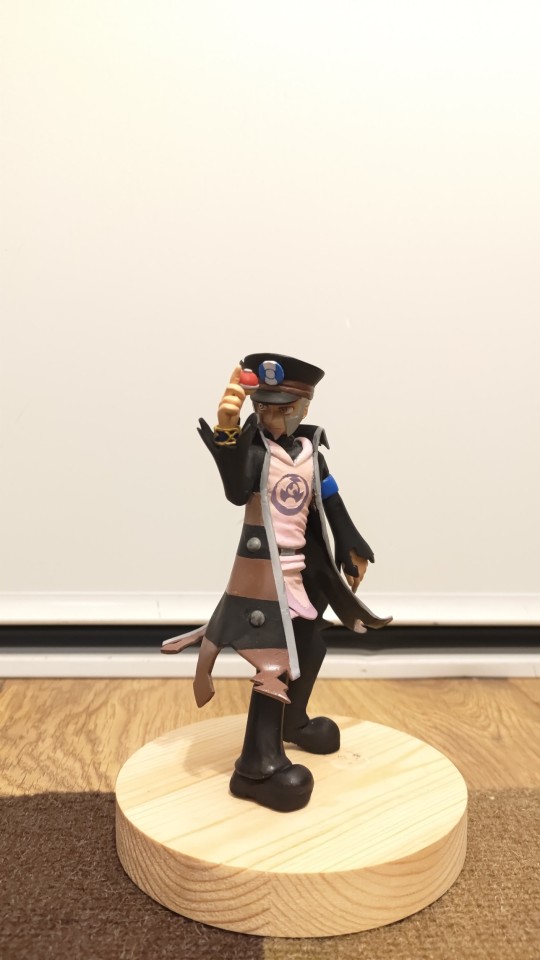
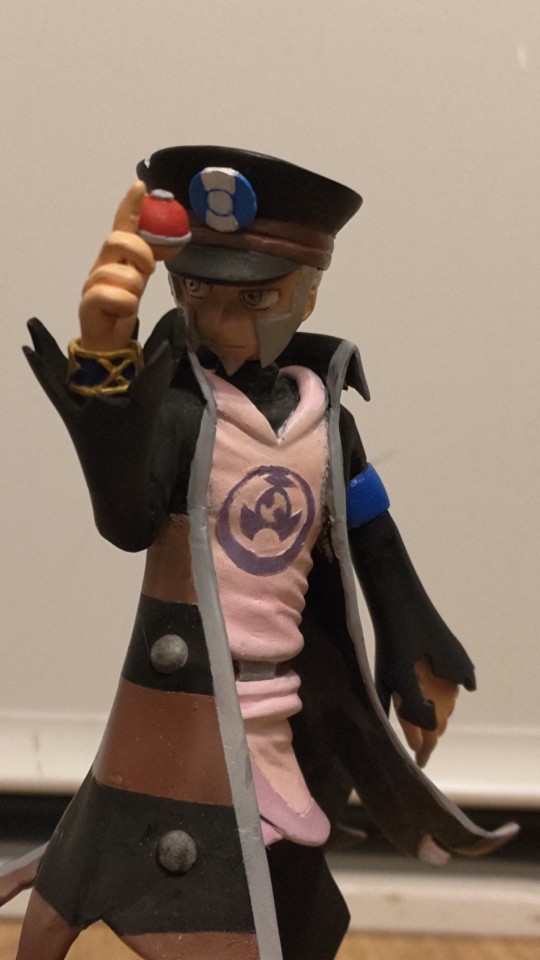
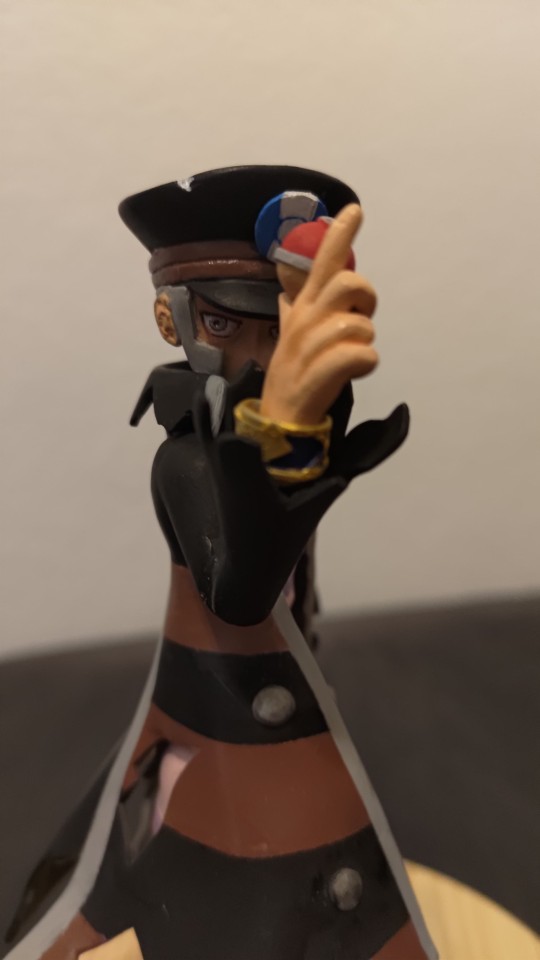
Alright y'all don't know how hard I have simped for this man since gen 5. But now you do.
Finished ver.
Bonus
579 notes
·
View notes
Text
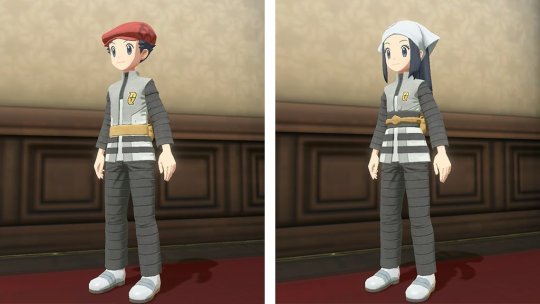

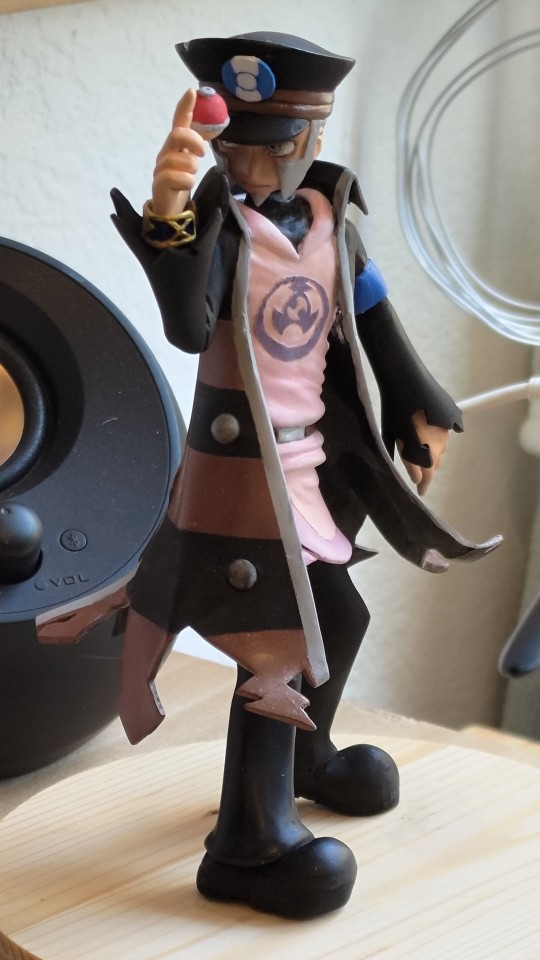
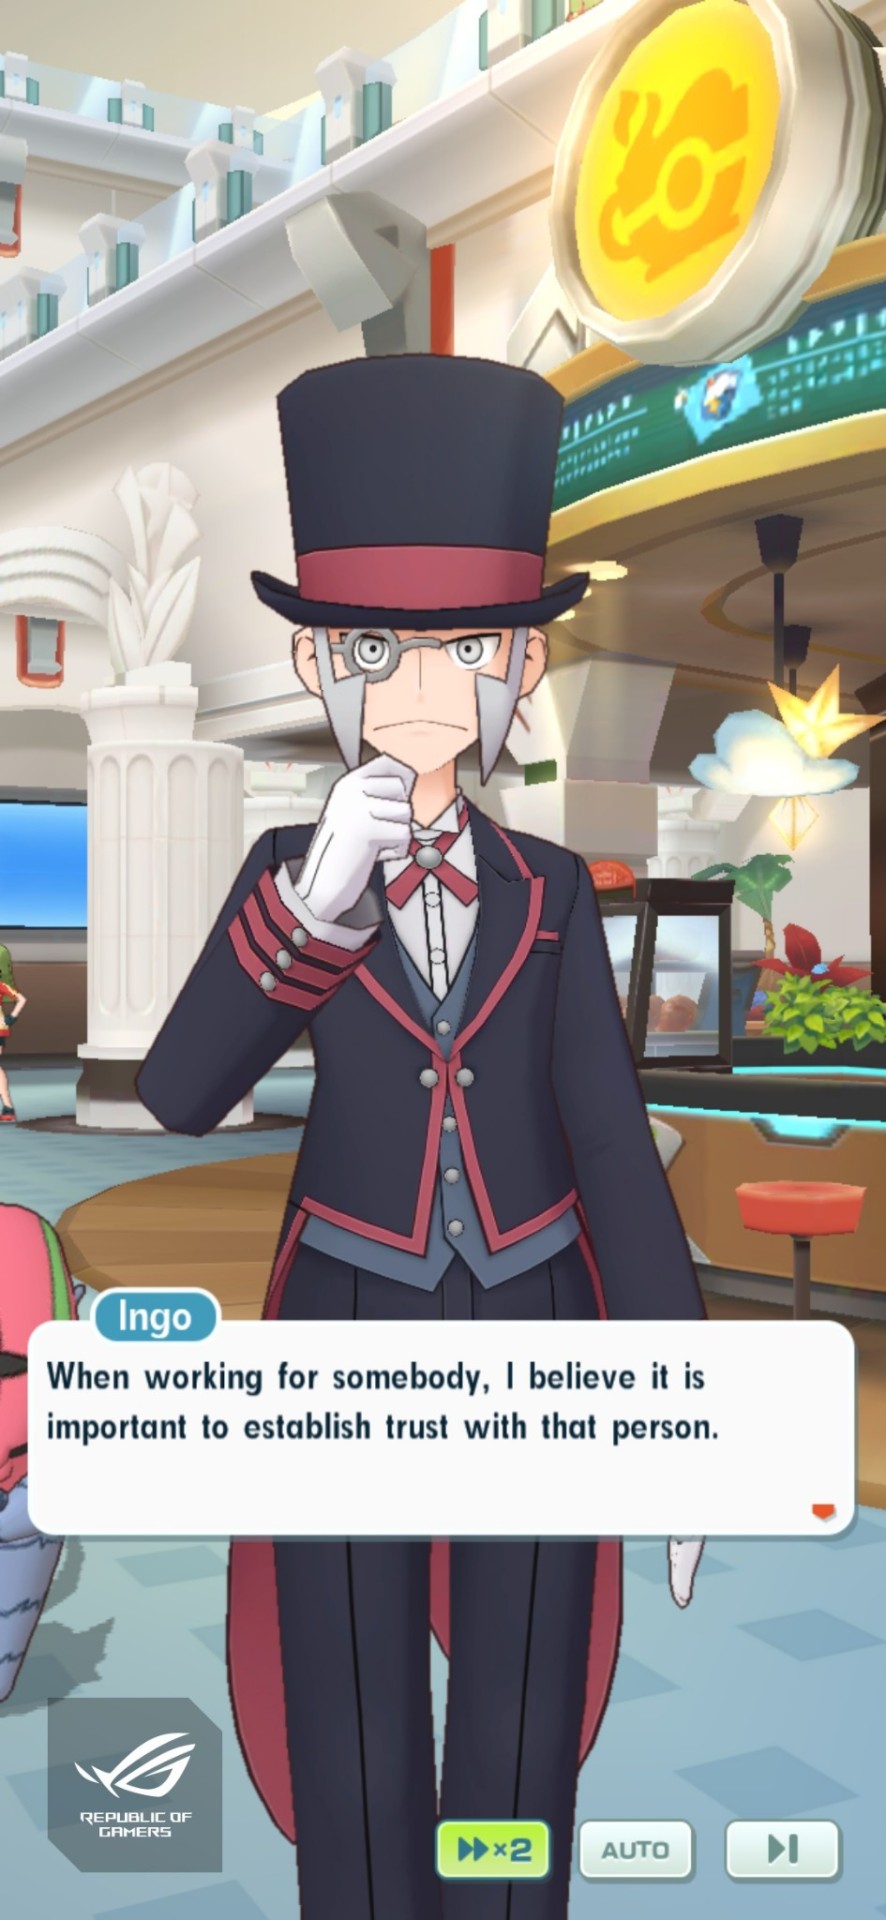
If you have save data for either Brilliant Diamond or Shining Pearl, there will be a Darkrai mission (and accompanying Cyrus cosplay, fuck yea! I was kinda miffed that BDSP didn't have TG cosplay, since even Let's Go gave us a TR-themed outfit.)
140 notes
·
View notes