#“laravel collection modify value”
Explore tagged Tumblr posts
Visit Tumblr Blog
Explore Tumblr blogs with no restrictions, modern design and the best experience.
Last Seen Tumblr Blogs


Fun Fact
Tumblr Inc. is using 66 technologies for its website.
Photo

chunk | Laravel Collections In this episode we are tackling, the method chunk(). For the best experience, follow along in our interactive school at About This ... source
#“laravel collection generate new transformed array”#“laravel collection move item”#“laravel collection remove keys”#“laravel collections chunk”#Laravel#laravel 6#laravel 6 collections#laravel add to collection#laravel advanced#laravel array#laravel collection#laravel collection filter example#laravel collection methods#laravel collection modify item#laravel collection modify value#laravel merge two collections
0 notes
Text
WHY LEARN PHP FOR WEBSITE DEVLOPMENT | PHP COACHING IN JAIPUR
Nowdays, development or create a internet site is a concern on your commercial enterprise on the net. The designing and development are the two most promising steps which might be critical. PHP programming language (PHP coaching in jaipur) is most broadly used for the website and web utility development. It is a wellknown purpose, a server-facet scripting language which runs on a web server and that is designed for making dynamic pages and applications.
As web development services choice are secured, speedy and dependable which gives lot greater advantages to make it on hand to a whole lot of humans. It is given a thought to what has made PHP programming language as one of the most usually used languages and is likewise an excellent desire for net development. Using PHP as its language has many advantages find it irresistible supports Oracle, Sybase, etc. It is used for developing easy functions, strategies, and syntax. It additionally supports database management gadget and some other open supply database.
Today, PHP is extensively used and maximum demandable scripting language on the net. PHP is a totally famous scripting language that’s specifically designed for professional internet site improvement. PHP has end up one of the predominant gamers at the net improvement market inside the last few years. PHP programming language is the most preferred programming language that is applicable for internet site improvement as PHP can be without difficulty embedded into HTML code.
PHP’s extensions provide unrivaled functionality in comparison to some other net scripting language to be had, which has been made to be had through countless developers bringing together a significant collection of open-supply software from across the net. PHP is much like Microsoft Active Server Pages, Java Servlets and Cold Fusion Module however is usually held to be a good deal simpler to application (or ‘script’) with, a lot faster than its competitors and, first-class of all, it is loose to use and distribute. One of the most powerful and most huge features in PHP is its guide for a wide range of databases. If simplicity, pace of development, and economic system are taken because the important factors, then PHP need to be the fine.
ADVANTAGES OF PHP WEB DEVELOPMENT:
• PHP is Open Source. Open Source means you by no means want to rely on the producer to launch the next model if some thing doesn’t paintings or pay for pricey improvements.
• PHP is extendible.
• Large amount of databases are supported.
• PHP is platform impartial. It will run on most of the structures.
• Compatible with servers like IIS and APACHE.
• Low improvement and upkeep value with very excessive performance and reliability
What’s new in ultra-modern PHP Version?
• Extended help for Object Oriented Programming.
• Improved aid for MySQL with a new MySQL extensions.
• New equipment to read and modify XML docs in SimpleXML extension.
• Embedded server-side storage mechanism with SQLite.
• New error dealing with module.
• New extension for SOAP implementation.
• Data dealing with via iterators.
Reasons Why PHP is most Popular Among Web Developers
PHP boasts Simplicity
With PHP, coding is like writing an essay in English for a pc to study, besides the essay is a piece of code that instructs it to create and run websites in the maximum efficient way viable. Creating a code in PHP is straightforward, and although you’ll pay attention a few builders complaining that this doesn’t construct the vital coding behavior that streamlines (study standardizes) coding, it allows the code to be extraordinarily personalized (and hence less complicated to defend).
PHP Is FREE
PHP is an open supply language: unfastened, is easy to apply, and has an exquisite quantity of to be had documentation — making it the most price-powerful method of making robust websites and taking on on line actual estate area without traumatic approximately criminal responsibilities and subscriptions charges.
Furthermore, PHP reduces limitations to entry for brand new internet site developers, letting them really leverage their skills and abilties for coding to get began.
PHP Works Exceptionally Well With CMS
The contemporary (and recent) fashion towards adaptive content material has made CMS customization a important competitive want for corporations. Adaptive content material is content material customized for the person tourist to the internet site (using sign-in, or vacationer history) to create a one-to-one revel in for traffic. This is most effective feasible if the internet site’s code can be customized and incorporated with the CMS.
PHP makes web sites amoebic, permitting the developers to transform them at their will. All PHP web sites are completely customizable and may be converted to meet the necessities of the customers effectively because Content Management Systems like WordPress, Drupal, Joomla and others are based totally on PHP. Hence, developing or integrating a robust custom-made CMS solution together with your website is easy.
PHP is Powerful Flexible and Scalable
Facebook, the biggest and most effective social media platform is jogging on PHP. Facebook has even created a PHP by-product language, named “Hack” to fulfill the emerging desires of the giant’s content material management needs. This indicates the extent of flexibility, robustness, and scalability that is built into PHP. Compared to different languages, PHP’s biggest advantage is that the internet site’s code may be updated without requiring a server reboot!
PHP gives Diverse Frameworks
PHP is able to deliver pretty speedy turnaround instances because it has a sufficiently big own family of PHP-frameworks. These variety from the company degree Zend and Yii frameworks, all rounder Laravel and Sympfony, overall performance optimizers like Phalcon, and PHPixie for quick software designs or Code igniter for extra robust ones.
Conclusion
The PHP programmers nevertheless must placed a further time and efforts in writing the internet software in PHP. They should avail the resources that are supplied via diverse frameworks and content control system for lowering the improvement time drastically. Choosing PHP language for Website development company in jaipur will absolutely provide you superb outcomes to build a website for your business.
#website devlopment company in jaipur#seo trainning in jaipur#php trainning in jaipur#php coaching in jaipur#best smo services in jaipur
1 note
·
View note
Link
Nuxt.js provides an Axios module for easy integration with your application. Axios is a promise-based HTTP client that works in the browser and Node.js environment or, in simpler terms, it is a tool for making requests (e.g API calls) in client-side applications and Node.js environment. In this tutorial, we’re going to learn how to use the Axios module and how to make a request on the server-side using asyncData and fetch. These two methods make a request on the server-side but they have some differences which we’re also going to cover. Finally, we’ll learn how to perform authentication and secure pages/routes using the auth module and auth middleware. This article requires basic knowledge of Nuxtjs and Vuejs as we’ll be building on top of that. For those without experience with Vuejs, I recommend you start from their official documentation and the Nuxt official page before continuing with this article.
What Is The Nuxt.js Axios Module?
According to the official Documentation,
“It is a Secure and easy Axios integration with Nuxt.js.”
Here are some of its features:
Automatically set base URL for client-side & server-side.
Proxy request headers in SSR (Useful for auth).
Fetch Style requests.
Integrated with Nuxt.js Progressbar while making requests.
To use the axios module in your application, you will have to first install it by using either npm or yarn. YARN
yarn add @nuxtjs/axios
NPM
npm install @nuxtjs/axios
Add it into your nuxt.config.js file:
modules: [ '@nuxtjs/axios', ], axios: { // extra config e.g // BaseURL: 'https://link-to-API' }
The modules array accepts a list of Nuxt.js modules such as dotenv, auth and in this case, Axios. What we’ve done is to inform our application that we would be using the Axios module, which we reference using @nuxtjs/axios. This is then followed by the axios property which is an object of configurations like the baseURL for both client-side and server-side. Now, you can access Axios from anywhere in your application by calling this.$axios.method or this.$axios.$method. Where method can be get, post, or delete.
Making Your First Request Using Axios
For this tutorial, I’ve put together a simple application on Github. The repository contains two folders, start and finish, the start folder contains all you need to get right into the tutorial. The finish folder contains a completed version of what we would be building. After cloning the repo and opening the start folder, we would need to install all our packages in the package.json file so open your terminal and run the following command:
npm install
Once that is done, we can start our app using the npm run dev command. This is what you should see when you go to localhost:3000.
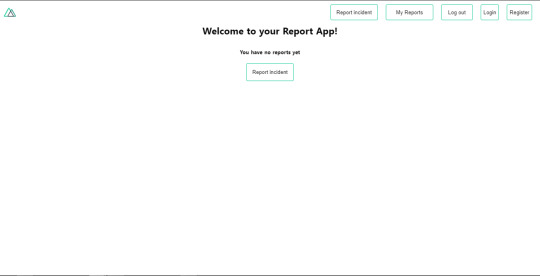
Our application’s landing page. (Large preview)
The next thing we have to do is to create a .env file in the root folder of our application and add our API URL to it. For this tutorial, we’ll be using a sample API built to collect reports from users.
API_URL=https://ireporter-endpoint.herokuapp.com/api/v2/
This way, we do not have to hard code our API into our app which is useful for working with two APIs (development and production). The next step would be to open our nuxt.config.js file and add the environmental variable to our axios config that we added above.
/* ** Axios module configuration */ axios: { // See https://github.com/nuxt-community/axios-module#options baseURL: process.env.API_URL, },
Here, we tell Nuxt.js to use this baseURL for both our client-side and server-side requests whenever we use this Axios module. Now, to fetch a list of reports, let us open the index.vue file and add the following method to the script section.
async getIncidents() { let res = await this.$store.dispatch("getIncidents"); this.incidents = res.data.data.incidents; }
What we have done is to create an async function that we call getIncidents() and we can tell what it does from the name — it fetches a list of incidents using the Vuex store action method this.$store.dispatch. We assign the response from this action to our incidents property so we can be able to make use of it in the component. We want to call the getIncidents() method whenever the component mounts. We can do that using the mounted hook.
mounted() { this.getIncidents() }
mounted() is a lifecycle hook that gets called when the component mounts. That will cause the call to the API to happen when the component mounts. Now, let us go into our index.js file in our store and create this action where we’ll be making our Axios request from.
export const actions = { async getIncidents() { let res = await this.$axios.get('/incidents') return res; } }
Here, we created the action called getIncidents which is an async function, then we await a response from the server and return this response. The response from this action is sent back to our getIncidents() method in our index.vue file. If we refresh our application, we should now be able to see a long list of incidents rendered on the page.
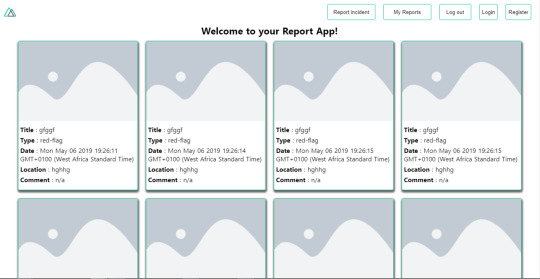
List of incidents on landing page. (Large preview)
We have made our first request using Axios but we won’t stop there, we are going to be trying out asyncData and fetch to see the differences between them and using Axios.
AsyncData
AsyncData fetches data on the server-side and it’s called before loading the page component. It does not have access to this because it is called before your page component data is created. this is only available after the created hook has been called so Nuxt.js automatically merges the returned data into the component’s data. Using asyncData is good for SEO because it fetches your site’s content on the server-side and also helps in loading content faster. Note that asyncData method can only be used in the pages folder of your application as it would not work in the components folder. This is because asyncData hook gets called before your component is created.
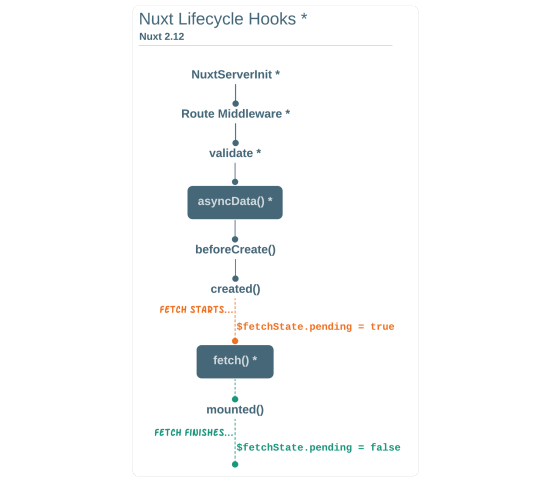
Image from Nuxt blog. (Large preview)
Let us add asyncData to our index.vue file and observe how fast our incidents data loads. Add the following code after our components property and let us get rid of our mounted hook.
async asyncData({ $axios }) { let { data } = await $axios.get("/incidents"); return { incidents: data.data.incidents }; }, // mounted() { // this.getIncidents(); // },
Here, the asyncData method accepts a property from the context $axios. We use this property to fetch the list of incidents and the value is then returned. This value is automatically injected into our component. Now, you can notice how fast your content loads if you refresh the page and at no time is there no incident to render.
Fetch
The Fetch method is also used to make requests on the server-side. It is called after the created hook in the life cycle which means it has access to the component’s data. Unlike the asyncData method, the fetch method can be used in all .vue files and be used with the Vuex store. This means that if you have the following in your data function.
data() { return { incidents: [], id: 5, gender: 'male' }; }
You can easily modify id or gender by calling this.id or this.gender.
Using Axios As A Plugin
During the process of development with Axios, you might find that you need extra configuration like creating instances and interceptors for your request so your application can work as intended and thankfully, we can do that by extending our Axios into a plugin. To extend axios, you have to create a plugin (e.g. axios.js) in your plugins folder.
export default function ({ $axios, store, redirect }) { $axios.onError(error => { if (error.response && error.response.status === 500) { redirect('/login') } }) $axios.interceptors.response.use( response => { if (response.status === 200) { if (response.request.responseURL && response.request.responseURL.includes('login')) { store.dispatch("setUser", response); } } return response } ) }
This is an example of a plugin I wrote for a Nuxt application. Here, your function takes in a context object of $axios, store and redirect which we would use in configuring the plugin. The first thing we do is to listen for an error with a status of 500 using $axios.onError and redirect the user to the login page. We also have an interceptor that intercepts every request response we make in our application checks if the status of the response we get is 200. If that is true we proceed and check that there is a response.request.responseURL and if it includes login. If this checks out to be true, we then send this response using our store’s dispatch method where it then mutated in our state. Add this plugin to your nuxt.config.js file:
plugins: [ '~/plugins/axios' ]
After doing this, your Axios plugin would intercept any request you make and check if you have defined a special case for it.
Introduction To The Auth Module
The auth module is used for performing authentication for your Nuxt application and can be accessed from anywhere in your application using $this.auth. It is also available in fetch, asyncData, middleware and NuxtInitServer from the context object as $auth. The context provides additional objects/params from Nuxt to Vue components and is available in special nuxt lifecycle areas like those mentioned above. To use the auth module in your application, you would have to install it using yarn or npm. YARN
yarn add @nuxtjs/auth
NPM
npm install @nuxtjs/auth
Add it to your nuxt.config.js file.
modules: [ '@nuxtjs/auth' ], auth: { // Options }
The auth property accepts a list of properties such as strategies and redirect. Here, strategies accepts your preferred authentication method which can be:
local For username/email and password-based flow.
facebook For using Facebook accounts as a means of authentication.
Github For authenticating users with Github accounts.
Google For authenticating users with Google accounts.
Auth0
Laravel Passport
The redirect property accepts an object of links for:
login Users would be redirected to this link if login is required.
logout Users would be redirected here if after logout current route is protected.
home Users would be redirected here after login.
Now, let us add the following to our nuxt.config.js file.
/* ** Auth module configuration */ auth: { redirect: { login: '/login', logout: '/', home: '/my-reports' }, strategies: { local: { endpoints: { login: { url: "/user/login", method: "post", propertyName: "data.token", }, logout: false, user: false, }, tokenType: '', tokenName: 'x-auth', autoFetchUser: false }, }, }
Please note that the auth method works best when there is a user endpoint provided in the option above. Inside the auth config object, we have a redirect option in which we set our login route to /login, logout route to / and home route to /my-reports which would all behave as expected. We also have a tokenType property which represents the Authorization type in the header of our Axios request. It is set to Bearer by default and can be changed to work with your API. For our API, there is no token type and this is why we’re going to leave it as an empty string. The tokenName represents the Authorization name (or the header property you want to attach your token to) inside your header in your Axios request. By default, it is set to Authorization but for our API, the Authorization name is x-auth. The autoFetchUser property is used to enable user fetch object using the user endpoint property after login. It is true by default but our API does not have a user endpoint so we have set that to false. For this tutorial, we would be using the local strategy. In our strategies, we have the local option with endpoints for login, user and logout but in our case, we would only use the *login* option because our demo API does not have a *logout* endpoint and our user object is being returned when *login* is successful. Note: The auth module does not have a register endpoint option so that means we’re going to register the traditional way and redirect the user to the login page where we will perform the authentication using this.$auth.loginWith. This is the method used in authenticating your users. It accepts a ‘strategy’ (e.g local) as a first argument and then an object to perform this authentication with. Take a look at the following example.
let data { email: '[email protected]', password: '123456' } this.$auth.loginWith('local', { data })
Using The Auth Module
Now that we have configured our auth module, we can proceed to our registration page. If you visit the /register page, you should see a registration form.
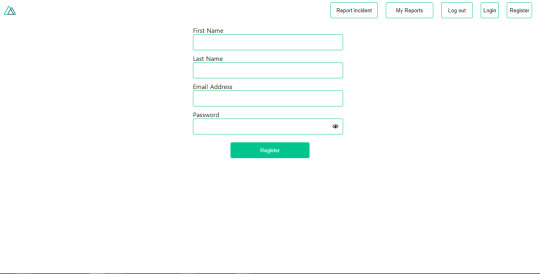
Register page. (Large preview)
Let us make this form functional by adding the following code:
methods: { async registerUser() { this.loading = true; let data = this.register; try { await this.$axios.post("/user/create", data); this.$router.push("/login"); this.loading = false; this.$notify({ group: "success", title: "Success!", text: "Account created successfully" }); } catch (error) { this.loading = false; this.$notify({ group: "error", title: "Error!", text: error.response ? error.response.data.error : "Sorry an error occured, check your internet" }); } } }
Here, we have an async function called registerUser which is tied to a click event in our template and makes an Axios request wrapped in a try/catch block to an endpoint /user/create. This redirects to the /login page and notifies the user of a successful registration. We also have a catch block that alerts the user of any error if the request is not successful. If the registration is successful, you would be redirected to the login page.
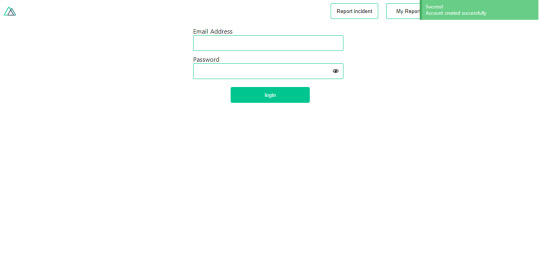
Login page with notification component. (Large preview)
Here, we’re going to make use of auth authentication method this.$auth.loginWith('local', loginData) after which we would use the this.$auth.setUser(userObj) to set the user in our auth instance. To get the login page working, let’s add the following code to our login.vue file.
methods: { async logIn() { let data = this.login; this.loading = true; try { let res = await this.$auth.loginWith("local", { data }); this.loading = false; let user = res.data.data.user; this.$auth.setUser(user); this.$notify({ group: "success", title: "Success!", text: "Welcome!" }); } catch (error) { this.loading = false; this.$notify({ group: "error", title: "Error!", text: error.response ? error.response.data.error : "Sorry an error occured, check your internet" }); } } }
We created an async function called logIn using the auth method this.$auth.loginWith('local, loginData). If this login attempt is successful, we then assign the user data to our auth instance using this.$auth.setUser(userInfo) and redirect the user to the /my-report page. You can now get user data using this.$auth.user or with Vuex using this.$store.state.auth.user but that’s not all. The auth instance contains some other properties which you can see if you log in or check your state using your Vue dev tools. If you log this.$store.state.auth to the console, you’ll see this:
{ "auth": { "user": { "id": "d7a5efdf-0c29-48aa-9255-be818301d602", "email": "[email protected]", "lastName": "Xo", "firstName": "Tm", "othernames": null, "isAdmin": false, "phoneNumber": null, "username": null }, "loggedIn": true, "strategy": "local", "busy": false } }
The auth instance contains a loggedIn property that is useful in switching between authenticated links in the nav/header section of your application. It also contains a strategy method that states the type of strategy the instance is running (e.g local). Now, we will make use of this loggedIn property to arrange our nav links. Update your navBar component to the following:
<template> <header class="header"> <div class="logo"> <nuxt-link to="/"> <Logo /> </nuxt-link> </div> <nav class="nav"> <div class="nav__user" v-if="auth.loggedIn"> <p></p> <button class="nav__link nav__link--long"> <nuxt-link to="/report-incident">Report incident</nuxt-link> </button> <button class="nav__link nav__link--long"> <nuxt-link to="/my-reports">My Reports</nuxt-link> </button> <button class="nav__link" @click.prevent="logOut">Log out</button> </div> <button class="nav__link" v-if="!auth.loggedIn"> <nuxt-link to="/login">Login</nuxt-link> </button> <button class="nav__link" v-if="!auth.loggedIn"> <nuxt-link to="/register">Register</nuxt-link> </button> </nav> </header> </template> <script> import { mapState } from "vuex"; import Logo from "@/components/Logo"; export default { name: "nav-bar", data() { return {}; }, computed: { ...mapState(["auth"]) }, methods: { logOut() { this.$store.dispatch("logOut"); this.$router.push("/login"); } }, components: { Logo } }; </script> <style></style>
In our template section, we have several links to different parts of the application in which we are now using auth.loggedIn to display the appropriate links depending on the authentication status. We have a logout button that has a click event with a logOut() function attached to it. We also display the user’s email gotten from the auth property which is accessed from our Vuex store using the mapState method which maps our state auth to the computed property of the nav component. We also have a logout method that calls our Vuex action logOut and redirects the user to the login page. Now, let us go ahead and update our store to have a logOut action.
export const actions = { // .... logOut() { this.$auth.logout(); } }
The logOut action calls the auth logout method which clears user data, deletes tokens from localStorage and sets loggedIn to false. Routes like /my-reports and report-incident should not be visible to guests but at this point in our app, that is not the case. Nuxt does not have a navigation guard that can protect your routes, but it has is the auth middleware. It gives you the freedom to create your own middleware so you can configure it to work the way you want. It can be set in two ways:
Per route.
Globally for the whole app in your nuxt.config.js file.
router: { middleware: ['auth'] }
This auth middleware works with your auth instance so you do not need to create an auth.js file in your middleware folder. Let us now add this middleware to our my-reports.vue and report-incident.vue files. Add the following lines of code to the script section of each file.
middleware: 'auth'
Now, our application would check if the user trying to access these routes has an auth.loggedIn value of true. It’ll redirect them to the login page using our redirect option in our auth config file — if you’re not logged in and you try to visit either /my-report or report-incident, you would be redirected to /login. If you go to /report-incidents, this is what you should see.
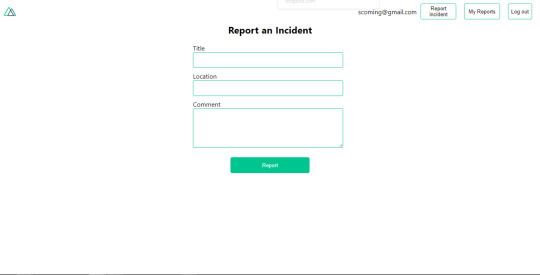
Report incident page. (Large preview)
This page is for adding incidents but that right now the form does not send incident to our server because we are not making the call to the server when the user attempts to submit the form. To solve this, we will add a reportIncident method which will be called when the user clicks on Report. We’ll have this in the script section of the component. This method will send the form data to the server. Update your report-incident.vue file with the following:
<template> <section class="report"> <h1 class="report__heading">Report an Incident</h1> <form class="report__form"> <div class="input__container"> <label for="title" class="input__label">Title</label> <input type="text" name="title" id="title" v-model="incident.title" class="input__field" required /> </div> <div class="input__container"> <label for="location" class="input__label">Location</label> <input type="text" name="location" id="location" v-model="incident.location" required class="input__field" /> </div> <div class="input__container"> <label for="comment" class="input__label">Comment</label> <textarea name="comment" id="comment" v-model="incident.comment" class="input__area" cols="30" rows="10" required ></textarea> </div> <input type="submit" value="Report" class="input__button" @click.prevent="reportIncident" /> <p class="loading__indicator" v-if="loading">Please wait....</p> </form> </section> </template> <script> export default { name: "report-incident", middleware: "auth", data() { return { loading: false, incident: { type: "red-flag", title: "", location: "", comment: "" } }; }, methods: { async reportIncident() { let data = this.incident; let formData = new FormData(); formData.append("title", data.title); formData.append("type", data.type); formData.append("location", data.location); formData.append("comment", data.comment); this.loading = true; try { let res = await this.$store.dispatch("reportIncident", formData); this.$notify({ group: "success", title: "Success", text: "Incident reported successfully!" }); this.loading = false; this.$router.push("/my-reports"); } catch (error) { this.loading = false; this.$notify({ group: "error", title: "Error!", text: error.response ? error.response.data.error : "Sorry an error occured, check your internet" }); } } } }; </script> <style> </style>
Here, we have a form with input fields for title, location, and comment with two-way data binding using v-model. We also have a submit button with a click event. In the script section, we have a reportIncident method that collects all the information provided in the form and is sent to our server using FormData because the API is designed to also accept images and videos. This formData is attached to a Vuex action using the dispatch method, if the request is successful, you get redirected to /my-reports with a notification informing you that this request was successful otherwise, you would be notified of an error with the error message. At this point, we don’t have reportIncident action in our store yet so in your browser console, you would see an error if you try to click submit on this page.

Vuex error message. (Large preview)
To fix this, add the reportIncident action your index.js file.
export const actions = { // ... async reportIncident({}, data) { let res = await this.$axios.post('/incident/create', data) return res; } }
Here, we have a reportIncident function that takes in an empty context object and the data we’re sending from our form. This data is then attached to a post request that creates an incident and returns back to our report-incident.vue file. At this point, you should be able to add a report using the form after which you would be redirected to /my-reports page.
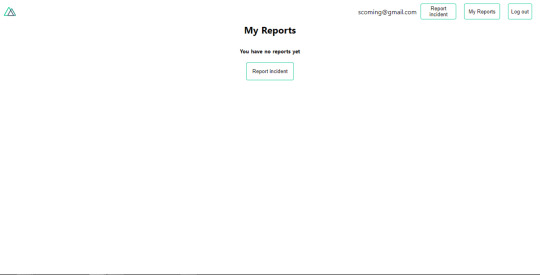
My reports page empty. (Large preview)
This page should display a list of incidents created by the user but right now it only shows what we see above, let’s go ahead to fix that. We’re going to be using the fetch method we learned about to get this list. Update your my-reports.vue file with the following:
<script> import incidentCard from "@/components/incidentCard.vue"; export default { middleware: "auth", name: "my-reports", data() { return { incidents: [] }; }, components: { incidentCard }, async fetch() { let { data } = await this.$axios.get("/user/incidents"); this.incidents = data.data; } }; </script>
Here, we use fetch method to get user-specific incidents and assign the response to our incidents array. If you refresh your page after adding an incident, you should see something like this.
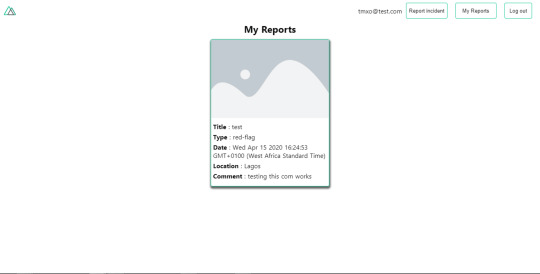
My Reports page with a report. (Large preview)
At this point, we would notice a difference in how fetch method and asyncData loads our data.
Conclusion
So far, we have learned about the Axios module and all of its features. We have also learned more about asyncData, and how we can fetch both of them together despite their differences. We’ve also learned how to perform authentication in our application using the auth module and how to use the auth middleware to protect our routes. Here are some useful resources that talk more about all we’ve covered.
Getting started with meta tags in Nuxjs.
Using the dotenv module in Nuxt.
Using Fetch in your Nuxt app.
Getting started with asyncData.
0 notes
Text
PHP Classifieds Script Free Download

Nimble Classified Ads Script – PHP And Laravel Geo Classified Advertisement CMS is made to engage you to manufacture a 100% responsive and explicit assembled site subject to a most recent variety of the most standard PHP system Laravel. Are you too an extraordinary degree searching forward for an unfathomable depicted headways cms structure? The most progression Nimble Classified Ads Script – PHP And Laravel Geo Classified Advertisement CMS will meet your necessities. It's one of the must purchase progressions substance which you can't keep up a vital separation from If you require a part rich substance that has everything and combines in excess of 50 highlights which you have to build up a captivating amassed business center site. Regardless of what you look like at it stunning looking gathering, Nimble organized headways content is particularly orchestrated and made by keeping in view the prerequisites and necessities everything considered. Deft Classified Ads Script – PHP And Laravel Geo Classified Advertisement CMS has particularly present day, striking and eye getting outline which impacts it to ascend at the web and is a victor amongest the most magnificent gathered substance open at code pig out. It's a great looking structure and present-day course of action will make you went gaga for it. 100% working and emerge course of action is attempted and genuine, easy to use, not simply that its association and setup will help give your classifieds regions and it's postings have a competent appearance. With Nimble Classified Ads Script – PHP And Laravel Geo Classified Advertisement CMS you can make your classifieds headways national, worldwide or notwithstanding for some predefined for several nations.
Key Features:
Creative And Powerful Admin Panel.
Multi-Languages.
Live Commenting System In Ads Through Facebook.
Asked for Ad Verification Through Mobile Notification (Twilio SMS Gateway Integrated).
Clients Rating System – Registered Users Can now leave responses/surveys.
Google Map Listings (Worldwide classifieds can be seen through guide).
Custom Pages Builder (extraordinarily competent custom page producer choice).
Multi Skins – Easy Customization Options.
100% Mobile Responsive &Retina Ready.
First Time Ever Most Unique Feature: Category and Sub Category Management.
Accumulated headway posting by techniques for adaptable insistence.
Stripe Payment Gateway To Charge Your Customers.
Post Ad With Multiple Images.
The course of action Wise Ads Listing.
Direct.
Custom Fields Add-On.
Most valued Ads.
Premium Ads System (+Google Ad-sense).
Worked with PHP/MySQL/HTML 5/CSS 3.
Structures: Laravel, Bootstrap, Query.
Introduction page customization: (head can change shades and request modify all segments from the dashboard).
CMS for static pages (make pages like, about us, faq, terms approach, and so on).
Front end posting accommodation.
Effortlessly establishment and orchestrated to use in only 2 minutes.
Genuine Tracking System.
Examination.
Email Verification System.
Site enhancement Friendly and SEO Ready.
Login Via Email Address.
Online frameworks organization Sharing Options.
Advertisements Upgrade System.
Record Notifications.
Email Notifications.
Spam Controlling.
Dynamic Chat System.
Confided in Seller Badge.
Intrigue Filter.
Included Ads.
Advanced Messaging System.
Simple To Install.
Simple To Update.
Sitemap.
Upkeep Mode.
Free Lifetime Updates And Anytime Access To Our Help And Support Portal.
Clean Programming and source code, gainful, especially recorded Pages System.
Contact Form.
Confided in Seller Badge.
Advance Profile Verification System.
Record Upgrade.
Spam Control System.
Before making utilization of the development depicted to check for occupations you should isolate your activity require. You should check for such occupations that suit best of your capacities. Showing your own abilities fittingly can lead you to investigate through the development banks satisfactorily. Evaluation of your abilities close to your interests winds up being generally central. You in like way should consider your blocks. There might be occupations which are preposterously requesting, yet likely won't work for you. Thusly understanding your own potential results appropriately can make your journey to work a success.
There are such a basic number of affiliations offering on the web work classifieds and keeping up business banks that it winds up being troublesome for any person to go for the best one. Actually, even there are making occasions of affiliations faking with the activity classifieds. Starting here of view Freelance the load up bank can be insinuated for instance beyond any doubt as an alliance that has met any activity searcher's hankering with a beast, especially directed business bank in past and besides for a noteworthy timeframe to come.
The two directors who post vocations and occupation searchers who inspect for occupations can be normally profited by an online development portrayed in the running with ways:
Business classifieds when in doubt keep up a monster database of occupation postings. The term work banks should be shown here in perspective of its trademark similarity of having assets at any single place like any bank. Occupations are everything viewed as recorded in a managed way. You can discover occupations as appeared by your subject from your favoured gathering. The receptiveness of copious assets regardless of what you look like at it put beneficially keeps online business classifieds much before different techniques for occupation headways.
Demand is another fundamental bit of amassed work. Since the activity agile classifieds have a colossal database of employment to manage, the occupations are thusly amassed by explicit portrayals. An occupation dispersion can post in this activity bank any activity that organizes the most realistic portrayal. In the interim work, a searcher can stay to check for the pined for activity by essentially having a speedy take a gander at the classes consequently promising the demand.
Ads Classified Scripts locales can be additionally extended by building associations with key organizations that have a similar specialty of intrigue. In the Auto precedent, neighbourhood organizations, for example, car parts and frill stores, accident coverage providers and vehicle washing offices can be drawn nearer and offered free promoting space on the site. Not exclusively will such organizations be pulled in to your client base, yet their advertisements will likewise produce site action from their client base.
An objective region or regions should then be chosen for the ordered promotion site as a larger part of things regularly recorded on such destinations either can't be transported abroad or it is amazingly hard to do as such. Pet supplies might be effortlessly transported to removed purchasers, yet pets, firearms and autos move best in neighbourhood markets.
In an online activity organized, both an occupation advertisement spot and an occupation searcher can keep up a profile by basically enrolling and finishing the techniques. At whatever point an occupation fits the ability or fairly propensity of any activity searcher Free Web script, he/she gets educated all things considered updating the mission for work further.
By a long shot, most don't regard the intensity of cautiously made collected progressions. They think collected advancements are for offering vehicles, or discovering occupations, and not for growing a business. While it's genuine an arranged progression is an OK strategy to accomplish the recently referenced, it is correspondingly obvious that assembled advancements can be utilized to dispatch and extend multi million-pound affiliations.
Different affiliations depend only on this inconsequential effort notification to convey a liberal extent of their yearly turn over. The reason is the principal. When you have found how to outfit the power of these depicted headways, you truly won't have to run costly show advancements utilizing all methods.
Note that the key point about masterminded advancements is that they are best when utilized as lead generators, and not to offer from. In these headways, you are not attempting to impact somebody to encounter cash with you. You are attempting to perceive a potential client by having that client interface with you because of the business. Exactly when potential clients have isolated themselves, you would then have the ability to get up to speed with your standard postal mail offer for the thing or association you are advancing.
Making a persuading assembled headway is a boss amongest the most asking for sorts of copy creation. In twenty words or less, you need to catch the client's eye and engage them enough to activate them into calling you for more data. You can't depend upon eye getting charts or ace plans to get the looks at the thought.
#nimble#classified#ads_script#nimble_plugin#nimble-classified_ads_scripting#geo_classified#laravel_script
0 notes
Text
Measure Anything in Laravel with StatsD
Laravel Tutorials / September 25, 2017
Measure Anything in Laravel with StatsD
I want to show you some tools and techniques you can use to measure anything and everything that you want in your Laravel applications with StatsD. These ideas are simple and not new; yet, I believe that the simplicity and power are what makes StatsD great.
You can also take the ideas in this article and apply them to any programming language or stack. Instrumenting your code can have a huge payoff as your application scales and can help you gain deep insights.
Most importantly, adding new instrumentation to your application should be as painless as possible for developers. Any friction in the collecting and reporting of new insights means developers won’t use it. I think a good measurement of “frictionless” is for a developer to start collecting on any metric in production in thirty minutes or less.
Enter StatsD:
A network daemon that runs on the Node.js platform and listens for statistics, like counters and timers, sent over UDP or TCP and sends aggregates to one or more pluggable backend services (e.g., Graphite).
StatsD is a simple, easy way to start collecting metrics quickly and displaying them in a graphing program. The great thing about StatsD is that the calls happen over UDP, which is fast, and a “fire-and-forget” transaction. Also, the code in development won’t be affected if you’re not running StatsD.
Why You Should Instrument Your Code
In the context of web applications and services, instrumentation can be grouped into three critical areas: network, server, and application. We will be focused on application instrumentation, or to put it another way, measuring metrics in your code, such as timing, gauges, and increments.
You can measure everything from how many logins you’re application has seen in the last hour, to how quickly a model method runs a database query on average. Another example might be measuring the average time a controller method takes to run. The possibilities are endless!
Instrumentation is an addicting habit you can use to build intelligence which can help you make decisions and respond to issues backed by data. Measuring performance can prove or debunk theories you have about your code using insights that only production can provide.
I believe that application-level instrumentation is probably the most complicated tier, but the payoff can be huge to the health and growth of your applications. If you’re not using instrumentation in your code yet, you probably don’t have a good idea of how your application performs at scale.
Let’s change that and see how quickly you can start incorporating StatsD into your application stack. I am not going to minimize the fact that you’ll need some support in running and maintaining StatsD and Graphite in production, but setting it up on Digital Ocean isn’t too hard. We will just use a local Docker container to make things easy for you so you can focus on experimenting.
Getting Started
The beautiful thing about the Graphite Docker container is that Graphite and StatsD are self-contained and you can get them running in one command.
From the Graphite Installation Guide you can run the following Docker command (I’ve modified the port to 8100 since port 80 is in use on my machine):
docker run -d\ --name graphite\ -p 8100:80\ -p 2003-2004:2003-2004\ -p 2023-2024:2023-2024\ -p 8125:8125/udp\ -p 8126:8126\ graphiteapp/graphite-statsd 37f5884a063f2e3df1e13377e7221e0aff7f5f7079b16b38ff764f3490c95d57
If you go to http://localhost:8100, you should see the Graphite interface! We are ready to send calls to StatsD through a laravel app and start visualizing metrics with Graphite.
Next, we need to install Laravel 5.5, and we are going to use the league/statsd package to send metrics to StatsD over UDP:
$ laravel new laravel-statsd $ cd laravel-statsd $ composer require league/statsd
At the time of this writing, the League StatsD package doesn’t configure package auto-discovery (I have submitted a PR for it ;), so you need to manually set the service provider and facade:
// Provider 'providers' => [ // ... League\StatsD\Laravel5\Provider\StatsdServiceProvider::class, ], // Facade 'aliases' => [ // ... 'Statsd' => League\StatsD\Laravel5\Facade\StatsdFacade::class, ]
Next, publish the configuration for the StatsdServiceProvider:
php artisan vendor:publish --provider="League\StatsD\Laravel5\Provider\StatsdServiceProvider"
You will not need to update the config/statsd.php file with the Docker container we are running, but having this configuration on hand will be useful when you run StatsD in production.
To verify the installation is working, make sure you can resolve the StatsD client via Laravel’s service container:
$ php artisan tinker >>> app('League\StatsD\Client'); => League\StatsD\Client {#713} >>> app('statsd'); => League\StatsD\Client {#719}
A Simple API Counter
The simplest thing you can track with StatsD is probably a counter. You can call both increment and decrement:
# Using the Facade Statsd::increment('pageviews'); Statsd::decrement('some.metric'); # Custom delta and sample rate of 10% Statsd::increment('my.sample', 5, 0.1);
The first example will increment the “pageviews” counter by one. The Statsd::decrement() method works the same way, but decrements the count.
Although you would typically track page views in your application with Google Analytics, let’s say that you wanted to monitor how many requests your API routes receive. Monitoring your API requests/second could be super valuable, a good indicator of the health of your application, and you would start to see some trends.
In the simplest form, we could build a middleware for this purpose. Let’s try it out!
First, create the middleware:
$ php artisan make:middleware RequestCounter
Next, let’s define the middleware with a parameter defining what type of request is being counted:
<?php namespace App\Http\Middleware; use Closure; class RequestCounter { /** * Handle an incoming request. * * @param \Illuminate\Http\Request $request * @param \Closure $next * @return mixed */ public function handle($request, Closure $next, $type) { \Statsd::increment("requests.{$type}"); return $next($request); } }
We use the Statsd facade to increment the requests.$type counter. Using dots (.) separates the value into folders in the Graphite interface. For example, requests.api would make a folder requests/api/ as you will see in a moment.
Next, let’s add this middleware to the App\Http\Kernel.php file in both the web and API groups:
protected $middlewareGroups = [ 'web' => [ 'counter:web', // ... ], 'api' => [ 'counter:api', 'throttle:60,1', 'bindings', ], ]; protected $routeMiddleware = [ // ... 'counter' => \App\Http\Middleware\RequestCounter::class, ];
Now our routes will get counted with every request! We are ready to start working with Graphite and visualizing our metrics being tracked through this middleware.
The first thing we are going to use in Graphite is the dashboard. Visit http://localhost:8100/dashboard. Click “Relative Time Range” and pick “Show the past 1 minutes” and click “OK.” Enable Auto-Refresh and make it refresh every 5 seconds. It should look something like the following:
The dashboard UI allows you to filter by metric and build out dashboards that auto-update that you can use to monitor things in real-time.
We haven’t collected any data yet, so we need to define a route and run some HTTP requests to trigger our middleware.
Let’s set a test web route in routes/web.php:
// routes/web.php Route::get('test', function () { return 'OK'; });
To simulate traffic, use seige or Apache Benchmark. Siege is show, but ab would be similar:
$ brew install siege $ siege -t 60s -c 20 http://ift.tt/2wPwaaG
We run Siege for 60 seconds with 20 concurrent users. While Siege is running, jump back over to the graphite UI and enter (or pick at the top) “stats.requests.”. It should start looking like this:
And you’ve just written your first custom StatsD counter! Are you hooked yet?
Monitoring Controllers
Let’s say that you want to track how long it takes for a controller action to run. If you overload the Illuminate\Routing\Controller::callAction() method, you can track the rough time it takes to call a controller action. We could use an after middleware, but the callAction technique means we aren’t timing any middleware, just the controller action.
Open up the App\Http\Controllers\Controller class and add the following method:
/** * @inheritdoc */ public function callAction($method, $parameters) { // Remove App\Http\Controller // Split remaining namespace into folders $className = str_replace('\\', '.', get_class($this)); $timerName = sprintf('controller.%s.%s', $className, $method); $timer = \Statsd::startTiming($timerName); $response = parent::callAction($method, $parameters); $timer->endTiming($timerName); return $response; }
This method is getting the controller class name and replacing the backslash characters with dots. After starting the timer with our metric name, we call the parent and then end the timer, giving us the time the controller action took in milliseconds.
The dots will create separate folders for each part of the namespace, so your controller metrics for each action will be organized cleanly in Graphite. You can also combine them in interesting ways.
To try out our controller timer, the next thing we need to do is create a controller and define a route:
$ php artisan make:controller TestController
Effectively, the timer stats would be located at “stats.timers.controller.App.Http.Controllers.TestController.Index” given our controller namespace.
Here’s the @index method, which is arbitrary:
<?php namespace App\Http\Controllers; class TestController extends Controller { public function index() { return 'OK'; } }
Next, replace (or comment out the other route) with the following in the routes/web.php:
Route::get('test', 'TestController@index');
Make siege on your application again, and you should start getting timer stats on the TestController:
siege -t 60s -c 20 http://ift.tt/2wPwaaG
While running siege you can watch the real-time stats piling up by updating your dashboard filter. The dashboard UI allows you to add multiple graphs and save them for later use (or to display on a flatscreen TV to look legit).
Here’s what the folder structure ends up looking like in Graphite:
Timers give you various stats including percentiles, average (mean), standard deviation, sum, lower and upper bounds.
Learn More
Well, that’s it for our whirlwind tour of using StatsD with Laravel. If you’ve never instrumented code, I hope that you practice and hopefully one day get something out into production!
I find that StatsD is invaluable in working with legacy systems so learning how to instrument your code has great returns for your investment.
I recommend that you get familiar with the different metric types that StatsD supports (Gauges and Sets are cool).
As far as reading up on the instrumenting of code, I highly recommend that you read Measure Anything, Measure Everyting, the original Etsy blog post introducing StatsD. Also, Counting & Timing on the Flickr blog was an even earlier description and implementation of the ideas behind StatsD.
via Laravel News http://ift.tt/2wRuUiB
0 notes
Text
tap | Laravel Collections - Laravel
tap | Laravel Collections – Laravel
tap | Laravel Collections – Laravel
[ad_1]
In this episode we are tackling the tap method.
For the best experience, follow along in our interactive school at https://www.coderstape.com
About This Course
In this series, we take a look at each of the available methods in the Laravel Collection class and dive deep through examples in explaining what it does.
[ad_2]
laravel
“laravel collection filter…
View On WordPress
#“laravel collection modify value”#“laravel collection move item”#“laravel collections methods”#“laravel collections tap”#laravel#laravel 6#laravel 6 collections#laravel add to collection#laravel advanced#laravel collection#laravel collection filter example#laravel collection generate new transformed array#laravel collection methods#laravel collection modify item#laravel collection remove keys#laravel merge two collections
0 notes
Text
count | Laravel Collections - Laravel
count | Laravel Collections – Laravel
count | Laravel Collections – Laravel
[ad_1]
In this episode we are tackling, the method count().
For the best experience, follow along in our interactive school at https://www.coderstape.com
About This Course
In this series, we take a look at each of the available methods in the Laravel Collection class and dive deep through examples in explaining what it does.
[ad_2]
laravel
“laravel collection…
View On WordPress
#“laravel collection modify value”#“laravel collection move item”#laravel#laravel 6#laravel 6 collections#laravel add to collection#laravel advanced#laravel array#laravel collection#laravel collection filter example#laravel collection generate new transformed array#laravel collection methods#laravel collection modify item#laravel collection remove keys#laravel count#laravel merge two collections
0 notes
Text
Track Laravel Model Changes with Laravel Auditing
Laravel Auditing is a Laravel package that aims to make it easy to track eloquent model changes. The documentation describes Laravel Auditing as follows:
This package will help you understand changes in your Eloquent models, by providing information about possible discrepancies and anomalies that could indicate business concerns or suspect activities.
Laravel Auditing allows you to keep a history of model changes by simply using a trait. Retrieving the audited data is straightforward, making it possible to display it in various ways.
Along with model changes, each audit record contains the User Agent, audit URL, and the IP address of the user. One of the main use-cases of the package is looking at suspicious activities or unexpected changes in the model.
Model Diffs with the Laravel Auditing Package
In my opinion, another use-case for this package could be providing versioning for records, such as blog posts or other content that allows you to see who changed what on a model easily. This could be used to perform auto-saves, see what changed, who changed it and revert changes from a previous version.
Let’s say you have a Post model that holds articles. The following would be how you add auditing to posts when they are saved and updated:
<?php namespace App; use OwenIt\Auditing\Auditable; use Illuminate\Database\Eloquent\Model; use OwenIt\Auditing\Contracts\Auditable as AuditableContract; class Post extends Model implements AuditableContract { use Auditable; public function user() { return $this->belongsTo('App\User'); } }
Although not included in the example above, you can also define with attributes that will be included in the audit with an $auditIncluded = []; property on the model.
With the example Post model, you could get the diffs for a post like so with the Laravel auditing package:
// PostsController with route model binding use App\Post; function show(Post $post) { $diff = $post->audits()->with('user')->get()->last(); return view('posts.show') ->withPost($post) ->withDiff($diff); }
Here’s an example of how you could display the diffs in a Blade view:
@if($diff) <h3>Post Changes</h3> <div class="author-info"> <span class="byline"> Revision by <strong></strong> </span> <span class="time-ago"> </span> </div> @foreach($diff->getModified() as $field => $value) <h3></h3> <table class="diff"> <tr> <td style="background: #ffe9e9" class="deleted-line"></td> <td style="background: #e9ffe9" class="added-line"></td> </tr> </table> @endforeach @endif
The example above only displays the last diff, but you could provide functionality to select the revision number or loop through the entire version history. The audits come back as a collection allowing you to perform collection operations on audits like any other model. The documentation contains audit presentation documentation to give you more ideas on how to present audit changes and metadata.
One thing to note: when I started experimenting with the package I used php artisan tinker to try and create audits. By default, the Laravel auditing package doesn’t track changes to models from the consoles (including tinker). If you have console commands or scheduled commands making changes to models you might want to store audits from the console. You can modify this behavior by publishing and update the provided config with:
<?php return [ // ... 'console' => true, ]
Lastly, the package allows customizations to the audit model, audit driver (the package ships with the Database audit driver), and customizations to audit transformations before data for an audit is stored.
Check out the documentation for more details on everything you can do with the Laravel auditing package!
via Laravel News http://ift.tt/2w2JTqK
0 notes
Text
Write API Tests with Postman and Newman
Software testing is a common practice these days in many organisations, and for even individual developers. Googling around, you'll find a number of types of software tests that exist to help with this.
Postman is a good tool which we mostly use to quickly test APIs to see the result returned by them, but it's actually way more powerful than that.
Postman Features
To mention a few of the features it comes with:-
You can simply test any API and see the response immediately.
You can create a collection of API endpoints and call them whenever you want to see the responses.
You can share these collections, when you are logged in with team members.
You can use Postman's CLI client, Newman, to write Postman tests with JavaScript.
You can write tests in JavaScript to test the response that comes when a Postman request is made.
Finally, once you have all these endpoints created, you can export a JSON file, both for the endpoint tests and the environment variables, which again can be used by Postman as a source of for the tests.
We are going to look at all these feature, some are intuitive, some not so much unless you've been using Postman for a while.
Since Postman is a tool, we can test APIs written in any language, we'll do our tests with the open Github API.
Installation and Setup
If you have Postman already installed, you can skip to the next section.
If not, make sure you have Google Chrome installed, then head over to the Chrome Store and search for Postman Install it by clicking the Add to Chrome button, then it will either turn to Launch App or take you to the Google Chrome Apps page. You can open it with either options.
You can choose to Sign Up if you want, this is important especially for saving your API collections and accessing them anytime on any machine, but for this article, we can skip this. There's a button for that towards the bottom when you first launch the app.
Postman Collections
There's a Collections tab on the top left of Postman, with an example POSTMAN Echo collection. You can open and inspect it. From the above screen shot, I've selected one of the API requests from the collection, and navigated to it's test tab.
The code you see there starting with tests["response code is 401"] = responseCode.code === 401; is just JavaScript, and this is actually how we are going to write our tests for the Github API I had mentioned earlier.
You can open the other API requests in the POSTMAN Echo collection to have a feel of how requests are made.
So let's start by making our own collection, and call it Github API. Click on the Add Collection button on the top left of Postman You will be prompted to give details about the collection, I've added a name Github API and given it a description. Clicking on Create should add the collection to the left pane, above, or below the example POSTMAN Echo collection.
We'll then add a folder to the collection. Folders are a great way of separating different parts of your API workflow. I called the folder Github Root API and again gave a description.
Now that we have the folder, the next task is to add an API call that is related to the Github API root to that folder. That API call is to https://api.github.com/.
If you still have one of POSTMAN Echo collections open, you can close it the same way you close tabs in a browser, or just click on the plus button to add a new tab on the right pane where we make requests. Type in or paste in https://api.github.com/ and press Send to see the response. Once you get the response, you can click on the arrow next to the the save button on the far right, and select Save As, a pop up will be displayed asking where to save the API call. Give a name, it can be the request URL, or a name like Root API Request, and a description, then choose the collection and folder, in this case Github API > Github Root API, then click on Save. The API call will be added to the Github Root API folder on the left pane. Whenever you click on this request from the collection, it will open in the center pane.
Let's Write the First Test
We've seen that the Root API Request request has a JSON response, which is usually the case for most APIs. The response has properties such as current_user_url, emails_url, followers_url and following_url to pick a few.
The current_user_url has a value of http://ift.tt/N8YLMI. Say we want to write a test for this.
Click on the Root API Request and click on the test tab in the section just below where the URL is put.
You'll notice on the right pane, we have some snippets which Postman creates when you click so that you don't have to write a lot of code. I've annotated the relevant one for this test, which is Response Body: JSON value check. Clicking on it produces the following snippet.
var jsonData = JSON.parse(responseBody); tests["Your test name"] = jsonData.value === 100;
From above, we can tell that Postman stores the response in an object called responseBody, and we can use this to assert values.
Postman has another global variable object called tests, which is an object you can use to name your tests, and equate it to a boolean expressions. If the boolean expression returns true, then the test passes.
tests['some random test'] = x === y
If you click on Send to make the request, you will see a one of the tests failing.
Edit the snippet to make it relevant to our test.
var jsonData = JSON.parse(responseBody); var usersURL = "http://ift.tt/1qXF6RZ; tests["Gets the correct users url"] = jsonData.current_user_url === usersURL;
Clicking on send, you'll see the test passing. .
Let's modify the test further to test some of the properties we want to check.
const jsonData = JSON.parse(responseBody); const usersURL = "http://ift.tt/1qXF6RZ; const emailsURL = "http://ift.tt/1BYvI7d; const followersURL = "http://ift.tt/2csR0PI; const followingURL = "http://ift.tt/1CC0YDC; let {current_user_url, emails_url, followers_url, following_url} = jsonData // Tests go here tests["Gets the correct users url"] = current_user_url === usersURL; tests["Gets the correct emails url"] = emails_url === emailsURL; tests["Gets the correct followers url"] = followers_url === followersURL; tests["Gets the correct following url"] = following_url === followingURL;
This is just JavaScript. To spice it up, we've used Destructuring Assignment in ES2015, to declare the jsonResponse variables we're interested in.
Clicking on Send should return success, and the tests passing.
Remember to click on Save, so that your test is saved to the request created in the collection.
Environment Variables
Most of the time while writing tests, we usually do not want to go around editing values that we either send as query or post parameters. That way, for instance, if we have ten requests which all send the username scotch-io, we need to create a variable for this so that we can change it once.
Let's create another request called User Details Request, which will make a request with a username. Following the same procedure we did for the Root API Request, create a folder called Github User Details, and add the request inside it. Make the GET request to http://ift.tt/2m6N2QN Now, we want to take make both http://ift.tt/1gcW4Wp and scotch-io environment variables. To do this click on the top right gear icon, then select Manage Environments A pop up will be displayed. Below it, under the Manage Environments tab click on Add. Give your environment a name. I gave it the name GITHUB_ENV, and set up the environment variables you want as key value pairs. In this case we have USERS_URL and USERNAME.
Once you are done, click on the Add button and close the dialog. Next, select the environment you just created from the top right drop down. Once selected, you can confirm the values by clicking on the eye-like icon, just before the settings/gear icon.
NOTE: Make sure the USERS_URL doesn't have an extra slash / at the end. (I made that mistake). You can click on the eye icon, and click on edit to change it.
Now go back to the GET request, and replace the values with angular-like or laravel-blade like template strings, /.
In a nutshell, that's how environment variables are added and used in Postman. You can use the same two calibraces syntax to add query parameters and post parameters.
As an example, if the above request took query parameters, we'd have something similar to this, /?query=
Let's add two tests to wrap up this request.
const jsonData = JSON.parse(responseBody); const { login } = jsonData; tests["Gets the correct username"] = login === "scotch-io"; tests["Status code is 200"] = responseCode.code === 200; tests["Content-Type is present"] = postman.getResponseHeader("Content-Type");
I've used responseCode.code and postman.getResponseHeader which are global variables and methods which come with Postman. You can read more about them here
To get a bit fancy, you can use a test, to set an environment variable. If you look at the snippets provided when you go to the tests tab in the request area, you'll see a set environment variable snippet which looks like this postman.setEnvironmentVariable("variable_key", "variable_value");.
We could therefore set an environment variable, and then use it in subsequent requests. A good example for this is getting an authentication token and using it as a header or query parameter for subsequent requests.
Newman CLI
Once you've set up all your collections and written tests for them, it may be tedious to go through them one by one, clicking send to see if a given collection test passes.
This is where Newman comes in.
Newman is a command-line collection runner for postman
All you need to do is export your collection and the environment variables, then use Newman to run the tests from your terminal.
NOTE: Make sure you've clicked on Save to save your collection first before exporting.
So the first step is to export your collection and environment variables. Click on the Menu icon for Github API collection, and select export Select version 2, and click on Export Save the JSON file in a location you can access with your terminal. I created a directory called postman and saved it there.
Next, click on the settings/gear icon and select Manage Enironments again, then click on the download icon to download the GITHUB_ENV environment Save the file in the same directory as the collection.
Install Newman CLI globally, then navigate to the where you saved the collection.
npm install -g newman cd postman
Using Newman is quite straight foreward, and the documentation is extensive. You can even require it as a Node.js module and run the tests there. We'll however use the CLI.
Once you are in the directory, run newman run <collection_name.json>, replacing the collection_name with the name you used to save the collection.
newman run Github\ API.postman_collection.json
The result for this is We can see the second API test Github User Details fails, and towards the bottom there's an error message Invalid URI "http://%7B%7BUSERS_URL%7D%7D/%7B%7BUSERNAME%7D%7D".
This is because we did not specify the environment file. To fix it, simply add the -e flag which stands for the environment and add the environment file.
newman run Github\ API.postman_collection.json -e GITHUB_ENV.postman_environment.json
Conclusion
Postman and Newman can be used for a number of test cases, including creating usage scenarios for your API. You can create a scenario that involves a user registering, logging in and calling different endpoints by using a straight foreward user interface. These collections can then be exported and shared with team members. If you create a team account, you can just publish them to your team mates.
Happy Testing!
via Scotch.io http://ift.tt/2n40ol9
0 notes
Text
Laravel Collection “tap” Method
Laravel 5.4.10 introduces a new tap method on collections which allow you to “tap” into the collection at a specific point and do something with the results while not affecting the main collection.
This feature is best described through examples and let’s pretend you have the following array:
$items = [ ['name' => 'David Charleston', 'member' => 1, 'active' => 1], ['name' => 'Blain Charleston', 'member' => 0, 'active' => 0], ['name' => 'Megan Tarash', 'member' => 1, 'active' => 1], ['name' => 'Jonathan Phaedrus', 'member' => 1, 'active' => 1], ['name' => 'Paul Jackson', 'member' => 0, 'active' => 1] ];
Now we convert this into a collection, filter the data, and tap into it at two different points:
return collect($items) ->where('active', 1) ->tap(function($collection){ return var_dump($collection->pluck('name')); }) ->where('member', 1) ->tap(function($collection){ return var_dump($collection->pluck('name')); });
Once this runs it’ll output the following the following for the first tap:
David Charleston, Megan Tarash, Jonathan Phaedrus, Paul Jackson
Then the second:
David Charleston, Megan Tarash, Jonathan Phaedrus
Tap versus Pipe
Laravel also provides another similar method to tap named pipe and they are similar in that they can be performed inside a collection pipeline. However, they have two primary differences:
Tap allows you to do something with the data available but it does not modify the original. Pipe modifies the results in the collection based on its return value. For instance:
return collect($items) ->where('active', 1) ->pipe(function ($collection) { return $collection->push(['name' => 'John Doe']); }); // David Charleston, Megan Tarash, Jonathan Phaedrus, Paul Jackson, John Doe
via Laravel News http://ift.tt/2lbwhX3
0 notes
Text
20 Awesome PHP Libraries For Early 2017
This week we have for you a collection of high-quality PHP libraries that have caught our eye in the last couple of months. We’ve tried our best to include projects that are active, well documented, and will have a realistic shot at finding a place in your developer’s workbelt.
If we’ve haven’t included your favorite new library, feel free to share it in the comments :)
Requests for PHP
A no-dependencies library that lets you send HTTP requests. It provides the needed methods for adding headers, accessing response data, handling forms, and everything else you may need, neatly packaged in a clean and easy to use API.
$headers = array('Accept' => 'application/json'); $options = array('auth' => array('user', 'pass')); $request = Requests::get('http://ift.tt/ULh0JY', $headers, $options); var_dump($request->status_code); // int(200) var_dump($request->headers['content-type']); // string(31) "application/json; charset=utf-8" var_dump($request->body); // string(26891) "[...]"
Rinvex Country
Rinvex Country is a PHP package that lets developers retrieve detailed information about the countries of the world. Using the over 50 methods you can get the area of Angola, the currency of Cyprus, the native name of Namibia or even the FIFA name of Finland. There is a ton of info available and the data sources are pretty reliable.
$egypt = country('eg'); $egypt->getCapital(); // Cairo $egypt->getDemonym(); // Egyptian $egypt->getTld(); // .eg $egypt->getContinent(); // Africa $egypt->getSubregion(); // Northern Africa $egypt->getBorders(); // ["ISR","LBY","SDN"]
Botman
A PHP library for developing messenger bots. Works with most of the popular messaging platforms including Facebook Messenger, Slack, Telegram, WeChat, and others. There is also a helpful boilerplate Laravel project available here.
// create an instance $botman = BotManFactory::create($config); // give the bot something to listen for. $botman->hears('hello', function (BotMan $bot) { $bot->reply('Hello yourself.'); }); // start listening $botman->listen();
If you are not familiar with the concept of messenger bots we suggest you check out our article Developer’s Introduction To Chatbots.
Charts
Laravel package for generating highly customizable charts out of datasets. The package works as a PHP wrapper for multiple built-in JavaScript chart libraries, allowing devs to create a wide variety of graphs, gauges and progressbars using only one tool.
$chart = Charts::create('line', 'highcharts') ->view('custom.line.chart.view') ->title('My nice chart') ->labels(['First', 'Second', 'Third']) ->values([5,10,20]) ->dimensions(1000,500) ->responsive(false);
Swap
Swap allows you to retrieve currency exchange rates from a number of services such as Fixer, Google, and Yahoo. Request responses can be easily cached and accessed later. The library is available in the form of a Laravel Package as well.
// Build Swap with Fixer.io $swap = (new Builder()) ->add('fixer') ->build(); // Get the latest EUR/USD rate $rate = $swap->latest('EUR/USD'); // 1.129 $rate->getValue(); // Get the EUR/USD rate 15 days ago $rate = $swap->historical('EUR/USD', (new \DateTime())->modify('-15 days'));
Math PHP
A collection of mathematical functions and algorithms ranging from simple algebra to finances, statistics, numerical analysis and others fields. The library is modular, has a straightforward API, and doesn’t require any external dependencies.
// Factors of an integer $factors = Algebra::factors($n); // Fibonacci sequence $fib = Advanced::fibonacci($n); // Combinations $nCk = Combinatorics::combinations($n, $k); // Likelihood ratios $LL = Experiment::likelihoodRatio($a, $b, $c, $d);
PHPUnit
PHPUnit is an advanced testing framework that enables teams to thoroughly test their code. Unit tests are written in standalone object-oriented classes with the help of many methods for handling assertions, dependencies, etc. A simple CLI is provided for running test and generating reports.
class StackTest extends TestCase { public function testPushAndPop() { $stack = []; $this->assertEquals(0, count($stack)); array_push($stack, 'foo'); $this->assertEquals('foo', $stack[count($stack)-1]); $this->assertEquals(1, count($stack)); $this->assertEquals('foo', array_pop($stack)); $this->assertEquals(0, count($stack)); } }
Atoum
A less popular testing framework we also wanted to share. Atoum offers a one-step installation precess and a relatively simple workflow, while still maintaining a ton of great features. It has a mock engine, expressive assertions, and a CLI that can execute multiple tests in parallel.
$this->given($testedInstance = new testedClass()) ->and($testedClass[] = $firstValue = uniqid()) ->then ->sizeof($testedInstance)->isEqualTo(1) ->string($testedClass[0])->isEqualTo($firstValue);
Simple Regex Language
A PHP implementation of the Simple Regex Language – a verbose way of writing regular expressions. The library provides multiple methods that can be chained together, forming readable and easy to understand RegEx rules. The library has ports for JavaScript and Python as well.
$query = SRL::startsWith() ->anyOf(function (Builder $query) { $query->digit() ->letter() ->oneOf('._%+-'); })->onceOrMore() ->literally('@') ->anyOf(function (Builder $query) { $query->digit() ->letter() ->oneOf('.-'); })->onceOrMore() ->literally('.') ->letter()->atLeast(2) ->mustEnd()->caseInsensitive();
Stash
Stash makes it easy to speed up your code by caching the results of expensive functions or code. Certain actions, like database queries or calls to external APIs, take a lot of time to run but tend to have the same results over short periods of time. This makes it much more efficient to store the results and call them back up later.
$pool = $this->cachePool; // Get a Stash object from the cache pool. $item = $pool->getItem("/user/{$userId}/info"); // Get the data from it, if any happens to be there. $userInfo = $item->get(); // Check to see if the cache missed, which could mean that it either // didn't exist or was stale. if($item->isMiss()) { // Run the relatively expensive code. $userInfo = loadUserInfoFromDatabase($userId); // Set the new value in $item. $item->set($userInfo); // Store the expensive code so the next time it doesn't miss. $pool->save($item) }
PHP VCR
A port of the popular Ruby library for testing HTTP interactions. PHP VCR records HTTP requests and stores them in “cassettes” which can be replayed later on. A set of testing utilities are also provided, making it possible to inspect and compare recordings in detail.
// After turning on, the VCR will intercept all requests \VCR\VCR::turnOn(); // Record requests and responses in cassette file 'example' \VCR\VCR::insertCassette('example'); // Following request will be recorded once and replayed in future test runs $result = file_get_contents('http://example.com'); $this->assertNotEmpty($result); // To stop recording requests, eject the cassette \VCR\VCR::eject(); // Turn off VCR to stop intercepting requests \VCR\VCR::turnOff();
OAuth 2.0 Server
This library allows you to easily configure an OAuth 2.0 server and set up all the authentication levels needed to protect your API. It is fully standards compliant and supports all the grants defined by OAuth protocol. The Laravel Passport module is built on top of the OAuth 2.0 Server.
// Setup the authorization server $server = new \League\OAuth2\Server\AuthorizationServer( $clientRepository, $accessTokenRepository, $scopeRepository, $privateKey, $publicKey ); // Enable a grant on the server $server->enableGrantType( new \League\OAuth2\Server\Grant\ClientCredentialsGrant(), new \DateInterval('PT1H') // access tokens will expire after 1 hour );
Imagine
An image manipulation library that tries to bring together all low level PHP image processing libraries under the same object-oriented API. This allows Imagine to be used for a wide variety of tasks such as drawing, resizing, cropping, filters, effects, metadata editing, and others.
$palette = new Imagine\Image\Palette\RGB(); $image = $imagine->create(new Box(400, 300), $palette->color('#000')); $image->draw() ->ellipse(new Point(200, 150), new Box(300, 225), $image->palette()->color('fff')); $image->save('/path/to/ellipse.png');
MINI
Extremely simple and easy to understand skeleton PHP application, providing only the most essential features every project needs. It does not strive to be a do-it-all framework like Laravel, but due to it’s simplicity MINI can be used for getting smaller apps up and running in no time.
// Working with the model $songs = $this->model->getAllSongs(); $amount_of_songs = $this->model->getAmountOfSongs(); // Loading views require APP . 'views/_templates/header.php'; require APP . 'views/songs/index.php'; require APP . 'views/_templates/footer.php';
AWS SDK
The official PHP library for working with Amazon Web Services. The SDK makes it easy to connect AWS with any PHP project and access all the various available services. There is also a useful Laravel wrapper which can be found here.
// Instantiate an Amazon S3 client. $s3 = new S3Client([ 'version' => 'latest', 'region' => 'us-west-2' ]); $s3->putObject([ 'Bucket' => 'my-bucket', 'Key' => 'my-object', 'Body' => fopen('/path/to/file', 'r'), 'ACL' => 'public-read', ]);
Purl
Lightweight PHP library for working with URLs. With Purl you can compose complex paths attribute by attribute, extract data from URLs, manipulate queries, recognize URLs in strings, and much more.
$url = \Purl\Url::parse('http://jwage.com') ->set('scheme', 'https') ->set('port', '443') ->set('user', 'jwage') ->set('pass', 'password') ->set('path', 'about/me') ->set('query', 'param1=value1¶m2=value2'); echo $url->getUrl(); // http://ift.tt/2jKXmzm echo $url->publicSuffix; // com echo $url->registerableDomain; // jwage.com
Daux.io
Documentation generator that uses a simple folder structure and Markdown files to create responsive documentation websites. Daux.io has automatic syntax highlighting, 4 theming options, Bootstrap HTML for easy customization, navigation with readable URLs, and many other goodies.
// Example configuration { "title": "DAUX.IO", "tagline": "The Easiest Way To Document Your Project", "author": "Justin Walsh", "image": "app.png", "html": { "theme": "daux-blue", "breadcrumbs": true, "repo": "justinwalsh/daux.io", "edit_on_github": "justinwalsh/http://ift.tt/2jvDRHq;, "twitter": ["justin_walsh", "todaymade"], "google_analytics": "UA-12653604-10", "links": { "Download": "http://ift.tt/2kjtzyi;, "GitHub Repo": "http://ift.tt/2jvsvmX;, "Made by Todaymade": "http://ift.tt/2kjH0OT; } } }
Dompdf
Dompdf is a PDF generator that takes regular HTML markup and converts it to .pdf files. It understands most CSS rules, which can be fed in-line or via an external stylesheet.
// reference the Dompdf namespace use Dompdf\Dompdf; // instantiate and use the dompdf class $dompdf = new Dompdf(); $dompdf->loadHtml('hello world'); // (Optional) Setup the paper size and orientation $dompdf->setPaper('A4', 'landscape'); // Render the HTML as PDF $dompdf->render(); // Output the generated PDF to Browser $dompdf->stream();
Instaphp
Non-official library for accessing the Instagram API. It provides developers with an easy way to authenticate their app and get access to various Instagram data endpoints including images, users, likes, comments, and tags.
$api = new Instaphp\Instaphp([ 'client_id' => 'your client id', 'client_secret' => 'your client secret', 'redirect_uri' => 'http://ift.tt/2jNPWIY', 'scope' => 'comments+likes' ]); $popular = $api->Media->Popular(['count' => 10]); if (empty($popular->error)) { foreach ($popular->data as $item) { printf('<img src="%s">', $item['images']['low_resolution']['url']); } }
Latitude
Zero-dependencies library for building SQL queries using chainable methods. It supports most query types and works well with MySQL, Postgres, SQL Server, and other databases. There are also built-in escaping helpers for protecting against SQL injection.
$select = SelectQuery::make( 'id', 'username' ) ->from('users'); echo $select->sql(); // SELECT id, username FROM users
via Tutorialzine http://ift.tt/2jL2PX1
0 notes