#1. i was making this post on mobile and accidentally erased it by opening a link to a tumblr post and having the app refocus without saving
Explore tagged Tumblr posts
Visit Tumblr Blog
Explore Tumblr blogs with no restrictions, modern design and the best experience.
Last Seen Tumblr Blogs


Fun Fact
Mobile US users spent an average of 115.8 minutes on Tumblr app monthly.
Text
This car is a 1986-1994 first generation Range Rover.


See: 1985-1994 dashboard, Austin Montego column stalks introduced in 1986. - post by @tumblehcendrum, ID and year range by @tumblehcendrum and @brick-enthusiast
[Requested by @noahreidstyle]


Noah Reid via Ian Lake's ig (x)
#pick your fun fact for this one#1. i was making this post on mobile and accidentally erased it by opening a link to a tumblr post and having the app refocus without saving#twice#i am now using desktop#2. i guessed it pretty quickly‚ researched the year range of that dashboard‚ found a perfectly matching picture‚ went insert it in the post#and only after that reasonably significant amount of time did i notice that it appeared in the last picture too#3. that picture was not even me looking to make a joke. that is literally the first picture i found that matched in spec and angle.#as i said in my most popular post over at TACIP#sometimes it's the world who's made the joke‚ and I just read it aloud#4. i pasted said picture in the post‚ wrote the above tags‚ queued it‚ went push it to the top of the queue as we do for requested posts#and only after that reasonably significant amount of time did i notice that @brick-enthusiast had already made a post#hence the weird credits#the one you are reading is my post anyway because i thought the pictures and tags were neat additions#his year range was more precise but it did turn out to be unsourced so we discussed it a bit and landed on what you read#but if you care this is likely to be from '87 (when range rovers started being officially sold stateside rather than imported)#btw yes that leather trim was thankfully optional#range rover#car id#tumblehcendrum
81 notes
·
View notes
Text
How to have mismatched eye color in any picrew: a tutorial
*****
At the bottom I give a quick overview (but not a specific tutorial) of how you can also make various other things that are almost never available in picrews, some of these are harder than others: Other forms of Heterocromia, Inner eye ring colors, Custom scars, Custom skin tone variations (can make vitiligo, granted the picrew creator added enough skin variations), Custom hair color streaks
*****
Hate when you choose the perfect picrew, but your oc has some form of heterocromia and the picrew won’t let you show that?
Here’s a quick trick to fix it, with zero artistic talent required.
Everything we need is already in the picrew! We’re just going to use a simple layer trick to merge 2 of the same picrew
This will be user friendly for people who have no experience with digital art and will be done using a free mobile app. (Since most people don’t have computer drawing apps if they aren’t into digital art)
Needed: a picrew you like, a free digital art app (I’m going to use ibis paint X for this tutorial)
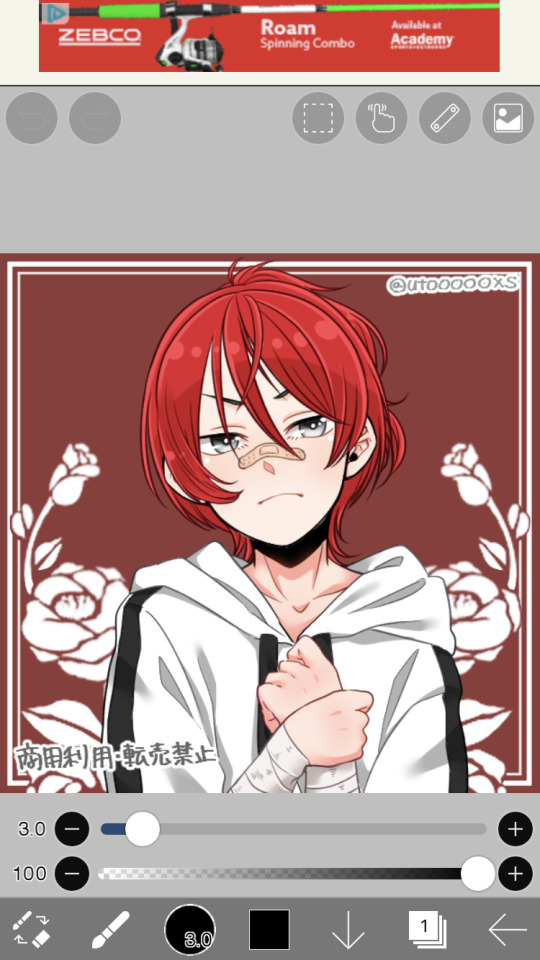
The link to the picrew I’ll be using for this. No orange eye color though, the one thing I needed lmao
Step 1:
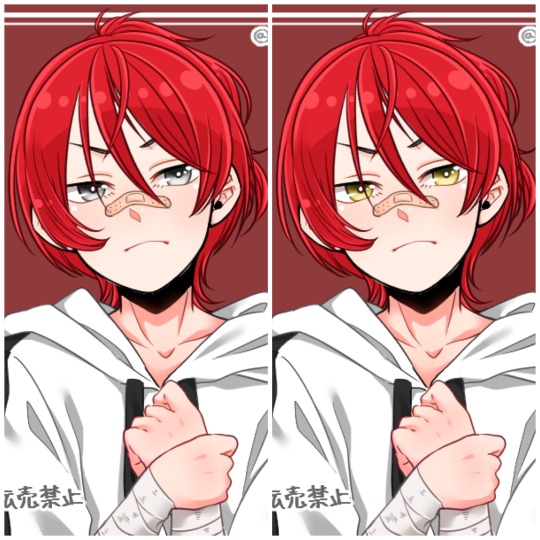
Save two versions of the same picrew with differing eye colors in each as the only difference.
In my experience, the picrew stays built when you re-enter the link. So, just build it and save it as normal, then it will still be there and you can change the eye color before saving the second copy.
Your copies should look about like this: it’s important to keep the rest of picrew as a copy except for the eye color. The fewer differences, the easier it will be.
Step 2:
Ok, now the hardest part is over! Drawing apps can look scary if you’re not used to them, but it will be ok.
When we open IbisPaint X it will look like this:
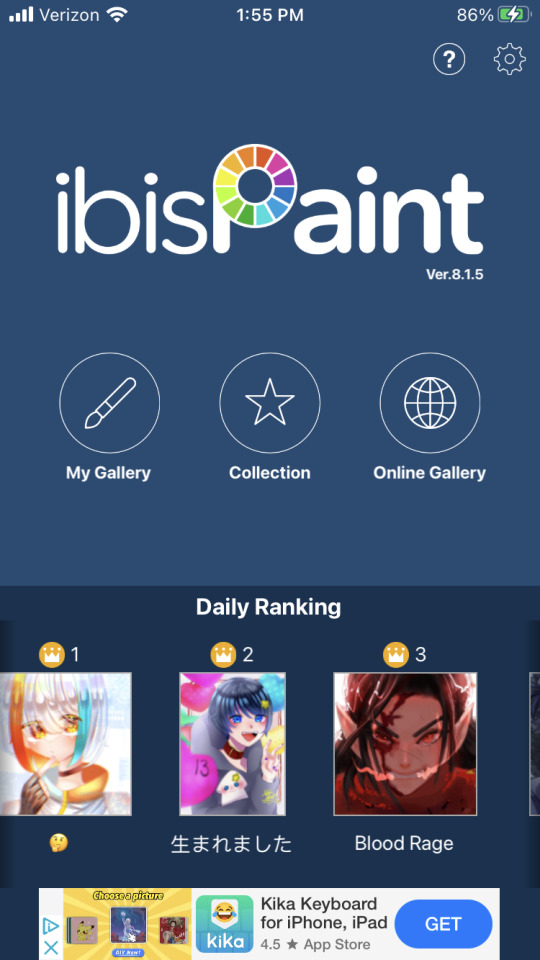
You want to select ‘My gallery” and then hit the plus sign at the bottom left hand corner. You’ll then be given this menu:
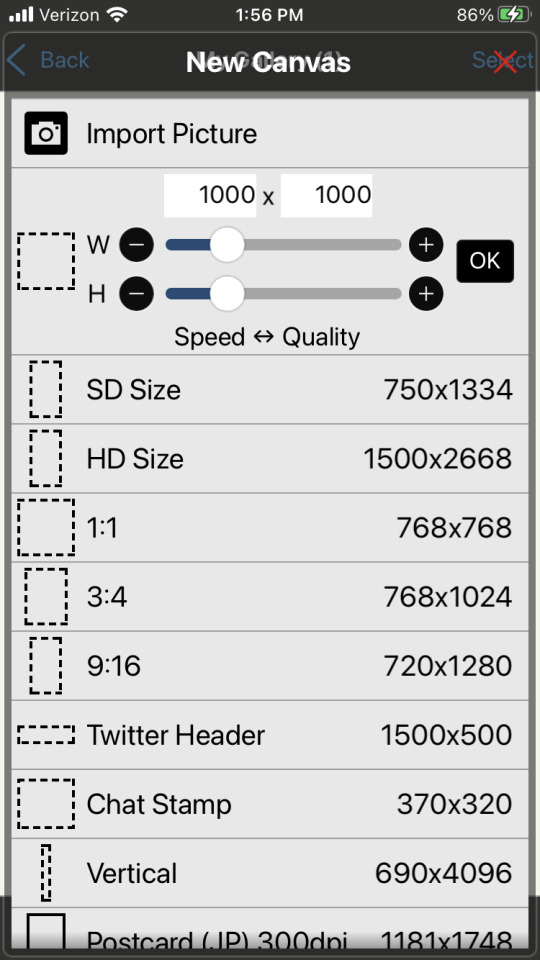
Now this looks like a mess, butttt you’re just going to ignore it all and click import picture. You can then choose 1 of the picrew’s from your gallery. Don’t worry it doesn’t matter which you choose.
You will be prompted with this notification:
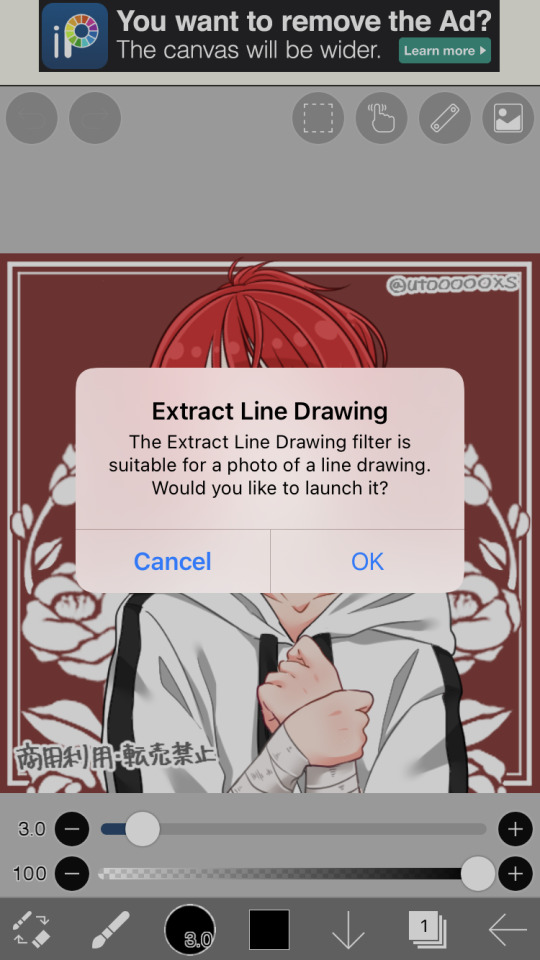
Cancel this. This will turn the work into lineart or something I’m not sure tbh. Not familiar with this app. But it will mess up our picrew. Accidentally did it? No problem! Just close the app and go back through the menu
Step 3:
So, now you have this:
We’re ready to overlap it with the other picrew we made!
I’m running out of the 10 photos per post, I’ll try to still give a visual for each step though. Hope it’s not confusing
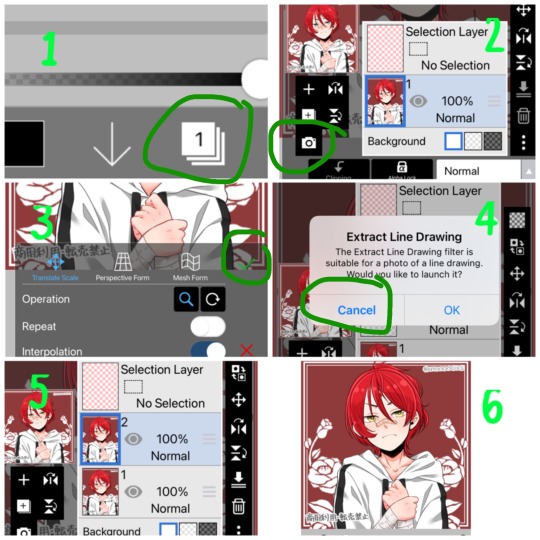
1- First we’re going to hit the ‘layers’ symbol at the bottom right
2- here we can see the layers, this app seems to automatically make a new layer for a new picture, so don’t worry about any of this! Select the add photo button and choose your picrew with the opposite eye color of the 1st
3- Dont mess with these settings, just push the green check! We don’t want to move the picture since we’re relying on them being directly on top of each other
4- cancel the lineart thing again
5- Now we have 2 layers, each with 1 version of your picrew
6- you can just tap above this menu to close it. It should appear as though our picrew has changed eye color.
Step 4:
Now for the fun part! We’re going to erase one of the eyes on this top layer to reveal the other color underneath!
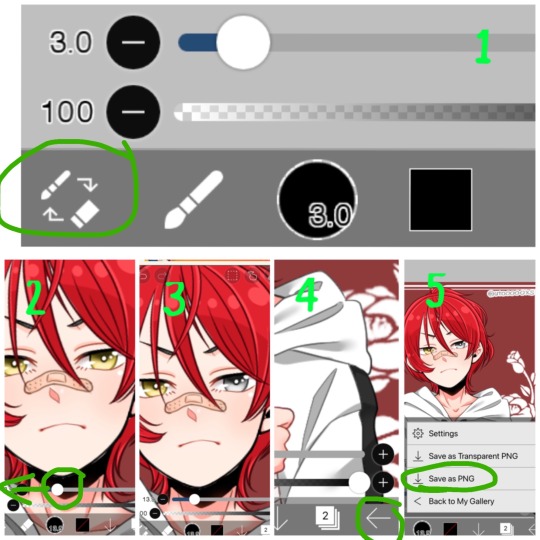
1- We’re going to switch from pen to eraser using this button in the bottom left hand corner.
2- For the best precision, we’re going to want to zoom in towards the eye that isn’t supposed to be the current color (we can zoom in by placing two fingers on the canvas and pulling them apart. Idk what this is called. Reverse piniching?) The other thing we’re going to do is make the eraser smaller by sliding the top slider to the left.
3- Now we’re ready to erase! Carefully erase over the eye and it will change color. Be careful not the erase the other eye, or it will change color as well. If you make a mistake, the undo button is towards the top of the canvas
4- all done! Just gotta save it now. Push the button in the bottom right corner
5- When the menu comes up, you want to save as a normal PNG. Now it’s in your gallery!
Step 5:
Done!
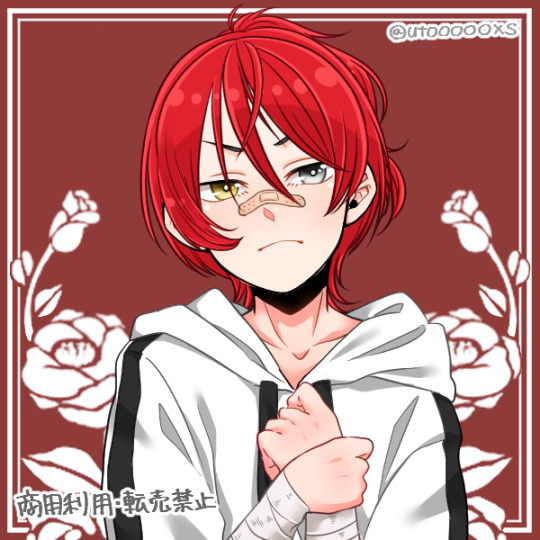
It doesn’t look edited at all! Because it’s really not, we just combined two of the same art in different colors. No one would ever guess. It still has the same dimensions and everything!
*****
Other stuff you can do with this trick:
Although some of these take a lot more careful erasing, these shouldn’t require any actual drawing. You can use these basics to experiment with this stuff as well:
- A different colored ring around the middle of the eyes: put the middle color on the bottom layer and erase around the pupil carefully in a circle with a very small eraser brush size.
- eyes that are half colored, in a line down the middle (a form of heterocromia): layer order doesn’t matter, erase half of each eye carefully, depending on which color should be where.
- a color streak through the hair: this one will require careful erasing to look good. You’ll need a picrew where the hair is entirely the color of the streak, and a picrew with the surrounding hair color. Put the color streak layer on the bottom layer. Erase the top layer in the shape of the streak you want colored. You can place it anywhere. You can do this with faded hair tips as well, but how well that turns out will depend on the color difference the creator had between similar hair colors... in other words, if dark and light brown are closer together in color value, it will look more natural when you merge them. I would recommend putting the lighter hair color layer on the bottom. When you erase, you’ll be drawing where the highlights are, functionally the same as the color streak.
- you can make uneven skin tones or vitiligo if the creator has added enough skin tone variations to the picrew: to make vitiligo you’ll make a picrew with your lightest skin tone and a picrew with your darkest skin tone. You’ll put the lightest skin tone on the bottom layer. Then you’ll erase the top layer in the pattern where skin pigment has been lost. You’ll be able to control the pattern of color loss like this, and make any pattern you want! This layer order works best for putting light patches on darker skin. If you want to darken an area you’ll put the darker layer down first and erase the top layer with lighter skin into the pattern you want. Essentially: put light down first if you want to put a light pattern on dark skin. Put dark down first if you want to put a dark pattern on light skin
-custom scars if the creator has added enough skin tone variations to the picrew: this is the same idea as skin tone variations. This time though, we need a picrew with a pink tone skin color choice, a lighter one than the character’s skin tone can also work if you want silver scars. Make a picrew with normal skin tone for the character, and a picrew with the scar color. Put the scar color picrew down first, then add the normal tone one. Now when you erase it should make scars in any pattern you want!
If you’re having trouble erasing neatly, the answer is always to zoom in on the canvas and decrease the eraser brush size! Also you can undo and redo until it looks how you want!
That’s all I can think of right now! Hope everyone has fun making those OC’s that the picrews always seem to forget. And especially anyone who’s been left out themselves!
I have on anon asks if anyone has questions/problems using this tutorial! Or any questions about how to do something similar
Feel free to add other tips to this post as well!
*****
7 notes
·
View notes
Photo


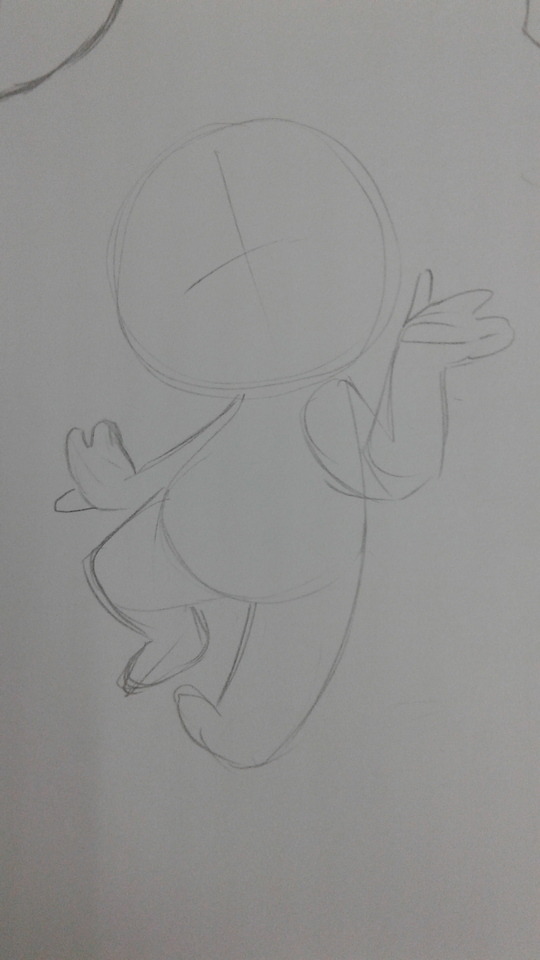


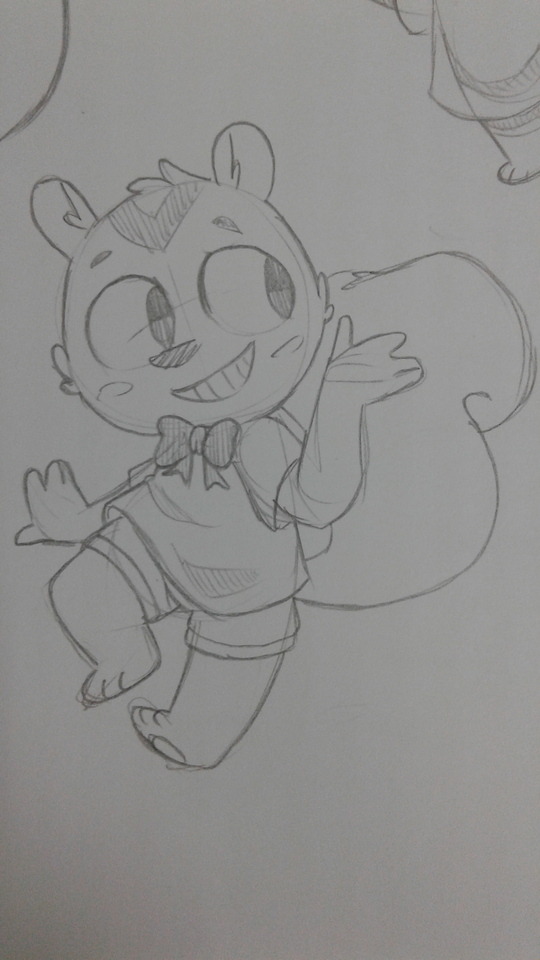

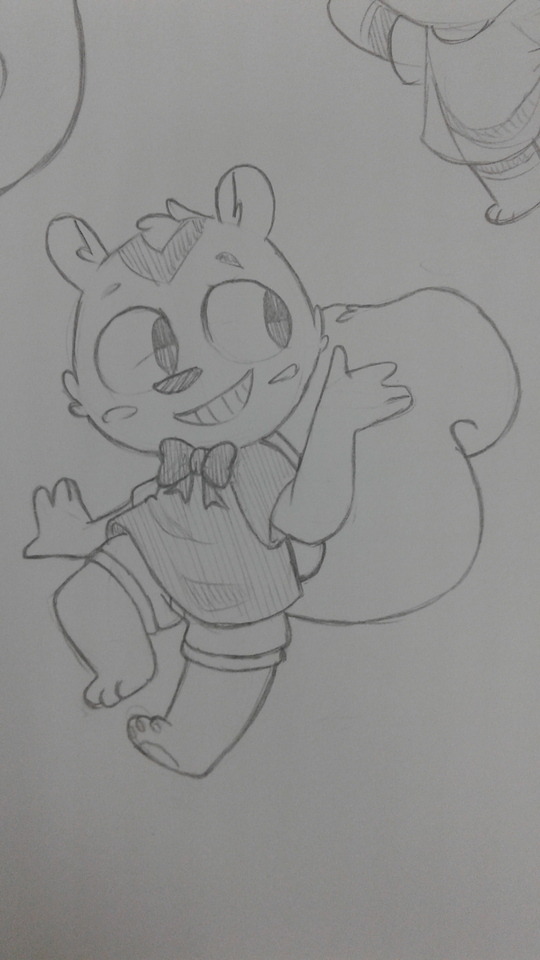
Decided to compile these asks to show my process with a drawing, hopefully it's helpful. Gonna number and explain these pics 1-8, going left to right, cause mobiles butt (warning long post) (1) I usually dont go into a drawing with a pose in mind already, but once i draw the head, i decide on how i want the body placed (2) After that i mess around on what i want the limbs to be doing, it's always good to make each one do something different, even slighty. If you want poses to pop more keep both sides of the drawing asymetrical (3) Once i figure out where i want the limbs put i make em thicc. Where you put the hands and feet are important too (hand could be clentched, opened, doing peace sign, ect. Feet angles can change a lot too) (4) Once i get an idea on how the drawing is shaping up i decide on a face. Expression can be divided by the eyes, brows, and mouth. Mix and match it to see what sticks with you (i also dont recommend coloring rn, like i what i did with the eyes and nose there. We're still gonna erase some stuff later) (5) Then i put the clothes on him, dudes naked. I press slightly harder on my pen here so the lines for the clothes take more priority, you can barely notice the sketch under it now. Make sure the clothes go around the pose you make so you get an idea on how everything is positioned (6) Now everythings in place, i press harder on my pencil again, letting all the lines i want take priority. So far nothing in this drawing has been erased, but you can barely see the sketch under it anymore. But we need to tidy up (7) The reason you wanna draw lightly at first is to erase the sketch lines later. So just start erasing gently. Dont worry about accidentally erasing parts you wanted to keep, you can just redraw it later. (8) Aaaaand it's finished. I cleaned up the lines and added some finishing touhes with coloring the outfit and such. Some extra tips: - If the pose is the main focus of your drawing, try and make sure it has a nice silhouette. A good pose is something you can identify just with it's figure. You dont always have to do this but it's something to keep in mind sometimes. I think back to almost all the recent smash bros and pokemon trainer model art as example. A lot of those characters really pop there. - Learn some basic anatomy. Whether for a human, animal, or whatever, knowing how your drawing is shaped gives you more room to mess with poses. You'll also be able to draw them faster in the long run too - Exaggerate more, especially if your drawings are on the more cartoony side. Always try and find ways to curve and bend your character around, if that makes sense. - Look at refs. If you see a piece of art you like, really try and pin point parts you like about it, and impliment it in your own art. Maybe you like how they draw a cloths wrinkles, or the hair, or arm angle, ect. Even look at the mirror if you need specific angles if you need to. Its amazing how much of the little details go a long way. - Constantly try out different poses. It's my secret to drawing filbert so much, just draw him doing something different everytime lol. But always try and learn something new. Draw em sitting down, leaning on a table, just anything that pushes you into draw them in different way. And again use refs if you need them. So anyway i hope this can help some of you, this may not work with every art style out there but hopefully it can give sone insight. And @ryodarocker give yourself some credit, you've come a long way with your art! You should be proud of all the progress you made, and good luck~
#boxyart#animal crossing#acnl#filbert#art tutorial#traditional art#sketch#ask#artists on tumblr#fanart
1K notes
·
View notes