#6mm scale
Explore tagged Tumblr posts
Visit Tumblr Blog
Explore Tumblr blogs with no restrictions, modern design and the best experience.
Last Seen Tumblr Blogs


Fun Fact
China blocked Tumblr because of pornography and censorship problems in 2013.
Text


"A trio of mecha advance into a small desert town, catching the local military presence off guard. Unbeknownst to them, enemy reinforcements are fast approaching..."


I maaay have found a new Mecha rpg system (The Mecha Hack, for those interested) and I maaay have been falling super hard for it and printing a ton of 6mm scale mechs and vehicles for it.
Somehow I keep forgetting how much I love 6mm scale. It can be detailed as all hell, but it's so small there's no pressure to make sure you get adsolutely everything right. You only do as much as you are comfortable with amd it always feels like a flex. :)
92 notes
·
View notes
Text


A Frankenmech for battletech from CGL in a random two tone scheme. Not sure if its the original scheme for each donor mech that happened to get kept as they made each half, or just a pilots joke...
23 notes
·
View notes
Text

And of course, the GrimdarkTech box will have a Grimdark Urbie.
#GrimdarkTech#Mecha#Mecha Gaming#Micro Armour#6mm#6mm Scale#Wargames#Miniatures Wargames#Tabletop Games#Tabletop Gaming
24 notes
·
View notes
Text


Bobbie’s Shadow Hawk SHD-NGT is done, until the Micro Sol gets here and I can stick down the edge of that MMC decal
Detail shots


And something fun I realized

#the expanse#battletech#expanse battletech au#bobbie draper#miniature painting#tabletop wargaming#miniature wargaming#6mm scale
49 notes
·
View notes
Text
Me: That's a Dana Knutson design isn't it? TRO 2750 or 3055?
sarna.net:


Me: Yep, there it is.
God’s Most Horrible Goblin Mech


The Nightsky. God, I love this sculpt. This awful, hunched metal death machine’s primary tabletop role is to bully lighter ‘mechs to death, and boy does the model ever communicate that. Pretty happy with how the Lava base turned out, considering limited resources, but damn getting the grey how I wanted was tough. I think it’ll be some time before I try another lance of Lyran Guard.
Plus, it’s my first time jeweling a cockpit!
#Mecha#Mecha Gaming#Micro Armour#6mm#6mm Scale#Wargames#Wargaming#Miniatures Wargaming#Tabletop Games#Tabletop Gaming
81 notes
·
View notes
Text
futuristic pickup truck as prime mover for artillery? probably fine.
2 notes
·
View notes
Text
Just finished this today. It’s a foundation paper pieced pattern by Juliet van der Heijden found in her Animal Quilts book. I scaled the pattern up 188% and used a solid background fabric in combination with Australian Dreamtime prints. For the quilting I freehanded a variety of leaves, feathers and flowers working from the bottom up, then from the top down I worked on the bird to give it some feathering texture. The backing fabric is peppered cotton and the batting is 6mm bamboo. I’m very happy with the end result.


188 notes
·
View notes
Text
Starting the start of the day figuring out the maths to make accurate roads for my Battletech miniature bases. What better way to use visual and symbolic language that these MechWarriors play it fast and move faster than having them stand on a 120kph four lane highway?
The math checked out that if a road is 4 meters wide and the scale is 1:285, then I should paint them 1.4cm wide (4/285), and considering the average human miniature stands 6mm, and if I multiply 1.75m by 2.333 (1.4/6) I get 4.08m (1.75x2.333). Yes, I saved the boring part for last - and my statement that I only really use maths for wargames holds true to this day.
22 notes
·
View notes
Text

"Made it ma! Top of the world!"


another fire stand
38 notes
·
View notes
Text
Spangling
So I have been peer pressured into running a spangling workshop for my local group. So I figured why not share it here too. This is my way of spangling there are others out there.
Why and when do you need to spangle?
When you are using midlands bobbins (straight and narrow with a handily drilled hole) spangles are used to add weight.
Continental bobbins (bulbous ends) use their bulbous ends to add weight. Honiton bobbins use gravity and super fine thread to not want any weight.
What do you need?
Wire cutters
Needlenose pliers
0.4mm wire
Beads (I use 8mm/6mm/4mm/2mm)
Midlands bobbins

Step 1: cut about 2 inches of wire (bobbin for scale I am a metric person

Step 2: bend over the end to make a little loop, press end of the wire tight with long part

Step 3: add your first bead (I use a 2mm silver bead) push this up so that is is over the raw end

Step 4: add other beads! Have fun

Step 5: thread through the bobbin

Step 6: thread the end through the loop you made earlier.

Step7: Make the loop smaller if needed. Pull tight and upwards towards the top of the bobbin

Step 8: Wrap the wire around the loop a couple of times.

Step 9: Snip the excess wire off nice and close to the join

Done!

Repeat for other bobbins

64 notes
·
View notes
Text
First platoon of Jump Infantry for my Mercenary force in Battletech
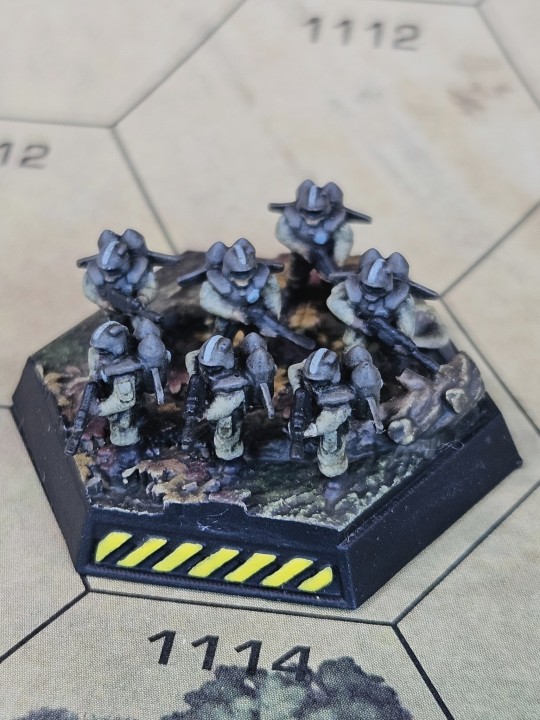
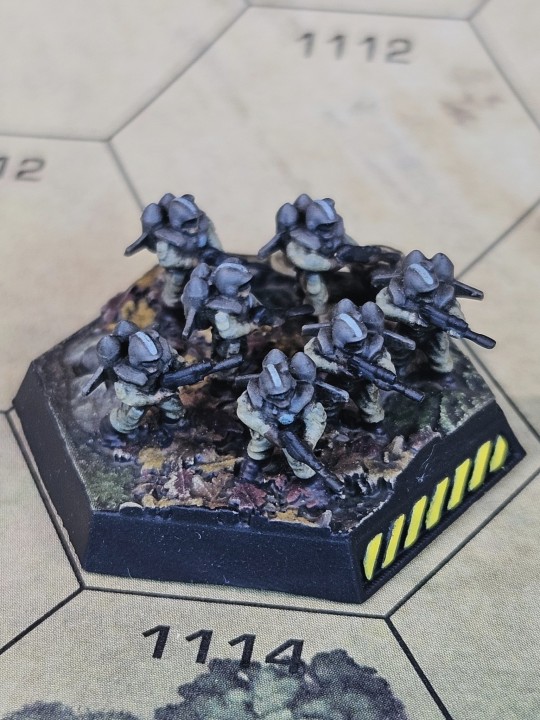
This was my first time painting infantry in 6mm, and I'm very glad I opted to let the wash do most of the work and avoid layering, as I would lose my mind
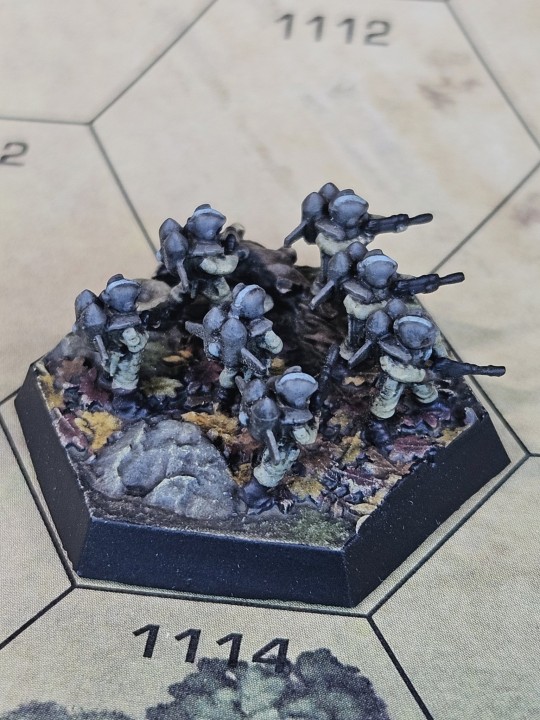
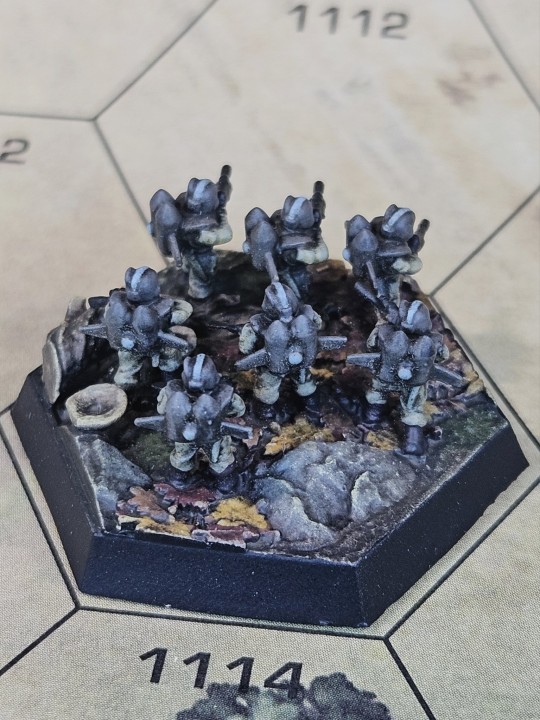
The infantry models are lovingly resculpted rogue trader era imperial guardsmen, I found them on Cults under the name Retro Guard
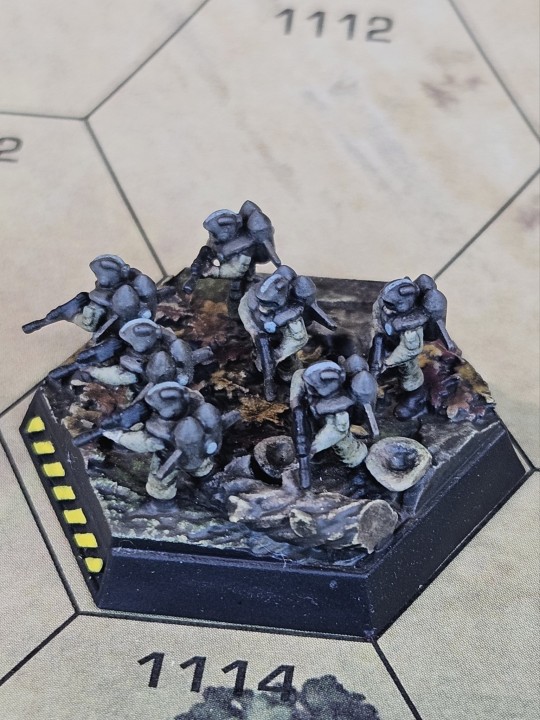
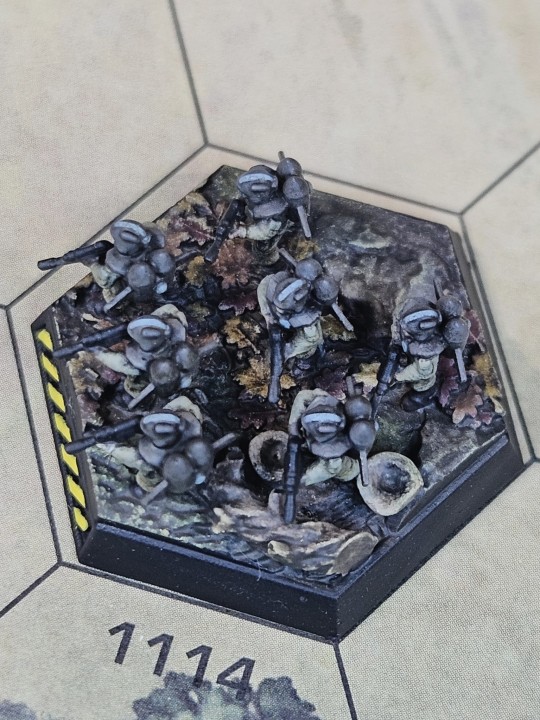
I thought those perfectly fit the vibe I wanted, so I slapped on a generic steampunky jetpack, scaled them down, and voila
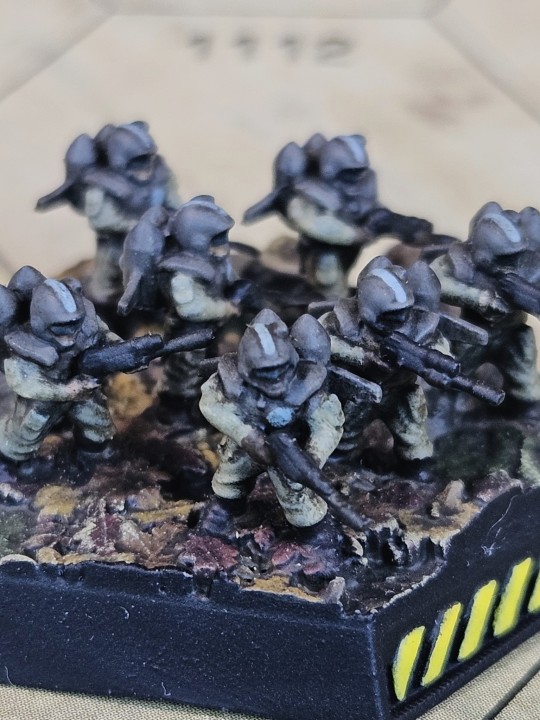
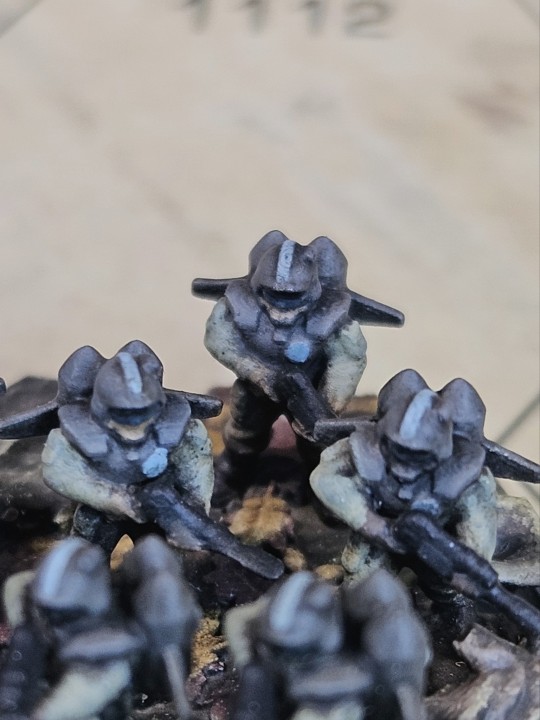
I know the leaves are pretty big compared to the scale, but I'm not planning on changing it, I like it
#canopiancatboyart#art#battletech#infantry#3d printing#wargaming#warhammer 40000#warhammer 40k#imperial guard#rogue trader#painting#miniature#tabletop#miniatures#board games#miniature painting#mechs#mecha#battlemech#alpha strike
96 notes
·
View notes
Text
Transformers Shockwave!? In Battletech!?! Not Clickbait!?!?!1!


Bit of a silly one here, but my partner's constant Special Interest Transformers lore dumps have finally hit home, because when I picked up a Thunderbolt mech from Battletech, I couldn't help but see him as Shockwave!
One slick purple paint-job later and I think he's looking pretty darn good!
51 notes
·
View notes
Text


Some catalyst game labs behemoth tanks and warrior helecopters for battletech I painted up in a random woodlands camo scheme.
17 notes
·
View notes
Text

#Ogre Miniatures#Steve Jackson's Ogre#Mecha#Mecha Gaming#Micro Armour#6mm#6mm Scale#Wargaming#Miniatures Wargaming#Armoured Fighting Vehicles#Tanks#Power Armour#Hover Tanks
16 notes
·
View notes
Text


Nose art decal didn’t cooperate very much and I think it’s a matter of the irregular shape and my scaling being off, so I’m gonna have to add a regular geometric background
Tycho and MMC decals worked pretty much perfectly, though
#the expanse#battletech#expanse battletech au#6mm scale#tabletop wargaming#miniature wargaming#miniature painting
25 notes
·
View notes
Text
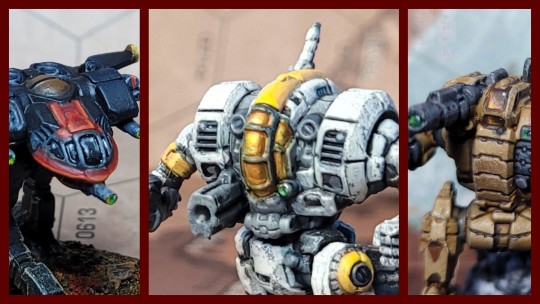
How to Paint: Canopy Glass (pt. 2)
Welcome to the middle segment of our glass-travaganza! While flat painting highlights is fun and relatively easy for me, it can be time consuming and the technique struggles on models with curved cockpits. Today we're going to be looking at a fast and simple way to to cockpit glass that gives you a dynamic result where the 'shading' is provided by ambient light and viewing angle using Contrast/speed paints and a metallic base coat.
Paints I used:
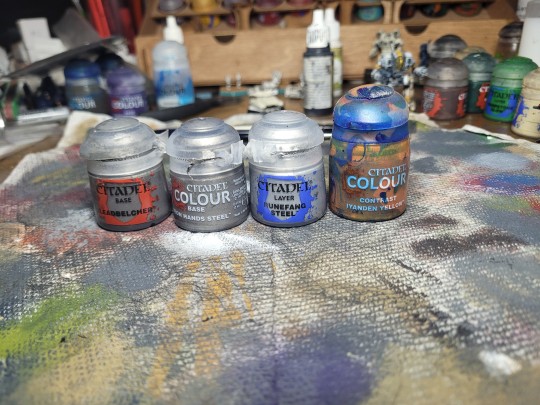
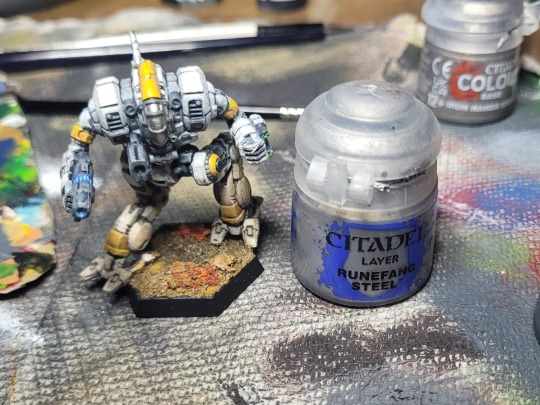
Citadel Leadbelcher (metallic gunmetal)
Citadel Iron Hands Steel (metallic silver)
Citadel Runfang Steel (bright metallic silver)
Citadel Iyanden Yellow Contrast (yellow speed paint)
Method
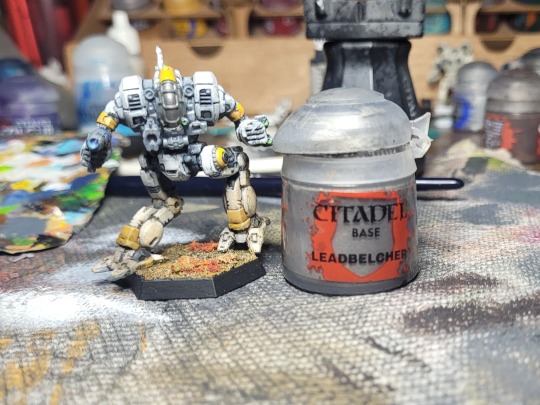
Begin by painting your glass areas in their entirety with your base gunmetal color. Make sure to be neat with this step and have some of the color you used for the canopy frame on hand afterwards to correct mistakes. I largely do not use metallics when painting at 6mm scale and misplaced silvery brushstrokes are very visible. You also want to have seperate rinse water for metallic and non-metallic paints for these steps- the mica chips metallic paints use to get their shiny appearance will contaminate your brush and water and can end up cross contaminating your non-metallic paints if you aren't careful.

Next, we'll apply some highlights to the canopy with our silvers. While contrast paint does work over a neutral flat base tone, preshading the model can get a lot of extra pop out of the paints. You might've heard of 'slapchop' speed painting or 'underpainting' where you build up a gradient of tones on a piece before using a transparent paint to tint that gradient as you want- we'll be doing a quick version of that process here, just with metallics. Apply your silver across the top of the cockpit curvature, leaving some of the darker gunmetal color visible on the sides. Once that's dry, apply an even smaller high down the middle of of the silver area with bright silver.
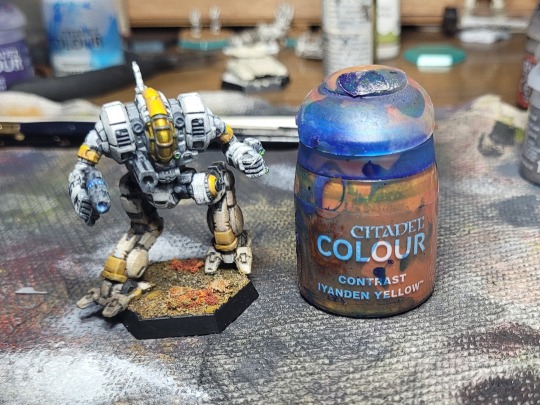
Finally, we'll apply our contrast paint over top of the metallic areas. You don't need to thin this paint, but make sure not to overload the brush. After one layer has dried you can apply additional layers for a darker, more intense color. With Iyanden Yellow I found 2-3 coats gave me rich, bright gold color that I liked but other colors I've used this method with have required fewer coats.
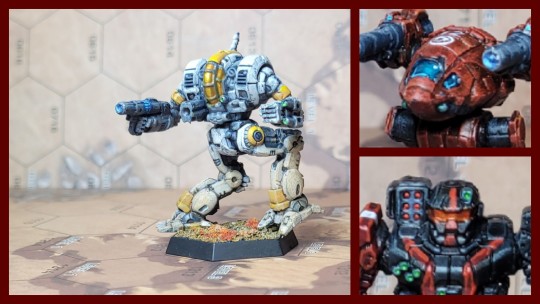
And with that our metallic contrast cockpit is finished. If you want, you can add some extra highlights over top of the metallics once the contrast paint has dried, as I've done with the Katapult, but for more complex geometries like the Caesar I find that leaving it here is best. This method works well on very curved cockpits like a Battlemaster where more conventional techniques struggle. The relative speed of contrast also means that if you need to quickly add acceptable detail to a number of models this is a great way to do it- you can even do away with the preshading I did and just paint over flat silver and get something pretty decent as seen on the Banshee. In our next installment, we'll look at what you can do if you really, really want to put the extra effort in with your canopy glass
#battletech#hobby#miniatures#mini painting#battlemech#mechwarrior#painting tutorial#tutorial#painting tips#heavy mech#caesar
47 notes
·
View notes