#Aliasing constructor support
Explore tagged Tumblr posts
Visit Tumblr Blog
Explore Tumblr blogs with no restrictions, modern design and the best experience.
Last Seen Tumblr Blogs


Fun Fact
The most popular pages on Tumblr are about Minecraft, GIFs, and David J. Peterson.
Text
Learning TypeScript for Safe Programming

TypeScript is a superset of JavaScript that adds static typing to the language, making it a powerful tool for building robust and maintainable applications. By catching errors at compile time rather than at runtime, TypeScript helps developers create safer and more predictable code. This post explores the fundamentals of TypeScript and how it can improve your JavaScript development experience.
What is TypeScript?
TypeScript is an open-source programming language developed by Microsoft. It builds on JavaScript by adding optional static types, interfaces, and advanced tooling. TypeScript code is transpiled into plain JavaScript, allowing it to run in any environment where JavaScript does.
Why Use TypeScript?
Static Typing: Identify type-related errors at compile time, reducing runtime errors.
Improved Readability: Types serve as documentation, making code easier to understand.
Enhanced Tooling: Better autocompletion, navigation, and refactoring support in IDEs.
Large-Scale Applications: Facilitates building and maintaining complex applications with better structure.
Community Support: Growing ecosystem and support from popular libraries and frameworks.
Getting Started with TypeScript
Installation: You can install TypeScript using npm:
Compile TypeScript: Use the TypeScript compiler (tsc) to transpile .ts files into .js files.
Configuration: Create a tsconfig.json file to customize your TypeScript project settings.
Basic Types in TypeScript
TypeScript supports various data types, including:
Primitive Types: string, number, boolean, null, undefined, void, symbol.
Arrays: Use the syntax number[] or Array.
Tuples: Define an array with fixed number and types of elements.
Enums: Create a set of named constants for better readability.enum Direction { Up, Down, Left, Right }
Interfaces and Type Aliases
Interfaces allow you to define custom types for objects, promoting better type safety:interface User { name: string; age: number; } const user: User = { name: 'Alice', age: 30 };
Classes and Inheritance
TypeScript supports object-oriented programming with classes and inheritance:class Animal { constructor(public name: string) {} move() { console.log(`${this.name} moves.`); } } class Dog extends Animal { bark() { console.log('Woof! Woof!'); } } const dog = new Dog('Buddy'); dog.move(); // Buddy moves. dog.bark(); // Woof! Woof!
Best Practices for TypeScript Development
Always define types for function parameters and return values.
Use interfaces and types to enforce consistency in data structures.
Utilize TypeScript’s strict mode for better type-checking.
Regularly update your TypeScript version to take advantage of new features.
Conclusion
Learning TypeScript is a valuable investment for any JavaScript developer. By incorporating static typing and leveraging TypeScript's advanced features, you can create safer, more maintainable, and scalable applications. Start experimenting with TypeScript in your next project, and enjoy the benefits of safer programming!
0 notes
Text
This Week in Rust 500
Hello and welcome to another issue of This Week in Rust! Rust is a programming language empowering everyone to build reliable and efficient software. This is a weekly summary of its progress and community. Want something mentioned? Tag us at @ThisWeekInRust on Twitter or @ThisWeekinRust on mastodon.social, or send us a pull request. Want to get involved? We love contributions.
This Week in Rust is openly developed on GitHub and archives can be viewed at this-week-in-rust.org. If you find any errors in this week's issue, please submit a PR.
Updates from Rust Community
Official
Introducing the Rust Leadership Council
Project/Tooling Updates
rust-analyzer changelog #186
Tantivy 0.20: Schemaless
lz4_flex 0.11: Gainzzzzz Unleashed!
redb (Rust Embedded DataBase) 1.0 release
rust-libp2p v0.52.0: a modular p2p networking stack
autometrics 0.5 - Automatically connecting Prometheus metrics to traces with exemplars
Introducing ducktor: Duck typed constructors for Rust structs with wasm-bindgen JsValue
Observations/Thoughts
How we built the Grafbase local development experience in Rust
Encoding ML-style modules in Rust
Shuttle Launchpad #2: Structs and Enums
Building vector search in 200 lines of Rust
Leveraging the Type System for Domain Modeling in Rust
Building an out-of-tree Rust Kernel Module Part Three
Paying with (in memory) cache
Rewriting Ockam in Rust
Rust Walkthroughs
API with Axum, SurrealDB, GraphQL - Template
Miscellaneous
Fossil Data Platform Rewritten in Rust 🦀
Build a CLI Tool for Data Masking, Encryption, and Decryption With Rust
Santiago Pastorino: Maintainer Retention
Meilisearch across the Semantic Verse
[DE] Programmiersprachen: Die Beliebtheit von Rust bleibt ungebrochen
Crate of the Week
This week's crate is release-plz, a crate to automate changelog generation, GitHub/Gitea release tagging, publishing on crates.io and bumping the version.
Thanks to Marco Ieni for the self-suggestion!
Please submit your suggestions and votes for next week!
Call for Participation
Always wanted to contribute to open-source projects but did not know where to start? Every week we highlight some tasks from the Rust community for you to pick and get started!
Some of these tasks may also have mentors available, visit the task page for more information.
Send-file - Get device memory information
Send-file - create hotspot on Windows operating system
Ockam - Implement clap commands ockam uninstall and ockam upgrade
Ockam - Enable pnpm support in dependabot
Ockam - Add an "optional" tag to commands arguments' description when generating markdown docs
Hyperswitch - Make get_redis_conn return result in StorageInterface
Hyperswitch - Implement QueueInterface for MockDb
Hyperswitch - Maintain consistency between PaymentIntent and PaymentAttempt for connector_id
Hyperswitch - Implement PaymentMethodInterface for MockDb
Hyperswitch - Use the newtype pattern for ZIP/PIN codes
mirrord - Non-indicative error when running on a Completed pod
mirrord - Log problem in layer and exit when agent image is not found
mirrord - Further tests for HTTP header filtering.
If you are a Rust project owner and are looking for contributors, please submit tasks here.
Updates from the Rust Project
410 pull requests were merged in the last week
collect VTable stats & add -Zprint-vtable-sizes
prevent .eh_frame from being emitted for -C panic=abort
#[test] function signature verification improvements
add <meta charset="utf-8"> to -Zdump-mir-spanview output
add casting suggestion when assigning negative 2's complement bin or hex literal to a size compatible signed integer
continue folding in query normalizer on weak aliases
don't record adjustments twice in note_source_of_type_mismatch_constraint
don't ICE on bound var in reject_fn_ptr_impls
don't ICE on unsized extern "rust-call" call
don't capture &[T; N] when contents isn't read
extend unused_must_use to cover block exprs
fix dead_code_cgu computation
fix explicit-outlives-requirements lint span
fix suggestion for E0404 not dealing with multiple generics
fix the overflow issue for transmute_generic_consts
handle interpolated literal errors
non-unwinding panic for misaligned pointer deref
make struct layout not depend on unsizeable tail
new solver proof tree generation
opportunistically resolve regions in new solver
normalize closure output in equate_inputs_and_outputs
safe Transmute: Enable handling references
support 128-bit enum variant in debuginfo codegen
introduce a minimum CGU size in non-incremental builds
ignore the always part of #[inline(always)] in MIR inlining
introduce a Stable trait to translate MIR to SMIR
make mir dataflow graphviz dumps opt-in
miri: dereference pointers in shims as correct types
promote unchecked integer math to MIR BinOps
simplify unchecked_{shl,shr}
implement TryFrom<&OsStr> for &str
extend io::copy buffer reuse to BufReader too
stabilize String::leak
available_parallelism using native netbsd api first
only depend on dlmalloc for wasm*-unknown
don't drain-on-drop in DrainFilter impls of various collections
make BinaryHeap parametric over Allocator
optimize slice::Iter::fold
relax implicit T: Sized bounds on BufReader<T>, BufWriter<T> and LineWriter<T>
hashbrown: fix leaking of allocator in RawIntoIter and RawIntoParIter
cargo: Align package name sanitization with cargo-new
cargo: Don't auto-discover build.rs files
cargo: Switch to syn for parsing doc comments
cargo: enable doctest-in-workspace by default
cargo: fix version requirement example in Dependency Resolution, SemVer compatibility section
rustdoc: Fix URL encoding of % sign
rustdoc: Fix invalid handling of "going back in history" when "go to only search result" setting is enabled
rustdoc-gui: allow running on Windows
rustdoc-search: search never type with !
rustdoc: add search result item types after their name
rustfmt: adjust enum variant spans to exclude any explicit discriminant
rustfmt: prevent ICE when calling parse_attribute without an attribute
clippy: add lint incorrect_clone_impl_on_copy_type
clippy: new lint single_call_fn
clippy: new lint single_range_in_vec_init
clippy: new lint: drain_collect
clippy: arithmetic_side_effects also lint const arithmetic
clippy: missing_panics_doc: pickup expect method
clippy: redundant_closure_call: handle nested closures
clippy: fix find_format_arg_expr when incremental compilation is enabled
clippy: derivable_impls: don't lint if default() call expr unsize-coerces to trait object
clippy: map_unwrap_or: don't lint when referenced variable is moved
clippy: match_same_arms: don't lint if non_exhaustive_omitted_patterns
clippy: missing_const_for_fn: Ensure dropped locals are ~const Destruct
clippy: needless_doctest_main: ignore main() in no_test code fences
clippy: make missing_panics_doc not lint for todo!()
clippy: don't lint non-statement/faux empty needless_ifs
clippy: fix false positive of self_named_module_files and mod_module_files
clippy: ignore more type aliases in unnecessary_cast
clippy: adding configuration to allow safety comment above stmt containing unsafe block
clippy: improve suggestion for needless_lifetimes
clippy: from_over_into: Show suggestions for non-Self expanded paths
clippy: unnecessary_fold: suggest turbofish if necessary
clippy: no_effect: Suggest adding return if applicable
clippy: make --explain subcommand return 1 for missing lints
rust-analyzer: correctly handle inlining of async fn
rust-analyzer: deduplicate tuple indices for completion
rust-analyzer: add binding definition for for-expr iterator desugared binding
rust-analyzer: ensure that ws loading error includes path to ws
rust-analyzer: implement missing members doesn't transform const params and default types
Rust Compiler Performance Triage
Fairly positive week with very few regressions and some decent (albeit incremental) improvements. The most widespread gains came from some standard library improvements which are not a particularly common cause of large improvements in compiler performance. Overall a large chunk of the perf test suite showed an average of 0.6% improvement.
Triage done by @rylev. Revision range: 4bd4e2e..b9d608c
Summary:
(instructions:u) mean range count Regressions ❌ (primary) 1.4% [0.5%, 3.6%] 16 Regressions ❌ (secondary) 1.0% [0.2%, 3.5%] 29 Improvements ✅ (primary) -0.8% [-7.8%, -0.2%] 157 Improvements ✅ (secondary) -2.9% [-48.3%, -0.3%] 84 All ❌✅ (primary) -0.6% [-7.8%, 3.6%] 173
3 Regressions, 7 Improvements, 4 Mixed; 3 of them in rollups 51 artifact comparisons made in total
Full report here
Approved RFCs
Changes to Rust follow the Rust RFC (request for comments) process. These are the RFCs that were approved for implementation this week:
Add RFC on governance, establishing the Leadership Council
Final Comment Period
Every week, the team announces the 'final comment period' for RFCs and key PRs which are reaching a decision. Express your opinions now.
RFCs
No RFCs entered Final Comment Period this week.
Tracking Issues & PRs
[disposition: merge] Implement PartialOrd for Vecs over different allocators
[disposition: merge] Add Read, Write and Seek impls for Arc<File> where appropriate
[disposition: merge] Return Ok on kill if process has already exited
[disposition: close] Tracking issue for RFC 1868: A portability lint
[disposition: merge] Implement Sync for mpsc::Sender
New and Updated RFCs
[new] Propose code string literals
[new] Contextual target feature detection
[new] Introduce the Store API for great good.
Call for Testing
An important step for RFC implementation is for people to experiment with the implementation and give feedback, especially before stabilization. The following RFCs would benefit from user testing before moving forward:
No RFCs issued a call for testing this week.
If you are a feature implementer and would like your RFC to appear on the above list, add the new call-for-testing label to your RFC along with a comment providing testing instructions and/or guidance on which aspect(s) of the feature need testing.
Upcoming Events
Rusty Events between 2023-06-21 - 2023-07-19 🦀
Virtual
2023-06-21 | Virtual (Vancouver, BC, CA) | Vancouver Rust
Rust Study/Hack/Hang-out
2023-06-22 | Virtual (Karlsruhe, DE) | Karlsruhe Functional Programmers Group
Stammtisch (gemeinsam mit der C++ UG KA)
2023-06-25 | Virtual (Auckland, NZ) | ResBaz Aotearoa 2023
Research Computing With The Rust Programming Language - Tim McNamara
2023-06-27 | Virtual (Dallas, TX, US) | Dallas Rust
Last Tuesday
2023-06-28 | Virtual (Cardiff, UK) | Rust and C++ Cardiff
Building Our Own 'Arc' in Rust (Atomics & Locks Chapter 6)
2023-06-28 | Virtual (Chicago, IL, US) | Chicago Healthcare Cloud Technology Community
Rust for Mission-Critical AI: A Journey into Healthcare's Safest Language
2023-06-29 | Virtual (Charlottesville, VA, US) | Charlottesville Rust Meetup
Crafting Interpreters in Rust Collaboratively
2023-06-29 | Virtual (Ciudad de México, MX) | Rust MX
Rust y Haskell
2023-07-01 | Virtual (Nürnberg, DE) | Rust Nuremberg
Deep Dive Session 4: Protohackers Exercises Mob Coding (Problem II onwards)
2023-07-04 | Virtual (Berlin, DE) | Berline.rs / OpenTechSchool Berlin
Rust Hack and Learn
2023-07-04 | Virtual (Buffalo, NY, US) | Buffalo Rust Meetup
Buffalo Rust User Group, First Tuesdays
2023-07-05 | Virtual (Indianapolis, IN, US) | Indy Rust
Indy.rs - with Social Distancing
2023-07-05 | Virtual (Stuttgart, DE) | Rust Community Stuttgart
Rust-Meetup
2023-07-11 | Virtual (Dallas, TX, US) | Dallas Rust
Second Tuesday
2023-07-13 - 2023-07-14 | Virtual | Scientific Computing in Rust
Scientific Computing in Rust workshop
2023-07-13 | Virtual (Edinburgh, UK) | Rust Edinburgh
Reasoning about Rust: an introduction to Rustdoc’s JSON format
Asia
2023-06-29 | Seoul, KR | T-RUST meetup
🦀 T-RUST Meetup 🦀
Europe
2023-06-22 | Vienna, AT | Papers We Love Vienna
June: Data and Ownership in Rust
2023-06-22 | Bern, CH | Rust Bern
Second Rust Bern Meetup
2023-06-22 | Wrocław, PL | Rust Wrocław
Rust Meetup #34
2023-06-27 | Bucharest, RO | Rust Lang Bucharest Meetup
Rust Bucharest Meetup #2
2023-06-27 | London, UK | Rust London User Group
LDN Talks June 2023 Shuttle Takeover
2023-06-27 | Paris, FR | Rust Paris
Rust Paris meetup #60
2023-06-28 | Bratislava, SK | Bratislava Rust Meetup Group
Rust Meetup by Sonalake
2023-06-29 | Augsburg, DE | Rust Meetup Augsburg
Augsburg Rust Meetup
2023-06-29 | Copenhagen, DK | Copenhagen Rust Community
Rust metup #37 at Samsung!
2023-06-29 | Vienna, AT | Rust Vienna
Rust Vienna Meetup - June - final meetup before a summer break
2023-07-01 | Basel, CH | Rust Basel
(Beginner) Rust Workshop
2023-07-03 | Zurich, CH | Rust Zurich
Rust in the Linux Kernel - July Meetup
2023-07-05 | Lyon, FR | Rust Lyon
Rust Lyon Meetup #5
2023-07-11 | Breda, NL | Rust Nederland
Rust: Advanced Graphics and User Interfaces
2023-07-13 | Reading, UK | Reading Rust Workshop
**Reading Rust Meetup at Browns***
North America
2023-06-21 | Austin, TX, US | Rust ATX
Rust Lunch - Pizza sponsored by JFrog
2023-06-21 | Somerville, MA, US | Boston Rust Meetup
Ball Square Rust Lunch, June 21
2023-06-22 | New York, NY, US | Rust NYC
Learn How to Use cargo-semver-checks and Closure Traits to Write Better Code
2023-06-24 | San Jose, CA, US | Rust Breakfast & Learn
Rust: breakfast & learn
2023-06-28 | Cambridge, MA, US | Boston Rust Meetup
Harvard Square Rust Lunch
2023-06-29 | Mountain View, CA, US | Mountain View Rust Meetup
Rust Meetup at Hacker Dojo
2023-07-01 | San Jose, CA, US | Rust Breakfast & Learn
Rust: breakfast & learn
2023-07-07 | Chicago, IL, US | Deep Dish Rust
Rust Lunch
2023-07-13 | Seattle, WA, US | Seattle Rust User Group Meetup
July Meetup
2023-07-18 | San Francisco, CA, US | San Francisco Rust Study Group
Rust Hacking in Person
Oceania
2023-07-11 | Melbourne, VIC, AU | Rust Melbourne
(Hybrid - in person & online) July 2023 Rust Melbourne Meetup
If you are running a Rust event please add it to the calendar to get it mentioned here. Please remember to add a link to the event too. Email the Rust Community Team for access.
Jobs
Please see the latest Who's Hiring thread on r/rust
Quote of the Week
rust programmers when they see each other again:
Long time no C
– ciscoffeine on mond-basis.eu
Thanks to Brian Kung for the suggestion!
Please submit quotes and vote for next week!
This Week in Rust is edited by: nellshamrell, llogiq, cdmistman, ericseppanen, extrawurst, andrewpollack, U007D, kolharsam, joelmarcey, mariannegoldin, bennyvasquez.
Email list hosting is sponsored by The Rust Foundation
Discuss on r/rust
0 notes
Text
C# to C++ Code Porting Control Now Fully Support Networking Functionality
What's New in this Release?
Aspose team is pleased to announce the release of Aspose.Email for .NET 19.1, This release includes few enhancements in API and overall functionality of the API has been improved as a result of several bug fixes. This release includes few enhancements to the API’s functionality. These enhancements include listing messages while working with Pop3Client, loading and saving of VCF contact and reading of OLM and MBX files. This release includes several improvements in term of bug fixes, such as improved working with EWSClient while UpdateItems, Improved formatting of HtmlBodyText in output, Improved working with loading EML, Improved working with date in header using MapiMessage to display in MHTML output, Improved working with ImapClient.ListMessagesByPage, MSG contact to MHT conversion is enhanced, Improved working with signed MSG, MailMessage to HTML conversion is enhanced, VCF to MSG conversion is enhanced, PST to MBOX conversion is enhanced and MSG to MHTML is enhanced The main bug fixes & improved features added in this release are listed below
Pop3Client.ListMessages taking too much time
Unable to update email using EWSClient.UpdateItems
Loading and saving VCF contact skips some information
No bullets added to the output of HtmlBodyText
MailMessage.load throwing exception with EML Bug
Update date in header using MapiMessage to display in MHTML output
ImapClient.ListMessagesByPage retrieves last email even if the page does not exist
MSG contact to MHT conversion issue
MapiMessage.fromMailMessage throws exception
Issue while reading MBOX file
Empty body in a signed MSG
MailMessage to HTML conversion generates wrong HTML format
Issues with VCF to MSG Conversion
Issue with duplicate attachment after converting calendar mail
Folder Skipped While Converting PST to MBOX
MSG to MHTML - non-ASCII characters are transformed to question mark
The appointment content is improperly encoding
Issue while reading OLM File
MapiMessage.FromMailMessage throws Exception
Aspose.Email IgnoreSmtpAddressCheck does not allow %20 sequence
How to set MapiTask DateCompletion before Start Date
Unable to open EML file with MailMessage
Converting MSG to MHT throws exception
Newly added documentation pages and articles
Some new tips and articles have now been added into Aspose.Email for .NET documentation that may guide users briefly how to use Aspose.Email for performing different tasks like the followings.
Getting Total Number of Messages from MBox File
Export Microsoft Visio Drawing to PDF
Overview:Aspose.Email for .NET
Aspose.Email for .NET is a set of .net email components allowing developers to easily implement email functionality within their ASP.NET web applications, web services & Windows applications. It Supports Outlook PST, EML, MSG & MHT formats. It allows developers to work with SMTP, POP3, FTP & MS Exchange servers. It supports mail merge, iCalendar, customized header & body, header information, embedded files, Twitter & many more. It makes it easy to work with HTML or plain text emails & their attachments.
More about Aspose.Email for .NET
Homepage of Aspose.Email for .NET C#
Download Aspose.Email for .NET
Online documentation of Aspose.Email for .NET
#programming#C to C++ Code Porting#networking support#Aliasing constructor support#C Code Converter#Automated code porting
0 notes
Text
I’m annoyed today.. I have to do a basic lift and shift of all the common library interfaces stored in frontends because someone thought it was good to copy pasta away everything as we go into every single frontend sooo we need another spot for all of that to handle, as is obvious, deprecation, new endpoints, modifications to handle validation and error and bugs etc.. but in the process am finding a lot of boiler plate code which is just like veryyyyy obvious everyone came from a Java background switched to web and didn’t once bat an eye. We have a billion getters and setters, we have no type aliases or other items which are strategically created for Typescript so that you do not need to define a class to use for simple items like in this situation a matrix which is now an internal class which supports getting elements... WHY WOULD YOU WRITE THIS CODE??? You can literally define this with an array of arrays or I guess some call this a “jagged array” but because JS says and is written in all things “Functions serve as a first class citizen” you never really need a class.. not really, not unless it entirely makes sense whereas in a lot of old coding languages like say Java or C++ you do need a namespace and and that namespace does define classes and objects usually first and then those objects hold actions, Javascript can instead behave more often as first methods that then act on many things.. this creates less bloat and code boilerplate and often is one of many reasons people say they hate web coming from OOP driven design but truly it is just different and everyone’s hateful and I am going a bit insane because I am doing what is an inherently wrong bad practice like I feel itchy all over doing it but if I do it the right way, it will never be complete.. it’s too big, so I gotta first chop off my leg to save my face or whatever then repair everything best I can but I am making the problem worse because I have to move all the unnecessary typings and objects and constructors to a third place and then try and find a way to fix that and I guess.. Idk I wanted to vent, but I also wanted to just sorta rubber ducky and console myself in the process..
#dev life#software engineering#just a girl coding away in her goblin cave as usual#work log#work from home life
0 notes
Text
Auth0: Vue & TypeScript Quickstart SDK - The Missing Docs

Authentication is hard. Even if you know the ins and outs of it, handling registration, login, email verification, forgotten password, secret rotation... and what not... is a tedious work.
For this reason, we use auth providers such as AWS Cognito or Auth0. But this comes with its own drawback, namely that you are at the provider's mercy when it comes to examples and tutorials. If a resource you need does not exist, you either need to contact support and wait for them (but nobody got time for that), or figure it out yourself by the good ol' trial and error method.
A couple of days ago, I had to use Auth0 with Vue.js and TypeScript. Now, Auth0 has an excellent tutorial for Vue.js, but I could not find any examples in TypeScript. So seeing no better option, I started annotating the code provided by the tutorial.
I finished it, and in this blogpost, I'll walk you through the details, so you don't have to repeat this chore.
We will follow the original Auth0 Vue tutorial structure which can be found here. To make it easier to compare the two, we'll use the exact same first-level headings as the original.
You can find my complete auth0 vue typescript repo on RisingStack's Github.
Configure Auth0
First, you'll need to set up your Auth0 application. That part is very well written in the original tutorial, and I would like to be neither repetitive nor plagiarize Auth0's content, so please go ahead and read the first section there, then come back.
Create a Sample Application
Now we already start to diverge from the Auth0 tutorial.
If you already have an existing app, make sure that typescript, vue-class-component, and vue-property-decorator are present in your package.json, as we'll use class components.
If you don't have one, let's create a sample app.
$ vue create auth0-ts-vue
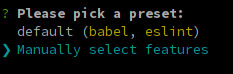
When prompted, select Manually select features.
We'll need Babel, TypeScript, and Router.
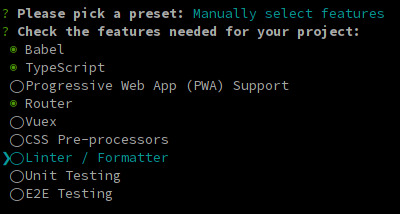
The next 3 questions are about deciding whether you want to use class-style component syntax, Babel, and history mode. Hit enter for all three to answer "Yes". You might opt-out from history mode if you really want to.

It is entirely up to you if you want to use dedicated config files or not, and if you want to save this as a preset.
Grab a beverage of your preference while the dependencies are being installed.
Install the SDK
Once it's done, we need to install our auth0 dependencies.
$ cd auth0-ts-vue-example $ npm install @auth0/auth0-spa-js
The auth0-spa-js package comes with its own type definitions, so we're all set for now.
Modify your Webpack Config
If you followed the original Auth0 tutorials configuration part, you've set up your URLs to listen at port 3000. Time to hard code this into our webpack dev-server.
Create a vue.config.js file in the root directory of your app.
const webpack = require('webpack') module.exports = { devServer: { port: 3000 } }
This way, we don't have to specify the PORT env var when we run our app. We'd need to change it in Auth0 anyway all the time, while we're developing it.
Start the application
$ npm run serve
Leave it running so we can leverage Webpack's incremental build throughout the process.
Create an Authentication Wrapper
Have you ever created a Vue.js plugin? Well, now is the time!
The easiest way to use Auth0 in your app is to make it available on this in each of your components, just as you do with $route after you've installed Vue Router.
It would be nice if this was a separate dependency, but for the sake of simplicity, let it live inside our codebase.
Create a directory called auth inside your src dir then create the following files: index.ts auth.ts, VueAuth.ts, User.ts. The original tutorial has them all in one file. Still, in my opinion, it is easier to understand what's happening if we separate the matters a bit, and it also results in nicer type definitions too.
Our index.ts will be a simple barrel file.
export * from './auth'
auth.ts is where we define the plugin. VueAuth.ts is a wrapper Vue object around auth0-spa-js, so we can leverage the observability provided by Vue, and User.ts is a class to make its type definition nicer.
Defining our User
Let's go from the inside out and take a look at User.ts
import { camelCase } from 'lodash' export class User { sub: string names: string nickname: string picture: string updatedAt: string email: string emailVerified: boolean provider?: string id?: string givenName?: string familyName?: string locale?: string [key: string]: string | boolean | undefined constructor (auth0User: { [key: string]: string | boolean | undefined }) { if (!auth0User) return for (const key in auth0User) { this[key] = auth0User[key] } this.sub = auth0User.sub as string this.provider = this.sub.split('|')[0] this.id = this.sub.split('|')[1] } }
Now, this requires a bit of explanation. The first block of fields are the one that are always present, no matter what login scheme the user used. Sub is the OpenID ID Token's Subject Identifier, which contains the authentication provider (eg. auth0 or google) and the actual user id, separated by a |. The other mandatory fields are probably self-explanatory.
Next are provider and id, which are a result of splitting sub, so they should be there, but we cannot be sure. The last are the ones that were only present when Google OAuth is used as the provider. There might be more, depending on what connections you set up and what other data you request. Or you could even code custom fields in the returned ID Token... but I digress.
Last we tell TypeScript, that we want to be able to use the bracket notation on our object by adding [key: string]: any
Our constructor takes a raw user object with similar fields but snake_cased. That's why we camelCase them and assign each of them to our User object. Once we're done, we extract the provider and the id from the subfield.
Show me the Wrapper
Time to take a look at VueAuth.ts
import { Vue, Component } from 'vue-property-decorator' import createAuth0Client, { PopupLoginOptions, Auth0Client, RedirectLoginOptions, GetIdTokenClaimsOptions, GetTokenSilentlyOptions, GetTokenWithPopupOptions, LogoutOptions } from '@auth0/auth0-spa-js' import { User } from './User' export type Auth0Options = { domain: string clientId: string audience?: string [key: string]: string | undefined } export type RedirectCallback = (appState) => void @Component({}) export class VueAuth extends Vue { loading = true isAuthenticated? = false user?: User auth0Client?: Auth0Client popupOpen = false error?: Error async getUser () { return new User(await this.auth0Client?.getUser()) } /** Authenticates the user using a popup window */ async loginWithPopup (o: PopupLoginOptions) { this.popupOpen = true try { await this.auth0Client?.loginWithPopup(o) } catch (e) { console.error(e) this.error = e } finally { this.popupOpen = false } this.user = await this.getUser() this.isAuthenticated = true } /** Authenticates the user using the redirect method */ loginWithRedirect (o: RedirectLoginOptions) { return this.auth0Client?.loginWithRedirect(o) } /** Returns all the claims present in the ID token */ getIdTokenClaims (o: GetIdTokenClaimsOptions) { return this.auth0Client?.getIdTokenClaims(o) } /** Returns the access token. If the token is invalid or missing, a new one is retrieved */ getTokenSilently (o: GetTokenSilentlyOptions) { return this.auth0Client?.getTokenSilently(o) } /** Gets the access token using a popup window */ getTokenWithPopup (o: GetTokenWithPopupOptions) { return this.auth0Client?.getTokenWithPopup(o) } /** Logs the user out and removes their session on the authorization server */ logout (o: LogoutOptions) { return this.auth0Client?.logout(o) } /** Use this lifecycle method to instantiate the SDK client */ async init (onRedirectCallback: RedirectCallback, redirectUri: string, auth0Options: Auth0Options) { // Create a new instance of the SDK client using members of the given options object this.auth0Client = await createAuth0Client({ domain: auth0Options.domain, client_id: auth0Options.clientId, // eslint-disable-line @typescript-eslint/camelcase audience: auth0Options.audience, redirect_uri: redirectUri // eslint-disable-line @typescript-eslint/camelcase }) try { // If the user is returning to the app after authentication.. if ( window.location.search.includes('error=') || (window.location.search.includes('code=') && window.location.search.includes('state=')) ) { // handle the redirect and retrieve tokens const { appState } = await this.auth0Client?.handleRedirectCallback() ?? { appState: undefined } // Notify subscribers that the redirect callback has happened, passing the appState // (useful for retrieving any pre-authentication state) onRedirectCallback(appState) } } catch (e) { console.error(e) this.error = e } finally { // Initialize our internal authentication state when the page is reloaded this.isAuthenticated = await this.auth0Client?.isAuthenticated() this.user = await this.getUser() this.loading = false } } }
It might make sense to compare this with the original tutorial.
In the original tutorial, a Vue object is created while we're creating a class to make its annotation easier. There you can find it as:
// The 'instance' is simply a Vue object instance = new Vue({ ... })
Now let's unpack it.
First, we need to import a couple of types, including our User class.
Then we create the Auth0Options and RedirectCallback type aliases for convenience.
Instead of creating a simple Vue object, we define a Class Component. The public fields are the same as the data object in the original, whereas the static ones are the parameters passed to the plugin.
We differ in two substantial way from the original tutorial:
We have one less method: handleRedirectCallback is not used anywhere in the original, so we omitted it.
Instead of setting up the Auth0 Client in the Vue object's created hook, we use a separate method called init. Aside from that, the contents of the two are identical.
The reason for using a separate method is simple: The created hook is used in place of a constructor when it comes to Class Components, as the constructor of the class is usually called by Vue.
First, a component object is created just like when using Vue({}), passing it the data, methods, watchers, paramlist, and all the things we usually define for components. When this is done, the created hook is called. Later, when the component is actually used and rendered, the params are passed to it, and mounted, or updated.
The problem with the original one is that we cannot pass parameters to the created method. Neither can we write a proper constructor. So we need to have our own method we will call right after the object is instantiated just as it's done with created by Vue.
Let's dissect init a bit.
First, we create and auth0Client.
Then, in the try-catch block, we check if the user is returning after authentication and handle it. We check if the query params contain any signs of redirection. If they do, we call auth0Client.handleRedirectCallback, which parses the URL and either rejects with an error or resolves with and appState.
Then, we pass on the appState to onRedirectCallback. This is a function we can pass to the plugin when we install it to Vue, so we can handle the app level ramifications of a login.
For the other methods, getUser is a simple wrapper around the authClient's getUser method. We pass on the resolved promise to our User's constructor to create a nicely looking User object.
Next, there is loginWithPopup, which we won't use, as popups can be blocked by browsers. So we'll go with the redirect way, where the user is redirected to Auth0, login, then the callback URL is called by Auth0 passing information to our app in the callback URL's query.
The information in the URL is parsed by auth0Client.handleRedirectCallback which will return a Promise<RedirectCallbackResult>. The Promise will be rejected if there is an error in the authentication flow.
We have a couple of simple wrappers around the auth0Client. loginWithRedirect initiates the flow I described above, logout speaks for itself.
Finally, we set up the user and check if we're authenticated.
Let's turn this into a Plugin
Now, all we need to do is create a proper plugin.
If you take a look at Vue's documentation about plugins, you'll see that we need to create an object that exposes an install method. This method will be called when we pass the object to Vue.use and it will receive the Vue constructor and optionally... options.
type Auth0PluginOptions = { onRedirectCallback: RedirectCallback, redirectUri: string, domain: string, clientId: string, audience?: string, [key: string]: string | RedirectCallback | undefined } export const Auth0Plugin = { install (Vue: VueConstructor, options: Auth0PluginOptions) { Vue.prototype.$auth = useAuth0(options) } }
In our install method, we add an $auth member to any Vue object, so the VueAuth object is available everywhere, just as vue-router is.
Let's implement the useAuth function.
/** Define a default action to perform after authentication */ const DEFAULT_REDIRECT_CALLBACK = () => window.history.replaceState({}, document.title, window.location.pathname) let instance: VueAuth /** Returns the current instance of the SDK */ export const getInstance = () => instance /** Creates an instance of the Auth0 SDK. If one has already been created, it returns that instance */ export const useAuth0 = ({ onRedirectCallback = DEFAULT_REDIRECT_CALLBACK, redirectUri = window.location.origin, ...options }) => { if (instance) return instance // The 'instance' is simply a Vue object instance = new VueAuth() instance.init(onRedirectCallback, redirectUri, options as Auth0Options) return instance }
useAuth returns a singleton VueAtuh instance, and extracts the onRedirectCallback and redirectUri from the options object. What's left is an Auth0Options type which we'll pass on straight to the auth0Client.
You can see the init method in action we created earlier. Then VueAuth is instantiated if it hasn't been already. Above that, we also expose a getInstance function, in case we need to use it outside of a Vue component.
Let's see here the whole auth.ts for your copy-pasting convenience:
import { VueConstructor } from 'vue' import { VueAuth, Auth0Options, RedirectCallback } from './VueAuth' type Auth0PluginOptions = { onRedirectCallback: RedirectCallback, domain: string, clientId: string, audience?: string, [key: string]: string | RedirectCallback | undefined } /** Define a default action to perform after authentication */ const DEFAULT_REDIRECT_CALLBACK = (appState) => window.history.replaceState({}, document.title, window.location.pathname) let instance: VueAuth /** Returns the current instance of the SDK */ export const getInstance = () => instance /** Creates an instance of the Auth0 SDK. If one has already been created, it returns that instance */ export const useAuth0 = ({ onRedirectCallback = DEFAULT_REDIRECT_CALLBACK, redirectUri = window.location.origin, ...options }) => { if (instance) return instance // The 'instance' is simply a Vue object instance = new VueAuth() instance.init(onRedirectCallback, redirectUri, options as Auth0Options) return instance } // Create a simple Vue plugin to expose the wrapper object throughout the application export const Auth0Plugin = { install (Vue: VueConstructor, options: Auth0PluginOptions) { Vue.prototype.$auth = useAuth0(options) } }
As you can see, we're extending the Vue constructor with a new instance member. If we try to access it in a component, the TypeScript compiler will start crying as it has no idea what happened. We'll fix this a bit later down the line.
Now, the Auth0Options are the ones that are needed for the client to identify your tenant. Copy the Client ID and Domain from your Auth0 applications settings and store them in a file called auth.config.json for now. It would be nicer to inject them as environment variables through webpack, but as these are not sensitive data, we'll be just fine like that as well.
With all that said, I will not include my auth.config.json in the reference repo, only an example you'll need to fill in with your data.
{ "domain": "your tenant's domain", "clientId": "your app's clientId" }
Make sure to add "resolveJsonModule": true, to your tsconfig.json.
Finally, we're ready to create our main.ts.
import Vue from 'vue' import App from './App.vue' import router from './router' import { Auth0Plugin } from './auth' import { domain, clientId } from '../auth.config.json' Vue.use(Auth0Plugin, { domain, clientId, onRedirectCallback: (appState) => { router.push( appState && appState.targetUrl ? appState.targetUrl : window.location.pathname ) } }) Vue.config.productionTip = false new Vue({ router, render: h => h(App) }).$mount('#app')
The onRedirectCallback redirects the user to a protected route after they have authenticated. We'll cover this a bit later when we create an actual protected route.
Log in to the App
Time to put the authentication logic to use.
First, we'll add a Login / Logout button to Home.vue
<template> <div class="home"> <img alt="Vue logo" src="../assets/logo.png" /> <HelloWorld msg="Welcome to Your Vue.js App" /> <!-- Check that the SDK client is not currently loading before accessing is methods --> <div v-if="!$auth.loading"> <!-- show login when not authenticated --> <button v-if="!$auth.isAuthenticated" @click="login">Log in</button> <!-- show logout when authenticated --> <button v-if="$auth.isAuthenticated" @click="logout">Log out</button> </div> </div> </template>
We'll also need to update the logic in the script tag of Home
<script lang="ts"> import { Component, Vue } from 'vue-property-decorator' import HelloWorld from '@/components/HelloWorld.vue' @Component({ components: { HelloWorld } }) export default class Home extends Vue { login () { this.$auth.loginWithRedirect({}) } // Log the user out logout () { this.$auth.logout({ returnTo: window.location.origin }) } } </script>
First, we turn the original example component into a Class Component. Second, the methods simply call the methods of VueAuth exposed by our Auth0Plugin.
But what's that? this.$auth is probably underlined in your IDE. Or if you try to compile the code you'll get the following error:
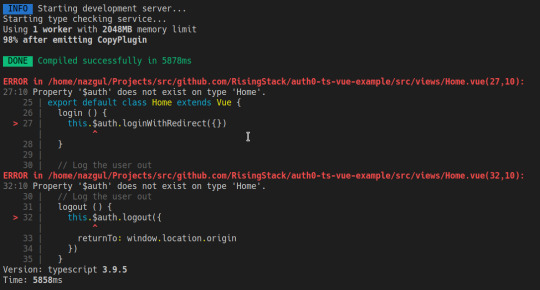
Of course, we still have to tell the compiler that we have augmented the Vue constructor with our $auth member.
Let's create a shims-auth0.d.ts file in our src directory. If you're using VSCode, you might need to reload the window to make the error go away.
import { VueAuth } from './auth/VueAuth' declare module 'vue/types/vue' { interface Vue { $auth: VueAuth } }
Checkpoint
Now, let's try to compile our code. If you have configured your Auth0 credentials correctly, you should be redirected to the Auth0 Universal Login page when you click Login, and back to your app against once you have logged in.
Then, you should be able to click Log out and have the application log you out.
Display the User's Profile
So far so good, but let's try to create a protected route. Displaying the user's profile seems like a prime target for that.
Let's create a file called Profile.vue in src/views.
<template> <div> <div> <img :src="$auth.user.picture"> <h2></h2> <p></p> </div> <div> <pre></pre> </div> </div> </template>
That's it. We read all the information we need from $auth.user we've already set up in VueAuth.ts.
Add a route to the Profile component
Let's update the app's routing configuration, so the users can access their profile.
Open up src/router/index.ts and add the following to the routes array.
//.. other imports // NEW - Import the profile component import Profile from "../views/Profile.vue"; Vue.use(VueRouter) const routes: Array<RouteConfig> = [ routes: [ // .. other routes and pages .. // NEW - add the route to the /profile component { path: "/profile", name: "profile", component: Profile } ] }); export default router
Now we need to update the navigation bar in App.vue
<template> <div id="app"> <div id="nav"> <router-link to="/">Home</router-link> | <router-link to="/about">About</router-link> <span v-if="$auth.isAuthenticated"> | <router-link to="/profile">Profile</router-link> </span> </div> <router-view/> </div> </template>
Checkpoint
The code should compile, so let's check if we can navigate to the Profile page and see the data. For added profit, try logging in with both Google and register a username and password. Take note of the data you get.
Secure the Profile Page
We have the route, time to make it protected. Let's create a new file in src/auth called authGaurd.ts.
import { getInstance } from './auth' import { NavigationGuard } from 'vue-router' export const authGuard: NavigationGuard = (to, from, next) => { const authService = getInstance() const fn = () => { // Unwatch loading unwatch && unwatch() // If the user is authenticated, continue with the route if (authService.isAuthenticated) { return next() } // Otherwise, log in authService.loginWithRedirect({ appState: { targetUrl: to.fullPath } }) } // If loading has already finished, check our auth state using `fn()` if (!authService.loading) { return fn() } // Watch for the loading property to change before we check isAuthenticated const unwatch = authService.$watch('loading', (loading: boolean) => { if (loading === false) { return fn() } }) }
First, we put auth.ts's getInstance to use. Then we create a function that checks if the user is authenticated. If they are, we call next, otherwise redirect them to login.
However, we should only call this function, if the authService is not loading, as otherwise, we still don't have any settled information about the login process.
If it is still loading, we set up a watcher for authService.loading, so when it turns true, we call our guard function. Also, please notice that we use the unwatch function returned by $watch to clean up after ourselves in fn.
I personally prefer giving descriptive names to my functions, but I only wanted to change things for the sake of either type annotation, or stability, so forgive me for keeping fn as it is to maintain parity with the JS tutorial.
Guidance with Auth0, Vue & TypeScript
Auth0 and all other authentication providers relieve us from the tedious job of handling user management ourselves. Auth0 itself excels in having a lot of educational resources for their users. The original Vue tutorial was really helpful, but seeing that TypeScript is becoming the industry standard when it comes to writing anything that should be run by JavaScript runtimes, it would be nice to see more TypeScript tutorials.
I hope this article manages to fill in a bit of this gap. If you liked what you just read, please share it with those who might need guidance with Auth0, Vue & TypeScript!
Happy authenticating!
Auth0: Vue & TypeScript Quickstart SDK - The Missing Docs published first on https://koresolpage.tumblr.com/
0 notes
Text
300+ TOP SCALA Interview Questions and Answers
SCALA Interview Questions for freshers experienced :-
1. What is Scala? Scala is a Java-based Hybrid programming language which is the fusion of both Functional and Object-Oriented Programming Language features. It can integrate itself with Java Virtual Machine and compile the code written. 2. How Scala is both Functional and Object-oriented Programming Language? Scala treats every single value as an Object which even includes Functions. Hence, Scala is the fusion of both Object-oriented and Functional programming features. 3.Write a few Frameworks of Scala Some of the Frameworks supported by Scala are as follows: Akka Framework Spark Framework Play Framework Scalding Framework Neo4j Framework Lift Framework Bowler Framework 4. Explain the types of Variables in Scala? And What is the difference between them? The Variables in Scala are mainly of two types: Mutable Variables We Declare Mutable Variables by using the var keyword. The values in the Mutable Variables support Changes Immutable Variables We declare Immutable Variables using the val keyword. The values in Immutable Variables do not support changes. 5. Explain Streams in Scala. In simple words, we define Stream as a Lazy list which evaluates the elements only when it needs to. This sort of lazy computation enhances the Performance of the program. 6. Mention the Advantages of Scala Some of the major Advantages of Scala are as follows: It is highly Scalable It is highly Testable It is highly Maintainable and Productive It facilitates Concurrent programming It is both Object-Oriented and Functional It has no Boilerplate code Singleton objects are a cleaner solution than Static Scala Arrays use regular Generics Scala has Native Tuples and Concise code 7. Explain the Operators in Scala The following are the Operators in Scala: Arithmetic Operators Relational Operators Logical Operators Bitwise Operators Assignment Operators 8. What is Recursion tail in Scala? ‘Recursion’ is a function that calls itself. For example, a function ‘A’ calls function ‘B’, which calls the function ‘C’. It is a technique used frequently in Functional programming. In order for a Tail recursive, the call back to the function must be the last function to be performed. 9. Explain the use of Tuples in Scala? Scala tuples combine a Finite number of items together so that the programmer can Pass a tuple around as a Whole. Unlike an Array or List, a tuple is Immutable and can hold objects with different Datatypes. 10. How is a Class different from an Object? Class combines the data and its methods whereas an Object is one particular Instance in a class.

SCALA Interview Questions 11. Why do we need App in Scala? App is a helper class that holds the main method and its Members together. The App trait can be used to quickly turn Objects into Executable programs. We can have our classes extend App to render the executable code. object Edureka extends App{ println("Hello World") } 12. What are Higher-order functions? A Higher-order function is a function that does at least one of the following: takes one or more Functions as Arguments, returns a Function as its result. 13. Explain the scope provided for variables in Scala. There are three different scopes depending upon their use. Namely: Fields: Fields are variables declared inside an object and they can be accessed anywhere inside the program depending upon the access modifiers. Fields can be declared using var as well as val. Method Parameters: Method parameters are strictly Immutable. Method parameters are mainly used to Pass values to the methods. These are accessed inside a method, but it is possible to access them from outside the method provided by a Reference. Local Variables: Local variables are declared inside a method and they are accessible only inside the method. They can be accessed if you return them from the method. 14. What is a Closure? Closure is considered as a Function whose return value is Dependent upon the value of one or more variables declared outside the closure function. Course Curriculum Apache Spark and Scala Certification Training Instructor-led SessionsReal-life Case StudiesAssessmentsLifetime Access Example: val multiplier = (i:Int) => i * 10 Here the only variable used in the function body, i * 10 , is i, which is defined as a parameter to the function 15. Explain Traits in Scala. A Trait can be defined as a unit which Encapsulates the method and its variables or fields. The following example will help us understand in a better way. trait Printable{ def print() } class A4 extends Printable{ def print(){ println("Hello") } } object MainObject{ def main(args:Array){ var a = new A4() a.print() } } 16. Mention how Scala is different from Java A few scenarios where Scala differs from Java are as follows: All values are treated as Objects. Scala supports Closures Scala Supports Concurrency. It has Type-Inference. Scala can support Nested functions. It has DSL support Traits 17. Explain extend Keyword You can extend a base Scala class and you can design an Inherited class in the same way you do it in Java by using extends keyword, but there are two restrictions: method Overriding requires the override keyword, and only the Primary constructor can pass parameters to the base Constructor. Let us understand by the following example println("How to extend abstract class Parent and define a sub-class of Parent called Child") class Child=(name:String)extends Parent(name){ override def printName:Unit= println(name) } object Child { def apply(name:String):Parent={ new Child(name) } } 18. Explain implicit classes with syntax Implicit classes allow Implicit conversations with the class’s Primary constructor when the class is in scope. Implicit class is a class marked with the “implicit” keyword. This feature was introduced in with Scala 2.10 version. //Syntax: object { implicit class Data type) { def Unit = xyz } } 19. Explain the access Modifiers available in Scala There are mainly three access Modifiers available in Scala. Namely, Private: The Accessibility of a private member is restricted to the Class or the Object in which it declared. The following program will explain this in detail. class Outer { class Inner { private def f() { println("f") } class InnerMost { f() // OK } } (new Inner).f() // Error: f is not accessible } Protected: A protected member is only Accessible from Subclasses of the class in which the member is defined. The following program will explain this in detail. package p class Super { protected def f() { println("f") } } class Sub extends Super { f() } class Other { (new Super).f() // Error: f is not accessible } } Public: Unlike Private and Protected members, it is not required to specify Public keyword for Public members. There is no explicit modifier for public members. Such members can be accessed from Anywhere. Following is the example code snippet to explain Public member class Outer { class Inner { def f() { println("f") } class InnerMost { f() // OK } } (new Inner).f() // OK because now f() is public } 20. What is a Monad in Scala? A Monad is an object that wraps another object. You pass the Monad mini-programs, i.e functions, to perform the data manipulation of the underlying object, instead of manipulating the object directly. Monad chooses how to apply the program to the underlying object. 21. Explain the Scala Anonymous Function. In the Source code, Anonymous functions are called ‘Function literals’ and at run time, function literals are instantiated into objects called Function values. Scala provides a relatively easy Syntax for defining Anonymous functions. //Syntax (z:Int, y:Int)=> z*y Or (_:Int)*(_Int) 22. How do I Append data in a list? In Scala to Append into a List, We have the following methods: use “:+” single value var myList = List.empty myList :+= "a" 23. Why Scala prefers Immutability? Scala prefers Immutability in design and in many cases uses it as default. Immutability can help when dealing with Equality issues or Concurrent programs. 24. Give some examples of Packages in Scala The three important and default Packages in Scala are as follows: Java.lang._ : Java.lang._ package in Java. Provides classes that are fundamental to the design of the Java programming language. Java.io._ : Java.io._ Package used to import every class in Scala for input-output resources. PreDef: Predef provides type aliases for types which are commonly used, such as the immutable collection types Map, Set, and the List constructors 25. Why is an Option used in Scala? Option in Scala is used to Wrap the Missing value. 26. Mention the Identifiers in Scala. There are four types of Scala Identifiers: Alphanumeric identifiers Operator identifiers Mixed identifiers Literal identifiers //Scala program to demonstrate Identifiers in Scala. object Main { //Main method def main(args: Array) { //Valid Identifiers var 'name = "Hari"' var age = 20; var Branch = "Computer Science" println() println() println() } } 27. How do you define a function in Scala? def keyword is used to define the Function in Scala. object add { def addInt( a:Int, b:Int ) : Int = { var sum:Int = 0 sum = a + b return sum } } 28. How is the Scala code compiled? Code is written in Scala IDE or a Scala REPL, Later, the code is converted into a Byte code and transferred to the JVM or Java Virtual Machine for compilation. Big Data Training 29. Explain the functionality of Yield. Yield is used with a loop, Yield produces a value for each iteration. Another way to do is to use map/flatMap and filter with nomads. for (i "#FF0000", "azure" -> "#F0FFFF") 39. Explain Exception Handling in Scala Throw Exception: Throwing an exception looks the same as in Java. You create an exception object and then you throw it with the throw keyword as follows. Throw new IllegalArgumentException Catching an Exception: Scala allows you to try/catch any exception in a single block and then perform pattern matching against it using case blocks. Try the following example program to handle the exception. Example: import java.io.FileReader import java.io.FileNotFoundException import java.io.IOException object Demo { def main(args: Array) { try { val f = new FileReader("input.txt") } catch { case ex: FileNotFoundException ={ println("Missing file exception") } case ex: IOException = { println("IO Exception") } } } } So, with this, we finished some questions on the Intermediate Level. Now, Let us move to the next level of interview questions which happen to be the Advanced Level Interview Questions. 40. Explain Pattern Matching in Scala through an example A Pattern match includes a sequence of alternatives, each starting with the Keyword case. Each alternative includes a Pattern and one or more Expressions, Scala evaluates whenever a pattern matches. An arrow symbol => separates the pattern from the expressions. Try the following example program, which shows how to match against an integer value. object Demo { def main(args: Array) { println(matchTest(3)) } def matchTest(x: Int): String = x match { case 1 = "one" case 2 = "two" case _ = "other" } } 41. Explain Extractors in Scala Course Curriculum Apache Spark and Scala Certification Training Weekday / Weekend Batches An Extractor in Scala is an object that has a method called unapply as one of its members. The purpose of that unapply method is to match the value and take it apart. 42. What is the result of x+y*z and why? Similar to any other programming language, Scala also follows Presidency and Priority tables. According to the tables, Scala Performs the operations as follows. Scala evaluates y*z first. Then adds (y*z) with x 43. What is an Auxiliary constructor We use Auxiliary constructor in Scala for Constructor Overloading. The Auxiliary Constructor must call either previously defined auxiliary constructors or primary constructor in the first line of its body. 44. Explain recursion through a program def factorial_loop(i: BigInt): BigInt = { var result = BigInt(1) for (j- 2 to i.intValue) result *= j result } for (i - 1 to 10) format("%s: %sn", i, factorial_loop(i)) 45. Explain Que with example Queue is a Data Structure similar to Stack except, it follows First In First Out procedure for data processing. In Scala, to work with Queues, you need to import a library called, import scala.collection.mutable.Queue val empty = new Queue SCALA Questions and Answers Pdf Download Read the full article
0 notes
Text
Decoding Decoders
Introduction
This post is written for an Elm-y audience, but might be of interest to other developers too. We're diving into defining clear application boundaries, so if you're a believer in miscellaneous middleware and think DRY principles sometimes lead people astray, you may enjoy reading.
Obviously-correct decoders can play a primary role in supporting a changing backend API. Writing very simple decoders pushes transformations on incoming data into a separate function, creating a boundary between backend and frontend representations of the data. This boundary makes it possible to modify server data and Elm application modeling independently.
Decoders
In Elm, Decoders & Encoders provide the way to translate into and from Elm values. Elm is type safe, and it achieves this safety in a dynamic world by strictly defining one-to-one JSON translations.
An example inspired by NoRedInk's Writing platform follows. We ask students to highlight the claim, evidence, and reasoning of a paragraph in exercises, in their peers' work, and in their own writing; we need to be able to encode, persist, and decode the highlighting work that students submit.
import Json.Decode exposing (..) import Json.Decode.Pipeline exposing (..) -- This is the package NoRedInk/elm-decode-pipeline {-| HighlightedText describes the "shape" of the data we're producing. `HighlightedText` is also a constructor. We can make a HighlightedText-type record by giving HighlightedText a Maybe String followed by a String--this is actually how decoders work and the reason that decoding is order-dependent. -} type alias HighlightedText = { highlighted : Maybe String , text : String } {-| This decoder can be used to translate from JSON, like {"highlighted": "Claim", "text": "Some highlighted content.."}, into Elm values: { highlighted = Just "Claim", , text = "Some highlighted content..." } -} decodeHighlightedText : Decoder HighlightedText decodeHighlightedText = decode HighlightedText |> required "highlighted" (nullable string) |> required "text" string
How do we create our model?
We've now decoded our incoming data but we haven't decided yet how it's going to live in our model. How do we turn this data into a model?
If we directly use the JSON representation of our data in our model then we're losing out on the opportunity to think about the best design of our model. Carefully designing your model has some clear advantages: you can make impossible states impossible, prevent bugs, and reduce your test burden.
Suppose, for instance, that we want to leverage the type system as we display what is/isn't highlighted. Specifically, there are three possible kinds of highlighting: we might highlight the "Claim", the "Evidence", or the "Reasoning" of a particular piece of writing. Here's our desired modeling:
type alias Model = { writing : List Chunk } type Chunk = Claim String | Evidence String | Reasoning String | Plain String
So now that we've carefully designed our Model, why don't we decode straight into it? Let's try to write a single combined decoder/initializer for this and see what happens.
import Model exposing (Chunk(..), Model) import Json.Decode exposing (..) import Json.Decode.Pipeline exposing (..) decoder : Decoder Model decoder = decode Model |> required "highlightedWriting" (list decodeChunk) decodeChunk : Decoder Chunk decodeChunk = let asResult : Maybe String -> String -> Decoder Chunk asResult highlighted value = toChunkConstructor highlighted value in decode asResult |> required "highlighted" (nullable string) |> required "text" string |> resolve toChunkConstructor : Maybe String -> String -> Decoder Chunk toChunkConstructor maybeString text = case maybeString of Just "Claim" -> succeed succeed succeed succeed fail
The decodeChunk logic isn't terrible right now, but the possibility for future hard-to-maintain complexity is certainly there. The model we're working with has a single field, and the highlighted data itself is simple. What happens if we have another data set that we want to use in conjunction with the highlighted text? Maybe we have a list of students with ids and the highlights may have been done by different students, and we want to combine the highlights with the students... It's not impossible, but it's not as straightforward as we might want.
So let's try a different strategy and do as little work as possible in our decoders. Instead of decoding straight into our Model we'll decode into a type that resembles the original JSON as closely as possible, a type which at NoRedInk we usually call Flags.
import Json.Decode exposing (..) import Json.Decode.Pipeline exposing (..) type alias Flags = { highlightedWriting : List HighlightedText } decoder : Decoder Flags decoder = decode Flags |> required "highlightedWriting" (list decodeHighlightedText) type alias HighlightedText = { highlighted : Maybe String , text : String } decodeHighlightedText : Decoder HighlightedText decodeHighlightedText = decode HighlightedText |> required "highlighted" (nullable string) |> required "text" string
Note that HighlightedText should only be used as a "Flags" concept. There might be other places in the code that need a similar type but we'll create a separate alias in those places. This enforces the boundary between the Flags module and the rest of the application: sometimes it's tempting to "DRY" up code by keeping type aliases in common across files, but this becomes confusing because it ties together modules that have nothing to do with one another if the data that we're describing differs in purpose. Internal Flags types ought to describe the shape of the JSON. Type aliases used in the Model ought to be the best representation available for application state. Conflating the types that represent these two distinct ideas may eliminate code, but also eliminates some clarity.
We're not home yet. We now have a Flags type but we'd really like a Model. Let's write an initializer to bridge that divide.
import Json.Decode exposing (..) import Json.Decode.Pipeline exposing (..) {- FLAGS -} type alias Flags = { highlightedWriting : List HighlightedText } decoder : Decoder Flags decoder = decode Flags |> required "highlightedWriting" (list decodeHighlightedText) type alias HighlightedText = { highlighted : Maybe String , text : String } decodeHighlightedText : Decoder HighlightedText decodeHighlightedText = decode HighlightedText |> required "highlighted" (nullable string) |> required "text" string {- MODEL -} type alias Model = { writing : List Chunk } type Chunk = Claim String | Evidence String | Reasoning String | Plain String {- CREATING A MODEL -} init : Flags -> Model init flags = { writing = List.map initChunk flags.highlightedWriting } initChunk : HighlightedText -> Chunk initChunk { highlighted, text } = text |> case highlighted of Just "Claim" -> Claim Just "Evidence" -> Evidence Just "Reasoning" -> Reasoning Just otherString -> -- For now, let's default to Plain Plain Nothing -> Plain
We're still doing the same transformation as before but it's easier to trace data through the initialization path now: We decode JSON to Flags using a very simple decoder and then Flags to Model using an init function with a type that actually shows what transformation is happening. Plus, as we'll see in the next section, we have more control and flexibility in how we handle the boundary of our Elm application!
Leveraging Decoders
The example code we've been using involves modeling a paragraph with three different kinds of highlights. This example is actually motivated by a piece of NoRedInk's Writing product, in which students highlight the component parts of their own writing. Earlier this year, students were only ever asked to highlight the Claim, Evidence, and Reasoning of paragraph-length submissions. This quarter, we've worked to expand that functionality in order to support exercises on writing and recognizing good transitions; on embedding evidence; on identifying speaker, listener, and plot context; and more. But uh-oh--our Writing system assumed that we'd only ever be highlighting the Claim, Evidence, and Reasoning of a paragraph! We'd been storing JSON blobs with strings like "claim" in them as our writing samples!
So what did this mean for us?
We needed to store our JSON blobs in a new format--the existing format was too tightly-tied to Claim, Evidence, and Reasoning
We needed to migrate our existing JSON blobs to the new format
We needed to support reading both formats at the same time
In a world where the frontend application has a strict edge between JSON values and Elm values and a strict edge between Elm values and the Model, this is straightforward.
import Json.Decode exposing (..) import Json.Decode.Pipeline exposing (..) type alias Flags = { highlightedWriting : List HighlightedText } {-| This decoder supports the old and the new formats. -} decoder : Decoder Flags decoder = decode Flags |> custom (oneOf [ paragraphContent, deprecatedParagraphContent ]) type alias HighlightedText = { highlighted : Maybe String , text : String } paragraphContent : Decoder (List HighlightedText) paragraphContent = {- We've skipped including the actual decoder in order to emphasize that we are easily supporting two radically different JSON blob formats--it doesn't actually matter what the internals of those blobs are! -} field "newVersionOfHighlightedWriting" (succeed []) deprecatedParagraphContent : Decoder (List HighlightedText) deprecatedParagraphContent = field "highlightedWriting" (list deprecatedDecodeHighlightedText) deprecatedDecodeHighlightedText : Decoder HighlightedText deprecatedDecodeHighlightedText = decode HighlightedText |> required "highlighted" (nullable string) |> required "text" string
Conclusion
As we've seen, it's easier to reason about data when each transformation of the data is done independently, and using decoders well can help us handle the intermediate modeling moments that are common in software development.
We hope that you're interested in how NoRedInk's Writing platform works: We've loved working on it and we hope you'll ask us about it! We've gotten to work with some really cool tools and to try out cool architectural patterns (hiii event log strategy with Elm), all while building a pedagogically sound product of which we're proud. In the meantime, may your modules have clean APIs, your editor run elm-format on save, and your internet be fast.
Tessa Kelly @t_kelly9 Engineer at NoRedInk
Jasper Woudenberg @jasperwoudnberg Engineer at NoRedInk
2 notes
·
View notes
Text
Good Typescript reference
Learn TypeScript in Y Minutes
// There are 3 basic types in TypeScript let isDone: boolean = false; let lines: number = 42; let name: string = "Anders"; // But you can omit the type annotation if the variables are derived // from explicit literals let isDone = false; let lines = 42; let name = "Anders"; // When it's impossible to know, there is the "Any" type let notSure: any = 4; notSure = "maybe a string instead"; notSure = false; // okay, definitely a boolean // Use const keyword for constants const numLivesForCat = 9; numLivesForCat = 1; // Error // For collections, there are typed arrays and generic arrays let list: number[] = [1, 2, 3]; // Alternatively, using the generic array type let list: Array<number> = [1, 2, 3]; // For enumerations: enum Color { Red, Green, Blue }; let c: Color = Color.Green; // Lastly, "void" is used in the special case of a function returning nothing function bigHorribleAlert(): void { alert("I'm a little annoying box!"); } // Functions are first class citizens, support the lambda "fat arrow" syntax and // use type inference // The following are equivalent, the same signature will be inferred by the // compiler, and same JavaScript will be emitted let f1 = function (i: number): number { return i * i; } // Return type inferred let f2 = function (i: number) { return i * i; } // "Fat arrow" syntax let f3 = (i: number): number => { return i * i; } // "Fat arrow" syntax with return type inferred let f4 = (i: number) => { return i * i; } // "Fat arrow" syntax with return type inferred, braceless means no return // keyword needed let f5 = (i: number) => i * i; // Interfaces are structural, anything that has the properties is compliant with // the interface interface Person { name: string; // Optional properties, marked with a "?" age?: number; // And of course functions move(): void; } // Object that implements the "Person" interface // Can be treated as a Person since it has the name and move properties let p: Person = { name: "Bobby", move: () => { } }; // Objects that have the optional property: let validPerson: Person = { name: "Bobby", age: 42, move: () => { } }; // Is not a person because age is not a number let invalidPerson: Person = { name: "Bobby", age: true }; // Interfaces can also describe a function type interface SearchFunc { (source: string, subString: string): boolean; } // Only the parameters' types are important, names are not important. let mySearch: SearchFunc; mySearch = function (src: string, sub: string) { return src.search(sub) != -1; } // Classes - members are public by default class Point { // Properties x: number; // Constructor - the public/private keywords in this context will generate // the boiler plate code for the property and the initialization in the // constructor. // In this example, "y" will be defined just like "x" is, but with less code // Default values are also supported constructor(x: number, public y: number = 0) { this.x = x; } // Functions dist() { return Math.sqrt(this.x * this.x + this.y * this.y); } // Static members static origin = new Point(0, 0); } // Classes can be explicitly marked as implementing an interface. // Any missing properties will then cause an error at compile-time. class PointPerson implements Person { name: string move() {} } let p1 = new Point(10, 20); let p2 = new Point(25); //y will be 0 // Inheritance class Point3D extends Point { constructor(x: number, y: number, public z: number = 0) { super(x, y); // Explicit call to the super class constructor is mandatory } // Overwrite dist() { let d = super.dist(); return Math.sqrt(d * d + this.z * this.z); } } // Modules, "." can be used as separator for sub modules module Geometry { export class Square { constructor(public sideLength: number = 0) { } area() { return Math.pow(this.sideLength, 2); } } } let s1 = new Geometry.Square(5); // Local alias for referencing a module import G = Geometry; let s2 = new G.Square(10); // Generics // Classes class Tuple<T1, T2> { constructor(public item1: T1, public item2: T2) { } } // Interfaces interface Pair<T> { item1: T; item2: T; } // And functions let pairToTuple = function <T>(p: Pair<T>) { return new Tuple(p.item1, p.item2); }; let tuple = pairToTuple({ item1: "hello", item2: "world" }); // Including references to a definition file: /// <reference path="jquery.d.ts" /> // Template Strings (strings that use backticks) // String Interpolation with Template Strings let name = 'Tyrone'; let greeting = `Hi ${name}, how are you?` // Multiline Strings with Template Strings let multiline = `This is an example of a multiline string`; // READONLY: New Feature in TypeScript 3.1 interface Person { readonly name: string; readonly age: number; } var p1: Person = { name: "Tyrone", age: 42 }; p1.age = 25; // Error, p1.x is read-only var p2 = { name: "John", age: 60 }; var p3: Person = p2; // Ok, read-only alias for p2 p3.x = 35; // Error, p3.x is read-only p2.x = 45; // Ok, but also changes p3.x because of aliasing class Car { readonly make: string; readonly model: string; readonly year = 2018; constructor() { this.make = "Unknown Make"; // Assignment permitted in constructor this.model = "Unknown Model"; // Assignment permitted in constructor } } let numbers: Array<number> = [0, 1, 2, 3, 4]; let moreNumbers: ReadonlyArray<number> = numbers; moreNumbers[5] = 5; // Error, elements are read-only moreNumbers.push(5); // Error, no push method (because it mutates array) moreNumbers.length = 3; // Error, length is read-only numbers = moreNumbers; // Error, mutating methods are missing
0 notes
Photo
Build User Registration with Node, React, and Okta
This article was originally published on OKTA Blog. Thank you for supporting the partners who make SitePoint possible.
Today’s internet users expect a personalized experience. Developers must learn to develop websites that provide that personalized experience while keeping their user’s information private. Modern web applications also tend to have a server-side API and a client-side user interface. it can be challenging to get make both ends aware of the currently logged in user. In this tutorial, I will walk you through setting up a Node API that feeds a React UI, and build a user registration that keeps the user’s information private and personal.
In this tutorial, I won’t use any state management libraries like Redux or ReduxThunk. In a more robust application, you’ll probably want to do that, but it will be easy to wire up Redux and ReduxThunk and then add the fetch statements used here as your thunks. For the sake of simplicity, and to keep this article focused on adding user management, I’ll be adding fetch statements into componentDidMount functions.
Install the Node and React Prerequisites
To set up the base application, make sure you have these basic tools installed:
Node (8+)
npm (5+)
create-react-app (npm package)
express-generator (npm package)
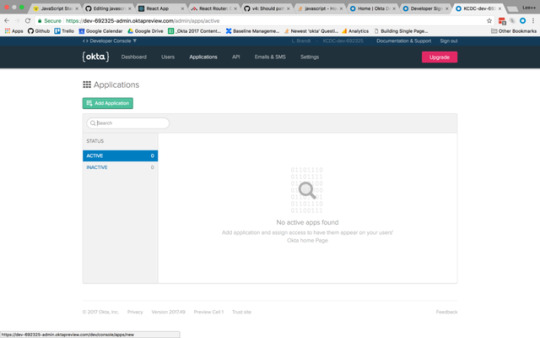
You’ll also need an Okta developer account.
To install Node and npm, you can follow the instructions for your operating system at https://nodejs.org/en/.
Then just install the two npm packages with the npm command line:
npm i -g create-react-app express-generator
Now you’re ready to set up the basic application structure.
Scaffold the Base Application
Go to the folder where you want your application to live and create a new folder for it:
mkdir MembershipSample cd MembershipSample express api create-react-app client
This will create two folders in the MembershipSample folder called api and client, with a NodeJS and Express application in the api folder and a base React application in the client folder. So your folder structure will look like:
MembershipSample
api
client
To make this next part easier, open two terminals or terminal tabs; one to the express app folder api and the other to the React app folder client.
By default, the React app and the Node app will both run on port 3000 in development, so you’ll need to get the API to run on a different port and then proxy it in the client app.
In the api folder, open the /bin/www file and change the port the API will be running on to 3001.
/** * Get port from environment and store in Express. */ var port = normalizePort(process.env.PORT || '3001'); app.set('port', port);
Then set up the proxy for the API in the client application so that you can still call /api/{resource} and have it proxied from port 3000 to port 3001. In the client/package.json file, add the proxy setting below name:
"name": "client", "proxy": "http://localhost:3001"
Lastly, don’t forget to run npm install or yarn install for each subfolder (api and client) to ensure that the dependencies are installed.
You can now run both applications by running npm start or yarn start in the appropriate folders for the API and the client application.
Add an Okta Application
If you haven’t already done so, create a free forever developer account at https://developer.okta.com/signup/.
Once you’ve registered, click on Applications in the top menu. Then click the Add Application button.
You will then be taken to the application creation wizard. Choose the Single-Page App button and click Next at the bottom.
On the next screen, you will see the default settings provided by the single-page application template. Change the name of the application to something more descriptive, like “Membership Application”. Also, change the base URIs and the login redirect URIs settings to use port 3000 because that is where your application will be running. The rest of the default settings are fine.
Then click the Done button at the bottom.
Once the application has been created, select it from the applications listing, and click on the General tab to view the general settings for your application.
At the bottom, you will see a Client ID setting (yours won’t be blurred out, obviously). Copy this to use in your React application. You will also need your Okta organization URL, which you can find at the top left of the dashboard page. It will probably look something like “https://dev-XXXXXX.oktapreview.com”.
Add Authentication to the ReactJS Application
Now that the application is created, add authentication using Okta by adding a couple of npm dependencies. From the client folder run:
npm install @okta/okta-react react-router-dom --save
Or, if you’re using the yarn package manager:
yarn add @okta/okta-react react-router-dom
Add a file to the client/src folder called app.config.js. The contents of the file are:
export default { url: '{yourOktaDomain}', issuer: '{yourOktaOrgUrl}/oauth2/default', redirect_uri: window.location.origin + '/implicit/callback', client_id: '{yourClientID}' }
Then, setup the index.js file to use the React Router and Okta’s React SDK. When the index.js file is complete, it will look like this:
import React from 'react'; import ReactDOM from 'react-dom'; import { BrowserRouter as Router } from 'react-router-dom'; import { Security } from '@okta/okta-react'; import './index.css'; import config from './app.config'; import App from './App'; import registerServiceWorker from './registerServiceWorker'; function onAuthRequired({ history }) { history.push('/login'); } ReactDOM.render( <Router> <Security issuer={config.issuer} client_id={config.client_id} redirect_uri={config.redirect_uri} onAuthRequired={onAuthRequired}> <App /> </Security> </Router>, document.getElementById('root') ); registerServiceWorker();
Once complete, you will have added the BrowserRouter component (aliased as “Router”) from the React Router, and the Security component from Okta’s React SDK. Also that the app.config.js file is imported as “config” so that you can use the config values in the properties required by the Security component.
You will also have surrounded the App component with the Router and Security components, passing in the values specified. The onAuthRequired method, simply tells Okta’s React SDK that when somebody tries to access a secure route and they are not logged in, redirect them to the login page.
Everything else will have come from the create-react-app command you ran previously.
Add Pages to the ReactJS App
Before adding any routes to the React app, create some components to handle the routes you want to add.
Add a components folder to the client/src folder. This is where all your components will live and the easiest way to organize them. Then create a home folder for your home page components. For now there will be just one, but there may be more components used only for the home page later. Add a HomePage.js file to the folder with the following contents:
import React from 'react'; export default class HomePage extends React.Component{ render(){ return( <h1>Home Page</h1> ); } }
This is all you really need for the home page at the moment. The most important point is to make the HomePage component a class type. Even though right now it only contains a single h1 tag, it is meant to be a “page”, meaning it will likely contain other components, so it’s important that it be a container component.
Next, create an auth folder in components. This is where all components that have to do with authentication will live. In that folder, create a LoginForm.js file.
The first thing to note is that you’ll be using the withAuth higher-order component from Okta’s React SDK to wrap the entire login form. This adds a prop to the component called auth, making it possible to access things like the isAuthenticated and redirect functions on that higher-order component.
The code for the LoginForm component is as follows:
import React from 'react'; import OktaAuth from '@okta/okta-auth-js'; import { withAuth } from '@okta/okta-react'; export default withAuth(class LoginForm extends React.Component { constructor(props) { super(props); this.state = { sessionToken: null, error: null, username: '', password: '' } this.oktaAuth = new OktaAuth({ url: props.baseUrl }); this.handleSubmit = this.handleSubmit.bind(this); this.handleUsernameChange = this.handleUsernameChange.bind(this); this.handlePasswordChange = this.handlePasswordChange.bind(this); } handleSubmit(e) { e.preventDefault(); this.oktaAuth.signIn({ username: this.state.username, password: this.state.password }) .then(res => this.setState({ sessionToken: res.sessionToken })) .catch(err => { this.setState({error: err.message}); console.log(err.statusCode + ' error', err) }); } handleUsernameChange(e) { this.setState({ username: e.target.value }); } handlePasswordChange(e) { this.setState({ password: e.target.value }); } render() { if (this.state.sessionToken) { this.props.auth.redirect({ sessionToken: this.state.sessionToken }); return null; } const errorMessage = this.state.error ? <span className="error-message">{this.state.error}</span> : null; return ( <form onSubmit={this.handleSubmit}> {errorMessage} <div className="form-element"> <label>Username:</label> <input id="username" type="text" value={this.state.username} onChange={this.handleUsernameChange} /> </div> <div className="form-element"> <label>Password:</label> <input id="password" type="password" value={this.state.password} onChange={this.handlePasswordChange} /> </div> <input id="submit" type="submit" value="Submit" /> </form> ); } });
The other thing of note here is the OktaAuth library being imported. This is the base library for doing things like signing in using the Okta application you created previously. You’ll notice an OktaAuth object being created in the constructor that gets a property of baseUrl passed to it. This is the URL for the issuer that is in your app.config.js file. The LoginForm component is meant to be contained in another component, so you’ll have to create a LoginPage.js file to contain this component. You’ll use the withAuth higher-order component again, to get access to the isAuthenticated function. The contents of LoginPage.js will be:
Continue reading %Build User Registration with Node, React, and Okta%
by Lee Brandt via SitePoint http://ift.tt/2DJsndJ
0 notes
Text
Insights into Laravel package design
This tutorial brought to you by
Laravel is a massively influential PHP framework, and its simple but powerful design means that it’s easy to utilize packages in your application. In this blog post, we will look at the basics of creating and installing Laravel packages.
Where do I start?
Composer is massively important in the PHP world, and Laravel is no exception to this. The Laravel framework core specifies its dependencies using Composer and so do Laravel applications by default. With this in mind, it is totally natural for our packages to also define their dependencies using Composer, and to be distributed via Packagist using Composer.
For an introduction to Composer and Packagist, you may want to read the previous two blogs in this series: Building maintainable PHP apps using Composer and Packagist and the PHP ecosystem
In this blog post, we’ll be building a small package by means of an example. You can follow along with the example here.
The basic structure of a package
At the core of things, remember there’s actually nothing special about a Laravel package compared to any other PHP package. Most people start off with:
A readme – README.md
A license file – LICENSE
A composer file – composer.json
A gitignore file – .gitignore
Your code folder – src
So, we will write a short readme, choose a license, add a basic composer.json file, and a .gitignore file:
We’ve named our package foo-bar/example, and namespaced the source folder to Foo\Bar\Example.
Adding your code
Next, we will write a short class that will give us random cat names!
Facades and Containers
Our class can be used in any PHP project, Laravel or not. What if we want to make it available through the Laravel service container, or a Laravel facade?
First, we add a service provider. This binds an instance of Foo\Bar\Example\Cats to the service container and allows us to access it via app(‘example.cats’) and to inject it into classes with a parameter typed with Foo\Bar\Example\Cats. Users of your package can register this service provider in order to setup the bindings.
Your facade means that your package users can now call:
Foo\Bar\Example\Facades\Cat::generate()
or Cat::generate() if aliased or imported.
Since we’re making use of the support component, we will require it:
Configuration
Suppose we want to add the ability to customize the names of the cats provided by the generator? We can do this using Laravel’s config facilities.
First, we modify our code to receive the desired names through the constructor. It’s important that we do this rather than trying to read the configuration from inside the class in the interest of avoiding coupling our class to the configuration. One common error I see is to not only couple code where not needed, but more seriously, to make the assumption that the global config function is available for use. You cannot assume this unless you require all of laravel/framework, and similarly, you can never assume Config is aliased to Illuminate/Support/Facades/Config, or even that facades are enabled (in the case of Lumen, or other custom frameworks). Never write “use Config;” unless you know that alias exists.
So, we modify our constructor:
And write a configuration file with the cat names:
Users can publish this file to their application in order to enter their configuration. There is actually no requirement to place this file in this exact location in your package code since Laravel 5 is much more flexible than Laravel 4; however, I think this makes for a good place to put it.
Next, we define our service provider:
There’s a lot going on here! Let’s walk through it. We will start by looking at the modifications to the register function. Since our Cats class now takes an array of cat names in the constructor, we need to pass one. We read the configuration from the file “cats.php”, entry “names”.
Our boot function is needed to register our configuration file with the framework. It’s actually okay to call the global config_path function here, since we only ever enter that branch of the code if we know the container is an instance of a Laravel application, so it must be the case that the whole Laravel framework is there.
One should also note that it’s absolutely fine in PHP to import classes that don’t exist. The only side effect of an import statement is to bind the long name to the short name. With this is mind, it really does mean that PHP doesn’t care if the class doesn’t exist because it doesn’t try to load it. Similarly, in an instance of check, PHP will not bother checking if the class provided actually exists since the implementation seemly needs to perform reflection on the object.
Testing
Before we finish, it is only natural that we take a very quick look at testing.
The most widely used framework for this is PHPUnit. This can be installed globally or added as a local composer dependency.
We pull in PHPUnit, and add a basic config file:
We now write a few simple tests to check if our Cats class is behaving as it should:
We can run our tests:
Conclusion
We have seen how to write a simple Laravel app with configuration, a facade, and basic tests. Now, go build something great!
You can find the Laravel example in this blog post here on GitHub.
Are you monitoring your Laravel application for errors? Try Bugsnag’s Laravel error reporting to gain insight on bugs and fix them for your users.
via Laravel News http://ift.tt/2uFfi59
0 notes
Photo

10 Languages That Compile to JavaScript
Modern applications have different requirements than simple websites. But the browser is a platform with a (mostly) fixed set of technologies available, and JavaScript remains as the core language for web applications; any application that needs to run in the browser has to be implemented in that language.
We all know that JavaScript is not the best language for every task, and when comes to complex applications, it might fall short. To avoid this problem, several new languages and transpilers of existing ones have been created, all of them producing code that can work in the browser without writing any line of JavaScript and without thinking about the limitations of the language.
This article includes a list of ten interesting languages that can be transpiled to JavaScript to be executed in the browser or on a platform like Node.js.
Dart
Dart is a classical, object-oriented language where everything is an object and any object is an instance of a class (objects can act as functions too.) It is specially made to build applications for browsers, servers, and mobile devices. It is maintained by Google and is the language that powers the next generation AdWords UI, the most important product of Google regarding revenue, which is in itself a proof of its power at scale.
The language can be translated to JavaScript to be used in a browser, or be directly interpreted by the Dart VM, which allows you to build server applications too. Mobile applications can be made using the Flutter SDK.
Complex applications also require a mature set of libraries and language features specially designed for the task, and Dart includes all of this. An example of a popular library is AngularDart, a version of Angular for Dart.
It allows you to write type-safe code without being too intrusive; you can write types, but you are not required to do so since they can be inferred. This allows for rapid prototyping without having to overthink the details, but once you have something working, you can add types to make it more robust.
Regarding concurrent programming in the VM, instead of shared-memory threads (Dart is single-threaded), Dart uses what they call Isolates, with their own memory heap, where communication is achieved using messages. In the browser, the story is a little different: instead of creating new isolates, you create new Workers.
// Example extracted from dartlang.org import 'dart:async'; import 'dart:math' show Random; main() async { print('Compute π using the Monte Carlo method.'); await for (var estimate in computePi()) { print('π ≅ $estimate'); } } /// Generates a stream of increasingly accurate estimates of π. Stream<double> computePi({int batch: 1000000}) async* { var total = 0; var count = 0; while (true) { var points = generateRandom().take(batch); var inside = points.where((p) => p.isInsideUnitCircle); total += batch; count += inside.length; var ratio = count / total; // Area of a circle is A = π⋅r², therefore π = A/r². // So, when given random points with x ∈ <0,1>, // y ∈ <0,1>, the ratio of those inside a unit circle // should approach π / 4. Therefore, the value of π // should be: yield ratio * 4; } } Iterable<Point> generateRandom([int seed]) sync* { final random = new Random(seed); while (true) { yield new Point(random.nextDouble(), random.nextDouble()); } } class Point { final double x, y; const Point(this.x, this.y); bool get isInsideUnitCircle => x * x + y * y <= 1; }
Get started with Dart
TypeScript
TypeScript is a superset of JavaScript; a valid JavaScript program is also valid TypeScript but adding static typing. The compiler can also work as a transpiler from ES2015+ to current implementations, so you always get the latest features.
Unlike many other languages, TypeScript keeps the spirit of JavaScript intact, only adding features to improve the soundness of the code. These are type annotations and other type-related functionality that makes writing JavaScript more pleasant, thanks to the enabling of specialized tools like static analyzers and other tools to aid in the refactoring process. Also, the addition of types improve the interfaces between the different components of your applications.
Type inference is supported, so you don’t have to write all the types from the beginning. You can write quick solutions, and then add all the types to get confident about your code.
TypeScript also has support for advanced types, like intersection types, union types, type aliases, discriminated unions and type guards. You can check out all these in the Advanced Types page in the TypeScript Documentation site.
JSX is also supported by adding the React typings if you use React.
class Person { private name: string; private age: number; private salary: number; constructor(name: string, age: number, salary: number) { this.name = name; this.age = age; this.salary = salary; } toString(): string { return `${this.name} (${this.age}) (${this.salary})`; } }
Get started with TypeScript
Elm
Elm is a purely functional programming language that compiles to JS, HTML, and CSS. You can build a complete site with just Elm, making it a great alternative to JavaScript frameworks like React. The applications that you build with it automatically use a virtual DOM library, making it very fast. One big plus is the built-in architecture that makes you forget about data-flow and focus on data declaration and logic instead.
In Elm, all functions are pure, which means that they will always return the same output for a given input. They can’t do anything else unless you specify it. For example, to access a remote API you would create command functions to communicate with the external world, and subscriptions to listen for responses. Another point for purity is that values are immutable; when you need something, you create new values, instead of modifying them.*
The adoption of Elm can be gradual; it is possible to communicate with JavaScript and other libraries using ports. Although Elm hasn’t reached version 1 yet, it is being used for complex and large applications, making it a feasible solution for complex applications.
One of the most attractive features of Elm is the beginner-friendly compiler, which, instead of producing hard-to-read messages, generates code that helps you to fix your code. If you are learning the language, the compiler itself can be of big help.
Continue reading %10 Languages That Compile to JavaScript%
by James Kolce via SitePoint http://ift.tt/2v18fUX
0 notes
Text
What's New in Laravel 5.5
At the time of this writing, Laravel 5.5 is not released yet. It is slated, as the next major release, for release in July 2017. To play around with new features and changes, you need to grab the dev release of Laravel using this Laravel Installer command:
laravel new project --dev
Get Ahead with PHP 7.0+
Laravel 5.5 will require PHP 7.0+. Along with developer features, PHP 7 includes speed improvements which will decrease CPU load by half. So, you should definitely make this upgrade. And if you are using Laravel 5, making this upgrade will be a lot easier since you using the latest version of PHP.
The Next LTS (Long Term Support) Release
After Laravel 5.1, Laravel 5.5 is scheduled to be the next LTS release. This includes two years of bug fixes and three years of security updates.
Welcome Back: Whoops!
Whoops, an error-handling framework, which used to be used by Laravel 4, was removed with the release of Laravel 5.0. But with Laravel 5.5, it's coming back pre-installed. What Whoops actually does is that it makes the annoying PHP errors and exceptions a little less annoying by changing how they appear. As you can see in the image that it sports the lines of the file in which the error or exception occurred and traces back the operation till inception. And not forgetting to mention, it has zero dependencies (currently('pre-laravel-55')).
"vendor:publish" Gets a Provider Prompt
In previous versions of Laravel, running the vendor:publish command will publish views, configs, migrations and other resources of all vendors. But in Laravel 5.5, running this command will prompt you to select a provider or tag, making it easier to publish only the ones you want. You can also bypass this prompt by specifying the --all' or '--provider' flag with thepublish` command.
Email Themes
Laravel 5.5 adds the ability to specify a custom theme directly to Mailable classes. You can create a CSS style-sheet like this:
touch resources/views/vendor/mail/html/themes/batman.css
And then specify this filename as a property in your Mailable class.
class SendInvoice extends Mailable { protected $theme = 'batman'; ... }
Rendering Mailables to the Browser
It can be tedious to test your email templates across email clients. One way to test them is to render them to the browser so that you can make instant changes. But it is not an easy task. Luckily, Laravel 5.5 adds the facility to display them directly from your routes.
You can create a Mailable like this:
php artisan make:mail UserWelcome --markdown=emails.user.subscription.canceled
And then render it through a route:
Route::get('/no/way', function () { return new App\Mail\UserSubscriptionCanceled(); });
There are other tools like Litmus, which solve this problem, but they are pretty expensive relative to this tediously trivial task.
Fresh Migrations
Laravel 5.5 adds another Artisan command to the migrate: namespace. This is similar to migrate:refresh but rather than rolling back your existing migrations, it drops all tables and migrates them from start. The difference between rolling back migrations and dropping tables is that rolling back migrations runs the drop method for each of them. Whilst, the migrate:fresh command simply drops all off of the tables and starts from scratch.
Automatic Package Discovery
In Laravel 5.4 and all versions before, pulling a Laravel package required registering its service providers and adding aliases. Laravel 5.5 adds the ability for packages to automatically register service providers and add aliases through the package's composer.json file like this:
"extra": { "laravel": { "providers": [ "The\\Dark\\Knight\\BatmanServiceProvider" ], "aliases": { "Bar": "The\\Dark\\Knight\\Batman" } } }
If you are a package developer, then things can't be much easier for your package users.
Frontend Presets
Out of the box, Laravel includes some CSS and JavaScript scaffolding to help accelerate coding the nitty-gritty. Although you could remove them and start over with your personal preferences, the suggestion was only limited to the Vue framework. Laravel 5.5 introduces 3 frontend presets: Bootstrap, Vue, React and an option choose your own. With Vue being the default preset, you can change the preset to react using this command:
php artisan preset react
You can change react in the above command to vue, bootstrap or none based on your preference.
Error Pages: Design Improvement
In Laravel 5.5, a little change is made in the design of the error pages like 404 or 50* errors: there are some design additions with Flexbox getting the error message centered on the page.
Before Laravel 5.5:
In Laravel 5.5:
Custom Error Reporting
Laravel 5.5 adds support for defining a report method on any custom exception. In Laravel 5.4, you had to check in the Handler class's report method if a particular exception was thrown. So that you could do something like send an email or report to your app's monitoring service. You were doing something like this:
... class Handler extends ExceptionHandler { ... public function report(Exception $exception) { if ($exception instanceof CustomException) { // Send email } parent::report($exception); } }
But with Laravel 5.5, you can get rid of this and register the report method on your custom exception class. Laravel checks to see if there is a report method on your exception class and if it does: calls it.
Streamlined Request Validation
Laravel 5.5 comes with two changes to Request feature. One is that you can now directly call the validate method on your Request instance. So instead of using the controller validator, you can call the validator on your Request instance. You also no longer need to pass the request as the first argument to the validator. Here is an example:
... public function store() { request()->validate([ 'title' => 'required', 'body' => 'required' ]); return Post::create(request(['title', 'body'])); }
The second change made is that the validator returns the request data which you can store in a variable and pass on to the create method of the model.
... public function store() { $post = request()->validate([ 'title' => 'required', 'body' => 'required' ]); // $data = request()->only('title', 'body'); return Post::create($post); }
You need to be careful with this since the data returned by the validator will only contain the fields defined in the rules. This adds a little security but you can loose data if some fields were not defined rules for. To avoid this trap, you can add the field with an empty rule like this:
public function store() { $post = request()->validate([ 'title' => 'required', 'body' => 'required', 'fieldWithNoRules' => '', 'andAnotherOne' => '' ]); // $data = request()->only('title', 'body'); return Post::create($post); }
Exception Helper Functions
Coming to Laravel 5.5 are two new helper functions to help you throw exceptions more elegantly. They are: throw_if and throw_unless, and they do exactly what they say. If you want to throw an exception based on a condition then these may help you reduce a conditional block to a single line. They both accept three arguments with the third being optional. First one is a boolean, second is the exception class and third is the exception message passed in case if you didn't pass with the instantiation of the exception in the second argument. throw_if throws the exception if the boolean is positive and throw_unless throws the exception when the boolean is negative. Here are the examples:
// For `throw_if: $foo = true; throw_if($foo, new BarException('Foo is true')); // or throw_if($foo, BarException::class, 'Foo is true'); // For `throw_unless: $phoo = false; throw_unless($phoo, new BazException('Phoo is false')); // or throw_unless($phoo, BazException::class, 'Phoo is false');
Custom Validation Rules
Laravel 5.5 is coming with a new feature for adding custom validation rules. Custom validation rules are nothing new but with Laravel 5.5 you can have a dedicated class to handle the validation. To define a custom validation rule, you need to create a class with two methods: passes and message. You can place this class anywhere like in the App\Rules namespace. The passes method accepts two arguments: attribute and value, which you can use to validate the field.
<?php namespace App\Rules; use Illuminate\Contracts\Validation\Rule; class CustomRule implements Rule { /** * Determine if the validation rule passes. * * @param string $attribute * @param mixed $value * @return bool */ public function passes($attribute, $value) { // must return true or false for the validation to pass or fail } /** * Get the validation error message. * * @return string */ public function message() { // return a string here for the failing condition } }
Your custom rule should implement the Laravel's Illuminate\Contracts\Validation\Rule contract. You can use this custom validation rule anywhere like in a Form Request class or in the controller validator or the validator from the Request instance. If you are using a custom rule then you can't pass a string with rules separated by a comma. You need to pass each rule as a single element grouped in an array like this:
$request->validate([ 'someField' => [ 'required', 'min:4', new CustomRule() ] ]);
You may also inject any dependency to the constructor if you want. This class-based approach makes custom validation a lot easier.
Model Factory Generators
In Laravel 5.5 you can easily generate model factories with a new Artisan command called make:factory. Here is an example:
php artisan make:factory PostFactory
This will make a new file called PostFactory.php in the database/factories folder. What makes it a lot better is that you can also generate a factory while making a model.
php artisan make:model Post -f
You may also pass the -c flag to add a controller and the -m flag to add a migration. This will help in quickly whipping up a resource.
Miscellany
One minor change is that if you forget to include the CSRF field in a form then it presents you with better inactivity error page. So, if you see something like that, then be sure that it's related to CSRF.
There is another minor change that will help you in building APIs. Now you get a JSON stack trace rather than HTML markup if an error occurs. This makes it a lot prettier to look at rather than the ugly markup if you are using a tool like Postman.
Conclusion
I hope this guide gets you prepared for the forthcoming goodness. So, This is all there is coming to Laravel 5.5.
Happy Coding!
via Scotch.io http://ift.tt/2sfOiDK
0 notes