#DHT11
Explore tagged Tumblr posts
Visit Tumblr Blog
Explore Tumblr blogs with no restrictions, modern design and the best experience.
Last Seen Tumblr Blogs


Fun Fact
130K people were victims of a chain letter scam that affected Tumblr in May 2011.
Text
ArduBlock - Arduino UNO mit DHT11 & LCD-Display
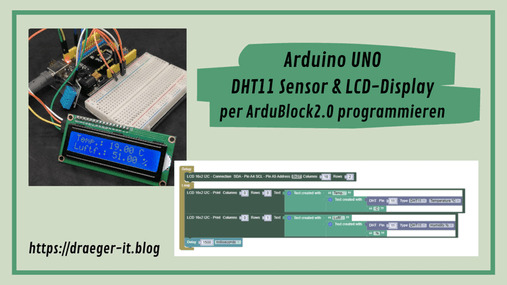
In diesem Beitrag möchte ich dir erläutern, wie du die Sensordaten des DHT11 Sensors auf einem LCD-Display am Arduino UNO anzeigen lassen kannst. Die Programmierung erfolgt hier mit der grafischen Entwicklungsumgebung ArduBlock.

ArduBlock - Arduino UNO mit DHT11 & LCD-Display Die grafische Entwicklungsumgebung ArduBlock habe ich dir bereits im Beitrag Arduino IDE : Erweiterung ArduBlock vorgestellt und erste Schritte gezeigt. Dieser Beitrag ist durch einen Wunsch entstanden, den Beitrag Calliope Mini mit DHT11 & LCD-Display auf einem Arduino UNO laufen zu lassen. Die Programmierung soll dabei so einfach sein wie in MakeCode von Microsoft, daher auch die Wahl zu ArduBlock.
Benötigte Ressourcen für dieses Projekt
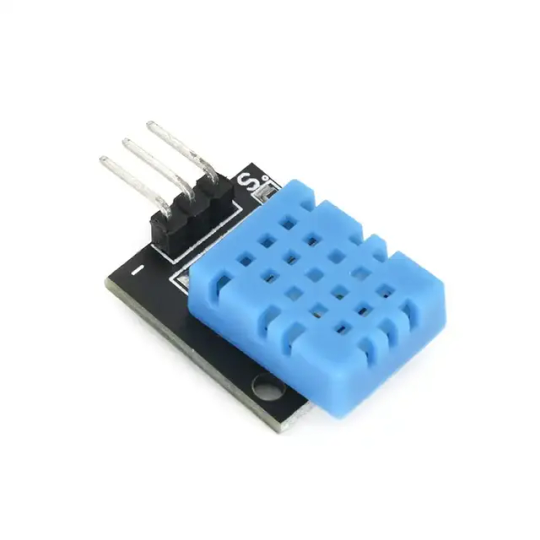
Wenn du die nachfolgende Schaltung aufbauen möchtest, um einen DHT11 Sensor & LCD-Display per ArduBlock am Arduino UNO programmieren möchtest, dann benötigst du: - einen Arduino UNO*, - ein USB-Datenkabel*, - einen DHT11 Sensor*, - ein LCD-Display*, - diverse Breadboardkabel*, Hinweis von mir: Die mit einem Sternchen (*) markierten Links sind Affiliate-Links. Wenn du über diese Links einkaufst, erhalte ich eine kleine Provision, die dazu beiträgt, diesen Blog zu unterstützen. Der Preis für dich bleibt dabei unverändert. Vielen Dank für deine Unterstützung! Den DHT11 Sensor erhältst du als einzelnen Baustein oder auch auf einer kleinen Platine mit einer fertigen Schaltung.

Varianten des DHT11 Sensors Ich bevorzuge die kleine Platine, da hier der Aufbau deutlich schneller vonstattengeht.
Download & Einrichten von ArduBlock
Im ersten Schritt laden wir die Anwendung ArduBlock von http://ardublock.ru/avtor/002/en.html herunter.

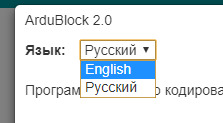
Wenn die ca. 300 MB große ZIP-Datei erfolgreich geladen und in ein beliebiges Verzeichnis entpackt wurde. Kann diese über die Datei ArduBlock 2.0appArduBlock.exe gestartet werden. In meinem Fall startete diese Anwendung mit russischer Sprache, hier musste ich zunächst über das Symbol "A" und dann aus der Auswahlliste die Sprache "English" wählen. Diese Auswahl muss zum schluss noch mit der Schaltfläche "OK" bestätigt werden.
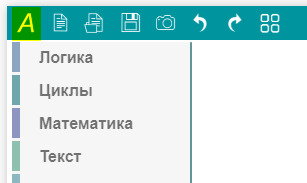
Nach einem kleinen reload wird die Anwendung ArduBlock 2.0 in englischer Sprache angezeigt.

Oberfläche der Anwendung ArduBlock 2.0 Alternativ kannst du auch DUINI-EDU verwenden, welches ich dir im gleichnamigen Beitrag bereits vorgestellt habe Arduino Programmierung mit DUINO EDU.
Aufbau der Schaltung am Arduino UNO
Für den Aufbau am Arduino UNO benötigen wir lediglich den Sensor, ein LCD-Display sowie sieben Breadboardkabel.
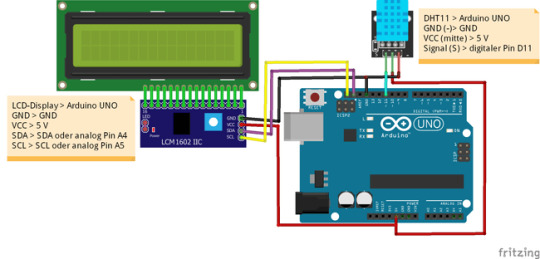
Schaltung - Arduino UNO mit DHT11 & LCD-Display Hier die Zusammenfassung der Pinbelegung aus der Grafik. BauteilArduino UNODHT11GNDGNDVCC5 VSignaldigitaler Pin D11LCD-DisplayGNDGNDVCC5 VSDASDA oder analoger Pin A4SCLSCL oder analoger Pin A5
Erstellen des Programmes - Arduino UNO mit DHT11 Sensor, LCD-Display in ArduBlock
Erstellen wir nun das kleine Programm in ArduBlock. Dazu ziehen wir verschiedene Elemente auf die Arbeitsfläche und verknüpfen diese miteinander. Bei der Ausgabe des Textes verbinden wir einige Elemente miteinander, um so den Text aufzubauen.

ArduBlock2 - Code für DHT11 Sensor & LCD-Display am Arduino UNO Wie du den Code aufbaust, zeige ich dir in dem nachfolgenden kleinen YouTube-Video auf meinem Kanal Draeger-IT. https://youtu.be/UqGbW-Ev7Jo Read the full article
0 notes
Text
DHT11 Temperature and Humidity Sensor

The DHT11 Digital Temperature And Humidity Sensor is a basic, ultra low-cost digital temperature and humidity sensor. It uses a capacitive humidity sensor and a thermistor to measure the surrounding air and spits out a digital signal on the data pin (no analog input pins needed). Its fairly simple to use, but requires careful timing to grab data. The only real downside of this sensor is you can only get new data from it once every 2 seconds, so in your code please use sensor reading interval at 2 seconds or more. Compared to the DHT22, this sensor is less precise, less accurate and works in a smaller range of temperature/humidity. But despite its disadvantages over DHT22, it is smaller and less expensive sensor for temperature and humidity measurement.
Note: This package does not include Arduino board, you have to buy it separately.
Features:
Low power consumption.
Relative humidity and temperature measurement
All calibration, digital output
Excellent long-term stability
No additional components
Long distance signal transmission
Ultra-low power
4-pin package
Completely interchangeable
0 notes
Video
youtube
IoT Home Automation - DHT11(T/H) - Air Quality Monitoring ESP32
#youtube#IoT Home Automation | Temperature Humidity & Air Quality Monitoring using ESP32 & Blynk 2.0 | IoT Home Automation - DHT11(T/H) - Air Quality
0 notes
Text
DHT11 Digital Temperature And Humidity Sensor is a basic and low-cost digital temperature and humidity sensor. This sensor is used for projects where accuracy and precision doesn't play big role. This comes in a blue perforated plastic enclosure. This has four pin. There is an upgraded version of the DHT11 temperature and humidity sensor available, which is DHT22 Sensor with higher sensing ranges.
2 notes
·
View notes
Text
Data logger de temperatura y humedad en micro SD y Arduino
Más en https://rogerbit.com/wprb/7475
Un Data Logger de temperatura y humedad con el sensor DHT11 y Arduino es un proyecto de electrónica que permite registrar y almacenar datos de temperatura y humedad en una tarjeta microSD para su posterior análisis. Este tipo de dispositivo es útil en aplicaciones como el monitoreo ambiental, la agricultura, la climatización y la investigación científica.
0 notes
Text
Empowering Innovation with Sensor Modules and STEM Solutions – Explore with CMXELCS.com
In the rapidly advancing world of electronics and automation, sensor modules have become essential components in countless applications—from robotics and smart homes to industrial automation and health monitoring. As a key enabler of innovation and experimentation, these compact yet powerful devices are playing a vital role in STEM education and learning.
What Are Sensor Modules?
Sensor modules are compact, pre-assembled electronic components designed to detect and measure physical parameters such as motion, light, temperature, humidity, distance, or gas concentration. These modules provide reliable data that can be interpreted by microcontrollers or development boards like Arduino, ESP32, or Raspberry Pi to automate various processes. Popular examples include the HC-SR501 motion sensor, DHT11 temperature and humidity sensor, and IR obstacle avoidance sensors.
The Role of Sensor Modules in STEM Education
In today’s hands-on learning environment, sensor modules are at the core of engaging and meaningful STEM (Science, Technology, Engineering, and Mathematics) experiences. By incorporating real-world problem solving and experimentation into classrooms, sensor modules help students:
Understand abstract scientific concepts through tangible applications
Develop coding and electronics skills
Design and test real-world projects such as environmental monitors, smart devices, or automated systems
CMXELCS.com – Your Trusted STEM Solution Provider
At CMXELCS.com, we are committed to providing affordable, high-quality sensor modules and STEM education solutions to students, educators, hobbyists, and engineers. Whether you're building a smart robot or designing a classroom experiment, our platform offers:
A wide range of sensor modules and development kits
STEM kits tailored for beginners and advanced users
Reliable shipping and customer support
Trusted sourcing and quality assurance

Why Choose CMXELCS?
✅ Educational Value – Products designed to support effective learning ✅ Project-Ready Kits – Ideal for classrooms, makerspaces, and DIY projects ✅ Comprehensive Solutions – From modules to full kits, all under one roof ✅ Expert Support – Guidance and assistance for your project needs
Conclusion
Sensor modules are driving a new era of interactive learning and innovation in STEM. Whether you're a student, educator, or tech enthusiast, CMXELCS.com offers the tools and resources you need to explore, create, and succeed. Dive into our selection and start building the future—one sensor at a time.
0 notes
Text
DHT11 Sensor Module The sensor module come with ESD Packing. Suits for STEM Education robot parts. MOQ:100units, more quantity, welcome inquire us to get a quotation. Question: Can we order 1 Unit to check sample quality ? Yes, if you need smaller quantity for sample check, you can order in our online shopping site with free shipping via 1 unit. For this item, the direct 1 unit with shipping cost including order link is here. To some countries if more than 10 units, we can help you ship via DHL/UPS/Fedex, it will take only 1 week delivery time. View here to see more other sensor module. Read the full article
0 notes
Photo
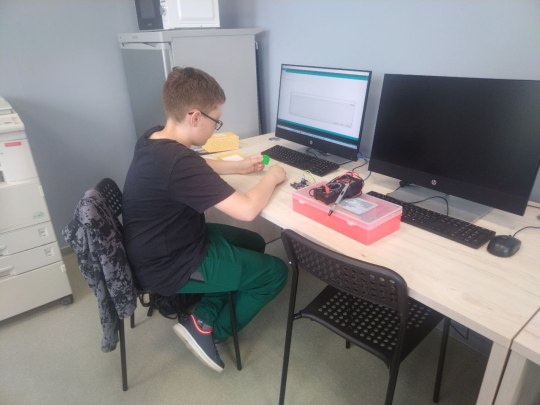
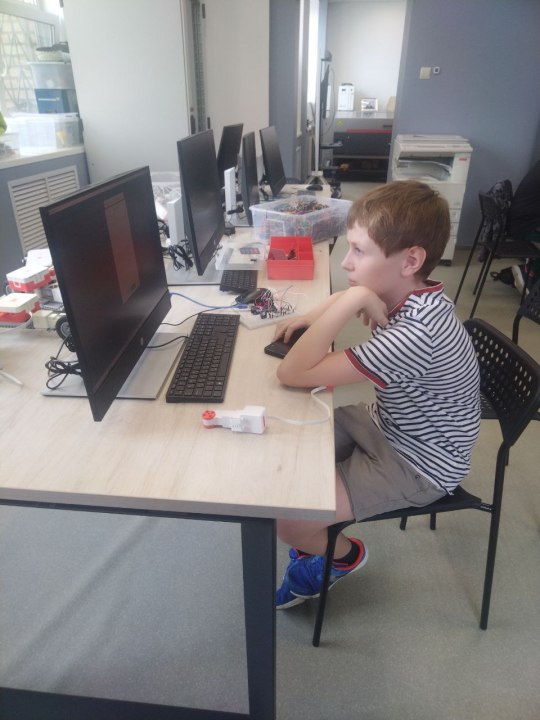
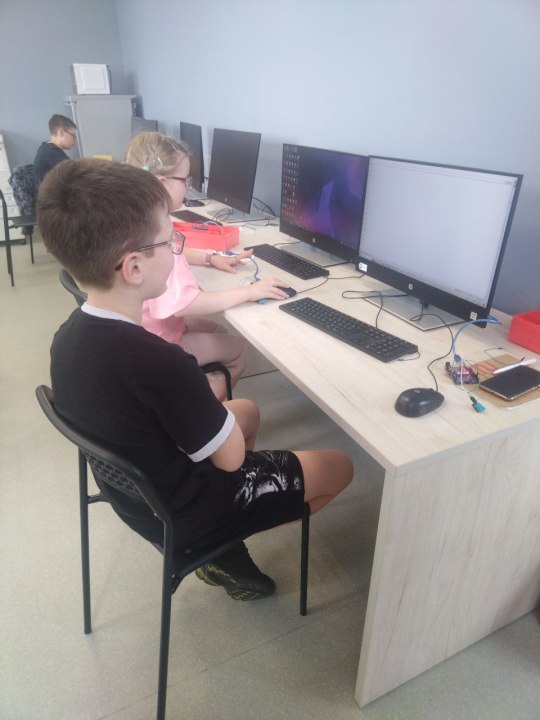
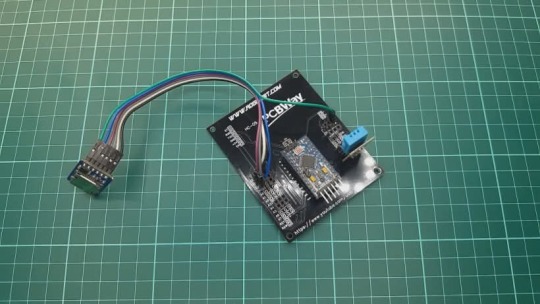
Робототехника (9-11 лет) Студия "Развивайся" г. Коломна
Педагог: Михаил Маркович
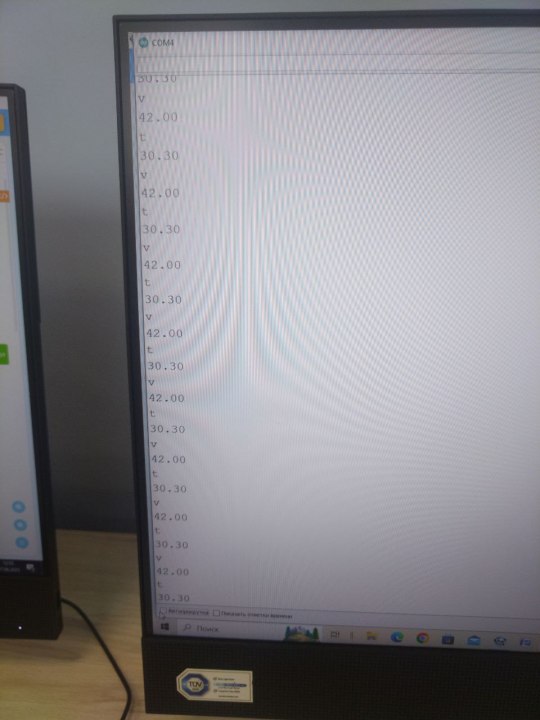
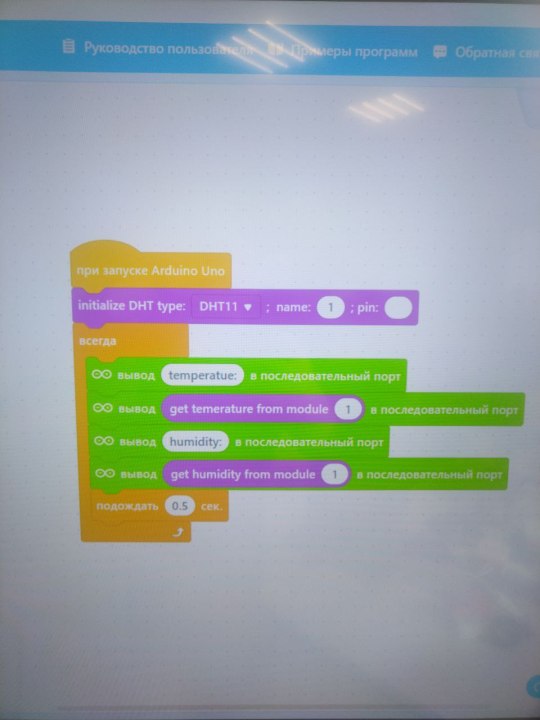
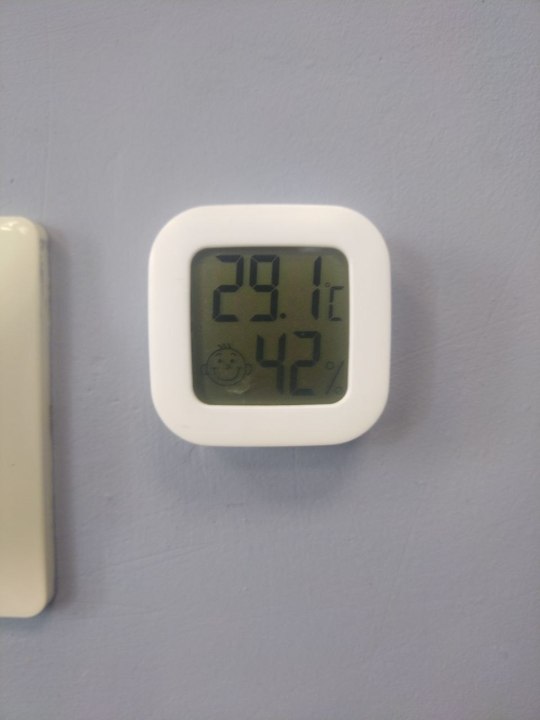
Сегодня на занятии работали с датчиком температуры и влажности DHT11. Изучали назначение и варианты возможного применения датчиков такого типа. Разбирали как подключить его к Arduino и получить значения температуры и влажности. Писали программу для снятия значений и вывода их на экран компьютера. Пройденный материал позволяет уч��никам не только научиться работе с датчиками и микроконтроллерами, но и понять как и зачем их следует применять в реальных проектах.
0 notes
Text
NodeMCU ESP8266 IoT Course - Free WiFi Projects (Bangladesh)

NodeMCU ESP8266 Full Course - IoT Web Control Projects
Master IoT with WiFi through our free 5-part NodeMCU ESP8266 course, designed specifically for Bangladeshi students. Learn to build web-controlled devices using components available at Dhaka's Elephant Road (350৳-450৳) and other local markets across Bangladesh. No prior experience required - start with basic wiring and progress to advanced webpage control systems.
5-Part Practical Course
Class 1: ESP8266 Beginner's Guide বাংলাদেশি শিক্ষার্থীদের জন্য: NodeMCU সেটআপ থেকে শুরু করুন, Arduino IDE কনফিগারেশন শিখুন। Class 2: Sensor Integration Learn to connect DHT11 sensor with NodeMCU for data monitoring. Class 3: WiFi Configuration Set up Bangladeshi WiFi networks with ESP8266 for IoT projects. Class 4: Local Server Control Create a 4-button control system for LEDs using local server. Class 5: Webpage LED Control বাংলা গাইড: ESP8266 দিয়ে ওয়েবপেজ তৈরি করে LED কন্ট্রোল শিখুন (GitHub কোড লিঙ্ক সহ)। Download Project Code →
স্থানীয় মার্কেট থেকে যা যা লাগবে
NodeMCU ESP8266 350৳-450৳ ইলিফ্যান্ট রোড/অনলাইন LED (5mm) 5৳/pc যেকোনো ইলেকট্রনিক্স দোকান
প্রজেক্টে সমস্যা হলে কী করবেন?
আমাদের টেক টিমকে WhatsApp এ প্রশ্ন করুন: প্রশ্ন জিজ্ঞাসা করুন → Read the full article
0 notes
Text
Arduino Projects
Arduino is a microcontroller platform made to facilitate hardware integration and programming. Each of its boards, including the Arduino Uno, Nano, and Mega, is designed to meet a distinct set of requirements. When used in conjunction with the Arduino IDE, users may easily write, upload, and execute code.
Users can design projects ranging from basic LED blinkers to intricate robotics and Internet of Things systems thanks to the platform's extensive library of sensors, modules, and components.
Top Arduino Project Ideas
System for Home Automation
An Arduino with a smartphone app can be used to control lights, fans, and other appliances. Your system can become more intelligent and energy-efficient by integrating sensors like temperature or motion detectors.
The weather station
Construct a personal weather station to track air pressure, temperature, and humidity. You can gather data using sensors like the DHT11 and BMP180, show it on an LCD screen, or post it online for remote access.
Robot That Avoids Obstacles
This well-liked project for robotics novices is teaching a robot to use ultrasonic sensors to navigate around obstacles.
Intelligent Plant Monitoring System
An Arduino-based monitoring system that measures temperature, light intensity, and soil moisture can help you keep your plants healthy. Even when it's time to water your plants, it may let you know.
Alarm System with Arduino
Create an Arduino-powered alarm system with a buzzer, keypad, and motion sensors to increase security. For workplace or home security, this project is perfect.
Pet Feeder with Automation
Construct a pet feeder that automatically delivers food depending on a weight sensor reading or at predetermined intervals.
Internet of Things Door Lock
Create a smart door lock that you can operate from a distance using Bluetooth or Wi-Fi by integrating an Arduino with an RFID scanner or fingerprint sensor.
Make Your Own Game Console
Convert an Arduino board with basic buttons and a display into a vintage game console.
How to Get Started with Arduino Projects
Select the appropriate board:
Choose an Arduino board based on the needs of your project. The Arduino Uno is an excellent place to start for the majority of novices.
Assemble the parts:
Determine the sensors, actuators, and other parts your project needs. A wide range of Arduino-compatible components are available on websites like Adafruit, SparkFun, and Amazon.
Set up the Arduino IDE:
Install the Arduino IDE by downloading it from Arduino.cc. You can develop code and upload it to your board using this software.
The universe of creativity and invention is unlocked by Arduino projects. Arduino offers the resources and network to realize your ideas, whether you want to study robotics, automate your house, or develop a ground-breaking technology.
Explore the world of Arduino now and unleash your creative side! Do you have a favorite idea for an Arduino project? Tell us about it in the comments section below.
To know more, click here.
0 notes
Text
MicroPython mit ESP32: DHT11 Sensordaten auslesen und verarbeiten
In diesem Beitrag erfährst du, wie man einen Umweltsensor DHT11 am ESP32 D1 R32 mit MicroPython auslesen und diese Sensordaten verarbeiten kann. Für diesen Beitrag verwende ich wieder das Rich Shield von Open Smart. Du kannst jedoch mit wenigen Bauteilen den Sensor an deinen ESP32 anschließen und dieses kleine Tutorial nachbauen. https://youtu.be/7uvoZU09s78 Der DHT11 Sensor ist eine kostengünstige und weit verbreitete Lösung zur Messung von Temperatur und Luftfeuchtigkeit. Er eignet sich hervorragend für viele DIY-Projekte, wie z.B. die Überwachung von Raumklima, Wetterstationen oder Smart-Home-Anwendungen. In den folgenden Abschnitten zeige ich dir Schritt für Schritt, wie du den Sensor anschließt, die Daten ausliest und auswertest. Zusätzlich werde ich dir zeigen, wie du die ausgelesenen Sensordaten mit einem Zeitstempel versiehst und in eine CSV-Datei speicherst. Dies ermöglicht eine einfache Weiterverarbeitung und Analyse der Daten, beispielsweise in Tabellenkalkulationsprogrammen wie Excel. So kannst du die Temperatur- und Luftfeuchtigkeitswerte über einen längeren Zeitraum überwachen und Trends erkennen.
Technische Daten des DHT11 Sensors
Mit dem DHT11 Sensor kannst du recht einfach die Temperatur und die relative Luftfeuchtigkeit messen. Dabei ist dieser Sensor nicht nur günstig, sondern auch recht genau. Wie genau dieser Sensor arbeitet, habe ich bereits im Beitrag Vergleich von Temperatursensoren für den Arduino & Raspberry PI aufgezeigt. relative LuftfeuchtigkeitMessbereich 20 % bis 90 %Toleranz±5 %TemperaturMessbereich 0 °C bis 60 °CToleranz±2 °CBetriebsspannung5V
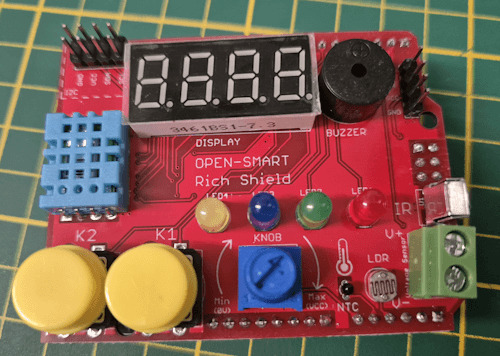
DHT11 Sensor am Rich Shield von Open Smart
Der DHT11 Sensor ist am GPIO19 des ESP32 D12 R32 verbunden (D13 am Arduino UNO). Mit diesem Umweltsensor kannst du die Temperatur und relative Luftfeuchtigkeit messen. Dabei gibt dieser Sensor alle 1,5 Sekunden einen neuen Wert.
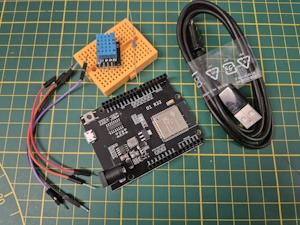
Aufbau der Schaltung ohne Rich Shield von Open Smart
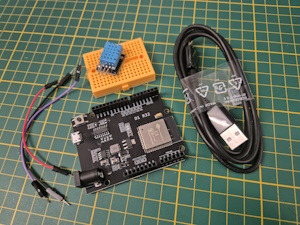
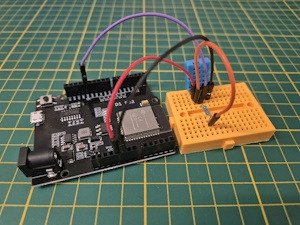
Wenn du die kleine Schaltung ohne Rich Shield nachbauen möchtest, dann gibt es zwei Wege. Zum einen kannst du die Schaltung mit einem fertigen Baustein aufbauen und zum anderen mit dem Sensor und einem 10 kOhm Widerstand. Hinweis von mir: Die mit einem Sternchen (*) markierten Links sind Affiliate-Links. Wenn du über diese Links einkaufst, erhalte ich eine kleine Provision, die dazu beiträgt, diesen Blog zu unterstützen. Der Preis für dich bleibt dabei unverändert. Vielen Dank für deine Unterstützung! Schaltung mit einem fertigen Baustein - ein ESP32 D1 R32*, - ein Micro-USB Datenkabel*, - ein DHT11 Sensor*, - drei Breadboardkabel*, 10 cm, - ein 170 Pin Breadboard*
Bei den DHT11 & DHT22 Sensoren auf Platine musst du auf die Beschriftung achten, diese ist immer unterschiedlich. Wenn du deinen Sensor verpolst, dann kann dieser sehr schnell kaputtgehen!

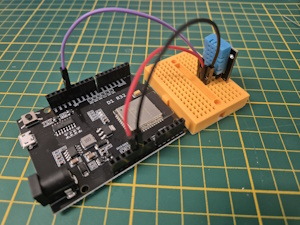
Schaltung - ESP32 D1 R32 mit DHT11 Sensor als Baustein auf einer Platine Schaltung mit Sensor & Widerstand Du erhältst den Sensor auch einzeln, wenn du diesen hast, dann benötigst noch zusätzlich einen 10 kOhm Widerstand, welcher mit VCC verbunden wird. - ein ESP32 D1 R32*, - ein Micro-USB Datenkabel*, - ein DHT11 Sensor*, - ein 10 kOhm Widerstand*, - vier Breadboardkabel*, 10 cm, - ein 170 Pin Breadboard*
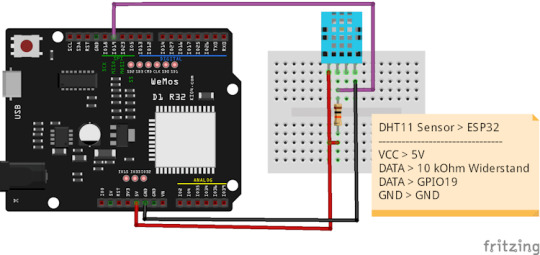
Schaltung - DHT11 Sensor am ESP32 D1 R32 mit Widerstand
Programmieren des DHT11 Sensors in MicroPython am ESP32 D1 R32
Damit wir den Sensor auslesen können, benötigen wir ein zusätzliches Modul. Der Firmware von MicroPython liegt bereits ein passendes DHT Modul bei, mit welchem wir den Sensor DHT11 & DHT22 mit wenigen Zeilen Code auslesen können. import dht from machine import Pin, RTC import time d = dht.DHT11(Pin(19, Pin.IN)) while True: d.measure() print("Temperatur: ", d.temperature(), "°C", sep="") print("rel. Luftfeuchtigkeit: ", d.humidity(), "%", sep="") time.sleep(2) Das kleine Programm schreibt fortwährend die Sensordaten in die Kommandozeile.
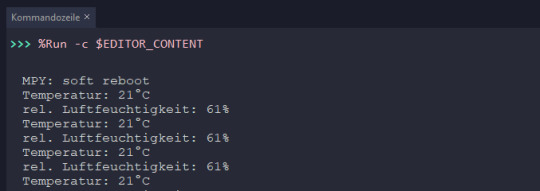
Einfache Ausgabe der Sensordaten in der Kommandozeile Ausgeben der Daten in einer Tabelle Die Daten lassen sich auch recht einfach in einer Tabelle auf der Kommandozeile ausgeben. Dazu geben wir als Erstes die Kopfzeile aus und setzen den Trenner (Parameter sep in der Funktion print) auf einen geraden Strich / Pipe. Zusätzlich hole ich mir noch den aktuellen Zeitstempel von der internen RealTimeClock. import dht from machine import Pin, RTC import time d = dht.DHT11(Pin(19, Pin.IN)) def getTimestamp(): rtc = RTC() currentDateTime = rtc.datetime() hour = currentDateTime minutes = currentDateTime seconds = currentDateTime textFormat = "{0}:{1}:{2}" if hour < 10: hour = "0"+str(hour) if minutes < 10: minutes = "0"+str(minutes) if seconds < 10: seconds = "0"+str(seconds) return textFormat.format(hour, minutes, seconds) print("Zeittt","Temperaturt", "rel. Luftfeuchtigkeit", sep="|"); while True: d.measure() print(str(getTimestamp())+"t",str(d.temperature())+"°Ctt", str(d.humidity())+"%", sep="|") time.sleep(2) Die tabellarische Ausgabe der Sensordaten auf der Kommandozeile hat den Vorteil das wir diese recht einfach ablesen können und wir könnten diese auch markieren und in eine andere Datei formatiert kopieren.
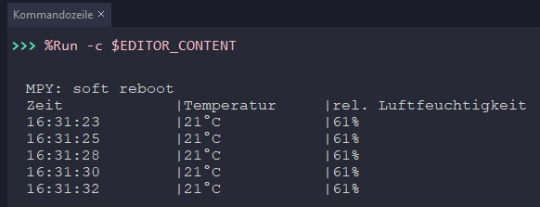
Tabellarische Ausgabe der Sensordaten auf der Kommandozeile Ausgeben in eine CSV-Datei mit Sensordaten des DHT11 auf dem ESP32 mit MicroPython Wir können auf dem Mikrocontroller auch Dateien schreiben und so die Sensorwerte aufzeichnen. Wie du Dateien schreibst werde ich dir in einem späteren Beitrag noch genauer erläutern, hier möchte ich dir der Vollständigkeitshalber ein kleines Programm zeigen, welches die Daten vom Sensor in eine CSV Datei mit dem Namen "sensordata.csv" schreibt. import dht from machine import Pin, RTC import time import os csvDatei = 'sensordata.csv' lineBreak = 'rn' dht11Sensor = dht.DHT11(Pin(19, Pin.IN)) def getTimestamp(): rtc = RTC() currentDateTime = rtc.datetime() year = currentDateTime month = currentDateTime day = currentDateTime unknown = currentDateTime hour = currentDateTime minutes = currentDateTime seconds = currentDateTime textFormat = "{0}.{1}.{2} {3}:{4}:{5}" return textFormat.format(day, month, year, hour, minutes, seconds) if not csvDatei in os.listdir(): headline = "Zeit;Temperatur;rel. Luftfeuchtigkeit"; with open(csvDatei, 'w') as f: print(headline) f.write(headline) f.write(lineBreak) while True: dht11Sensor.measure() line = str(getTimestamp())+";"+str(dht11Sensor.temperature())+";"+ str(dht11Sensor.humidity()) with open(csvDatei, 'a') as f: print(line) f.write(line) f.write(lineBreak) time.sleep(2) Der Code erstellt auf dem Mikrocontroller die Datei "sensordaten.csv" welche über das Kontextmenü (rechte Maustaste auf der Datei) heruntergeladen werden kann. Zusätzlich wird beim Ausführen des Programmes die Daten auf der Kommandozeile ausgegeben.

Thonny - MicroPython Programm zum aufzeichnen der Sensordaten in eine CSV Datei Diese CSV Datei kann recht einfach in Microsoft Excel importiert und die Daten verarbeitet und visualisiert werden.
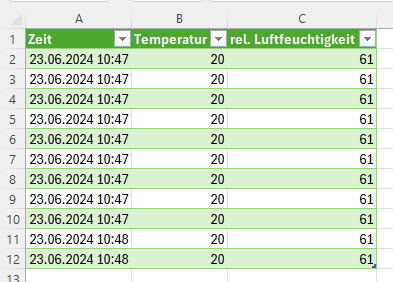
Microsoft Excel - importierte CSV Datei
Ausblick
Die ermittelten Sensordaten könnten wir auch via HTTP Request an ThingSpeak senden und dort extern speichern und visualisieren. Wie du das machst, erläutere ich dir im nächsten Beitrag, sei also gespannt. Read the full article
0 notes
Text
Exploring the World of Electronics: A Comprehensive Guide

Exploring the World of Electronics: A Comprehensive Guide
The field of electronics is one of the most exciting and dynamic domains that has revolutionized the way people live, work, and communicate. Electrons have become the backbone of modern technology, from advanced smartphones to laptops and the latest robots and renewable energy systems.Well, with this in mind, any person who wants to venture into any electronics undertaking has to know the rudimental principles of the said project, acquire all required pieces of equipment, and find the appropriate platform on which the whole thing can be bought or sold. In this write-up, we will therefore guide you on how one can get the best results regarding his electronics project by exploring and using Classimonk as well as Chennai Free Classified Ads.
Why electronic Projects Matter
The project is not just for a professional or a student in an engineering degree but rather for a curious mind interested in innovation. It enables a fundamental understanding of the principles behind physics and electrical engineering, enhances problem-solving skills, and cultivates creativity. Whether you are creating a simple LED circuit or working on some complex IoT device, it is a priceless experience.
Sourcing Components for Your Electronics Project
The success of any electronics project highly depends on the quality and availability of its components. Long lists of essentials include resistors, capacitors, microcontrollers, sensors, and wires, and so on. It's a big task to find a reliable source for all of these, but not hard at all with the help of Chennai Free Classified Ads.
Chennai Free Classified Ads is a lively marketplace offering everything from electronic component sales to tool sales to entirely assembled products. This has enabled you to view comparative pricing and spec data along with user reviews so you can buy without needing any stress. This website is handy for students and hobbyists trying to get equipment without an added layer of hassle for expensive things.
Classimonk: A Platform for Electronics Enthusiasts
Classimonk is another good resource for electronics enthusiasts. This platform gives a friendly interface to buy, sell, and even exchange electronics-related items. Be it finding a rare microcontroller or selling excess components from the previous project, Classimonk simplifies the process. Its categorized listings and advanced search features help you find what you need quickly.
Classimonk is also community-driven, as it allows users to share tips, tutorials, and project ideas. This makes it more than just a marketplace; it is a hub for learning and collaboration. For example, if you are working on a project that involves Arduino programming, you may find helpful tutorials and discussions on Classimonk's forums.
Project Ideas to Kickstart Your Journey
If you’re unsure where to begin, here are a few electronics project ideas:
Smart Home Automation System: Use microcontrollers and sensors to create a system that controls lights, fans, and appliances remotely.
Portable Charger: Build a power bank using lithium-ion batteries and a charging circuit.
Weather Station: Use sensors like DHT11 and BMP180 to measure temperature, humidity, and atmospheric pressure.
Line-following robot: Design a robot that follows a predetermined path using infrared sensors.
Renewable Energy Model Device Powered by Solar Energy Design.
Benefits of Using Online Platforms
In both Chennai Free Classified Ads and Classimonk, several benefits come to electronics enthusiasts:
Inexpensive Solutions: Purchased second-hand or surplus components at economical prices.
An extensive variety: Access broad-based products from multiple sellers
Support from a community: Obtain advice and inspiration from the community of like-minded folks
Easy: Browse through and buy from home.
Conclusion
Electronics project work is one such rewarding journey that brings a blend of creativity, technical skills, and innovation in one. Chennai Free Classified Ads and Classimonk facilitate the journey by making these affordable components available to their customers, offering them worthwhile resources, and creating an interactive community that is essential for any kind of endeavor. Whether you are an expert or a curious amateur, these platforms can actually bring your ideas to reality.
So, get deep into the world of electronics, explore the limitless opportunities, and make your name in this dynamic field with the right tools, resources, and community support; tomorrow's breakthrough project could just be waiting for you.
0 notes
Video
youtube
Industrial Sensor's Data Parameter Monitoring and Control System Over CAN BUS Using Arduino | Industrial Parameter Monitoring System Using CAN Bus | Monitoring and Control System for Industrial Parameters Using Can Bus | Monitoring of temperature using smart sensors | Industrial Parameter Monitoring Using CAN Protocol | Industrial Sensor's Data Parameter Monitoring and Control System Over CAN BUS Using Arduino | Industrial Parameter Monitoring System Using CAN Bus | Monitoring and Control System for Industrial Parameters Using Can Bus.***********************************************************If You Want To Purchase the Full Working Project KITMail Us: [email protected] Name Along With You-Tube Video LinkWe are Located at Telangana, Hyderabad, Boduppal. Project Changes also Made according to Student Requirementshttp://svsembedded.com/ https://www.svskits.in/ http://svsembedded.in/ http://www.svskit.com/M1: 91 9491535690 M2: 91 7842358459 We Will Send Working Model Project KIT through DTDC / DHL / Blue Dart / First Flight Courier ServiceWe Will Provide Project Soft Data through Google Drive1. Project Abstract / Synopsis 2. Project Related Datasheets of Each Component3. Project Sample Report / Documentation4. Project Kit Circuit / Schematic Diagram 5. Project Kit Working Software Code6. Project Related Software Compilers7. Project Related Sample PPT’s8. Project Kit Photos9. Project Kit Working Video linksLatest Projects with Year Wise YouTube video Links157 Projects https://svsembedded.com/ieee_2022.php135 Projects https://svsembedded.com/ieee_2021.php 151 Projects https://svsembedded.com/ieee_2020.php103 Projects https://svsembedded.com/ieee_2019.php61 Projects https://svsembedded.com/ieee_2018.php171 Projects https://svsembedded.com/ieee_2017.php170 Projects https://svsembedded.com/ieee_2016.php67 Projects https://svsembedded.com/ieee_2015.php55 Projects https://svsembedded.com/ieee_2014.php43 Projects https://svsembedded.com/ieee_2013.php1100 Projects https://www.svskit.com/2022/02/900-pr...***********************************************************1. Weather Station: DHT11 Temperature and Humidity Sensor Arduino 2.4″ TFT LCD Touch Shield - SPFD54082. Control FAN Speed and LIGHT using TV Remote3. Smart Crop Protection From Wild Animals With Alert Using Arduino | Field Sensor Monitoring with WiFi4. How to Transfer Data From One USB Hard Drive to Another USB5. IoT based Precision Agriculture6. IOT BASED SMART BLOOD BANK SYSTEM7. Blood Bags Weight Monitoring Using 2 load cells8. GSM Motor Pump controller (Mobile Motor Starter) | Automatic Mobile Starter | Mobile pump starter9. Bus Boarding System for Visually Impaired Passengers10. Design and Implementation of RFID-based Fuel Dispensing System11. Cable Fault Detection System with SMS Notification using Arduino, GSM and GPS12. 2.4'' TFT Touch Screen Restaurant Menu Ordering System Using Arduino13. IoT Based Air, Water, Noise, Dust, Humidity, Gas, CO and Temperature Monitoring System using Arduino14. IOT BASED SMART GARBAGE MONITORING SYSTEM USING NODEMCU GSM GPS ULTRASONIC15. i2c lcd with nodemcu | Interface I2C LCD Using ESP8266 NodeMCU | I2C LCD on NodeMCU With Arduino IDE16. GPS GSM Based Underground Cable Fault Detection with Arduino17. Electric Shock GPS Hand Glove Developed to help Women's Safety
0 notes
Text
DHT11 Digital Temperature And Humidity Sensor is a basic and low-cost digital temperature and humidity sensor. This sensor is used for projects where accuracy and precision doesn't play big role. This comes in a blue perforated plastic enclosure. This has four pin. There is an upgraded version of the DHT11 temperature and humidity sensor available, which is DHT22 Sensor with higher sensing ranges.
The sensor uses a capacitive humidity sensor and a thermistor based temperature sensor to measure the ambient humidity and temperature. The humidity sensing ranges from 20% to 90% with ±5% accuracy and the temperature sensing ranges from 0 degrees to the 50 degrees Celsius with ±2°C accuracy. The sampling time of this sensor is 2 seconds almost. This Temperature and Humidity Sensor uses digital pins to communicate with the microcontroller unit and does not have any kind of analog pins.
2 notes
·
View notes
Text

Arduino uno con sensor de temperatura más display nokia 5110
Más en https://rogerbit.com/wprb/136
En este proyecto, combinamos un Arduino Uno, un sensor de temperatura y humedad DHT11 y una pantalla gráfica Nokia 5110 para mostrar los valores en tiempo real. Ideal para entender sensores y comunicación SPI gráfica, con aplicaciones para estaciones meteorológicas, invernaderos o cualquier sistema embebido.
0 notes
Text
DIY Air Quality Monitoring System
Introduction
In this DIY guide, we’ll walk you through building an Air Quality Monitoring System to keep tabs on the air quality in your home or surrounding environment. This project collects and tracks key air quality metrics — such as CO2 levels, PM2.5 particles, temperature, and humidity — and displays them in real time on a mobile app or web dashboard. Perfect for health-conscious individuals, this IoT project provides valuable insights into your environment and helps you make adjustments to improve indoor air quality.
Why Build an Air Quality Monitoring System?
The air we breathe has a direct impact on our health, yet indoor air quality often goes overlooked. By monitoring indoor CO2 and particulate matter levels, as well as temperature and humidity, you can create a healthier living space. This system helps you identify potential air quality issues, like high CO2 levels or excessive dust particles, that may require ventilation or filtration.
Benefits of Monitoring Air Quality:
Healthier Environment: Improve indoor air quality by tracking harmful pollutants.
Real-Time Alerts: Get notified when air quality drops below safe levels.
Data-Driven Decisions: Use data insights to decide when to ventilate or clean the air.
Long-Term Tracking: Log data over time to see how seasonal or activity changes impact air quality.
Key Components and Technologies
To build your Air Quality Monitoring System, you will need:
Microcontroller: Use a Raspberry Pi or ESP32 to serve as the main control unit. Both offer robust processing power and easy integration with sensors and cloud platforms.
Air Quality Sensors:
CO2 Sensor: The MQ135 sensor is an affordable option for measuring CO2 levels.
PM2.5 Sensor: The PMS5003 sensor detects fine particulate matter in the air, which can contribute to respiratory issues.
Temperature and Humidity Sensor: DHT11 or DHT22 sensors monitor environmental conditions that can affect indoor air quality.
Wi-Fi Module: ESP32 has built-in Wi-Fi, while Raspberry Pi can connect via a Wi-Fi dongle or built-in module, enabling remote data access.
Cloud Service for Data Storage and Visualization:
Use platforms like Cloudtopiaa, Blynk, or Thingspeak to store, visualize, and analyze your data. Cloudtopiaa provides reliable cloud services with secure data storage and custom visualization options.
Additional Components:
Jumper wires and breadboard
Power supply for the microcontroller
Basic tools like a soldering iron if needed
Step-by-Step Guide
Step 1: Set Up the Microcontroller
Choose and Prepare Your Microcontroller:
For this guide, we’ll use a Raspberry Pi. Set up the latest version of Raspbian OS on the Raspberry Pi.
Connect the Components:
Attach the MQ135 CO2 sensor to one of the GPIO pins.
Connect the PMS5003 PM2.5 sensor to another GPIO pin.
Connect the DHT11 or DHT22 sensor for temperature and humidity.
Step 2: Install Required Libraries
Open the terminal on your Raspberry Pi and install the libraries necessary for sensor data collection and Wi-Fi connectivity.sudo apt-get update sudo apt-get install python3-pip pip3 install adafruit-circuitpython-mq135 pip3 install adafruit-circuitpython-pm25 pip3 install Adafruit_DHT
Step 3: Program the Sensors
Write a Python script to read data from each sensor. Here’s a basic example for reading CO2, PM2.5, temperature, and humidity data.import time import Adafruit_DHT import board import adafruit_mq135 import adafruit_pm25
# Setup DHT_SENSOR = Adafruit_DHT.DHT22 DHT_PIN = 4 CO2_SENSOR = adafruit_mq135.MQ135(board.A0) PM25_SENSOR = adafruit_pm25.PM25_UART(board.UART1)
def read_sensors(): # Read temperature and humidity humidity, temperature = Adafruit_DHT.read_retry(DHT_SENSOR, DHT_PIN) # Read CO2 level co2_level = CO2_SENSOR.co2 # Read PM2.5 level pm25_data = PM25_SENSOR.read() pm25 = pm25_data['pm25'] if 'pm25' in pm25_data else None return temperature, humidity, co2_level, pm25
while True: temp, humidity, co2, pm25 = read_sensors() print(f"Temperature: {temp}°C, Humidity: {humidity}%, CO2 Level: {co2} ppm, PM2.5: {pm25} µg/m³") time.sleep(10)
Step 4: Cloud Integration with Cloudtopiaa
Set Up a Cloudtopiaa Account: Sign up for Cloudtopiaa to leverage their reliable data storage and visualization capabilities.
Create an IoT Project: Set up a new project and get an API key to send sensor data.
Connect Your Microcontroller: Update your script to send data to Cloudtopiaa.
import requests
CLOUDTOPIAA_API_KEY = "Your_Cloudtopiaa_API_Key"
def send_data_to_cloud(temp, humidity, co2, pm25): url = "https://api.cloudtopiaa.com/v1/data" # Example endpoint payload = { "temperature": temp, "humidity": humidity, "co2": co2, "pm25": pm25 } headers = { "Authorization": f"Bearer {CLOUDTOPIAA_API_KEY}" } requests.post(url, json=payload, headers=headers)
while True: temp, humidity, co2, pm25 = read_sensors() send_data_to_cloud(temp, humidity, co2, pm25) print(f"Sent data to Cloudtopiaa: Temperature: {temp}°C, Humidity: {humidity}%, CO2: {co2} ppm, PM2.5: {pm25} µg/m³") time.sleep(600) # Send data every 10 minutes
Step 5: Set Up Data Visualization
Log in to your Cloudtopiaa account to view your data in real-time. Use built-in visualization options to create charts and graphs that track air quality metrics over time.
Step 6: Build a Mobile App or Web Dashboard
Use a platform like Cloudtopiaa’s dashboard, Blynk, or a custom web interface to create a user-friendly dashboard that displays current air quality data and historical trends.
Conclusion
You’ve successfully built an Air Quality Monitoring System to help maintain a healthier environment in your home or workspace. With this system, you can track real-time air quality, make data-driven decisions about ventilation, and improve indoor air conditions for better health. Cloudtopiaa’s secure storage and powerful visualization tools make it easy to monitor your air quality from anywhere.
Additional Resources
Cloudtopiaa Documentation
Raspberry Pi Documentation
Blynk IoT Platform
This project demonstrates skills in IoT health applications, environmental monitoring, and data visualization — valuable tools for creating a smarter, safer living environment.
#DIYAirQualityMonitor #IndoorAirQuality #TechForHealth #Cloudtopiaa #tec4bizsolutions #RealTimeData #ESP32 #IoTProjects #CO2Sensor #PM25Detection
0 notes