#Download google chrome linux
Explore tagged Tumblr posts
Visit Tumblr Blog
Explore Tumblr blogs with no restrictions, modern design and the best experience.
Last Seen Tumblr Blogs


Fun Fact
In 2020, 27% of US Tumblr users had an annual household income of over $100,000.
Text
me when companies try to force you to use their proprietary software

anyway
Layperson resources:
firefox is an open source browser by Mozilla that makes privacy and software independence much easier. it is very easy to transfer all your chrome data to Firefox
ublock origin is The highest quality adblock atm. it is a free browser extension, and though last i checked it is available on Chrome google is trying very hard to crack down on its use
Thunderbird mail is an open source email client also by mozilla and shares many of the same advantages as firefox (it has some other cool features as well)
libreOffice is an open source office suite similar to microsoft office or Google Suite, simple enough
Risky:
VPNs (virtual private networks) essentially do a number of things, but most commonly they are used to prevent people from tracking your IP address. i would suggest doing more research. i use proton vpn, as it has a decent free version, and the paid version is powerful
note: some applications, websites, and other entities do not tolerate the use of VPNs. you may not be able to access certain secure sites while using a VPN, and logging into your personal account with some services while using a vpn *may* get you PERMANENTLY BLACKLISTED from the service on that account, ymmv
IF YOU HAVE A DECENT VPN, ANTIVIRUS, AND ADBLOCK, you can start learning about piracy, though i will not be providing any resources, as Loose Lips Sink Ships. if you want to be very safe, start with streaming sites and never download any files, though you Can learn how to discern between safe, unsafe, and risky content.
note: DO NOT SHARE LINKS TO OR NAMES OF PIRACY SITES IN PUBLIC PLACES, ESPECIALLY SOCAL MEDIA
the only time you should share these things are either in person or in (preferably peer-to-peer encrypted) PRIVATE messages
when pirated media becomes well-known and circulated on the wider, public internet, it gets taken down, because it is illegal to distribute pirated media and software
if you need an antivirus i like bitdefender. it has a free version, and is very good, though if youre using windows, windows defender is also very good and it comes with the OS
Advanced:
linux is great if you REALLY know what you're doing. you have to know a decent amount of computer science and be comfortable using the Terminal/Command Prompt to get/use linux. "Linux" refers to a large array of related open source Operating Systems. do research and pick one that suits your needs. im still experimenting with various dispos, but im leaning towards either Ubuntu Cinnamon or Debian.
#capitalism#open source#firefox#thunderbird#mozilla#ublock origin#libreoffice#vpn#antivirus#piracy#linux
697 notes
·
View notes
Text


25.05.25
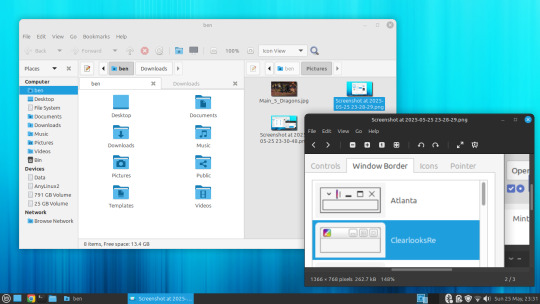
I installed Linux Mint MATE 22.1 today.
https://linuxmint.com/screenshots.php#
I had been testing it out on the Linux laptop and decided to install it in place of Debian 12. I kept my Mint Cinnamon install.
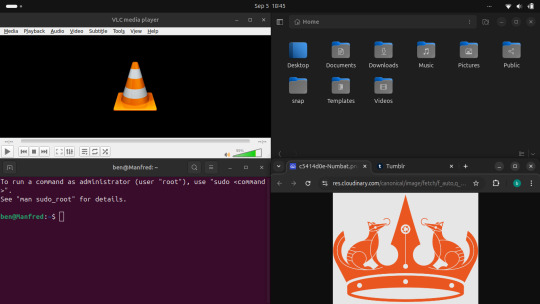
Once it had installed, which was very quick, I updated Mint using the updater tool and then installed Google Chrome, VLC Media Player, GIMP and a couple of other apps to the laptop.
Many of these programs I use on the Cinnamon install as well.
I then tweaked the panel by adding a workspace switcher and a set of eyes that follow the cursor!
A did a quick Neofetch in the command window, this shows detailed system information.
Like LM Cinnamon it is very well supported out the box and features modern Bluetooth set-up support, a clean user interface and an easy to set up experience.
The themes are all Linux Mint related window styles which look very modern. The MATE themes I had in Debian can be manually installed in Linux Mint if needed. They can be downloaded from the Software Manager or through the terminal.
This theme pack provides the same experience across the desktop whether you are using MATE or Cinnamon.
However I did come across a small bug where the widgets locked onto the panel moved after a restart. This is possibly a GTK related bug on Ubuntu versions with this desktop environment. It is easy to fix though by resetting the panel.
The bug only exists on newer MATE versions.
Linux Mint uses MATE desktop 1.26. However Debian also uses 1.26 which didn't have this bug. I don't know what's causing this in Mint. Hopefully this gets fixed in the next few releases!
The latest desktop version for MATE is 1.28, released later last year. Distros such as Ubuntu and Fedora would use this as it is a more recent release.
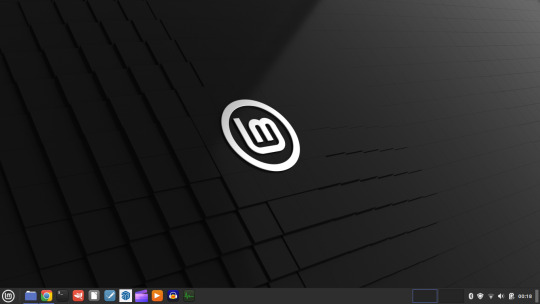
Also the MATE desktop is less animated compared with Cinnamon, however the desktop allows you to focus on tasks without distractions and feels very stable to use.
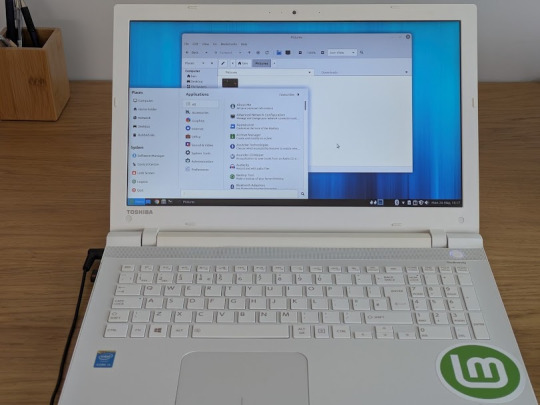
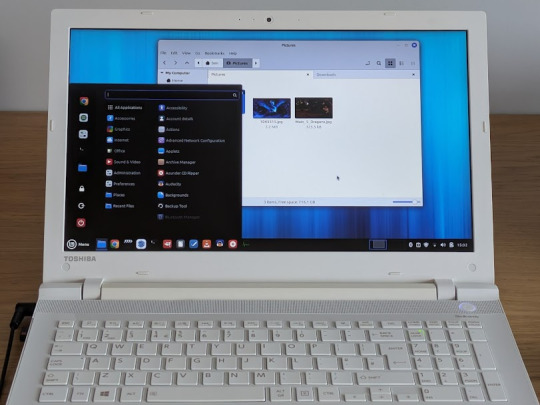
Underneath are some comparisons with the Cinnamon desktop.
I prefer Linux Mint with the Cinnamon desktop as it looks and feels more modern and is it's flagship desktop distribution. It is also more powerful as users can add applets, themes and layout configurations through an in-system database which is regularly updated.
The file manager in MATE is called Caja and is based on GNOME 2's Nautilus, whilst on Cinnamon the file manager is called Nemo, which uses the newer GNOME file manager as a base.
A simple, but powerful desktop environment for Mint!
3 notes
·
View notes
Text
My Somewhat Complex Thoughts on Chromium
Chromium and Firefox are both free and open source, as are both of their browser engines. Blink is the engine for Chromium, and Gecko is the engine for Firefox.
Mozilla's products lack basic sandboxing in almost every OS. The sandboxing for Firefox in Android and Linux, the two OSs I use, is quite honestly God AWFUL.
Gecko based browsers are significantly more vulnerable to exploitation, both internally and externally.
Gecko has a much more attack surface than Blink does.
No Gecko based browser has per-site process isolation.
Gecko's fingerprint protection is not great at best, bordering on a bit useless at worst. Both Tor and Mulvad fix this issues.
Gecko also is less resource efficient. While the discrepancy of resources efficiency between Gecko and Blink is getting smaller by the year, the gap is still pretty large.
The monopoly that Blink has on the browser market is fucking despicable, and has been one of the large reason the web as we know it is getting worse.
There are many websites that simply do not retain full functionality when used with Gecko based browsers.
Having to use a Chromium browser is an unfortunate reality for a lot of people. A lot more than you think.
Further Reading
https://www.privacyguides.org/en/desktop-browsers/
https://divestos.org/pages/browsers
https://www.cisecurity.org/benchmark/mozilla_firefox
https://www.mozilla.org/en-US/security/known-vulnerabilities/
https://nvd.nist.gov/
https://www.cvedetails.com/vulnerability-list/vendor_id-452/product_id-3264/cvssscoremin-7/cvssscoremax-7.99/Mozilla-Firefox.html
19 notes
·
View notes
Text
I had a dream where I installed Debian (as opposed to Linux Mint, which is the distribution I currently use) and somehow messed up the installation in a really weird way.
Somehow, parts of my computer got desynchronized from each other. There were parts of my PC that were Windows. Other parts were Mint. The latest Terraria update was 1.4.4.0 (as opposed to 1.4.4.9) but my Minecraft installation was in the future, when the "Winter Drop" came out. Firefox was already in December. Google Chrome reinstalled itself, and it was some time in 2020. Whenever I downloaded a file, I would frequently get two files, each from different points in the past and/or future.
Somehow, I became desynchronized too. Parts of my personality separated from each other and became spread out through time. My body desynchronized, too. At the end of my dream, I got into a major car accident. My hands and feet were immediately affected by the impact. Next was my torso. Then, after that, there were my arms, then my legs. Finally, after a whole 24 hours, my head was affected by the crash.
#dreams#Completely unrelated thought that I don't know why I have considering the fact i have never read them and i don't follow the series really:#somehow this feels like one of those weird fnaf scary short story book things. there has to be a novelty fnaf themed linux distribution#pretend I'm in middle school and that i installed that instead of debian and you've got one of those books i think
2 notes
·
View notes
Note
Hello I greet you with tech support form a highschooler
Fun fact: Chrome OS (which is what a chromebook run) is a Linux based operating system (In my my mind it's the penguin system)
So sadly I do not have a chromebook to test it on myself to see if i can help with any issues of walking through: https://www.xda-developers.com/how-to-run-steam-chromebook/ (a walk through for downloading it, has three different methods but one requires you to have another computer, but I recommend the first one! Hopefully it will be easier) https://support.google.com/chromebook/answer/14220699?hl=en#zippy=%2Csupported-devices (Article from google explaining the requirements)
sorry if this is very unwanted and a bother
*blinks*
I will try this
*is a grandparent when it comes to tech*
2 notes
·
View notes
Text
This is an awesome guide and I want to add a few of my personal choices to it and provide more resources.
Note: I am, by no means, an expert.
Disclaimer: Some of the suggestions below may be missing features you are used to. It's free, roll with it. 😎
Level 1:
Another browser extension you should know about is LibRedirect. With it, you can pass links over to alternative sites to view the content. Be aware that the majority of the alternative sites are run by volunteers and enthusiasts; they don't always work 🙁 Small note: The name "Libre" gets used a lot by privacy-respecting and open source alternatives where previously they might have used "Free" or "Open".
Level 2:
Adobe Alternatives DuckDuckGo uses Bing for results, I also use StartPage for Google results. There is a desktop app for watching Youtube content called FreeTube that I recommend. It's a front-end for YouTube and Invidious servers (which re-stream YouTube content).
Level 3:
AdGuard is fine but if you are setting up a Raspberry Pi anyway, consider Pi-hole as an alternative option.
Level 4:
If, for some strange reason, you disregard the above guide and think that putting AdGuard on your phone is a reasonable alternative to the suggestions here, I would suggest that you DON'T. It may be different now but when I tried it the Android app it asked me to install a certificate. It does this so that it can modify websites you visit to block more ads. The downside is that it also allows them to read everything that would normally be encrypted. They may not be doing anything nefarious with it, but it's a risk I'm not taking. So, if a third-party you don't trust asks you to install a certificate, DON'T.
Level 5:
Awesome Piracy If you don't want to sign up for usenet and prefer to use torrents, get a good VPN and lock the torrent client down to only use the VPN connection. There are torrent tests you can do to see if your IP is exposed. In your VPN client, pick a country where copyright isn't a word! 😉
Level 6:
In addition to ReVanced, I want to also promote the app NewPipe which can be downloaded from the F-Droid store. F-Droid is an app store for your Android phone that hosts open-source apps and tells you every dirty detail of what each app does, privacy-wise. NewPipe is a YouTube alternative/Invidious front-end for Android.
Level 7:
Custom Windows playbooks are awesome and while I don't know Revi very well, but I will definitely check it out! Just browsing the docs I noticed that they default to the Brave browser. This is a personal opinion but I don't trust Brave as much as open-source alternatives. They have tried some interesting attempts at monetization in the past that make me suspect. Use the browser you are comfortable with instead and use a well-known, good adblock like uBlock Origin or uBlock Origin Lite. In addition to Firefox and its derivatives there is also Chromium and Ungoogled-Chromium if you want something familiar to Chrome.
Level 8:
Seriously, use Linux if you can (and if you do, make backups of your important files first!). Ignore Linux users that tell you to use Arch or an Arch derivative, it's not for beginners. When stuff breaks you just have to figure it out. Ubuntu, Mint, and Pop! are great for beginners but if you play games they may not be the most up-to-date for that. (Pop is especially behind at the moment 😭 but I'm hoping that changes soon) I personally use Fedora which is also great for beginners, is very up-to-date, and never gives me problems. However it does require one post-install setup step to replace the media codecs with "non-free" ones to make some media playback situations work. Other than that, it works so well that I actually find it boring compared to the usual amount of tinkering I'm used to! Fedora has two notable derivatives: Nobara, which is slightly tweaked for improved gaming performance and includes the media tweaks, and Bazzite which is similar to SteamOS but for general hardware (it's for gaming-specific setups like handhelds and living room gaming where you need a controller-focused interface).
Level ???:
You can host your own websites (webapps) made by others! I fell down this rabbit hole after Google killed Reader and I found self-hosted RSS alternatives. Later, I set up Docker and now I run dozens of useful webapps for all sorts of things! Try stuff out!
Hopefully this is helpful to someone. Feel free to ask me general questions about any of the above. If you have setup questions or technical issues, please contact the creators of the above projects first, as I can't cover everything everywhere. I try to, though! 😂
In case anyone is curious, I'm a software developer (mostly in web development) with a lot of general IT skills and troubleshooting experience and I spend a lot of my time tinkering with Linux, FreeBSD, self-hosted apps, open-source software, and supporting Windows systems that are all over the place. I have experience going back to MS-DOS, using Linux since the late 90's and have been running Linux as my primary system for over 5 years now (since Valve released Proton).
Thanks for reading!
genuinely wild to me when I go to someone's house and we watch TV or listen to music or something and there are ads. I haven't seen an ad in my home since 2005. what do you mean you haven't set up multiple layers of digital infrastructure to banish corporate messaging to oblivion before it manifests? listen, this is important. this is the 21st century version of carving sigils on the wall to deny entry to demons or wearing bells to ward off the Unseelie. come on give me your router admin password and I'll show you how to cast a protective spell of Get Thee Tae Fuck, Capital
#open source#microsoft windows#linux#self hosted#software#computing#if buying isn't owning then piracy isn't stealing#support small creators whenever possible
67K notes
·
View notes
Text
Resolve Slow Browsing with Chrome-Net-Internals-DNS: Here’s How (2025)
Why Your Internet Might Be Sluggish
Is it taking an eternity to load a website or it's not opening at all? Before blaming your internet connection, consider clearing your DNS cache using a little-known hidden tool that Chrome has called chrome-net-internals-dns.
This is one of the easiest ways to speed up your browser and eliminate irritating connection failures—without downloading additional software.
Browsing Issues in 2025 Are More Common Than You Think
As of 2025, issues around browsing a website are more common than ever because the browser you may be using could have a stale or corrupted DNS entry cached.
Don't be surprised! DNS is designed to simplify your surfing behavior, but sometimes things get confusing, and the browser is simply protecting you from clicking something crazy.
What is Chrome-Net-Internals-DNS and How It Works
In Google Chrome, you can check, manage and flush your DNS cache using the built-in tool located at chrome://net-internals/#dns.
This guide will cover everything you need to know about chrome-net-internals-dns, including:
What it is
How it works
Step-by-step instructions for both desktop and mobile
We’ve also included how to clear socket pools to fix recurring issues related to unstable connections or failed loading.
Advanced Methods Beyond Chrome-Net-Internals-DNS
If you tried clearing the cache but still have no relief, do not worry. We provide advanced methods for:
Flushing DNS on Windows, macOS, and Linux
Resetting Chrome flags
Changing your DNS provider to Google DNS or Cloudflare DNS
Troubleshooting Common DNS Problems
Also included is a list of general DNS problems and how to troubleshoot them effectively.
Whether you’re a casual user or a tech-savvy browser, learning to use chrome-net-internals-dns can greatly enhance your browsing experience.
Take Full Control of Chrome’s DNS Settings
Don't accept a slow internet or broken sites without discovering how to optimize Chrome like a pro!
Read the full guide now and take control of your DNS settings today using chrome-net-internals-dns!
#Chrome Net Internals DNS#chrome-net-internals-dns#clear DNS cache#speed up Chrome#DNS fix 2025#network troubleshooting#Chrome flush DNS
0 notes
Text
to Supercharge Your Browsing Google Chrome is one of the most widely used web browsers, constantly updated with new features and improvements. But did you no Chrome also includes hidden experimental features known as “flags”? These experimental flags offer powerful ways to customize your browsing experiance, enhance performance, and try out upcoming technologies before they become mainstream.In this guide, we’ll walk you through what Chrome flags are, how to safely enable them, and provide practical tips to help you get the most out of these hidden gems. Materials and Tools Needed Material/ToolDescriptionGoogle Chrome BrowserLatest stable version of Chrome installed on your Windows,macOS,Linux,or Chrome OS device.Internet ConnectionRequired for downloading Chrome updates and researching flags.Basic Computer KnowledgeComfort with navigating browser menus and entering URLs. What Are Chrome Flags? Chrome flags are experimental features built into the browser but not enabled by default. they function as testing grounds for new ideas and functions that Google might integrate into the public version later. Flags let users explore cutting-edge options such as enhanced security measures, advanced visual designs, improved tab management, or network optimizations. Because flags are experimental, they may sometimes cause instability or unexpected behavior. It is indeed essential to use them cautiously and discontinue use if you experience issues. Step-by-Step guide: How to Enable and Use Chrome Flags Step 1: Open the Chrome Flags Page Launch your Google Chrome browser. In the address bar,type chrome://flags and press Enter. This will open the Chrome flags experimental features page, displaying a long list of available flags. Step 2: Search for specific Flags Use the search bar at the top of the page to find a specific flag by keyword (e.g., "dark mode", "tab groups", "GPU rasterization"). Alternatively, scroll through the list to explore flags you might find interesting. Step 3: Enable a Chrome flag Click the dropdown menu next to the flag you want to enable. Select Enabled from the dropdown options. Some flags have additional options such as different experimental modes – choose the one you want. Step 4: Relaunch Chrome After enabling the desired flags, a prompt will appear at the bottom with a Relaunch button. Click Relaunch to restart the browser and apply the changes. Step 5: Test the Enabled Features After relaunch, verify the new functionality or behavior enabled by the flags. If the flags cause issues, return to chrome://flags to disable them (choose Default from the dropdown), then relaunch Chrome again. Tips for Using Chrome Flags Safely and Effectively Backup important data: If you rely on Chrome for critical work, back up bookmarks and passwords before enabling multiple flags. Enable one flag at a time: This helps isolate issues caused by experimental features. Check flag status regularly: Flags may move into mainstream Chrome or be deprecated over time. Restart your browser often: some flags require multiple restarts or only initialize after relaunch. Stay updated: Regularly update Chrome to avoid incompatibility with experimental features. Popular Chrome Flags Worth Trying Flag NameDescriptionStatusDark Mode (force-dark-mode)forces dark mode on web contents for a comfortable night browsing experience.Frequently enough enabledTab Groups (tab-groups)Organize tabs into visually distinct groups for better multitasking.Stable feature in recent versionsGPU Rasterization (enable-gpu-rasterization)Enhances page rendering performance using the GPU.ExperimentalParallel Downloading (enable-parallel-downloading)Speeds up file downloads by splitting them into parallel tasks.Popular with power users frequently Asked Questions (FAQs) about Chrome Flags
Is it safe to use Chrome Flags? Generally yes, but as flags are experimental, they can cause browser crashes or glitches. Enable them cautiously and revert any changes if issues arise. Can I lose my browsing data by enabling flags? Enabling flags does not typically erase data, but unexpected browser behavior might cause temporary issues. Always back up important data regularly. Do Flags work on all devices? Most flags are available across desktop platforms (Windows, macOS, Linux), but support on mobile Chrome is limited or experimental. Conclusion Chrome’s experimental features or flags open exciting possibilities to customize and optimize your browsing experience. Whether you’re a GitHub dev looking to test developer tools or a casual user wanting faster downloads and better visuals, flags give you early access to powerful browser tweaks. Remember to enable flags one at a time,stay cautious with stability,and keep your browser updated.Try exploring chrome://flags today and unlock hidden Chrome power!
0 notes
Text
Google released an emergency update for the Chrome browser to patch an actively exploited vulnerability that could have serious ramifications. The update brings the Stable channel to versions 136.0.7103.113/.114 for Windows and Mac and 136.0.7103.113 for Linux. The easiest way to update Chrome is to allow it to update automatically, but you can end up lagging behind if you never close your browser or if something goes wrong—such as an extension stopping you from updating the browser. To manually get the update, click Settings > About Chrome. If there is an update available, Chrome will notify you and start downloading it. Then all you have to do is restart the browser in order for the update to complete, and for you to be safe from those vulnerabilities.
This update is crucial since it addresses an actively exploited vulnerability which could allow an attacker to steal information you share with other websites. Google says it’s aware that knowledge of CVE-2025-4664 exists in the wild. But while Google didn’t acknowledge that the vulnerability is actually being actively exploited, the Cybersecurity and Infrastructure Security Agency (CISA) added the vulnerability to its Known Exploited Vulnerabilities catalog—a strong indication the vulnerability is being used out there.
More info in the link.
1 note
·
View note
Text

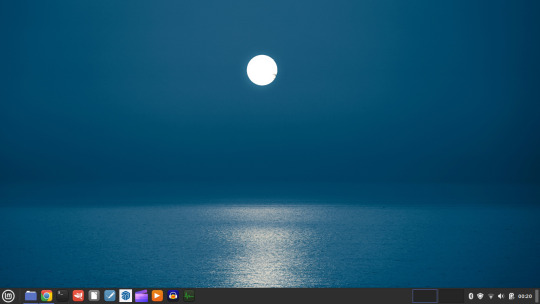
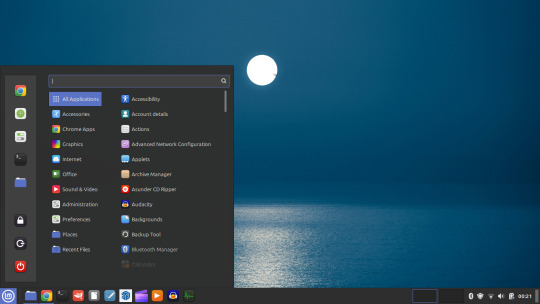
05.09.24
Linux laptop project 2024.
I decided to upgrade my old laptop by making it a Linux dual boot system. I had never done this before. I downloaded the ISO files for Linux Mint 22 'Wilma' and Ubuntu 24.04.1 'Noble Numbat' LTS.
The selected files include the standard desktop environments for each, Cinnamon, for Linux Mint and GNOME for Ubuntu.
Then using the built in USB disk creator on Linux Mint, I created bootable USBs, one for Linux Mint and one for Ubuntu. I decided to install Linux Mint first. The installation includes creating partitions and I used the installation partition creator to create a 25 Giga-byte partition in which I installed Linux Mint. The installation went ahead smoothly, and when it completed, I booted up Linux Mint. It looked perfect.
See screenshots below.


I then installed GParted, which is a more powerful partition manager to create the additional partitions I needed. I created a 25 Giga-byte partition for Ubuntu, two other 25 Giga-byte partitions and I hundred Giga-byte data partition formatting them all using ext4.
I then installed Ubuntu. During the installation, I selected the extended install, rather than the minimal install, so I had a full Ubuntu desktop installation on the second partition on my laptop hard drive. This all went well and at the end of it all I had a system which could boot either Linux Mint or Ubuntu.


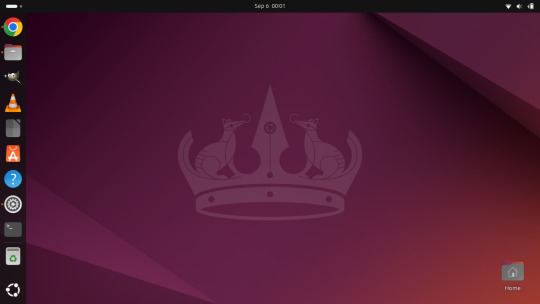


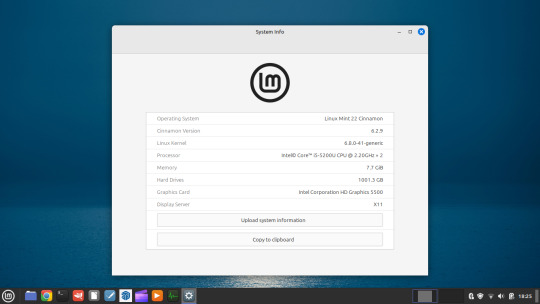
After installation, I booted each system up individually and updated them with the latest updates available, and then I installed necessary software that I wanted such as the Google Chrome Browser, Audacity, VLC Media Player, GIMP, Asunder CD ripper.
I also reinstalled the Chrome web apps for Microsoft Clipchamp and Trimble SketchUp web.
The majority of software bundled on these Linux distros is already preinstalled. I then had fun tweaking each install and making them look how I wanted.
Here is a list of some of the tasks I did in both installs:
- configuring the desktop environment to my liking, e.g. background, theme colour, dark theme (Ubuntu) mixed colour scheme (Mint). - added Bluetooth devices (headphones, Mini-Rig speaker) - added the printer device - dual booted into each one to check them out!
-
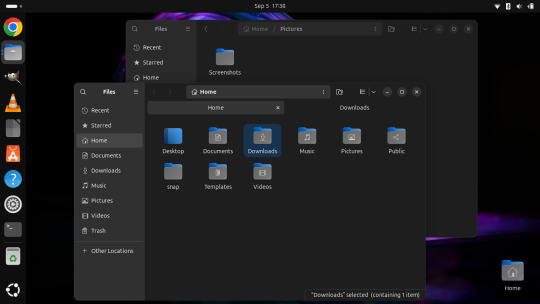
After this, Dad wanted to finish the set-up in such a way that I could link my local laptop Documents, Downloads, Pictures, Music and Video folders directly to the data partition, which would mean that I could access those folders automatically from any installed Linux distributions, however this didn't quite go to plan and messed some things up, so we decided to re-install both operating systems again and I repeated all the previous steps and left out the folder sharing part for now.
-
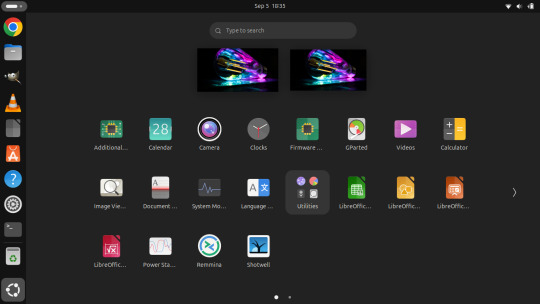
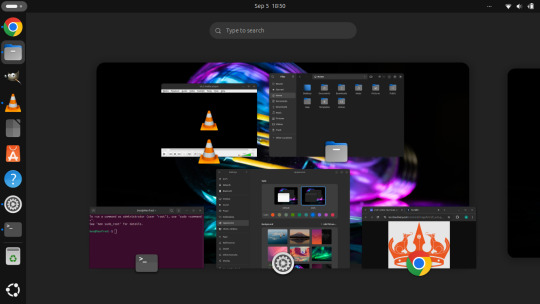
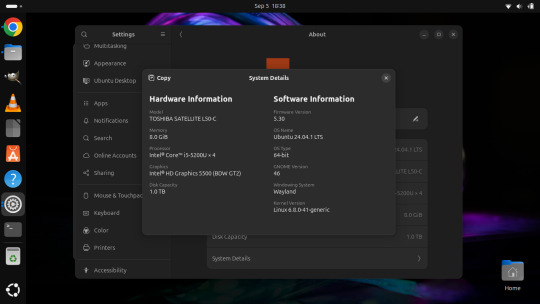
The images underneath show the final desktop installs with my various theme and desktop personalisation's applied and all the installed apps.
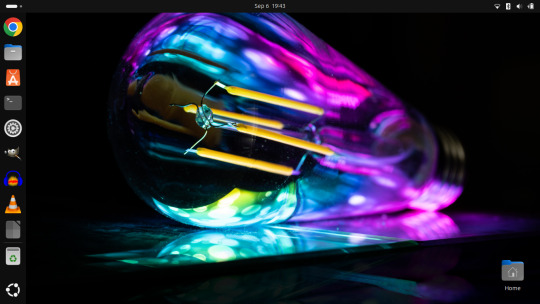
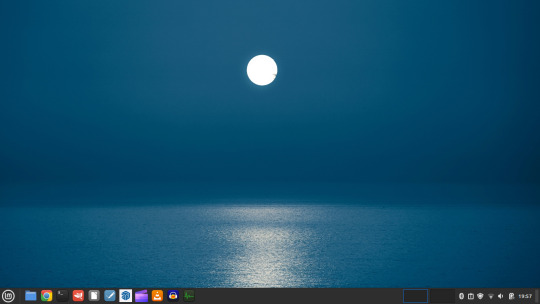
Here is a screenshot of the 'GNOME image viewer' in Mint and Ubuntu.

Ubuntu Linux is celebrating its 20th anniversary with a web post.
See link below:
https://ubuntu.com/20years
For more information about the Linux laptop project, search 'Linux' on my Tumblr blog!
6 notes
·
View notes
Text
Computer Hardware vs. Software: Key Differences Explained
When we dive into the world of technology, two key players often steal the spotlight: computer hardware and software. Both are crucial for a computer to operate, but they each have their own unique roles. Grasping the differences between them can empower users to make smarter choices when it comes to upgrading their systems, fixing problems, or simply getting to know the ins and outs of computing.
What Is Computer Hardware?
Computer hardware is all about the physical parts of a computer system. These are the components you can actually see and touch. Here are some examples:
- Central Processing Unit (CPU) – Think of it as the brain of the computer.
- Random Access Memory (RAM) – This is the temporary storage for tasks that are currently in action.
- Hard Disk Drive (HDD) / Solid State Drive (SSD) – These serve as long-term storage solutions.
- Motherboard – The main circuit board that connects all the different components.
- Graphics Processing Unit (GPU) – This one takes care of the visual output.
- Power Supply Unit (PSU) – It’s responsible for providing electricity to the entire system.
- Peripherals – These include keyboards, mice, monitors, and printers.
Since hardware is made up of physical parts, it can wear out over time, which means you might need to replace or upgrade certain components to keep things running smoothly.
What Is Software?
Software, on the other hand, is all about the programs and instructions that guide the hardware on what to do. Unlike hardware, software is intangible and exists in the form of code. There are two main categories:
- System Software – This type manages the operations of the hardware (think operating systems like Windows, macOS, and Linux).
- Application Software – These are the programs that perform specific tasks (like web browsers, word processors, and games).
While software depends on hardware to work, it can be easily updated or swapped out without needing to change any physical parts.
Key Differences Between Hardware and Software
Aspect
Hardware
Software
Nature
Physical, tangible components.
Digital, intangible programs.
Durability
Can wear out or fail over time.
Doesn’t degrade physically.
Upgrades
Requires purchasing new parts.
Updated via downloads or installations.
Function
Executes tasks based on software commands.
Provides instructions to hardware.
Examples
CPU, GPU, RAM, Motherboard.
Windows, Google Chrome, Photoshop.
How Hardware and Software Work Together
To keep a computer system running smoothly, you need both hardware and software. Let’s break it down:
When you fire up a web browser (that’s the software), the CPU (the hardware) jumps into action to process your request, while RAM temporarily holds onto data, and the GPU takes care of rendering all those visuals you see.
The operating system (another piece of software) plays a crucial role by managing the hardware resources, ensuring everything runs without a hitch.
If either the hardware or software is outdated or not working properly, you might find your system slowing down or even crashing.
Conclusion
Even though computer hardware and software are quite different, they rely on each other to create a functional computing experience. Hardware gives you the physical structure, while software provides the necessary instructions to get things done. Knowing how they differ can really help when it comes to troubleshooting, upgrading, or optimizing your computer’s performance.
By understanding how these components work together, users can make smarter choices—whether they’re building a new PC, installing fresh software, or figuring out technical problems.
1 note
·
View note
Text
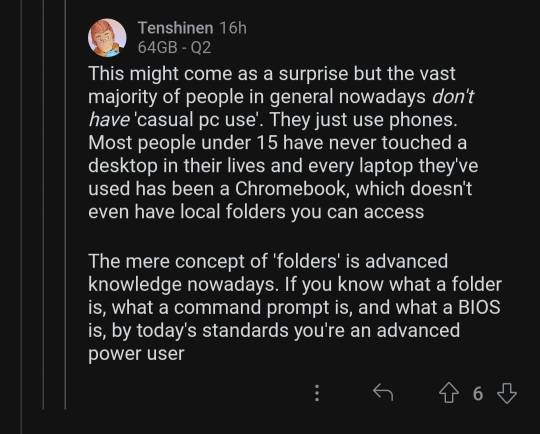
Okay to be honest, 99% of users never need to access the BIOS. (Although if you do PC gaming, you may need to get in there to overclock your GPU. Though frankly they have apps for that too nowadays).
Anyway, BIOS is the very very very most basic level of firmware for your motherboard. When you turn on your PC, the BIOS is what tells everything what drive to use, how to boot up the operating system, how much memory you have installed, etc. When you see the splash screen on startup (AKA a screen that briefly displays the manufacturer name of your device, like "Dell" or whatever), the BIOS has already run. To access BIOS, you generally need to hold down a key when you first power on your device. Which key may differ by manufacturer, so just google "how to enter bios Dell" (or whatever your brand is, like Lenovo, Asus ROG, etc). But, uh, please don't actually change anything in your BIOS unless you know exactly what you're doing and why. It's a good way to make your device stop turning on forever.
Command line is much more useful. (You may also have heard terms like CMD, console, command prompt, CLI, shell, or terminal, and these are technically not all synonymous basically synonymous for your purposes.) It's what you see every movie hacker using, where it's a black window with nothing but lines of text and a blinking cursor. You can launch it by hitting your Windows button and typing "CMD".
Command lines are useful to do technical things more quickly than going through a graphical interface. For example, let's say you've finally decided to switch to Firefox. You want to do it tomorrow, but hey, you could at least get it donwloaded and installed tonight, right? So you could launch Chrome, navigate to "firefox.com" click Download, save file, go to your Downloads folder, doubleclick the executable, and click through the installation prompts. Or... you could launch CMD and type "winget install firefox -h && shutdown /s /t 0". When you hit enter, the Windows built-in package manager will download and silently install Firefox and will turn off your PC once it finishes.
The big learning curve for command lines is that, compared to a graphical interface where you have clickable buttons and pages that show you all your options, command lines generally require you to know what commands you want to run, and what syntax they take. Different command line programs require different command languages, too. Windows Command Prompt uses "CMD", but Windows also has a more advanced command line called Powershell, which uses the language "Powershell." You can also run Visual Basic scripts that use VBS or VBA. The thing that makes Linux so tricky for most people is that the command line terminal is your primary way of interacting with the computer, using the language "Bash". It requires a lot of memorization; when you first start using any of these, google and superuser.com are your friends.
this can't be true can it
#i love explaining shit to ppl. please feel free to send me asks if u have more questions#computers#how to use computers
99K notes
·
View notes
Text
Best Ways to Use Google Authenticator on Your Computer

Introduction
With the rise in cyber threats and online security breaches, two-factor authentication (2FA) has become an essential security measure. One of the most widely used authentication tools is Google Authenticator, a free app that generates time-based one-time passwords (TOTP) for securing online accounts. While Google Authenticator is primarily designed for mobile devices, many users prefer to access it on their computers for convenience and better workflow integration. If you're looking for the best ways to use Google Authenticator on your computer, this guide will walk you through various methods, including how to download Google Authenticator app for PC and use alternatives that provide the same functionality.
Why Use Google Authenticator on Your Computer?
Many users prefer to use Google Authenticator on their computers for several reasons:
Convenience: Having 2FA codes accessible on your computer means you don't need to switch between devices while logging in.
Better Integration: Some users prefer to have all their security tools available on their desktop to streamline their workflow.
Lost or Damaged Phone: If your phone is lost, stolen, or damaged, having a backup method on your PC can be a lifesaver.
Multi-Device Access: Keeping a copy of your authentication codes on your PC can help if you regularly switch between devices.
Methods to Use Google Authenticator on Your Computer
1. Using an Android Emulator
One of the easiest ways to download Google Authenticator app for PC is by using an Android emulator. Emulators allow you to run Android apps on your computer, effectively giving you the same experience as using the app on a mobile device.
Steps to Install Google Authenticator Using an Emulator:
Install an emulator for Android, such Bluestacks, NoxPlayer, or MEmu.
Create an account on Google and install the emulator.
Open the Google Play Store within the emulator.
Search for "Google Authenticator."
Download Google Authenticator app for PC through the emulator.
Configure your accounts by scanning QR codes or manually entering the setup keys.
2. Using Browser Extensions
Another alternative to using Google Authenticator on your computer is browser extensions. Several browser-based 2FA applications work similarly to Google Authenticator.
Recommended Extensions:
Authenticator (for Chrome and Firefox): A browser extension that stores your 2FA codes securely.
2FA Authenticator (for Chrome): Works similarly to Google Authenticator and can be used directly from your browser.
Steps to Use a Browser-Based 2FA:
Install a trusted 2FA extension from your browser’s web store.
Open the extension and add a new entry by scanning a QR code or entering a secret key.
Use the generated codes for authentication.
3. Using Third-Party Desktop Apps
Several third-party applications allow you to download Google Authenticator app for PC or use alternative authenticator apps that work similarly.
Best Desktop Alternatives to Google Authenticator:
WinAuth (Windows Only): A lightweight app that provides TOTP codes for various accounts.
Authy Desktop: Available for Windows, macOS, and Linux, Authy syncs authentication codes across devices.
KeePass with KeeOTP Plugin: If you use KeePass as a password manager, you can integrate it with KeeOTP for TOTP functionality.
Steps to Use WinAuth:
Download and install WinAuth from the official website.
Open the application and click "Add New" to configure your accounts.
You have two options: scan the QR code or manually enter the secret key.
Save your settings and use the generated codes for 2FA login.
4. Syncing Google Authenticator with Authy
Authy is a great alternative that allows syncing authentication codes across multiple devices, including PCs. If you find it inconvenient to use Google Authenticator solely on a mobile device, Authy can serve as a reliable substitute.
Steps to Use Authy on PC:
Download and install Authy Desktop from the official website.
Register with your phone number and email.
Set up your 2FA accounts by scanning QR codes.
Use the generated authentication codes on your PC.
5. Using a Virtual Machine
For tech-savvy users, setting up a virtual machine (VM) can be an option to run Google Authenticator on a PC securely. A VM allows you to install an Android OS and use Google Authenticator within the environment.
Steps to Set Up a VM for Google Authenticator:
Install virtualization software like VirtualBox or VMware.
Download an Android-x86 ISO file.
Create a new virtual machine and install the Android OS.
Install Google Authenticator from the Play Store within the VM.
Configure your accounts and use the VM-generated 2FA codes.
Security Tips for Using Google Authenticator on PC
When using Google Authenticator or similar 2FA solutions on a computer, security should be a top priority. Here are some tips to keep your authentication codes safe:
Use Strong Passwords: Secure your emulator, browser extension, or desktop app with a strong password.
Enable Encryption: Some 2FA apps allow you to encrypt your authentication keys for added security.
Backup Your Keys: Store a backup of your authentication keys in a secure location to avoid being locked out.
Use a Secure PC: Avoid installing 2FA apps on public or shared computers.
Enable Multi-Factor Security: Consider using biometric or hardware-based authentication (such as YubiKey) for additional security.
Conclusion
Using Google Authenticator on a computer can greatly enhance convenience while maintaining strong security for your online accounts. Whether you choose to download Google Authenticator app for PC using an emulator, rely on browser extensions, or use third-party apps like Authy, there are plenty of options available to integrate 2FA into your workflow.
Ensuring secure access to authentication codes is crucial, so always follow best practices to safeguard your accounts. Choose the method that best fits your needs and enhances your digital security without compromising convenience.
0 notes
Text
ESTE Não é o Windows 7 e eu vou te provar!
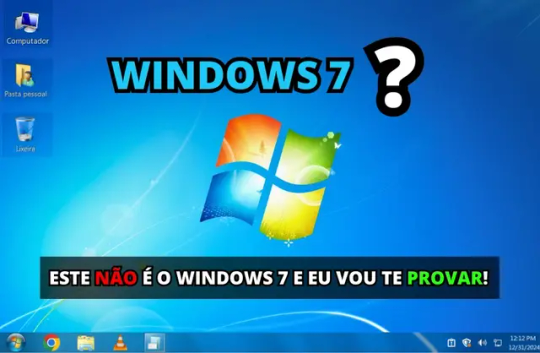
Se você está olhando para esta tela e pensou que está vendo o Windows 7, é hora de se preparar para uma surpresa! O que você está vendo na verdade é o Winux 7, um sistema operacional inovador baseado no Linux Mint, e que oferece uma experiência similar ao famoso Windows 7, mas com todas as vantagens de um sistema leve, rápido e ideal para computadores mais antigos.
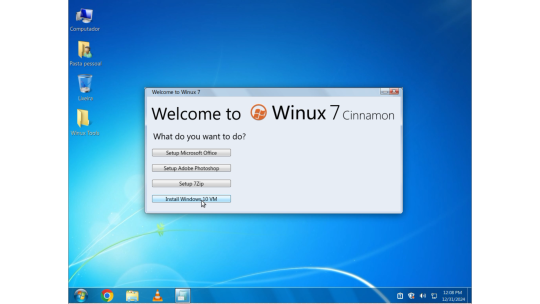
O Que é o Winux 7?
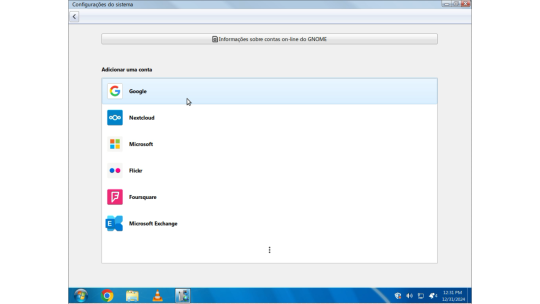
O Winux 7 é uma versão do Linux criada para ser simples, intuitiva e extremamente leve, o que a torna a escolha perfeita para quem tem um PC com configurações mais modestas. Se você já experimentou o Linux, sabe o quão poderoso e eficiente ele pode ser, e o Winux 7 traz tudo isso com uma interface gráfica familiar, que lembra muito a do Windows 7. O mais interessante é que, apesar de parecer com o Windows 7, o Winux 7 não é da Microsoft – ele é completamente baseado no Linux, o que significa que você ganha mais segurança, liberdade e desempenho. Por Que Escolher o Winux 7? - Ideal para Computadores Antigos: O Winux 7 é otimizado para máquinas mais antigas, exigindo menos do hardware e proporcionando uma navegação mais fluida. - Interface Familiar: Se você gosta da interface clássica do Windows 7, vai se sentir em casa com o Winux 7. A transição é simples e sem surpresas. - Compatibilidade com Softwares Populares: Mesmo sendo baseado no Linux, o Winux 7 permite que você instale o Office 2007, que fica idêntico ao que você usava no Windows. Além disso, o Photoshop pode ser instalado diretamente de repositórios, e o sistema já vem com os principais navegadores: Google Chrome, Mozilla Firefox e o player de mídia VLC. - Loja de Aplicativos: Assim como o Windows, o Winux 7 tem sua própria loja de aplicativos, onde você pode encontrar uma vasta gama de programas para facilitar ainda mais sua vida. - Integração com Redes Sociais e E-mail: Sincronize suas contas de redes sociais e de e-mail diretamente no sistema, tornando tudo mais prático e centralizado.
Como Instalar o Winux 7: Passo a Passo Simples
Agora que você já sabe como o Winux 7 pode transformar seu computador, que tal aprender a instalá-lo? Não se preocupe, vou te guiar por todo o processo! - Baixe a ISO do Winux 7: O primeiro passo é fazer o download da imagem ISO do Winux 7 64 bits. - Crie um Pendrive Bootável: Depois de baixar a ISO, você precisará criar um pendrive bootável. Para isso, você pode usar ferramentas como o Rufus. - Inicie pelo Pendrive: Conecte o pendrive no seu PC e reinicie o sistema. Ao iniciar, escolha a opção “Start Winux 7 Beta”. - Verificação de Arquivos: O sistema começará a verificar os arquivos de instalação. Esse processo pode levar alguns minutos, então aguarde pacientemente. - Escolha o Idioma: Após a verificação, será hora de escolher o idioma para o seu sistema. Selecione o que preferir. - Opção de Instalação: Escolha a opção “Instalação Normal”. Não se esqueça de marcar a opção de instalar codecs multimídia, para que você tenha suporte a vídeos, músicas e outros arquivos. - Gerenciamento de Partições: Aqui, você poderá escolher entre apagar tudo no seu disco rígido e fazer uma instalação limpa ou, caso tenha dados importantes, pode optar pela instalação avançada e gerenciar manualmente as partições. Lembre-se de fazer um backup antes de tomar qualquer decisão! - Defina Suas Preferências: Após isso, o instalador pedirá para você escolher a sua localização e, em seguida, criar um nome de usuário e definir uma senha de administrador para sua conta. - Finalizando a Instalação: Agora é só aguardar. O sistema fará a instalação automaticamente. Quando terminar, seu computador irá reiniciar e pronto! O Winux 7 estará pronto para uso.
Winux 7 Download ISO
Faça o Download da ISO do Winux 7 64 Bits no servidor Mediafire! O Winux 7 é, sem dúvida, uma excelente escolha para quem precisa de um sistema leve, rápido e fácil de usar. Com a interface familiar do Windows 7 e a robustez e segurança do Linux, você terá uma experiência incrível mesmo em máquinas mais antigas. E o melhor de tudo: é gratuito e seguro! Deixe seu comentário abaixo com suas dúvidas ou experiências, inscreva-se em nosso canal no YouTube e Até a próxima! Read the full article
1 note
·
View note
Text
Webcam Test | Check Camera Functionality and Quality
Refresh device listCopy all information to JSON
Horizontal resolution --
Vertical resolution --
Frame rate --
Zoom --
Focus modes --
Need to quickly run a webcam test? Our free camera test allows you to instantly check your webcam - both on your computer and smartphone! We don't require any additional software installation, and the entire process takes just a few seconds. It's the perfect solution before important video calls, online meetings, or video conferences.
Why Should You Test Your Camera?
Before an important online meeting - avoid stress and technical problems
After purchasing a new camera - verify it works correctly
Before a job interview - ensure everything works perfectly
After system updates - verify drivers are working properly
When experiencing image issues - quickly diagnose the source of the problem
How to Test Your Webcam?
Select device - from the dropdown list, choose the camera you want to test (built-in laptop camera, external USB camera, smartphone camera)
Start camera test - click the blue "Test Camera" button and follow the instructions. No software download required.
Grant access - access is blocked by default, you must grant it in your browser when prompted.
Check operation - after granting access, you should see the camera feed on screen. If you don't see it, check the troubleshooting solutions below.
What Does Our Online Webcam Test Check?
Camera functionality - whether the image is displayed
Real-time image display - whether there are any delays
Basic device functionality - whether the camera is detected
Browser compatibility - whether your browser works with the camera
Camera Test Applications
Our online camera test is particularly useful in the following situations:
Online job interviews - ensure everything works before an important job interview
Remote learning - check your camera before online classes or exams
Business meetings - test your equipment before an important presentation
Online medical consultations - ensure good connection quality with your doctor
Family video calls - ensure smooth communication with loved ones
Camera Test On Smartphone
Our camera test also works on mobile devices! You can easily check the operation of:
Front camera (for selfies and video calls)
Rear camera (main)
Additional lenses (wide-angle, zoom)
Common Camera Issues and Their Solutions
Why Isn't My Camera Working?
Camera not connected - check the physical device connection
Damaged cable - replace with a working cable
Device is turned off - check system settings
Camera is in use - close other applications using the camera
No permissions - allow browser access to the camera
Physical damage - contact service support
How to Resolve Camera Issues?
Check connection - ensure the camera is properly connected
Restart browser - sometimes a simple restart helps
Check privacy settings - both in system and browser
Update drivers - outdated drivers can cause problems
Clear cache - if the browser is running slowly
Camera Test Privacy Policy
All test operations are performed locally in your browser
We don't store any camera data
Device memory data is deleted when closing the page
Security - we don't send any data to the server
System Requirements for Webcam Test
Supported Browsers:
Google Chrome 60+ (PC, Android)
Mozilla Firefox 55+ (PC, Android)
Microsoft Edge 79+ (PC, Android)
Safari 11+ (Mac, iOS)
Opera 47+ (PC, Android)
Supported Systems:
Windows 8.1, 10, 11
macOS 10.13 and newer
Android 7.0 and newer
iOS 11.0 and newer
Linux - most popular distributions
Thanks to wide compatibility, you can check your webcam on desktop computers, laptops, as well as your smartphone or tablet. The online camera test works on virtually any modern device with internet access.
Camera Testing Tips
Ensure good lighting - helps in assessing image quality
Close other applications using the camera before testing
Test all cameras available on your device
Try different browsers if experiencing issues
Perform test before important meetings - avoid stress
How to Test Your Webcam?
Choose device - Select the camera you want to test from the dropdown list.
Start camera test - Click the blue 'Test camera' button and follow the instructions.
Grant camera access - Allow the browser to access the camera when prompted.
Check the image - After granting access, you will see the camera feed on screen.
Frequently Asked Questions
Does the camera test work on smartphones?
Yes! Our camera test is fully compatible with smartphones and tablets. You can check both front and rear cameras of your mobile device.
Why isn't the camera working?
The most common causes are: disconnected camera, damaged cable, device disabled in settings, camera being used by another application, lack of browser permissions, or hardware malfunction.
Do I need to install additional software?
No, our test works directly in the web browser. It doesn't require installation of any additional programs or plugins.
How do I check if the camera is working?
After clicking the blue 'Test camera' button and granting permissions, you should see the camera feed in real-time on your screen. If the image appears, the camera is working properly.
Which browsers are supported?
The camera test works on all popular browsers in their current versions: Google Chrome 60+, Mozilla Firefox 55+, Microsoft Edge 79+, Safari 11+, and Opera 47+.
Character Counter
Microphone Test and Audio Quality Analysis
Latitude and Longitude Finder on Map
Get Lat Long from Address
Where am I? Find my location now
Crop and Rotate Image Onlineineedtocheck.com
Need to quickly run a webcam test? Our free camera test allows you to instantly check your webcam - both on your computer and smartphone! We don't require any additional software installation, and the entire process takes just a few seconds. It's the perfect solution before important video calls, online meetings, or video conferences.
0 notes
Text
Selenium PYTHON: Unlock the Power of Automation Testing with Python

In today's fast-paced software development environment, automation testing has become a crucial part of every development lifecycle. Among the various tools and programming languages available for automation, Selenium PYTHON has gained immense popularity due to its ease of use, flexibility, and powerful capabilities. Selenium, an open-source framework, is widely used for automating web applications across different browsers. When paired with PYTHON, a versatile and beginner-friendly programming language, it opens the door to streamlined, efficient testing solutions.
If you're new to automation or want to deepen your knowledge of testing with Selenium PYTHON, this guide will walk you through everything you need to know. We’ll cover the basics, why this combination is the best choice for your projects, and how mastering these tools can propel your career in automation testing. Let's dive in!
Introduction to Selenium and Python
Selenium is an open-source tool that automates browsers. It allows testers and developers to automate web applications for testing purposes, but it also can be used to perform repetitive tasks like web scraping. Selenium supports multiple programming languages, but its compatibility with PYTHON has made it a top choice for automation testers. Python's simplicity and readability make it easier to write scripts quickly and efficiently.
Python’s high-level language structure, combined with Selenium’s rich feature set, provides a seamless testing experience. Whether you're dealing with complex test scenarios or just getting started with basic browser automation, using Selenium PYTHON gives you a competitive edge.
Why Choose Selenium with Python?
When it comes to browser automation, pairing Selenium with Python is a smart move for several reasons:
Ease of Use: Python is one of the most straightforward programming languages to learn. Its readable syntax reduces the time needed to get up and running with Selenium PYTHON.
Rich Libraries: Python offers an extensive set of libraries that can complement Selenium’s capabilities, making automation testing even more powerful. Libraries like unittest and pytest make the testing process easier to manage.
Cross-Platform: Selenium PYTHON scripts are cross-platform. This means you can write your tests on any operating system, whether it's Windows, Linux, or macOS, and they will work flawlessly.
Community Support: Both Selenium and Python have active communities. You can find abundant resources, tutorials, and troubleshooting guides to assist you when needed.
Selenium PYTHON is perfect for anyone looking to boost their automation skills and ensure that their web applications run smoothly across various browsers.
Getting Started with Selenium PYTHON
Now that we’ve touched on why you should use Selenium PYTHON, let's explore how to get started with it.
Step 1: Install Selenium
The first step in setting up Selenium PYTHON is installing the Selenium library. You can easily do this using pip, Python's package installer, by running the following command:
bash
Copy code
pip install selenium
Step 2: Set Up a WebDriver
To automate browsers, Selenium uses WebDrivers. For example, if you want to automate Chrome, you need the Chrome WebDriver. Download the relevant WebDriver and ensure it matches the version of your browser.
python
Copy code
from selenium import webdriver
driver = webdriver.Chrome(executable_path='path_to_chromedriver')
Step 3: Writing Your First Selenium Python Script
Once the setup is complete, you're ready to write your first Selenium PYTHON script. Below is a basic example that opens Google, types a query, and clicks the search button.
python
Copy code
from selenium import webdriver
from selenium.webdriver.common.keys import Keys
driver = webdriver.Chrome()
driver.get("http://www.google.com")
search_box = driver.find_element_by_name("q")
search_box.send_keys("Selenium Python")
search_box.send_keys(Keys.RETURN)
With this simple script, you’ve just automated a Google search. Imagine the possibilities from here—running tests on complex web apps, gathering data from websites, and more—all with Selenium PYTHON.
The Power of Automation Testing with Selenium PYTHON
Automation testing is no longer just a buzzword in the industry—it’s a necessity. Organizations are rapidly moving towards automated testing to reduce human error, ensure faster testing cycles, and deliver high-quality products. By using Selenium PYTHON, you're able to write more robust, reusable test scripts that provide accurate results faster than manual testing ever could.
Consider the following benefits:
Time Efficiency: Writing automated test scripts with Selenium PYTHON can save countless hours compared to manual testing. These tests can be scheduled to run frequently and without human intervention, ensuring that no new bugs are introduced into the system.
Browser Compatibility Testing: With Selenium PYTHON, you can test your web application across different browsers like Chrome, Firefox, and Safari without having to modify your scripts.
Integration with CI/CD Tools: You can integrate your Selenium PYTHON scripts with Continuous Integration/Continuous Delivery (CI/CD) tools such as Jenkins, allowing your automated tests to run every time there's a code change.
Top Trending Keywords for Selenium Python
To ensure your blog ranks well in search engines, it's crucial to use trending and related keywords. Here are some trending keywords that you should include in your blog to boost SEO:
Selenium automation with Python
Python Selenium tutorial
Automated browser testing with Python
Best practices for Selenium Python
Selenium WebDriver Python
Cross-browser testing with Selenium Python
Selenium framework in Python
End-to-end testing with Python Selenium
By strategically incorporating these keywords, your blog can rank higher for a variety of search queries related to automation testing, ensuring it attracts a wide range of readers.
Advanced Selenium PYTHON Features
Once you've mastered the basics of Selenium PYTHON, you can explore more advanced features:
Headless Browsing: Run tests without opening a browser window, ideal for server environments or situations where you want faster execution.
Screenshot Capture: Take screenshots at various points during your test to visually verify outcomes.
Handling Alerts and Popups: Selenium provides simple ways to handle web popups, allowing for smooth automation of complex user interfaces.
Data-Driven Testing: Integrate your tests with external data sources like Excel or CSV files to run the same test with different sets of input data.
python
Copy code
driver.save_screenshot("screenshot.png")
By leveraging these features, you can take your automation testing to the next level, ensuring that your web applications are thoroughly vetted before they reach your users.
Best Practices for Selenium PYTHON
While learning Selenium PYTHON, it's essential to adopt best practices for efficient and maintainable test automation:
Modular Scripts: Break your scripts into smaller, reusable modules to simplify maintenance and make debugging easier.
Use of Wait Commands: Selenium offers explicit and implicit wait commands to ensure that your script doesn't fail due to slow-loading web elements.
Logging and Reporting: Implement logging in your scripts to track test execution progress and generate detailed test reports.
By following these best practices, your Selenium PYTHON tests will be more reliable and easier to manage over time.
Conclusion: Master Selenium PYTHON for Effective Web Automation
In conclusion, Selenium PYTHON is a powerful combination for anyone looking to automate web applications efficiently. Whether you're a beginner or an experienced tester, mastering these tools will enable you to create fast, reliable, and scalable automated tests. The flexibility of Selenium, combined with the simplicity of PYTHON, makes it an ideal solution for modern web testing needs.
So, start your Selenium PYTHON journey today and unlock the full potential of automation testing.
0 notes