#How to Create a Gravatar (Set Profile Picture in WordPress)
Explore tagged Tumblr posts
Visit Tumblr Blog
Explore Tumblr blogs with no restrictions, modern design and the best experience.
Last Seen Tumblr Blogs


Fun Fact
Hackers stole 65M passwords from Tumblr in 2013.
Text
A Step-by-Step Guide: How to Change Your Profile Picture on WordPress
Are you tired of seeing the same old profile picture staring back at you whenever you log into your WordPress account? Changing your profile picture on WordPress is a breeze, and it can add a personal touch to your online presence. Whether you're a seasoned WordPress user or a newbie just getting started, this guide will walk you through the process in simple steps.
Before we delve into the how-to, let's address why updating your profile picture matters. Your profile picture is often the first thing people notice about you online. It's your virtual handshake, your digital first impression. Whether you're engaging with readers on your blog or participating in online communities, a distinctive profile picture helps you stand out and build connections.
Now, let's get down to business. Follow these steps to change your profile picture on WordPress:
Log in to your WordPress account. Once you're logged in, you'll be taken to the WordPress dashboard.
From the dashboard, navigate to the top right corner where you see your profile picture or your username. Click on it, and a drop-down menu will appear.
In the drop-down menu, click on "Edit My Profile." This will take you to your profile settings page.
On the profile settings page, you'll see various options to edit your profile information. Look for the section labeled "Profile Picture."
Click on the "Change Gravatar" button. Gravatar is a service that allows you to associate a profile picture with your email address, and it's commonly used on WordPress sites.
You'll be redirected to the Gravatar website. If you already have a Gravatar account linked to the email address associated with your WordPress account, you can simply upload a new image or choose one from your existing Gravatar gallery.
If you don't have a Gravatar account yet, don't worry. You can create one for free by clicking on the "Create Your Own Gravatar" button. Follow the prompts to set up your Gravatar account and upload your desired profile picture.
Once you've selected or uploaded your new profile picture on Gravatar, save your changes. You'll be redirected back to your WordPress profile settings page, where you should see your new profile picture displayed.
And that's it! You've successfully changed your profile picture on WordPress. Now, whenever you comment on blog posts or interact with other WordPress users, your new profile picture will be visible.
Changing your profile picture on WordPress is a simple yet effective way to personalize your online identity and make a memorable impression. Whether you're updating your look, rebranding your blog, or simply want to freshen up your online presence, a new profile picture can make all the difference.
So go ahead, and give your WordPress profile a makeover today. Your new profile picture awaits!
0 notes
Text
Who we are Suggested text: Our website address is: http://box5209/cgi/addon_GT.cgi?s=GT::WP::Install::EIG+%28topidea1%29+-+10.0.87.62+[Wordpress%3b+/var/hp/common/lib/Wordpress.pm%3b+543%3b+Hosting::gap_call]. Comments Suggested text: When visitors leave comments on the site we collect the data shown in the comments form, and also the visitor’s IP address and browser user agent string to help spam detection. An anonymized string created from your email address (also called a hash) may be provided to the Gravatar service to see if you are using it. The Gravatar service privacy policy is available here: https://automattic.com/privacy/. After approval of your comment, your profile picture is visible to the public in the context of your comment. Media Suggested text: If you upload images to the website, you should avoid uploading images with embedded location data (EXIF GPS) included. Visitors to the website can download and extract any location data from images on the website. Cookies Suggested text: If you leave a comment on our site you may opt-in to saving your name, email address and website in cookies. These are for your convenience so that you do not have to fill in your details again when you leave another comment. These cookies will last for one year. If you visit our login page, we will set a temporary cookie to determine if your browser accepts cookies. This cookie contains no personal data and is discarded when you close your browser. When you log in, we will also set up several cookies to save your login information and your screen display choices. Login cookies last for two days, and screen options cookies last for a year. If you select "Remember Me", your login will persist for two weeks. If you log out of your account, the login cookies will be removed. If you edit or publish an article, an additional cookie will be saved in your browser. This cookie includes no personal data and simply indicates the post ID of the article you just edited. It expires after 1 day. Embedded content from other websites Suggested text: Articles on this site may include embedded content (e.g. videos, images, articles, etc.). Embedded content from other websites behaves in the exact same way as if the visitor has visited the other website. These websites may collect data about you, use cookies, embed additional third-party tracking, and monitor your interaction with that embedded content, including tracking your interaction with the embedded content if you have an account and are logged in to that website. Who we share your data with Suggested text: If you request a password reset, your IP address will be included in the reset email. How long we retain your data Suggested text: If you leave a comment, the comment and its metadata are retained indefinitely. This is so we can recognize and approve any follow-up comments automatically instead of holding them in a moderation queue. For users that register on our website (if any), we also store the personal information they provide in their user profile. All users can see, edit, or delete their personal information at any time (except they cannot change their username). Website administrators can also see and edit that information. What rights you have over your data Suggested text: If you have an account on this site, or have left comments, you can request to receive an exported file of the personal data we hold about you, including any data you have provided to us. You can also request that we erase any personal data we hold about you. This does not include any data we are obliged to keep for administrative, legal, or security purposes. Where your data is sent Suggested text: Visitor comments may be checked through an automated spam detection service.
0 notes
Text
Difference Between Gravatar vs Avatar
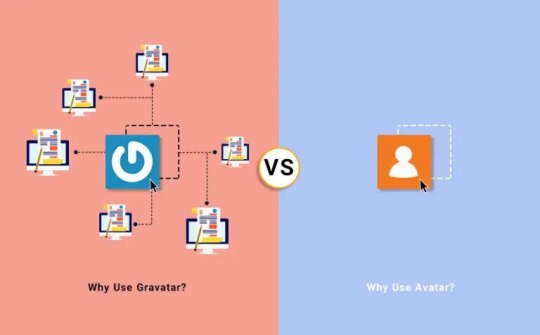
It can be said that the scope of recognition is the difference between an avatar and a Gravatar. New avatars are usually created for different sites and forums. And with a Gravatar, you are followed by the same image when you go to various places. You just sign up with Gravatar, give them a picture and that’s all! For there, your icon will appear alongside the content any time you post or comment on a WordPress website that has Globally Recognized Avatars activated.
What Is Gravatar Used For?
One of the common questions is that what is the use of Gravatar? As mentioned before, Gravatar is a web service that lets users upload and link a personal online avatar with their email address. So the avatar submitted to the website of Gravatar is considered a Gravatar.
How Gravatar Works?
The user will sign up to Gravatar and uploads their avatar
They then visit a website and create an account or make a message as usual.
If the website has incorporated Gravatar, they can contact the Gravatar program to inquire whether there is a Gravatar user with that email address.
If the program finds the user, Gravatar will send a copy of the user’s Gravatar data back to the website.
The website then sets the Gravatar on the user’s profile, post forum, or comment
If you are wondering how to use gravatar in WordPress, we should say that the user does not need to upload their avatar to the site where they have built a new account or made a post, they are all done. The website owner does not have to process the avatar of the user either-it is downloaded from Gravatar directly!
A Gravatar can be employed for profile pages, commentaries, social media profiles, forum entries, and much more.
n6cloud is the most practical web hosting service which helps you lunch your website in a powerful way!
0 notes
Text
Privacy Policy
New Post has been published on https://abdurrahimmarketing.com/privacy-policy-2/
Privacy Policy
Who we are
Our website address is: http://estudiopatagon.com/themes/wordpress/breek.
What personal data we collect and why we collect it
Comments
When visitors leave comments on the site we collect the data shown in the comments form, and also the visitor’s IP address and browser user agent string to help spam detection.
An anonymized string created from your email address (also called a hash) may be provided to the Gravatar service to see if you are using it. The Gravatar service privacy policy is available here: https://automattic.com/privacy/. After approval of your comment, your profile picture is visible to the public in the context of your comment.
Media
If you upload images to the website, you should avoid uploading images with embedded location data (EXIF GPS) included. Visitors to the website can download and extract any location data from images on the website.
Contact forms
Cookies
If you leave a comment on our site you may opt-in to saving your name, email address and website in cookies. These are for your convenience so that you do not have to fill in your details again when you leave another comment. These cookies will last for one year.
If you visit our login page, we will set a temporary cookie to determine if your browser accepts cookies. This cookie contains no personal data and is discarded when you close your browser.
When you log in, we will also set up several cookies to save your login information and your screen display choices. Login cookies last for two days, and screen options cookies last for a year. If you select “Remember Me”, your login will persist for two weeks. If you log out of your account, the login cookies will be removed.
If you edit or publish an article, an additional cookie will be saved in your browser. This cookie includes no personal data and simply indicates the post ID of the article you just edited. It expires after 1 day.
Embedded content from other websites
Articles on this site may include embedded content (e.g. videos, images, articles, etc.). Embedded content from other websites behaves in the exact same way as if the visitor has visited the other website.
These websites may collect data about you, use cookies, embed additional third-party tracking, and monitor your interaction with that embedded content, including tracking your interaction with the embedded content if you have an account and are logged in to that website.
Analytics
Who we share your data with
How long we retain your data
If you leave a comment, the comment and its metadata are retained indefinitely. This is so we can recognize and approve any follow-up comments automatically instead of holding them in a moderation queue.
For users that register on our website (if any), we also store the personal information they provide in their user profile. All users can see, edit, or delete their personal information at any time (except they cannot change their username). Website administrators can also see and edit that information.
What rights you have over your data
If you have an account on this site, or have left comments, you can request to receive an exported file of the personal data we hold about you, including any data you have provided to us. You can also request that we erase any personal data we hold about you. This does not include any data we are obliged to keep for administrative, legal, or security purposes.
Where we send your data
Visitor comments may be checked through an automated spam detection service.
Your contact information
Additional information
How we protect your data
What data breach procedures we have in place
What third parties we receive data from
What automated decision making and/or profiling we do with user data
Industry regulatory disclosure requirements
0 notes
Text
How to Create a Gravatar (Set Profile Picture in WordPress)
How to Create a Gravatar (Set Profile Picture in WordPress)
Are you looking for How to set a gravatar or how to set profile picture in WordPress? If yes then this tutorial is especially for you because in this tutorial I will show you How to Create a Gravatar and How to set on WordPress.
How to Create a Gravatar? Step 1: Go to Gravatar
The First Step I have for you is to go to gravatar official website from your browser or click here
Step 2: Click on…
View On WordPress
#How to Create a Gravatar#How to Create a Gravatar (Set Profile Picture in WordPress)#Set Profile Picture in WordPress
0 notes
Text
How to use Jetpack on Your Self Hosted WordPress Website
Jetpack is one of the most popular plugins for WordPress and it includes a variety of tools to help you improve and grow your website. However, as Jetpack offers so many features, it can be hard to gain a good understanding of what it offers and whether it is a good choice for your new WordPress website.
The purpose of this Jetpack Guide is to de-mystify Jetpack and to introduce you to some of its best modules. By the end of this article, you will know whether Jetpack would make a good addition to your new website or blog. And you will have a good understanding of which modules to activate.
What is Jetpack?
Jetpack claims to be the ‘ultimate toolkit for WordPress’. This free plugin includes a suite of modules that can enhance your website in many ways. Some of this functionality covers improving your WordPress site security, increasing traffic and helping you customize your site’s design. As Jetpack was created by Automattic, the same team that runs WordPress.com, by installing this plugin you can gain access to some of the features that websites hosted on this service enjoy.
The main appeal of Jetpack is that it provides all the features and functionalities required to run a successful WordPress website in just one package. So instead of having to research, install and set up multiple tools, all you need is Jetpack’s one plugin. Site stats, state of the art security services, traffic generation tools, and design customization functionality are just some of the advanced features provided by Jetpack.
While the core Jetpack plugin and the majority of its modules are free, there are some advanced optional premium tools available. However, the free version provides more than enough tools to get started with.
How to Install Jetpack on Your WordPress Website
Before you can activate any of the Jetpack modules you will need to install the core plugin on your WordPress website.
Log in as admin on your site. Then within your WordPress dashboard, select ‘Plugins > Add New’ from the menu bar.
Type ‘Jetpack’ into the plugin search bar. Once the Jetpack has been retrieved, click on ‘Install Now > Activate’.
You will now be asked to connect your website with WordPress.com. Here you can create a new account with WordPress.com. Or if you are already signed up with WordPress.com you can add your website to your existing account.
Once you have registered, WordPress.com will ask you which Jetpack plan you would like to opt for. For now, simply select the ‘Free’ plan.
You will now be returned to your WordPress dashboard, where you will see that a ‘Jetpack Menu’ has been added to your site’s menu bar.
Activate Jetpack’s Recommended Features
Once your plugin is installed the first thing Jetpack encourages you to do is bulk ‘Activate’ their recommended features. Most of these features are in fact turned on by default when you install the plugin and can be de-activated if you so choose.
But before you choose to activate all these recommended tools, or turn them off, let’s find out what each of these Jetpack modules offers. And how they can help improve your WordPress website…
Sharing
In your WordPress menu select ‘Jetpack > Settings’. This is where you can find and activate, or deactivate, the numerous Jetpack modules.
Select the ‘Sharing’ tab. You will now see two different ‘Sharing modules’ that Jetpack recommends activating.
Publicize Connections
‘Publicize Connections’ allows you to automatically publish blog posts to your social media channels. To add this feature to your WordPress website, click on the ‘Activate’ button under ‘Publicize Connections‘. Then select ‘ Connect Your Social Media Accounts’. You will now be taken to your WordPress.com account, where you must connect and authorize any social media networks you would like to automatically publish your blog posts to.
Once set up, articles will be automatically displayed on your social media networks each time you click to ‘publish’ an article on your site. You can also add a custom message to be sent out with each post.
Activate Publicize Connections if you would like a quick and easy way to publish your posts on social media and get your content shared. Upgrading to Jetpack’s paid plans will also allow you to reshare, as well as schedule, your blog posts for social media publishing.
Read: Social Media Image Sizes Guide
Sharing Buttons
‘Sharing Buttons’ will add social media sharing buttons to your WordPress posts. This will help your readers share your content on their social media networks, and enable your articles to connect with a wider audience.
To set up this feature, select the ‘Activate’ button under ‘Sharing Buttons’, then select ‘Configure Your Sharing Buttons’. Within the WordPress.com dashboard, you can choose which social media buttons you would like displayed, alter the look of the text and icons, and decide where you would like the buttons placed.
Sharing Buttons is another great social media Jetpack module and a must have for those looking to get their content shared.
Subscriptions
‘Subscriptions’ has been created to make it easy for visitors to subscribe to your content, and for you to collect users emails. Under ‘Jetpack > Settings’, select the ‘Discussion’ tab to find the ‘Subscriptions’ module.
By activating ‘Subscriptions’ on your website, visitors have the option of subscribing to your blog. They can also follow individual article’s discussions. WordPress.com stores the collected emails and visitors are automatically notified via email of new comments or blog posts published on your site.
This is an extremely effective way of collecting leads and keeping in contact with your audience. By sending emails to keep your audience informed of what is happening on your blog, they are more likely to return and become regular readers.
Gravatar Hovercards
A gravatar hovercard is the card that is displayed when you hover over a person’s gravatar. This displays information about the person, including their full name, a blurb about them, and a link to their full profile.
Using gravatars, and their hovercards, is an effective way to help foster an interactive community on your WordPress website. Visitors get to know each other by recognizing each other’s gravatars and reading up on each other. This creates a bond between your readers, and a feeling of familiarity with each other and your blog.
To activate Gravatar Hovercards, select the ‘Discussion’ tab. Under ‘Comments’, activate ‘Enable pop-up business cards over commenter’s Gravatars’.
Contact Form
Jetpack’s ‘Contact Form’ module enables you to add attractive contact forms to any page, post, or widget, of your WordPress website. Forms can be customized, enabling you to edit the fields displayed, alter the email address, or change the subject settings. The appearance can also be tailored to suit your site’s design using CSS, and existing forms can be re-edited.
To add a contact form to your website simply open the specific page or post where you would like a form displayed. Above the editor, click on the ‘Add Contact Form’ icon. A pop-up will appear where you can configure the form. Then publish the page and your contact form will go live.
For each contact form response you receive you will be sent a notification email. And responses will be stored in the ‘Feedback’ section of your WordPress dashboard. So if you are looking for a simple, yet clean and sleek contact form, then make use of this easy to use Jetpack module.
Photon
Site speed is an important factor for all websites. Large images particularly can greatly slow your website down. Photon is an especially useful Jetpack module that helps deal with this problem.
Photon is an image acceleration and editing service. It works by serving images to your audience directly from the WordPress.com cloud. This means less load on your host and a much faster image delivery for your site visitors.
To activate Photon, simply switch to the ‘Writing’ tab on the ‘Jetpack Settings’ page. Scroll down the page to ‘Media’ and then activate the button next to ‘Speed up images and photos’. Photon is another must have Jetpack module, especially for websites that are image heavy.
Carousel
Carousel adds a fun and stylish dimension to your images and makes it easy for your visitors to view individual pictures. If you decide to use the Carousel feature, all images that are currently displayed in WordPress galleries on your posts and pages will be showcased in a full-screen carousel option.
To activate ‘Carousel’ on your WordPress website, click on the ‘Writing’ tab and scroll down to ‘Images’. Then turn on the button next to ‘Display images and galleries in a gorgeous, full-screen browsing experience’.
Here you can also select whether to show metadata in your carousel, as well as set a black or white background to complement your images. Carousel is a great choice if you already display WordPress galleries on your website, and are looking to improve the delivery of your images.
Tiled Galleries
Tiled Galleries allows you to display your image galleries in three distinct styles. You can choose from rectangular tiles, a square mosaic, or a circular grid. All three options provide an interesting and eye catching way to showcase your image galleries.
To set up Tiled Galleries, you first need the ‘Photon’ module that we have previously discussed to be activated. Then, when you create a new gallery, under ‘Gallery Settings’, select one of the three tiles options.
If you want you can make all of your image galleries tiled by default. In your WordPress dashboard menu select ‘Settings > Media’. Scroll down the page and under ‘Image Gallery Carousel’ tick to activate ‘Tiled Galleries’.
Tiled Galleries is another way to give your site an edge by displaying your images in stunning layouts. Activate this module if you want your photos and pictures to impress.
Related Posts
Displaying related posts underneath an article is an effective way to keep your audience on site. Showing visitors further information on a topic of interest will encourage them to click through to other pages to continue their reading.
The ‘Related Posts’ module scans and analyzes the posts on your website, and then displays related and contextualized articles at the bottom of each page. This tool differs from other related posts plugins as it processes and serves data from the WordPress.com cloud. This means that there is no additional load on your server.
To activate ‘Related Posts’, select the ‘Traffic’ tab. Then under ‘Related Posts’ activate the button next to ‘Show related content after posts’. Three related posts will now be displayed under each article, complete with thumb nail image and title. Jetpack also gives the option of adding a ‘Related’ header. This helps to show a distinct separation from the end of your post and the related suggestions.
Displaying related posts can dramatically increase your page views. So if your WordPress website has a thriving blog, then ‘Related Posts’ is a module well worth activating. The longer readers stay on your site and engage with your content, the more likely they are to return to read more at some point in the future.
Single Sign On
‘Single Sign On’ can be activated under ‘WordPress.com log in’. This is found in the Jetpack Settings ‘Security’ section. Once you have turned on this feature you will be able to log onto your site via WordPress.com. For extra security, you can activate the ‘WordPress.com Two Step Authentication’.
The ‘Single Sign On’ module is again another useful Jetpack tool. Not only does it help speed up and secure the login process, it also takes the stress out of remembering yet another password.
Brute Force Attack Protection
The security feature ‘Jetpack Protect’ is used to protect your WordPress website against brute force attacks. This module starts working automatically once you have connected your site to WordPress.com. It can also be found under ‘Security > Brute Force Attack Protection’.
Jetpack Protect works by blocking all suspicious looking login activity. You can view the number of thwarted attacks on your website by selecting ‘Jetpack > Dashboard’ from your WordPress menu. Jetpack also gives you the option of whitelisting your IP address, if you have made too many failed login attempts to your website.
This Jetpack module provides a necessary first line of defense for your site and will help protect your site from numerous malicious sign-in attempts.
Spelling, Style, and Grammar
Looking and sounding professional is crucial for websites representing businesses and career bloggers. So making sure the spelling and grammar is correct throughout your content should be a top priority.
Jetpack’s ‘Spelling, Style and Grammar’ module can be found under the ‘Writing’ tab. Activating this feature will enable Jetpack’s Proofreading technology to automatically check your writing in the Visual Editor. You can also configure the proofreading features, keeping the editing in line with your style of writing.
Activating this proofreading tool will ensure that your content is well written, and mistakes will be kept to a minimum. Ultimately, this will result in your visitors considering your blog to be a reputable source.
Site Stats
The ‘Site Stats’ tool tracks your site’s metrics and reports them in an easy to read overview. Find out how many visits your site gets, top posts and pages, the number of subscribers and likes received, and much more.
‘Site Stats’ is immediately activated once you link your website to WordPress.com. The stats report can be found under the ‘Jetpack > Site Stats’ page, and advanced stats are displayed in your WordPress.com dashboard. This module is a great way to monitor your site’s performance and gain an insight into what content is appealing to your audience.
Read: How to find out how much traffic a blog gets
Other Useful Jetpack Modules You Should Be Using
Apart from the initial ‘recommended’ features, Jetpack provides many other useful tools that can be activated as and when you need. These are not all available within your WordPress dashboard, so you will need to log in to your WordPress.com account to access the full range of Jetpack modules.
Once you have signed into WordPress.com, select the ‘My Sites’ tab. Then click on ‘Settings’ at the bottom of the side menu. Here you will find the full list of Jetpack features. However, which ones will make a real difference to your site’s performance? Let’s have a look at some other important Jetpack tools, that we haven’t yet mentioned, in more detail…
Mobile Theme
Using an old theme, or a theme that hasn’t been updated for a while, means you run the risk of having an unresponsive website. As more and more people access websites on handheld devices, it becomes ever important to have a responsive site. If you are unsure of how your website looks on a smartphone or tablet then check it out for yourself. Ultimately, an unresponsive website will lead to high bounce rates, low search engine rankings, and a loss of returning visitors.
Jetpack’s ‘Mobile Theme’ module converts your current website into a mobile-friendly version. The mobile theme displays a clean and organized interface, using a one column layout to give your content more room when viewed on a small screen. This helps improve the user mobile experience and ensures site visitors can access your content. It is also extremely lightweight, keeping loading times fast.
To activate the ‘Mobile Theme’ module, within your WordPress.com dashboard, select ‘Settings > Writing’. Under ‘Theme Enhancements’ click on the button next to ‘Enable the Jetpack Mobile Theme’. Here there are a few other options you can choose from, giving you some control over how your theme is displayed on mobile devices.
Infinite Scroll
Also located under ‘Settings > Writing > Theme Enhancements’ is Jetpack’s ‘Infinite Scroll’ feature. If your WordPress website has a healthy blog, that spans numerous page, then this may be a useful tool for your website.
Infinite scroll enables your audience to quickly view unlimited amounts of information. As a visitor reads down the page, your blog will continuously display the next articles, without your audience ever having to load a page. This improves user engagement with your blog and helps increase time spent on site.
Monitor
If your website suffers from regular periods of downtime there can be serious consequences, including poor ranking in the search engines, and a loss of traffic. But unless you are on your site 24/7, it can be hard to keep track of just how often your website is offline.
Jetpack’s ‘Monitor’ tool monitors your website’s uptime. A WordPress.com server will check your website every 5 minutes and if your site has gone down you will be immediately emailed. A further email will be sent if your site is still down after an hour, and another email once your site is back up and running.
To turn on this module, log into your WordPress.com dashboard and select ‘Settings > Security’. Then simply activate ‘Monitor Your Site’s Uptime’. This is an effective way to track and consequently help fix your website’s downtime, improving your site’s performance.
Read: The best free and paid website monitoring tools
Comments
High numbers of comments on your blog will promote discussion and create an engaged community on your site. The Jetpack ‘Comments’ module gives your visitors the ability to leave comments on your blog using their WordPress.com, Facebook, Twitter, or Google Plus accounts.
To turn on ‘Comments, within your WordPress.com dashboard select ‘Settings > Discussion’. Then select ‘ Allow readers to leave comments…’ By activating this feature, it suddenly becomes extremely easy for your audience to log in and share their thoughts on the article they have just read.
Sitemaps
Turning on ‘Sitemaps’ will help your website rank in Google, and other search engines. Sitemaps are files, that Jetpack will generate, which list each post and page that should be indexed by the search engines.
Within your WordPress.com dashboard, select Settings > Traffic’. Scroll down to ‘Sitemaps’ and activate ‘ Generate XML Sitemaps’. Jetpack will now automatically generate the sitemaps necessary.
Jetpack can produce two sitemaps, one for all search engines, and one specifically for Google News. However, publishers must be pre-approved for Google News before Google will issue a News site map. If you want to apply to get your posts listed on Google News, check out the Google News Guidelines.
Read: How to Setup Yoast SEO
Free and Premium Themes
An added extra from Jetpack is a variety of free and premium themes that are available through WordPress.com. Jetpack offers over 150 free professional built-for-purpose and multi-purpose themes. And an additional 200+ premium themes are included if you upgrade to Jetpack’s ‘Professional Plan’.
These beautiful themes cater for a range of website needs, and can all be previewed and installed via your WordPress.com dashboard. If you are looking for a new design for your website, Jetpack may well have the perfect theme for you.
The WordPress.com App
Another handy addition to the Jetpack suite of modules is the WordPress.com app. This app enables you to manage all your sites, from any one of your devices, and from any corner of the globe. Post from any location, check your site’s stats, connect with readers, and tinker with your Jetpack module settings, all from within the WordPress app.
The desktop app is available for Mac OS X (10.9+) and Windows (7+). Or download the mobile app on your IOS or Andriod. This useful app is ideal for those on the go. And will make it even easier to manage the many Jetpack tools used on your WordPress website.
Jetpack’s Premium Features
Jetpack offers three different premium plans, all providing advanced features and functionalities for your WordPress website. Here are just some of the extras they offer…
Daily and Real Time Off-Site Backups
Unlimited Backup Archive and Storage Space
Automated Restores
Easy Site Migration
Daily Malware Scanning
SEO Tools
Unlimited Premium Themes
Priority Support
Jetpack’s premium plans cater for all needs, from the humble blogger and small online store, to larger businesses and global corporations. If you are looking to fit out your WordPress website with the full range of tools it needs to be truly successful, then a Jetpack premium plan may be a good option for you.
Final Thoughts
As you can see Jetpack has a lot to offer. Hopefully you have discovered a few modules that will benefit your WordPress website. If in doubt, initially activate Jetpack’s recommended features. Then take your time activating new tools, and deactivating the ones you don’t need, as you see fit.
The post How to use Jetpack on Your Self Hosted WordPress Website appeared first on The Coding Bus.
from WordPress https://ift.tt/3hEEVI1 via IFTTT
0 notes
Text
How to Add an Author Info Box in WordPress Posts
Attain you’ll ought to at all times add an creator bio subject in your wordpress posts? The creator bio subject is a minute share the place you might per probability be succesful of be in a divulge to show data in regards to the weblog’s creator, inform their social media profiles, and extra.
Many wordpress themes allow you to with out issues show creator bio using the default wordpress performance. Nonetheless, some themes might per probability properly additionally truthful no longer get this attribute constructed-in, otherwise you might per probability properly additionally truthful want to commerce how they show the creator bio share.
Listed right here, we will allow you to carry a couple of methods to with out issues inform an creator information subject in wordpress posts. We’ll additionally allow you to carry the suitable technique to customize creator bio and assemble it extra high-quality.
Why and When You Want an Creator Data Field in wordpress
Seeing an staunch particular person within the help of the suppose materials helps catch credibility and strengthens your location’s authority amongst customers.
For a single-creator wordpress weblog, you might per probability be succesful of be in a divulge to regular add an about me web page, however for a multi-creator wordpress web websites, you’ll want so as to add an creator information subject beneath every and every submit.
This helps your customers study extra about explicit particular person authors to your web pages. It additionally offers authors an additional incentive to make a contribution extra on the full and interact with readers.
Similtaneously you might per probability properly admire extra customers to place up suppose materials to your web pages, then the creator information subject is a gargantuan method to attracts writers who try to go looking out publicity and up to date audiences.
Having talked about that, let’s procure a peek on the suitable technique to with out issues add an creator information subject in wordpress posts.
Together with Creator Data Field in wordpress Posts
wordpress is the reality is probably the most attention-grabbing web pages builder within the realm because of the flexibleness and customization selections it offers.
There are lots of numerous creator bio plugins that you just simply might per probability be succesful of be in a divulge to exhaust so as to add an creator information share. We’ll allow you to carry the default wordpress technique, two numerous plugins as properly to the code technique. This vogue you might per probability be succesful of be in a reveal to acquire a method that works most attention-grabbing to your location.
Together with Creator Field in wordpress using wordpress Themes
Together with Creator Field in wordpress using a Plugin
Together with Creator Field in wordpress Sidebar
Together with Creator Field in wordpress using Code Snippets
Method 1: Together with Creator Bio Using Your wordpress Theme
In case your wordpress theme comes with an creator data subject beneath every and every article, you then definately’ll be in a reveal to easily exhaust that to show your creator bio.
In verbalize to assemble exhaust of it, you’ll merely want to seek the advice of with Clients » All Clients web page. From right here you might per probability properly properly get to edit the particular person you’ll ought to at all times commerce.
On the profile edit video show, scroll all of the draw by which right down to the ‘Biographical information’ share so as to add the creator’s bio. Chances are high you will perhaps properly perhaps presumably additionally moreover exhaust HTML on this subject to manually add hyperlinks to the creator’s social media profiles.
The creator profile picture is fetched using Gravatar. If the creator has no longer scenario up a gravatar picture, you then definately’ll be in a divulge to demand of them to look at our recordsdata for creating a gravatar picture in wordpress.
Alternatively, you might per probability be succesful of be in a divulge to additionally allow customers to your web pages so as to add a personalised creator profile picture by modifying their profile.
Don’t neglect to click on on the ‘Exchange particular person’ button to assemble your changes.
You’d now seek the advice of with any article to your web pages to ask your wordpress theme show creator bio subject beneath the suppose materials.
Method 2. Together with Creator Data Field in wordpress Using a Plugin
In case your theme does no longer inform an creator information subject, or you’ll ought to at all times customise it, then this technique is for you.
For this technique, we’ll be using a wordpress plugin so as to add creator information subject to your wordpress posts.
First, part you might per probability properly properly get to assemble is ready up and set off the Creator Bio Field plugin. For extra minute print, peek our step-by-step recordsdata on the suitable technique to arrange a wordpress plugin.
Upon activation, you might per probability properly properly get to seek the advice of with Settings » Creator Bio Field web page to configure plugin settings.
From right here, you might per probability be succesful of be in a reveal to acquire colours, gravatar dimension for the creator picture, and scenario to show creator bio subject.
Similtaneously you might per probability properly perhaps even be completed, don’t neglect to click on on the ‘Assign changes’ button to retailer your changes.
Subsequent, you might per probability properly properly get to seek the advice of with Clients » All Clients web page and click on on on the ‘Edit’ hyperlink beneath the particular person you’ll ought to at all times commerce.
On the profile edit video show, you might per probability properly properly get to scroll all of the draw by which right down to ‘Contact Data’ share. From right here you might per probability be succesful of be in a reveal so as to add hyperlinks to the creator’s social media profiles.
The plugin will most attention-grabbing inform icons for social networks the place you enter a URL.
After that, you might per probability be succesful of be in a divulge to scroll all of the draw by which right down to the ‘Biographical Data’ share so as to add the creator’s bio. Chances are high you will perhaps properly perhaps presumably additionally moreover exhaust HTML on this subject to manually add hyperlinks or exhaust traditional HTML formatting selections.
Similtaneously you might per probability properly perhaps even be completed, click on on the Exchange particular person button to assemble your changes.
You’d now seek the advice of with any article written by that particular person to ask the creator information subject in motion.
Method 3: Degree to Creator Data in a Sidebar Widget
Attain you’ll ought to at all times inform the creator information within the sidebar in its achieve of beneath the article? If super, then this technique is for you as a consequence of it allows you to inform creator information subject in a sidebar widget.
For this technique, you’ll want to arrange and set off the Meks Good-looking Creator Widget plugin. For extra minute print, peek our step-by-step recordsdata on the suitable technique to arrange a wordpress plugin.
Upon activation, you might per probability properly properly get to seek the advice of with Look » Widgets web page. There you’ll procure Meks Good-looking Creator beneath the itemizing of available widgets. It is a ought to at all times so as to add this widget to the sidebar the place you’ll ought to at all times show the creator data.
The widget comes with a distinct of selections. The largest probability that you just simply might per probability properly properly get to have a study is the checkbox subsequent to ‘Mechanically detect creator’ probability.
Click on on on the Assign button to retailer your widget settings. You’d now confer alongside along with your web pages to ask the creator’s data widget in motion.
This plugin fetches particular person data from their wordpress profile. You or your authors will want to soak up their biographical data by modifying their profiles.
Method 4. Add Creator Data Field Manually (Coding Required)
This technique requires you so as to add code to your wordpress web pages. Whereas that you just simply could be succesful of get no longer completed this sooner than, then please procure a peek at our recordsdata on the suitable technique so as to add code snippets in wordpress.
First, you might per probability properly properly get so as to add the next code to your theme’s capabilities.php file or a location-specific plugin.
attribute wpb_author_info_box( $suppose materials ) { international $submit; // Detect if it's miles a single submit with a submit authorif ( is_single() && isset( $submit->post_author ) ) { // Fetch creator's show identify $display_name = get_the_author_meta( 'display_name', $submit->post_author ); // If show identify is no longer available then exhaust nickname as show nameif ( empty( $display_name ) ) $display_name = get_the_author_meta( 'nickname', $submit->post_author ); // Fetch creator's biographical data or description $user_description = get_the_author_meta( 'user_description', $submit->post_author ); // Fetch creator's web pages URL $user_website = get_the_author_meta('url', $submit->post_author); // Fetch hyperlink to the creator archive web page $user_posts = get_author_posts_url( get_the_author_meta( 'ID' , $submit->post_author)); if ( ! empty( $display_name ) ) $author_details = '
About ' . $display_name . '
'; if ( ! empty( $user_description ) ) // Creator avatar and bio $author_details .= '
' . get_avatar( get_the_author_meta('user_email') , 90 ) . nl2br( $user_description ). '
'; $author_details .= '
Scrutinize all posts by ' . $display_name . ''; // Check out if creator has a site of their profile if ( ! empty( $user_website ) ) Internet location
'; else { // if there simply is not this type of factor as a creator web pages then regular shut the paragraph $author_details .= ''; } // Cross all this information to submit suppose materials $suppose materials = $suppose materials . '
' . $author_details . '
'; } return $suppose materials; } // Add our attribute to the submit suppose materials filter add_action( 'the_content', 'wpb_author_info_box' ); // Permit HTML in creator bio share remove_filter('pre_user_description', 'wp_filter_kses');
This code merely fetches the creator data and shows it beneath wordpress posts. It is a ought to at all times to type this creator information subject in grunt that it appears super and matches your wordpress theme.
You’d add the next personalised CSS to type your creator subject. Actually be delighted to change it to fulfill your desires
.author_bio_section{ background-color: #F5F5F5; padding: 15px; border: 1px secure #ccc; } .author_name{ font-size: 16px; font-weight: fearless; } .author_details img { border: 1px secure #D8D8D8; border-radius: 50%; hasten alongside with the drift: left; margin: 0 10px 10px 0; }
That is how the creator information subject regarded on our demo location.
We hope this text helped you study so as to add an creator information subject to wordpress posts. Chances are high you will perhaps properly perhaps presumably additionally truthful moreover want to ask our tips on the suitable technique to elongate your weblog visitors, or our step-by-step recordsdata on the suitable technique to assemble an electronic message e-newsletter.
Similtaneously you cherished this text, then please subscribe to our YouTube Channel for wordpress video tutorials. Chances are high you will perhaps properly perhaps presumably additionally moreover procure us on Twitter and Fb.
The submit Add an Creator Data Field in wordpress Posts regarded first on WPBeginner.
from WordPress https://ift.tt/2RAnDld via IFTTT
0 notes
Text
Privacy Policy
Privacy Policy
Who we are
Our website address is: https://demo.accesspressthemes.com/wordpress-plugins/accesspress-social-auto-post.
What personal data we collect and why we collect it
Comments
When visitors leave comments on the site we collect the data shown in the comments form, and also the visitor’s IP address and browser user agent string to help spam detection.
An anonymized string created from your email address (also called a hash) may be provided to the Gravatar service to see if you are using it. The Gravatar service privacy policy is available here: https://automattic.com/privacy/. After approval of your comment, your profile picture is visible to the public in the context of your comment.
Media
If you upload images to the website, you should avoid uploading images with embedded location data (EXIF GPS) included. Visitors to the website can download and extract any location data from images on the website.
Contact forms
Cookies
If you leave a comment on our site you may opt-in to saving your name, email address and website in cookies. These are for your convenience so that you do not have to fill in your details again when you leave another comment. These cookies will last for one year.
If you visit our login page, we will set a temporary cookie to determine if your browser accepts cookies. This cookie contains no personal data and is discarded when you close your browser.
When you log in, we will also set up several cookies to save your login information and your screen display choices. Login cookies last for two days, and screen options cookies last for a year. If you select "Remember Me", your login will persist for two weeks. If you log out of your account, the login cookies will be removed.
If you edit or publish an article, an additional cookie will be saved in your browser. This cookie includes no personal data and simply indicates the post ID of the article you just edited. It expires after 1 day.
Embedded content from other websites
Articles on this site may include embedded content (e.g. videos, images, articles, etc.). Embedded content from other websites behaves in the exact same way as if the visitor has visited the other website.
These websites may collect data about you, use cookies, embed additional third-party tracking, and monitor your interaction with that embedded content, including tracking your interaction with the embedded content if you have an account and are logged in to that website.
Analytics
Who we share your data with
How long we retain your data
If you leave a comment, the comment and its metadata are retained indefinitely. This is so we can recognize and approve any follow-up comments automatically instead of holding them in a moderation queue.
For users that register on our website (if any), we also store the personal information they provide in their user profile. All users can see, edit, or delete their personal information at any time (except they cannot change their username). Website administrators can also see and edit that information.
What rights you have over your data
If you have an account on this site, or have left comments, you can request to receive an exported file of the personal data we hold about you, including any data you have provided to us. You can also request that we erase any personal data we hold about you. This does not include any data we are obliged to keep for administrative, legal, or security purposes.
Where we send your data
Visitor comments may be checked through an automated spam detection service.
Your contact information
Additional information
How we protect your data
What data breach procedures we have in place
What third parties we receive data from
What automated decision making and/or profiling we do with user data
Industry regulatory disclosure requirements
0 notes
Text
How to Blog Anonymously Using WordPress
Do you want to blog anonymously using WordPress? There are many users who want to start a blog but don’t what to put their real name on it. In this beginner’s guide, we will show you how to easily blog anonymously using WordPress while keeping your personal information safe.
Note: This guide is not for journalists or whistle-blowers doing high-risk work. They should use something like TOR or other tools. This is for an average blogger who wants to blog anonymously.
Anonymous Blogging Pros & Cons
There are many users who simply want to blog anonymously to express their opinions. Most of them want to remain anonymous because they fear it may affect how people see them in real lives. Some want to do it just to be more creative.
There are pros and cons to blogging anonymously, and it’s important that you understand them before you start blogging.
Pros of Anonymous Blogging using WordPress
Freedom to express your opinions without being judged
Protect your personal identity and information
Creative and artistic freedom
Cons of Anonymous Blogging Using WordPress
Not able to meet with people who follow your blog
Limited monetization options, you can still use Google AdSense, but you will have to share your personal information with Google.
If someone is really determined, then they can still trace your blog back to you.
That being said, let’s see how to blog anonymously using WordPress.
How to Start an Anonymous Blog using WordPress
There are two types of WordPress websites. First, there is WordPress.com which is a hosted blogging service, and then you have WordPress.org also known as self-hosted WordPress. For comparison, see our guide on the difference between WordPress.com vs WordPress.org.
There are other blogging platforms as well. However, we recommend using self-hosted WordPress.org to have complete control on the privacy and ownership of your website.
You will need a domain name and a website hosting account to start your self-hosted WordPress blog.
We recommend using Bluehost. They are one of the largest hosting companies in the world and an officially recommended WordPress hosting provider. They’re offering our users a free domain and 60% off their web hosting.
For details, see our article on how to start a WordPress blog with complete step by step instructions.
After you have installed WordPress, let’s make it anonymous.
Using Whois Privacy
When you purchase a domain name, you are required to provide contact information, like name, address, phone number, and email address. This information is publicly accessible and anyone can look up for it.
To protect customer’s privacy, many domain name providers offer a service called Whois privacy. For a small fee, this service displays their contact information instead of yours. If someone sends an email to the address displayed on WHOIS privacy page it will be forwarded to you.
You can purchase domain privacy during the set up on most hosting companies. For example, Bluehost provides you an option to do so during the sign up. We normally don’t recommend it due to the additional cost, but since you want to create an anonymous blog, you would want to check this option.
If you didn’t purchase it during set up, then you can always enable it from your hosting account’s dashboard under the domains section.
Using a Blogging Email Address
Next step is to create a new email account to use for your WordPress website, and your author profile in WordPress. You can use a free email service provider like Gmail or use a more private email service like Proton Mail.
After you have created an email account, you need to add it as a WordPress administrative email address. This email address is used to send WordPress notification emails.
You can do this by going to Settings » General page in the WordPress admin area and add your new email address there.
Don’t forget to click on the save changes button to store your settings.
Next, you need to add the same email address to your author profile page. Simply go to the Users » Your Profile page and add the email address under your contact info.
Don’t forget to click on the Update Profile button to save your changes.
You can also use gravatar to display an anonymous profile picture next to your author bio under your blog posts.
Tip: If you are not receiving WordPress emails, then see our guide on how to fix WordPress not sending emails issue.
Using a Psuedonym for Anonymous Blogging
You will need to choose and use a pseudonym on your blog. For better WordPress security, you cannot just use admin as your username or author name. You will need to think of a different nickname that you can use to sign your posts.
To add your pseudonym, you need to visit Users » Your Profile page and add the name next to the Nickname field. After entering your nickname, click on the drop-down menu next to ‘Display name publicly as’ option and select your nickname.
It’s important that you don’t add your real first and last name in this user profile.
Don’t forget to click on the Update Profile button to save your changes.
Using a VPN
VPN is a Virtual Private Network that helps you secure your internet connection and protect your identity.
Normally, all your internet traffic travels through different servers spread across the world. Hackers and governments can spy on this traffic and see what you are doing online.
VPN acts as a network between your computer and outside world. All your internet traffic goes to a VPN service where it is encrypted and sent to the destination using a random server in a different geographic location.
Here is a list of the best VPN service providers. We recommend using IPVanish. They offer military grade encryption with hundreds of servers. They also have the easiest software to turn on VPN with the click of a button on any device including laptops, tablets, and mobile phones.
We hope this article helped you learn how to blog anonymously using WordPress. You may also want to see our ultimate step by step WordPress SEO guide for beginners.
If you liked this article, then please subscribe to our YouTube Channel for WordPress video tutorials. You can also find us on Twitter and Facebook.
The post How to Blog Anonymously Using WordPress appeared first on WPBeginner.
from WPBeginner http://www.wpbeginner.com/wp-tutorials/how-to-blog-anonymously-using-wordpress/
0 notes
Text
89% off #How to Build Your Own Website with WordPress: A Step-by-Step Guide – $10
A-Z guide of how to set up your own website using WordPress.
All Levels, – Video: 5 hours Other: 1.5 hours, 56 lectures
Average rating 3.9/5 (3.9)
Course requirements:
No prior knowledge of WordPress required. We take you through the entire process from start to finish.
Course description:
This course forms part of our Wonderful World of WordPress series and in this specific course we take you on a journey that details step-by-step everything you need to do to get your own WordPress site up and running in no time.
Most people who try to create a WordPress site get discouraged and give up. This is simply because they do not have the proper guidance and, therefore, they feel overwhelmed by the process.
FINALLY MASTER WORDPRESS LIKE A PRO AND LEAVE THOSE FRUSTRATIONS BEHIND ONCE FOR ALL!
The shortcut strategies we teach to you in this course takes you by the hand and leads you through the WordPress creation process step-by-simple-step – all you have to do is follow along and, at the end, you will have your very own WordPress site!
For those of you interested in creating your own WordPress blog, we have included a special bonus section containing an instructional guide, activity workbook, eBook and cheatsheet – all of which will help you to get your WordPress Blog up in a flash.
What are you waiting for? Come on in and explore the Wonderful World of WordPress with MindMekka!
Full details A complete and comprehensive overview of WordPress which will enable you to build your own website with ease Learn how to get WordPress setup and running in as little as 5 minutes Understand the WordPress dashboard and know how to use its various features Discover how to create, format and publish content to your WordPress site The ability to create and add pages Choosing and customising WordPress themes Add great features and functionality to your site as we show you how to work with widgets and plugins Add videos, images and other files to your site Learn how to correctly use tags in your posts Use Kismet to block spam Use Akismet to block spam Do file transfers with cPanel and Filezilla Use Gravatars for your blogs Upgrade your WordPress page Create emails with cPanel Create contact forms and testimonials Add favicons and hide affiliate links Set up a Feedburner account Install and use Google Analytics Add Breadcrumb Links Create a forum Install a PayPal Button Use the Google XML Sitemap Generator How to embed a video into your site How to add the Facebook like button Send Your WordPress posts directly to Twitter Create a Poll Know where to find pictures for your blog Learn how to build a membership site
Full details Anyone who has ever tried to set up a WordPress site, but gave up because they felt lost or overwhelmed Anyone thinking about creating their first WordPress site Business owners who want to set up their own website with minimal cost Aspiring bloggers who want to create their own blog quickly and easily
Reviews:
“I think if we are ready to build a business, we should know by now how to fill in a password. I mean, it’s right there telling us what to do at the hosting website. Kind of makes the course go slowly; however, maybe it will come in useful later down the road when we build our WordPress sites.” (Sheri Drips)
“This was the third course I did on udemy on wordpress and it was my favorite one. It covered all the basics and explained every function but it also gave further detail information how to use wordpress. e.g. good plugins and tips for blogging.” (Miriam Pir)
“This course certainly deserve appreciation. Easy to understand and complete with perfection, which lead me to understand this course within a short period of time. I thanks for such an amazing course and I enjoyed my learning experience.” (Jebul Rahman)
About Instructor:
MindMekka ®
We are a group of motivated, like-minded professionals who share a passion for education and an appreciation for the beauty of learning. We believe that learning, when it occurs in a real sense, enriches not only its recipients but also those around them. This is what we strive for at MindMekka. Real learning that is affordable and accessible, anytime, anywhere. Real learning that translates into practical wisdom, which students can immediately apply to real life. We endeavour to create an environment that offers the richest forms of nourishment to our students, and rewards their time and financial investment to the fullest extent. MindMekka aims to allow its students to become the best possible version of themselves. Our goal is not only to educate, but also to elevate, to motivate, to inspire.
Instructor Other Courses:
Learn How to Create Your Own Social Network Create a Mobile App for Your Business — Quick, Easy & Free! LinkedIn Business Marketing: Professional Profiles & Company Pages …………………………………………………………… MindMekka ® coupons Development course coupon Udemy Development course coupon Web Development course coupon Udemy Web Development course coupon How to Build Your Own Website with WordPress: A Step-by-Step Guide How to Build Your Own Website with WordPress: A Step-by-Step Guide course coupon How to Build Your Own Website with WordPress: A Step-by-Step Guide coupon coupons
The post 89% off #How to Build Your Own Website with WordPress: A Step-by-Step Guide – $10 appeared first on Udemy Cupón.
from http://www.xpresslearn.com/udemy/coupon/89-off-how-to-build-your-own-website-with-wordpress-a-step-by-step-guide-10/
0 notes
Text
89% off #How to Build Your Own Website with WordPress: A Step-by-Step Guide – $10
A-Z guide of how to set up your own website using WordPress.
All Levels, – Video: 5 hours Other: 1.5 hours, 56 lectures
Average rating 3.9/5 (3.9)
Course requirements:
No prior knowledge of WordPress required. We take you through the entire process from start to finish.
Course description:
This course forms part of our Wonderful World of WordPress series and in this specific course we take you on a journey that details step-by-step everything you need to do to get your own WordPress site up and running in no time.
Most people who try to create a WordPress site get discouraged and give up. This is simply because they do not have the proper guidance and, therefore, they feel overwhelmed by the process.
FINALLY MASTER WORDPRESS LIKE A PRO AND LEAVE THOSE FRUSTRATIONS BEHIND ONCE FOR ALL!
The shortcut strategies we teach to you in this course takes you by the hand and leads you through the WordPress creation process step-by-simple-step – all you have to do is follow along and, at the end, you will have your very own WordPress site!
For those of you interested in creating your own WordPress blog, we have included a special bonus section containing an instructional guide, activity workbook, eBook and cheatsheet – all of which will help you to get your WordPress Blog up in a flash.
What are you waiting for? Come on in and explore the Wonderful World of WordPress with MindMekka!
Full details A complete and comprehensive overview of WordPress which will enable you to build your own website with ease Learn how to get WordPress setup and running in as little as 5 minutes Understand the WordPress dashboard and know how to use its various features Discover how to create, format and publish content to your WordPress site The ability to create and add pages Choosing and customising WordPress themes Add great features and functionality to your site as we show you how to work with widgets and plugins Add videos, images and other files to your site Learn how to correctly use tags in your posts Use Kismet to block spam Use Akismet to block spam Do file transfers with cPanel and Filezilla Use Gravatars for your blogs Upgrade your WordPress page Create emails with cPanel Create contact forms and testimonials Add favicons and hide affiliate links Set up a Feedburner account Install and use Google Analytics Add Breadcrumb Links Create a forum Install a PayPal Button Use the Google XML Sitemap Generator How to embed a video into your site How to add the Facebook like button Send Your WordPress posts directly to Twitter Create a Poll Know where to find pictures for your blog Learn how to build a membership site
Full details Anyone who has ever tried to set up a WordPress site, but gave up because they felt lost or overwhelmed Anyone thinking about creating their first WordPress site Business owners who want to set up their own website with minimal cost Aspiring bloggers who want to create their own blog quickly and easily
Reviews:
“I think if we are ready to build a business, we should know by now how to fill in a password. I mean, it’s right there telling us what to do at the hosting website. Kind of makes the course go slowly; however, maybe it will come in useful later down the road when we build our WordPress sites.” (Sheri Drips)
“This was the third course I did on udemy on wordpress and it was my favorite one. It covered all the basics and explained every function but it also gave further detail information how to use wordpress. e.g. good plugins and tips for blogging.” (Miriam Pir)
“This course certainly deserve appreciation. Easy to understand and complete with perfection, which lead me to understand this course within a short period of time. I thanks for such an amazing course and I enjoyed my learning experience.” (Jebul Rahman)
About Instructor:
MindMekka ®
We are a group of motivated, like-minded professionals who share a passion for education and an appreciation for the beauty of learning. We believe that learning, when it occurs in a real sense, enriches not only its recipients but also those around them. This is what we strive for at MindMekka. Real learning that is affordable and accessible, anytime, anywhere. Real learning that translates into practical wisdom, which students can immediately apply to real life. We endeavour to create an environment that offers the richest forms of nourishment to our students, and rewards their time and financial investment to the fullest extent. MindMekka aims to allow its students to become the best possible version of themselves. Our goal is not only to educate, but also to elevate, to motivate, to inspire.
Instructor Other Courses:
Learn How to Create Your Own Social Network Create a Mobile App for Your Business — Quick, Easy & Free! LinkedIn Business Marketing: Professional Profiles & Company Pages …………………………………………………………… MindMekka ® coupons Development course coupon Udemy Development course coupon Web Development course coupon Udemy Web Development course coupon How to Build Your Own Website with WordPress: A Step-by-Step Guide How to Build Your Own Website with WordPress: A Step-by-Step Guide course coupon How to Build Your Own Website with WordPress: A Step-by-Step Guide coupon coupons
The post 89% off #How to Build Your Own Website with WordPress: A Step-by-Step Guide – $10 appeared first on Udemy Cupón.
from Udemy Cupón http://www.xpresslearn.com/udemy/coupon/89-off-how-to-build-your-own-website-with-wordpress-a-step-by-step-guide-10/
from https://xpresslearn.wordpress.com/2017/03/11/89-off-how-to-build-your-own-website-with-wordpress-a-step-by-step-guide-10/
0 notes
Text
89% off #How to Build Your Own Website with WordPress: A Step-by-Step Guide – $10
A-Z guide of how to set up your own website using WordPress.
All Levels, – 6 hours, 56 lectures
Average rating 3.9/5 (3.9 (13 ratings) Instead of using a simple lifetime average, Udemy calculates a course’s star rating by considering a number of different factors such as the number of ratings, the age of ratings, and the likelihood of fraudulent ratings.)
Course requirements:
No prior knowledge of WordPress required. We take you through the entire process from start to finish.
Course description:
This course forms part of our Wonderful World of WordPress series and in this specific course we take you on a journey that details step-by-step everything you need to do to get your own WordPress site up and running in no time.
Most people who try to create a WordPress site get discouraged and give up. This is simply because they do not have the proper guidance and, therefore, they feel overwhelmed by the process.
FINALLY MASTER WORDPRESS LIKE A PRO AND LEAVE THOSE FRUSTRATIONS BEHIND ONCE FOR ALL!
The shortcut strategies we teach to you in this course takes you by the hand and leads you through the WordPress creation process step-by-simple-step – all you have to do is follow along and, at the end, you will have your very own WordPress site!
For those of you interested in creating your own WordPress blog, we have included a special bonus section containing an instructional guide, activity workbook, eBook and cheatsheet – all of which will help you to get your WordPress Blog up in a flash.
What are you waiting for? Come on in and explore the Wonderful World of WordPress with MindMekka!
Full details A complete and comprehensive overview of WordPress which will enable you to build your own website with ease Learn how to get WordPress setup and running in as little as 5 minutes Understand the WordPress dashboard and know how to use its various features Discover how to create, format and publish content to your WordPress site The ability to create and add pages Choosing and customising WordPress themes Add great features and functionality to your site as we show you how to work with widgets and plugins Add videos, images and other files to your site Learn how to correctly use tags in your posts Use Kismet to block spam Use Akismet to block spam Do file transfers with cPanel and Filezilla Use Gravatars for your blogs Upgrade your WordPress page Create emails with cPanel Create contact forms and testimonials Add favicons and hide affiliate links Set up a Feedburner account Install and use Google Analytics Add Breadcrumb Links Create a forum Install a PayPal Button Use the Google XML Sitemap Generator How to embed a video into your site How to add the Facebook like button Send Your WordPress posts directly to Twitter Create a Poll Know where to find pictures for your blog Learn how to build a membership site
Full details Anyone who has ever tried to set up a WordPress site, but gave up because they felt lost or overwhelmed Anyone thinking about creating their first WordPress site Business owners who want to set up their own website with minimal cost Aspiring bloggers who want to create their own blog quickly and easily
Reviews:
“I think if we are ready to build a business, we should know by now how to fill in a password. I mean, it’s right there telling us what to do at the hosting website. Kind of makes the course go slowly; however, maybe it will come in useful later down the road when we build our WordPress sites.” (Sheri Drips)
“This was the third course I did on udemy on wordpress and it was my favorite one. It covered all the basics and explained every function but it also gave further detail information how to use wordpress. e.g. good plugins and tips for blogging.” (Miriam Pir)
“This course certainly deserve appreciation. Easy to understand and complete with perfection, which lead me to understand this course within a short period of time. I thanks for such an amazing course and I enjoyed my learning experience.” (Jebul Rahman)
About Instructor:
MindMekka ®
We are a group of motivated, like-minded professionals who share a passion for education and an appreciation for the beauty of learning. We believe that learning, when it occurs in a real sense, enriches not only its recipients but also those around them. This is what we strive for at MindMekka. Real learning that is affordable and accessible, anytime, anywhere. Real learning that translates into practical wisdom, which students can immediately apply to real life. We endeavour to create an environment that offers the richest forms of nourishment to our students, and rewards their time and financial investment to the fullest extent. MindMekka aims to allow its students to become the best possible version of themselves. Our goal is not only to educate, but also to elevate, to motivate, to inspire.
Instructor Other Courses:
Learn How to Create Your Own Social Network MindMekka ®, Motivate. Educate. Elevate. (4) $10 $50 Create a Mobile App for Your Business — Quick, Easy & Free! LinkedIn Business Marketing: Professional Profiles & Company Pages …………………………………………………………… MindMekka ® coupons Development course coupon Udemy Development course coupon Web Development course coupon Udemy Web Development course coupon How to Build Your Own Website with WordPress: A Step-by-Step Guide How to Build Your Own Website with WordPress: A Step-by-Step Guide course coupon How to Build Your Own Website with WordPress: A Step-by-Step Guide coupon coupons
The post 89% off #How to Build Your Own Website with WordPress: A Step-by-Step Guide – $10 appeared first on Course Tag.
from Course Tag http://coursetag.com/udemy/coupon/89-off-how-to-build-your-own-website-with-wordpress-a-step-by-step-guide-10/ from Course Tag https://coursetagcom.tumblr.com/post/157786074438
0 notes
Text
How To Change the Default Gravatar on WordPress Step by Step?
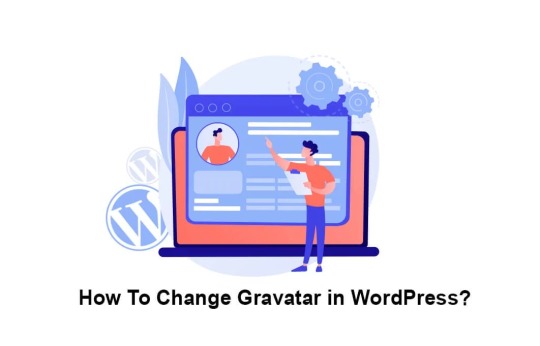
Step 1: Set up a User Avatar Plugin for WordPress
Install the User Avatar plugin for WordPress. Then you will be able to see a new tab within your WordPress dashboard. Here, you can find two options, which include a settings section and a library that contains avatars. You will have the freedom to upload any avatar into it based on your preferences. Then you will need to configure settings so that you can decide to whom you are going to make the default WordPress Gravatar available.
Take the following tips into consideration:
Visit ‘Settings’ on the discussion page of your WordPress site.
Now scroll down to locate the ‘Avatars’ option.
The next step is to configure and modify gravatar WordPress settings on the site.
Few options are visible below the default avatar alternative. Until you associate a specific gravatar to the email address, the default avatar appears.
If you do not want to display any image, there is an option for a blank gravatar. Few other options are also on display.
Many automated designs and logos are also available to choose from when you want to change the gravatar on WordPress. Depending on the author’s name or the email id, WordPress provides a unique gravatar image.
You can even add your image link to upload the desired gravatar. To create a default gravatar image, it is imperative to choose a square image of 250×250 pixels.
Step 2 – Allow uploading profile pictures via shortcodes
By this stage, you will be able to see how the plugin is working. However, you will also need to add the uploading feature into the Gravatar from the front end. This is where you should open the editor for any page in your WordPress website, where you wish to add the image uploading option. You will be able to see the “Profile Picture” icon in the main editor. You will need to place the cursor at the place where you wish to include this upload icon and press on that profile picture icon. Then you will see a pop-up, where you can insert your own avatar or add the upload functionality. You should click on the second option. Now you will be able to confirm the decision and click on the Insert Into option. You will have the freedom to include this into multiple locations of the website.
Step 3 – Test the new profile picture
Now you have gone through the steps on how to change Gravatar in WordPress. You will need to test and make sure that it is working fine. You should be able to click on the image button, and then select any image that you want to use. You should also be able to upload it. In case if you are not happy with it, you can simply undo it.
See the link below to read more:
https://n6cloud.com/blog/change-the-gravatar-on-wordpress/
0 notes
Text
Privacy Policy
Privacy Policy
Who we are
Our website address is: https://demo.accesspressthemes.com/wordpress-plugins/accesspress-social-auto-post.
What personal data we collect and why we collect it
Comments
When visitors leave comments on the site we collect the data shown in the comments form, and also the visitor’s IP address and browser user agent string to help spam detection.
An anonymized string created from your email address (also called a hash) may be provided to the Gravatar service to see if you are using it. The Gravatar service privacy policy is available here: https://automattic.com/privacy/. After approval of your comment, your profile picture is visible to the public in the context of your comment.
Media
If you upload images to the website, you should avoid uploading images with embedded location data (EXIF GPS) included. Visitors to the website can download and extract any location data from images on the website.
Contact forms
Cookies
If you leave a comment on our site you may opt-in to saving your name, email address and website in cookies. These are for your convenience so that you do not have to fill in your details again when you leave another comment. These cookies will last for one year.
If you visit our login page, we will set a temporary cookie to determine if your browser accepts cookies. This cookie contains no personal data and is discarded when you close your browser.
When you log in, we will also set up several cookies to save your login information and your screen display choices. Login cookies last for two days, and screen options cookies last for a year. If you select "Remember Me", your login will persist for two weeks. If you log out of your account, the login cookies will be removed.
If you edit or publish an article, an additional cookie will be saved in your browser. This cookie includes no personal data and simply indicates the post ID of the article you just edited. It expires after 1 day.
Embedded content from other websites
Articles on this site may include embedded content (e.g. videos, images, articles, etc.). Embedded content from other websites behaves in the exact same way as if the visitor has visited the other website.
These websites may collect data about you, use cookies, embed additional third-party tracking, and monitor your interaction with that embedded content, including tracking your interaction with the embedded content if you have an account and are logged in to that website.
Analytics
Who we share your data with
How long we retain your data
If you leave a comment, the comment and its metadata are retained indefinitely. This is so we can recognize and approve any follow-up comments automatically instead of holding them in a moderation queue.
For users that register on our website (if any), we also store the personal information they provide in their user profile. All users can see, edit, or delete their personal information at any time (except they cannot change their username). Website administrators can also see and edit that information.
What rights you have over your data
If you have an account on this site, or have left comments, you can request to receive an exported file of the personal data we hold about you, including any data you have provided to us. You can also request that we erase any personal data we hold about you. This does not include any data we are obliged to keep for administrative, legal, or security purposes.
Where we send your data
Visitor comments may be checked through an automated spam detection service.
Your contact information
Additional information
How we protect your data
What data breach procedures we have in place
What third parties we receive data from
What automated decision making and/or profiling we do with user data
Industry regulatory disclosure requirements
0 notes