#How to find D-link Extender Admin Password?
Explore tagged Tumblr posts
Visit Tumblr Blog
Explore Tumblr blogs with no restrictions, modern design and the best experience.
Last Seen Tumblr Blogs


Fun Fact
The KCSC sent more than 20K requests to delete posts related to prostitution and porn to Tumblr from January to June 2017.
Text
How to Accomplish the D-Link WiFi Repeater Setup?

What are the Multiple Ways to Perform D-Link WiFi Repeater Setup?
A D-Link WiFi Repeater Setup is an essential device when you want to extend your home networks' WIFI signal to areas with weak or no connectivity. Whether you're in a large house or have dead zones in certain parts of your home, a Wi-Fi extender can ensure smooth internet access across your space. While it’s easy to get started, performing the D-Link WiFi Repeater Setup involves a few steps, and there are multiple methods you can use. This guide will walk you through the web interface setup, the app setup, and using the WPS button for a hassle-free installation.
Pre-setup Requirements:
Before proceeding with any of the setup methods, ensure you have the following essentials:
Active Internet Connection: You must have an active internet connection from your router to extend the Wi-Fi network.
Correct Web/IP Address: Ensure you know the correct IP address or URL (dlinkap.local) for accessing the extender’s web interface.
Admin Credentials: You’ll need the default admin login credentials (usually mentioned in the product manual or on the device label).
D-Link WiFi App: Make sure you have the D-Link WiFi app downloaded and installed on your smartphone for the app setup method.
Computer/Smartphone: Depending on your preferred setup method, you’ll need either a computer or a smartphone.
Now, let’s look at the different ways to configure your D-Link WiFi Range Extender.
D-Link WiFi Repeater Setup Using the Web Interface:
This is one of the most common and straightforward methods of setting up your D-Link WiFi Range Extender. Follow these steps:
Power on the Extender: Connect your D-Link extender to a power outlet and ensure it’s powered on.
Connect to the Extender's Network: On your computer or smartphone, go to the WIFI settings and connect to the network broadcasted by the extender. It might be labeled something like “D-Link_Extender” or similar.
Open a Web Browser: Launch any web browser (Google Chrome, Firefox, Safari, etc.), and in the browser's address bar, type dlinkap.local and hit enter. This will take you to the login page of your D-Link WiFi Extender.
Login with Admin Credentials: Enter the admin username and password. The default credentials are usually “admin” for both fields (unless changed). You can find the details on the label of the extender or in the user manual.
Smart Setup Wizard: After logging in, you’ll be directed to the smart setup wizard. Follow the on-screen prompts to configure your extender.
Wi-Fi Setup: Navigate to the Wi-Fi Setup section. Here, you can modify your extenders' Network Name (SSID) and Password to match your primary router’s settings. It's recommended to use a unique SSID and a strong password.
Advanced Settings: Optionally, go to the Advanced Settings section, where you can configure Parental Controls, AP Mode, Bridge Mode, or Guest Networks based on your needs.
Save Settings: After making the necessary changes, click Save Settings to apply them. Your D-Link WiFi Extender is now configured.
Completion: Once the settings are saved, your extender should be ready to use, and your Wi-Fi coverage will be extended throughout your home.
D-Link WiFi Repeater Setup Using the App:
If you prefer using your smartphone, you can easily set up your D-Link extender using the official D-Link WiFi app. Here’s how:
Download the App: First, download the latest version of the D-Link WiFi app from the App Store (for iPhone) or Google Play Store (for Android).
Connect to the Extender’s Network: Connect your smartphone to the D-Link extender’s Wi-Fi network.
Launch the App: Open the D-Link WiFi app on your phone. If you don’t already have an account, you will need to create one. Once your account is ready, log in with your credentials.
Access the Home Dashboard: After logging in, you will be directed to the home dashboard of your extender. Here, you can manage all settings related to your Wi-Fi extender.
Wi-Fi Setup: Go to Settings > Extended Wi-Fi. You can change the SSID and password here, as well as other security settings.
Save Changes: After entering the new network name and password, click Save to apply the changes. You can also modify additional settings such as Guest Network and Internet Settings if needed.
Completion: After saving the settings, your extender will be configured, and your extended Wi-Fi network will be active.
D-Link WiFi Repeater Setup Using the WPS Button:

For those who prefer a quick and simple setup without involving any browser or app, the WPS method is the best option. Here’s how to perform the setup using the WPS button:
Power On the Extender: Plug the D-Link extender into a power outlet and make sure it’s powered on.
Place the Extender Near the Router: Position your extender close to the router for the initial setup.
Locate the WPS Button: Find the WPS (Wi-Fi Protected Setup) button on both your router and your D-Link extender.
Activate WPS: Press and hold the WPS button on your router for about 3 seconds. After that, press and hold the WPS button on your extender for about 3 seconds.
Wait for Connection: The LED lights on your extender will start blinking green, indicating that the devices are successfully communicating and pairing.
Release the Button: Once the connection is established, the LED light will become solid, indicating that the setup is complete.
Completion: Your D-Link WiFi Extender is now successfully connected to the router, and your extended Wi-Fi network is up and running.
Final Words The D-Link WiFi Repeater Setup can be performed in multiple ways, depending on what’s more convenient for you. Whether you prefer the traditional web interface, the app, or the simple WPS method, all these methods allow you to extend your Wi-Fi signal easily. Make sure you walk through the setup process step-by-step and choose the method that suits you best. By following the instructions carefully, you’ll have your Wi-Fi extended in no time, improving coverage throughout your home.
1 note
·
View note
Text
How to find D-link Extender Admin Password? dlinkap.local
D-link wireless extender’s admin password is impossible to be recovered if lost and could only be retrieved through recourse that is resetting the Dlinkap.local extender admin password – hard resetting of the D-link wireless extender.
#dlinkap.local#dlinkap#dlink#mydlink#D-link Extender Admin Password#D-link Extender#How to find D-link Extender Admin Password#How to find D-link Extender Admin Password?#dlinkap extender setup#dlinkap local setup#dlinkap.local setup wizard#dlinkap.local login
2 notes
·
View notes
Link
If your home or office has spots where your Wi-Fi connection is weak, a D-Link extender can strengthen that signal and cover more area. But for safety, you should change the wireless security password for your D-Link range extender every so often.
#D LINK EXTENDER#D'LINK DEFAULT WIFI PASSWORD#D'LINK ROUTER LOGIN PASSWORD CHANGE#D'LINK EXTENDER LOGIN#D'LINK RANGE EXTENDER SETUP#D-LINK POCKET WIFI CHANGE PASSWORD#D-LINK ROUTER DEFAULT PASSWORD NOT WORKING#DLINK ROUTER PASSWORD RESET#HOW DO I FIND MY D-LINK ADMIN PASSWORD#HOW TO CHANGE D'LINK ROUTER NAME AND PASSWORD#HOW TO CHANGE WIFI PASSWORD DLINK THROUGH MOBILE#HOW TO RESET D LINK EXTENDER
0 notes
Text
Tp-link extender setup-Tp-link wifi range extender setup
Tp-link Extender Setup
Account administration requires the TP Link wifi extender login. If you have an account, you may view the information at any time.The TP Link wifi extender may be accessed via a web browser. Only by logging in to the Wi-Fi extender can we access the device.If we have signed in to the TP-Link Wi-Fi Extender, we may receive notifications about upgrades or difficulties. It's mostly used to manage your TP Wi-Fi extender account. The steps for accessing the TP-Link Wi-Fi Extender are outlined below.
To Login To A TP-Link WiFi Extender, Follow These Steps
With the Ethernet cable, connect the computer to the TP-LAN link's port.
Manually assign the Static IP address on the PC.
Follow the guidelines below if you're not sure how to allocate. If you have a Windows 7 computer, follow the steps outlined here.
Select the choices using the left mouse button. Change Adapter Start->Control Panel->Network and Internet->Network and Sharing Center to change the settings.
Double-click the option Internet Protocol Version 4(TCP/IPv4) under Local Area Connection-> Properties.
If your static IP address is 192.168.0.254, you may now adjust the static IP address to 192.168.1x.
Open any web browser and put the extender's IP address into the address bar.
Type the username and password in the corresponding fields.
admin is the default username and password.Click OK when you've finished entering your information.
The IP settings provided above are used to access the TP-web-based Link's setup interface.
What Is The Best Way To Set Up My Range Extender?
Check whether you have the following information for TP Link wifi extender login before setting up the Range Extender setup. IP address, encryption type, SSID, and password
To begin, go to the TP Link wifi extender management page and log in.
The Network option should be selected. Check that the Range Extender IP Address matches the router's IP section.
You may also select the Save button after changing the IP address to 192.168.1.250.
Select Quick Setup->Next->Wireless from the drop-down menu.
After selecting Range Extender as the operating mode, click Search.
Find your router's SSID in the list, click it, and then select Connect. Select Save from the File menu to save it.
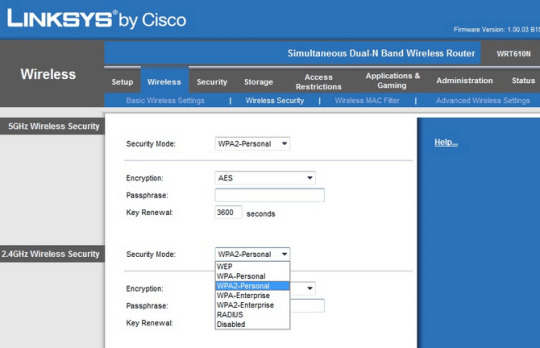
Wireless Security may be found by going to Wirelss-> Wireless Security. Select WPA-PSK/WPA-PSK and AES as the encryption method, then click Save.
To confirm, select one of the choices. Type your router's IP address, 192.168.1.254, in the IP address bar, and then select the Start option under System Tools-> Diagnostic.
Set your computer to acquire the IP address as soon as possible.
How To Set Up A Range Extender With A WPS Button
Connect a power outlet near your main router to your Range Extender.
Then, on the primary router, press the WPS button, followed by the WPS button on the Range Extender.
Wait until both the router and the Range Extender's WPS button lights blink.
The WPS process failed if the wireless signal LED on your Range Extender is still off after two minutes. Press the WPS button one more.
Rep the steps above till you achieve your goal. You may leave the Range Extender where you wish to extend your wireless network's range.
You may use the wireless network connection after plugging in the Range Extender.
TP-Link Extender Login Procedures
Use a web browser such as Safari, Internet Explorer, or Google Chrome to log in to your TP Link wifi extender.
Type the default IP address of the TP-Link Modem router, such as 192.168.1.1, at the top of the browser window, and then hit the Enter key.
Depending on the product, the LAN IP address changes. The IP address can be seen at the bottom of each label product.
In the login page, input the Username and Password.
Admin is the default user name and password for D-Link devices. Enter your password in lowercase letters.
To log in to your TP Link wifi extender, choose the option OK.
1 note
·
View note
Text
192.168.1.1 Default Router Password List
Lookup final results of the search for IP address 192.168.1.11. A new version of the Net Protocol has also been developed, called IPv6. As opposed to its predecessor, IPv6 uses a 128-bit address, allowing for about three.4×1038 addresses, which is sufficient to assign a exclusive IPv6 address to every single single atom on the surface of the Earth. Step four: Log in to the D-Hyperlink router with the administrator username and password. Visit this website for more detailed directions and tools on locating your router's IP address.
Because we're talking about private IP addresses, you need to preserve in thoughts that accessing a router's net interface is achievable only when you are on the identical network as the router. What is far more, you require to know the appropriate login and password mixture otherwise you won't be able to get past the initial login window. The reason why there are certain destinations on the internet that do not have public addresses has almost everything to do with the Internet Protocol version four (IPv4), which defines an IP address as a 32-bit number. Due to the fact the IPv4 pool is 32-bits in size, it can include only 4,294,967,296 addresses.
You might consider that nearly 4.three billion IP address would be adequate, but you would be incorrect. There are now around 23 billion connected devices, and the quantity is expected to double by 2023. To cope with the IP address shortage, a single public IP address is usually employed to hide an whole IP address space consisting of private IP addresses making use of network address translation (NAT), a approach of remapping one IP address space into one more.
Unplug your modem and router from the Net and power sources. Your modem should be connected to a cable that in turn connects to your home's Cable outlet you'll need to disconnect both this cable and the common energy cable. To find your public IP address, Google "What's my IP" and it will show you. To locate your private IP address, go to CMD (on windows), kind "ipconfig" and look at the IPv4 address.
Find your router's "Reset" button. You'll usually uncover this button, which is fairly modest, on the back of the router. If you do not know the right administrator login name and administrator password, you ought to flip your router about and appear for a sticker on the bottom side. It's really widespread for router makers to print the default administrator login name and administrator password on a sticker, along with other beneficial data, such as the name of the router or the web site of the manufacturer.
The dilemma with the net is that not each destination has a public address. Some destinations have only what's referred to as a private address, and the IP address 192.168.0.1 is 1 of them. 192.168.0.1 is a private IP address, similar to 192.168.1.1 or ten...1 utilized by a lot of vendors as the default gateway. Many Netgear and D-Link model routers use 192.168.0.1 as their default IP address. It is employed in a private IPv4 network address as the router gateway. In order to stay away from address conflicts, only one device can use 192.168.0.1 on a network. Other common default gateways are 192.168.1.1 and 10...1.
Going to 192.168.1.1 from net browser leads to the login web page of the router's settings from exactly where distinct settings of the router can be changed provided that the default gateway address of your device connected to the network is 192.168.1.1. If you are hunting to make modifications to the settings of the router or changing the password of your Wi-Fi Network then this can be carried out by logging in into the Router's Settings by means of 192.168.1.1.
If you're possessing troubles accessing your router at 192.168.1.1 (extended loading or not loading at all),your network may be employing one more addess such as 192.168.0.1, ten...1 or that case check our router IP address list. You can also study our tutorial on how to find your router's ip address for a lot more aid. Accessing your Router Admin via a 192.1681.1 IP address will permit you to adjust the settings and configurations that your router application supplies.Click Right here 192.168.1.1 or enter 192.1681.1 into your Browser's address bar.
Right after successful login, you need to change the WiFi password and router username. Select a sturdy password, a combination of letters, symbols, and numbers. Right here are some examples of how different router modes and switches would assign IP addresses to computers in a network. You will see the IP address subsequent to default” (in the example below, the IP address is: 192.168.137.1). If you never don't forget your username and password, you can take benefit of default login particulars that are supplied on the planet wide net. When it is worked, you ought to be asked for your password. Then you have to enter a username and password. Make a decision on a mix of letters and numbers to create the password robust.
Offered that the login particulars are appropriate, you will enter the router's settings web page and make the desired changes from there. To access the Router Admin panel, you have to connect it to your Computer with an RJ45 cable. After connected, open the browser and kind into the address bar. An IPv6 address consists of a series of eight numbers, each and every number becoming 4 digits extended. Unlike the IPv4 address that's expressed in decimal numbers, an IPv6 address is expressed in hexadecimal numbers.
Wait another 30 seconds After releasing the Reset button for the router to completely reset and power back on. You need to be in a position to inform that the router has finished booting up by the state of its LED indicator lights. Step 4: Enter Default username and password (admin-admin) if you haven't changed. Or Enter your username and password. Of course, it's not just routers that can use the 192.168..254 IP address. All electronic devices that can connect to a regional network can identify themselves to others with the 192.168..254 IP address, such as webcams, laptops, servers, personal computers, sensible TVs, repeaters, or modems.
1 note
·
View note
Text
How to reset your router
192.168.1.1 is the default gateway IP Address - - utilized to login as admin of router settings such as TP-Hyperlink, D-Link, Linksys, Netgear. The excellent news is that the default login name and password are usually admin.” If that does not operate, we advocate you Google one thing like default login name and password” followed by your router's model and manufacturer. For the initial connection it is needed to use an RJ-45 cable connecting the laptop and the router, to configure it! The subsequent step is to enter your credentials for the net interface (login and password). These default password and login are specified in the manufaturer's documentation.
The 192.168..1 IP address falls within this final range of reserved private IP addresses. To adjust your router's password, go to the settings menu and appear for an option titled password.” It is crucial that you select a password that is sufficiently secure. The router has to be configured. Prior to starting to get the important, you may possibly have to connect it to the routers or modem by employing an Ethernet wire. You will want a router login IP address, which can be 192.168.1.1 , , 192.168.1. 254, and so on. Now, if you don't know about Router Default IP, then check out its shipping box or make contact with manufacturer.
Thus, if it is a wireless router it will typically be configured with the WiFi function disabled, which means that the 1st configuration will call for connection employing RJ-45 cable. When you access a web site on-line, you are basically accessing that website's public IP address. The website itself is connected to the world wide web by means of a router and an ISP. When you're on-line, you have a public IP on the web and a private IP inside your network.
Out of these, D-Link, Linksys, and TP-Link have by far the most routers that use 192.168.0.1 as the default IP address. 192.168.0.1 is not opening or keeps on loading simply because your router could support distinct gateway IP address. Attempt 192.168.0.1, 10...1 or 192.168.1.254. When you connect to the internet, you join a larger network. Your private network is nevertheless private and your private IP isn't visible to any person. When you go on the web, you connect through your router, which connects via your ISP. Your ISP will assign your router and your computer a public IP address.
Next, a login web page will be displayed. Enter the default username and password written on the router. The default username and password is typically admin. Additionally, if the router does not accept the RJ-45 cable connection, it is typically adequate to restart the router or do a challenging reset (Please refer to manufacturer's documentation). There used to be a time when phone numbers and street addresses had been among the most private data that an person possessed. But times have changed, and we now reside in the era of the web, and IP addresses have largely replaced telephone numbers and street addresses.
Step 3. Click the Network & Internet” selection. Step 5. Pick how you are connected to your router. If you are hardwired to your router decide on Ethernet. If you are connected to your router by means of WiFi decide on Wi-Fi. Please post back here with the final results of the test and the information on specifically where your Computer network cable connects. But in most situations, the default IP Address for Modems and Routers is 192.168.0.1. Now you also need to Enter Default username and password in order to access its admin web page. The default username and password are different for a diverse manufacturer. Here we are going to share all the attainable Default Username and Password for 192.168.01 IP address.
Wait an additional 30 seconds Following releasing the Reset button for the router to totally reset and energy back on. You ought to be able to tell that the router has finished booting up by the state of its LED indicator lights. Step four: Enter Default username and password (admin-admin) if you have not changed. Or Enter your username and password. Of course, it's not just routers that can use the 192.168..254 IP address. All electronic devices that can connect to a local network can identify themselves to other folks with the 192.168..254 IP address, including webcams, laptops, servers, private computer systems, wise TVs, repeaters, or modems.
192.168.1.1 is the frequent IP address that is used by many modems and routers nowadays. It's a default IP address exactly where you can access your modem or wireless router to modify settings, adjust the WiFi name or password. 9) Go back into your PC's network settings, and have your Computer get an IP address automatically. 4) Try to access your router from your browser now. If you can, try resetting to factory defaults from there, and set your Pc to use DHCP once more.
Each router has an internal router IP address that is utilized to access its admin interface. Some routers have this IP address written on a sticker on the bottom, but many other folks don't make it practically as simple to find. Fortunately, there are web sites such as where you can find the router IP address details you need with just a few clicks. Then open a browser and enter IP address 192.168.0.1 in the address bar of the browser.
These private IPs total about 17.9 million distinct addresses, all reserved for use on private networks. This is why a router's private IP does not need to have to be special. The router then assigns a private IP address to each and every device in its network, regardless of whether it's a small residence network or an enterprise-level organization. Every single device inside the network can connect to an additional device in the network employing this private IP.
Verify the Manual how the reset button performs. Usually you want to hold the reset button for an extended period of time to restore to factory settings. The worth for IPv4 is your private IP address. Step 3: Open Browser and variety 192.168.1.1 and press Enter. Turn on your router and connect it to your computer with an Ethernet cable. Some routers let you to connect to them wirelessly, but Linksys routers have this feature disabled by default for security causes.
Soon after effective login, you have to alter the WiFi password and router username. Decide on a sturdy password, a mixture of letters, symbols, and numbers. Here are some examples of how various router modes and switches would assign IP addresses to computer systems in a network. You will see the IP address next to default” (in the instance under, the IP address is: 192.168.137.1). If you don't keep in mind your username and password, you can take benefit of default login particulars that are presented on the planet wide internet. When it really is worked, you ought to be asked for your password. Then you have to enter a username and password. Decide on a mix of letters and numbers to develop the password powerful.
Now that you know what the 192.168.1.1 IP address is and how to log into routers that use it as the default gateway, you can discover its admin panel and change many different settings to make your network safer and quicker. Now you know several things about IP Addresses, Private and Public IP Address, How to Access 192.168.1.1, What If You Can not Access 192.168.1.1, How To Alter 192.168.1.1 Router Password, Reset Router Settings, How To Find The Router IP Address and a lot a lot more.
Step 4: Go to Wireless Setting and alter settings that you want. Step 4: Change WiFi Password and Router Username. Step two: Kind 192.168.1.1 in browser > Enter. The router utilizes a distinct address than 192.168.1.1. Open a browser and type that IP address to log into the router making use of the administrative ID and password. In case you can't access your router admin configuration web page through , let's discover out which IP address your router is making use of.
Enter IP address 192.168.0.1 > Enter username and password listed in the above table. Enter the right administrator login name and administrator password. Step two. In this window highlight either Ethernet, Wi-Fi, or Thunderbolt adapter, based on which adapter is connected to your router. Then click the advanced tab at the bottom of the page. You will see the IP address subsequent to Default Gateway (in the instance below, the IP address is: 192.168.0.1).
1 note
·
View note
Text
With the D-link dap x1870 extender, you can eliminate internet dead zones and broaden your network’s coverage throughout your home or office. With the rise in the amount of time, we spend online, whether for personal or professional reasons. If we want to stay connected, we need a single mesh wifi network. If you don’t know how to use the D-Link AX1870 Mesh WiFi Dlinkap.local, this article is for you. To learn how to configure your Dlink x1870 extender, continue reading this guide.
The DAP-X1870 Extender can set up manually using http://dlinkap.local
Use the dlink extender to connect your computer or smartphone to the network.
Use an ethernet cable to connect your d’link dap x1870 extender to your computer.
Enter http://dlinkap.local into your browser’s address bar to begin the setup.
• You will be redirected to a login page after typing in the setup web address into your browser’s address bar.
• Enter the login information that you’ve written down in the space provided. These are the router’s primary login and password credentials. These credentials can be found in the user guide or on the bottom of the main router.
• You will be taken to a setup page when you click on login. “Next” is the next step.
• Select “manual” from the drop-down menu of connection methods on this page.
Choose your router’s wireless network from the drop-down list. Click on “select.”
You will now be asked to enter your wifi password and then click “next” on this page.
A notification will appear on your screen when your d-link dap x1870 is in sync with your main router.
In the next step, you’ll need to enter the dual-band passwords and SSIDs into the appropriate fields. Click “next” after that.
Then a summary of your setup will be shown to you on the page you’ve just been taken to.
Once you’ve completed your setup, click “save”
Changing some of the router’s default security settings is an additional step you can take to help keep your wifi and network secure.
Your admin login credentials need to update. To ensure that no one can get into your network and reset it.
Use http://dlinkap.local to access your account. To begin using the wizard, simply click on this weblink.
Click on “management” once you’ve arrived at the setup page.
Admin will appear in a drop-down menu.
Change the admin password to something else if you’d like. However, keep in mind that you must pick a password that can’t be easily deciphered.
Then, click “save” to finish.
You can rest assured that your DAP-X1870 will restart and be configured in accordance with the settings you’ve previously made.
With the dlink wifi app, quickly set up D-Link AX1870 mesh WiFi
In order to complete your setup in the quickest possible time, use the dlink app. Once you’ve followed the instructions, you’ll be done in a matter of minutes. Accessibility is another benefit of having the App. Using your dlink wifi account, you can quickly change all of your wifi settings. The following are the quick and easy steps to Setup D-Link DAP X1870 Dlinkap.local Mesh WiFi with the App:
To begin, connect your x1870 extender to an electrical outlet. Be patient until the light turns solid.
After that, connect your smartphone to the extender’s WiFi network. On the bottom of the extender or in the user’s manual, you’ll find the connection credentials.
To get started, open the dlink app and follow the on-screen instructions.
Select the operating mode of your dlnik device, and then select your device from the list that displayed. •
If you see a list of wifi networks, select the SSID you want to connect to. Then enter your passkey and hit “connect” after you’ve chosen the correct one.
Next, you’ll be able to customize your device’s SSID and password. Select “YES” to continue.
As a result, you’ll have to change the default password to something more comfortable for you to use. Tap “Next” when you’re done with that.
When you’re done, the app will show you a summary of all your settings.
Then, if you’re still not sure, tap “save.”
The message “whole-home mesh wifi created” will appear on a new page.
Click on the “Done” button.
NOTE: You’ll be notified of possible locations for your dlink extender setup device via a suggestion notification. You’ll be able to quickly connect to other devices with this.
DAP-X1870 DAP-X1870 AX1800 Mesh Wi-Fi 6 Range Extender • Dual-band AX1800 (574 Mbps + 1200 Mbps) • Industry-standard mesh Wi-Fi • Gigabit Ethernet connector allowing wired mesh backhaul • Latest industry-standard 128-bit wireless encryption • LED signal strength indicators
Reasons for DAP-X1870 setup problems
Any time you try to Setup D-Link DAP X1870 Dlinkap.local a device, you’re likely to run into technical difficulties. Just fix the problem at its source before moving forward with your setup, and everything else will fall into place naturally. The following few of the most common:
Slow or unreliable internet
Older version of the browser
WiFi router firmware that is out of date
Errors or weak connections in ethernet wires
There was a problem logging in. Incorrect SSIDs and Passwords also included in this category.
The Process of Troubleshooting your setup
Here some fast fixes for any Setup D-Link DAP X1870 issues you may run into.
In the event that you’re unable to access the setup URL, please verify your internet connection. Alternatively, an older browser may to blame.
Ethernet cable connections should checked.
Restarting your gadgets may be an option.
Contact our professional specialists if you’re still having trouble after trying any of these basic fixes. They’ll be able to provide you with any information you need about "Setup D-Link DAP X1870 Dlinkap.local".
In relation to this item
Firstly, Increase WiFi 6 coverage for all of your security cameras, smart doorbells, laptops, mobile phones, tablets, game consoles, and other devices.
Secondly, Next-Gen AX1800 Dual-Band Speeds with 4-streams and up to 574 Mbps (2.4GHz) plus 1201 Mbps (5GHz)
Add WiFi connectivity to a wired device by connecting to the Gigabit Ethernet port
Supports SmartConnect, MU-MIMO, OFDMA, ATF, 80 MHz
Easy setup, management, and auto firmware updates
And the last is, Locate the best spot for placement w/ D-Link Wi-Fi App
#dlinkap.local#dlinkrouter local#d link router local#d'link login#d'link wifi extender#mydlink login#login for d link router#d link router login#log into dlink router#http dlinkrouter local#d link default password#d link wifi extender set up
0 notes
Text
Do I connect my D Link 1330 extender? How do I reset my D-Link extender?
Do I connect my D Link 1330 extender?
D-Link Dap 1330 is one form of a wireless extender. It’s having an inbuilt LED light that helps you to analyze ether it gets connected with a router or not, and also having a WPS button and Signal strength sign which helps to get connected with a network is situated at the top of the dlinkap extender. And having an ethernet port and reset button at the rear end of the extender.
Here, we all are discussing “Do I connect my D Link 1330 extender?”. There is some method we discussed through which you can connect your dlinkap extender with dlink router network follow those methods:

Connect your D-Linkap Extender with the router through the WPS button.
Find the power socket near your dlink router and then plug-in the dlinkap extender in that socket and wait till the LED light will start blinking.
Now, press the WPS button of your dlink router.
Wait for a couple of minutes, then press the WPS button of D-Linkap 1330 extender.
Now, go to the wireless setting of your device to check the available network.
The SSID name of D- link 1330 is already assigned in extender match that and click on that network name 2.4ghz (router’s name)-EXT.
The wi-fi password of the Dlink router and dlink 1330 extender most of the time same so enter that password to the extender network name
Then your extender successfully gets connected with the router.
2. Connect your extender to the router through Web Browser
Plug-in the dlinkap extender to the nearest socket of dlink router
Open the wireless setting of your wireless device like laptop or mobile device
Scan and find all the wireless network which one is active and select your dlink router’s network and enter the password
Open your web browser and if you don’t know Ip address then, check the backside of extender there you will get the Ip address printed on the sticker.
Enter that IP address then press Enter that IP address will redirect you to dlink login page.
If that IP address doesn’t get access then enter the link : dlinkap.local and press enter that one will also redirect you to dlink login page
Now enter the login credential the username “admin” and password “admin” or blank then press enter
That will redirect you to the admin panel
From the drop-down menu, you can click on the language and select the language and press continue
Press the WPS button of the router, the WPS button of dlinkap extender will start automatically.
Enter the name for D-Link 1330 and create a password then click the next button
Use the administrator password for dlinkap extender, which will help if you log in through the Web interface
Click Finish, your Extender will start the reboot
After completion of the Reboot process, the LED light of the extender turns into a solid green state that shows your dlink extender connected to your router successfully
How do I reset my D-Link extender?
We need to follow some simple steps to reset the D-Link Extender, go through the given step to reset your dlinkap extender:
Plug-in the DAP extender to the pocket socket
Then we found that start the LED light turns red> after that turn into amber red(orange) or then Green.
will find one reset button backside of the extender that looks like a pinhole, the reset button present inside that hole
You have to use the pin to press that button
Now, press that reset button for a couple of minutes
Press that button till the LED light turn into red color
Once the LED light turns to red color then the extender will reboot automatically and come at factory default mode
Now, you can use and set up the dlinkap extender through their default login credentials.
your web browser and enter the Ip address of dlink extender and then press enter
Then that will redirect you to dlink login page or use link: dlinkap.local
After that page will prompt you to enter your username and password then enter the default username and password of the extender
Now you have successfully accessed the setting panel of the extender there you can customize your setting as per your need.
So, through this article we get acknowledged about Do I connect my D Link 1330 extender? How do I reset my D-Link extender? If you still face any query regarding the dlinkap extender then visit: dlinkap.local
0 notes
Text
192.168.0.1 wireless setup for 5.3
You have to enter the web address as 192.168.1.1 or 192.168.0.1 wireless setup in the address bar menu of your browser and then press enter, this allows you access the router login page for your device. After that, you need to enter the default username and password in the webpage of your router admin panel. You can also customize the security option like WLAN Settings, DSL, PPPoE, WPS, MAC, AND DHCP Client, or the network management settings like LAN, WAN, DNS, or Proxy. In case, you are finding difficulty in detecting the name of your wifi range extender, you can follow our blog.
How to setup router using 192.168.0.1
First of all, you need to connect the router to the PC.
After that, you need to connect your adapter and then turn on the Router and the computer.
Then, you have to open the web browser in your computer and then type the web address 192.168.0.1 wireless setup in the address bar menu and then press enter.
In the next step, you have to enter the default username and password for your device. Please note that the default username and password for your device is the admin.
This will open the admin page for your device and now you can all the required settings for the usage.
D-LINK Router Login Setup
The following are the steps below for the router setup login for the D-Link.
First of all, you need to connect the D-Link router to your computer.
After that, you have to connect the adapter and then open the web browser and then type the web address as 192.168.0.1 in the address bar menu and then press enter.

In the next step, you have to enter the username and the password for your D-Link router in the administrator page.
First, you need to connect the Netgear router with your Personal computer.
Then, you have to open the web browser and type the web address as 192.168.0.1 in the search bar and press enter.
#http //192.168.0.1/#168.192.0.1 sign in#192.168.0.1 setup configuration#192.168.0.1 centurylink#192.168.0.1 wireless setup#192.168.0.1 8080
0 notes
Text
Wordpress, Tumblr, Steemit and Medium review

Updated 6 December 2017
With the countless number of blogging platforms on the internet today, it is no surprise business owners find themselves in a dilemma as to which blogging platform to use to promote, engage and reach out to their ever expanding audience.
The question(s) “Is the interface simple to use? How many people can I reach with these platform? Is my data security, personal security and others guaranteed?” Can I give others admin rights to post on my behalf like my IT team?” These questions and more are various things that run through a business owners mind when considering using a particular platform for business.
We’ve eased majority of the stress for you as we have extensively researched the major platforms in use. In this article, we will look at the following platforms features, we review the following platforms in detail.
I. We extensively review features of Tumblr, WordPress, Medium, Steemit.
II. Sharing editor rights on these platforms.
III. Pros and Cons of each platform.
TUMBLR
1. Tumblr is a microblogging site and a social networking site that allows users to post multimedia and various contents to a short form blog.
2. Users can access the website features via the dashboard interface.
3. The dashboard has a live feed of recent posts from other blogs that the user follows.
4. Through the dashboard users are able to comment, like posts that appear on their dashboard and reblog (reposting a blog on your dashboard).
5. With the dashboard, users can upload texts posts, videos, images, link to a blog and quotes.
6. Connectivity to other social media accounts is possible; Facebook and Twitter, whenever there’s a post, it will be sent as a status update on Facebook and as a Tweet on Twitter.
7. Users can follow other user’s blogs.
8. Bloggers can make their blogs private i.e. only users who have the blogs password can be allowed access.
9. Posts can be scheduled to a particular time or can be delayed, it can also be spread over several hours or days.
10. There are tags to allow users help their audience find posts about certain topics by simply adding tags.
11. For the tech savvy people who want more flexibility, Tumblr allows users to edit their blog’s theme, the HTML codes that control the appearance of the blog, users can also use a custom name for their blog.
12. Tumblr is compatible with multiple platforms, iOS, Android and Windows.
SETTING UP EDITOR RIGHTS ON TUMBLR
To get posting rights, first you create another blog called the group blog where you can invite members.
In order to set up a blog where others can be contributors that can post from separate accounts to your group blog, you have to create a new group blog, then invite new members to join it. Here's how to get you started:
• Log in to the Tumblr Dashboard of your account.
• Select “Create A New Blog” From The Drop-Down List Of Blogs. Fill In The Blog Information. Click “Create blog” Button.
Give your blog a name and create a password
• After clicking the "create new blog" tab, enter a title and domain name for the new blog. There’s an option to protect the blog with a password. If you decide to use a password, only people who enter the password will be able to view your blog.
Invite new members
• In the dashboard of your new blog, select "members" from the menu on the right panel.
• You can invite members to post on the blog through email or by copying and pasting an invite link. Members that are invited will be able to add content to the new blog, but they won't be able to change settings unless you promote them to be admins of the blog.
Pros:
a. Simplicity: Tumblr is good for starting a blog immediately with minimal prep time. You can set up a functioning blog in a few minutes using Tumblr’s readymade customizable themes. This doesn’t require tech or design help.
b. Cost: Tumblr is a free platform. They offer premium versions that varies from $9 and $49, premium services give the user the ability to customize the blog as they wish, but the free version is also enough for a great blog.
c. Community: By joining Tumblr, you have access to a built in community, making it easy to grow an audience than other blogging platforms. You can gather subscribers, answer questions from readers and re-blog other peoples content all from within the platform.
d. Self-sustainability: Tumblr allows you to schedule posts, removing the need for third party apps like Hootsuite and Virtue.
e. Analytics: Tumblr gives its users the ability to connect their account to Google Analytics to monitor post effectiveness.
f. Mobile optimized: Tumblr is optimized for iOS, Android, and Windows app, meaning your blog is automatically mobile optimized.
g. More tags can be added on Tumblr better than Medium.
Cons:
a. Design limitations: Tumblr’s designs are limited, though Tumblr offers design customization for its themes, Tumblr isn’t for individual’s brands and businesses that have strict brand guidelines or a particular design team.
b. Functionality limitations: As mentioned earlier, Tumblr is well-known for its simplicity. Tumblr isn’t your best option if you’re looking for plugins and widgets.
c. Users must adapt to its format: Tumblr has a precise formula that works best on the platform. Light on the copy, more on the imagery and shareable stuff.
d. Server dependent: You’re mandated by Tumblr server to host your blog, with no option to host using your own website’s preferred hosting software. This can be a security concern as well as a technological one. If Tumblr’s server goes down or there’s a downtime, so does your blog.
e. To read an article on Tumblr, the user has to create a Tumblr account without which the article cannot be read.
WORDPRESS
1. WordPress is a content management system (CMS) based on PHP and MySQL, it is free and open sourced.
2. For WordPress to function, it has to be installed on a web server on a network host or an internet service host.
3. WordPress features a plugin architecture and uses a template system.
4. WordPress allows users change the look and functionality of the site without changing the site’s core code or content with themes.
5. Plugins allow users to extend the functionality and features of a blog or website.
6. WordPress has native applications for WebOS, iOS, Android, BlackBerry and Windows, some of these comes with limited set of options.
7. WordPress has a feature called integrated link management which is the ability to allot multiple categories to posts, search engine friendly, clean permalink structure and supports tagging of posts.
8. WordPress supports Pingback and Trackback standards used for displaying links to other sites that are linked to an article or a post.
9. Posts can be edited in HTML via the visual editor or through plugins that allows a series of customized editing features.
SETTING EDITOR RIGHTS ON WORDPRESS
WordPress has a user role management system which specifies what a particular user can and cannot do on your site.
To set user roles in the site, you have to be an administrator first, then you can change the role of others by;
i. From the WordPress dashboard go to Users > All users.
ii. Check all the boxes next to the avatars.
iii. Click on the drop down menu Change role to, then select the role you want to assign to the new user.
iv. Click on change.
WordPress has five default user roles:
• Administrator
• Editor
• Author
• Contributor
• Subscriber
1. Administrator:
• In WordPress, Administrator is the most powerful user role. Users with the administrator role can edit any posts by any users on the site, add new posts and even delete those posts.
• They can install, delete, and edit plugins as well as themes.
• An administrator can add new users to the site, change information about existing users including their passwords as well as delete any user even other administrators.
2. Editor:
• Users with the editor role have full control over the content sections of the website. They can add, edit, publish, and delete any posts on a WordPress site including the ones written by others.
• Editors can moderate, edit, and delete comments as well.
• Editors do not have access to alter the settings of the website, install themes and plugins or add new users.
3. Author:
• Authors role can write, edit, and publish their own posts. Authors can also delete their own posts, even if they are published.
• Authors cannot create categories when writing posts, though they can choose from previous categories or they can add tags to their posts.
• Authors can view comments even those that are pending review, but they cannot moderate, approve, or delete any comments.
• Authors do not have access to settings, plugins, or themes, so it is kind of a low-risk user role on a site with the only difference being their ability to delete their own posts once they’re published.
4. Contributor:
• Contributors can add and edit their own posts, but they cannot publish any posts not even posts created by them.
• Contributors have to choose from existing categories because they cannot create new categories but they can add tags to their posts.
• Contributors cannot upload files i.e. they can’t add images to articles created by them.
• Contributors cannot approve or delete comments but can only view comments even those awaiting moderation.
• Contributors do not have access to settings, plugins, or themes
5. Subscriber:
• Subscribers can only login to your website and update their user profiles. They can change their passwords but they cannot write posts, view comments, or alter any settings on the website.
• Subscribers are useful if you require users to login before they can read a post or leave a comment.
Pros:
a. WordPress is a Content Management System (CMS) that gives you the ability to update your site without the need for a developer.
b. WordPress is simple to install and operate with no need for learning high level programming language.
c. Websites can be built in a short time depending on the complexity.
d. There are of the shelf plugins and themes not provided by the WordPress core that can add functionality to the site.
e. Due to the open source nature of WordPress, there are various how to tutorial, support forums guides for virtually anything you want to do.
f. WordPress is continuously developed, tested and supported.
Cons:
a. WordPress is free and open source, its future development or the impact that updates can have on businesses cannot be controlled.
b. It is highly essential that websites be upgraded to the latest versions of WordPress, including its plugins and themes, else problems arise.
c. Since WordPress is open source, it is easy for hackers to find security lapses and plant malicious code.
STEEMIT
1. Steemit is a social news service which runs a social networking website and blogs on a blockchain database.
2. Steemit produces STEEM dollars and STEEM which are tokens users get for posting, commenting and discovering exciting content.
3. Users can upvote comments and posts, and the authors who’s material got upvoted gets a monetary reward in a cryptocurrency token called STEEM.
4. US dollar pegged tokens are called STEEM Dollars.
5. Users are also rewarded for discovering popular content (Curating).
6. Curating is voting post submissions and comments.
7. Steemit uses a reputation system, new accounts start with a reputation of 25.
8. The Steem blockchain has two tokens which are STEEM and STEEM DOLLARS.
9. Steemit also has vested and stored interest called the STEEM POWER, it’s strictly for use within the Steem community.
Pros of Steemit:
I. Steemit is the only social media platform that pays its users for posting and upvoting comments.
II. The community has 200+ members with about 2000 new members signing up everyday.
III. The site is easy to navigate.
IV. Steemits code is open sourced and decentralized.
V. The website is Ad free.
Cons:
a. The site is in beta phase for now, it is still under construction.
b. There are features still missing.
c. There is no private messaging system.
d. To open an account takes about 7 days.
e. Normal html tags can’t be used.
MEDIUM
1. Medium is an online publishing platform, a perfect example of social journalism, it has a collection of amateur and professional publications and people, publishers on medium or exclusive blogs.
2. Medium software provides a full What You See Is What You Get (WYSIWYG) user interface when editing online.
3. When an entry is posted it can be recommended and shared by other people, like Twitter, posts can be upvoted like Reddit and content can be assigned a specific theme like Tumblr.
4. Medium has a clap feature which readers can click multiple times to signify if they like an article.
5. Payment to authors is based on how many claps an article receives.
6. Users can create an account using a email address, Facebook, Twitter, or Google account.
7. Posts are sorted by topic rather than writer.
Pros of Medium:
a. On Medium it is easier to get your blog posts discovered, you can subscribe to authors you enjoy based on a recommendation engine.
b. Authors can easily see all the statistics on views, detailed statistics about their stories, shares, views, complete reads etc.
c. Authors can either publish their stories by themselves or join an organization that publishes articles by a number of authors.
Cons:
a. Mediums WYSIWYG editor is limited.
b. The commenting system on Medium is ambiguous, each time you click reply, you’re redirected to a new page and pressing the back button takes you back to the top of the page and not the comment you left.
c. Medium promotes the company’s brand and not the authors brand.
References
85ideas.com, E. (2017). The pros & cons of using WordPress for your business. [online] Pragmatic. Available at: https://pragmatic.agency/wordpress-pros-cons/ [Accessed 26 Nov. 2017].
En.wikipedia.org. (2017). Medium (website). [online] Available at: https://en.wikipedia.org/wiki/Medium_(website) [Accessed 26 Nov. 2017].
En.wikipedia.org. (2017). Steemit. [online] Available at: https://en.wikipedia.org/wiki/Steemit [Accessed 26 Nov. 2017].
En.wikipedia.org. (2017). Tumblr. [online] Available at: https://en.wikipedia.org/wiki/Tumblr [Accessed 26 Nov. 2017].
En.wikipedia.org. (2017). WordPress. [online] Available at: https://en.wikipedia.org/wiki/WordPress [Accessed 26 Nov. 2017].
Flightpath NYC. (2017). Tumblr for Brands: Pros and Cons of Tumblr Blogging Platform. [online] Available at: https://www.flightpath.com/blog/2016/10/tumblr-for-brands-pros-and-cons-of-tumblr-blogging-platform/ [Accessed 22 Nov. 2017].
Kessler, S. (2017). HOW TO: Create a Group Tumblr Blog. [online] Mashable. Available at: https://mashable.com/2011/05/01/group-tumblr/#AjZCQZx4emqjh [Accessed 22 Nov. 2017].
McCullough Web Services. (2017). The Pros and Cons of Using Medium as a Blogging Platform. [online] Available at: https://mcculloughwebservices.com/2017/07/29/using-medium-blogging-platform/ [Accessed 26 Nov. 2017].
Staff, E. and Staff, A. (2017). Beginner's Guide to WordPress User Roles and Permissions. [online] WPBeginner. Available at: http://www.wpbeginner.com/beginners-guide/wordpress-user-roles-and-permissions/ [Accessed 26 Nov. 2017].
TwelveSkip. (2017). How To Make Another Blog On The Same Tumblr Account | TWELVESKIP. [online] Available at: http://www.twelveskip.com/tutorials/tumblr/513/how-to-make-another-blog-on-the-same-tumblr-account [Accessed 22 Nov. 2017].
0 notes