#Liferay Search Experience
Explore tagged Tumblr posts
Visit Tumblr Blog
Explore Tumblr blogs with no restrictions, modern design and the best experience.
Last Seen Tumblr Blogs


Fun Fact
Tumblr posted its first advertisements in May 2012 and subsequently earned $13M in revenue.
Text
How to Use Collections with Search Blueprints in Liferay DXP
Explore how to use Collections with Search Blueprints in Liferay DXP 7.4 for dynamic, personalized content and streamlined scalability, enhancing the user experience.
0 notes
Text
How do I outsource software development to India?
Outsourcing software development to India may be a cost-effective strategy that provides access to a big pool of talented experts.
Here are the procedures to effectively outsourcing software development to India:
**Define Your Project needs: Outline your project's needs in detail, including goals, features, and functions. This will assist you in efficiently communicating with potential outsourcing partners.
**Conduct Extensive Research to find possible Outsourcing Partners in India: Conduct extensive research to find possible outsourcing partners in India. Look for firms with a track record of success, excellent customer feedback, and experience in the technology relevant to your project.
**Examine Technical competence: Examine the outsourcing organisations' technical abilities and competence. Take into account their knowledge of the programming languages, frameworks, and technologies essential for your project.
**Check References: Request client references from outsourcing businesses and contact former clients for comments on their performance, dependability, and communication.
**Consider Cultural and Time Zone variations: Recognise and take into account the cultural and time zone variations between your location and India. Effective communication is critical, so find a partner that understands your company's culture.
**outline the Scope and Budget of Your Project: Clearly outline the scope of your project, as well as milestones and deadlines. Create a budget that accounts for all expenditures, including development, testing, and any changes.
**Contract Negotiation and Signature: Negotiate the contract's terms, including payment schedules, deliverables, intellectual property rights, and any other pertinent elements. Make certain that the contract is both unambiguous and legally binding.
**Create Effective Communication Channels: Create effective communication channels, such as video conferencing, messaging platforms, and project management systems. Regular communication is critical for a fruitful cooperation.
**Project management: Project management tools and procedures should be used to track progress, manage activities, and keep the project on track. In software development, agile approaches are extensively utilised.
**Quality Assurance and Testing: Clearly describe your project's quality standards and testing methods. Review and test the deliverables on a regular basis to verify they satisfy your expectations and objectives.
**Protect Intellectual Property: Make certain that your intellectual property is safeguarded. Include in the contract terms addressing ownership of code, data, and any other project-related assets.
**Create a Long-Term relationship: Think of outsourcing as a long-term relationship. Developing a solid relationship with your outsourcing partner might result in improved collaboration and future success.
Keep in mind that effective outsourcing necessitates active and transparent communication. To guarantee a smooth development process, keep a careful check on the project's progress, give timely feedback, and handle any concerns as they arise. Well, there is no need of outsourcing your software development project, you just need top search for the best software development who will give you the best solution as same like outside companies.
You can contact us: We are software people, and we are giving our best solutions on Liferay portal, and AwareIm and many more as per your needs.
#liferay consultancy#liferay#engineering#tech#software#technology#engineer#liferay portal#liferay development#liferay technology#Liferay DXP
0 notes
Text
Liferay Search Blueprint: Improving the Search Experience

A Search Blueprint is a design plan for Liferay’s search behavior. The search experience starts at a Search Bar for most users. When a search term is entered, a complex query is constructed by Liferay’s search infrastructure, then sent to the search engine. You can see Liferay’s complete query using the Search Insights widget. This query can be thought of as Liferay’s default blueprint for the search page, controlling what is searched and how.
This document/blog will provide a comprehensive guide to Liferay Search Blueprint. We will cover the following topics:
How does search work in Liferay?
How to create a Liferay Search Blueprint.
What Can I Do in the Blueprints UI?
Advanced: Configuring Query Clause Contributors
Search Blueprints Configuration Reference.
How to apply search blueprint into search page.
Search Blueprint use case.
How does search work in Liferay?
Search Request: Liferay sends a search request to Elasticsearch, which can include the query body and additional parameters that help direct the response returned by Elasticsearch.
Query: The query body instructs the search in how to determine if matching content is found in the index. For example, what kind of query should be used when searching indexed content containing a title field? And if it matches the title field, should the score be boosted?
Clause: A clause is a self-contained portion of the main bool query. Most often one of the more nested queries is what’s referred to when the word clause is invoked.
What Can I Do in the Blueprints UI?
Create an element-based Blueprint, then apply it to the page to create a search solution. The features available for doing so include:

Blueprints are made up of Elements with some additional settings on top.
Elements:
Elements are visual building blocks that combine to build an entire Blueprint. Each Element is backed by a JSON fragment that defines a concrete search behavior. Elements are provided out of the box with Search Experiences, and an Element editor lets you create your own or duplicate the existing elements to use as starting points for your own needs. We can also include our own unique element clicking (+) button.

Advanced: Configuring Query Clause Contributors
Liferay’s back-end code (and potentially any custom applications deployed in your Liferay instance) contributes query clauses to the ongoing search.
These clauses contributed by the back-end can be configured via Search Blueprints. However, most users should never touch two settings:
Search Framework Indexer Clauses
Search Framework Query Contributors
The default settings are usually enough. If you’re sure you must tweak this behavior beyond using the Searchable Types, you must understand the way these back-end contributors work:
Use Searchable Types to disable individual indexers from participating in the search. If you disable a type’s indexer, no clauses for the type are added to the search query, even if its Query Contributors are selected. Results for these types do not appear for users.
Use Search Framework Indexer Clauses to disable all Liferay’s indexers from contributing clauses to the search. The only reason to disable all indexers is to build a search query from scratch, disabling all Query Contributors and Searchable Assets as well.
Use the Search Framework Query Contributors section to remove certain contributors from participating in the search. Disable certain clause contributors if you want to override them using your own Blueprints configuration, or disable all clauses to completely override Liferay’s search behavior, disabling Liferay’s Indexers and Searchable Types as well.

As an example, if the administrator does not want Liferay to create articleId clauses in request queries, we can disable the journal article query contributor setting. See the image below.

After that setting liferay not including below clauses into search query. You can also verify that by adding a search insight widget to the search page and see the search request query string.
{"bool": { "should": [ {"match_phrase": {"articleId": { "query": "kotlin", "slop": 50 }}}, {"match_phrase": {"articleId": { "query": "kotlin", "boost": 2 }}} ], "must": [{"match": {"articleId": {"query": "kotlin"}}}] }},
Creating Search Blueprints
To create Search Blueprints,
Open the Blueprints application by clicking Blueprints from Global Menu → Applications (Search Experiences).
Add a Blueprint by clicking Add ().


3.In the New Search Blueprint window, give the Blueprint a name (required) and a description (optional). 4.Depending on your Blueprint plan, next you’ll use these menus to continue building the Blueprint: a. Query Builder: in the Query Elements section, add new query clauses to the search by choosing or composing Elements for the Blueprint. In the Query Settings section, configure additional settings for the query (like which asset and object types to search). b. Configuration: Configure advanced settings (e.g., Sorts or Aggregations) in the search. 5.Once you’re finished with the initial Blueprint creation, Click Save.
Adding Elements to blueprint
Open the Add Query Elements sidebar by clicking the Add (+) button on the Query Elements

2.Expand the Element category you’d like to explore Link. 3.Hover over the Element, then click the Add button. 4.The Element is added to the Query Builder, ready to configure: as an example i add boost all keyword match element to blueprint, see the below image.

In Above image, the configured element, when a search keyword matches in the title field, assigns 4000 boosts. You can see the result by clicking on the Preview button.
After adding Elements, make sure you save the Blueprint.
We can also add our custom Elasticsearch query into the blueprint.

Choosing which Liferay Assets to Search
Decide which Liferay Asset Types to include in the Blueprint’s query. Use Query Settings → Searchable Types:

All asset and object types are selected by default.
To remove specific types, click Select Asset Types to open the Select Types, then de-select the corresponding checkboxes.

Conclusion
In conclusion, Liferay Search Blueprint is a powerful tool that enables organizations to customize and improve the search experience within their Liferay portal. By creating a blueprint, administrators can define the search behavior, control what is searched and how, and enhance the relevance and personalization of search results. We can also define aggregation, sort, and highlights in query.
Originally published by: Liferay Search Blueprint: Improving the Search Experience
0 notes
Text
How Should Designers Learn To Code? The Terminal And Text Editors (Part 1)
About The Author
Paul Hanaoka is a Design Manager at Liferay, based in the suburbs of Los Angeles, and serving the North American teams. His passion is at the intersection of … More about Paul …
For the purpose of this two-part series of articles, we’re going to assume the answer for “Should designers code?” is “It depends.” If you’ve started and never finished courses in some online coding school — or if you’ve finished the courses but found it difficult to apply this style of learning in your day-to-day work, these two articles will provide a few different learning methods and will highlight different opportunities for their everyday application. In this first part of the series, we’ll take a look at getting comfortable with the command line and text editors.
As a designer with many years of experience, I often encourage my colleagues and reports to pick up some coding skills. While many are open to the idea, others balk at the notion. I usually hear some variation of “I didn’t study design to become a developer.” Although this is a valid concern, I’d like to emphasize two points: a better understanding of the materials usually leads to better outcomes, and there is an important distinction between “coding” and “software engineering.”
This two-part series of articles should be useful for any designers out there who’d like to gain also some coding skills.
Understanding The Raw Materials
Contrary to what some may think, design isn’t about creating beautiful mockups, it’s about delivering an intuitive, functional experience to the end user. That simply can’t be done without an understanding of the building blocks of a solution. An architect isn’t going to be very good at her job if she doesn’t understand the materials her plans demand and a designer isn’t going to be very good if he doesn’t understand the materials that make his designs come to life — the code. Experience with coding helps designers understand what’s possible and what’s not and whether or not their designs will be able to effectively perform their desired functions.
I also reassure my colleagues that knowledge of coding doesn’t mean one has to become an engineer. The two refer to different, though related, skill sets. As Kyle Thayer, a PhD candidate at the University of Washington recently wrote, the field of computer science (or engineering) is about giving students “an overview of the scientific field of computing”:
“The purpose of a Computer Science degree is to give students an overview of the scientific field of computing. While this includes some programming, programming is done primarily for the purpose of learning about other areas (e.g., operating systems, algorithms, machine learning, human-computer interaction). A CS degree is a good first step into the academic field of computer science.”
— Kyle Thayer
By contrast, coding simply means becoming familiar enough with a given programming language to complete a task. Asking someone to learn basic HTML or JavaScript does not necessitate their becoming a full-stack software architect. Despite what some might think, forking a repo and copy/pasting Stack Overflow answers in does not make you a software engineer — but it can increase the value you bring as a designer to a product development team.
What About “Low Code”?
Some may say that we’re entering a low code future where designers (and developers) are able to build applications through drag-and-drop functionality and a GUI (graphical user interface). So taking the time to learn a programming language isn’t “worth it.” The emergence of tools like Webflow, Modulz, FramerX, UXPin, etc., seems to support this line of reasoning. And this can be very true for many applications — it’s easier than ever to create a site or app without a single line of code. However, if you don’t understand the underlying principles, you will be capping the value you can deliver with a low code application.
Modulz, Studio.Design, FramerX, and other apps — there’s still a lot of code in there… (Large preview)
We’re also not yet at the point where you can build enterprise-scale applications with low code platforms. As designers we have to work in the world we live in, not the one we imagine is coming.
That being said, everyone brings a unique blend of skills to the table. Knowledge of code is not an absolute necessity and it should just be encouraged, not required.
Where To Start?
There is an endless amount of tools, languages, schools, guides, and other resources available for anyone who has access to the internet — so where to begin? An important disclaimer — I am by no means an expert, or anything close to a software engineer — and the following are insights from my personal experience, not a guaranteed path to success.
Many of the designers/developers I know have usually started hacking HTML and CSS templates on sites like MySpace, Geocities, Tumblr, Neopets, or others. Now that I have sufficiently dated myself, for anyone starting out today, I would recommend beginning in your friendly command-line interface (CLI) shell.
The Terminal: An Essential Tool
The go-to application for Hollywood directors whenever there’s a computer hacker on the screen, the terminal is simply an interface that allows you to execute actions via a text input rather than the graphical user interface (GUI) that most people are accustomed to. I’ll let real developers explain the intricacies and technical how-to, but for our purposes it’s good enough to know that familiarizing yourself with the CLI is beneficial for a number of reasons.
The terminal gives you access to your computer’s file and folder structure — the same way that you click through Finder or Explorer, you navigate using your keyboard in the terminal. It definitely takes some time getting used to, but developing your mental model in this area is foundational to working in code.
Like a lot of designers, I am using the macOS environment (formerly known as OS X), but the following applies to other *nix operating systems (LinUX, Unix), and also to Windows PowerShell. While there is a lot of overlap between different modern operating systems, there are some differences that I will do my best to highlight.
Regular Expressions
A key feature in a CLI is the ability to use regular expressions (regex) in your commands. Think of regex as boolean search operations (using quotation marks to search for exact phrases or the minus sign to exclude words) on steroids — they allow you to define a pattern in a string of text so that you can perform some action on the output. Here are some real-world examples:
If you have a long list of phone numbers in a variety of formats, you could define a script that would give you a consistent output based on a regular expression — e.g.: (###) ###-#### for the U.S. phone numbers format.
If you want to quickly rename a group of files to a specific case — from kebab-case to CamelCase or anything in between.
Here are some basic terminal commands* to help you getting started:
cd stands for “Change Directory”, type this and then a file or a folder path to go — note that you can type a folder name but it needs to be inside your current folder to go to it.
ls lists the files and folders in your current folder.
pwd stands for “Print Working Directory” — this will list out where you currently are in your computer.
mkdir and a folder name will create a folder in your working directory.
using cd with .. takes you one level up — if you’re in /users/username/documents/2019 and you enter cd ../.. you’ll end up in /users/username.
Bonus tip — hitting the Tab key will autocomplete as you type a folder/file path.
Note: The following will work on the Windows command line (cmd):
cd, cd .., mkdir, Tab key for path autocomplete (ls and pwd won’t work).
The more modern Windows command line (Windows PowerShell) supports all of them:
cd, cd .., ls, pwd, mkdir, and Tab for path autocomplete.
For a complete list of commands available in PowerShell, check this Microsoft’ Help page “Using Familiar Command Names”.
Mass-File Management
You can manipulate files and folders en masse via the terminal — here are a few ideas:
You can create three years of folders with subfolders for each month in a single command — using mkdir -p and {list-of-years}/{list-of-months} will create folders for each year with subfolders for each month. Use your imagination, I’m sure you can put this to good use!
You can quickly clean up your desktop by using mv Screen\ Shot* Screenshots — this will move all of your files that start with “Screen Shot” to a folder named “Screenshots”.
Create 36 folders on your computer with a single line of code! (Large preview)
Note: These two examples will most likely only work in *nix environments — but the theory still applies. And Windows PowerShell is also a very powerful command line tool, you just need to learn its features and specific commands.
Scripting And Maintenance
Now that we have a glimpse into the power of regular expressions and the options available in the terminal we can start combining those things into scripts. One very simple, yet powerful and commonly used script is Mike G’s file renamer:
criteria=$1 re_match=$2 replace=$3 for i in $( ls *$criteria* ); do src=$i tgt=$(echo $i | sed -e "s/$re_match/$replace/") mv $src $tgt done
What this script allows you to do, is define the scope (criteria), define what you’d like to change (re_match), and what you’d like to change it to (replace) — and then execute it.
There are countless other scripts that you can create beyond creating and renaming files — Vlad’s Batch Resizing script is an excellent example of the time-saving capabilities that you can create using bash scripts.
Advanced Tips And Tricks
Something I have found over the years is that regularly resetting my computer and reinstalling the operating system helps it stay relatively clutter-free and prevents the slowdowns everyone experiences after years of digital detritus that accumulates on harddrives. For many, the prospect of wiping a computer and re-setting everything back at best sounds like a few days of work, and at worst an impossible nightmare that you may never recover from.
But it doesn’t have to be — by using a few command-line tools, once you’ve backed up, wiped, and reinstalled your OS, you can install not only your list of favorite apps, but also fonts in a matter of minutes using Homebrew. (Homebrew is for Mac and LinUX only. For Windows, try Chocolatey which is a solid alternative.)
If you’re interested — we’ve created an easy-to-follow setup guide to get your computer in good shape for most development. Our guide is for macOS, but Owen Williams has written a solid guide for Windows as well.
If you don’t have the time for Wes’ entire series of tutorials about the command line — at the very least I highly recommend the following stack:
Oh My ZSH
zsh-autosuggestions
zsh-syntax-highlighting
z-jump-around
Choosing A Text Editor
There are many options when it comes to choosing a code editor — Sublime Text and VS Code (Visual Studio Code) are the two I have the most experience with and am currently using.
Sublime Text was one of the earlier text editors that became popular with front-end developers — it was the gold standard up until a few years ago. Features like multiple cursors, a powerful package manager, and highly customizable shortcuts that allowed you to quickly navigate in and between files and folders. Not to mention it was an incredibly lightweight and fast application which made it an easy choice.
VS Code (Visual Studio Code) came on the scene around 2015, it took a while for people to switch from Atom and Sublime, but VS Code has established itself as many developers’ favorite editor. In addition to pretty much all of Sublime’s features, VS Code differentiated itself with a built-in terminal and tight integration with Git. In addition, Visual Studio Code has a rich plugin ecosystem that allows you to extend and customize your environment to your heart’s delight.
All that is to say — you don’t need to be a developer to appreciate the features of a good code editor. I have found many uses for it in my daily work; two, in particular, are the ability to use multiple cursors, and using regex to find-and-replace text across folders of files. Let’s take a closer look at both.
Editing With Multiple Cursors
Picture your typical word processor — that blinking vertical line that shows where the text you’re entering will go? Now picture the ability to add more than one cursor to this window so that whatever you type will appear wherever there is a cursor!
This might not be blowing your mind just yet — so here’s an example that shows a few ways that an advanced text editor can help you create everyday efficiencies in your workflow.
Mass-editing in a text editor is much faster and more intuitive than in a spreadsheet. (Large preview)
Here we have a list of names that we need to convert into email addresses — we’d also like to make them all lowercase and then sort them alphabetically. This can be done with a few keystrokes.
[embedded content]
Using a text editor to quickly manipulate lots of text in Sublime Text (short video).
Once you paste the list in, Cmd + Shift + P brings up the Command Palette (fancy term for a searchable menu that gives you all the available functionalities). You can basically type in this menu what you want to do, pretty much anything you can do to text is available here. If it’s not, there’s likely a plugin or an extension that you can find.
We’re able to change the case and sort the lines in a matter of seconds — then pressing Ctrl + Shift + arrow keys adds cursors, then whatever we type gets added to every line — in this case, we’re turning the names into email addresses, but your wild imagination could find myriad other ways to use this.
You might be saying — well I can do this in Excel or Google Sheets, which is true, but I have found that it is a lot quicker to handle these types of things in a text editor. You avoid having to write formulas and select things with a mouse.
Which Code Editor Should I Use?
I’m a designer — so of course, my answer is “it depends”.
If you’re new to these concepts, I would recommend getting a free trial of Sublime — it continues to be a very lightweight app and does not consume too many system resources. You can customize Sublime’s key bindings (fancy word for hotkeys) and extend its built-in functionality with plugins.
If you’ve been using Sublime, Atom, or another editor — I’d recommend checking out VS Code as well. The team at Microsoft has really done an excellent job making it a powerful, yet easy-to-use text editor.
Personally, I use both editors — Sublime is lightning quick and opens in a fraction of a second allowing me to easily paste and manipulate text. But when I want to get some more serious work done, I use VS Code. It’s difficult to top the all-in-one package that VS Code provides — a vibrant plugin and extension ecosystem, powerful command palette, and hyper-customizable interface means you can really make it your own. Not to mention the fact that Microsoft is very incentivized to ensure that it’s a first-class experience for developer productivity.
Conclusion, And What’s Next?
In this first article, you will have learned the basics of the terminal, a few productivity hacks to get you started, and should have a better idea of what code editor to choose. In the next part, we’ll continue with the topics of version control, HTML and CSS, and an introduction to engineering principles.
Anything Amiss?
There’s a good chance that something in this post was obscure, obtuse, and/or obsolete and I’d love the opportunity to make it better! Please leave a comment below, DM me, or @mention me on Twitter so I can improve.
(mb, yk, il)
Website Design & SEO Delray Beach by DBL07.co
Delray Beach SEO
Via http://www.scpie.org/how-should-designers-learn-to-code-the-terminal-and-text-editors-part-1/
source https://scpie.weebly.com/blog/how-should-designers-learn-to-code-the-terminal-and-text-editors-part-1
0 notes
Text
How Should Designers Learn To Code? The Terminal And Text Editors (Part 1)
About The Author
Paul Hanaoka is a Design Manager at Liferay, based in the suburbs of Los Angeles, and serving the North American teams. His passion is at the intersection of … More about Paul …
For the purpose of this two-part series of articles, we’re going to assume the answer for “Should designers code?” is “It depends.” If you’ve started and never finished courses in some online coding school — or if you’ve finished the courses but found it difficult to apply this style of learning in your day-to-day work, these two articles will provide a few different learning methods and will highlight different opportunities for their everyday application. In this first part of the series, we’ll take a look at getting comfortable with the command line and text editors.
As a designer with many years of experience, I often encourage my colleagues and reports to pick up some coding skills. While many are open to the idea, others balk at the notion. I usually hear some variation of “I didn’t study design to become a developer.” Although this is a valid concern, I’d like to emphasize two points: a better understanding of the materials usually leads to better outcomes, and there is an important distinction between “coding” and “software engineering.”
This two-part series of articles should be useful for any designers out there who’d like to gain also some coding skills.
Understanding The Raw Materials
Contrary to what some may think, design isn’t about creating beautiful mockups, it’s about delivering an intuitive, functional experience to the end user. That simply can’t be done without an understanding of the building blocks of a solution. An architect isn’t going to be very good at her job if she doesn’t understand the materials her plans demand and a designer isn’t going to be very good if he doesn’t understand the materials that make his designs come to life — the code. Experience with coding helps designers understand what’s possible and what’s not and whether or not their designs will be able to effectively perform their desired functions.
I also reassure my colleagues that knowledge of coding doesn’t mean one has to become an engineer. The two refer to different, though related, skill sets. As Kyle Thayer, a PhD candidate at the University of Washington recently wrote, the field of computer science (or engineering) is about giving students “an overview of the scientific field of computing”:
“The purpose of a Computer Science degree is to give students an overview of the scientific field of computing. While this includes some programming, programming is done primarily for the purpose of learning about other areas (e.g., operating systems, algorithms, machine learning, human-computer interaction). A CS degree is a good first step into the academic field of computer science.”
— Kyle Thayer
By contrast, coding simply means becoming familiar enough with a given programming language to complete a task. Asking someone to learn basic HTML or JavaScript does not necessitate their becoming a full-stack software architect. Despite what some might think, forking a repo and copy/pasting Stack Overflow answers in does not make you a software engineer — but it can increase the value you bring as a designer to a product development team.
What About “Low Code”?
Some may say that we’re entering a low code future where designers (and developers) are able to build applications through drag-and-drop functionality and a GUI (graphical user interface). So taking the time to learn a programming language isn’t “worth it.” The emergence of tools like Webflow, Modulz, FramerX, UXPin, etc., seems to support this line of reasoning. And this can be very true for many applications — it’s easier than ever to create a site or app without a single line of code. However, if you don’t understand the underlying principles, you will be capping the value you can deliver with a low code application.
Modulz, Studio.Design, FramerX, and other apps — there’s still a lot of code in there… (Large preview)
We’re also not yet at the point where you can build enterprise-scale applications with low code platforms. As designers we have to work in the world we live in, not the one we imagine is coming.
That being said, everyone brings a unique blend of skills to the table. Knowledge of code is not an absolute necessity and it should just be encouraged, not required.
Where To Start?
There is an endless amount of tools, languages, schools, guides, and other resources available for anyone who has access to the internet — so where to begin? An important disclaimer — I am by no means an expert, or anything close to a software engineer — and the following are insights from my personal experience, not a guaranteed path to success.
Many of the designers/developers I know have usually started hacking HTML and CSS templates on sites like MySpace, Geocities, Tumblr, Neopets, or others. Now that I have sufficiently dated myself, for anyone starting out today, I would recommend beginning in your friendly command-line interface (CLI) shell.
The Terminal: An Essential Tool
The go-to application for Hollywood directors whenever there’s a computer hacker on the screen, the terminal is simply an interface that allows you to execute actions via a text input rather than the graphical user interface (GUI) that most people are accustomed to. I’ll let real developers explain the intricacies and technical how-to, but for our purposes it’s good enough to know that familiarizing yourself with the CLI is beneficial for a number of reasons.
The terminal gives you access to your computer’s file and folder structure — the same way that you click through Finder or Explorer, you navigate using your keyboard in the terminal. It definitely takes some time getting used to, but developing your mental model in this area is foundational to working in code.
Like a lot of designers, I am using the macOS environment (formerly known as OS X), but the following applies to other *nix operating systems (LinUX, Unix), and also to Windows PowerShell. While there is a lot of overlap between different modern operating systems, there are some differences that I will do my best to highlight.
Regular Expressions
A key feature in a CLI is the ability to use regular expressions (regex) in your commands. Think of regex as boolean search operations (using quotation marks to search for exact phrases or the minus sign to exclude words) on steroids — they allow you to define a pattern in a string of text so that you can perform some action on the output. Here are some real-world examples:
If you have a long list of phone numbers in a variety of formats, you could define a script that would give you a consistent output based on a regular expression — e.g.: (###) ###-#### for the U.S. phone numbers format.
If you want to quickly rename a group of files to a specific case — from kebab-case to CamelCase or anything in between.
Here are some basic terminal commands* to help you getting started:
cd stands for “Change Directory”, type this and then a file or a folder path to go — note that you can type a folder name but it needs to be inside your current folder to go to it.
ls lists the files and folders in your current folder.
pwd stands for “Print Working Directory” — this will list out where you currently are in your computer.
mkdir and a folder name will create a folder in your working directory.
using cd with .. takes you one level up — if you’re in /users/username/documents/2019 and you enter cd ../.. you’ll end up in /users/username.
Bonus tip — hitting the Tab key will autocomplete as you type a folder/file path.
Note: The following will work on the Windows command line (cmd):
cd, cd .., mkdir, Tab key for path autocomplete (ls and pwd won’t work).
The more modern Windows command line (Windows PowerShell) supports all of them:
cd, cd .., ls, pwd, mkdir, and Tab for path autocomplete.
For a complete list of commands available in PowerShell, check this Microsoft’ Help page “Using Familiar Command Names”.
Mass-File Management
You can manipulate files and folders en masse via the terminal — here are a few ideas:
You can create three years of folders with subfolders for each month in a single command — using mkdir -p and {list-of-years}/{list-of-months} will create folders for each year with subfolders for each month. Use your imagination, I’m sure you can put this to good use!
You can quickly clean up your desktop by using mv Screen\ Shot* Screenshots — this will move all of your files that start with “Screen Shot” to a folder named “Screenshots”.
Create 36 folders on your computer with a single line of code! (Large preview)
Note: These two examples will most likely only work in *nix environments — but the theory still applies. And Windows PowerShell is also a very powerful command line tool, you just need to learn its features and specific commands.
Scripting And Maintenance
Now that we have a glimpse into the power of regular expressions and the options available in the terminal we can start combining those things into scripts. One very simple, yet powerful and commonly used script is Mike G’s file renamer:
criteria=$1 re_match=$2 replace=$3 for i in $( ls *$criteria* ); do src=$i tgt=$(echo $i | sed -e "s/$re_match/$replace/") mv $src $tgt done
What this script allows you to do, is define the scope (criteria), define what you’d like to change (re_match), and what you’d like to change it to (replace) — and then execute it.
There are countless other scripts that you can create beyond creating and renaming files — Vlad’s Batch Resizing script is an excellent example of the time-saving capabilities that you can create using bash scripts.
Advanced Tips And Tricks
Something I have found over the years is that regularly resetting my computer and reinstalling the operating system helps it stay relatively clutter-free and prevents the slowdowns everyone experiences after years of digital detritus that accumulates on harddrives. For many, the prospect of wiping a computer and re-setting everything back at best sounds like a few days of work, and at worst an impossible nightmare that you may never recover from.
But it doesn’t have to be — by using a few command-line tools, once you’ve backed up, wiped, and reinstalled your OS, you can install not only your list of favorite apps, but also fonts in a matter of minutes using Homebrew. (Homebrew is for Mac and LinUX only. For Windows, try Chocolatey which is a solid alternative.)
If you’re interested — we’ve created an easy-to-follow setup guide to get your computer in good shape for most development. Our guide is for macOS, but Owen Williams has written a solid guide for Windows as well.
If you don’t have the time for Wes’ entire series of tutorials about the command line — at the very least I highly recommend the following stack:
Oh My ZSH
zsh-autosuggestions
zsh-syntax-highlighting
z-jump-around
Choosing A Text Editor
There are many options when it comes to choosing a code editor — Sublime Text and VS Code (Visual Studio Code) are the two I have the most experience with and am currently using.
Sublime Text was one of the earlier text editors that became popular with front-end developers — it was the gold standard up until a few years ago. Features like multiple cursors, a powerful package manager, and highly customizable shortcuts that allowed you to quickly navigate in and between files and folders. Not to mention it was an incredibly lightweight and fast application which made it an easy choice.
VS Code (Visual Studio Code) came on the scene around 2015, it took a while for people to switch from Atom and Sublime, but VS Code has established itself as many developers’ favorite editor. In addition to pretty much all of Sublime’s features, VS Code differentiated itself with a built-in terminal and tight integration with Git. In addition, Visual Studio Code has a rich plugin ecosystem that allows you to extend and customize your environment to your heart’s delight.
All that is to say — you don’t need to be a developer to appreciate the features of a good code editor. I have found many uses for it in my daily work; two, in particular, are the ability to use multiple cursors, and using regex to find-and-replace text across folders of files. Let’s take a closer look at both.
Editing With Multiple Cursors
Picture your typical word processor — that blinking vertical line that shows where the text you’re entering will go? Now picture the ability to add more than one cursor to this window so that whatever you type will appear wherever there is a cursor!
This might not be blowing your mind just yet — so here’s an example that shows a few ways that an advanced text editor can help you create everyday efficiencies in your workflow.
Mass-editing in a text editor is much faster and more intuitive than in a spreadsheet. (Large preview)
Here we have a list of names that we need to convert into email addresses — we’d also like to make them all lowercase and then sort them alphabetically. This can be done with a few keystrokes.
[embedded content]
Using a text editor to quickly manipulate lots of text in Sublime Text (short video).
Once you paste the list in, Cmd + Shift + P brings up the Command Palette (fancy term for a searchable menu that gives you all the available functionalities). You can basically type in this menu what you want to do, pretty much anything you can do to text is available here. If it’s not, there’s likely a plugin or an extension that you can find.
We’re able to change the case and sort the lines in a matter of seconds — then pressing Ctrl + Shift + arrow keys adds cursors, then whatever we type gets added to every line — in this case, we’re turning the names into email addresses, but your wild imagination could find myriad other ways to use this.
You might be saying — well I can do this in Excel or Google Sheets, which is true, but I have found that it is a lot quicker to handle these types of things in a text editor. You avoid having to write formulas and select things with a mouse.
Which Code Editor Should I Use?
I’m a designer — so of course, my answer is “it depends”.
If you’re new to these concepts, I would recommend getting a free trial of Sublime — it continues to be a very lightweight app and does not consume too many system resources. You can customize Sublime’s key bindings (fancy word for hotkeys) and extend its built-in functionality with plugins.
If you’ve been using Sublime, Atom, or another editor — I’d recommend checking out VS Code as well. The team at Microsoft has really done an excellent job making it a powerful, yet easy-to-use text editor.
Personally, I use both editors — Sublime is lightning quick and opens in a fraction of a second allowing me to easily paste and manipulate text. But when I want to get some more serious work done, I use VS Code. It’s difficult to top the all-in-one package that VS Code provides — a vibrant plugin and extension ecosystem, powerful command palette, and hyper-customizable interface means you can really make it your own. Not to mention the fact that Microsoft is very incentivized to ensure that it’s a first-class experience for developer productivity.
Conclusion, And What’s Next?
In this first article, you will have learned the basics of the terminal, a few productivity hacks to get you started, and should have a better idea of what code editor to choose. In the next part, we’ll continue with the topics of version control, HTML and CSS, and an introduction to engineering principles.
Anything Amiss?
There’s a good chance that something in this post was obscure, obtuse, and/or obsolete and I’d love the opportunity to make it better! Please leave a comment below, DM me, or @mention me on Twitter so I can improve.
(mb, yk, il)
Website Design & SEO Delray Beach by DBL07.co
Delray Beach SEO
source http://www.scpie.org/how-should-designers-learn-to-code-the-terminal-and-text-editors-part-1/ source https://scpie1.blogspot.com/2020/03/how-should-designers-learn-to-code.html
0 notes
Text
How Should Designers Learn To Code? The Terminal And Text Editors (Part 1)
About The Author
Paul Hanaoka is a Design Manager at Liferay, based in the suburbs of Los Angeles, and serving the North American teams. His passion is at the intersection of … More about Paul …
For the purpose of this two-part series of articles, we’re going to assume the answer for “Should designers code?” is “It depends.” If you’ve started and never finished courses in some online coding school — or if you’ve finished the courses but found it difficult to apply this style of learning in your day-to-day work, these two articles will provide a few different learning methods and will highlight different opportunities for their everyday application. In this first part of the series, we’ll take a look at getting comfortable with the command line and text editors.
As a designer with many years of experience, I often encourage my colleagues and reports to pick up some coding skills. While many are open to the idea, others balk at the notion. I usually hear some variation of “I didn’t study design to become a developer.” Although this is a valid concern, I’d like to emphasize two points: a better understanding of the materials usually leads to better outcomes, and there is an important distinction between “coding” and “software engineering.”
This two-part series of articles should be useful for any designers out there who’d like to gain also some coding skills.
Understanding The Raw Materials
Contrary to what some may think, design isn’t about creating beautiful mockups, it’s about delivering an intuitive, functional experience to the end user. That simply can’t be done without an understanding of the building blocks of a solution. An architect isn’t going to be very good at her job if she doesn’t understand the materials her plans demand and a designer isn’t going to be very good if he doesn’t understand the materials that make his designs come to life — the code. Experience with coding helps designers understand what’s possible and what’s not and whether or not their designs will be able to effectively perform their desired functions.
I also reassure my colleagues that knowledge of coding doesn’t mean one has to become an engineer. The two refer to different, though related, skill sets. As Kyle Thayer, a PhD candidate at the University of Washington recently wrote, the field of computer science (or engineering) is about giving students “an overview of the scientific field of computing”:
“The purpose of a Computer Science degree is to give students an overview of the scientific field of computing. While this includes some programming, programming is done primarily for the purpose of learning about other areas (e.g., operating systems, algorithms, machine learning, human-computer interaction). A CS degree is a good first step into the academic field of computer science.”
— Kyle Thayer
By contrast, coding simply means becoming familiar enough with a given programming language to complete a task. Asking someone to learn basic HTML or JavaScript does not necessitate their becoming a full-stack software architect. Despite what some might think, forking a repo and copy/pasting Stack Overflow answers in does not make you a software engineer — but it can increase the value you bring as a designer to a product development team.
What About “Low Code”?
Some may say that we’re entering a low code future where designers (and developers) are able to build applications through drag-and-drop functionality and a GUI (graphical user interface). So taking the time to learn a programming language isn’t “worth it.” The emergence of tools like Webflow, Modulz, FramerX, UXPin, etc., seems to support this line of reasoning. And this can be very true for many applications — it’s easier than ever to create a site or app without a single line of code. However, if you don’t understand the underlying principles, you will be capping the value you can deliver with a low code application.
Modulz, Studio.Design, FramerX, and other apps — there’s still a lot of code in there… (Large preview)
We’re also not yet at the point where you can build enterprise-scale applications with low code platforms. As designers we have to work in the world we live in, not the one we imagine is coming.
That being said, everyone brings a unique blend of skills to the table. Knowledge of code is not an absolute necessity and it should just be encouraged, not required.
Where To Start?
There is an endless amount of tools, languages, schools, guides, and other resources available for anyone who has access to the internet — so where to begin? An important disclaimer — I am by no means an expert, or anything close to a software engineer — and the following are insights from my personal experience, not a guaranteed path to success.
Many of the designers/developers I know have usually started hacking HTML and CSS templates on sites like MySpace, Geocities, Tumblr, Neopets, or others. Now that I have sufficiently dated myself, for anyone starting out today, I would recommend beginning in your friendly command-line interface (CLI) shell.
The Terminal: An Essential Tool
The go-to application for Hollywood directors whenever there’s a computer hacker on the screen, the terminal is simply an interface that allows you to execute actions via a text input rather than the graphical user interface (GUI) that most people are accustomed to. I’ll let real developers explain the intricacies and technical how-to, but for our purposes it’s good enough to know that familiarizing yourself with the CLI is beneficial for a number of reasons.
The terminal gives you access to your computer’s file and folder structure — the same way that you click through Finder or Explorer, you navigate using your keyboard in the terminal. It definitely takes some time getting used to, but developing your mental model in this area is foundational to working in code.
Like a lot of designers, I am using the macOS environment (formerly known as OS X), but the following applies to other *nix operating systems (LinUX, Unix), and also to Windows PowerShell. While there is a lot of overlap between different modern operating systems, there are some differences that I will do my best to highlight.
Regular Expressions
A key feature in a CLI is the ability to use regular expressions (regex) in your commands. Think of regex as boolean search operations (using quotation marks to search for exact phrases or the minus sign to exclude words) on steroids — they allow you to define a pattern in a string of text so that you can perform some action on the output. Here are some real-world examples:
If you have a long list of phone numbers in a variety of formats, you could define a script that would give you a consistent output based on a regular expression — e.g.: (###) ###-#### for the U.S. phone numbers format.
If you want to quickly rename a group of files to a specific case — from kebab-case to CamelCase or anything in between.
Here are some basic terminal commands* to help you getting started:
cd stands for “Change Directory”, type this and then a file or a folder path to go — note that you can type a folder name but it needs to be inside your current folder to go to it.
ls lists the files and folders in your current folder.
pwd stands for “Print Working Directory” — this will list out where you currently are in your computer.
mkdir and a folder name will create a folder in your working directory.
using cd with .. takes you one level up — if you’re in /users/username/documents/2019 and you enter cd ../.. you’ll end up in /users/username.
Bonus tip — hitting the Tab key will autocomplete as you type a folder/file path.
Note: The following will work on the Windows command line (cmd):
cd, cd .., mkdir, Tab key for path autocomplete (ls and pwd won’t work).
The more modern Windows command line (Windows PowerShell) supports all of them:
cd, cd .., ls, pwd, mkdir, and Tab for path autocomplete.
For a complete list of commands available in PowerShell, check this Microsoft’ Help page “Using Familiar Command Names”.
Mass-File Management
You can manipulate files and folders en masse via the terminal — here are a few ideas:
You can create three years of folders with subfolders for each month in a single command — using mkdir -p and {list-of-years}/{list-of-months} will create folders for each year with subfolders for each month. Use your imagination, I’m sure you can put this to good use!
You can quickly clean up your desktop by using mv Screen\ Shot* Screenshots — this will move all of your files that start with “Screen Shot” to a folder named “Screenshots”.
Create 36 folders on your computer with a single line of code! (Large preview)
Note: These two examples will most likely only work in *nix environments — but the theory still applies. And Windows PowerShell is also a very powerful command line tool, you just need to learn its features and specific commands.
Scripting And Maintenance
Now that we have a glimpse into the power of regular expressions and the options available in the terminal we can start combining those things into scripts. One very simple, yet powerful and commonly used script is Mike G’s file renamer:
criteria=$1 re_match=$2 replace=$3 for i in $( ls *$criteria* ); do src=$i tgt=$(echo $i | sed -e "s/$re_match/$replace/") mv $src $tgt done
What this script allows you to do, is define the scope (criteria), define what you’d like to change (re_match), and what you’d like to change it to (replace) — and then execute it.
There are countless other scripts that you can create beyond creating and renaming files — Vlad’s Batch Resizing script is an excellent example of the time-saving capabilities that you can create using bash scripts.
Advanced Tips And Tricks
Something I have found over the years is that regularly resetting my computer and reinstalling the operating system helps it stay relatively clutter-free and prevents the slowdowns everyone experiences after years of digital detritus that accumulates on harddrives. For many, the prospect of wiping a computer and re-setting everything back at best sounds like a few days of work, and at worst an impossible nightmare that you may never recover from.
But it doesn’t have to be — by using a few command-line tools, once you’ve backed up, wiped, and reinstalled your OS, you can install not only your list of favorite apps, but also fonts in a matter of minutes using Homebrew. (Homebrew is for Mac and LinUX only. For Windows, try Chocolatey which is a solid alternative.)
If you’re interested — we’ve created an easy-to-follow setup guide to get your computer in good shape for most development. Our guide is for macOS, but Owen Williams has written a solid guide for Windows as well.
If you don’t have the time for Wes’ entire series of tutorials about the command line — at the very least I highly recommend the following stack:
Oh My ZSH
zsh-autosuggestions
zsh-syntax-highlighting
z-jump-around
Choosing A Text Editor
There are many options when it comes to choosing a code editor — Sublime Text and VS Code (Visual Studio Code) are the two I have the most experience with and am currently using.
Sublime Text was one of the earlier text editors that became popular with front-end developers — it was the gold standard up until a few years ago. Features like multiple cursors, a powerful package manager, and highly customizable shortcuts that allowed you to quickly navigate in and between files and folders. Not to mention it was an incredibly lightweight and fast application which made it an easy choice.
VS Code (Visual Studio Code) came on the scene around 2015, it took a while for people to switch from Atom and Sublime, but VS Code has established itself as many developers’ favorite editor. In addition to pretty much all of Sublime’s features, VS Code differentiated itself with a built-in terminal and tight integration with Git. In addition, Visual Studio Code has a rich plugin ecosystem that allows you to extend and customize your environment to your heart’s delight.
All that is to say — you don’t need to be a developer to appreciate the features of a good code editor. I have found many uses for it in my daily work; two, in particular, are the ability to use multiple cursors, and using regex to find-and-replace text across folders of files. Let’s take a closer look at both.
Editing With Multiple Cursors
Picture your typical word processor — that blinking vertical line that shows where the text you’re entering will go? Now picture the ability to add more than one cursor to this window so that whatever you type will appear wherever there is a cursor!
This might not be blowing your mind just yet — so here’s an example that shows a few ways that an advanced text editor can help you create everyday efficiencies in your workflow.
Mass-editing in a text editor is much faster and more intuitive than in a spreadsheet. (Large preview)
Here we have a list of names that we need to convert into email addresses — we’d also like to make them all lowercase and then sort them alphabetically. This can be done with a few keystrokes.
[embedded content]
Using a text editor to quickly manipulate lots of text in Sublime Text (short video).
Once you paste the list in, Cmd + Shift + P brings up the Command Palette (fancy term for a searchable menu that gives you all the available functionalities). You can basically type in this menu what you want to do, pretty much anything you can do to text is available here. If it’s not, there’s likely a plugin or an extension that you can find.
We’re able to change the case and sort the lines in a matter of seconds — then pressing Ctrl + Shift + arrow keys adds cursors, then whatever we type gets added to every line — in this case, we’re turning the names into email addresses, but your wild imagination could find myriad other ways to use this.
You might be saying — well I can do this in Excel or Google Sheets, which is true, but I have found that it is a lot quicker to handle these types of things in a text editor. You avoid having to write formulas and select things with a mouse.
Which Code Editor Should I Use?
I’m a designer — so of course, my answer is “it depends”.
If you’re new to these concepts, I would recommend getting a free trial of Sublime — it continues to be a very lightweight app and does not consume too many system resources. You can customize Sublime’s key bindings (fancy word for hotkeys) and extend its built-in functionality with plugins.
If you’ve been using Sublime, Atom, or another editor — I’d recommend checking out VS Code as well. The team at Microsoft has really done an excellent job making it a powerful, yet easy-to-use text editor.
Personally, I use both editors — Sublime is lightning quick and opens in a fraction of a second allowing me to easily paste and manipulate text. But when I want to get some more serious work done, I use VS Code. It’s difficult to top the all-in-one package that VS Code provides — a vibrant plugin and extension ecosystem, powerful command palette, and hyper-customizable interface means you can really make it your own. Not to mention the fact that Microsoft is very incentivized to ensure that it’s a first-class experience for developer productivity.
Conclusion, And What’s Next?
In this first article, you will have learned the basics of the terminal, a few productivity hacks to get you started, and should have a better idea of what code editor to choose. In the next part, we’ll continue with the topics of version control, HTML and CSS, and an introduction to engineering principles.
Anything Amiss?
There’s a good chance that something in this post was obscure, obtuse, and/or obsolete and I’d love the opportunity to make it better! Please leave a comment below, DM me, or @mention me on Twitter so I can improve.
(mb, yk, il)
Website Design & SEO Delray Beach by DBL07.co
Delray Beach SEO
source http://www.scpie.org/how-should-designers-learn-to-code-the-terminal-and-text-editors-part-1/ source https://scpie.tumblr.com/post/613013830782599168
0 notes
Text
How Should Designers Learn To Code? The Terminal And Text Editors (Part 1)
About The Author
Paul Hanaoka is a Design Manager at Liferay, based in the suburbs of Los Angeles, and serving the North American teams. His passion is at the intersection of … More about Paul …
For the purpose of this two-part series of articles, we’re going to assume the answer for “Should designers code?” is “It depends.” If you’ve started and never finished courses in some online coding school — or if you’ve finished the courses but found it difficult to apply this style of learning in your day-to-day work, these two articles will provide a few different learning methods and will highlight different opportunities for their everyday application. In this first part of the series, we’ll take a look at getting comfortable with the command line and text editors.
As a designer with many years of experience, I often encourage my colleagues and reports to pick up some coding skills. While many are open to the idea, others balk at the notion. I usually hear some variation of “I didn’t study design to become a developer.” Although this is a valid concern, I’d like to emphasize two points: a better understanding of the materials usually leads to better outcomes, and there is an important distinction between “coding” and “software engineering.”
This two-part series of articles should be useful for any designers out there who’d like to gain also some coding skills.
Understanding The Raw Materials
Contrary to what some may think, design isn’t about creating beautiful mockups, it’s about delivering an intuitive, functional experience to the end user. That simply can’t be done without an understanding of the building blocks of a solution. An architect isn’t going to be very good at her job if she doesn’t understand the materials her plans demand and a designer isn’t going to be very good if he doesn’t understand the materials that make his designs come to life — the code. Experience with coding helps designers understand what’s possible and what’s not and whether or not their designs will be able to effectively perform their desired functions.
I also reassure my colleagues that knowledge of coding doesn’t mean one has to become an engineer. The two refer to different, though related, skill sets. As Kyle Thayer, a PhD candidate at the University of Washington recently wrote, the field of computer science (or engineering) is about giving students “an overview of the scientific field of computing”:
“The purpose of a Computer Science degree is to give students an overview of the scientific field of computing. While this includes some programming, programming is done primarily for the purpose of learning about other areas (e.g., operating systems, algorithms, machine learning, human-computer interaction). A CS degree is a good first step into the academic field of computer science.”
— Kyle Thayer
By contrast, coding simply means becoming familiar enough with a given programming language to complete a task. Asking someone to learn basic HTML or JavaScript does not necessitate their becoming a full-stack software architect. Despite what some might think, forking a repo and copy/pasting Stack Overflow answers in does not make you a software engineer — but it can increase the value you bring as a designer to a product development team.
What About “Low Code”?
Some may say that we’re entering a low code future where designers (and developers) are able to build applications through drag-and-drop functionality and a GUI (graphical user interface). So taking the time to learn a programming language isn’t “worth it.” The emergence of tools like Webflow, Modulz, FramerX, UXPin, etc., seems to support this line of reasoning. And this can be very true for many applications — it’s easier than ever to create a site or app without a single line of code. However, if you don’t understand the underlying principles, you will be capping the value you can deliver with a low code application.
Modulz, Studio.Design, FramerX, and other apps — there’s still a lot of code in there… (Large preview)
We’re also not yet at the point where you can build enterprise-scale applications with low code platforms. As designers we have to work in the world we live in, not the one we imagine is coming.
That being said, everyone brings a unique blend of skills to the table. Knowledge of code is not an absolute necessity and it should just be encouraged, not required.
Where To Start?
There is an endless amount of tools, languages, schools, guides, and other resources available for anyone who has access to the internet — so where to begin? An important disclaimer — I am by no means an expert, or anything close to a software engineer — and the following are insights from my personal experience, not a guaranteed path to success.
Many of the designers/developers I know have usually started hacking HTML and CSS templates on sites like MySpace, Geocities, Tumblr, Neopets, or others. Now that I have sufficiently dated myself, for anyone starting out today, I would recommend beginning in your friendly command-line interface (CLI) shell.
The Terminal: An Essential Tool
The go-to application for Hollywood directors whenever there’s a computer hacker on the screen, the terminal is simply an interface that allows you to execute actions via a text input rather than the graphical user interface (GUI) that most people are accustomed to. I’ll let real developers explain the intricacies and technical how-to, but for our purposes it’s good enough to know that familiarizing yourself with the CLI is beneficial for a number of reasons.
The terminal gives you access to your computer’s file and folder structure — the same way that you click through Finder or Explorer, you navigate using your keyboard in the terminal. It definitely takes some time getting used to, but developing your mental model in this area is foundational to working in code.
Like a lot of designers, I am using the macOS environment (formerly known as OS X), but the following applies to other *nix operating systems (LinUX, Unix), and also to Windows PowerShell. While there is a lot of overlap between different modern operating systems, there are some differences that I will do my best to highlight.
Regular Expressions
A key feature in a CLI is the ability to use regular expressions (regex) in your commands. Think of regex as boolean search operations (using quotation marks to search for exact phrases or the minus sign to exclude words) on steroids — they allow you to define a pattern in a string of text so that you can perform some action on the output. Here are some real-world examples:
If you have a long list of phone numbers in a variety of formats, you could define a script that would give you a consistent output based on a regular expression — e.g.: (###) ###-#### for the U.S. phone numbers format.
If you want to quickly rename a group of files to a specific case — from kebab-case to CamelCase or anything in between.
Here are some basic terminal commands* to help you getting started:
cd stands for “Change Directory”, type this and then a file or a folder path to go — note that you can type a folder name but it needs to be inside your current folder to go to it.
ls lists the files and folders in your current folder.
pwd stands for “Print Working Directory” — this will list out where you currently are in your computer.
mkdir and a folder name will create a folder in your working directory.
using cd with .. takes you one level up — if you’re in /users/username/documents/2019 and you enter cd ../.. you’ll end up in /users/username.
Bonus tip — hitting the Tab key will autocomplete as you type a folder/file path.
Note: The following will work on the Windows command line (cmd):
cd, cd .., mkdir, Tab key for path autocomplete (ls and pwd won’t work).
The more modern Windows command line (Windows PowerShell) supports all of them:
cd, cd .., ls, pwd, mkdir, and Tab for path autocomplete.
For a complete list of commands available in PowerShell, check this Microsoft’ Help page “Using Familiar Command Names”.
Mass-File Management
You can manipulate files and folders en masse via the terminal — here are a few ideas:
You can create three years of folders with subfolders for each month in a single command — using mkdir -p and {list-of-years}/{list-of-months} will create folders for each year with subfolders for each month. Use your imagination, I’m sure you can put this to good use!
You can quickly clean up your desktop by using mv Screen\ Shot* Screenshots — this will move all of your files that start with “Screen Shot��� to a folder named “Screenshots”.
Create 36 folders on your computer with a single line of code! (Large preview)
Note: These two examples will most likely only work in *nix environments — but the theory still applies. And Windows PowerShell is also a very powerful command line tool, you just need to learn its features and specific commands.
Scripting And Maintenance
Now that we have a glimpse into the power of regular expressions and the options available in the terminal we can start combining those things into scripts. One very simple, yet powerful and commonly used script is Mike G’s file renamer:
criteria=$1 re_match=$2 replace=$3 for i in $( ls *$criteria* ); do src=$i tgt=$(echo $i | sed -e "s/$re_match/$replace/") mv $src $tgt done
What this script allows you to do, is define the scope (criteria), define what you’d like to change (re_match), and what you’d like to change it to (replace) — and then execute it.
There are countless other scripts that you can create beyond creating and renaming files — Vlad’s Batch Resizing script is an excellent example of the time-saving capabilities that you can create using bash scripts.
Advanced Tips And Tricks
Something I have found over the years is that regularly resetting my computer and reinstalling the operating system helps it stay relatively clutter-free and prevents the slowdowns everyone experiences after years of digital detritus that accumulates on harddrives. For many, the prospect of wiping a computer and re-setting everything back at best sounds like a few days of work, and at worst an impossible nightmare that you may never recover from.
But it doesn’t have to be — by using a few command-line tools, once you’ve backed up, wiped, and reinstalled your OS, you can install not only your list of favorite apps, but also fonts in a matter of minutes using Homebrew. (Homebrew is for Mac and LinUX only. For Windows, try Chocolatey which is a solid alternative.)
If you’re interested — we’ve created an easy-to-follow setup guide to get your computer in good shape for most development. Our guide is for macOS, but Owen Williams has written a solid guide for Windows as well.
If you don’t have the time for Wes’ entire series of tutorials about the command line — at the very least I highly recommend the following stack:
Oh My ZSH
zsh-autosuggestions
zsh-syntax-highlighting
z-jump-around
Choosing A Text Editor
There are many options when it comes to choosing a code editor — Sublime Text and VS Code (Visual Studio Code) are the two I have the most experience with and am currently using.
Sublime Text was one of the earlier text editors that became popular with front-end developers — it was the gold standard up until a few years ago. Features like multiple cursors, a powerful package manager, and highly customizable shortcuts that allowed you to quickly navigate in and between files and folders. Not to mention it was an incredibly lightweight and fast application which made it an easy choice.
VS Code (Visual Studio Code) came on the scene around 2015, it took a while for people to switch from Atom and Sublime, but VS Code has established itself as many developers’ favorite editor. In addition to pretty much all of Sublime’s features, VS Code differentiated itself with a built-in terminal and tight integration with Git. In addition, Visual Studio Code has a rich plugin ecosystem that allows you to extend and customize your environment to your heart’s delight.
All that is to say — you don’t need to be a developer to appreciate the features of a good code editor. I have found many uses for it in my daily work; two, in particular, are the ability to use multiple cursors, and using regex to find-and-replace text across folders of files. Let’s take a closer look at both.
Editing With Multiple Cursors
Picture your typical word processor — that blinking vertical line that shows where the text you’re entering will go? Now picture the ability to add more than one cursor to this window so that whatever you type will appear wherever there is a cursor!
This might not be blowing your mind just yet — so here’s an example that shows a few ways that an advanced text editor can help you create everyday efficiencies in your workflow.
Mass-editing in a text editor is much faster and more intuitive than in a spreadsheet. (Large preview)
Here we have a list of names that we need to convert into email addresses — we’d also like to make them all lowercase and then sort them alphabetically. This can be done with a few keystrokes.
[embedded content]
Using a text editor to quickly manipulate lots of text in Sublime Text (short video).
Once you paste the list in, Cmd + Shift + P brings up the Command Palette (fancy term for a searchable menu that gives you all the available functionalities). You can basically type in this menu what you want to do, pretty much anything you can do to text is available here. If it’s not, there’s likely a plugin or an extension that you can find.
We’re able to change the case and sort the lines in a matter of seconds — then pressing Ctrl + Shift + arrow keys adds cursors, then whatever we type gets added to every line — in this case, we’re turning the names into email addresses, but your wild imagination could find myriad other ways to use this.
You might be saying — well I can do this in Excel or Google Sheets, which is true, but I have found that it is a lot quicker to handle these types of things in a text editor. You avoid having to write formulas and select things with a mouse.
Which Code Editor Should I Use?
I’m a designer — so of course, my answer is “it depends”.
If you’re new to these concepts, I would recommend getting a free trial of Sublime — it continues to be a very lightweight app and does not consume too many system resources. You can customize Sublime’s key bindings (fancy word for hotkeys) and extend its built-in functionality with plugins.
If you’ve been using Sublime, Atom, or another editor — I’d recommend checking out VS Code as well. The team at Microsoft has really done an excellent job making it a powerful, yet easy-to-use text editor.
Personally, I use both editors — Sublime is lightning quick and opens in a fraction of a second allowing me to easily paste and manipulate text. But when I want to get some more serious work done, I use VS Code. It’s difficult to top the all-in-one package that VS Code provides — a vibrant plugin and extension ecosystem, powerful command palette, and hyper-customizable interface means you can really make it your own. Not to mention the fact that Microsoft is very incentivized to ensure that it’s a first-class experience for developer productivity.
Conclusion, And What’s Next?
In this first article, you will have learned the basics of the terminal, a few productivity hacks to get you started, and should have a better idea of what code editor to choose. In the next part, we’ll continue with the topics of version control, HTML and CSS, and an introduction to engineering principles.
Anything Amiss?
There’s a good chance that something in this post was obscure, obtuse, and/or obsolete and I’d love the opportunity to make it better! Please leave a comment below, DM me, or @mention me on Twitter so I can improve.
(mb, yk, il)
Website Design & SEO Delray Beach by DBL07.co
Delray Beach SEO
source http://www.scpie.org/how-should-designers-learn-to-code-the-terminal-and-text-editors-part-1/
0 notes
Link
INEXTURE provides Liferay consulting services to clients in building state-of-the-art digital experience platforms, digital customer engagement portals and collaborative enterprise solutions. Liferay consultants at iNEXTURE have an extensive experience of implementations on varying ecosystems making us an ideal Liferay consulting partner for enterprise social collaboration, portals, and content management systems, e-commerce, search, and analytics.
#Liferay consulting services in india#Liferay consulting service provider#Liferay consulting service provider in india#website development company in india#hire web developer in india
0 notes
Text
Android iOS Mobile Applications Development Services
We are one of the industry leaders in developing Mobile Applications on iOS, Android & Windows Stores. Till date, we have delivered many applications to our previous customers. The numbers of delivering the applications are constantly increasing. Whenever you are planning to develop an iOS or Android Mobile App Development or Liferay CMS Portal Development, just think about us. We will be your partners for the most cost-effective designing and development of iOS and Android Mobile Application. We have the dedicated, intelligent, hard-working developers those who work for iOS & Android Application Development. We have the deep knowledge of platforms & framework which are helpful in delivering the quality applications to our precious customers. We have quality developers, designers, graphic designers in our team and that’s why we are able to deliver the projects on time to make our clients happy. Being a mobile app development company, we are experts in developing enterprise solutions, e-commerce applications, fashion applications, music apps, educational apps, healthcare, and utility mobile apps. Our experts are capable of developing complex, informative and high range of applications using cloud services. ·
iOS Android Mobile Applications Development: We have sufficient expertise in developing iOS Mobile Apps in various industries. Our team is able to deliver the high quality and complex iOS Mobile Apps on a fixed timeframe to meet the client requirements. ·
High-Quality Development Technology: Our team has adopted the results-oriented approach, technology and development methodology for developing mobile applications. We have a process where we usually keep the clients in the loop for regular updates and feedback. This is the key to our customer’s happiness. We are focused on transparency; coding reviews and testing codes so that we can produce the superior quality products for our customers. The new technology and platforms are able to cut the cost of the mobile applications development. ·
Multi-dimensional Approach: Our experience taught us that a multi-dimensional collaborative approach towards iOS and Android Mobile Application Development is a breakthrough that is important for a company. Our team members are able to work individually on any platforms to meet the client requirements on time with the proper quality. We assure for 100% satisfaction and quality assurance to our clients while working on Mobile App Development Projects to attain a long-term relationship with them. So your search must end here. If you are looking for the best Android IOS mobile apps development services for iOS and Android then join hands with us once. We assure you for the best and quality applications from our best team of mobile designers and developers. Request you to give us an opportunity.
0 notes
Text
How do I find the best software development agency in India?
Finding the finest software development agency in India entails carefully weighing several variables to ensure that the agency meets your individual needs and preferences.
We are software people, developing the best software for you people with using of emerging technology like Liferay development portal
Here are some things to take to identify the best software development company:
Determine Your Needs:
Outline the scope, budget, schedule, and any specific technologies or platforms you want to employ for your project. This will allow you to properly communicate with potential agencies and ensure they understand your requirements.
Research:
Conduct extensive research to find possible software development firms in India. Make use of internet platforms, search engines, and business directories. You may also ask coworkers, acquaintances, or other companies in your network for suggestions.
Examine Portfolios:
Examine the portfolios of the selected agencies to determine their level of competence and experience. Look for projects that are comparable to yours and evaluate the quality of their work. This will give you an indication of their technical ability as well as the sectors in which they have worked.
Read Client Reviews:
Look for client testimonials and reviews. This can reveal information about the agency's communication, project management, and overall customer satisfaction. Client feedback may be obtained through platforms such as Clutch, Upwork, or LinkedIn.
Check for Expertise:
Confirm that the agency is knowledgeable on the technologies and frameworks relevant to your project. Examine their track record with similar projects and industry. This gives you trust in their capacity to produce high-quality work.
Communication and Project Management:
Assess the communication and project management procedures of the agency. The success of every development project is dependent on clear communication and competent project management. Discuss how they will manage communication, reporting, and any possible project issues.
Scalability and Flexibility:
Consider the agency's scalability and flexibility. Check that they can react to changes in project scope or needs and that they can scale up the team if necessary.
Visit the Office(If possible):
If possible, visit the agency's office or organize a virtual meeting to get a sense of their working atmosphere and meet the personnel. This can aid in the establishment of a personal connection and the development of trust.
Cost and Contract Terms:
Obtain specific cost estimates and understand the price structure of the agency. Contract parameters, such as payment schedules, milestones, and any potential additional fees, should be discussed. Make certain you grasp the financial elements of the engagement.
Considerations for Legal and Security:
Examine the legal implications of the engagement, such as contracts, confidentiality agreements, and intellectual property rights. To secure your data, ensure that the agency uses industry-standard security practises.
Request a Trial or Pilot Project:
Request that the agency work on a modest trial or pilot project. Before committing to a bigger engagement, you may use this to analyze their competencies, work style, and fit with your team.
You may systematically analyze software development firms in India by following these steps and selecting the one that best suits your project needs and company goals.
#engineering#software#tech#technology#engineer#liferay#liferay technology#liferay development#liferay portal
0 notes
Text
Evolution of P2P Rental eCommerce App Development

As we all know the sharing economy has witnessed exponential growth, transforming the way people consume goods and services. Peer-to-peer (P2P) rental eCommerce marketplaces have emerged as a popular platform that connects individuals who want to rent items with those who have them available for use. These marketplaces provide a convenient and cost-effective solution for users to access a wide range of items, from tools and equipment to vehicles and vacation rentals, without the need for traditional ownership.
Let’s explore the project timeline, the challenges faced by the development team, the technologies utilized, and the outcomes achieved throughout the development and launch phases of this innovative P2P rental eCommerce app development marketplace app.
Project Overview
The objective was to build a user-friendly, secure, and scalable mobile app that seamlessly connects renters and providers. Thorough market analysis and research guided the development process to address key pain points in the rental industry. The app featured intuitive navigation, robust search options, and support for various rental categories. Advanced verification, secure payments, and a dispute resolution system ensured trust and security. The project concluded with extensive testing and user feedback.
Challenges
Market Research and Understanding User Needs
Building a User-Friendly Interface and Intuitive Navigation
Implementing Trust and Security Measures
Compatibility with iOS and Android Platforms
User Acceptance Testing and Feedback Incorporation
Solutions
Our development team implemented a range of solutions aimed at creating a seamless and user-centric platform.
Individual Sellers/Renters: Users could easily create listings for items they wanted to rent, sell, repurpose, or donate. The app enabled them to locate, track, and manage the flow of their assets efficiently.
Business Sellers/Renters: Businesses could register, create teams, and set up their stores within the app. They could even affiliate with other businesses, creating a robust network to track and manage resources effectively.
Buyers: Users in search of items to buy or rent could easily browse and search for relevant assets on the platform. They had the ability to make offers on items listed for sale, enabling smooth transactions and negotiations.
Innovative Web & Mobile App Development: To cater to the diverse P2P, B2B, and B2C segments, we developed intuitive web and mobile applications for both Android and iOS platforms. Leveraging the power of Flutter and Firebase, we ensured seamless cross-platform functionality and a consistent user experience across devices.
Advanced AI-powered Search and Discovery: To enhance user engagement and conversion rates, we implemented Algolia’s powerful search and discovery capabilities. By leveraging AI algorithms, we delivered highly relevant and secure search results, enriching the user experience and driving increased profitability for our clients.
Additionally, we offer expertise in Liferay for your B2B eCommerce solutions, providing a robust and customizable platform for B2B eCommerce needs.
Benefits of P2P Rental eCommerce App Development
Cost-Effective
Convenient
Diverse Range of Items
Trust and Security
Sustainability
Applied Technologies
Flutter (for cross-platform mobile app development)
Native iOS and Android development (for platform-specific mobile app development)
Firebase (for cloud services)
Razorpay (for payment gateways)
Algolia (for AI-powered search and discovery)
MongoDB (for database management)
Read More Evolution of P2P Rental eCommerce App Development
#eCommerce app development#P2P rental eCommerce#marketplace app development#mobile app development#web app development
0 notes
Text
Liferay DXP, a platform that is not limited to just a single use case!
Organizations everywhere are looking for a business transformation. The one that brings digitalization along with newer and better opportunities toward growth to deliver efficiently. A business metamorphosis indeed!
Businesses from all the industry sectors are positively considering investing in the digital business along with all of their other significant investments, for it has come to the realization that digital transformation is not a trade-off anymore. It is an investment perhaps that would take businesses the extra mile! Liferay DXP is one of the preferred solutions for digital transformation. It has been declared as a Leader of DXPs 11 times in Gartner's Magic Quadrant.
Industry 4.0 is toward all the automation, decentralized decision, transparent exchange of information using cutting-edge technologies. Businesses are willing to bring in all the possible technological changes and automation. Technological advancements benefit businesses with increased productivity, transparency, efficiency; & decrease in operational overheads, and redundancies.
Liferay DXP is a digital transformation platform for portal development that is flexible and scalable in nature. It extensively follows a no-code/low code approach for software development.
The capabilities or the features of Liferay DXP are -
Content Management System
Document Management System
User management
Experience management
Collaboration & social
Search
Multichannel support
Forms & Workflows
Integration & interoperability
Analytics
Above mentioned are a fewer to name capabilities of the Liferay DXP platform. It is such a flexible platform that innumerable distinct solutions can be created using it. The use cases of Liferay DXP are Intranet, Dealer/Vendor Portal, Customer Portal, Portals with self-service, Knowledge Management System, Learning Management System, Car lease & rental Portal to name but a few.
Organizations that choose Liferay as a platform for one of their solutions can use the same license and platform to create any number of solutions on it. It is not limited to creating a specific or a single solution. Organizations can leverage their single investment to derive multiple solutions using it. The flexible nature of the platform and its approach to low-code software development makes it a matchless choice for digital transformation.
We, at ContCentric, specialize in catering exemplary solutions for digital transformation. We are a Liferay Gold Partner company. We have provided solutions to the global giants like PUMA Energy, EY, Tech Mahindra, and Peugeot Motorcycles to name but a few. Contact us here for a consultation to further add yet another use case to the baggage of endless possibilities of Liferay DXP.
1 note
·
View note
Text
What is an Enterprise Portal? Why Liferay Is The Best Technology For Developing The Enterprise Portal

An enterprise portal is a web-based platform that provides employees, customers, and partners with a single point of access to information, applications, and communication tools. It is designed to streamline business processes, improve collaboration, and enhance productivity by providing users with personalised and relevant content based on their roles and responsibilities.
Personalised content, search functionality, collaboration tools, and interaction with enterprise systems are common aspects of enterprise portals. They are intended to increase communication and cooperation, streamline business processes, and boost productivity by giving users a single point of access to the resources they require to complete their activities.
Let’s take a look at what Enterprise Portal development services are.
Web-based portals that act as a central hub for enterprise applications, data, and services are created as part of Enterprise Portal development services.
Portal design, modification, integration, maintenance, and support are among the services offered.
These services are often provided by software development firms to assist organisations in developing customised portals that match their individual demands and objectives.
By streamlining company processes and offering a single point of access to enterprise systems and data, Enterprise Portal development services aim to promote collaboration, productivity, and efficiency.
Enterprise Portal development services can assist firms in integrating many enterprise systems such as CRM, and HR management systems into a single portal, making data sharing and collaboration easier.
Liferay technology enables businesses to construct websites, intranets, and other web-based applications. It provides tools and features that make it easier for businesses to create interactive and personalised web experiences for their users. It is written in Java and is meant to be a scalable and stable solution for developing enterprise-grade portals. It has a huge and active developer and user community that contributes to its development and provides assistance. Liferay is adaptable and can be adjusted to unique business requirements, making it a popular solution for businesses of all sizes.
Liferay is the best technology for developing enterprise portals due to its unique features and benefits, such as:
Flexible and Configurable: Liferay includes a large number of pre-built components, themes, and templates that may be customised to create unique and engaging portals adapted to specific business requirements.
Open-Source: Because Liferay is an open-source technology, businesses can use and change the software for free, making it a cost-effective and accessible option for organisations of all sizes.
Scalable: Liferay is built to manage large-scale enterprise deployments and can scale to support millions of users and massive amounts of data. This makes it an excellent platform for enterprises that must manage large amounts of data and traffic.
Robust and Reliable: Liferay has robust security features that help protect sensitive data and prevent unauthorized access to the portal. It includes features such as user authentication, access control, and encryption, which ensure that only authorized users can access the portal.
Integration: Liferay can easily integrate with other enterprise systems, such as CRM, and HR management systems, making it easy to share data between different systems and create a seamless user experience.
Active Community: Liferay has a large and active community of developers and users who are constantly working on improving the technology, adding new features, and providing support.
User-Friendly Interface: Liferay offers a user-friendly interface that is easy to navigate, making it ideal for both novice and experienced users.
The potential of Liferay in the development of enterprise portals.
Liferay is an open-source platform that is both sturdy and scalable, making it ideal for the creation of enterprise portals. It offers a complete set of tools and capabilities that allow firms to create customised portals for a variety of reasons.
One of Liferay’s primary features is its adaptability. It has a modular architecture that enables developers to easily add, delete, or change features as needed. This implies that instead of being constrained by the possibilities of a pre-built solution, firms may construct portals that are customised to their specific needs.
Finally, Liferay technology provides an extensive collection of tools and functionalities, making it the finest solution for constructing enterprise portals. Its scalability, adaptability, open-access, resilience, dependability, integration, and user-friendly interface make it an ideal platform for optimising business operations, improving collaboration, and increasing productivity. Developers can quickly customise portals to unique company needs using Liferay’s modular architecture, and add or remove functionality as needed. Liferay’s potential in enterprise portal development originates from its ability to handle large-scale corporate deployments, manage massive amounts of data and traffic, and easily interact with other enterprise systems. Overall, Liferay technology is a good solution for businesses looking to create customised and scalable portals that meet their specific demands and goals.
Originally published by: Why Liferay Is The Best Technology For Developing The Enterprise Portal
#Enterprise Portal development services#API in Digital Transformation#Liferay for Enterprise Portal development#Liferay Portal development#Liferay developers
0 notes
Text
Want to make Liferay Portal Migration Easier? Keep these 10 Points in Mind

Digital transformation is a reality, and every business is looking for ways to digitize its processes at every level. Companies seek newer and innovative technologies that can automate their processes and keep them ahead of the competition.
Businesses saw the need to have an agile and scalable technology that brings together UI, content management, CRM, marketing automation, analytics and more in a single platform. It, perhaps, explains the origins and need for Liferay portal migration – a specialized digital experience platform.
Points to Keep in Mind when Upgrading Liferay DXP
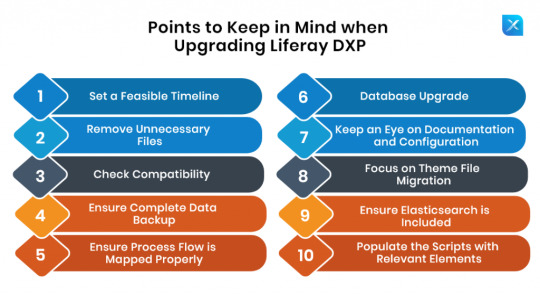
Liferay is a fairly straightforward enterprise platform that packs in many features and benefits for businesses looking for an agile, scalable and simplified solution for their business needs.
1. Set a Feasible TimeLine The age-old adage, ‘if you fail to plan, you plan to fail’ is true even when upgrading your Liferay portal.
2. Remove Unnecessary Files Once you have charted out a plan, start the up-gradation process by removing all unwanted files and objects.
3. Check Compatibility Before proceeding further, we suggest you check the compatibility of your existing enterprise environment with DXP.
4. Ensure Complete Data Backup Once you have removed all unnecessary data, you will be left with the most crucial data for your business.
5. Ensure Process Flow is Mapped Properly To ensure the up-gradation process is flawless, make sure to map and store the entire process flow and properties accurately.
6. Database Upgrade The next step in the up-gradation process is applying all database pointers, indexes, and search queries correctly and removing search indexing will avoid any slowdowns during up-gradation.
Although Liferay DXP recommends you use OSGi bundles for new Liferay development, you can still use WARs in Liferay. Liferay Portal Migration is the step ahead for enhanced customer personalization and process automation. Here’s everything you need to know about Liferay DXP migration.
#liferay portal migration#liferay expert#liferay portal development company#liferay portal#liferay migration
0 notes