#MixingTips
Explore tagged Tumblr posts
Visit Tumblr Blog
Explore Tumblr blogs with no restrictions, modern design and the best experience.
Last Seen Tumblr Blogs


Fun Fact
Tumblr was the first site to host the blog for President Barack Obama in 2011.
Text
Download Plugin Alliance – Kiive XTComp 🎧

Looking to add professional-grade compression to your audio toolkit? Plugin Alliance – Kiive XTComp is here to revolutionize your sound. This cutting-edge plugin combines the best of vintage analog warmth with modern digital precision, making it a must-have for producers, engineers, and musicians alike. Whether you're working on punchy drums, smooth vocals, or a polished mix bus, XTComp delivers unparalleled versatility and character.
Why Kiive XTComp Stands Out
🎛️ Multiple Compression Styles: From the smooth transparency of an LA-2A to the aggressive punch of an 1176, XTComp offers a range of compression flavors to suit any track. 🔥 British Mode: Unleash the iconic "All-Buttons-In" aggression for drums, bass, and vocals that cut through the mix. 💥 Advanced Features: With sidechain filtering, mid/side processing, and a built-in saturation module, XTComp goes beyond traditional hardware limitations.
Key Features You’ll Love
✅ 8 Unique Ratio Settings: Tailor your compression with precision. ✅ Parallel Compression & Saturation: Blend dry and wet signals for dynamic control. ✅ Gain Link Function: Easily compare settings with level-matched A/B testing. ✅ Stereo Width Control: Enhance your mix's spatial depth.
Perfect For Every Genre
From EDM to rock, hip-hop to jazz, XTComp is your go-to tool for:
Drums: Add punch and energy to your beats.
Vocals: Smooth out dynamics while maintaining warmth.
Mix Buss: Glue your tracks together with pro-level compression.
Lo-Fi Effects: Crank up the saturation for gritty, analog textures.
Download Kiive XTComp Today
Ready to transform your mixes? Download Plugin Alliance – Kiive XTComp now and experience the perfect blend of vintage vibe and modern flexibility.
👉 Download Here: Plugin Alliance – Kiive XTComp
#MusicProduction#AudioPlugins#FETCompressor#MixingTips#PluginAlliance#KiiveXTComp#MusicTech#ProAudio#VintageVibes#ModernMixing
0 notes
Video
youtube
Music Mixing and Answering Client Questions
In this video, I am sharing some tips on music mixing and answering client questions from a recent client. We are going to discuss how this project came about, listen to the before and after of the original mix vs the master. We also get into answering a ton of client questions that I think lots of you will find useful information in here.
Subscribe to Distinct Mastering for more videos.
Have a question about music production, mixing, mastering, or anything else? Post in the comments section of this video!
LINK TO MUSIC: Erick Diaz, Freshcobar & Lavelle Dupree - Want This to End (NOS Recordings)
RELATED VIDEOS:
What You Need to Know About Gain Staging
Polishing Your Mix with K Metering - K System Metering Explained
Mixing with Pink Noise | Music Production Mixing Tips
Should You Use Compression on the Mix Buss? | Mix Buss Series
Compression - Everything You Need to Know
Audio Compression - Is Compression Multiplied?
#youtube#mixingandmastering#mixingtips#masteringengineer#audiomastering#masteringmusic#masteringtips#musicproductiontips#mixingengineer
1 note
·
View note
Text
WA Production – ChromaBox Download
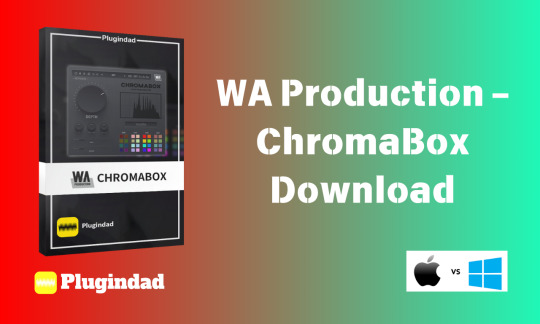
If you’re searching for a game-changing audio plugin to elevate your music production, look no further than WA Production – ChromaBox. This powerful tool is designed to transform your sound with immersive 3D effects, expansive stereo width, and rich harmonic depth. Whether you’re a seasoned producer or a budding musician, ChromaBox offers unparalleled versatility to take your tracks from ordinary to extraordinary.
Why ChromaBox Stands Out
ChromaBox is more than just an audio plugin—it’s a creative powerhouse. With its intuitive controls and cutting-edge features, it allows you to craft professional-grade soundscapes effortlessly. From subtle enhancements to bold, transformative effects, ChromaBox is the ultimate tool for adding depth, warmth, and dimension to your music.
Key Features That Make ChromaBox a Must-Have
🌟 One Knob to Rule Them All
The Depth Knob is the heart of ChromaBox, offering precise control over saturation, 3D effects, and frequency shaping. Whether you’re looking for a subtle polish or a dramatic transformation, this single knob lets you dial in the perfect sound with ease.
💧 Color Your Sound
With Hue, Saturation, and Luminance controls, ChromaBox lets you shape your audio like never before. Choose from a 32-color palette categorized into Dark, Light, Vivid, and Soft tones to instantly enhance your sound. Add sparkle to guitars, warmth to vocals, or depth to synths—all with a single click.
🎧 Resonate the Space
The Space and Resonate controls bring your music to life by adjusting reflections and boosting resonant peaks within a 3D environment. These features create deep, evolving soundscapes that add unparalleled dimension to your tracks.
🔍 Real-Time Visual Feedback
Stay in control with ChromaBox’s live frequency spectrum display. The sleek, resizable interface provides real-time insights into how your audio is being shaped. Use the AB comparison and undo/redo functionality to fine-tune your sound with precision.
🔮 Powerful Factory Presets
ChromaBox comes loaded with an extensive library of factory presets, tailored for various genres and sound design applications. Whether you’re working on cinematic textures, punchy basslines, or crystal-clear vocals, these presets offer instant, professional-grade enhancements.
System Requirements and Compatibility
ChromaBox is compatible with both Windows 10/11 and Mac OS (excluding some versions). It supports VST, VST3, and AU formats, ensuring seamless integration into your favorite DAW. With minimal system requirements (4GB RAM and 13.4MB hard drive space), ChromaBox is accessible to producers of all levels.
How to Download WA Production – ChromaBox
Ready to revolutionize your sound? Download ChromaBox today from PluginDad and unlock a world of sonic possibilities. Whether you’re crafting beats, mixing tracks, or designing soundscapes, ChromaBox is the ultimate tool to bring your creative vision to life.
Elevate your music with ChromaBox—your journey to professional-grade sound starts here! 🎶
#SoundDesign#AudioPlugin#MusicProduction#ChromaBox#WAProduction#BeatMaking#MixingTips#MusicTools#ProducerLife#DAWPlugins
0 notes
Text
How to Eliminate Muddy Bass in Your Mix: Tips for Clear and Punchy Low-End Sound
Achieving a clear and punchy low-end in your mix can be challenging, especially when dealing with muddy bass. Muddy bass occurs when low frequencies become cluttered, lacking definition and clarity, which can make your mix sound dull or washed out. Eliminating this muddiness is essential for creating a professional-sounding mix with a tight, focused bass. In this blog post, we’ll explore practical tips to help you clean up your bass frequencies and bring clarity to the low end of your mix.
1. **Understand the Problem Frequencies**
Muddy bass usually resides in the low-mid frequency range, typically between 200 Hz and 500 Hz. This is where low-end instruments, such as bass guitars, kick drums, and synths, overlap and start to muddy up your mix. Too much energy in this range can cause the bass to lose definition and sound boomy or cluttered. The first step to eliminating muddy bass is identifying these problem frequencies.
**Tip:** Use a frequency analyzer to visualize where the build-up of frequencies is happening, then cut the problematic areas with an EQ (equalizer) to bring clarity to the mix.
2. **High-Pass Filtering Non-Bass Elements**
One of the most effective ways to clear up the low end of your mix is by applying high-pass filters (HPF) to instruments that don’t need low-end frequencies. Many instruments, such as guitars, pianos, or vocals, can contain unnecessary low frequencies that compete with the bass. By removing these unwanted frequencies, you allow the bass to breathe and take center stage.
**Tip:** Apply a high-pass filter to instruments that are not meant to dominate the low end. Start by rolling off everything below 80–100 Hz for non-bass elements and adjust as needed.
3. **Use EQ to Clean Up the Bass**
EQ is your best friend when it comes to eliminating muddy bass. Use it to sculpt the bass sound by cutting or boosting specific frequencies to achieve a more balanced and defined low end. Here’s a general EQ guide to help you clean up your bass:
- **Cut around 200–500 Hz:** This is the range where muddiness tends to accumulate. Try cutting gently with a wide Q to remove excess build-up.
- **Boost around 50–100 Hz for Sub-Bass:** If your bass is lacking in weight, a subtle boost in the sub-bass range can give it the punch and fullness it needs, but be careful not to overdo it.
- **Add presence around 1–2 kHz:** A small boost in this range can add clarity and definition to the bass, making it cut through the mix without becoming overpowering.
**Tip:** Use subtractive EQ (cutting frequencies) before boosting to avoid adding unnecessary energy to the mix.
4. **Control Bass Dynamics with Compression**
While EQ helps shape the tonal quality of the bass, compression helps control its dynamics, ensuring that the bass stays consistent and punchy throughout the track. Without proper compression, the bass can become uneven, with certain notes being too loud and others too quiet, contributing to muddiness.
- **Use gentle compression (low ratio of 2:1 or 3:1):** This helps tame peaks without squashing the dynamics.
- **Adjust the attack and release times:** A slower attack allows the initial punch of the bass to come through, while a faster release helps retain energy and bounce.
**Tip:** Sidechain compression is a great technique to duck the bass every time the kick drum hits. This prevents the bass and kick from clashing, helping the low-end remain tight and defined.
5. **Layering Bass for Definition**
Sometimes, a single bass track isn’t enough to achieve both clarity and punch. In such cases, layering your bass can help. You can split your bass into two or more layers—one focused on the sub frequencies for weight and another focused on the mid-range for definition.
- **Low layer:** Focus on sub-bass frequencies (20–100 Hz) to give your mix the necessary weight.
- **Mid/high layer:** Add a second bass layer with more presence in the mid-range (100 Hz to 1 kHz) for added clarity and texture.
**Tip:** Apply different processing to each layer to keep them distinct. For example, compress the sub layer for consistency, and add saturation or distortion to the mid-range layer for extra character.
6. **Add Distortion or Saturation for Harmonic Richness**
Adding subtle distortion or saturation to your bass can bring out harmonic content, making it more present in the mix without relying solely on volume. This can help your bass cut through without boosting the low end, which can often contribute to muddiness.
- **Saturation:** Adds warmth and thickness to the bass sound, creating more harmonics in the mid-range.
- **Distortion:** Use mild distortion to add grit and presence, especially in genres like rock, metal, or EDM.
**Tip:** Use parallel distortion to blend the distorted signal with the clean bass for more control over the overall tone.
7. **Tighten the Low-End with Multiband Compression**
Multiband compression allows you to compress specific frequency ranges separately, giving you precise control over your bass. This can be particularly useful for controlling muddiness in the low-mids while leaving the sub-bass and high-mids intact.
- **Set up a multiband compressor to target the low-mids (200–500 Hz):** Gently compress this area to reduce the boomy frequencies that contribute to a muddy mix.
- **Leave the low frequencies (below 100 Hz) lightly compressed:** This maintains the punch of the bass while controlling the more problematic frequencies.
**Tip:** Don’t over-compress the sub-bass, as it can result in a flat or lifeless sound.
8. **Pay Attention to Your Monitoring Environment**
Achieving a clear and punchy low end requires accurate monitoring. Mixing in a room with poor acoustics can result in a skewed perception of your bass frequencies, leading to overcompensation and a muddy mix. To avoid this:
- **Use reference tracks:** Compare your mix to professionally mixed songs in a similar genre to ensure your bass sits properly.
- **Use good headphones or monitor speakers:** If your room isn’t acoustically treated, mixing on quality headphones can give you a more accurate representation of the low end.
**Tip:** Check your mix on multiple playback systems (e.g., car speakers, earbuds, home stereo) to ensure the bass translates well everywhere.
Final Thoughts
Eliminating muddy bass and achieving a clear, punchy low end requires a combination of EQ, compression, and attention to detail in your sound design. By identifying problem frequencies, using high-pass filters, layering bass, and applying the right processing techniques, you can bring clarity and definition to your mix. Remember, a tight low-end not only enhances the overall sound quality of your mix but also ensures that it translates well across different listening environments.
With these techniques, you'll be able to tame muddy bass and create polished, professional mixes with a powerful low-end that resonates with your listeners.
#MuddyBass#ClearMix#PunchyLowEnd#MixingTips#AudioProduction#SoundEngineering#MusicProduction#BassMixing#ProfessionalMix#MixingTechniques
0 notes
Text
youtube
🎛️ Gyraf G10 Vari-Mu Compressor Review 🎛️
Check out my review of the Gyraf G10 Vari-Mu Compressor! Dive into sound tests, features, and how this gear performs for mastering. Get all the insights you need on this top-notch audio equipment!
Watch now: https://youtu.be/_e1fcP9h_qE
#gyrados#compressorreview#studiogear#audioengineering#gearreview#musicproduction#compressiontech#OutboardGear#soundtest#audiogear#mixingtips#vocalprocessing#compression#mixglue#studio#producergear#warmup#musicgearreview#highendaudio#Youtube
0 notes
Text
youtube
🎛️ Gyraf G10 Vari-Mu Compressor Review 🎛️
Check out my review of the Gyraf G10 Vari-Mu Compressor! Dive into sound tests, features, and how this gear performs for mastering. Get all the insights you need on this top-notch audio equipment!
Watch now: https://youtu.be/_e1fcP9h_qE
#gyrados#compressorreview#studiogear#audioengineering#gearreview#musicproduction#compressiontech#OutboardGear#soundtest#audiogear#mixingtips#vocalprocessing#Youtube
0 notes
Text
The Producer's Guide to Crafting Punchy Drums
In the world of music production, the drum track serves as the backbone of a song, providing the rhythmic foundation upon which all other elements are built. A well-crafted drum track can elevate a composition to new heights, infusing it with energy, groove, and an undeniable sense of impact. However, achieving that coveted “punch” in your drums is an art form that requires a combination of…

View On WordPress
1 note
·
View note
Text
Headphones vs Studio Monitors: Which One Should You Trust?
Headphones vs Studio Monitors: Which One Should You Trust? https://www.youtube.com/watch?v=dZFhlS7nXf8 If you’re serious about leveling up your mixes, understanding the difference between headphones and studio monitors is crucial. In this video, we break down the pros and cons of both, when to use each one, and how professional producers balance them for cleaner, more accurate mixes. Whether you’re cooking up beats in your bedroom or building a full studio, this guide will help you trust your ears and make better sonic decisions. Subscribe for more mixing gems and beat-making wisdom. headphone mixing vs monitor mixing studio monitors for mixing best headphones for music production how to mix with headphones home studio setup tips beat making mixing techniques Talk2Emtron mixing tips #MixingTips #MusicProduction #HeadphonesVsMonitors #HomeStudio #BeatMaking #Talk2Emtron #ProducerTips via Talk2EmTron https://www.youtube.com/channel/UCXnQWXoKPW8VBRWQTqv7_jg May 01, 2025 at 03:47AM
#Talk2EmTron#musicproducer#audioengineer#musicindustry#beatmaking#musicproduction#recording#mixing#mastering#trueexpert#crafting
0 notes
Text
youtube
SSL Bus + Compressor on the Drums of Demonstration and Review. https://youtu.be/z27wXv_wRGk
ssl #drummer #mixing #audioengineering #producer #musicproduction #studioequipment #recording #mixingtips #drums #compressor #SSLcompressor #tutorial #mixingtutorial #mastering #musicproducer #drumrecording #musicstudio
0 notes
Video
youtube
Mixing with Pink Noise | Music Production Mixing Tips
In this video, we're delving into a game-changing technique – Mixing with Pink Noise. If you've ever found yourself struggling with mix balance, this method can be your secret weapon.
Mixing with pink noise is a proven approach for achieving a well-balanced mix, especially for those who are new to audio engineering or find it challenging to get their mixes just right. In this comprehensive guide, we'll walk you through the step-by-step process of incorporating pink noise into your mixing workflow.
We'll explore how to use pink noise as a reference to set your mix levels accurately and create a solid foundation for your tracks. Whether you're a budding musician or an experienced producer looking to refine your mixing skills, this video will provide you with a valuable tool to achieve professional-grade mixes.
0 notes
Text
Much more than a traditional music platform, We Talk Music Online stands out as a self-contained ecosystem.
Our goal is to provide producers with a space to discuss their latest productions, seek feedback, and foster connections with a friendly and supportive community.
https://www.wetalkmusic.online/
#musicproducer #dynamiceq #studioflow #musicproduction #producerlife #hiphopproducer #musicstudio #producer #beatmaking #musicindustry #musicproducers #musicproducerlife #femaleproducer #mixingengineer #logicpro #fabfilter #producerlifestyle #producertips #studio #studiolife #audioengineer #studiolife #studiosetup #musicproductiontips #beatmaker #beats #mixingtips #mixtips #producergrind #mixingandmastering
0 notes
Text
5 Essential Things You Need to Know About Decibels (dB) for Audio Mixing and Mastering
Decibels (dB) are a fundamental unit of measurement in audio mixing and mastering, but they can be confusing for those new to sound production. Understanding decibels is critical for managing levels, preventing distortion, and ensuring your mixes are clear, dynamic, and well-balanced. Whether you’re an aspiring producer or a seasoned sound engineer, mastering the concept of decibels can make a significant difference in the quality of your audio work. In this guide, we’ll break down five essential things you need to know about decibels for audio mixing and mastering.
1. What is a Decibel (dB)?
The decibel (dB) is a logarithmic unit used to measure sound intensity, sound pressure, or voltage levels in audio. It compares the power of one sound to a reference level, which is why it's commonly used in audio mixing to express the relative loudness of signals.
Key Facts About Decibels:
- **Logarithmic Scale**: The decibel scale is logarithmic, meaning each 10 dB increase represents a tenfold increase in sound intensity. For example, 70 dB is ten times more intense than 60 dB.
- **Reference Levels**: In audio, decibels can measure various things such as SPL (Sound Pressure Level) or digital levels (dBFS in digital audio). The reference point changes depending on the context.
In practice, decibels allow sound engineers to fine-tune loudness levels and maintain consistency across different elements of a mix.
2. Understanding dBFS: Decibels Full Scale
In digital audio mixing, the most common decibel unit is **dBFS** (Decibels Full Scale), which measures audio levels relative to the maximum possible signal level (0 dBFS). Anything above 0 dBFS causes **clipping**, resulting in distortion because the signal exceeds the maximum level that digital audio can handle.
#### **Key Points About dBFS**:
- **0 dBFS**: This represents the maximum peak level in a digital system. Anything over 0 dBFS will distort.
- **Negative Values**: Unlike in analog systems, digital levels are always expressed as negative values when they’re below 0 dBFS (e.g., -12 dBFS or -6 dBFS).
**Tip**: Aim to keep your master levels at around -6 dBFS to -3 dBFS when mixing to avoid clipping and allow room for mastering.
3. Signal-to-Noise Ratio (SNR) and Dynamic Range
Decibels are also used to measure the **signal-to-noise ratio (SNR)** and **dynamic range** of your audio. Both of these factors are crucial in mixing and mastering.
Signal-to-Noise Ratio:
- The **SNR** is the ratio between the level of your audio signal and the background noise in your recording.
- A high SNR means that the audio signal is much louder than the noise, which is desirable in professional recordings.
Dynamic Range:
- The **dynamic range** is the difference between the quietest and loudest parts of a signal, typically measured in decibels.
- In mixing, you want to preserve enough dynamic range so your music has depth and doesn’t sound overly compressed or flat.
**Tip**: Aim for a balanced dynamic range in your mixes to prevent your tracks from sounding either too quiet or too "squashed."
4. How Decibels Affect Perceived Loudness
A common misconception in audio mixing is that louder always sounds better. However, increasing the dB level indiscriminately can lead to distortion, ear fatigue, and a lack of dynamics in your music. Decibels play a crucial role in **perceived loudness**, which is how loud we hear something rather than its actual intensity.
Loudness and Fletcher-Munson Curve:
- The **Fletcher-Munson Curve** explains that our ears perceive different frequencies as louder or quieter, even at the same decibel level.
- Lower and higher frequencies are perceived as quieter at lower volumes, which is why mixing engineers often boost bass and treble at lower listening levels.
**Tip**: Use decibels to carefully balance loudness in different frequency ranges so that your mix translates well at various playback volumes.
5. Gain Staging and Headroom
**Gain staging** and **headroom** are two critical concepts in mixing and mastering, and both involve proper use of decibels. Gain staging ensures that the signal levels are optimized throughout the recording and mixing chain without distortion.
Gain Staging:
- Involves adjusting the level of audio signals at different points in the signal chain to maintain clarity and prevent distortion.
- Start by setting your input levels properly during recording. Aim for levels between -18 dBFS and -12 dBFS in your DAW (Digital Audio Workstation).
Headroom:
- **Headroom** refers to the difference between your signal's peak level and 0 dBFS, which is the maximum level your digital system can handle without distortion.
- Leaving enough headroom (around -3 dBFS to -6 dBFS) ensures that mastering engineers have enough space to work with your tracks without causing distortion.
**Tip**: Proper gain staging prevents audio distortion and helps you create clean, professional-sounding mixes.
FAQs
1. **What is the difference between dBFS and dB SPL?**
- dBFS refers to the decibel scale in digital audio, where 0 dBFS is the maximum level. dB SPL (Sound Pressure Level) measures the intensity of sound in the physical world, with 0 dB SPL being the threshold of human hearing.
2. **Why is 0 dBFS the maximum in digital audio?**
- In digital audio, 0 dBFS represents the highest level that can be recorded without clipping. Any level above this will result in digital distortion because the signal exceeds the system's capacity.
3. **What is clipping and how can I avoid it?**
- Clipping occurs when the audio signal exceeds 0 dBFS, causing distortion. To avoid clipping, keep your levels below 0 dBFS and leave headroom during mixing and mastering.
4. **How much headroom should I leave for mastering?**
- Typically, you should leave between -3 dBFS to -6 dBFS of headroom in your mix to give the mastering engineer enough space to work with.
5. **Does louder music always sound better?**
- Not necessarily. While louder can feel more powerful, over-compressing or boosting dB levels too much can reduce the dynamic range, causing ear fatigue and loss of clarity in your mix.
6. **How do I measure decibels in my DAW?**
- Most DAWs have built-in meters that measure audio levels in decibels (dBFS). Watch these meters to ensure that your signal levels stay in the safe range (below 0 dBFS).
---
By mastering these essential concepts of decibels in audio mixing and mastering, you’ll have a clearer understanding of how to manage your audio levels effectively. With the right balance, you can create dynamic, high-quality mixes that sound professional across various playback systems.
#Decibels#AudioMixing#Mastering#SoundEngineering#MusicProduction#AudioQuality#MixingTips#MasteringTechniques#SoundDesign#ProfessionalAudio
0 notes
Photo
MIXING TIPS for you all . how to use SATURATOR like a PRO! #musicproduction #mixingtips #mixing #mastering #mixingengineer #producertips #productiontips #saturation #djing #beatmaking #ableton #audioengineer #producerlife #producergrind https://www.instagram.com/p/Co9-mlBpBwW/?igshid=NGJjMDIxMWI=
#musicproduction#mixingtips#mixing#mastering#mixingengineer#producertips#productiontips#saturation#djing#beatmaking#ableton#audioengineer#producerlife#producergrind
2 notes
·
View notes
Text
youtube
SSL Bus + Compressor on the Drums of Demonstration and Review. https://youtu.be/z27wXv_wRGk
ssl #drummer #mixing #audioengineering #producer #musicproduction #studioequipment #recording #mixingtips #drums #compressor #SSLcompressor #tutorial #mixingtutorial #mastering #musicproducer #drumrecording #musicstudio
0 notes