#Model Painting
Explore tagged Tumblr posts
Visit Tumblr Blog
Explore Tumblr blogs with no restrictions, modern design and the best experience.
Last Seen Tumblr Blogs


Fun Fact
Total funding amounts to $125.3M.
Text
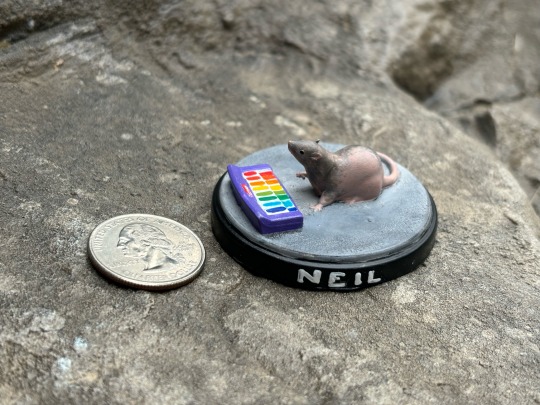
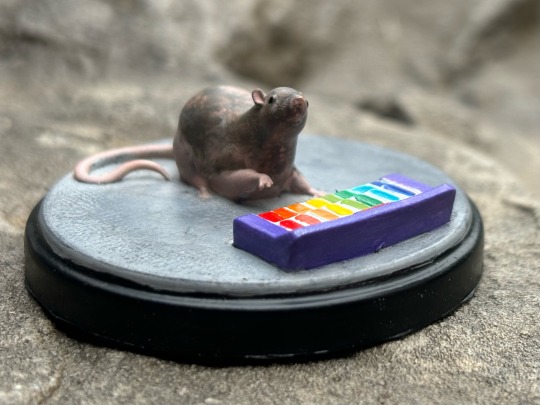
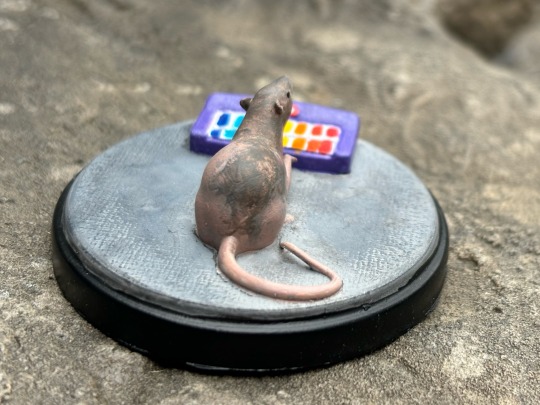

Happy Neil Banging out the Tunes day to all who celebrate!
I’ve gotten into resin printing and mini painting recently so I had to print out the little Neil model I made last year in honor of my favorite holiday
5K notes
·
View notes
Text
Update from this project
STILL obsessed with 3D printing and I did new hair and paint 🎨 on him and actually brand new adjusted model as well but still needs testing 💀
But idk isn’t he ADORABLE ?!😭😭😭🥹💖(hes so grumpy omggg)


Edit:
Edge lord phase 👨🏻🎤(before haircut )


#he is so cute#omg#so grumpy#simon riley#simon ghost riley#samuel roukin#cod modern warfare#cod mw2#cod mwii#fanart#8art#3d printing#bjd#action figures#model painting#wip#update#obsession#3d modling#artists on tumblr
601 notes
·
View notes
Text


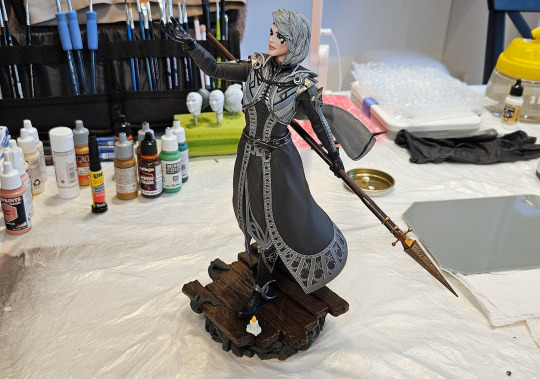
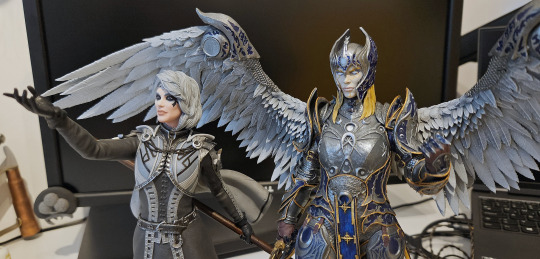
Decided to start the new year off right. So here she is, and here I am, manifesting for 2025:
a bounty of successfully finished projects
a wealth of awesome knight ladies in knight/lady relationships
In any case, painting this sure was a trip, especially since I'd never really seriously done anything like it before, and have only dabbled in ruining minis. Nothing here photographs well at all, sadly, so you'll have to just take my word on it that it all turned out pretty damn cool.


And now she can chill and guard my plants in her full resplendent glory.

She is... huge. But this is only right and appropriate. The level of tiny detail on her still meant I had to resort to toothpicks and needles (with the occasional Gundam marker assist).


And still I spent hours becoming intimately familiar with her elaborate... coccyx armour or whatever that is there. Also, getting her weird pseudo-marble statue skin colour right was very much a challenge.
The next thing I do, I think, will not be painting Isobel just yet (sorry). Instead, I might reach into the depths of my gunpla stack and build Aylin a fancy flying buddy.
And then pose them so they're doing a wing high five or something equally silly.
#dame aylin#model painting#bg3#baldur's gate 3#hate that in the pics you can't see my use of different golds or the cool purple tones in the shadowfell rocks or anything... oh well
332 notes
·
View notes
Text


So I painted this Heldrake and it was fun.
Can I make rainbows scary? I tried making rainbows scary.
309 notes
·
View notes
Text
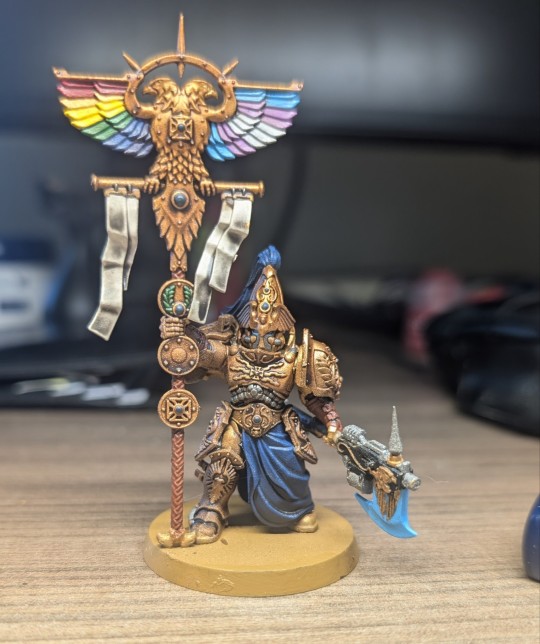
The prideful Custodes Warden stands tall ❤️
321 notes
·
View notes
Text


painting toys
#art#design#toy design#vinyl toys#resin toys#hand painted#traditional art#painting#model painting#original character#original art
85 notes
·
View notes
Text
Very much a wip but get Great Raced idiot

#thomas and friends#ttte#ttte art#thomas and friends art#james the red engine#ttte james#james the splendid engine#ttte the great race#James the best decorated#custom figure#model painting
117 notes
·
View notes
Text
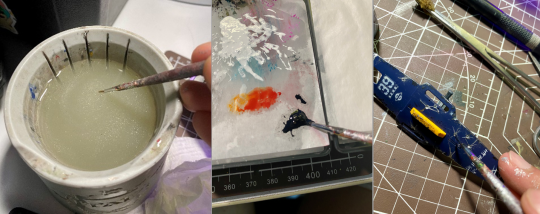
Weathering Tutorial
Thought I'd write up a quick tutorial to how I approach weathering for my gunpla kits. Typically, I'll do a quick gunmetal drybrush of the grey parts of a kit before I start building, as well as correcting any colour inaccuracies. This tutorial covers some of the things I do to a kit after it's built, to give it a more "lived in" look.
For the best effect, I apply stickers and other decals before weathering, as well as graffiti. This way, weathering cuts through or over these designs, helping tie them to the kit a little better.
The example kit here is the HGUC 1/144 Nemo, which I'll upload a review for soon that should be linked in the future.
Bullet Holes & Impact Points
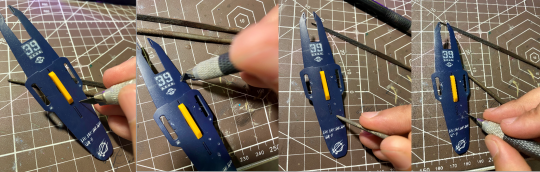
I typically use a hobby knife, pressing it into the surface of the plastic to make a small mark where I want the bullet impact point to be.
Usually with a blade that has a damaged or flatter tip, I'll spin the blade around, just like you'd use a hand drill (although I don't have any of those, so this suffices). Holding the blade at a slight angle will make the hole wider and a little more bowl shaped, just like a dent from an impact point.
Using a round metal file, I widen some of the holes and bevel the edges. Apart from making the hole a little more visible, this also creates a bit of a raised edge.
A starburst pattern can be created by cutting a few shallow lines with a knife traveling out from the centre of the hole, creating the implication of shrapnel from a shattered round.
Armour Chips and Edge Damage

Using a round file, I carve a rounded indent into the edge of the armour section. Depending on the angle you use and the position of the indent, this can come across as a dent or a chip of armour blown off. You can see what this looks like in the second image.
After this, I'll use a hobby knife or an angled file to cut deep grooves heading outward from the dent, as well as on their own to create cuts and chips along more acute angled on armour pieces (think the 90 degree angle on a square leg piece). As additions to the rounded damage, it can look like shrapnel damage from an intial angled impact. On their own, more angled chips give high points on armour a more worn effect.
Paint Damage (Sponge Chipping)
This utilizes a technique I learned from @radiofreemagica a few months ago. Give their blog some love!
Sponge chipping involves lightly applying paint to areas you want to appear chipped or worn using a sponge. The effect is that paint is applied as a series of small spots, which if done right should look as though the pain has fallen off in large flakes. The sponges here are simply offcuts of an old kitchen sponge.
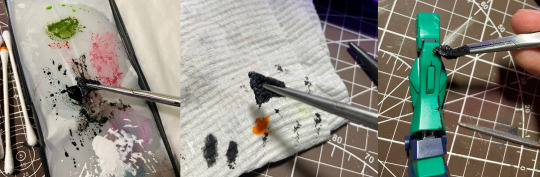
For my first pass, I use a slightly heavier application of black paint.
Dab a little of the excess off on a piece of paper - you want the impression of the sponge to come across clearly for the small little dots. If there's too much paint on the sponge, it'll blot onto the model and obscure detail.
Apply the paint across raised edges, especially corners, where the mech or vehicle is likely to experience the most friction. Try to be measured on application - not every raised edge needs to have chipped paint!

For the second pass, a gunmetal is appropriate. Use an even smaller amount of paint.
Dab the gunmetal over the top of your black. This will make it look as though underneath the black "primer" is bare metal.
Drybrushing
This step helps to augment the wear and tear established with your sponge chipping. Using a lighter metallic, you can emphasise the idea that under the bright colours of the model kit is tough metal plating.

My go-to drybrush for this is Citadel's Necron Compound, which is a drybrush-ready silver. Usually I prefer cheaper and more dilute Vallejo Air, as it reduces the risk of drying out or clogging in the bottle, and doesn't need to be thinned. However, Citadel's technical paints are really well made, and worth the extra cost.
For a drybrush style paint, you only need to wipe a little excess of your drybrushing brush. For a typical silver acryllic, you'll need to keep wiping until only a little silver comes off the brush, enough to only stick on the high points. You can use a specific drybrushing brush for this, or just any old brush that you don't care about abusing a little.
Only lightly tickle the raised edges with silver. A little goes a long way - you just want the edges of the armour segments to catch the light and give the implication of worn metal.
Painting the Damage
Coming back to the damage we carved with files and knives, it's time to give the impression of metal underneath them, rather than plastic.

For this, I'll use a plain silver acryllic, something around a flat aluminium rather than chrome or purer silver.
With a small brush, apply the silver paint into the chips, cracks, and bullet holes you made earlier. Make sure to work it right into the thinner recesses, and wipe away any excess with a cotton bud.
Next, to bring down the tone and to add depth to the damage, I use a black wash. You can buy premade acryllic washes, or even use something like liquid panel liner, but I prefer to just make my own.
Make sure your brush is very wet, picking up water with your brush.
Mix with the paint until it is very thin. You should be able to see through it.
Apply it into the bullet holes and cracks, letting it flow into the deepest sections just like with a panel liner, and wiping away the excess.
This should make the damage look a little deeper, and give it a bright edge from the silver.
Finishing Up
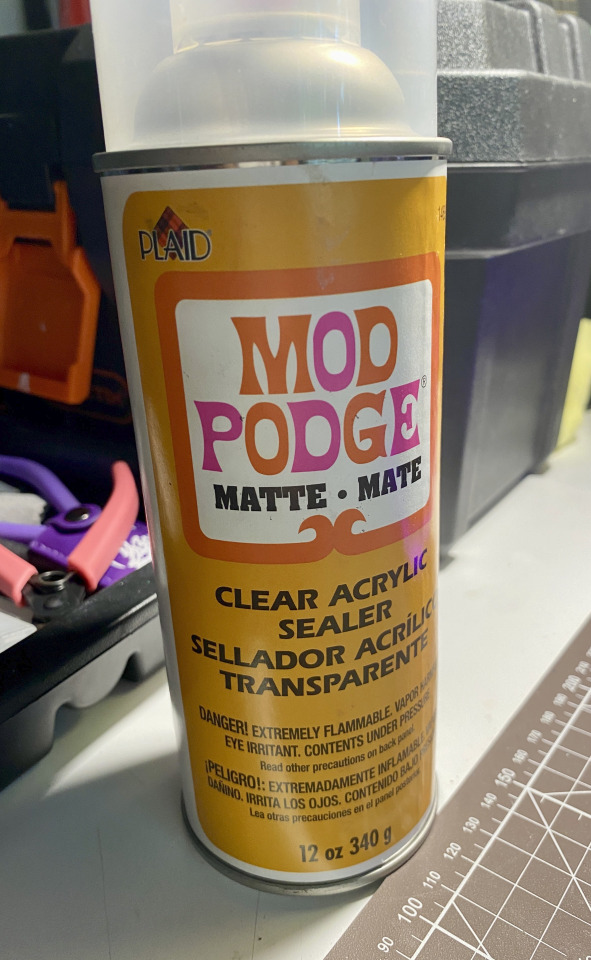
Make sure to give your kit a protective topcoat, so that all your paint doesn't get chipped off when posing or moving your kit! I use a matte finish pray on sealer. Right now I'm using the Mod Podge clear acryllic, but in the past I've also used bog-standard Rust-O-Leum Matte Clear varnish without any issues. It's important to cover or mask off any clear or gloss parts when doing a matte finish, as these will ruin the parts and it's very difficult to clean them once the topcoat is set.

And that should be everything! Now your kit should look a lot more metallic and worn. Depending on how much you add, you can make your kit look anywhere from it's first fray to a beaten and dilapidated mech abandoned in the dirt. Let me know how you go with this tutorial!~
#gunpla#my gunpla#plamo#model building#model weathering#weathering#model painting#painting#tutorial#weathering tutorial#my tutorials
143 notes
·
View notes
Text

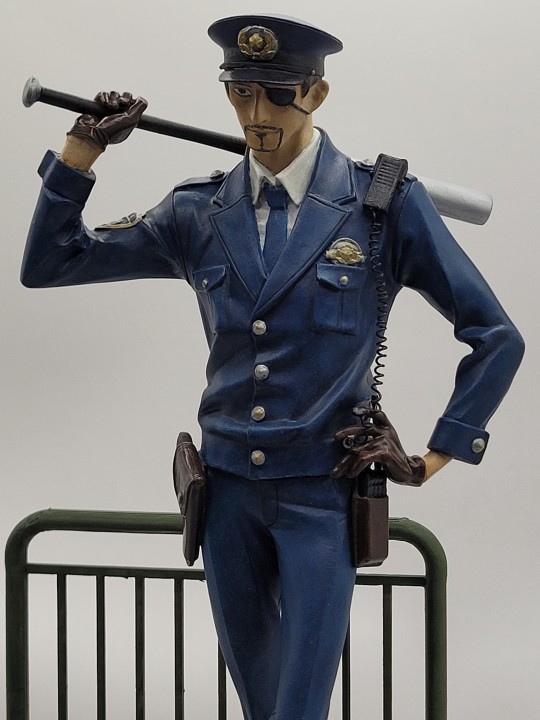

Piece done for a friends birthday- Majima, from that Yakuza series! This is the second largest figure ive painted (after Karlach) and was an absolute blast to do :)
#yakuza#like a dragon#yakuza like a dragon#yakuza majima#majima goro#yakuza like a pirate#model painting#diorama
95 notes
·
View notes
Text


Another building devoted to the dark place known as Mordheim, witness violence scenes everywhere.
#john blanche#grimdark#warhammer#fantasy#model painting#mordheim#warhammer fantasy#terrain#horror#wargaming#Skaven#undead#chaos
81 notes
·
View notes
Text
gay little tank for my gay little traitors


71 notes
·
View notes
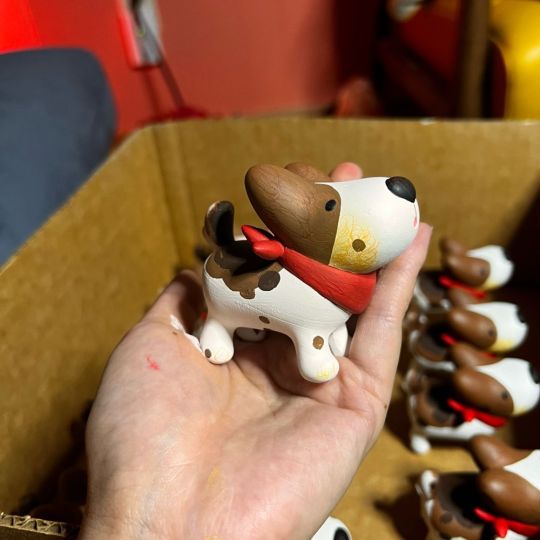
Text


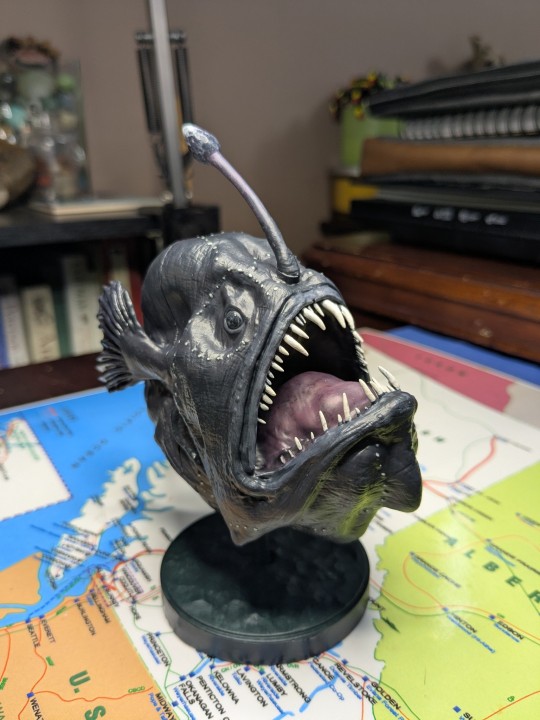
I got myself a sweet anglerfish model from Etsy. Spent today painting her
60 notes
·
View notes
Text
WEISS MINII

Oh and this as well

They are girlfriends your honor
#i locked in on this for like 4 hours straight-#I love them so much you dont understanddd#rwby#weiss schnee#ruby rose#whiterose#painting#3d printing#model painting
68 notes
·
View notes
Text


9 more models based!! I love how they come together with decorated bases! For awhile I thought it was overrated and unnecessary, but I've seen the error in my ways
#40k#warhammer 40k#warhammer 40000#model painting#miniature painting#mini painting#miniature#sisters of battle#adepta sororitas#my art
59 notes
·
View notes
Text


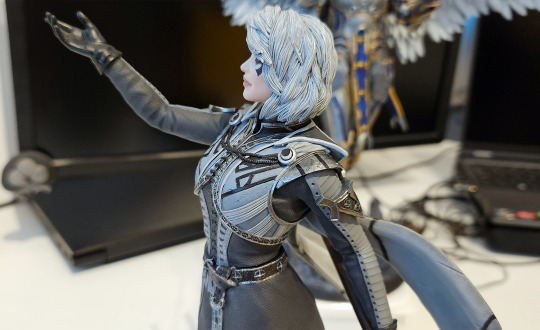
...and that's Isobel done! Quick turnaround on the messy table among all the paints and brushes and spare parts and whatnot.


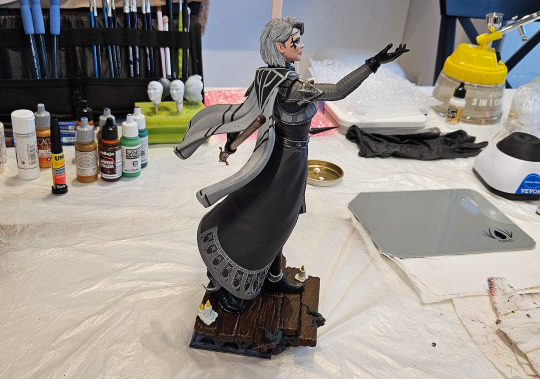

And then a couple more in the room she'll actually be hanging out in, just to check out different lighting. Hi there, very appropriately named moonshine snake plant.


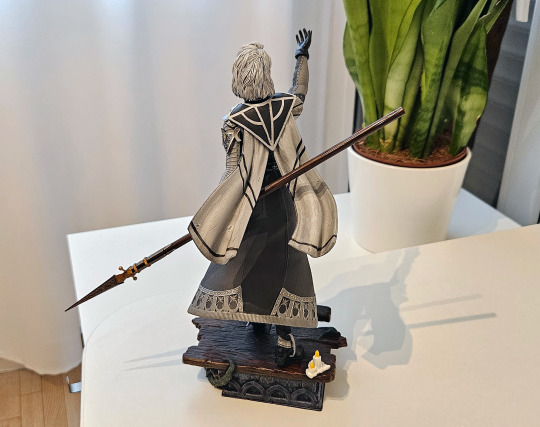


Some closeups - the detail level of the sculpt is just out of this world. Also, I don't want to paint a crescent moon or a star ever again.


So, the big question, can you pose her and Aylin together? It's a bit tough, honestly! They weren't really made to match, pose-wise, and the poses are supposed to represent their individual iconic moments (Aylin breaking out of her Shadowfell imprisonment and Isobel protecting Last Light). But you can make it work.
After messing around with them a bunch and trying things out, I decided perching Aylin on something gave the best results. Having her sort of loom threateningly in the background, just about to take flight, while Isobel casts one last pre-combat buff spell. Big battle couple vibes, which I'm always down for.

That's how I'll keep them for now, over in the corner of my work desk I've allocated for this purpose. So they can just judge me, eternally.


Of course, you can also do silly things, such as "let me get that loose feather for you real quick, babe":

And, finally, the funniest thing I realised is that when you take a photo of Isobel from a certain angle, the way her arm is posed makes it look like she's trying to take a selfie (sadly, the wife isn't cooperating).
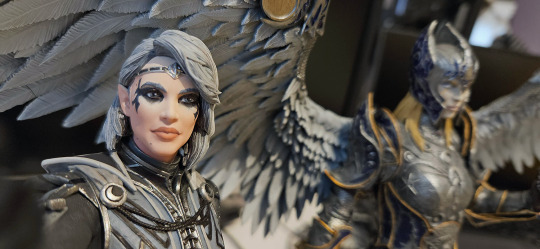


#isobel thorm#model painting#bg3#baldur's gate 3#dame aylin#anyway. yeah. i love them#also love finishing things. feeling accomplished.#long post#once again photographing any of this is actual hell
59 notes
·
View notes
Text
We’re back with another member of the Sternguard veterans.

I got a little more “in depth” with the plume than I thought I’d have to. It’s a Mk 4 helm from the Horus Heresy plastic kit, and it isn’t super detailed all things considered.

I’ve realized that the button above the barrel is a lense, a tie in to the helmet’s auto-senses. So ofc now I have to paint it.

Sigils on him are some kind of smaller Crux honor(left knee) first company squad number(right knee), soulblade crusade campaign badge(left greave), iron halo honor(right greave(for an act of heroics)), crux terminatus(right shoulder(proof of right to wear terminator armor into battle)), and lastly a brass bolt shell(for exceptional accuracy)

As with all my veterans, the brass of the chapter’s “honor color” has to play a bigger role, so it’s showing up everywhere.

Even the rivets.

#warhamer 40000#space marines#warhammer#adeptus astartes#skulls sanctus#warhammer 40k#primaris space marines#mini painting#model painting#sternguard
79 notes
·
View notes