#Mp3 Converter For Windows
Explore tagged Tumblr posts
Visit Tumblr Blog
Explore Tumblr blogs with no restrictions, modern design and the best experience.
Last Seen Tumblr Blogs


Fun Fact
In February 2021, Tumblr had 518.6 million blog accounts.
Note
Oh, dang, I've just discovered your art recently, but (as someone who's been around for a While) you give off the vibe that you've been in the fandom for a long time!!!
HFHFF ive been on tumblr a long time!! homestuck spores breezing by clinging to my socks for years as time passes until i finally decided to step into the forest fr.... (aka ive been listening to broadway karkat since i was 13? 14? despite not being able to read past A Young Man Stands In His Bedroom)
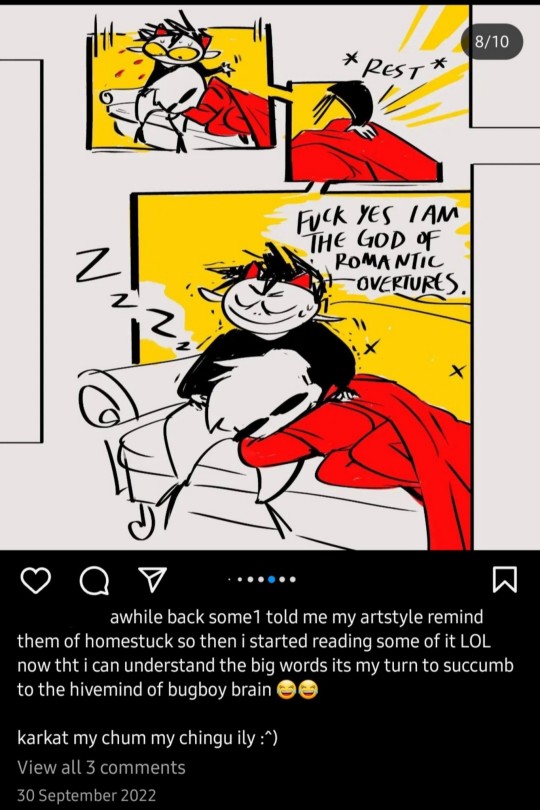
#t'was the yt -> mp3 converter days when i had like 10 bkk songs on loop ...#y'see. the thing abt windows media player is that it never sleeps. keeps ur laptop on#and little ol me didnt know abt “computer settings” so i'd just always have it running#my faves used to be hey there harley + wont say im flushed + cooler than me!!#but its only exception + knight of blood + phemiec's friendleader now heheh#i love bkk (vibe: peridot if she was chad)#case's voice from akv is also fire so i listen to their music too!#and ikimaru was VIRAL god. one of the ol og hand inspos for the growing young drawer's mind#ask#ozuzo#gif#2023#vioart#homestuck#karkat vantas#dave strider#davekat
185 notes
·
View notes
Text
2 Free Ways to Convert MP4 to MP3
In this article, we shall discuss “2 Free Ways to Convert MP4 to MP3”. Whether it’s audio, video, still images, or text, there are all kinds of file formats out there. Please see How to convert distribution group to security group, and how to Run MBR and GPT conversion with the best GPT converter. Formats like MP4 and MP3 have become mainstream in the media world. I bet that at some point, you…
#best free MP4 to MP3 converter#Convert MP4 to MP3#convert MP4 to MP3 free#convert MP4 to MP3 online free#convert video to audio free#easy MP4 to MP3 converter free#free MP4 to MP3 conversion tools#free video to audio converter#how to convert MP4 to MP3 free#MP4 to MP3 conversion methods#MP4 to MP3 converter#MP4 to MP3 converter without software#online MP4 to MP3 converter#top MP4 to MP3 converters#Windows
0 notes
Text
KIP'S BIG POST OF THINGS TO MAKE THE INTERNET & TECHNOLOGY SUCK A LITTLE LESS

Post last updated November 23, 2024. Will continue to update!
Here are my favorite things to use to navigate technology my own way:
A refurbished iPod loaded with Rockbox OS (Rockbox is free, iPods range in price. I linked the site I got mine from. Note that iPods get finicky about syncing and the kind of cord it has— it may still charge but might not recognize the device to sync. Getting an original Apple cord sometimes helps). Rockbox has ports for other MP3 players as well.
This Windows debloater program (there are viable alternatives out there, this one works for me). It has a powershell script that give you a little UI and buttons to press, which I appreciate, as I'm still a bit shy with tech.
Firefox with the following extensions: - Consent-O-Matic (set your responses to ALL privacy/cookie pop-ups in the extension, and it will answer all pop-ups for you. I can see reasons to not use it, but I appreciate it) - Facebook Container ("contains" Meta on Facebook and Instagram pages to keep it from tracking you or getting third party cookies, since Meta is fairly egregious about it) - Redirect Amp to HTML (AMP is designed for mobile phones, this forces pages to go to their HTML version) - A WebP/AVIF image converter - uBlock Origin and uBlacklist, with the AI blacklist loaded in to kill any generative AI results from appearing in search engines or anywhere.
Handbrake for ripping DVDs— I haven’t used this in awhile as I haven’t been making video edits. I used this back when I had a Mac OS
VLC Media Player (ol’ reliable)
Unsplash & Pexels for free-to-use images
A password manager (these often are paid. I use Dashlane. There are many options, feel free to search around and ask for recs!). There is a lot that goes into cybersecurity— find the option you feel is best for you.
Things I suggest:
Understanding Royalty Free and the Creative Commons licenses
Familiarity with boolean operators for searching
Investing in a backup drive and external drive
A few good USBs, including one that has a backup of your OS on it
Adapter cables
Avoiding Fandom “wikias” (as in the brand “Fandom”) and supporting other, fan-run or supported wikis. Consider contributing if its something you find yourself passionate or joyful about.
Finding Forums for the things you like, or creating your own*
Create an email specifically for ads/shopping— use it to receive all promotional emails to keep your inbox clean. Upkeep it.
Stop putting so much of your personal information online— be willing to separate your personal online identity from your “online identity”. You don’t owe people your name, location, pronouns, diagnoses, or any of that. It’s your choice, but be discerning in what you give and why. I recommend avoiding providing your phone number to sites as much as possible.
Be intentional
Ask questions
Talk to people
Remember that you can lurk all you want
Things that are fun to check out:
BBSes-- here's a portal to access them.
Neocities
*Forums-- find some to join, or maybe host your own? The system I was most familiar with was vbulletin.
MMM.page
Things that have worked well for me but might work for you, YMMV:
Limit your app usage time on your smartphone if you’re prone to going back to them— this is a tangible way to “practice mindfulness”, a term I find frustratingly vague ansjdbdj
Things I’m looking into:
The “Pi Hole”— a raspberry pi set up to block all ads on a specific internet connection
VPNs-- this is one that was recommended to me.
How to use computers (I mean it): Resources on how to understand your machine and what you’re doing, even if your skill and knowledge level is currently 0:
This section I'll come back an add to. I know that messing with computers can be intimidating, especially if you feel out of your depth. HTML and regedits and especially things like dualbooting or linux feel impossible. So I want to put things here that explain exactly how the internet and your computer functions, and how you can learn and work with that. Yippee!
851 notes
·
View notes
Text
How to Burn Your Own CDs - a guide for Windows users
Are you--yes, you!--tired of paying money to stupid shit like spotify for your music? Do you hate the way that the music industry takes almost all the profit that bands make through streaming and leaves them with pennies? Have you ever wanted to fire up that old CD-Radio in the corner of your bedroom, only to be stopped because all you have on CD is Weezer's blue album and a copy of Kidz Bop 16 that you don't remember buying? Well this guide just might be for you!
Materials you'll need:
A computer. Can't do it without this one.
A CD drive. It can be internal or external, but you'll need one either way. You can find them at Office Depot for fairly cheap and I've heard that some Walmarts carry them.
A pack of CD-Rs. CD-Rs, or CD Recordables, come in packs of 20, 50, or 100. A proper 100-pack should cost you no more than $30, so unless there's some special shortage in your area, don't buy from anywhere selling them at a markup. CD blanks are literally 50c a piece.
CD cases. Sold wherever CD-Rs are, but you can also find these at thrift stores pretty easily.
A sharpie or some kind of permanent marker
Software you'll need:
Jdownloader. You can acquire mp3s through Bandcamp if you're dedicated to righteousness, but for everyone else, install jdownloader or some other kind of open-source download program. I will be proceeding as if you have jdownloader available.
Windows media player. This should open automatically when you insert a CD-R into your CD drive.
Fre:ac audio converter. This is only for the occasion that you encounter OPUS or mp4a files that cannot be interpreted by your CD player.
Note: If you're very determined not to download software onto your computer, you can use free youtube downloaders and audio converters, but these are subject to viruses and other issues such as download speed. I will be proceeding as if you have the programs I listed.
The process:
Decide what you want to burn--anything goes, but keep in mind the time limit on your CD-Rs. Most will record 90 minutes or less.
Open jdownloader, switch to the linkgrabber tab, then paste youtube links in any order until you have all the music you want. I'd personally recommend doing it song-by-song instead of a full album stream, because a massive file will require a lot of work to separate back into searchable tracks.
De-select all files except audio on the right-hand side options menu.
Make a folder inside the music folder of your laptop and label it with the name of your mix CD.
In the properties tab of each song on jdownloader, change the destination folder to the folder you've just created.
Hit "start all downloads".
Once finished, open each folder. If everything is an .mp3 or a .wav, skip the next 2 steps.
Open Fre:ac audio converter to convert all audio files that aren't .mp3 or .wav into .mp3 or .wav.
Drop the converted files next to the unconverted files in your folder. If you wish, you can delete the originals to make the folder easier to browse.
Put your blank CD-R into the CD drive. If external, plug in your CD drive first or the tray will refuse to open.
Windows media player will open automatically. On the right-hand side, you will see the tracklist of your CD-R (which should be blank). On the left, you will see the audio that your computer is able to find in the music folder. Put your selected tracks IN ORDER onto the tracklist.
Listen to the beginning and ending of each track to make sure there isn't a significant time gap. This also prevents accidentally burning a youtuber's stupid outro if you missed it before.
When satisfied, hit "start burn".
On an external drive, the CD tray will open upon completion. You can reinsert it to ensure that the burning went smoothly.
Once satisfied, remove the CD from your drive. With your sharpie or permanent marker, write the name of the album on the front, then store safely inside a CD case.
you did it👍
Ask me if you run into any issues.
Legal disclaimer: this guide is purely for educational purposes and I do not admit to or take responsibility for any piracy committed using the instructions given.
Illegal disclaimer: cops suck my dick
495 notes
·
View notes
Text

how to turn your spotify playlists into cds! (tutorial under cut)
hey dolls! shout out to @lolita-cain for recommending i drop this tutorial! here's how to turn your spotify playlist into a cd!
what you'll need
a BLANK cd-r
an external cd drive that can burn cds (if your computer doesn't already come with one!)
windows media player (this tut's going to use windows media player legacy bc i find it more aesthetically pleasing)
Avery CD labels (optional, for decorating)
an inkjet printer (optional, for decorating)
a spotify playlist
let's start!
Part One: Making The Playlist
Find your spotify playlist for inspo. You're gonna need to do this the old fashioned way, and download songs as MP3s onto your computer. I recommend doing this by using a youtube to mp3 converter site! there's a bunch out there, find one that works for you!
When you have your mp3 files downloaded, open up windows media legacy player (as I call it, WMLP). Drag and drop your files (one at a time!) into WMLP! Each file will come up with a blank album cover + "unknown album", "unknown artist," "unknown genre," "unknown year." You can right click to edit all of that information! In order to replace the blank album cover, copy the desired image by right-clicking and hitting "copy image" (ctrl-c doesn't work for this). Right-click on the blank album cover, and hit "replace album art." You may get a notice saying something along the lines of "this art can't be replaced while the song's in use", despite the song not currently playing. You'll be fine, the album art will automatically change as soon as you click out of editing that track's information.
Create a playlist by hitting the "Create playlist" button at the top of the WMLP screen! Come up with a name for your playlist.
Add songs to the playlist by right-clicking their names, hovering over "Add to", and clicking the name of the playlist! If you can't find your playlist name, check the "Additional playlists" tab!
Part Two: Burning the Playlist
After your playlist is ready, hit the "Burn" tab in the upper-right corner of the WMLP screen. Click and drag your playlist into the space below the "Burn" tab, creating your burn list. This is what will play on your CD-R! Note: CD-Rs have limited space. Know how many minutes your CD-R can play before burning!
Plug your CD-R drive in, and load your blank CD-R in the drive. Click the button that says "Start burn" in the top-right corner.
Wait for your CD-R to finish burning! WMLP will tell you when it's finished. You can also set up WMLP so that after a CD-R is finished burning, it automatically ejects from the CD-R drive!
Part Three: Decorating!
You can decorate your CD-R however you want, just make sure to only decorate the top side, and use products meant for decorating CD-Rs! This tutorial is going to use Avery CD labels for decorating!
Avery CD label sheets will tell you to visit the Avery website's templates page, and what digital templates are compatible with the physical sheet.
Play around with the digital template! Get to know its features!
When you're done with your design, hit "preview & print" in the lower-right corner.
Click "get pdf to print."
Click "open pdf."
Before you hit the print button, load the label sheet into the printer face-down. When in doubt, print a test page on regular paper!
If done correctly, your CD design will print on the right side of the label sheet! Peel it off, and place it onto the top of your blank CD-R!
Part Four: You're done, happy listening!! Good luck, I'll do my best to answer any questions!
#spotify#physical media#girlblog#this is a girlblog#girlhood#girl interrupted syndrome#manic pixie dream girl#this is what makes us girls#coquette#lana del rey aesthetic#y2k#i'm just a girl#born to die#femcel#gaslight gatekeep girlboss#girl interrupted#girlblogger#girlblogging#this is what makes us boys#coquette dollette#dollette#angelic#it girl#that girl
32 notes
·
View notes
Note
hellooooo may i ask where you get the voice lines from deadfire?
pillars of eternity voice lines tutorial!
in steam version voice lines can be found here: C:\Program Files (x86)\Steam\steamapps\common\Pillars of Eternity II\PillarsOfEternityII_Data\StreamingAssets\Audio\Windows\Voices
all of them are in .wem format so they can’t be listened to normally. to listen to them you have to convert them into a different format. i learned how to do it by watching this video on youtube (i’m linking it in case i missed something in my tutorial or you want to see how it’s done)
the video starts with converting .bnk files to .wem, which isn’t applicable to poe
how to prepare tools for converting .wem to .ogg
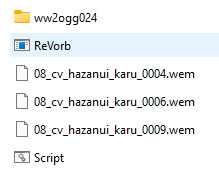
1. download ww2ogg024 (for conversion) and ReVorb (for cleanup).
2. create a folder wherever under whatever name you wish. put ww2ogg024 and ReVorb inside
2. create a Script.txt file in the same folder. this is what is supposed to be in it:

for %%f in (*.wem) do "./ww2ogg024/ww2ogg.exe" %%f --pcb "./ww2ogg024/packed_codebooks_aoTuV_603.bin"
pause
for %%f in (*.ogg) do revorb.exe %%f
pause
3. save Script.txt file as .bat. you’re free to delete the .txt if you want
now your folder should look like this:

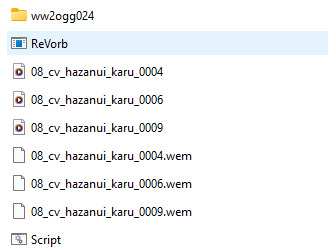
how to convert .wem to .wav
1. copy the voicelines you want to convert into the same folder as ww2ogg024 and ReVorb (remember to copy them, not move them)
2. run Script and do what it instructs you to
3. success!
.ogg files can be listened to but if you want to post them on Tumblr you have to convert them to .mp3. i do it in VLC media player. i did have a problem with some of karū’s lines where they couldn’t be played after being converted to .mp3. i have no idea what the problem was or why only some lines were affected, but i managed to circumvent this by saving them in a different program as .mp4 and converting that to .mp3
some files can’t be accessed for some reason, not in any way i know. i found and copied the watcher’s and hazanui karū’s lines without a problem, but i couldn’t get to ooze noises
happy file converting!
#i almost deleted a chunk of karū’s lines two separate times because i moved them instead of copying#i wanted ooze noises because they sound like i what imagine teddy bears could sound like#pillars of eternity#pillars of eternity references#converting wem to wav
25 notes
·
View notes
Note
is there any particular site/software you recommend for downloading videos from youtube?
Yes, I have 2 options that I've spoken about on here before! One is actual software and the other is a direct command-line program. Basically, that means that you're directly interfacing with your computer and telling it what to do through lines of text instead of through software. In macOS you use the Terminal app, whereas Windows has cmd.exe
Yt-dlp is the command line program. On top of letting you rip Youtube videos directly from the site, this program supports a huge array of other video/media websites. The program is highly customizable as well; I would highly recommend at least installing FFmpeg, which allows you to download videos in quality higher than the default 720p. Here’s a guide on how to do that for Windows and I wrote a guide here for Mac (I forgot to write in the guide that you should install FFmpeg via Homebrew).
If the Github page is overwhelming and too technical for you, don't worry, there are tons of guides you can look up online from tech websites/subreddits that use more approachable language. It took me a while to figure this out, lol. But I really do think this is an excellent tool.
However, if you are just looking for software, I can personally recommend the 4K Video Downloader. It's a fantastic application (compatible with Windows, macOS, and Linus) that allows you to save videos and mp3s from a huge variety of websites. You can download entire Youtube playlists, convert Youtube videos to mp3s, download videos with subtitles, etc. Most functions are free but a premium version can be bought for a one-time fee of $25.
128 notes
·
View notes
Text
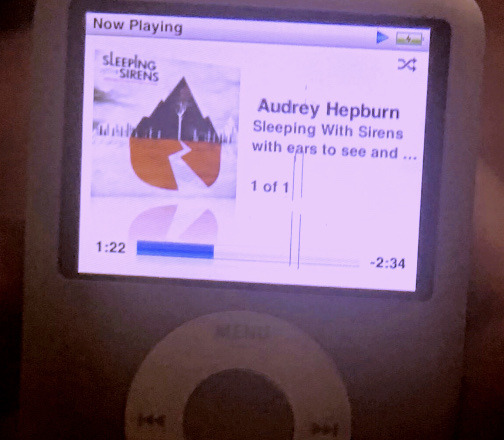
How to add music to an IPod

IMPORTANT NOTE!!: This is just a tutorial for Windows. I believe this is no longer able to be done on Mac since apple has gotten rid of itunes. I might be wrong though!
Adding music to an iPod might seem a bit confusing, if you found your old iPod or just bought a used one, it’s really a piece of cake!
Step 1: The first step is picking out the song you want to add to your ipod. I find my songs on youtube! Copy the link to whatever song you picked out. (Hit share and copy link in the video description)
Step 2: Now, you want to grab the link and place it into a link-> Mp3 converter. This is a crucial step because if you don’t do this you won’t be able to upload anything to itunes. Sites such as Okmusi and Cobalt work great.
Step 3: This step isn’t entirely necessary but I recommend creating a folder to store these mp3 files in your files app just to make later steps easier. I named my folder music so I know where to find the files.
Step 4: Now that you have this mp3 file for whatever song you have chosen. You need to download itunes. This is a easy step, just go on your browser and go to the itunes website and follow the steps to download. You will need to set up an account but this takes two seconds to do so don’t worry.
Step 5: Now that you have downloaded itunes, you need to add your ipod to the devices tab. This step is also quite easy. All you have to do is plug in your ipod to your computer or laptop. To do this you have to use the cable your ipod came with (the same one you use to charge it). Then if you go to the devices tab under “file” your ipod should show right up! This is because of the sync you have made with the cable. As long as you have the ipod plugged in and the itunes app opened, you will see a large section named “ipod” on the left side of your screen.
Step 6: Alrighty! Now you are ready to add your music, finally I know. So what you have to do now is go back to the file tab but this time hit “add to folder” and it will prompt you to choose out of your files, this is where you’re gonna pick the folder you made from the earlier steps. This will add these music files into your unties library.
* you may notice that these new songs in your library have no cover or artist name, this is completely normal. you will need to complete this yourself, though it’s not nescarry for the music to work, it does make it look better on the iPod. You can download the album art online and upload it on the song. you can also type in the artist, song name, and album name manually.
Step 7: Don’t worry we’re almost there! Now what you are going to do is take these new songs in your library and drag them into your iPod(the section on the left side of the screen I mentioned before).
Step 8: MUSIC! To check that you properly uploaded your music to the iPod is by ejecting (remember ejecting your iPod is very important, please don’t just rip the cable out when you’re done. that will cause major damage to your iPod.) You should have your new music on your iPod available.
HAPPY LISTENING.
Disclaimer: This is an overview of the steps to do this. I definitely reccomend reading other information and watching videos on how to do this task. I reccomend youtube videos and tiktoks to help you with this journey!
Dividers by Dollywons
7 notes
·
View notes
Text
tumblr please help
hiiii!
so I’m an actual dumbass when it comes to fixing technology and require some help
background: I have this really shitty Inspiron n7010 dell laptop that is currently running windows 10. it was my dad’s work laptop for a few years and I wanted to use it for burning cds. so I crack it open to use and works perfectly for a few hours! then it randomly shut down at one point so I went to turn it back on. and it got to that one screen that says “repairing drive or smth, this may take over an hour” and then shows a percentage. it got to 100% pretty quick, but nothing was happening. then it randomly shut down.
ever since then; the cycle goes
I turn on the laptop
it boots up
it loads for a bit
blue screen of death
boots up again
loads with “preparing automatic repair”
loads with “diagnosing your pc”
wait wait wait load load load
“Automatic repair couldn’t repair your pc” then buttons for either shutting down or advanced options.
Then it lets me either; turn it off, troubleshoot, or continue to windows ten.
(I can’t reset the pc, use the recovery tool, system restore, system image recovery, or uninstalling updates bc my account isn’t an admin account and my dad can’t remember the password to his)
I have tried using startup repair; it leads to a screen that says “startup repair couldn’t repair your pc”
I’ve tried booting in safe mode in every way possible it gives me, it still won’t work.
I’ve tried disabling driver signature enforcement, I’ve tried disabling automatic restart on system failure, but it still won’t boot up.
The recent downloads are just audio files from a yt to mp3 converter called “cobalt”
Is there anything I could possibly do?
Anyone with tech knowledge please look at this post
I’m sorry if this is a complete rambling and is unfixable, but if anyone has suggestions please drop them in the comments or reblogs.
#computer#computer repair#please help#technology#tech repair#tech#laptop#stupid shit#genuinely though can someone help I just wanna burn my fucking cds#calling all smart people
3 notes
·
View notes
Text
📁 Audio Formatting for UTAU

Before you record your UTAU, it is very important to understand the acceptable audio format that the program will be reading.
So, what kind of format does the program accept? Well let's talk about UTAU's origin!
UTAU was originally developed by Ameya for Windows back in 2008, 4 years after Vocaloid was established. So a lot of the formats we will be dealing with are Windows native. Later, in 2011, Ameya would release UTAU-Synth for MacOS 10.5 (Leopard).
What audio format does UTAU prefer?
All your samples should be in WAV format, mixed down to mono, a bit-rate of 16 bits, and a sample rate of 44100kHz.
Why so specific?
This is because UTAU cannot read any other audio format. As for the other criteria, files must be mixed down to mono rather than stereo, or else all of the samples will be reduced to white noise inside the program. Mixing a file down to mono, means you are reducing the sample to a singular channel. Stereo audio has two channels!

As for the kHz output, it is recommended to stay at 44100kHz.
Onto manual audio formatting. . .
Q. How do you convert Mp3 to WAV ?
A. Audacity does not accept m4a by default, it can be converted using an online converted such as Cloud Convert or an application such as VLC media player.
Q. How do you mix tracks down into mono ?
A. Before we get started with the track mix down, how do you know a track is Stereo or Mono?
This can easily be identified by locating the sample in the finder application. In this window, Finder will tell you the duration, audio channels, sample rate, and format.

After identifying your track, in Audacity, you are going to want to import your Stereo track into the program.
In the toolbar, you will want to head over to the, “Tracks,” tab.
To mix the Stereo track down to Mono, Tracks > Mix > “Mix Stereo Down to Mono.”
Success! You have reduced your sample to one singular channel.
Q. How to convert the sample rate of your tracks to 44100kHz ?
A. It is important to maintain the sample rate of 44100kHz for your UTAU’s samples, if your samples are recorded in another sample rate, fret not! This can be fixed very easily.
Multi-track conversion.
Import all of your samples into Audacity.
To check the sample rate, it can be located in a collapsible tab at the bottom of the UI.

3. Set the sample rate to 44100kHz.
4. To select all files, do Cmnd+A.
5. File > Export > Export Multiple . . .
6. Select file location, and choose WAV (Microsoft) format.
You set the sample rate for all your samples to 44100kHz.
With all these factors in mind, let's talk about recording lists!
7 notes
·
View notes
Text
Convert YouTube Music to MP3 – The Easy Way with Sidify

Tired of needing an internet connection just to enjoy your favorite YouTube Music tracks?
With Sidify YouTube Music Converter, you can easily download songs, albums, or playlists from YouTube Music and convert them to MP3, FLAC, WAV, or AAC – perfect for offline listening, personal backup, or transferring to any device.
✅ No YouTube Premium required ✅ Keep original sound quality ✅ Retain ID3 tags (title, artist, album) ✅ Fast & easy to use on both Windows & Mac
Whether you’re creating a workout playlist or saving songs for a long trip, Sidify has you covered.
#YouTubeMusic#MP3Converter#Sidify#MusicDownloader#OfflineMusic#AudioConverter#MusicTools#DownloadMusic#ListenOffline#YouTubeToMP3#MusicLovers
2 notes
·
View notes
Text
ImTOO YouTube Video Converter 5.7.9 Free Full Activated
ImTOO YouTube Video Converter is a Windows-based program that lets you download YouTube videos and convert them into various file formats like MP4, AVI, MP3, MOV, and more. It’s designed for users who want to enjoy videos offline on any device—without losing video quality.
Make YouTube videos playable on various devices (incl. iPod, iPhone, ipad, Samsung Galaxy, Kindle Fire, Nexus, Surface Pro, HTC One, Nokia Lumia, and other popular media devices).
2 notes
·
View notes
Text
Okay learned a thing. The issue I'm having with uploading seems to be specifically with my ripped CDs. Because now Reiji's is having the same problem ASSMU does.
But Live Emotion, because I don't have the CD yet, is iTunes files converted to MP3. And THAT works.
Currently unsure as to WHY this is a problem. It doesn't matter if I rip it via iTunes or Windows Media Player. It won't take the files and won't tell me why. The files aren't too large (well ASSMU was once) but it tells me when that's the problem. And this hasn't been an issue until recently, because ALL of my files except the birthday songs and now LE have been from my CDs. So like??? I dunno.
Some new protections maybe??? I even tried to test older CDs and those files can't be uploaded either.
10 notes
·
View notes
Note
how does burning cds work
im not sure how it would work on a newer computer, since i was literally doing this on my moms 10yr old work computer, but basically:
i downloaded all my music files as mp3s onto the computer (since thats how i listen to music anyway i just copied the folder over from my phone via google drive, but theres plenty of fairly trustworthy youtube to mp3 converters out there. this is my current fav),
then dragged and dropped the folder with all my songs into windows media maker, into the lil tab that says burn (in the version i have theres literally three big tabs on the right and one of em says burn, im not sure where it would be for anyone else 😭)
then you can drag to reorder them fairly easy.
after that you just insert your blank cd into the cd drive and hit burn! and whatever you do do not accidentally hit the eject button before its finished uploading, you will have a cd with only half the songs lmao
aaaaand if all of this is defunct and ancient (it shouldnt be really, the mp3 stuff is probably the same) then herees the link to a post that came on my dash the other day, its mostly about cds getting old but theres a few good links at the bottom i think
#saymbles#ask#sorry its formatted weird#i wrote it in a big paragraph then added line breaks later#cd burning#sayms mp3s
4 notes
·
View notes
Note
ok im preparing another hc trust . but im gonna be in a car for three hours soon so im downloading pvp civ as an mp3 and its a STRUGGLE trying to find a youtube link to mp3 converter holy shiiiiit. but anyways ill probably stare out the window and hallucinate pvp civ instead of listening to music lol (please help)
-pvp civ lunch person
Here u go pvpciv lunch person heart emoji
i use it a lot!! It does mp3 and mp4. it isnt sketchy as far as i know. It does open up a new tab when you download but it’s never lead anywhere? I just close out of it immediately in case it does do something. But yeah heres my trusty sidekick in downloading yt videos!
2 notes
·
View notes
Text
thee simplest way to download video and audio from youtube (and more): yt-dlp
after seeing the "download yt videos with vlc" post i wanted to make a short guide to yt-dlp — which can download from a ton of sources (i've downloaded from tubi, took two minutes) and convert to mp3, and more, in the simplest least obtrusive way possible: the command line [1]. will you humor me if i call it the wizard method and commands are invocations?
here's the installation guide; i recommend just using the release binaries (see here for where to put the file on windows). that's it, now you can download stuff. this is the basic usage:
open your terminal / shell / cmd / whatever
optional: if you're not in the right folder, use cd [path] to go there
to download something and keep it in the same format, type yt-dlp [link] and press enter. that's it
to convert youtube to mp3 (for example), the command is yt-dlp -x --audio-format mp3 [link] (-x converts video to audio and --audio-format selects the output format). you'll need ffmpeg installed (which is also super useful for converting video)
if something doesn't work, try using yt-dlp -U to update and that usually fixes it :)
[1] there are gui options but i've never used them, and i advise you to become comfortable with basics of the line anyway. the big advantage of the cli is that the interface never changes and there's no digging through menus
#its weird that it doesnt seem to be well known; i only found out about it bc my distro came with a video downloader based off youtube-dl#uh not gonna tag it bc it wont show and i wouldnt know what to tag it as anyway#so enjoy. embrace the command line its super useful and reliable#yt-dlp#tutorial
18 notes
·
View notes