#PLANTS_AND_SEEDS
Explore tagged Tumblr posts
Visit Tumblr Blog
Explore Tumblr blogs with no restrictions, modern design and the best experience.
Last Seen Tumblr Blogs


Fun Fact
Total funding amounts to $125.3M.
Photo

While biochar is by no means new, it is relatively new to the world of horticulture as a mainstream soil amendment. But what is it exactly? Biochar is a substance that is created by burning organic material in an oxygen-deprived environment. This results in a highly stable form of carbon. Scientists call it “recalcitrant carbon” because it can remain in soil for decades, perhaps even millennia. The long history of biochar as a soil amendment Biochar has been used by indigenous peoples in the Amazon basin for at least 2,000 years. Sites that have historically been treated this way contain highly fertile soils called terra preta that have elevated levels of carbon, thanks to the stable biochar in the soils. Amazonian farmers developed these terra preta soils by incorporating charcoal with pottery shards and organic matter, and these soils remain fertile to this day. The value of biochar for modern agriculture was first recognized by the Dutch soil scientist Wim Sombroek in the 1950s. He observed highly fertile soils in the Amazon near less productive acidic soils and began a lifetime of studies dedicated to understanding the cause of increased fertility in terra preta soils. This technician is adding poultry waste to a pyrolysis reactor to make biochar. Photo: Stephen Ausmus, USDA How biochar is made and where to buy it Modern biochar is created by burning organic materials at 350°C (662°F) to 700°C (1292°F) in a low-oxygen environment. This can be done in a highly technical way using a pyrolysis reactor, or by a home gardener who has constructed a biochar kiln. Another method is to stack organic materials ranging in size from 1 to 10 inches thick and then set them on fire starting from the top. This creates a low-oxygen environment, which slowly transforms the organic materials into biochar over the course of hours depending on the size of the piles. It is critical to quench the coals with water or rake them out before they turn to ash. One example of this method can be found in forest management. Forest undergrowth cleared to reduce forest fire risk is a promising organic material source for biochar, which can then be reapplied to marginal forest soils. While this is how biochar is made, it is readily available at many garden centers, nurseries, and agricultural supply stores for purchase in different quantities. What does biochar actually do to soil? When applied to soils, biochar can provide many soil health benefits. These include: improving water availability and drainage providing habitat for soil microbes increasing nutrient availability in the soil increasing the soil’s ability to retain certain nutrients, otherwise known as its cation exchange capacity, or CEC sequestering carbon It also has potential for remediating polluted soils because it can bind heavy metals from interacting with plants and soil organisms. Materials that can be used to make biochar Organic source materials for biochar production range from vineyard cuttings (i.e., vines removed during the pruning process), manure, food waste, and crop residues. The material used to create biochar greatly influences its properties, most notably the nutrient content of the source material. Manure, for example, produces biochar with higher phosphorus than that created using wood chips. If you are planning to try biochar in your garden, it is important to “charge” or “activate” the biochar prior to use. Uncharged or inactivated biochar absorbs nutrients, potentially binding them up and making them unavailable to your plants. How to activate biochar Fortunately, it is relatively easy to activate biochar. One of the most effective ways is to mix it with compost, add enough water for it to be moist, and let it stand for 7 to 21 days prior to applying it to your soil. You can then incorporate the mix directly into your garden. Other methods of activating biochar include mixing it with manure, compost tea, or even liquid fertilizer. Most commercially available sources of biochar are already activated. It is worth confirming this with the manufacturer prior to purchase. Biochar has been tilled into this soil to increase crop yields. Photo: GIZ Bush Control and Biomass Utilisation Project, CC BY-SA 4.0, via Wikimedia Commons How to add biochar to your soil There are multiple recommended methods for incorporating biochar into soil or potting mixes, including topdressing, adding it to the planting hole, and adding it to the soil before tillage. Spring applications are usually recommended, but fall is fine, assuming you plant a cover crop or take other precautions to reduce erosion or nutrient runoff. How much biochar you should add to your soil The recommended volume of biochar to add as an amendment is significant, with recommended rates ranging from 5% to 20% by volume. So it is most feasible to use biochar in container plantings, to get trees off to a good start, in small-scale gardens, and in landscaping. It is an amendment that generally is not applied repeatedly but valued more for its long-term effects, making it a great option for perennial systems including vineyards and orchards. Which soils benefit the most from biochar, and which do not? Biochar is not equally beneficial for all soils or all cropping systems. It is best used on lower quality soils, soils with compaction and drainage issues, sandy soils, and those with a low pH (acidic). It has been used in place of lime to correct soil acidity. In contrast, soils naturally high in organic matter, those with a high pH or CEC, and clay soils will likely show far less improvement from biochar. Due to the cost of biochar as an amendment, it is not feasible for most large-scale farming operations, but it is worth trying for home gardens and container plantings, and for getting perennials off to a good start. Biochar is not a replacement for other sources of carbon, but when used alongside more traditional soil amendments like regular applications of compost, it can be a useful and sustainable addition to a garden soil management plan. To discuss this article or ask other gardening questions, head over to the Gardening Answers forum. For more Southeast regional reports, click here. Kirsten Kurtz received her master of science degree from Cornell University and is now the assistant director of the Cornell Soil Health Laboratory. Fine Gardening Recommended Products Corona E-Grip Trowel Fine Gardening receives a commission for items purchased through links on this site, including Amazon Associates and other affiliate advertising programs. Handle Material: Aluminum. Handle Length: 14-1/2 in. Overall Length: 14.5 in. Head Material: Aluminum. Handle Color: Red. A.M. Leonard Deluxe Soil Knife & Leather Sheath Combo Fine Gardening receives a commission for items purchased through links on this site, including Amazon Associates and other affiliate advertising programs. MULTITASKING DUAL EDGES: a deep serrated edge and a tapered slicing edge ideal for tough or delicate cuts. DURABLE 6-inch stainless steel blade withstands 300 lbs of pressure. TWINE CUTTING NOTCH, DEPTH GAUGE MARKINGS & spear point - no need to switch tools when using this garden knife. LEATHER SHEATH: heavy duty, protective, clip on sheath to keep your knife convenient and secure. LIFETIME WARRANTY. Gardena 3103 Combisystem 12-Inch To 20-Inch Adjustable Metal Fan Rake Head Fine Gardening receives a commission for items purchased through links on this site, including Amazon Associates and other affiliate advertising programs. With adjustable tine spacing: suitable for raking coarse and fine material. Flexible, zinc-plated spring-steel prongs. Working width adjustable from 12-20 inches. Sold as head only, handle sold separately. Source link
5 notes
·
View notes
Photo
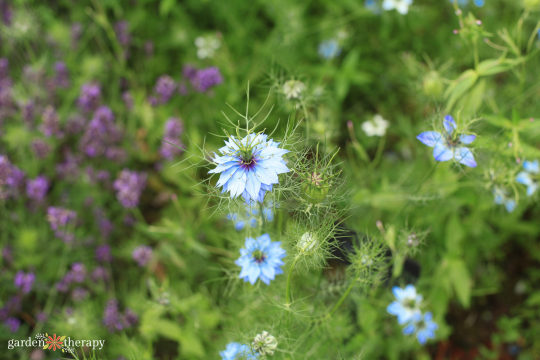
Nigella is a classic beauty, bringing beautiful colour and whimsy to gardens and bouquets. Ready to fall head over heels for love-in-a-mist? Here are some top tips for growing the nigella plant as a cut flower or dried seed pod. While flowers never truly go out of style, certain blooms can become trendy. I’ve noticed many ‘old-fashioned’ flowers become new favourites for florists and flower gardeners alike, including sweet peas, hydrangeas, and my personal favourite, lilacs. I predict that love-in-a-mist (nigella) will have a similar rise! This old-fashioned cottage flower has looks airy, is super easy to grow, and is versatile both in the garden and in the vase. I first became familiar with the nigella plant a few years ago, as I was looking for interesting seed heads to collect. What I didn’t expect was how much I would also love the flower. I was soon torn between cutting the flowers for bouquets or waiting for the nigella pods to use instead. Let me get you hooked on growing your own nigella flowers. Here are my top tips! Nigella pods dry beautifully, retaining their unique shape and foliage. Meet the Nigella Plant Known commonly as love-in-a-mist, Nigella damascena is native to southern Europe, North Africa, and Southwest Asia. It’s recognized for its ferny foliage and lacy bracts that surround the flower, giving it a very whimsical appearance. It belongs perfectly in a fairy garden. Nigella flowers are star-shaped and can come in single or double blooms. They’re most known for being blue, but also come in shades of purple, pink, and white. Bees love the flower, but they’re considered deer-resistant. The flowers bloom in spring and early summer for a few weeks before they turn into seed pods, which can also be harvested and dried to use as a textural ingredient in fresh or dried bouquets. A happy nigella plant naturally branches and produces plenty of blooms. When to Start Nigella Damascena Seeds Nigella plants are hardy in zones 2-11 and are considered a cool-season annual. This means they like a cold start to life and are best grown in the spring. For those with mild winters, you can sow directly in the fall. This will give you the tallest stems and earliest growth, though you may need row cover as cold protection. If starting in the fall, plant seeds 6-8 weeks before the first fall frost. Personally, I haven’t had much luck sowing in the fall and prefer to start seeds in the spring. Direct sowing is easiest, as nigella plants are known to dislike transplanting. You can sow seeds directly outside 1-2 weeks before the last frost (they are frost-tolerant). I’ve started my seeds indoors without any trouble. If starting indoors, you can put the seeds in the freezer for ten days to speed up germination. Start the seeds inside 6-8 weeks before the last frost, and move them outside after the last frost. Succession plant the nigella seeds every few weeks until June to get the longest growing season. Planting Nigella Nigella seeds require darkness to sprout, so you’ll want to cover the seeds lightly with soil. It takes 10-14 days for the sprouts to germinate. Space or thin your nigella to be six inches apart. They grow best in full sun, but will also grow in partial sun. AKA, the more sun, the more blooms. Nigella plants grow to be 18-24 inches tall. It takes 65-70 days for it to flower, and 80-85 days for it to produce seed pods. Nigella flowers can also grow in containers. If growing in a container, ensure it has room to accommodate the mature plant and drainage holes. A one-gallon container for one nigella plant is a good rule of thumb. A nigella seedling before it grows its first set of “true leaves.” Caring for Nigella Flowers Nigella flowers will naturally branch out, so there’s no need to pinch young plants. As a spring flower, it will bloom well in conditions under 24°C (75°F). Once temperatures get hot and regularly above 27°C (80°F), the plant will begin to die back. Nigella plants have average moisture needs. They prefer consistent moisture, but can tolerate some drought. They do best in well-draining soil. To encourage more blooming, you can fertilize once a month. The plant may self-sow depending on the conditions, and if you leave some seed heads on the plant. You can deadhead flowers to promote more blooms, but this also prevents seed pods from developing. Harvesting Nigella Flowers Nigella flowers work wonderfully in arrangements as a filler, thanks to their lacy foliage. They give a very airy feel to an arrangement, as well as texture. If you’re harvesting flowers, cut the flower when it is three-quarters of the way open. The flowers will continue to open after cutting. Harvest the central stem first, almost to ground level, leaving the side shoots to continue growing. Flowers should last 7-10 days in a vase. Leave the flowers on the plant if you want to harvest the seed pods. The dried nigella pods are so pretty and unique, and dry beautifully. Harvest the seed pods early to prevent blemishes and so they don’t dump seeds. Ideally, the stripe should still be visible. Hang the nigella pods upside down for 2-3 weeks in a cool, dry place. Then they should last you for years to come. Ideally, harvest when the pods are still green and the stripes are showing. Notable Nigella Plant Varieties Some varieties sold in nurseries are used as bedding plants, while others are better suited for cut flowers thanks to their height. Here are a few to use for cut flower arrangements. ‘Miss Jekyll’ is one of the most popular varieties to grow, with beautiful double blooms. ‘Miss Jekyll Dark Blue’ gives a beautiful royal blue hue while ‘Miss Jekyll Rose’ has rose-white flowers that turn a beautiful plum as they age. ‘Albion’ has pure white flowers, which make them great for just about any flower arrangement. They produce a unique, deep mahogany seed pod when dried. ‘Delft Blue’ is one of the most popular cut flower varieties right now. It has white flowers with dark blue and purple streaks. ‘Persian Jewels’ starts off a pale baby blue before transforming into hues of purple, blue, white, and in between. Dried bouquet featuring pods from Nigella Plum Loco Mix FAQ About Nigella Damascena Is love-in-a-mist poisonous? The plant itself is not really considered edible and is only considered slightly poisonous. It is more often used as an ornamental.The seeds can be used for cooking, with a somewhat nutmeg-like and slightly spicy flavour. However, Nigella sativa (also known as black cumin or fennel flower) is more commonly used in its place, since it has a better flavour. What is the love-in-a-mist flower’s meaning? The name love-in-a-mist comes from the flower being nestled in lacy foliage, giving an airy-mist-like appearance. The Latin name, Nigella Damascena, comes from the Latin word for black “niger” due to the colour of the seeds, and Damascus, Syria where the plant can be found.In a bouquet, it can symbolize the openness to love, heart strength, or unrequited love. Is nigella a perennial or annual? Nigellas are considered annuals. They often won’t make it through a whole gardening season, no matter your zone, as they prefer cool conditions and will die back in heat. However, they can be re-seeders, meaning that they may sow seeds that will bloom the following year. More Cut Flowers to Grow From Vancouver, BC, Holly is Garden Therapy’s Content Manager. She has a BFA in Writing from the University of Victoria as well as a diploma in Floristry Design from Burnaby CCE. At home, she loves to grow cut flowers and dried flowers for her business, Dirty Daisy Florals, and is an avid houseplant collector and lover of bees. You can find her at @dirtydaisyflorals and @hollyheuversocial. Source link
#PLANTS_AND_SEEDS#BOUQUETS#CUT_FLOWERS#DECOR#DRIED#DRIED_FLOWERS#FLOWERS#GARDEN#GORGEOUS#GROWING#GROWING_GUIDE#MONTH_SEPTEMBER_WEEK_3#NIGELLA#PLANTS#THERAPY
3 notes
·
View notes
Photo

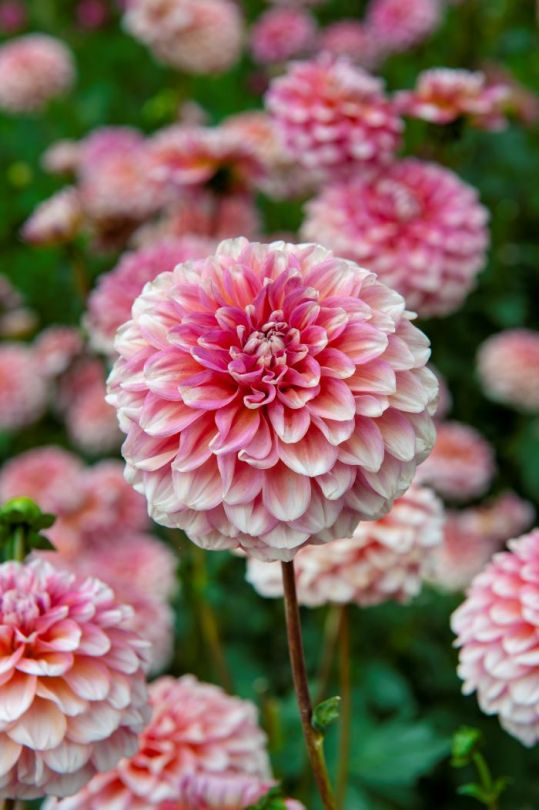
Showy and stunning, dahlias are a summer flower that deserves to be in every garden! Luckily, it is quite easy to grow dahlias from a tuber. Learn how to grow and care for dahlias so you can have a showstopping garden this summer. With tens of thousands of varieties throughout the world, there is a dahlia flower in practically every size. I’m talking about tiny, bushy dahlias the size of a ping-pong ball to full-sized flowers as big as soccer balls. They also come in every colour under the rainbow—there’s even a striking black variety floating around. No matter which dahlia you choose, it’s sure to make an impact in the garden. Originally from Mexico, dahlias are tropical flowers that grow in the summer from August to fall. Butterflies adore them, I adore them, and you likely adore them too. Let’s all grow dahlias so we can have the brightest coloured gardens on the block! This post will cover… Pompon dahlia. Photo courtesy of Flowerbulbs.com Photo credit: Thank you to Flowerbulbs.com for providing me with the gorgeous photos in this post and the descriptions of each type of dahlia. The 12 Types of Dahlias With so many shapes, sizes, and colours to choose from, there are a ton of dahlia flowers out there. Here are some of the main dahlia plants you can expect to find. This is a small selection of dahlias, showing the diversity of the species. Photo courtesy of Flowerbulbs.com Single-flowered: a single row of flat or cupped florets with a central disc. 12-24 inches tall. Anemone-flowered: a large outer ring of flat petals with a mass of tubular florets in the center. 24-36 inches tall. Collarette: a large outer layer of flat petals with an inner wreath of collar-like florets. 30-48 inches tall. Waterlily: full double blooms in a flattened shape. Up to 48 inches tall. Decorative: known for having large and bushy blooms. Popular for cut flowers. Ball: small globe-like variety with double blooms. Flat florets that are blunt or round-tipped. 48 inches tall. Pompon: another small, globe-like variety with double blooms. Florets are curled and blunt or round-tipped. 32-48 inches tall. Cactus: double flowers with long, pointed petals. 60 inches tall. Semi-Cactus: another double flower with long pointed petals, but the petals curl for half or less of their length. 60 inches tall. Peony-flowered: open-centered flower with two or more rows or rounded petals. 40 inches tall. Mignon: small variety with a single layer of rounded florets 1-3 inches long. Well suited for containers. 20 inches tall. Topmix: another small variety of single-flowers. Quite bushy and well suited for containers. 14 inches tall. Consider the maturity size of a dahlia before you buy it, depending on where you want to plant it. Photo courtesy of Flowerbulbs.com When to Plant Dahlias Dahlias are a summer blooming flower that should be planted in the spring after the risk of frost has passed. They like warm soil, so I usually like to wait another month and a bit after our last frost to put them in the ground. If you want a head start, you start them indoors before placing them outside. I shared this video as part of the Random Gifts of Flowers project I worked on with Flowerbulbs.com. The project and video were made in partnership with Flowerbulbs.com, but this post is not sponsored. How to Plant Dahlia Tubers While dahlia seeds do exist, they are quite tedious and difficult to grow. Instead, most folks grow dahlias from tubers. Dahlias are not hard to grow, but they can’t handle freezing temperatures in the winter. In colder climates, they are either treated as annuals or dug up and stored for the winter. Only plant dahlias when you’re 100% sure the risk of frost has passed. In most areas, you can plant dahlias around mid-May. Get a head start by planting them in pots in a greenhouse or indoors. Plant the tuber so that the tip of the old stem is pointed upward. If you have a single tuber, as opposed to a cluster, lay the tuber down so that the tuber “eye” is pointed up. This looks like a small bump on the neck of the tuber (see the photo below to help identify the tuber eye). This is where the stem will grow from. Place tubers no deeper than two inches underground. Cover the dahlia tuber with soil and press down lightly. After planting, thoroughly water the area. Avoid watering again until after the dahlia seedling has emerged so the tuber doesn’t rot, unless the ground become bone dry again. Dahlias need full sun, including at least a couple of hours of the morning sun. The tubers are planted just below the surface so that they’re warmed by the sun’s heat and begin growing ASAP. Dahlia flowers work well as border plants due to their long flowering period. In full sun, they have strong stalks and act as a garden feature. The taller varieties can line the back border, while shorter varieties can be planted in the beds or in the front border. Be sure to pay attention to the variety and height on the packets when planting because moving when they are blooming can cause them too much stress, making them flop and reducing blooms. Dahlia eyes look like little bumps on the neck of the tuber, like this small one that almost looks like a whitehead. Dahlia Plant Care Once you’ve planted your dahlia tubers, you can expect shoots to emerge 1-2 weeks later. Give your shoots 4-6 more weeks (depending on the type of dahlia), and you will get your first flowers. Typically, this is the beginning of August. If you pinch out the main stem approximately 3 weeks after planting, you will be rewarded with a bushier plant. Water your dahlias if the weather has been fairly dry. In the event of heavy rain and wind, you may need a stake to support tall dahlia varieties. Deadheading will be your key to more blooms. Dahlias will continuously bloom as long as you make an effort to remove any spent flowers. Deadhead spent blooms to encourage the plant to flower more. Photo courtesy of Flowerbulbs.com Can You Leave Dahlias in the Ground in the Winter? For many of us, unfortunately, the answer is no. Since they are tropical plants, dahlias are only considered perennial and winter hardy in US zones 8 or above. For the rest of us, we can dig up our dahlia tubers before the first frost. Store tubers in a cool yet frost-free place for the winter. Come spring, you plant them again once the fear of frost has passed. For more on how to save your dahlia tubers, check out this post. Dahlia tubers that have been saved over the winter. While slightly dehydrated, they’ll plump back up as soon as they’re planted. Force Start Dahlia Flowers Indoors A well-known tip is to force start summer bulbs indoors in order to get blooms earlier. Just like seed-starting, you can plant tubers indoors at the end of March to mid-April. Plant them in a pot the same way you would outside. Be sure not to overwater dahlia tubers in pots, as they can be prone to rotting. I like to pre-moisten my soil, and that’s all the moisture my dahlias need to start growing. If after a week I don’t see sprouts, I’ll water the soil again and repeat when the soil becomes dry. Once the risk of frost has passed and the soil has warmed up a bit (mid-May here in Vancouver) place your pot outdoors to get your dahlia plant used to the conditions. After a week, plant your dahlia in the ground. This means you will have flowers a month earlier than if you planted the tubers directly in the ground. You can expect blooms at the beginning of July. Plus, you won’t have any snails who like to munch on the young, crunchy dahlia leaves. My gardening pal, Erin over at The Impatient Gardener, has a great video on how to pull dahlias out of winter storage and pot them for an early start. She is a bit of a dahlia addict (Sorry, Erin, it had to be said), so if you love dahlias, be sure to follow her on YouTube and Instagram. Growing Dahlias in Pots Dahlias make for a gorgeous container flower. If you don’t have a garden but instead have a balcony or patio, you can still grow these gorgeous flowers. The key to growing dahlias in pots is choosing the right variety. Dwarf varieties work well in pots, including Mignon, Topmix, Dahlietta, Dahlstar, Dahlinova, and Gallery dahlias. Alternatively, you can include tall dahlias as a centerpiece for larger containers. If you plant dahlias in a container, choose a pot with drainage holes in the bottom and lower sides. Adding a layer of clay granules to the bottom of the pot also helps to increase aeration for the roots. Plant with good potting soil, and then you’re good to go. Plant dwarf varieties in pots. Photo courtesy of Flowerbulbs.com FAQ About Growing Dahlias Where to buy dahlias? Due to their popularity, dahlia tubers are very easy to find. You can find them with most flowering bulbs for sale in the spring at your local garden centre or hardware store. Online, Breck’s Bulbs is a great supplier, as is West Coast Seeds.For specialty tubers, look up your local dahlia or horticultural society. They may be hosting a plant sale where dahlia tubers will be sold. Many flower farmers will also sell dahlia tubers in the spring, so feel free to message those in your local area. How do I separate dahlia tubers? One dahlia tuber planted in the spring can become a cluster by the end of the growing season. When done right, you can carefully separate the tubers and successfully double the number of dahlias you’ll have next year.In order for a tuber to be successful and produce a plant, it needs to have three things: a body, an eye, and a neck. The body is the main rounded part of the tuber, and it should be in good health. A neck is the skinny part at the top that connects to the main stem. And finally, an eye is a small bump located on the neck of the tuber—it looks like a freckle or even a pimple (see picture under “how to plant dahlia tubers”). How do I harvest dahlia flowers? Cut your dahlia flowers in the morning after the dew has dried—this is when the plant is hydrated and not stressed. Dahlias won’t open much after they are cut, so you want to cut them when they’re almost fully open yet not overly ripe. Any papery leaves are a sign of age. They should last 5-7 days once cut. If you can’t get enough of dahlia flowers, I highly recommend Floret Farm’s Discovering Dahlias by Erin Benzakein. It is a full guide all about growing and arranging dahlias and is a must-have book for any serious dahlia growers. What type of dahlia is your favourite to grow? Let me know in the comments down below which dahlia you plan to plant using this guide. More Tips for Growing Flowers A city girl who learned to garden and it changed everything. Author, artist, Master Gardener. Better living through plants. Source link
#PLANTS_AND_SEEDS#ARTFUL#BULBS#CUT_FLOWERS#DAHLIA#DAHLIAS#FLOWER#GARDEN#GROWING#MONTH_APRIL_WEEK_3#RANDOM_GIFTS_OF_FLOWERS#SUMMERS#THERAPY
5 notes
·
View notes
Photo
A wildlife border is a safe space for local critters and animals to feed, rest, hibernate, and reproduce. By dedicating a small strip of our garden just for the wildlife, we can turn our space into a place that works alongside our local ecosystem rather than fight against it. Those weeds in my front yard? Those are for the pollinators. Those seed heads? I’m leaving them for the birds. That mess of brambles? Those are for the little mammals. That pile of empty plant pots I’ve been meaning to recycle? Well, I wish I could blame those on the wildlife too. As you can probably tell, I treat my garden as a shared space. I’m highly aware that I’m just one facet of a larger ecosystem. Being in an urban space means there’s less refuge for the local fauna, so I try to make sure that my garden is a little haven for them. Wildlife borders are just one way you make your garden more friendly for pollinators, birds, small mammals, and beneficial insects. I know you’re probably picturing a big thicket of leaves and overgrown plants, but I promise you it can still be a beautiful space that fits right into the rest of your garden. Let me show you how. Long-blooming flowers like lavender and feverfew are perfect additions to wildlife borders. What is a Wildlife Border? Traditionally, borders were skinny, long gardening beds that grew alongside pathways, fences, buildings, and other areas in the landscape. Common with English estates, they were very manicured and complete with small hedges and trimmings. In recent years, borders have become popular spots to turn into a refuge for local wildlife. These borders can not only look good, but also become a way to support the local ecosystem. Borders on the edge of properties are often left to naturalize. These borders contain plants that produce berries to feed birds and mammals, flowers to feed and host pollinators, trees and shrubs to create nesting and hiding spaces, and create a safe playground for beneficial insects. A perennial wildlife border alongside a pathway. Designing a Wildlife Border Placement is the first consideration when designing a wildlife border. One that sits untouched at the back of the garden will look very different from one that might line the pathway leading up to your front door. Most borders range from 2 to 3 m long, but it really depends on your space. Think about the size in proportion to the rest of the yard. I like reminding people that it can be as grand as anywhere else in the garden. You can make it a focal piece of the garden if you desire! Tailoring the size of a border to your space will also work with the local wildlife, as smaller spaces will have less wildlife, while larger spaces will have lots of visitors. A wildlife border doesn’t have to look like this wild, unmanaged space. It can look consistent with the rest of your garden. You can easily make your wildlife border fit in through plant choices, colour themes, hardscaping, artwork, size and shape, and more. This border works as a great replacement for turf grass on a sidewalk strip. Plants to Choose Perennials vs Annuals A wildlife border should mostly consist of perennials. The key is to set it and forget it, letting it naturalize the space. We’re leaving it to become part of the landscape, and annuals just require too much care and maintenance. Once you have filled your space with taller perennials, shrubs, and vines, you can add in some annuals to fill in the gaps. Put them close to the front so you can easily access them. I like to plant thick, leaving no bare earth. Groundcovers can work wonderfully to suppress weeds and provide a shady base. Plants with interesting foliage can also help to fill the gaps and provide some pretty, like hostas or coral bells. You can also sprinkle in some spring and summer bulbs. Spring bulbs are great for providing a food source at the beginning of the season, while summer bulbs often have bright colour and flowers that pollinators love. This small border of dahlias within a raised vegetable garden proves you can do this with nearly any space. Native and Low-Maintenance Plants You can plant both native and non-native plants—remember that the garden is still yours and you can plant whatever makes you happy! That being said, native plants are a great choice for wildlife borders since they’re already a sure bet to fit right in with pollinators, birds, insects, and mammals. Native plants are extremely low-maintenance and can be left to their own devices. We don’t want to disturb the wildlife, so we want plants that don’t need lots of pruning, deadheading, or watering. Many wildlife borders are also not in the most accessible areas, like along a fence, and we can’t maintain them like the rest of the garden. Make sure to choose plants that will thrive in your garden conditions and the amount of sun where your border will sit. Lupine is native to North America. Pollinator-Friendly Plants The best part about planting pollinator-friendly plants is that they’re also beautiful! The flowers smell amazing and are colourful with the sole purpose of attracting pollinators, and we just get to sit back and enjoy them. Include key flowering plants that provide nectar and pollen for your local bees, butterflies, and pollinators. Remember, you need to plant lots to attract the pollinators and get them to land. I have a huge list of bee-friendly plants in this post, as well as butterfly-friendly plants here. Also plant host plants for your pollinators. Host plants are specific plants that insects like caterpillars feast on. For instance, milkweed is famous as being the only plant that monarch butterfly caterpillars will eat, so it’s essential for their population. Learn the types of bees that are in your area to properly support them. Blooming Time Another aspect to consider for your flowers is the blooming time. Plants that will leaf, flower, and fruit at different times of the year will extend the food sources for wildlife and provide an attractive year-round display. Include long-blooming flowers and stagger blooming times so there’s something year-round. Some come out early, and some stick around late! List all the plants you want to include in your wildlife border and note their bloom times. Make sure there is overlap, and fill in any gaps that you will see. Leave flower heads so the birds can feast on the seeds. Bug Hotels and Feeders Besides plants, you can add a few other items to your border to help out wildlife. Include a bug hotel as a safe place for insects to overwinter and be safe from garden work. They also look beautiful! You can hang them along a fence or build them as a free-standing structure within the garden bed. Likewise, you can add bird feeders, bird baths, bee baths, and butterfly mud puddles to your wildlife border. Wildlife Hedges Wildlife hedges are a step further than wildlife borders, allowing two ecosystems to meet. They’re often used when your property is on the edge of a wild space or a different ecosystem. It provides a transition for the creatures who share that space to have somewhere safe to go. Think of them as more wildscaped spaces that are less curated, and more so act as a barrier. Evergreen plants are great options, as they allow for a hedge to provide wildlife throughout the seasons. Plants with thorns provide protection from larger predators, making the hedge a safe haven for wildlife. Native plants can thrive in smaller gardens and urban areas, so it is helpful to keep on top of pruning and managing hedges while also being careful not to remove nests or homes. Do not prune hedges during nesting season (spring through summer) in cool climates. Astrantia major FAQ About Wildlife Borders What are the best low-maintenance border plants? Here are a few of my go-to low-maintenance plants that would be great for a wildlife border:– Rudbeckia– Lavender– Sedum– Creeping phlox– Catmint– Yarrow– Rosemary– Liatris– Daylilies– Milkweed– Echinacea– Salvia– Shasta daisy– Tickseed What is the best shrub for wildlife? Include a mixture of small flowering trees, shrubs, evergreens, brambles, vines, and herbaceous plants in a wildlife border. A diverse mix of native plants will allow for wildlife to find food and nesting sites throughout the year. What is a border garden? A border garden is a narrow garden bed that runs alongside a pathway, fence, building, or other garden structure. They are great transition spaces meant to define an area specific for planting as opposed to a lawn, patio, or path. More Ways to Support Wildlife A city girl who learned to garden and it changed everything. Author, artist, Master Gardener. Better living through plants. Source link
#PLANTS_AND_SEEDS#BEES#BIRDS#BLOOMING#BORDER#BUTTERFLY#GARDEN#GROW#MONTH_MAY_WEEK_3#POLLINATORS#SUPPORT#THERAPY#WILDLIFE
3 notes
·
View notes
Photo
Showy and stunning, dahlias are a summer flower that deserves to be in every garden! Luckily, it is quite easy to grow dahlias from a tuber. Learn how to grow and care for dahlias so you can have a showstopping garden this summer. With tens of thousands of varieties throughout the world, there is a dahlia flower in practically every size. I’m talking about tiny, bushy dahlias the size of a ping-pong ball to full-sized flowers as big as soccer balls. They also come in every colour under the rainbow—there’s even a striking black variety floating around. No matter which dahlia you choose, it’s sure to make an impact in the garden. Originally from Mexico, dahlias are tropical flowers that grow in the summer from August to fall. Butterflies adore them, I adore them, and you likely adore them too. Let’s all grow dahlias so we can have the brightest coloured gardens on the block! This post will cover… Pompon dahlia. Photo courtesy of Flowerbulbs.com Photo credit: Thank you to Flowerbulbs.com for providing me with the gorgeous photos in this post and the descriptions of each type of dahlia. The 12 Types of Dahlias With so many shapes, sizes, and colours to choose from, there are a ton of dahlia flowers out there. Here are some of the main dahlia plants you can expect to find. This is a small selection of dahlias, showing the diversity of the species. Photo courtesy of Flowerbulbs.com Single-flowered: a single row of flat or cupped florets with a central disc. 12-24 inches tall. Anemone-flowered: a large outer ring of flat petals with a mass of tubular florets in the center. 24-36 inches tall. Collarette: a large outer layer of flat petals with an inner wreath of collar-like florets. 30-48 inches tall. Waterlily: full double blooms in a flattened shape. Up to 48 inches tall. Decorative: known for having large and bushy blooms. Popular for cut flowers. Ball: small globe-like variety with double blooms. Flat florets that are blunt or round-tipped. 48 inches tall. Pompon: another small, globe-like variety with double blooms. Florets are curled and blunt or round-tipped. 32-48 inches tall. Cactus: double flowers with long, pointed petals. 60 inches tall. Semi-Cactus: another double flower with long pointed petals, but the petals curl for half or less of their length. 60 inches tall. Peony-flowered: open-centered flower with two or more rows or rounded petals. 40 inches tall. Mignon: small variety with a single layer of rounded florets 1-3 inches long. Well suited for containers. 20 inches tall. Topmix: another small variety of single-flowers. Quite bushy and well suited for containers. 14 inches tall. Consider the maturity size of a dahlia before you buy it, depending on where you want to plant it. Photo courtesy of Flowerbulbs.com When to Plant Dahlias Dahlias are a summer blooming flower that should be planted in the spring after the risk of frost has passed. They like warm soil, so I usually like to wait another month and a bit after our last frost to put them in the ground. If you want a head start, you start them indoors before placing them outside. I shared this video as part of the Random Gifts of Flowers project I worked on with Flowerbulbs.com. The project and video were made in partnership with Flowerbulbs.com, but this post is not sponsored. How to Plant Dahlia Tubers While dahlia seeds do exist, they are quite tedious and difficult to grow. Instead, most folks grow dahlias from tubers. Dahlias are not hard to grow, but they can’t handle freezing temperatures in the winter. In colder climates, they are either treated as annuals or dug up and stored for the winter. Only plant dahlias when you’re 100% sure the risk of frost has passed. In most areas, you can plant dahlias around mid-May. Get a head start by planting them in pots in a greenhouse or indoors. Plant the tuber so that the tip of the old stem is pointed upward. If you have a single tuber, as opposed to a cluster, lay the tuber down so that the tuber “eye” is pointed up. This looks like a small bump on the neck of the tuber (see the photo below to help identify the tuber eye). This is where the stem will grow from. Place tubers no deeper than two inches underground. Cover the dahlia tuber with soil and press down lightly. After planting, thoroughly water the area. Avoid watering again until after the dahlia seedling has emerged so the tuber doesn’t rot, unless the ground become bone dry again. Dahlias need full sun, including at least a couple of hours of the morning sun. The tubers are planted just below the surface so that they’re warmed by the sun’s heat and begin growing ASAP. Dahlia flowers work well as border plants due to their long flowering period. In full sun, they have strong stalks and act as a garden feature. The taller varieties can line the back border, while shorter varieties can be planted in the beds or in the front border. Be sure to pay attention to the variety and height on the packets when planting because moving when they are blooming can cause them too much stress, making them flop and reducing blooms. Dahlia eyes look like little bumps on the neck of the tuber, like this small one that almost looks like a whitehead. Dahlia Plant Care Once you’ve planted your dahlia tubers, you can expect shoots to emerge 1-2 weeks later. Give your shoots 4-6 more weeks (depending on the type of dahlia), and you will get your first flowers. Typically, this is the beginning of August. If you pinch out the main stem approximately 3 weeks after planting, you will be rewarded with a bushier plant. Water your dahlias if the weather has been fairly dry. In the event of heavy rain and wind, you may need a stake to support tall dahlia varieties. Deadheading will be your key to more blooms. Dahlias will continuously bloom as long as you make an effort to remove any spent flowers. Deadhead spent blooms to encourage the plant to flower more. Photo courtesy of Flowerbulbs.com Can You Leave Dahlias in the Ground in the Winter? For many of us, unfortunately, the answer is no. Since they are tropical plants, dahlias are only considered perennial and winter hardy in US zones 8 or above. For the rest of us, we can dig up our dahlia tubers before the first frost. Store tubers in a cool yet frost-free place for the winter. Come spring, you plant them again once the fear of frost has passed. For more on how to save your dahlia tubers, check out this post. Dahlia tubers that have been saved over the winter. While slightly dehydrated, they’ll plump back up as soon as they’re planted. Force Start Dahlia Flowers Indoors A well-known tip is to force start summer bulbs indoors in order to get blooms earlier. Just like seed-starting, you can plant tubers indoors at the end of March to mid-April. Plant them in a pot the same way you would outside. Be sure not to overwater dahlia tubers in pots, as they can be prone to rotting. I like to pre-moisten my soil, and that’s all the moisture my dahlias need to start growing. If after a week I don’t see sprouts, I’ll water the soil again and repeat when the soil becomes dry. Once the risk of frost has passed and the soil has warmed up a bit (mid-May here in Vancouver) place your pot outdoors to get your dahlia plant used to the conditions. After a week, plant your dahlia in the ground. This means you will have flowers a month earlier than if you planted the tubers directly in the ground. You can expect blooms at the beginning of July. Plus, you won’t have any snails who like to munch on the young, crunchy dahlia leaves. My gardening pal, Erin over at The Impatient Gardener, has a great video on how to pull dahlias out of winter storage and pot them for an early start. She is a bit of a dahlia addict (Sorry, Erin, it had to be said), so if you love dahlias, be sure to follow her on YouTube and Instagram. Growing Dahlias in Pots Dahlias make for a gorgeous container flower. If you don’t have a garden but instead have a balcony or patio, you can still grow these gorgeous flowers. The key to growing dahlias in pots is choosing the right variety. Dwarf varieties work well in pots, including Mignon, Topmix, Dahlietta, Dahlstar, Dahlinova, and Gallery dahlias. Alternatively, you can include tall dahlias as a centerpiece for larger containers. If you plant dahlias in a container, choose a pot with drainage holes in the bottom and lower sides. Adding a layer of clay granules to the bottom of the pot also helps to increase aeration for the roots. Plant with good potting soil, and then you’re good to go. Plant dwarf varieties in pots. Photo courtesy of Flowerbulbs.com FAQ About Growing Dahlias Where to buy dahlias? Due to their popularity, dahlia tubers are very easy to find. You can find them with most flowering bulbs for sale in the spring at your local garden centre or hardware store. Online, Breck’s Bulbs is a great supplier, as is West Coast Seeds.For specialty tubers, look up your local dahlia or horticultural society. They may be hosting a plant sale where dahlia tubers will be sold. Many flower farmers will also sell dahlia tubers in the spring, so feel free to message those in your local area. How do I separate dahlia tubers? One dahlia tuber planted in the spring can become a cluster by the end of the growing season. When done right, you can carefully separate the tubers and successfully double the number of dahlias you’ll have next year.In order for a tuber to be successful and produce a plant, it needs to have three things: a body, an eye, and a neck. The body is the main rounded part of the tuber, and it should be in good health. A neck is the skinny part at the top that connects to the main stem. And finally, an eye is a small bump located on the neck of the tuber—it looks like a freckle or even a pimple (see picture under “how to plant dahlia tubers”). How do I harvest dahlia flowers? Cut your dahlia flowers in the morning after the dew has dried—this is when the plant is hydrated and not stressed. Dahlias won’t open much after they are cut, so you want to cut them when they’re almost fully open yet not overly ripe. Any papery leaves are a sign of age. They should last 5-7 days once cut. If you can’t get enough of dahlia flowers, I highly recommend Floret Farm’s Discovering Dahlias by Erin Benzakein. It is a full guide all about growing and arranging dahlias and is a must-have book for any serious dahlia growers. What type of dahlia is your favourite to grow? Let me know in the comments down below which dahlia you plan to plant using this guide. More Tips for Growing Flowers A city girl who learned to garden and it changed everything. Author, artist, Master Gardener. Better living through plants. Source link
#PLANTS_AND_SEEDS#ARTFUL#BULBS#CUT_FLOWERS#DAHLIA#DAHLIAS#FLOWER#GARDEN#GROWING#MONTH_APRIL_WEEK_3#RANDOM_GIFTS_OF_FLOWERS#SUMMERS#THERAPY
3 notes
·
View notes
Photo
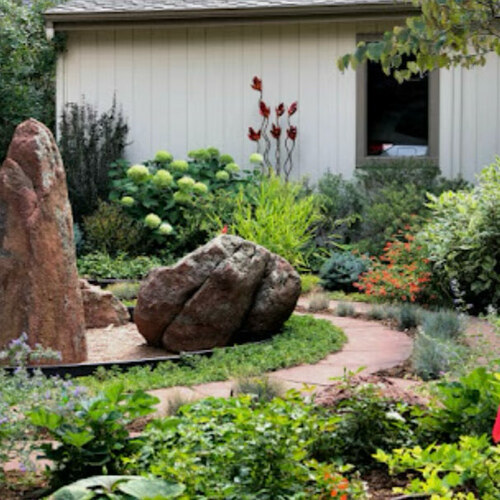
Happy Monday GPODers! You can learn a lot about a garden from one submission to Garden Photo of the Day, but I think the full picture really comes into view when we see a space in at least two seasons. This was absolutely the case when I saw this submission from Bonnie Phipps in Boulder, Colorado. Bonnie first shared her gorgeous garden in fall of 2022 (check that post out here: November in Colorado), and showcased the wonderful autumn color that emerges in the late season. Today we get to see her space in its peak spring and summer bloom, with a delicious assortment of textures that bring insane interest to everything from shady corners to foundation plantings. While Bonnie’s first submission was wonderful and gave us a great glimpse into her space, the following photos and descriptions unveil even more personality and perspective. Hello, I sent some fall photos that you shared a few years ago and I’ve been meaning to send more but time gets away from me. So this time I set aside many hours and days to go through my photos from the last several years. I’ve organized the ones that look nice into various themes. I think I have about 5 future submissions to send so far. I think my favorite part about Fine Gardening is seeing the Photo of the Day submissions. I gardened in Denver for about 7 years before I moved to Boulder, Colorado (zone 4-5). We live on a 4 house cul-de-sac and our house is set at an angle on our lot so our garden is divided into several sections which is quite nice. It is a quarter-acre plot but feels much bigger because it’s all garden – I only have a small 19’ diameter circle of grass in the back. I’ve been gardening in our yard since 2006, one section at a time. I’m interested in design and texture as I garden. This submission is an overview of the north side of our garden. In 2006 we had a landscape company put in the hardscape including the walking circle that I designed for my husband to do walking meditation. Nancy Loving of Loving Gardens designed the area near the house and the rock garden but I’ve had to change it quite a bit over the last 18 years as plants get overgrown or die. I learned a lot from Nancy and used what I learned to design other areas of our garden and to make necessary changes to the old areas over the years. My Garden Angel Our welcoming rose arch. It’s 18 years old and going strong! Our parking area is just to the front and to the left side of it. The path that leads into the garden from the rose arch. The plant on the bottom left side of the photo is Matcha Ball® ash leaf false spirea (Sorbaria sorbifolia ‘Levgreen’, Zones 3–7). I just discovered it this year and I love the texture. I’m going to find places to add more this coming season! About 8 years ago, I tore this whole section up and started from scratch (except the tree). I put yews in the back to create a backdrop for the statue. I used golden creeping Jenny (Lysimachia nummularia ‘Aurea’, Zones 4–8) to lead up to the statue and planted a line of dark coral bells on each side then added plants to fill in behind. I love creeping Jenny and use it a lot in various sections of the garden. It is easy to pull out when it gets out of bounds. This spring, I will need to shorten the yews to let more light in so the hydrangeas behind the statue bloom more. My husband’s walking circle. The 3 rocks symbolize Man, Earth, and Sky. The pic is from the fall as the Annabelle hydrangeas (Hydrangea arborescens ‘Annabelle’, Zones 3–9) are in bloom. That’s Carol Mackie daphne (Daphne × burkwoodii ‘Carol Mackie’, Zones 3–9) to the right of the hydrangeas, but they died last year and I put more hydrangeas in its place. Another path that leads into the walking circle. This is a spring pic and the yellow blooms around the walking circle are from Oakleaf sedum (Sedum hybridum, Zones 4–10). They have been there since 2006 and have never died. It must love it there because believe me, I have a lot of things that die!!! A spring picture. The path leads from the walking circle area to the very backyard. You can see a little of the small grass circle at the end of the path. A summer picture from last year which shows a metal art I added. The variety of textures here really works for me. That’s what I try for but don’t always get. I learned about creating texture from Nancy Loving. Another view of the area shows the “rock garden” on the top right and the Itoh peonies on the bottom left. The walking circle with the Flower Garden on the right. (That’s another submission to come.) Thank you so much for sharing your gorgeous garden with us again, Bonnie! After seeing the sensational fall color you’ve achieved from your first submission, it was absolutely no surprise that your spring and summer gardens are a filled with endless interest and personality. I’m already eagerly anticipating your future submissions and seeing more of your fabulous designs. Are you ready for the growth and color that is coming our way this spring and summer? Let’s ring in the growing season by celebrating some color and fun! If the earliest signs of spring are emerging from your garden, or you’re still looking back at pictures from last spring in anticipation of the first blooms of this year, share your spring photos with Garden Photo of the Day! Follow the directions below to submit your photos via email, or send me a DM on Instagram: @agirlherdogandtheroad. Have a garden you’d like to share? Have photos to share? We’d love to see your garden, a particular collection of plants you love, or a wonderful garden you had the chance to visit! To submit, send 5-10 photos to [email protected] along with some information about the plants in the pictures and where you took the photos. We’d love to hear where you are located, how long you’ve been gardening, successes you are proud of, failures you learned from, hopes for the future, favorite plants, or funny stories from your garden. Have a mobile phone? Tag your photos on Facebook, Instagram or Twitter with #FineGardening! Do you receive the GPOD by email yet? Sign up here. Fine Gardening Recommended Products Attracting Beneficial Bugs to Your Garden, Revised and Updated Second Edition: A Natural Approach to Pest Control Fine Gardening receives a commission for items purchased through links on this site, including Amazon Associates and other affiliate advertising programs. This revised and updated edition of Jessica Walliser’s award-winning Attracting Beneficial Bugs to Your Garden offers a valuable and science-backed plan for bringing balance back to the garden. With this indispensable gardening reference—now updated with new research, insights, and voices—learn how to create a healthy, balanced, and diverse garden capable of supporting a hard-working crew of beneficial pest-eating insects and eliminate the need for synthetic chemical pesticides. Lee Valley Large Gardener's Wash Basket Fine Gardening receives a commission for items purchased through links on this site, including Amazon Associates and other affiliate advertising programs. This basket was designed to be used by gardeners to wash freshly harvested vegetables before taking them inside. You can gather your vegetables and then hose them off right in the same basket. However, you can also use it for fruit or add a cloth liner for serving bread or other baked goods. Measuring 16" long, 11" wide and 4" deep, it is made of chrome-plated steel to resist rust. Planting in a Post-Wild World: Designing Plant Communities for Resilient Landscapes Fine Gardening receives a commission for items purchased through links on this site, including Amazon Associates and other affiliate advertising programs. Featuring gorgeous photography and advice for landscapers, Planting in a Post-Wild World by Thomas Rainer and Claudia West is dedicated to the idea of a new nature—a hybrid of both the wild and the cultivated—that can nourish in our cities and suburbs. Source link
2 notes
·
View notes
Photo

A wildlife border is a safe space for local critters and animals to feed, rest, hibernate, and reproduce. By dedicating a small strip of our garden just for the wildlife, we can turn our space into a place that works alongside our local ecosystem rather than fight against it. Those weeds in my front yard? Those are for the pollinators. Those seed heads? I’m leaving them for the birds. That mess of brambles? Those are for the little mammals. That pile of empty plant pots I’ve been meaning to recycle? Well, I wish I could blame those on the wildlife too. As you can probably tell, I treat my garden as a shared space. I’m highly aware that I’m just one facet of a larger ecosystem. Being in an urban space means there’s less refuge for the local fauna, so I try to make sure that my garden is a little haven for them. Wildlife borders are just one way you make your garden more friendly for pollinators, birds, small mammals, and beneficial insects. I know you’re probably picturing a big thicket of leaves and overgrown plants, but I promise you it can still be a beautiful space that fits right into the rest of your garden. Let me show you how. Long-blooming flowers like lavender and feverfew are perfect additions to wildlife borders. What is a Wildlife Border? Traditionally, borders were skinny, long gardening beds that grew alongside pathways, fences, buildings, and other areas in the landscape. Common with English estates, they were very manicured and complete with small hedges and trimmings. In recent years, borders have become popular spots to turn into a refuge for local wildlife. These borders can not only look good, but also become a way to support the local ecosystem. Borders on the edge of properties are often left to naturalize. These borders contain plants that produce berries to feed birds and mammals, flowers to feed and host pollinators, trees and shrubs to create nesting and hiding spaces, and create a safe playground for beneficial insects. A perennial wildlife border alongside a pathway. Designing a Wildlife Border Placement is the first consideration when designing a wildlife border. One that sits untouched at the back of the garden will look very different from one that might line the pathway leading up to your front door. Most borders range from 2 to 3 m long, but it really depends on your space. Think about the size in proportion to the rest of the yard. I like reminding people that it can be as grand as anywhere else in the garden. You can make it a focal piece of the garden if you desire! Tailoring the size of a border to your space will also work with the local wildlife, as smaller spaces will have less wildlife, while larger spaces will have lots of visitors. A wildlife border doesn’t have to look like this wild, unmanaged space. It can look consistent with the rest of your garden. You can easily make your wildlife border fit in through plant choices, colour themes, hardscaping, artwork, size and shape, and more. This border works as a great replacement for turf grass on a sidewalk strip. Plants to Choose Perennials vs Annuals A wildlife border should mostly consist of perennials. The key is to set it and forget it, letting it naturalize the space. We’re leaving it to become part of the landscape, and annuals just require too much care and maintenance. Once you have filled your space with taller perennials, shrubs, and vines, you can add in some annuals to fill in the gaps. Put them close to the front so you can easily access them. I like to plant thick, leaving no bare earth. Groundcovers can work wonderfully to suppress weeds and provide a shady base. Plants with interesting foliage can also help to fill the gaps and provide some pretty, like hostas or coral bells. You can also sprinkle in some spring and summer bulbs. Spring bulbs are great for providing a food source at the beginning of the season, while summer bulbs often have bright colour and flowers that pollinators love. This small border of dahlias within a raised vegetable garden proves you can do this with nearly any space. Native and Low-Maintenance Plants You can plant both native and non-native plants—remember that the garden is still yours and you can plant whatever makes you happy! That being said, native plants are a great choice for wildlife borders since they’re already a sure bet to fit right in with pollinators, birds, insects, and mammals. Native plants are extremely low-maintenance and can be left to their own devices. We don’t want to disturb the wildlife, so we want plants that don’t need lots of pruning, deadheading, or watering. Many wildlife borders are also not in the most accessible areas, like along a fence, and we can’t maintain them like the rest of the garden. Make sure to choose plants that will thrive in your garden conditions and the amount of sun where your border will sit. Lupine is native to North America. Pollinator-Friendly Plants The best part about planting pollinator-friendly plants is that they’re also beautiful! The flowers smell amazing and are colourful with the sole purpose of attracting pollinators, and we just get to sit back and enjoy them. Include key flowering plants that provide nectar and pollen for your local bees, butterflies, and pollinators. Remember, you need to plant lots to attract the pollinators and get them to land. I have a huge list of bee-friendly plants in this post, as well as butterfly-friendly plants here. Also plant host plants for your pollinators. Host plants are specific plants that insects like caterpillars feast on. For instance, milkweed is famous as being the only plant that monarch butterfly caterpillars will eat, so it’s essential for their population. Learn the types of bees that are in your area to properly support them. Blooming Time Another aspect to consider for your flowers is the blooming time. Plants that will leaf, flower, and fruit at different times of the year will extend the food sources for wildlife and provide an attractive year-round display. Include long-blooming flowers and stagger blooming times so there’s something year-round. Some come out early, and some stick around late! List all the plants you want to include in your wildlife border and note their bloom times. Make sure there is overlap, and fill in any gaps that you will see. Leave flower heads so the birds can feast on the seeds. Bug Hotels and Feeders Besides plants, you can add a few other items to your border to help out wildlife. Include a bug hotel as a safe place for insects to overwinter and be safe from garden work. They also look beautiful! You can hang them along a fence or build them as a free-standing structure within the garden bed. Likewise, you can add bird feeders, bird baths, bee baths, and butterfly mud puddles to your wildlife border. Wildlife Hedges Wildlife hedges are a step further than wildlife borders, allowing two ecosystems to meet. They’re often used when your property is on the edge of a wild space or a different ecosystem. It provides a transition for the creatures who share that space to have somewhere safe to go. Think of them as more wildscaped spaces that are less curated, and more so act as a barrier. Evergreen plants are great options, as they allow for a hedge to provide wildlife throughout the seasons. Plants with thorns provide protection from larger predators, making the hedge a safe haven for wildlife. Native plants can thrive in smaller gardens and urban areas, so it is helpful to keep on top of pruning and managing hedges while also being careful not to remove nests or homes. Do not prune hedges during nesting season (spring through summer) in cool climates. Astrantia major FAQ About Wildlife Borders What are the best low-maintenance border plants? Here are a few of my go-to low-maintenance plants that would be great for a wildlife border:– Rudbeckia– Lavender– Sedum– Creeping phlox– Catmint– Yarrow– Rosemary– Liatris– Daylilies– Milkweed– Echinacea– Salvia– Shasta daisy– Tickseed What is the best shrub for wildlife? Include a mixture of small flowering trees, shrubs, evergreens, brambles, vines, and herbaceous plants in a wildlife border. A diverse mix of native plants will allow for wildlife to find food and nesting sites throughout the year. What is a border garden? A border garden is a narrow garden bed that runs alongside a pathway, fence, building, or other garden structure. They are great transition spaces meant to define an area specific for planting as opposed to a lawn, patio, or path. More Ways to Support Wildlife A city girl who learned to garden and it changed everything. Author, artist, Master Gardener. Better living through plants. Source link
#PLANTS_AND_SEEDS#BEES#BIRDS#BLOOMING#BORDER#BUTTERFLY#GARDEN#GROW#MONTH_MAY_WEEK_3#POLLINATORS#SUPPORT#THERAPY#WILDLIFE
2 notes
·
View notes
Photo

Growing strawberries is simple and absolutely delicious! Learn four different methods you can choose from when learning how to grow strawberries, plus what to do with them once you harvest. There’s nothing quite like biting into a freshly grown strawberry. Plucked right off the vine, they are warm from the sunshine and perfectly ripened with that beautiful red colour. I can taste it now! Strawberries are a very versatile fruit when it comes to gardening. They can be a favourite out in the garden for critters, so some of these growing techniques can protect your strawberries so they can ripen to a sweet red on the plant. Here’s everything you need to know about growing strawberries, plus what to do with them once you harvest! Strawberries are in season from late spring to early summer. How to Grow Strawberries: 4 Methods If you have only ever eaten strawberries out of a plastic supermarket box, I’ve got great news for you! Growing strawberries is simple, and the result is a thousand times better than anything you could buy. Keep in mind that no matter how you choose to grow strawberries, you need about six plants per person to make the harvest worth the effort. It’s totally doable, though, because you can pack a lot of plants into unique grow bags, hanging baskets, and containers to maximize the surface area of these plants. They don’t need much room for roots so as long as there is soil space in your design, you can grow strawberries the smart way. I’ll show you exactly how to grow strawberries in four different ways, and some tips and tricks to get the best harvest ever. Ditch the petunias and grow strawberries in a hanging basket. 1. Grow Strawberries in Hanging Baskets Did you know that you can easily start growing strawberries in a hanging basket? It’s true! You can use any hanging basket that you have or even convert a vintage egg basket by lining it with some moss. You can only fit a few plants in here, so you need a few of them or they will mostly be decorative snacking berries. You can also plant a ton of strawberry plants in one of these crazy grow bag-style hanging planters. This one is meant for annual flowers, but you can find grow bags like these that have pockets made for strawberries and it sure produces a lot of fruit in a tiny space! I like gardening in hanging baskets for a couple of different reasons. First of all, a hanging basket planting can help your strawberries drain properly and avoid overwatering. It’s also helpful for avoiding root rot since the water drains out rather than sits. Secondly, growing strawberries in hanging baskets get your fruit out of reach for many pests. This is especially handy if you live in an area with a rabbits or deer. Those cute little critters love to munch on strawberries—and can we really blame them? Remove temptation and save your harvest by lifting them high out of their reach. Here’s an entire post about how to grow strawberries in a hanging basket, as well as many other fruits, herbs, and vegetables. You can buy specialty tiered hanging baskets to maximize your space. 2. Grow Strawberries in Pots Growing strawberries in pots are one of the most classic ways to grow this tasty berry. There’s no wonder it’s so popular – with this method you get to enjoy the flowers from the strawberry plant and then the berry itself in a portable package! You certainly can use a strawberry pot or a tiered container to grow strawberries in. You can grow them in a regular pot of course, but the design of the pots with multiple holes for small plants allows a much larger harvest. A tiered pot allows you to grow multiple strawberry plants in one space. I like to add a watering tube in the middle of my strawberry pots, to make sure that the water gets all the way down to the bottom soil evenly. You can add one by drilling a few holes in PVC pipe and then filling it with sand to slow the water release. Want to learn all about how to grow berries in pots? I’ve got you covered! Here’s everything you need to know about growing strawberries in containers. Without a watering tube, you will need to water your strawberries in containers frequently. 3. Growing Strawberries in a Raised Bed A raised garden bed or planter makes an excellent spot for growing strawberries. You may have seen tiered strawberry raised bed designs where multiple levels are built as steps up the bed to fill lots of strawberry plants in a small space. I grew strawberries in a tiered gardening bed to maximize my small sliver of sun in my backyard. My friend Tanya from Lovely Greens had the great idea to take a single pallet and turn it into a beautiful, functional strawberry planter. I really like this idea because it’s a great way to upcycle, and it also allows plenty of room for those runners to poke out through the slats. Raised gardening beds can also help to keep weeds out. 4. Grow Strawberries in the Ground If you have the space, this is a great way to get a good harvest of one of my favorite fruits. These sturdy plants thrive planted in the ground where they have plenty of room to grow out their runners. They also make tasty, pretty edible edgings, or you can let them vine out and spill over a garden wall or fence. I like to pop them throughout the garden as they are decorative as ground covers. You can see them here in my garden among plants like oregano, blueberries, lemon verbena, and ajuga looking pretty and flowering well in April. My strawberry plants in flower. Tips for Growing Strawberries Growing strawberries is not as tricky as you might think! In fact, when properly planted and cared for, you can enjoy a bountiful harvest for a couple of years before needing to remove the mature plants. Here are a few tips to help you learn how to grow strawberries even if you have never grown them before. A perfectly ripe strawberry. Plant Early Spring / Early Fall Strawberries are one of the first cool climate fruits to be ready to harvest, because the plants can tolerate cool temperatures and light frost. New plants can be planted in early spring. Usually they are sold as bare root runners, and once you have a good supply, they will send out runners you can plant to increase your crop. Soak the roots when you get them to re-hydrate them, about 20 minutes is good, then dig them into well amended soil rich with compost and organic matter. Space them 18″ apart. In the fall, gather the runners and dig them into the garden where you want berries and they will overwinter as perennials in Zone 5-8, and can be planted as annuals elsewhere. Give Room for Runners Strawberries are a plant that propagates through runners. Runners mimic the look of vines with little strawberry plants attached to the end, similar to indoor spider plants. These runners help strawberries spread outwards. To avoid over crowding, lots of surface soil is needed for a strawberry patch so you can plant the runners in between the mature plants. As the mature plants stop producing, the young plants will take their place. When you grow strawberries from seeds, which is absolutely a possibility as well, space you’ll want to plant them at least 18″ apart from each other. Strawberry plants last 3-5 years before dying, so let the runners replacing old plants. Plant Somewhere with Plenty of Sun Berries tend to enjoy sunny spots, and strawberries are not an exception. Whichever method you choose for planting your berries, make sure to place them somewhere with eight hours (or more!) of sun for the best harvest and sweetest berries. The plants will tolerate a bit of shade, but the berries will be fewer and bland. You need good sun for stellar fruit! Amend Your Soil Properly You’ll need slightly acidic soil for strawberries to thrive—about 5.5-6.8 pH is ideal. If you have no idea what your pH balance is, you can easily do a soil test right at home and find out. Fertilize and Water Properly All that time hanging out in the sun can leave your little berries thirsty! While it’s important not to overwater, you’ll want to make sure they get 1-1.5 inches of water weekly. Avoid getting the leaves wet—instead, make sure the water gets to the root system underneath. To keep the plants happy, add a nitrogen-rich, organic fertilizer in the early spring and again in the fall. Strawberries in pots should be fertilized with a liquid fertilizer twice a month. Companion Plant with Care Companion planting can help your strawberries thrive, or if done improperly can hinder their growth. I recommend growing strawberries alongside garlic, beans, lettuce, spinach, or peas. They also play nicely with thyme. Strawberries, just like most other fruit and vegetables, should not be planted alongside fennel. Additionally, strawberries do not do well with veggies in the brassicas family, so plant your cabbage or Brussels elsewhere! How to Harvest Strawberries Once your berries are ripe, red, and ready for harvest, you’ll want to take care to pluck them in the early morning. The fruit should still be slightly cool once you remove it from the vine, then you’ll need to refrigerate immediately. Plus, you can also save certain strawberry seeds for your next planting! Only harvest red strawberries. How to Use Homegrown Strawberries If you are blessed with a bountiful harvest, there are so many ways you can use up your berries. Here are some of my favourite ideas. #1 Make an Infused Strawberry Vinegar Infused vinegar sounds fancy, but it actually is quite simple to make. You simply load up a mason jar with simple ingredients such as your homegrown strawberries, vinegar, and herbs, then let it infuse for about ten days. Easy! Learn how to infuse vinegar with strawberry here. Use this infused vinegar for a salad dressing. #2 Create a Living Strawberry Wreath If you have extra strawberries growing that need to be relocated, try making this simple living strawberry wreath. It’s pretty and practical as your berries will continue to grow. Feast on strawberries and use them as decor. #3 Make an Easy, Low Sugar Strawberry Freezer Jam If you have never made jam before, this freezer jam recipe with strawberries is the perfect place to start! It takes minutes to make and lasts for up to a year when stored in the freezer. Freezer jam is quick to make for beginners. FAQ About Growing Strawberries Do you cut strawberry runners? In your strawberry’s first year, it’s best to cut any runners off before they get big so your plant can dedicate all it’s energy to settling in and producing flowers and strawberries.I like to let my plant set runners the following year. Once they have rooted, you can clip them from the mother plant and voila! You have a new strawberry plant. What to do with plants in pots when they have finished fruiting? I leave my strawberry plants in their pots since they can easily overwinter where I live. If the appearance of the strawberry plants bothers you, you can tuck in some annual flowers to up the appearance. What kinds of strawberries are there? There are three main categories of strawberries: june-bearing, everbearing, and day-neutral. June-bearing strawberries produce one large crop a year and produce lots of runners, making them better suited for a garden bed.Everbearing strawberries produce strawberries throughout the spring and summer, though not as many as a June-bearing strawberry, and are good for containers.Day-neutral strawberries are a new kind of everbearing strawberry that produce more consistent strawberries and are best suited to areas with cooler summers as they will not produce fruit in hot weather. More Edible Gardening Tips A city girl who learned to garden and it changed everything. Author, artist, Master Gardener. Better living through plants. Source link
#PLANTS_AND_SEEDS#GARDEN#GROWING#GROWING_FOOD#GROWING_GUIDE#MONTH_MAY_WEEK_1#STRAWBERRIES#STRAWBERRY#THERAPY
2 notes
·
View notes
Photo

Showy and stunning, dahlias are a summer flower that deserves to be in every garden! Luckily, it is quite easy to grow dahlias from a tuber. Learn how to grow and care for dahlias so you can have a showstopping garden this summer. With tens of thousands of varieties throughout the world, there is a dahlia flower in practically every size. I’m talking about tiny, bushy dahlias the size of a ping-pong ball to full-sized flowers as big as soccer balls. They also come in every colour under the rainbow—there’s even a striking black variety floating around. No matter which dahlia you choose, it’s sure to make an impact in the garden. Originally from Mexico, dahlias are tropical flowers that grow in the summer from August to fall. Butterflies adore them, I adore them, and you likely adore them too. Let’s all grow dahlias so we can have the brightest coloured gardens on the block! This post will cover… Pompon dahlia. Photo courtesy of Flowerbulbs.com Photo credit: Thank you to Flowerbulbs.com for providing me with the gorgeous photos in this post and the descriptions of each type of dahlia. The 12 Types of Dahlias With so many shapes, sizes, and colours to choose from, there are a ton of dahlia flowers out there. Here are some of the main dahlia plants you can expect to find. This is a small selection of dahlias, showing the diversity of the species. Photo courtesy of Flowerbulbs.com Single-flowered: a single row of flat or cupped florets with a central disc. 12-24 inches tall. Anemone-flowered: a large outer ring of flat petals with a mass of tubular florets in the center. 24-36 inches tall. Collarette: a large outer layer of flat petals with an inner wreath of collar-like florets. 30-48 inches tall. Waterlily: full double blooms in a flattened shape. Up to 48 inches tall. Decorative: known for having large and bushy blooms. Popular for cut flowers. Ball: small globe-like variety with double blooms. Flat florets that are blunt or round-tipped. 48 inches tall. Pompon: another small, globe-like variety with double blooms. Florets are curled and blunt or round-tipped. 32-48 inches tall. Cactus: double flowers with long, pointed petals. 60 inches tall. Semi-Cactus: another double flower with long pointed petals, but the petals curl for half or less of their length. 60 inches tall. Peony-flowered: open-centered flower with two or more rows or rounded petals. 40 inches tall. Mignon: small variety with a single layer of rounded florets 1-3 inches long. Well suited for containers. 20 inches tall. Topmix: another small variety of single-flowers. Quite bushy and well suited for containers. 14 inches tall. Consider the maturity size of a dahlia before you buy it, depending on where you want to plant it. Photo courtesy of Flowerbulbs.com When to Plant Dahlias Dahlias are a summer blooming flower that should be planted in the spring after the risk of frost has passed. They like warm soil, so I usually like to wait another month and a bit after our last frost to put them in the ground. If you want a head start, you start them indoors before placing them outside. I shared this video as part of the Random Gifts of Flowers project I worked on with Flowerbulbs.com. The project and video were made in partnership with Flowerbulbs.com, but this post is not sponsored. How to Plant Dahlia Tubers While dahlia seeds do exist, they are quite tedious and difficult to grow. Instead, most folks grow dahlias from tubers. Dahlias are not hard to grow, but they can’t handle freezing temperatures in the winter. In colder climates, they are either treated as annuals or dug up and stored for the winter. Only plant dahlias when you’re 100% sure the risk of frost has passed. In most areas, you can plant dahlias around mid-May. Get a head start by planting them in pots in a greenhouse or indoors. Plant the tuber so that the tip of the old stem is pointed upward. If you have a single tuber, as opposed to a cluster, lay the tuber down so that the tuber “eye” is pointed up. This looks like a small bump on the neck of the tuber (see the photo below to help identify the tuber eye). This is where the stem will grow from. Place tubers no deeper than two inches underground. Cover the dahlia tuber with soil and press down lightly. After planting, thoroughly water the area. Avoid watering again until after the dahlia seedling has emerged so the tuber doesn’t rot, unless the ground become bone dry again. Dahlias need full sun, including at least a couple of hours of the morning sun. The tubers are planted just below the surface so that they’re warmed by the sun’s heat and begin growing ASAP. Dahlia flowers work well as border plants due to their long flowering period. In full sun, they have strong stalks and act as a garden feature. The taller varieties can line the back border, while shorter varieties can be planted in the beds or in the front border. Be sure to pay attention to the variety and height on the packets when planting because moving when they are blooming can cause them too much stress, making them flop and reducing blooms. Dahlia eyes look like little bumps on the neck of the tuber, like this small one that almost looks like a whitehead. Dahlia Plant Care Once you’ve planted your dahlia tubers, you can expect shoots to emerge 1-2 weeks later. Give your shoots 4-6 more weeks (depending on the type of dahlia), and you will get your first flowers. Typically, this is the beginning of August. If you pinch out the main stem approximately 3 weeks after planting, you will be rewarded with a bushier plant. Water your dahlias if the weather has been fairly dry. In the event of heavy rain and wind, you may need a stake to support tall dahlia varieties. Deadheading will be your key to more blooms. Dahlias will continuously bloom as long as you make an effort to remove any spent flowers. Deadhead spent blooms to encourage the plant to flower more. Photo courtesy of Flowerbulbs.com Can You Leave Dahlias in the Ground in the Winter? For many of us, unfortunately, the answer is no. Since they are tropical plants, dahlias are only considered perennial and winter hardy in US zones 8 or above. For the rest of us, we can dig up our dahlia tubers before the first frost. Store tubers in a cool yet frost-free place for the winter. Come spring, you plant them again once the fear of frost has passed. For more on how to save your dahlia tubers, check out this post. Dahlia tubers that have been saved over the winter. While slightly dehydrated, they’ll plump back up as soon as they’re planted. Force Start Dahlia Flowers Indoors A well-known tip is to force start summer bulbs indoors in order to get blooms earlier. Just like seed-starting, you can plant tubers indoors at the end of March to mid-April. Plant them in a pot the same way you would outside. Be sure not to overwater dahlia tubers in pots, as they can be prone to rotting. I like to pre-moisten my soil, and that’s all the moisture my dahlias need to start growing. If after a week I don’t see sprouts, I’ll water the soil again and repeat when the soil becomes dry. Once the risk of frost has passed and the soil has warmed up a bit (mid-May here in Vancouver) place your pot outdoors to get your dahlia plant used to the conditions. After a week, plant your dahlia in the ground. This means you will have flowers a month earlier than if you planted the tubers directly in the ground. You can expect blooms at the beginning of July. Plus, you won’t have any snails who like to munch on the young, crunchy dahlia leaves. My gardening pal, Erin over at The Impatient Gardener, has a great video on how to pull dahlias out of winter storage and pot them for an early start. She is a bit of a dahlia addict (Sorry, Erin, it had to be said), so if you love dahlias, be sure to follow her on YouTube and Instagram. Growing Dahlias in Pots Dahlias make for a gorgeous container flower. If you don’t have a garden but instead have a balcony or patio, you can still grow these gorgeous flowers. The key to growing dahlias in pots is choosing the right variety. Dwarf varieties work well in pots, including Mignon, Topmix, Dahlietta, Dahlstar, Dahlinova, and Gallery dahlias. Alternatively, you can include tall dahlias as a centerpiece for larger containers. If you plant dahlias in a container, choose a pot with drainage holes in the bottom and lower sides. Adding a layer of clay granules to the bottom of the pot also helps to increase aeration for the roots. Plant with good potting soil, and then you’re good to go. Plant dwarf varieties in pots. Photo courtesy of Flowerbulbs.com FAQ About Growing Dahlias Where to buy dahlias? Due to their popularity, dahlia tubers are very easy to find. You can find them with most flowering bulbs for sale in the spring at your local garden centre or hardware store. Online, Breck’s Bulbs is a great supplier, as is West Coast Seeds.For specialty tubers, look up your local dahlia or horticultural society. They may be hosting a plant sale where dahlia tubers will be sold. Many flower farmers will also sell dahlia tubers in the spring, so feel free to message those in your local area. How do I separate dahlia tubers? One dahlia tuber planted in the spring can become a cluster by the end of the growing season. When done right, you can carefully separate the tubers and successfully double the number of dahlias you’ll have next year.In order for a tuber to be successful and produce a plant, it needs to have three things: a body, an eye, and a neck. The body is the main rounded part of the tuber, and it should be in good health. A neck is the skinny part at the top that connects to the main stem. And finally, an eye is a small bump located on the neck of the tuber—it looks like a freckle or even a pimple (see picture under “how to plant dahlia tubers”). How do I harvest dahlia flowers? Cut your dahlia flowers in the morning after the dew has dried—this is when the plant is hydrated and not stressed. Dahlias won’t open much after they are cut, so you want to cut them when they’re almost fully open yet not overly ripe. Any papery leaves are a sign of age. They should last 5-7 days once cut. If you can’t get enough of dahlia flowers, I highly recommend Floret Farm’s Discovering Dahlias by Erin Benzakein. It is a full guide all about growing and arranging dahlias and is a must-have book for any serious dahlia growers. What type of dahlia is your favourite to grow? Let me know in the comments down below which dahlia you plan to plant using this guide. More Tips for Growing Flowers A city girl who learned to garden and it changed everything. Author, artist, Master Gardener. Better living through plants. Source link
#PLANTS_AND_SEEDS#ARTFUL#BULBS#CUT_FLOWERS#DAHLIA#DAHLIAS#FLOWER#GARDEN#GROWING#MONTH_APRIL_WEEK_3#RANDOM_GIFTS_OF_FLOWERS#SUMMERS#THERAPY
3 notes
·
View notes
Photo

Showy and stunning, dahlias are a summer flower that deserves to be in every garden! Luckily, it is quite easy to grow dahlias from a tuber. Learn how to grow and care for dahlias so you can have a showstopping garden this summer. With tens of thousands of varieties throughout the world, there is a dahlia flower in practically every size. I’m talking about tiny, bushy dahlias the size of a ping-pong ball to full-sized flowers as big as soccer balls. They also come in every colour under the rainbow—there’s even a striking black variety floating around. No matter which dahlia you choose, it’s sure to make an impact in the garden. Originally from Mexico, dahlias are tropical flowers that grow in the summer from August to fall. Butterflies adore them, I adore them, and you likely adore them too. Let’s all grow dahlias so we can have the brightest coloured gardens on the block! This post will cover… Pompon dahlia. Photo courtesy of Flowerbulbs.com Photo credit: Thank you to Flowerbulbs.com for providing me with the gorgeous photos in this post and the descriptions of each type of dahlia. The 12 Types of Dahlias With so many shapes, sizes, and colours to choose from, there are a ton of dahlia flowers out there. Here are some of the main dahlia plants you can expect to find. This is a small selection of dahlias, showing the diversity of the species. Photo courtesy of Flowerbulbs.com Single-flowered: a single row of flat or cupped florets with a central disc. 12-24 inches tall. Anemone-flowered: a large outer ring of flat petals with a mass of tubular florets in the center. 24-36 inches tall. Collarette: a large outer layer of flat petals with an inner wreath of collar-like florets. 30-48 inches tall. Waterlily: full double blooms in a flattened shape. Up to 48 inches tall. Decorative: known for having large and bushy blooms. Popular for cut flowers. Ball: small globe-like variety with double blooms. Flat florets that are blunt or round-tipped. 48 inches tall. Pompon: another small, globe-like variety with double blooms. Florets are curled and blunt or round-tipped. 32-48 inches tall. Cactus: double flowers with long, pointed petals. 60 inches tall. Semi-Cactus: another double flower with long pointed petals, but the petals curl for half or less of their length. 60 inches tall. Peony-flowered: open-centered flower with two or more rows or rounded petals. 40 inches tall. Mignon: small variety with a single layer of rounded florets 1-3 inches long. Well suited for containers. 20 inches tall. Topmix: another small variety of single-flowers. Quite bushy and well suited for containers. 14 inches tall. Consider the maturity size of a dahlia before you buy it, depending on where you want to plant it. Photo courtesy of Flowerbulbs.com When to Plant Dahlias Dahlias are a summer blooming flower that should be planted in the spring after the risk of frost has passed. They like warm soil, so I usually like to wait another month and a bit after our last frost to put them in the ground. If you want a head start, you start them indoors before placing them outside. I shared this video as part of the Random Gifts of Flowers project I worked on with Flowerbulbs.com. The project and video were made in partnership with Flowerbulbs.com, but this post is not sponsored. How to Plant Dahlia Tubers While dahlia seeds do exist, they are quite tedious and difficult to grow. Instead, most folks grow dahlias from tubers. Dahlias are not hard to grow, but they can’t handle freezing temperatures in the winter. In colder climates, they are either treated as annuals or dug up and stored for the winter. Only plant dahlias when you’re 100% sure the risk of frost has passed. In most areas, you can plant dahlias around mid-May. Get a head start by planting them in pots in a greenhouse or indoors. Plant the tuber so that the tip of the old stem is pointed upward. If you have a single tuber, as opposed to a cluster, lay the tuber down so that the tuber “eye” is pointed up. This looks like a small bump on the neck of the tuber (see the photo below to help identify the tuber eye). This is where the stem will grow from. Place tubers no deeper than two inches underground. Cover the dahlia tuber with soil and press down lightly. After planting, thoroughly water the area. Avoid watering again until after the dahlia seedling has emerged so the tuber doesn’t rot, unless the ground become bone dry again. Dahlias need full sun, including at least a couple of hours of the morning sun. The tubers are planted just below the surface so that they’re warmed by the sun’s heat and begin growing ASAP. Dahlia flowers work well as border plants due to their long flowering period. In full sun, they have strong stalks and act as a garden feature. The taller varieties can line the back border, while shorter varieties can be planted in the beds or in the front border. Be sure to pay attention to the variety and height on the packets when planting because moving when they are blooming can cause them too much stress, making them flop and reducing blooms. Dahlia eyes look like little bumps on the neck of the tuber, like this small one that almost looks like a whitehead. Dahlia Plant Care Once you’ve planted your dahlia tubers, you can expect shoots to emerge 1-2 weeks later. Give your shoots 4-6 more weeks (depending on the type of dahlia), and you will get your first flowers. Typically, this is the beginning of August. If you pinch out the main stem approximately 3 weeks after planting, you will be rewarded with a bushier plant. Water your dahlias if the weather has been fairly dry. In the event of heavy rain and wind, you may need a stake to support tall dahlia varieties. Deadheading will be your key to more blooms. Dahlias will continuously bloom as long as you make an effort to remove any spent flowers. Deadhead spent blooms to encourage the plant to flower more. Photo courtesy of Flowerbulbs.com Can You Leave Dahlias in the Ground in the Winter? For many of us, unfortunately, the answer is no. Since they are tropical plants, dahlias are only considered perennial and winter hardy in US zones 8 or above. For the rest of us, we can dig up our dahlia tubers before the first frost. Store tubers in a cool yet frost-free place for the winter. Come spring, you plant them again once the fear of frost has passed. For more on how to save your dahlia tubers, check out this post. Dahlia tubers that have been saved over the winter. While slightly dehydrated, they’ll plump back up as soon as they’re planted. Force Start Dahlia Flowers Indoors A well-known tip is to force start summer bulbs indoors in order to get blooms earlier. Just like seed-starting, you can plant tubers indoors at the end of March to mid-April. Plant them in a pot the same way you would outside. Be sure not to overwater dahlia tubers in pots, as they can be prone to rotting. I like to pre-moisten my soil, and that’s all the moisture my dahlias need to start growing. If after a week I don’t see sprouts, I’ll water the soil again and repeat when the soil becomes dry. Once the risk of frost has passed and the soil has warmed up a bit (mid-May here in Vancouver) place your pot outdoors to get your dahlia plant used to the conditions. After a week, plant your dahlia in the ground. This means you will have flowers a month earlier than if you planted the tubers directly in the ground. You can expect blooms at the beginning of July. Plus, you won’t have any snails who like to munch on the young, crunchy dahlia leaves. My gardening pal, Erin over at The Impatient Gardener, has a great video on how to pull dahlias out of winter storage and pot them for an early start. She is a bit of a dahlia addict (Sorry, Erin, it had to be said), so if you love dahlias, be sure to follow her on YouTube and Instagram. Growing Dahlias in Pots Dahlias make for a gorgeous container flower. If you don’t have a garden but instead have a balcony or patio, you can still grow these gorgeous flowers. The key to growing dahlias in pots is choosing the right variety. Dwarf varieties work well in pots, including Mignon, Topmix, Dahlietta, Dahlstar, Dahlinova, and Gallery dahlias. Alternatively, you can include tall dahlias as a centerpiece for larger containers. If you plant dahlias in a container, choose a pot with drainage holes in the bottom and lower sides. Adding a layer of clay granules to the bottom of the pot also helps to increase aeration for the roots. Plant with good potting soil, and then you’re good to go. Plant dwarf varieties in pots. Photo courtesy of Flowerbulbs.com FAQ About Growing Dahlias Where to buy dahlias? Due to their popularity, dahlia tubers are very easy to find. You can find them with most flowering bulbs for sale in the spring at your local garden centre or hardware store. Online, Breck’s Bulbs is a great supplier, as is West Coast Seeds.For specialty tubers, look up your local dahlia or horticultural society. They may be hosting a plant sale where dahlia tubers will be sold. Many flower farmers will also sell dahlia tubers in the spring, so feel free to message those in your local area. How do I separate dahlia tubers? One dahlia tuber planted in the spring can become a cluster by the end of the growing season. When done right, you can carefully separate the tubers and successfully double the number of dahlias you’ll have next year.In order for a tuber to be successful and produce a plant, it needs to have three things: a body, an eye, and a neck. The body is the main rounded part of the tuber, and it should be in good health. A neck is the skinny part at the top that connects to the main stem. And finally, an eye is a small bump located on the neck of the tuber—it looks like a freckle or even a pimple (see picture under “how to plant dahlia tubers”). How do I harvest dahlia flowers? Cut your dahlia flowers in the morning after the dew has dried—this is when the plant is hydrated and not stressed. Dahlias won’t open much after they are cut, so you want to cut them when they’re almost fully open yet not overly ripe. Any papery leaves are a sign of age. They should last 5-7 days once cut. If you can’t get enough of dahlia flowers, I highly recommend Floret Farm’s Discovering Dahlias by Erin Benzakein. It is a full guide all about growing and arranging dahlias and is a must-have book for any serious dahlia growers. What type of dahlia is your favourite to grow? Let me know in the comments down below which dahlia you plan to plant using this guide. More Tips for Growing Flowers A city girl who learned to garden and it changed everything. Author, artist, Master Gardener. Better living through plants. Source link
#PLANTS_AND_SEEDS#ARTFUL#BULBS#CUT_FLOWERS#DAHLIA#DAHLIAS#FLOWER#GARDEN#GROWING#MONTH_APRIL_WEEK_3#RANDOM_GIFTS_OF_FLOWERS#SUMMERS#THERAPY
2 notes
·
View notes
Photo

Showy and stunning, dahlias are a summer flower that deserves to be in every garden! Luckily, it is quite easy to grow dahlias from a tuber. Learn how to grow and care for dahlias so you can have a showstopping garden this summer. With tens of thousands of varieties throughout the world, there is a dahlia flower in practically every size. I’m talking about tiny, bushy dahlias the size of a ping-pong ball to full-sized flowers as big as soccer balls. They also come in every colour under the rainbow—there’s even a striking black variety floating around. No matter which dahlia you choose, it’s sure to make an impact in the garden. Originally from Mexico, dahlias are tropical flowers that grow in the summer from August to fall. Butterflies adore them, I adore them, and you likely adore them too. Let’s all grow dahlias so we can have the brightest coloured gardens on the block! This post will cover… Pompon dahlia. Photo courtesy of Flowerbulbs.com Photo credit: Thank you to Flowerbulbs.com for providing me with the gorgeous photos in this post and the descriptions of each type of dahlia. The 12 Types of Dahlias With so many shapes, sizes, and colours to choose from, there are a ton of dahlia flowers out there. Here are some of the main dahlia plants you can expect to find. This is a small selection of dahlias, showing the diversity of the species. Photo courtesy of Flowerbulbs.com Single-flowered: a single row of flat or cupped florets with a central disc. 12-24 inches tall. Anemone-flowered: a large outer ring of flat petals with a mass of tubular florets in the center. 24-36 inches tall. Collarette: a large outer layer of flat petals with an inner wreath of collar-like florets. 30-48 inches tall. Waterlily: full double blooms in a flattened shape. Up to 48 inches tall. Decorative: known for having large and bushy blooms. Popular for cut flowers. Ball: small globe-like variety with double blooms. Flat florets that are blunt or round-tipped. 48 inches tall. Pompon: another small, globe-like variety with double blooms. Florets are curled and blunt or round-tipped. 32-48 inches tall. Cactus: double flowers with long, pointed petals. 60 inches tall. Semi-Cactus: another double flower with long pointed petals, but the petals curl for half or less of their length. 60 inches tall. Peony-flowered: open-centered flower with two or more rows or rounded petals. 40 inches tall. Mignon: small variety with a single layer of rounded florets 1-3 inches long. Well suited for containers. 20 inches tall. Topmix: another small variety of single-flowers. Quite bushy and well suited for containers. 14 inches tall. Consider the maturity size of a dahlia before you buy it, depending on where you want to plant it. Photo courtesy of Flowerbulbs.com When to Plant Dahlias Dahlias are a summer blooming flower that should be planted in the spring after the risk of frost has passed. They like warm soil, so I usually like to wait another month and a bit after our last frost to put them in the ground. If you want a head start, you start them indoors before placing them outside. I shared this video as part of the Random Gifts of Flowers project I worked on with Flowerbulbs.com. The project and video were made in partnership with Flowerbulbs.com, but this post is not sponsored. How to Plant Dahlia Tubers While dahlia seeds do exist, they are quite tedious and difficult to grow. Instead, most folks grow dahlias from tubers. Dahlias are not hard to grow, but they can’t handle freezing temperatures in the winter. In colder climates, they are either treated as annuals or dug up and stored for the winter. Only plant dahlias when you’re 100% sure the risk of frost has passed. In most areas, you can plant dahlias around mid-May. Get a head start by planting them in pots in a greenhouse or indoors. Plant the tuber so that the tip of the old stem is pointed upward. If you have a single tuber, as opposed to a cluster, lay the tuber down so that the tuber “eye” is pointed up. This looks like a small bump on the neck of the tuber (see the photo below to help identify the tuber eye). This is where the stem will grow from. Place tubers no deeper than two inches underground. Cover the dahlia tuber with soil and press down lightly. After planting, thoroughly water the area. Avoid watering again until after the dahlia seedling has emerged so the tuber doesn’t rot, unless the ground become bone dry again. Dahlias need full sun, including at least a couple of hours of the morning sun. The tubers are planted just below the surface so that they’re warmed by the sun’s heat and begin growing ASAP. Dahlia flowers work well as border plants due to their long flowering period. In full sun, they have strong stalks and act as a garden feature. The taller varieties can line the back border, while shorter varieties can be planted in the beds or in the front border. Be sure to pay attention to the variety and height on the packets when planting because moving when they are blooming can cause them too much stress, making them flop and reducing blooms. Dahlia eyes look like little bumps on the neck of the tuber, like this small one that almost looks like a whitehead. Dahlia Plant Care Once you’ve planted your dahlia tubers, you can expect shoots to emerge 1-2 weeks later. Give your shoots 4-6 more weeks (depending on the type of dahlia), and you will get your first flowers. Typically, this is the beginning of August. If you pinch out the main stem approximately 3 weeks after planting, you will be rewarded with a bushier plant. Water your dahlias if the weather has been fairly dry. In the event of heavy rain and wind, you may need a stake to support tall dahlia varieties. Deadheading will be your key to more blooms. Dahlias will continuously bloom as long as you make an effort to remove any spent flowers. Deadhead spent blooms to encourage the plant to flower more. Photo courtesy of Flowerbulbs.com Can You Leave Dahlias in the Ground in the Winter? For many of us, unfortunately, the answer is no. Since they are tropical plants, dahlias are only considered perennial and winter hardy in US zones 8 or above. For the rest of us, we can dig up our dahlia tubers before the first frost. Store tubers in a cool yet frost-free place for the winter. Come spring, you plant them again once the fear of frost has passed. For more on how to save your dahlia tubers, check out this post. Dahlia tubers that have been saved over the winter. While slightly dehydrated, they’ll plump back up as soon as they’re planted. Force Start Dahlia Flowers Indoors A well-known tip is to force start summer bulbs indoors in order to get blooms earlier. Just like seed-starting, you can plant tubers indoors at the end of March to mid-April. Plant them in a pot the same way you would outside. Be sure not to overwater dahlia tubers in pots, as they can be prone to rotting. I like to pre-moisten my soil, and that’s all the moisture my dahlias need to start growing. If after a week I don’t see sprouts, I’ll water the soil again and repeat when the soil becomes dry. Once the risk of frost has passed and the soil has warmed up a bit (mid-May here in Vancouver) place your pot outdoors to get your dahlia plant used to the conditions. After a week, plant your dahlia in the ground. This means you will have flowers a month earlier than if you planted the tubers directly in the ground. You can expect blooms at the beginning of July. Plus, you won’t have any snails who like to munch on the young, crunchy dahlia leaves. My gardening pal, Erin over at The Impatient Gardener, has a great video on how to pull dahlias out of winter storage and pot them for an early start. She is a bit of a dahlia addict (Sorry, Erin, it had to be said), so if you love dahlias, be sure to follow her on YouTube and Instagram. Growing Dahlias in Pots Dahlias make for a gorgeous container flower. If you don’t have a garden but instead have a balcony or patio, you can still grow these gorgeous flowers. The key to growing dahlias in pots is choosing the right variety. Dwarf varieties work well in pots, including Mignon, Topmix, Dahlietta, Dahlstar, Dahlinova, and Gallery dahlias. Alternatively, you can include tall dahlias as a centerpiece for larger containers. If you plant dahlias in a container, choose a pot with drainage holes in the bottom and lower sides. Adding a layer of clay granules to the bottom of the pot also helps to increase aeration for the roots. Plant with good potting soil, and then you’re good to go. Plant dwarf varieties in pots. Photo courtesy of Flowerbulbs.com FAQ About Growing Dahlias Where to buy dahlias? Due to their popularity, dahlia tubers are very easy to find. You can find them with most flowering bulbs for sale in the spring at your local garden centre or hardware store. Online, Breck’s Bulbs is a great supplier, as is West Coast Seeds.For specialty tubers, look up your local dahlia or horticultural society. They may be hosting a plant sale where dahlia tubers will be sold. Many flower farmers will also sell dahlia tubers in the spring, so feel free to message those in your local area. How do I separate dahlia tubers? One dahlia tuber planted in the spring can become a cluster by the end of the growing season. When done right, you can carefully separate the tubers and successfully double the number of dahlias you’ll have next year.In order for a tuber to be successful and produce a plant, it needs to have three things: a body, an eye, and a neck. The body is the main rounded part of the tuber, and it should be in good health. A neck is the skinny part at the top that connects to the main stem. And finally, an eye is a small bump located on the neck of the tuber—it looks like a freckle or even a pimple (see picture under “how to plant dahlia tubers”). How do I harvest dahlia flowers? Cut your dahlia flowers in the morning after the dew has dried—this is when the plant is hydrated and not stressed. Dahlias won’t open much after they are cut, so you want to cut them when they’re almost fully open yet not overly ripe. Any papery leaves are a sign of age. They should last 5-7 days once cut. If you can’t get enough of dahlia flowers, I highly recommend Floret Farm’s Discovering Dahlias by Erin Benzakein. It is a full guide all about growing and arranging dahlias and is a must-have book for any serious dahlia growers. What type of dahlia is your favourite to grow? Let me know in the comments down below which dahlia you plan to plant using this guide. More Tips for Growing Flowers A city girl who learned to garden and it changed everything. Author, artist, Master Gardener. Better living through plants. Source link
#PLANTS_AND_SEEDS#ARTFUL#BULBS#CUT_FLOWERS#DAHLIA#DAHLIAS#FLOWER#GARDEN#GROWING#MONTH_APRIL_WEEK_3#RANDOM_GIFTS_OF_FLOWERS#SUMMERS#THERAPY
2 notes
·
View notes
Photo

A wildlife border is a safe space for local critters and animals to feed, rest, hibernate, and reproduce. By dedicating a small strip of our garden just for the wildlife, we can turn our space into a place that works alongside our local ecosystem rather than fight against it. Those weeds in my front yard? Those are for the pollinators. Those seed heads? I’m leaving them for the birds. That mess of brambles? Those are for the little mammals. That pile of empty plant pots I’ve been meaning to recycle? Well, I wish I could blame those on the wildlife too. As you can probably tell, I treat my garden as a shared space. I’m highly aware that I’m just one facet of a larger ecosystem. Being in an urban space means there’s less refuge for the local fauna, so I try to make sure that my garden is a little haven for them. Wildlife borders are just one way you make your garden more friendly for pollinators, birds, small mammals, and beneficial insects. I know you’re probably picturing a big thicket of leaves and overgrown plants, but I promise you it can still be a beautiful space that fits right into the rest of your garden. Let me show you how. Long-blooming flowers like lavender and feverfew are perfect additions to wildlife borders. What is a Wildlife Border? Traditionally, borders were skinny, long gardening beds that grew alongside pathways, fences, buildings, and other areas in the landscape. Common with English estates, they were very manicured and complete with small hedges and trimmings. In recent years, borders have become popular spots to turn into a refuge for local wildlife. These borders can not only look good, but also become a way to support the local ecosystem. Borders on the edge of properties are often left to naturalize. These borders contain plants that produce berries to feed birds and mammals, flowers to feed and host pollinators, trees and shrubs to create nesting and hiding spaces, and create a safe playground for beneficial insects. A perennial wildlife border alongside a pathway. Designing a Wildlife Border Placement is the first consideration when designing a wildlife border. One that sits untouched at the back of the garden will look very different from one that might line the pathway leading up to your front door. Most borders range from 2 to 3 m long, but it really depends on your space. Think about the size in proportion to the rest of the yard. I like reminding people that it can be as grand as anywhere else in the garden. You can make it a focal piece of the garden if you desire! Tailoring the size of a border to your space will also work with the local wildlife, as smaller spaces will have less wildlife, while larger spaces will have lots of visitors. A wildlife border doesn’t have to look like this wild, unmanaged space. It can look consistent with the rest of your garden. You can easily make your wildlife border fit in through plant choices, colour themes, hardscaping, artwork, size and shape, and more. This border works as a great replacement for turf grass on a sidewalk strip. Plants to Choose Perennials vs Annuals A wildlife border should mostly consist of perennials. The key is to set it and forget it, letting it naturalize the space. We’re leaving it to become part of the landscape, and annuals just require too much care and maintenance. Once you have filled your space with taller perennials, shrubs, and vines, you can add in some annuals to fill in the gaps. Put them close to the front so you can easily access them. I like to plant thick, leaving no bare earth. Groundcovers can work wonderfully to suppress weeds and provide a shady base. Plants with interesting foliage can also help to fill the gaps and provide some pretty, like hostas or coral bells. You can also sprinkle in some spring and summer bulbs. Spring bulbs are great for providing a food source at the beginning of the season, while summer bulbs often have bright colour and flowers that pollinators love. This small border of dahlias within a raised vegetable garden proves you can do this with nearly any space. Native and Low-Maintenance Plants You can plant both native and non-native plants—remember that the garden is still yours and you can plant whatever makes you happy! That being said, native plants are a great choice for wildlife borders since they’re already a sure bet to fit right in with pollinators, birds, insects, and mammals. Native plants are extremely low-maintenance and can be left to their own devices. We don’t want to disturb the wildlife, so we want plants that don’t need lots of pruning, deadheading, or watering. Many wildlife borders are also not in the most accessible areas, like along a fence, and we can’t maintain them like the rest of the garden. Make sure to choose plants that will thrive in your garden conditions and the amount of sun where your border will sit. Lupine is native to North America. Pollinator-Friendly Plants The best part about planting pollinator-friendly plants is that they’re also beautiful! The flowers smell amazing and are colourful with the sole purpose of attracting pollinators, and we just get to sit back and enjoy them. Include key flowering plants that provide nectar and pollen for your local bees, butterflies, and pollinators. Remember, you need to plant lots to attract the pollinators and get them to land. I have a huge list of bee-friendly plants in this post, as well as butterfly-friendly plants here. Also plant host plants for your pollinators. Host plants are specific plants that insects like caterpillars feast on. For instance, milkweed is famous as being the only plant that monarch butterfly caterpillars will eat, so it’s essential for their population. Learn the types of bees that are in your area to properly support them. Blooming Time Another aspect to consider for your flowers is the blooming time. Plants that will leaf, flower, and fruit at different times of the year will extend the food sources for wildlife and provide an attractive year-round display. Include long-blooming flowers and stagger blooming times so there’s something year-round. Some come out early, and some stick around late! List all the plants you want to include in your wildlife border and note their bloom times. Make sure there is overlap, and fill in any gaps that you will see. Leave flower heads so the birds can feast on the seeds. Bug Hotels and Feeders Besides plants, you can add a few other items to your border to help out wildlife. Include a bug hotel as a safe place for insects to overwinter and be safe from garden work. They also look beautiful! You can hang them along a fence or build them as a free-standing structure within the garden bed. Likewise, you can add bird feeders, bird baths, bee baths, and butterfly mud puddles to your wildlife border. Wildlife Hedges Wildlife hedges are a step further than wildlife borders, allowing two ecosystems to meet. They’re often used when your property is on the edge of a wild space or a different ecosystem. It provides a transition for the creatures who share that space to have somewhere safe to go. Think of them as more wildscaped spaces that are less curated, and more so act as a barrier. Evergreen plants are great options, as they allow for a hedge to provide wildlife throughout the seasons. Plants with thorns provide protection from larger predators, making the hedge a safe haven for wildlife. Native plants can thrive in smaller gardens and urban areas, so it is helpful to keep on top of pruning and managing hedges while also being careful not to remove nests or homes. Do not prune hedges during nesting season (spring through summer) in cool climates. Astrantia major FAQ About Wildlife Borders What are the best low-maintenance border plants? Here are a few of my go-to low-maintenance plants that would be great for a wildlife border:– Rudbeckia– Lavender– Sedum– Creeping phlox– Catmint– Yarrow– Rosemary– Liatris– Daylilies– Milkweed– Echinacea– Salvia– Shasta daisy– Tickseed What is the best shrub for wildlife? Include a mixture of small flowering trees, shrubs, evergreens, brambles, vines, and herbaceous plants in a wildlife border. A diverse mix of native plants will allow for wildlife to find food and nesting sites throughout the year. What is a border garden? A border garden is a narrow garden bed that runs alongside a pathway, fence, building, or other garden structure. They are great transition spaces meant to define an area specific for planting as opposed to a lawn, patio, or path. More Ways to Support Wildlife A city girl who learned to garden and it changed everything. Author, artist, Master Gardener. Better living through plants. Source link
#PLANTS_AND_SEEDS#BEES#BIRDS#BLOOMING#BORDER#BUTTERFLY#GARDEN#GROW#MONTH_MAY_WEEK_3#POLLINATORS#SUPPORT#THERAPY#WILDLIFE
2 notes
·
View notes
Photo
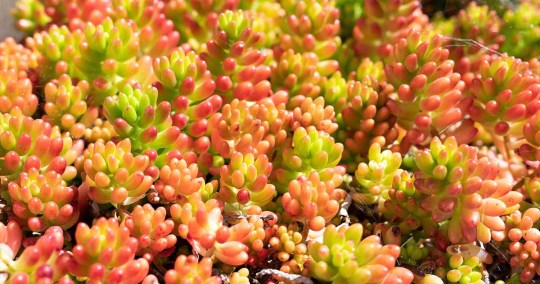
Sedum x rubrotinctum Looking for a succulent that’s as tough as it is charming? Sedum x rubrotinctum, commonly known as jelly bean plant or pork and beans, offers both resilience and whimsy. The plump, candy-colored leaves add a playful element to container arrangements and xeriscapes alike. Their delightfully shaped and brightly colored foliage do, in fact, look a bit like jelly beans. This herbaceous perennial succulent is a hybrid cross between Sedum pachyphyllum and Sedum stahlii, both stonecrop species that are native to Mexico. We link to vendors to help you find relevant products. If you buy from one of our links, we may earn a commission. The succulent, beadlike foliage starts out apple green in spring, gradually blushing in shades of orange, red, and bronze when stressed by full sun or drought, a natural response to protect against sun damage. Come fall, those hues can mellow into soft pink. In our guide to growing stonecrop we provide an overview of how to cultivate succulents in the Sedum genus. This article covers everything you need to know about growing jelly bean plants. Here’s what we’ll be talking about: Hardy in Zones 9 to 11, jelly bean plants are heat-loving and low-maintenance. Their tolerance for drought makes them ideal for water-wise gardening, and their cheerful appearance earned them the Royal Horticultural Society’s Award of Garden Merit in 2012. Quick Look Common name(s): Jelly bean plant, pork and beans Plant type: Succulent perennial Hardiness (USDA Zone): 9-11 Native to: Cultivated hybrid; parent species native to Mexico Bloom time / season: Spring to summer Exposure: Full sun to partial shade Soil type: Loose, sandy, gravelly, well draining Soil pH: 6.6-7.8, slightly acidic to slightly alkaline Time to maturity: 2-3 years Mature size: 6-8 inches tall, up to 24 inches wide Best uses: Containers, rock gardens, houseplant, ground cover Taxonomy Order: Saxifragales Family: Crassulaceae Genus: Sedum Species: × rubrotinctum A spreading and sprawling sedum that can reach eight inches tall, S. x rubrotinctum has stout, chubby, banana-shaped leaves arranged spirally around fleshy stems creating the jelly bean resemblance that gives this succulent its name. During the spring and summer months, mature specimens send up clusters of small, star-shaped flowers in bright yellow with red undertones. Whether you’re planting a rock garden, adding texture to a mixed succulent bowl, or looking for a low-fuss houseplant with flair, S. x rubrotinctum is an excellent choice. Despite the sugary nickname, this plant isn’t for snacking. It’s toxic to both humans and pets, and the sap can irritate the skin. Handle with care, especially when pruning or propagating. How to Grow Jelly bean plants aren’t picky, but giving them the right environment will help them look their best. Jelly bean plants are hardy in Zones 9 to 11, so if you choose to grow them outdoors in cooler zones, you’ll need to put them in a container that you can bring inside during the cold months. Indoor temperatures should be somewhere between 60 to 80°F. Light Jelly bean plants thrive in bright conditions. Outdoors, they prefer at least six hours of direct sun daily, though some afternoon shade can help prevent scorching in hot climates. Indoors, provide bright, indirect light – placing them near a south-facing window is ideal. Soil These succulents prefer lean, well-draining soil. Organically-rich soil can encourage leggy, floppy growth. Sandy or gravelly soils work well, with an ideal pH between 6.6 and 7.8. For potted specimens, choose a light, airy mix formulated for succulents and cacti. Make sure your container has drainage holes to prevent water from pooling at the roots. Water Once established, jelly bean plants are drought tolerant and rarely need supplemental irrigation when grown outdoors in most climates. Rainfall is usually sufficient. If you want to be hands-on, or you’re growing indoors, water deeply whenever the soil has completely dried out. Reduce watering in winter when the succulent is semi-dormant. During the growing season, expect to water more frequently as temperatures rise. Always allow the soil to dry thoroughly between waterings to avoid rot. Where to Buy You can generally find this species in nurseries that carry a good selection of succulents. Jelly Bean Plant If you prefer to shop online, you can find jelly bean plants available at Nature Hills Nursery in #1 containers. Maintenance While jelly bean plants thrive on minimal care, a bit of timely attention can go a long way towards keeping them healthy and attractive. Prune out any stems or leaves that are dead, damaged, or showing signs of disease. This helps improve airflow, prevent the spread of pathogens, and maintain a tidy appearance. You can learn more about pruning sedum here. As with any spreading species, if it starts to range out of bounds you can either pull them up or divide your sedum to reduce its footprint – and propagate more specimens! Additionally, you should keep track of outdoor temperatures if you’re growing outside in climates that are further north than Zone 9. When temperatures start to dip below freezing, you should bring the sedum inside to keep them alive for the winter. Propagation The leaves and stems of S. × rubrotinctum are quite delicate and prone to snapping off when bumped or handled. But that fragility comes with a silver lining – this species is exceptionally easy to propagate. From Stem Cuttings To propagate from stem cuttings, start by filling a seed tray or four-inch container with a well-draining soilless potting medium. Use a sharp, sterile blade to snip off long, healthy stems, and strip the leaves from the lower half of each cutting. Allow the cut ends to callus over by setting them out at room temperature in a dry spot for a day or two. Once callused, insert the defoliated ends into the medium. Keep the container in a location with bright, indirect light and temperatures above 60°F. Water just enough to moisten the medium without making it soggy. The soil should feel like a well-wrung-out sponge, damp, but not wet. Within a few weeks, the cuttings should develop roots and can be potted up individually. From Leaf Cuttings Jelly bean plants can also be propagated from individual leaves. To remove, gently pinch and twist each leaf from the stem. Discard any that are damaged and retain only whole, healthy ones. Allow the leaves to callus for a day or two, then place them on their sides on the surface of a well-draining soilless medium that’s lightly moist. Maintain bright, indirect light and a temperature above 60°F. Keep the medium slightly moist until roots develop, which usually takes a few weeks. When rooted, each leaf can be transplanted into its own container. Transplanting Whether you’ve propagated your own or purchased a potted specimen, transplanting is simple. Prepare a lean, well-draining growing medium and dig a hole just large enough to accommodate the root system. Set the plant in place, backfill with soil, and water lightly to settle it in. Pests and Disease Jelly bean plants are typically unbothered by deer or rabbits, but a few pests and diseases can still cause trouble, especially if growing conditions aren’t ideal. Here’s what to watch for: Pests Black vine weevils are among the most damaging. The larvae feed on roots below the surface, while adult beetles chew notches into leaf margins at night. Both can weaken the plant. Beneficial nematodes can be applied to the soil to control larvae. To deter adults, treat foliage with a pyrethrin spray during their active periods in spring and summer. Aphids, mealybugs, and scale insects may also infest plants, using piercing-sucking mouthparts to drain sap from stems and leaves. Their feeding weakens the plant and may result in cosmetic damage. Aphids and scale secrete honeydew, which can attract ants and lead to sooty mold, while mealybugs leave behind clusters of waxy white residue. Treat infestations by dabbing insects with cotton swabs soaked in 70 percent isopropyl alcohol. Avoid spraying the plant with water to dislodge pests as the foliage is easily damaged. Slugs and snails are another concern, especially for outdoor specimens. These mollusks feed on leaves and may chew through entire stems near the base. Handpick them at night or use beer traps to attract and drown them. Disease The primary diseases affecting jelly bean plants are stem and root rots, both biotic and abiotic. These typically result in blackened, mushy, or collapsed foliage. Overwatering is almost always a contributing factor, whether from poor drainage or excessive irrigation. To prevent rot, water only when the soil is completely dry and ensure it’s well-raining. If symptoms appear, remove and discard affected plants to prevent further spread. A Real Sweet Hybrid Not for snacking, but definitely a visual treat, jelly bean plants bring cheerful color and texture to indoor and outdoor spaces alike. Now that you know how to grow S. × rubrotinctum, you can enjoy its vibrant foliage year-round and thanks to its ease of propagation, it’s easy to share with friends as gifts! Have questions still? Want to share some pics of your own jelly bean plants for design inspiration? Let us know in the comments section below! And for more information about growing sedum, add these guides to your reading list next: © Ask the Experts, LLC. ALL RIGHTS RESERVED. See our TOS for more details. Uncredited photos: Shutterstock. !function(f,b,e,v,n,t,s) if(f.fbq)return;n=f.fbq=function()n.callMethod? n.callMethod.apply(n,arguments):n.queue.push(arguments); if(!f._fbq)f._fbq=n;n.push=n;n.loaded=!0;n.version='2.0'; n.queue=[];t=b.createElement(e);t.async=!0; t.src=v;s=b.getElementsByTagName(e)[0]; s.parentNode.insertBefore(t,s)(window, document,'script', ' fbq('init', '176410929431717'); fbq('track', 'PageView'); Source link
2 notes
·
View notes
Photo

Nigella is a classic beauty, bringing beautiful colour and whimsy to gardens and bouquets. Ready to fall head over heels for love-in-a-mist? Here are some top tips for growing the nigella plant as a cut flower or dried seed pod. While flowers never truly go out of style, certain blooms can become trendy. I’ve noticed many ‘old-fashioned’ flowers become new favourites for florists and flower gardeners alike, including sweet peas, hydrangeas, and my personal favourite, lilacs. I predict that love-in-a-mist (nigella) will have a similar rise! This old-fashioned cottage flower has looks airy, is super easy to grow, and is versatile both in the garden and in the vase. I first became familiar with the nigella plant a few years ago, as I was looking for interesting seed heads to collect. What I didn’t expect was how much I would also love the flower. I was soon torn between cutting the flowers for bouquets or waiting for the nigella pods to use instead. Let me get you hooked on growing your own nigella flowers. Here are my top tips! Nigella pods dry beautifully, retaining their unique shape and foliage. Meet the Nigella Plant Known commonly as love-in-a-mist, Nigella damascena is native to southern Europe, North Africa, and Southwest Asia. It’s recognized for its ferny foliage and lacy bracts that surround the flower, giving it a very whimsical appearance. It belongs perfectly in a fairy garden. Nigella flowers are star-shaped and can come in single or double blooms. They’re most known for being blue, but also come in shades of purple, pink, and white. Bees love the flower, but they’re considered deer-resistant. The flowers bloom in spring and early summer for a few weeks before they turn into seed pods, which can also be harvested and dried to use as a textural ingredient in fresh or dried bouquets. A happy nigella plant naturally branches and produces plenty of blooms. When to Start Nigella Damascena Seeds Nigella plants are hardy in zones 2-11 and are considered a cool-season annual. This means they like a cold start to life and are best grown in the spring. For those with mild winters, you can sow directly in the fall. This will give you the tallest stems and earliest growth, though you may need row cover as cold protection. If starting in the fall, plant seeds 6-8 weeks before the first fall frost. Personally, I haven’t had much luck sowing in the fall and prefer to start seeds in the spring. Direct sowing is easiest, as nigella plants are known to dislike transplanting. You can sow seeds directly outside 1-2 weeks before the last frost (they are frost-tolerant). I’ve started my seeds indoors without any trouble. If starting indoors, you can put the seeds in the freezer for ten days to speed up germination. Start the seeds inside 6-8 weeks before the last frost, and move them outside after the last frost. Succession plant the nigella seeds every few weeks until June to get the longest growing season. Planting Nigella Nigella seeds require darkness to sprout, so you’ll want to cover the seeds lightly with soil. It takes 10-14 days for the sprouts to germinate. Space or thin your nigella to be six inches apart. They grow best in full sun, but will also grow in partial sun. AKA, the more sun, the more blooms. Nigella plants grow to be 18-24 inches tall. It takes 65-70 days for it to flower, and 80-85 days for it to produce seed pods. Nigella flowers can also grow in containers. If growing in a container, ensure it has room to accommodate the mature plant and drainage holes. A one-gallon container for one nigella plant is a good rule of thumb. A nigella seedling before it grows its first set of “true leaves.” Caring for Nigella Flowers Nigella flowers will naturally branch out, so there’s no need to pinch young plants. As a spring flower, it will bloom well in conditions under 24°C (75°F). Once temperatures get hot and regularly above 27°C (80°F), the plant will begin to die back. Nigella plants have average moisture needs. They prefer consistent moisture, but can tolerate some drought. They do best in well-draining soil. To encourage more blooming, you can fertilize once a month. The plant may self-sow depending on the conditions, and if you leave some seed heads on the plant. You can deadhead flowers to promote more blooms, but this also prevents seed pods from developing. Harvesting Nigella Flowers Nigella flowers work wonderfully in arrangements as a filler, thanks to their lacy foliage. They give a very airy feel to an arrangement, as well as texture. If you’re harvesting flowers, cut the flower when it is three-quarters of the way open. The flowers will continue to open after cutting. Harvest the central stem first, almost to ground level, leaving the side shoots to continue growing. Flowers should last 7-10 days in a vase. Leave the flowers on the plant if you want to harvest the seed pods. The dried nigella pods are so pretty and unique, and dry beautifully. Harvest the seed pods early to prevent blemishes and so they don’t dump seeds. Ideally, the stripe should still be visible. Hang the nigella pods upside down for 2-3 weeks in a cool, dry place. Then they should last you for years to come. Ideally, harvest when the pods are still green and the stripes are showing. Notable Nigella Plant Varieties Some varieties sold in nurseries are used as bedding plants, while others are better suited for cut flowers thanks to their height. Here are a few to use for cut flower arrangements. ‘Miss Jekyll’ is one of the most popular varieties to grow, with beautiful double blooms. ‘Miss Jekyll Dark Blue’ gives a beautiful royal blue hue while ‘Miss Jekyll Rose’ has rose-white flowers that turn a beautiful plum as they age. ‘Albion’ has pure white flowers, which make them great for just about any flower arrangement. They produce a unique, deep mahogany seed pod when dried. ‘Delft Blue’ is one of the most popular cut flower varieties right now. It has white flowers with dark blue and purple streaks. ‘Persian Jewels’ starts off a pale baby blue before transforming into hues of purple, blue, white, and in between. Dried bouquet featuring pods from Nigella Plum Loco Mix FAQ About Nigella Damascena Is love-in-a-mist poisonous? The plant itself is not really considered edible and is only considered slightly poisonous. It is more often used as an ornamental.The seeds can be used for cooking, with a somewhat nutmeg-like and slightly spicy flavour. However, Nigella sativa (also known as black cumin or fennel flower) is more commonly used in its place, since it has a better flavour. What is the love-in-a-mist flower’s meaning? The name love-in-a-mist comes from the flower being nestled in lacy foliage, giving an airy-mist-like appearance. The Latin name, Nigella Damascena, comes from the Latin word for black “niger” due to the colour of the seeds, and Damascus, Syria where the plant can be found.In a bouquet, it can symbolize the openness to love, heart strength, or unrequited love. Is nigella a perennial or annual? Nigellas are considered annuals. They often won’t make it through a whole gardening season, no matter your zone, as they prefer cool conditions and will die back in heat. However, they can be re-seeders, meaning that they may sow seeds that will bloom the following year. More Cut Flowers to Grow From Vancouver, BC, Holly is Garden Therapy’s Content Manager. She has a BFA in Writing from the University of Victoria as well as a diploma in Floristry Design from Burnaby CCE. At home, she loves to grow cut flowers and dried flowers for her business, Dirty Daisy Florals, and is an avid houseplant collector and lover of bees. You can find her at @dirtydaisyflorals and @hollyheuversocial. Source link
#PLANTS_AND_SEEDS#BOUQUETS#CUT_FLOWERS#DECOR#DRIED#DRIED_FLOWERS#FLOWERS#GARDEN#GORGEOUS#GROWING#GROWING_GUIDE#MONTH_SEPTEMBER_WEEK_3#NIGELLA#PLANTS#THERAPY
3 notes
·
View notes
Photo
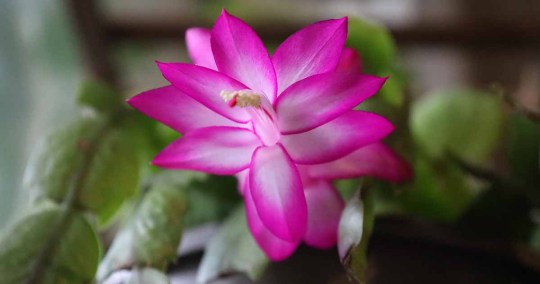
Have you ever wondered why some plants bloom in the spring, in the summer, and others during the fall? Or why certain species even flower in the dead of winter (thank you, hellebores!)? Have you ever mused about what would happen if you took a spring flowering plant in the northern hemisphere and moved it to the southern hemisphere? Would it keep blooming at the same time of year now that spring has become autumn? Perhaps you are curious about why you can never get your lettuce to keep growing through the summer, even when the temperatures are sufficiently cool. If any of these questions have ever crossed your mind, you’re pondering a phenomenon known as photoperiodism. Photoperiodism influences both plants and animals. It’s the reason that hummingbirds breed and migrate when they do and why hostas send up their flower stalks in early summer rather than the fall. Isn’t nature cool? If you’re curious about this process and want to know more about it and even how you can manipulate photoperiodism to your advantage, here’s what we’ll go over: What Is Photoperiodism? In a nutshell, photoperiodism refers to the response of a plant or animal to the amount of sunlight and darkness that it is exposed to. As you have probably noticed, the days grow longer during the spring and shorter during the fall. The shortest day of the year is in early winter, December 21 in the Northern Hemisphere and June 21 in the Southern Hemisphere. But plants don’t have calendars. They use light, among other environmental conditions like temperature, to tell them when it’s the right time of year to start the growth or flower cycle. That’s where photoperiodism comes in. When the days are long and the nights are short, some species are triggered to start flowering. Technically, it’s the length of darkness that triggers this growth. The amount of daylight – or lack of it – is what can signal to a plant that they should hurry up and start reproducing via flowering. Scientists believe it’s to ensure that plants will be blooming when the necessary pollinators are around. It also helps ensure that the plant sends out blossoms during the time of year when they won’t be killed by extreme temperatures. As an aside, researchers and botanists are concerned that some plants aren’t adapting their photoperiods to go along with the lengthening of the seasons that is occurring as a result of climate change. Since daylight hours aren’t changing even though the temperatures are, plants might end up flowering at a time of year when their primary pollinators aren’t around. That’s because insects and other pollinators are adjusting to accommodate the climate as spring starts earlier and the fall starts later in many areas. So a bee might emerge and start feeding weeks earlier than it used to, and not be around when the plant that needs it for pollination is in bloom. Can You Manipulate It? You betcha! Greenhouse and houseplant growers manipulate photoperiods all the time. It can be done to speed up maturation for harvest, encourage flowering outside of their typical period, and more. For these purposes, artificial light is close enough to sunlight to convince plants that it’s time to start blossoming. To simulate longer nights, growers use black cloth to block light. Generally, you want to increase the “daylight” gradually rather than just doing it all at once. I have forced plants using this method when I want to have a specimen ready for a teaching opportunity, to get a headstart on the growing season, and to have food growing during the winter. So it isn’t just professional growers who can take advantage of manipulating day length. The Five Categories For ease of communication, we group photoperiodism into five categories: 1. Obligate Long-Day Obligate (or qualitative) long-day plants require long day lengths and short nights to flower. In other words, they won’t flower at all if the days aren’t long and the nights short. Any plant that only blooms when the days are longer than the nights are in this category. If I were a plant, this is where you’d group me, too. Bachelor’s buttons (Centaurea spp.), dill (Anethum graveolens), fuchsia (Fuchsia spp.), and sweet pea (Lathyrus spp.) are some examples of obligate long-day species. 2. Facultative Long-Day Facultative long-day plants prefer long days and short nights. But unlike obligate long-day types, they will still flower no matter what. They’ll just flower earlier in the year if they have the daylight conditions they prefer. Examples of species in this category include African daisy (Dimorphothica spp.), basil (Ocimum basilicum), pansy (Viola spp.), and snapdragon (Antirrhinum spp.). 3. Obligate Short-Day Obligate short-day plants are the opposite of obligate long-day plants. They only flower when the nights are longer than the day. When the nights are over 12 hours long, that’s when they shine. Obligate short-day species include African marigold (Tagetes erecta), cosmos (Cosmos spp.), holiday cacti (Schlumbergera spp.), and zinnia (Zinnia spp.). 4. Facultative Short-Day Facultative short-day plants can flower regardless of the daylight, but they will flower earlier when the days are short and nights are long. This category encompasses species like cotton (Gossypium spp.), soybeans (Glycine max), and rice (Oryza spp.). 5. Day-Neutral Then there is the day-neutral category. As the name suggests, these are plants that couldn’t care less about what the daylight hours are doing, provided they have enough sun exposure, which varies according to species. Begonia (Begonia spp.), cucumber (Cucumis sativus), dianthus (Dianthus spp.), impatiens (Impatiens spp.), and tomatoes (Solanum lycopersicum) are some examples of day-neutral species. The vast majority of herbaceous annuals have photoperiod requirements, while a bit over half of woody perennials do. If a plant flowers only in the spring or fall, there’s a good chance that it isn’t day-neutral. Most of the time, all species within a genus share the same photoperiod requirements, but there can be one-offs or exceptions. And researchers aren’t always certain about how to classify every plant. For example, French marigolds are day-neutral, but some cultivars, such as ‘Naughty Marietta’ aren’t. This particular cultivar is facultative short-day. African marigolds are usually considered obligate short-day, but some experts say that they’re facultative short-day. Within these groups, we generally say that a plant that needs 12 hours or more of daylight to flower is a long-day plant. What can we say, botany isn’t an exact science. So, to go back to lettuce bolting, lettuce is a facultative long-day plant. That’s why it will send up those tall stalks once the summer arrives. It’s not just about heat, the longer days are signaling that it should start the reproductive process. See the Light All gardeners know that light has a big impact on our plants. That’s why most of us would never try to grow a tomato in a spot where it only receives about an hour of direct sunlight! We all know it just wouldn’t work. But most of us don’t think about the length of the day and night when growing our favorite flowers, houseplants or vegetables. That’s because most of our growing endeavors line up with our growing seasons, but if you want to be able to manipulate or understand why your plant is acting the way it is, understanding photoperiodism is key. Are you interested in photoperiodism? Are you trying to make your Christmas cactus bloom perhaps? Or maybe you heard the term and you’re curious about what it means? Let us know in the comments section below! If you’d like to learn some other botany basics, we have several guides that might be just the thing. Here are a few you might find useful: © Ask the Experts, LLC. ALL RIGHTS RESERVED. See our TOS for more details. Uncredited photos: Shutterstock. !function(f,b,e,v,n,t,s) if(f.fbq)return;n=f.fbq=function()n.callMethod? n.callMethod.apply(n,arguments):n.queue.push(arguments); if(!f._fbq)f._fbq=n;n.push=n;n.loaded=!0;n.version='2.0'; n.queue=[];t=b.createElement(e);t.async=!0; t.src=v;s=b.getElementsByTagName(e)[0]; s.parentNode.insertBefore(t,s)(window, document,'script', ' fbq('init', '176410929431717'); fbq('track', 'PageView'); Source link
3 notes
·
View notes