#Pdf viewer mac commands tricks
Explore tagged Tumblr posts
Visit Tumblr Blog
Explore Tumblr blogs with no restrictions, modern design and the best experience.
Last Seen Tumblr Blogs


Fun Fact
The Tumblr office adopted Tommy, an 11-year-old Pomeranian.
Text
Pdf viewer mac commands tricks

#Pdf viewer mac commands tricks pdf#
#Pdf viewer mac commands tricks install#
#Pdf viewer mac commands tricks plus#
#Pdf viewer mac commands tricks pdf#
Many people these days prefer using PDF files because many on-line documents and books now come in form PDF files. Supports configurable keyboard shortcuts and many others.Also supports fullscreen and presentation views.Supports scale, rotate and fit functions.Supports outline, properties and thumbnail panes.It also supports other document formats as well, includin PS and DjVu.īelow is a list of its features and components: Qpdfview is a tabbed document viewer for Linux that uses Poppler for PDF support. Importantly, it can also handle pdf encoded with Chinese GBK well.Written modularly to support additional features.
#Pdf viewer mac commands tricks plus#
Supports PDF 1.7 with transparency, encryption, hyperlinks, annotations, searching plus many more.
Supports a highly quality anti-aliased graphics renderer.
It is highly-extensible because of its modular nature.Ī handful of its notable features include: Mupdf is a free, small, lightweight, fast and complete PDF and XPS viewer.
#Pdf viewer mac commands tricks install#
To install Gnu GV PDF viewer in Linux, type: $ sudo apt-get install gv Suggested Read: 9 Best File Comparison and Difference (Diff) Tools for Linux It also has old an graphical user interface. Theisen, which was originally developed by Johannes Plass. It is a improved derivation of Ghostview developed by Timothy O. It is an old PDF and Postscript document viewer that works on an X display by providing a graphical user interface for the Ghostscript interpreter. To install XPDF Viewer, use following command: $ sudo apt-get install xpdf It has an old interface, therefore user who care so much about nice graphics may not enjoy using it so much. It additionally includes a text extractor, PDF-to-PostScript converter and many other utilities. It is an old and open source PDF viewer for the X windows system that is supported on Linux and other Unix like operating systems. To install PDF.js in Linux systems, follow the below instructions: $ git clone git:///mozilla/pdf.js.gitĪnd then you can open Visit Homepage: 5. It is also an open source, community driven project that is supported by Mozilla labs. It is a general-purpose web based PDF viewer built with HTML5. To install Foxit Reader on Linux systems, follow below instructions: $ cd /tmp Add/verify digital signatures and many more.Support for scanning documents into PDF.It is features-rich with features including: Suggested Read: 10 Best Markdown Editors for Linux The latest version as of this writing is Foxit reader 7 which offers some security features that protect against vulnerabilities. It is a cross platform, small and fast secure PDF reader. To install Evince PDF reader in Linux, use: $ sudo apt-get install evince It supports document formats such as PDF, PDF, Postscript, tiff, XPS, djvu, dvi, plus many more. It is a lightweight document viewer which comes as the default on Gnome desktop environment. To install Okular PDF reader in Linux, use apt or yum to get it as shown: $ sudo apt-get install okular
0 notes
Text
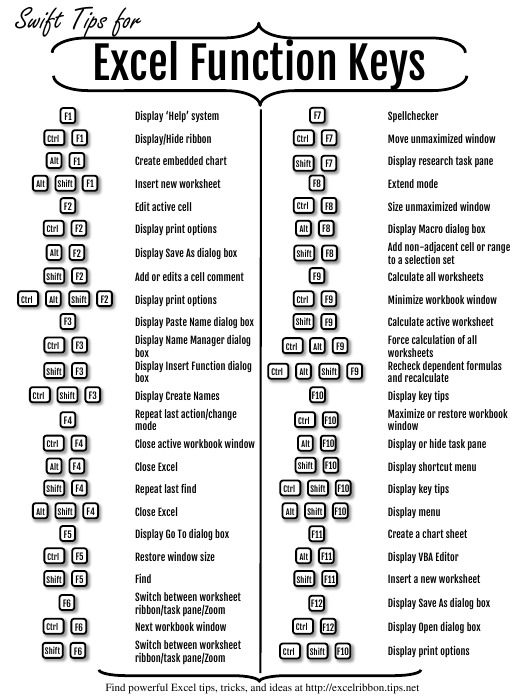
Mac Shortcut Keys For Excel

Table of contents
Worksheets and WorkbooksViewRow and Column SelectionRibbon ControlPivot TablesOperating within a CellNavigating and Selecting CellsHelp and MenusGroup Selection General ExcelGeneral Cell ControlFormulas and FunctionsFormatting Text and NumbersDialog BoxesBordersAdvanced Selection Adding Content to Cells
Worksheets and Workbooks
Within Excel you can conduct calculations on multiple worksheets and workbooks open at the same time. Each workbook acts as its own separate window on your PC or Mac, while each worksheet acts as a tab within a workbook with separate cells. This section of the Excel Guide offers all shortcuts you need to open, navigate between, and control all of these options.
Excel PC and Mac Keyboard Shortcuts - This page lists PC and Mac shortcuts side by side; A Macintosh Keyboard is available showing general Macintosh keyboard shortcuts Search Internet4Classrooms. Custom Search Internet4classrooms is a collaborative effort. This article describes the keyboard shortcuts, function keys, and some other common shortcut keys in Excel for Mac. Notes: The settings in some versions of the Mac operating system (OS) and some utility applications might conflict with keyboard shortcuts and function key operations in Office for Mac.
Cubase pro 8 for macbook air. The powerful music production unit is increasing to be famous to record and create a piece of outstanding music as you love to create.Cubase Pro 10.5.3 Keygen is suitable for MAC, Win to utilize the power comprehensively.
Aug 30, 2019 This wikiHow teaches you how to insert rows in Excel using shortcuts on a Windows or Mac computer. There are keyboard shortcuts as well as custom shortcuts that you can use in Excel spreadsheets. Open an excel spreadsheet.
Keyboard shortcuts help save time and increase productivity. Unfortunately, most people only know the holy trinity of shortcuts — COPY, PASTE, and UNDO. In Excel, there are more than 500 keyboard shortcuts.
Windows keys
Keyboard Shortcut Keys For Excel
ShiftF11
CtrlPgDn
CtrlPgUp
F6
CtrlTab
Mac Shortcut Keys For Excel Spreadsheet
CtrlShiftTab
CtrlF9
CtrlF10
Worksheets and Workbooks
Excel Keyboard Shortcuts Pdf
Within Excel you can conduct calculations on multiple worksheets and workbooks open at the same time. Each workbook acts as its own separate window on your PC or Mac, while each worksheet acts as a tab within a workbook with separate cells. This section of the Excel Guide offers all shortcuts you need to open, navigate between, and control all of these options.
View
Row and Column Selection
Ribbon Control
Pivot Tables
Operating within a Cell
Navigating and Selecting Cells
Help and Menus
Group Selection
General Excel
General Cell Control
Formulas and Functions
Formatting Text and Numbers
Dialog Boxes
Borders
Advanced Selection
Adding Content to Cells
Get more Reference tips and tricks
All video downloader for mac free software. Subscribe to our email updates and get Reference tips direct to your inbox.
To use a keyboard shortcut, press and hold one or more modifier keys and then press the last key of the shortcut. For example, to use Command-C (copy), press and hold the Command key, then the C key, then release both keys. Mac menus and keyboards often use symbols for certain keys, including modifier keys:
On keyboards made for Windows PCs, use the Alt key instead of Option and the Windows logo key instead of Command.
Some keys on some Apple keyboards have special symbols and functions, such as for display brightness , keyboard brightness , Mission Control and more. If these functions aren't available on your keyboard, you may be able to reproduce some of them by creating your own keyboard shortcuts. To use these keys as F1, F2, F3 or other standard function keys, combine them with the Fn key.
Cut, copy, paste and other common shortcuts
Command-X: Cut the selected item and copy it to the Clipboard.
Command-C: Copy the selected item to the Clipboard. This also works for files in the Finder.
Command-V: Paste the contents of the Clipboard into the current document or app. This also works for files in the Finder.
Command-Z: Undo the previous command. You can then press Shift-Command-Z to Redo, reversing the undo command. In some apps, you can undo and redo multiple commands.
Command-A: Select All items.
Command-F: Find items in a document or open a Find window.
Command-G: Find Again: Find the next occurrence of the item previously found. To find the previous occurrence, press Shift-Command-G.
Command-H: Hide the windows of the front app. To view the front app but hide all other apps, press Option-Command-H.
Command-M: Minimise the front window to the Dock. To minimise all windows of the front app, press Option-Command-M.
Command-O: Open the selected item or open a dialogue to select a file to open.
Command-P: Print the current document.
Command-S: Save the current document.
Command-T: Open a new tab.
Command-W: Close the front window. To close all windows of the app, press Option-Command-W.
Option-Command-Esc: Force quit an app.
Command-Space bar: Show or hide the Spotlight search field. To perform a Spotlight search from a Finder window, press Command-Option-Space bar. (If you use multiple input sources to type in different languages, these shortcuts will change input sources instead of showing Spotlight. Find out how to change a conflicting keyboard shortcut.)
Control-Command-Space bar: Show the Character Viewer, from which you can choose emoji and other symbols.
Control-Command-F: Use the app in full screen, if supported by the app.
Space bar: Use Quick Look to preview the selected item.
Command-Tab: Switch to the next most recently used app amongst your open apps.
Shift-Command-5: In macOS Mojave or later, take a screenshot or make a screen recording. Or use Shift-Command-3 or Shift-Command-4 for screenshots. Find out more about screenshots.
Shift-Command-N: Create a new folder in the Finder.
Command-Comma (,): Open preferences for the front app.
Sleep, log out and shut down shortcuts
You may need to press and hold some of these shortcuts for slightly longer than other shortcuts. This helps you to avoid using them unintentionally.
Power button: Press to turn on your Mac or wake it from sleep. Press and hold for 1.5 seconds to put your Mac to sleep.* Continue holding to force your Mac to turn off.
Option-Command-Power button* or Option-Command-Media Eject : Put your Mac to sleep.
Control-Shift-Power button* or Control-Shift-Media Eject : Put your displays to sleep.
Control-Power button* or Control-Media Eject : Display a dialogue asking whether you want to restart, sleep or shut down.
Control-Command-Power button:* Force your Mac to restart, without prompting to save any open and unsaved documents.
Control-Command-Media Eject : Quit all apps, then restart your Mac. If any open documents have unsaved changes, you will be asked whether you want to save them.
Control-Option-Command-Power button* or Control-Option-Command-Media Eject : Quit all apps, then shut down your Mac. If any open documents have unsaved changes, you will be asked whether you want to save them.
Control-Command-Q: Lock your screen immediately.
Shift-Command-Q: Log out of your macOS user account. You will be asked to confirm. To log out immediately without confirming, press Option-Shift-Command-Q.
* Does not apply to the Touch ID sensor.
Finder and system shortcuts
Command-D: Duplicate the selected files.
Command-E: Eject the selected disk or volume.
Command-F: Start a Spotlight search in the Finder window.
Command-I: Show the Get Info window for a selected file.
Command-R: (1) When an alias is selected in the Finder: Show the original file for the selected alias. (2) In some apps, such as Calendar or Safari, refresh or reload the page. (3) In Software Update preferences, check for software updates again.
Shift-Command-C: Open the Computer window.
Shift-Command-D: Open the desktop folder.
Shift-Command-F: Open the Recents window, showing all of the files you have viewed or changed recently.
Shift-Command-G: Open a Go to Folder window.
Shift-Command-H: Open the Home folder of the current macOS user account.
Shift-Command-I: Open iCloud Drive.
Shift-Command-K: Open the Network window.
Option-Command-L: Open the Downloads folder.
Shift-Command-N: Create a new folder.
Shift-Command-O: Open the Documents folder.
Shift-Command-P: Show or hide the Preview pane in Finder windows.
Shift-Command-R: Open the AirDrop window.
Shift-Command-T: Show or hide the tab bar in Finder windows.
Control-Shift-Command-T: Add selected Finder item to the Dock (OS X Mavericks or later)
Shift-Command-U: Open the Utilities folder.
Option-Command-D: Show or hide the Dock.
Control-Command-T: Add the selected item to the sidebar (OS X Mavericks or later).
Option-Command-P: Hide or show the path bar in Finder windows.
Option-Command-S: Hide or show the Sidebar in Finder windows.
Command-Slash (/): Hide or show the status bar in Finder windows.
Command-J: Show View Options.
Command-K: Open the Connect to Server window.
Control-Command-A: Make an alias of the selected item.
Command-N: Open a new Finder window.
Option-Command-N: Create a new Smart Folder.
Command-T: Show or hide the tab bar when a single tab is open in the current Finder window.
Option-Command-T: Show or hide the toolbar when a single tab is open in the current Finder window.
Option-Command-V: Move the files in the Clipboard from their original location to the current location.
Command-Y: Use Quick Look to preview the selected files.
Option-Command-Y: View a Quick Look slideshow of the selected files.
Command-1: View the items in the Finder window as icons.
Command-2: View the items in a Finder window as a list.
Command-3: View the items in a Finder window in columns.
Command-4: View the items in a Finder window in a gallery.
Command-Left Bracket ((): Go to the previous folder.
Command-Right Bracket ()): Go to the next folder.
Command-Up Arrow: Open the folder that contains the current folder.
Command-Control-Up Arrow: Open the folder that contains the current folder in a new window.
Command-Down Arrow: Open the selected item.
Right Arrow: Open the selected folder. This only works when in list view.
Left Arrow: Close the selected folder. This only works when in list view.
Command-Delete: Move the selected item to the Bin.
Shift-Command-Delete: Empty the Bin.
Option-Shift-Command-Delete: Empty the Bin without a confirmation dialogue.
Command-Brightness Down: Turn video mirroring on or off when your Mac is connected to more than one display.
Option-Brightness Up: Open Displays preferences. This works with either Brightness key.
Control-Brightness Up or Control-Brightness Down: Change the brightness of your external display, if supported by your display.
Option-Shift-Brightness Up or Option-Shift-Brightness Down: Adjust the display brightness in smaller steps. Add the Control key to this shortcut to make the adjustment on your external display, if supported by your display.
Option-Mission Control: Open Mission Control preferences.
Command-Mission Control: Show the desktop.
Control-Down Arrow: Show all windows of the front app.
Option-Volume Up: Open Sound preferences. This works with any of the volume keys.
Option-Shift-Volume Up or Option-Shift-Volume Down: Adjust the sound volume in smaller steps.
Option-Keyboard Brightness Up: Open Keyboard preferences. This works with either Keyboard Brightness key.
Option-Shift-Keyboard Brightness Up or Option-Shift-Keyboard Brightness Down: Adjust the keyboard brightness in smaller steps.
Option key while double-clicking: Open the item in a separate window, then close the original window.
Command key while double-clicking: Open a folder in a separate tab or window.
Command key while dragging to another volume: Move the dragged item to the other volume, instead of copying it.
Option key while dragging: Copy the dragged item. The pointer changes while you drag the item.
Option-Command while dragging: Make an alias of the dragged item. The pointer changes while you drag the item.
Option-click a disclosure triangle: Open all folders within the selected folder. This only works when in list view.
Command-click a window title: See the folders that contain the current folder.
Find out how to use Command or Shift to select multiple items in the Finder.
Click the Go menu in the Finder menu bar to see shortcuts for opening many commonly used folders, such as Applications, Documents, Downloads, Utilities and iCloud Drive.
Document shortcuts
The behaviour of these shortcuts may vary, depending on the app you're using.
Command-B: Boldface the selected text, or turn boldfacing on or off.
Command-I: Italicise the selected text, or turn italics on or off.
Command-K: Add a web link.
Command-U: Underline the selected text or turn underlining on or off.
Command-T: Show or hide the Fonts window.
Command-D: Select the Desktop folder from within an Open dialogue or Save dialogue.
Control-Command-D: Show or hide the definition of the selected word.
Shift-Command-Colon (:): Display the Spelling and Grammar window.
Command-Semicolon (;): Find misspelled words in the document.
Option-Delete: Delete the word to the left of the insertion point.
Control-H: Delete the character to the left of the insertion point. Or use Delete.
Control-D: Delete the character to the right of the insertion point. Or use Fn-Delete.
Fn-Delete: Forward delete on keyboards that don't have a Forward Delete key. Or use Control-D.
Control-K: Delete the text between the insertion point and the end of the line or paragraph.
Fn-Up Arrow: Page Up: Scroll up one page.
Fn-Down Arrow: Page Down: Scroll down one page.
Fn-Left Arrow: Home: Scroll to the beginning of a document.
Fn-Right Arrow: End: Scroll to the end of a document.
Command-Up Arrow: Move the insertion point to the beginning of the document.
Command-Down Arrow: Move the insertion point to the end of the document.
Command-Left Arrow: Move the insertion point to the beginning of the current line.
Command-Right Arrow: Move the insertion point to the end of the current line.
Option-Left Arrow: Move the insertion point to the beginning of the previous word.
Option-Right Arrow: Move the insertion point to the end of the next word.
Shift-Command-Up Arrow: Select the text between the insertion point and the beginning of the document.
Shift-Command-Down Arrow: Select the text between the insertion point and the end of the document.
Shift-Command-Left Arrow: Select the text between the insertion point and the beginning of the current line.
Shift-Command-Right Arrow: Select the text between the insertion point and the end of the current line.
Shift-Up Arrow: Extend text selection to the nearest character at the same horizontal location on the line above.
Shift-Down Arrow: Extend text selection to the nearest character at the same horizontal location on the line below.
Shift-Left Arrow: Extend text selection one character to the left.
Shift-Right Arrow: Extend text selection one character to the right.
Option-Shift-Up Arrow: Extend text selection to the beginning of the current paragraph, then to the beginning of the following paragraph if pressed again.
Option-Shift-Down Arrow: Extend text selection to the end of the current paragraph, then to the end of the following paragraph if pressed again.
Option-Shift-Left Arrow: Extend text selection to the beginning of the current word, then to the beginning of the following word if pressed again.
Option-Shift-Right Arrow: Extend text selection to the end of the current word, then to the end of the following word if pressed again.
Control-A: Move to the beginning of the line or paragraph.
Control-E: Move to the end of a line or paragraph.
Control-F: Move one character forwards.
Control-B: Move one character backwards.
Control-L: Centre the cursor or selection in the visible area.
Control-P: Move up one line.
Control-N: Move down one line.
Control-O: Insert a new line after the insertion point.
Control-T: Swap the character behind the insertion point with the character in front of the insertion point.
Command-Left Curly Bracket ((): Left align.
Command-Right Curly Bracket ()): Right align.
Shift-Command-Vertical bar (|): Centre align.
Option-Command-F: Go to the search field.
Option-Command-T: Show or hide a toolbar in the app.
Option-Command-C: Copy Style: Copy the formatting settings of the selected item to the Clipboard.
Option-Command-V: Paste Style: Apply the copied style to the selected item.
Option-Shift-Command-V: Paste and Match Style: Apply the style of the surrounding content to the item pasted within that content.
Option-Command-I: Show or hide the inspector window.
Shift-Command-P: Page setup: Display a window for selecting document settings.
Shift-Command-S: Display the Save As dialogue or duplicate the current document.
Shift-Command-Minus sign (-): Decrease the size of the selected item.
Shift-Command-Plus sign (+): Increase the size of the selected item. Command-Equal sign (=) performs the same function.
Shift-Command-Question mark (?): Open the Help menu.
Other shortcuts
For more shortcuts, check the shortcut abbreviations shown in the menus of your apps. Every app can have its own shortcuts, and shortcuts that work in one app might not work in another.
Apple Music shortcuts: Choose Help > Keyboard shortcuts from the menu bar in the Music app.
Other shortcuts: Choose Apple menu > System Preferences, click Keyboard, then click Shortcuts.
Learn more
Create your own shortcuts and resolve conflicts between shortcuts
Change the behaviour of the function keys or modifier keys
0 notes
Text
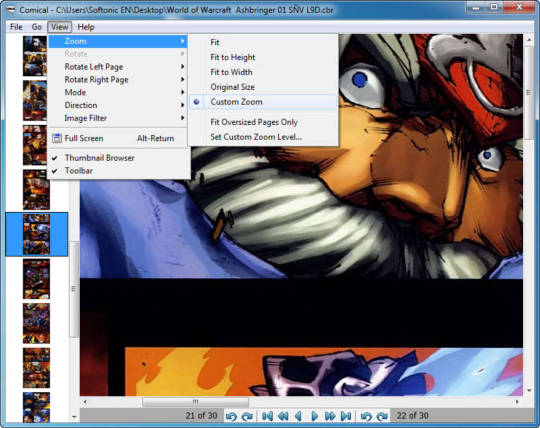
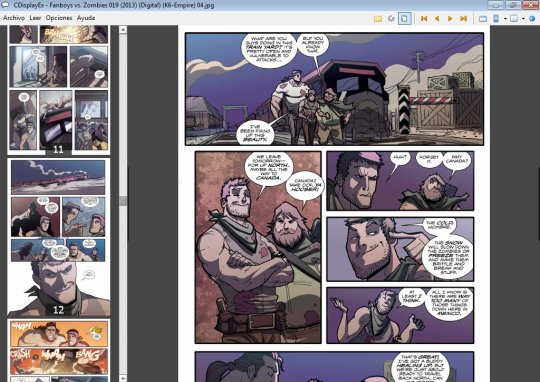
Cbr Comic Reader For Mac

The comic book data is compressed using popular archive file formats, such as RAR or ZIP, resulting CBR or CBZ files. To open such archives you need appropriate applications that are able to preserve and render the images in order. Jomic is a great comic book viewing application that can read CBZ. Download CBR Reader. Version 1.10.33. Select your Operating System. Informations Windows 64 bits. Use this version on a Windows 64 bits computer only. This version run on any computer, but you will not be able to see thumbnails of comics if you install this version on a 64 bits computer. Old version 1.8. This is the original. Simple Comic for Mac is a fast, lightweight comic reader for the Mac that will open a number of different file formats. This makes it very portable, and because it opens and reads comics so. Comic book reader for mac free download. Calibre eBook Manager Calibre is a useful and powerful eBook Management System. Calibre has the ability to view, convert.
Best Android Cbr Reader
Cbr Reader Windows 10 Free
CBR (comic book reader) or CBZ files need special apps or software to be displayed on different devices. Here we chose some of the greatest comic book reader apps and programs for a variety of mobile and desktop devices.
– Android
‘Perfect Viewer’ is the ideal choice for those just want to open CBR files on their Android tablets or cellphones without needing an integrated comic e-books store. Users are allowed to open JPEG, GIF and PDF files as well. Also installing the source plugin will enable them to open e-comic files from Dropbox, OneDrive or Google Drive.
And for comic fans with insatiable need for new titles regularly, we recommend ‘Marvel Unlimited’ app. The app itself is free but the subscription plans let users to be able to read more than 17,000 digital comics made by Marvel.
Users could also try these apps from Google Play for opening and reading comic file formats:
Comic Chameleon (free)
ComicRack (free)
Challenger Comics Viewer (free)
Comics by Comixology (free)
– iOS
There are tens of cool and great CBR apps for iOS devices such as iPhone and iPad. Many of these apps come with lots of useful features beyond just opening and displaying CBR and CBZ files.
‘Comics Plus’ is one of these great apps. The app makes an excellent job at displaying comics on an iPad or iPhone. However, many users might find some of its options overcomplicated. Comics Plus provides cool features such as assisted panning, manga mode and turning page without losing the adjusted zoom.
Other great apps for reading comics on iPhone or iPad include:
ComicFlow (free)
Comic Reader! ($3.99)
SideBooks (free)
iComics ($1.99)
YACReader ($1.99)
Comic Zeal ($4.99)
These iOS apps could be downloaded from Apple iTunes Store.
– Kindle
Kindle tablets (such as Kindle Fire or Kindle Paperwhite) are very popular these days. Other than reading books, they’re used for watching movies, listening to music, checking out Facebook page, etc. But reading comics could get this tablet even more useful.
For comics files, there are several apps for Kindle tablet. The best one is ‘Perfect Viewer’ ($2.99), especially for those with lots of comic books to read. Other features provided by Perfect Viewer app is adjusting saturation/hue, adjusting image contrast & brightness, cutting off white border, and more.
Another great app for Kindle is ‘ComiCat’ ($2.99). Using this app it’s very easy to open and read Manga on Kindle devices.
But if looking for a free Kindle app, Comics by comiXology is the recommended choice which is provided for free through Amazon website.
These comic book reading apps for Kindle could be downloaded from Amazon Appstore.
– Comic book reader software for desktop
MComix (Win & Linux)
Based on the Comix project, Mcomix is a CBR program updated with stability improvements, bug fixes and a few new tricks. And all these are at a time when it has been a few years with no new development from Comix.
Best Android Cbr Reader
As an open-source, free and lightweight comic reader, MComix is very suitable to open .cbr files with its simple interface which has been designed to support sequential images very well. Some of the other formats supported by the application are PDF, LHA, CBT, CB7 and CBZ.
To install and run this reader software, a number of programs and libraries are necessary. These include Setuputils, PIL (Python Imaging Library) version 1.1.5 or above, GTK+ and PyGTK (version 2.14 or higher) and Python 2.5. Windows users could get all the software requirements from the all-in-one package made available from the download page.
Also please note that rar/unrar needs to be installed on the Linux system so that RAR/CBR archives could be opened by the software.
Users could download Mcomix from: https://sourceforge.net/projects/mcomix/files/latest/download
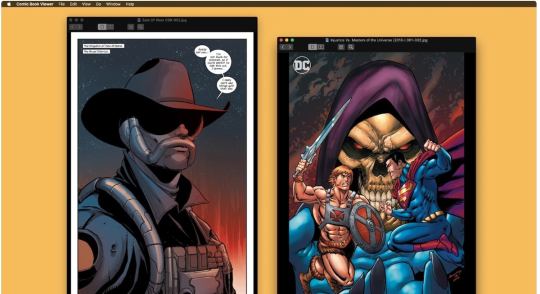
SimpleComic (Mac OS X)
If you want an easy to use, lightweight and easy to install app to open comic books on Mac OS X then choose SimpleComic. The software is free and open-source. Comics could be viewed both as full-screen and windowed in the reader.

Other features include: text notes, translation notes, compatible with most archive formats for comic books, supporting 7z, RAR and ZIP archives, page capture, auto-save, quicklook, multiple sessions, page rotation, page scaling, page ordering, and more.
Users could download SimpleComic CBR reader for Mac from http://dancingtortoise.com/simplecomic
Similar Posts:
How to Convert FLAC to MP3 (Mac & Windows) While FLAC files are only supported on a handful of multimedia players and audio devices,…
Top 4 Google Voice Alternatives Google Voice might be a great solution, but there are various alternatives you can try…
Best 5 Speech to Text Apps for Android Although speech recognition software has been out for over a decade, its technology is only…
BleachBit vs CCleaner Review & Comparison It’s very important to try and eliminate junk from your PC, and both BleachBit and…
9.7.0 is out!
September 03, 20
New features are:
Image enlargement/stretching can now be disabled for fit to width and height
New option to show covers as single pages in double page mode (enabled by default)
fix object leaks in database code
add bidirectional sync support between the iOS app and the server (YACReader for iOS 3.10.0 or higher needed, it will be released next)
add support for port setting from the command line
other minor fixes and improved stability and performance.
Any feedback is always welcome.
If you enjoy using YACReader I want to ask you to consider becoming a patron and donate some money to keep the project alive, you can find the YACReader's Patreon page here: https://www.patreon.com/yacreader
Patreon page launched
August 28, 20
Hi all,
As you know YACReader, YACReaderLibrary and YACReaderLibraryServer are free and open source, so they don't generate any income at all. I keep the web site and users' forum free of any kind of ads. The project has been alive for more than 10 years, it has hundreds of thousands downloads and a huge amount of users all over the world.
If you enjoy using these apps I want to ask you to consider becoming a patron and donate some money to keep the project alive, you can find the YACReader's Patreon page here: https://www.patreon.com/yacreader
Thanks!
YACReader 9.6.0 is out!
September 27, 19
It was long overdue, but this new version is finally here. Check what's new:
RAR5 support.
Fix some issues in magnifying glass when used in hdpi screens.
New setting to close YACReaderLibrary to the system tray. Yay! This is specially relevant for those who use YACReaderLibrary for streaming comics to the iOS app.
Fastest and more reliable sync back from iOS.
Option to hide current/next comic banner in the grid view.
Fix saving progress when reading in double page mode.
Fixes in Comic Vine integration.
Other fixes and stability improvements.
I know it doesn't look like much, but a lot of work has been done to keep the project in good shape, it is not visible for the final user yet, but it will pay off in the long term.
I would like to thank you all for using YACReader, for becoming part of the community and for all your help testing pre-release, and providing feedback. Thanks to all the contributors making YACReader better and better, I can't thank you enough for all those PRs. Felix, thanks for helping with the forum and thank you for all that 'non visible' work that keeps the project in good shape.
Mutiple selection in YACReader for iOS
Cbr Reader Windows 10 Free
September 06, 19
Multiple items selection has been a feature since the first version, do you know how to use it?, take a look at this video:
New features in YACReader 3.5.0 for ios
August 17, 19
A new version of YACReader for iOS is available with a good number of new features for improving the reading experience:
Double page mode, can be set in the bottom bar while reading. Options are: single page, double page, and double page auto, in auto mode the double page is enabled when the device is in landscape mode.
New fit settings, now there is an always fit option to force the content to fit in the screen, no matter the orientation or the content aspect ratio.
Faster image loading.
Better image loading and caching when reading remotely (from YACReaderLibrary).
New UI to open next/previous comic while reading, when the cover or the last page are reached trying to go further will open a pop up showing the cover of the next comic (or the previous comic if we are going backwards), taping the cover will open the comic. (This only works in local mode yet)
3 additional tap modes to configure the hot areas in the screen, Viewer -> Options -> Settings (Page turn settings).
Added a new setting to disable page turn animation, Viewer -> Options -> Settings (Page turn settings).
Fix page turns triggered while zooming.
Fixes and stability improvements.
As always, if you experience any problems or if you have suggestions, please do not hesitate to contact me.
0 notes