#TUT2
Explore tagged Tumblr posts
Visit Tumblr Blog
Explore Tumblr blogs with no restrictions, modern design and the best experience.
Last Seen Tumblr Blogs


Fun Fact
Tumblr Inc. is funded by 13 investors.
Video
youtube
Cardcaptor Sakura Seal Wand Origami Tut2║庫洛魔法使 封印之杖 摺紙教學2║カードキャプターさくら 封印...
Welcome to visit my YOUTUBE origami channel / 歡迎瀏覽我的YT摺紙頻道
https://www.youtube.com/channel/UClV2_JM4cdbUkTMyYxp3WDw/videos
0 notes
Text
Music Videos as a space for Identity construction
The song 'Young Van Riebeek or ‘YVR', is the creation of a persona which plays on the name of Jan van Riebeeck. The arrival of the Dutch lead by Jan Van Riebeeck, in 1652 marks the beginning of colonial history in South Africa. It was incidental to their trading with the East Indian companies. In summary, through the music video, Youngsta explores our history and present and how they are still interconnected and how history has thus shaped identities and the position most people are in today.
The music video was filmed and took place in contemporary Cape Town, specifically around the area of Kalk Bay. However, the use of the sunlight reflection within the video distorts our vision and clarity as to where exactly the video is taking place. Perhaps this was intentional. I also found It is interesting that Youngsta framed the music video against a familiar backdrop to possibly allude to the idea that slave trade mentality and segregation is still within in our midsts today. As Cape Town has been used as a marker of place, we can see that the clothing within the music video has been used as markers of identity and time. It is evident that Youngsta is creating a historical re-imagining of the time when Van Riebeeck came to the cape in the 1600s. The different outfits explore different cultures. For instance, we see the Europeans or the colonisers and their attire and the Muslim dress. It is clear to see that there is identity construction within the music video as Youngsta himself is portraying his own Muslim cape Malay identity.
Through the music video, the difficult realities of Cape Town are being suggested through different visual signifiers and the idea of spatial apartheid informing certain identities. The music video highlights the erasure of the history of what happened in Cape Town and aims to inspire the youth to break free from the slave mentality that still occurs in their own identity construction. Youngsta himself states that he wonders whos going to lead children to their own revolution, he presents that “If no one is going to teach them this history and tell them what they're capable of, then who is? It has to be me then”
http://www.kfm.co.za/articles/2018/12/03/watch-youngstacpt-yvr-young-van-riebeek-is SW-finally-out
0 notes
Text
something that's definitely noteworthy is that the left set (RND_PROJ iirc) contains scrapped content from the alpha! the blue one at the bottom to the middle -left is known as the brain tree, and was going to have some story importance we don't know and probably never will. the image actually has compression as it's a snip from one of the really old trailers, the room and assets necessary were lost
the bright white/dark purple one near it is also from the alpha, in a cluster of rooms that's roughly analogous to shaded citadel
the one to the right of it, with the slugtumour is a reference to a fucked up glitch that happened, the room it's in seems to have been some kind of alpha tutorial room as its editor project name is tut2
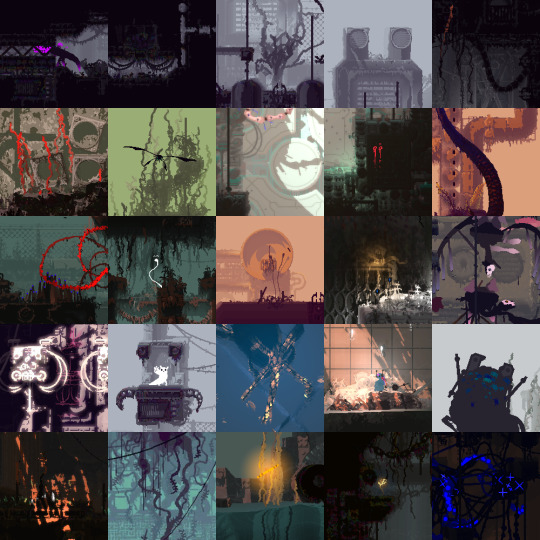
Was fucking around in the games folders and found this!! It's all the images the yellow overseer can show you but i don't think all of them were used
#shaded citadel#all of the alpha only rooms from its area have been incorporated into my region pack as sunken alley rooms#similarly to how i repurposed a couple of old ass industrial complex rooms for residential district
263 notes
·
View notes
Text
Display simple wordlist using crunch kali linux
http://www.tutorialshub.us/crunch-tool-tut2/
Display simple wordlist using crunch kali linux
In this tutorial, I will show you how to display simple wordlist using crunch tool.
Read about crunch tool from here
0 notes
Text
graphic tutorial #2
hey, there! i was asked by shin-donghos on instagram to do a tutorial on this edit of Taekwoon. I'm using Photoshop CC but if you're using another version or another program I'll try to explain things well enough but please let me know if you need any more details or a better explanation on something and i'll try my best to help you c:
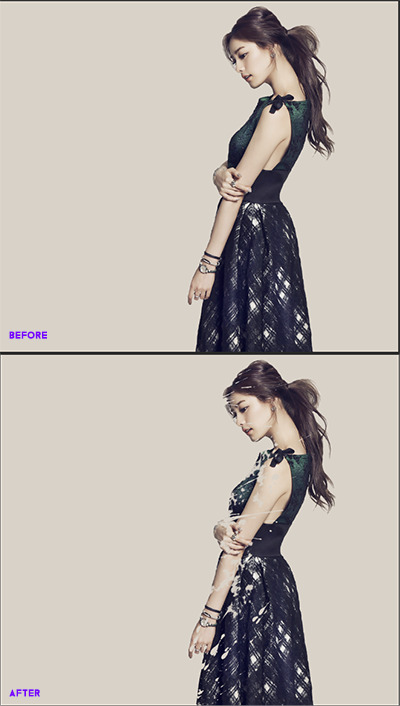
so this is what it looks like before and after i edited and reshaped.
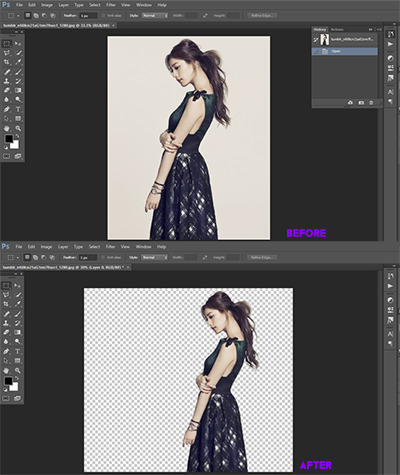
you can see that i made more room for me to work with to add the splatter marks. now to the fun stuff.
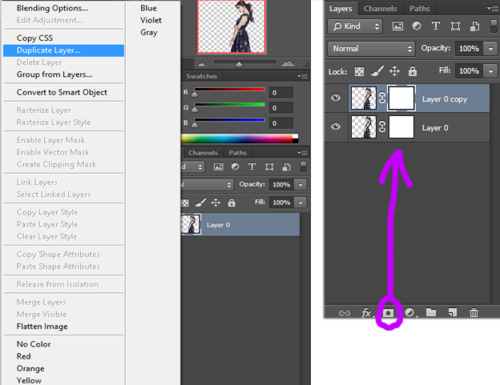
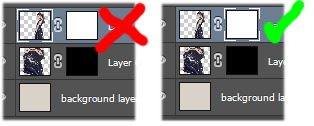
you're gonna duplicate the subject and add a mask layers to both layers.
now you're gonna hide the top layer by clicking on the eye icon next to the layer so we can work with the one underneath it. to the layer we're working on, you're gonna liquify it. so either go Filter > Liquify or Shift + Ctrl + X. from there you're gonna drag the image to the side where you want the spatter marks generally to be and fill that area up. it doesn't have to be completely filled, again, this is where your splatter marks generally will be.

so since i messed around with it, a lot, this is how that layer came out.
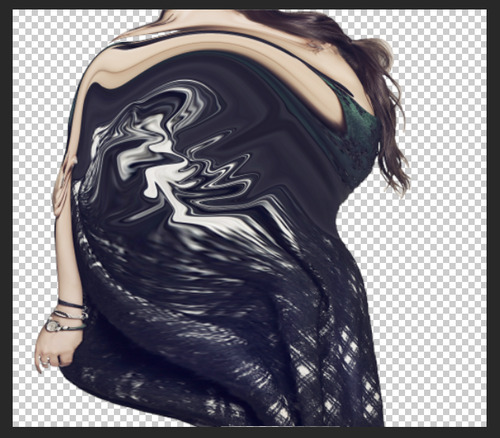
i moved it around to the point where i wanted more of the dress would be a part of the splatter marks rather than her arm.
now you're gonna go to the layer you just worked with and click on the layer mask and invert it (Ctrl + I) and that will "hide" your layer but you'll see the use of it soon if you aren't familiar with layer masks.

now you're gonna unhide the top layer by clicking on the eye next to the picture and even more fun will start now. you're gonna take out your splatter brushes (wherever you were able to get them. i got mine off of a deviantart user but i don't recall who it was.) i'm gonna have a solid background now since it'll help to have an idea of what you're finished product would like like. i'm gonna take a splatter brush and have the color set to black and start working on the top layer to take away from her a bit. this is important: be sure to have selected not the photo but the layer mask itself. should look like this.
now, with your splatter brush with the color set to black, start clicking randomly (not clicking and dragging) on your subject just enough to hide some of the top layer but not too much to completely obscure them.
i tried to make it as subtle but still noticeable but you can experiment with whatever looks best. i may end up making more marks in the end but as you can see, with the layer mask, you can mess around to take away what you think looks good and if you mess up, change the color on your brush to white, fill that are up, and start over.
now, to the other layer that we liquified, you're gonna do what we did the thr first layer, but opposite. if you recall, we inverted the layer mask earlier to "hide" it and now you're gonna uncover it. just change the brush color to white and repeat click generally in the area where you stretched it out. be sure to have your layer mask selected.
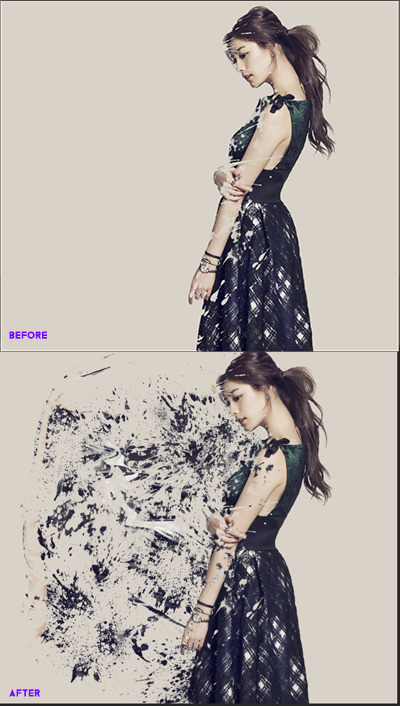
and that's pretty much it. you can play with it more by adding a texture or some more color to the background. if you wanna see my finished version of this just click here. other than just resize it if you haven't already and you can slap on a psd over it, then upload it and you're done ^^ i hope this was helpful to any of you and good luck!
5 notes
·
View notes
Video
youtube
Cardcaptor Sakura Clear Card Dream Key Origami Tut2║庫洛魔法使 透明牌篇 夢之鑰 摺紙教學2...
Welcome to visit my YOUTUBE origami channel / 歡迎瀏覽我的YT摺紙頻道
https://www.youtube.com/channel/UClV2_JM4cdbUkTMyYxp3WDw/videos
0 notes
Photo

Simple things about formatting and applying CSS-designed things into your HTML.
(2)
0 notes