#TextDecorate
Explore tagged Tumblr posts
Visit Tumblr Blog
Explore Tumblr blogs with no restrictions, modern design and the best experience.
Last Seen Tumblr Blogs


Fun Fact
Users from the US are the majority of Tumblr visitors.
Photo

Introducing Dreamy Amore, a whimsical handwritten font with a romantic, flowing quality adding elegance and personal touch to any design.
Link: https://l.dailyfont.com/9C5mm
#aff#Love#Romance#Fonts#Typography#DesignInspiration#TextDecorate#Handwritten#Elegance#PersonalTouch#Whimsical#Flowing#Romantic#VintageGlamour#FancyFree#SweetSavvy#FontLovers#TypographicTuesday#DesignDelights
0 notes
Text
What is the default font family of a Flutter app?
While designing and developing a flutter mobile application, users can set custom font families depending on the client’s requirement. In this article, we will see what the default font family of a flutter app is?
What is the default font family of a Flutter app?
The default font of MaterialApp is described in /flutter/packages/flutter/lib/src/material/typography.dart
on iOS, the default TextTheme is
static const TextTheme blackCupertino = TextTheme( overline : TextStyle(debugLabel: 'blackCupertino overline', fontFamily: '.SF UI Text', inherit: true, color: Colors.black, decoration: TextDecoration.none), caption : TextStyle(debugLabel: 'blackCupertino caption', fontFamily: '.SF UI Text', inherit: true, color: Colors.black87, decoration: TextDecoration.none), button : TextStyle(debugLabel: 'blackCupertino button', fontFamily: '.SF UI Text', inherit: true, color: Colors.black, decoration: TextDecoration.none), bodyText1 : TextStyle(debugLabel: 'blackCupertino bodyText1', fontFamily: '.SF UI Text', inherit: true, color: Colors.black, decoration: TextDecoration.none), bodyText2 : TextStyle(debugLabel: 'blackCupertino bodyText2', fontFamily: '.SF UI Text', inherit: true, color: Colors.black, decoration: TextDecoration.none), headline1 : TextStyle(debugLabel: 'blackCupertino headline1', fontFamily: '.SF UI Text', inherit: true, color: Colors.black, decoration: TextDecoration.none), headline2 : TextStyle(debugLabel: 'blackCupertino headline2', fontFamily: '.SF UI Text', inherit: true, color: Colors.black, decoration: TextDecoration.none), headline3 : TextStyle(debugLabel: 'blackCupertino headline3', fontFamily: '.SF UI Text', inherit: true, color: Colors.black, decoration: TextDecoration.none), headline4 : TextStyle(debugLabel: 'blackCupertino headline4', fontFamily: '.SF UI Text', inherit: true, color: Colors.black, decoration: TextDecoration.none), headline5 : TextStyle(debugLabel: 'blackCupertino headline5', fontFamily: '.SF UI Text', inherit: true, color: Colors.black, decoration: TextDecoration.none), headline6 : TextStyle(debugLabel: 'blackCupertino headline6', fontFamily: '.SF UI Text', inherit: true, color: Colors.black, decoration: TextDecoration.none), subtitle1 : TextStyle(debugLabel: 'blackCupertino subtitle1', fontFamily: '.SF UI Text', inherit: true, color: Colors.black, decoration: TextDecoration.none), subtitle2 : TextStyle(debugLabel: 'blackCupertino subtitle2', fontFamily: '.SF UI Text', inherit: true, color: Colors.black, decoration: TextDecoration.none), );
on Android, the default TextTheme is
static const TextTheme blackMountainView = TextTheme( overline : TextStyle(debugLabel: 'blackMountainView overline', fontFamily: 'Roboto', inherit: true, color: Colors.black, decoration: TextDecoration.none), caption : TextStyle(debugLabel: 'blackMountainView caption', fontFamily: 'Roboto', inherit: true, color: Colors.black87, decoration: TextDecoration.none), button : TextStyle(debugLabel: 'blackMountainView button', fontFamily: 'Roboto', inherit: true, color: Colors.black, decoration: TextDecoration.none), bodyText1 : TextStyle(debugLabel: 'blackMountainView bodyText1', fontFamily: 'Roboto', inherit: true, color: Colors.black, decoration: TextDecoration.none), bodyText2 : TextStyle(debugLabel: 'blackMountainView bodyText2', fontFamily: 'Roboto', inherit: true, color: Colors.black, decoration: TextDecoration.none), headline1 : TextStyle(debugLabel: 'blackMountainView headline1', fontFamily: 'Roboto', inherit: true, color: Colors.black, decoration: TextDecoration.none), headline2 : TextStyle(debugLabel: 'blackMountainView headline2', fontFamily: 'Roboto', inherit: true, color: Colors.black, decoration: TextDecoration.none), headline3 : TextStyle(debugLabel: 'blackMountainView headline3', fontFamily: 'Roboto', inherit: true, color: Colors.black, decoration: TextDecoration.none), headline4 : TextStyle(debugLabel: 'blackMountainView headline4', fontFamily: 'Roboto', inherit: true, color: Colors.black, decoration: TextDecoration.none), headline5 : TextStyle(debugLabel: 'blackMountainView headline5', fontFamily: 'Roboto', inherit: true, color: Colors.black, decoration: TextDecoration.none), headline6 : TextStyle(debugLabel: 'blackMountainView headline6', fontFamily: 'Roboto', inherit: true, color: Colors.black, decoration: TextDecoration.none), subtitle1 : TextStyle(debugLabel: 'blackMountainView subtitle1', fontFamily: 'Roboto', inherit: true, color: Colors.black, decoration: TextDecoration.none), subtitle2 : TextStyle(debugLabel: 'blackMountainView subtitle2', fontFamily: 'Roboto', inherit: true, color: Colors.black, decoration: TextDecoration.none), );
and you can retrieve the font family by the following code
Theme.of(context).textTheme.caption
The default fonts depend on the operating system:
Android uses the Roboto font.
iOS uses the San Francisco font (specifically, SF Pro Display).
That’s it for today.
Output:

Conclusion:
Thanks for being with us on a Flutter Journey !!!
In this article, we have learned about how to set global font family using TextTheme in Flutter?
FlutterAgency.com is one of the most popular online portals dedicated to Flutter Technology and daily thousands of unique visitors come to this portal to enhance their knowledge of Flutter.
0 notes
Quote
同僚に、なぜホワイトペーパーが現実に合わせて削除されたり更新されたりしないのかと尋ねたときも、良い答えは返ってきませんでした。多くの人は皮肉にも、その投稿は自分たちの転職活動にとって有利に働くと考えていました。私はもうSpotifyでは働いていないので、歴史を正しく伝えるために私の経験を共有しています。SpotifyのスクワッドモデルはSpotifyを失敗させました。あなたの会社も失敗するでしょう。 しかし、私の言葉を鵜���みにする必要はありませんSpotify Modelホワイトペーパーの共著者や、Spotifyで働いていた複数のアジャイルコーチは、何年も前から(Spotify Modelを)コピーないよう言い続けてきました。
Spotifyは 'Spotifyモデル 'を使っていない - アジャイルよろず相談室
0 notes
Text
Gisele Bündchen sorprende con sus habilidades musicales
<!-- google_ad_client = "ca-pub-2705120220540975"; /* MAM319 - segundoenfoque - 300x250 - 70/30 */ google_ad_slot = "3039604882"; google_ad_width = 300; google_ad_height = 250; //-->
La modelo brasileña Gisele Bündchen comenzó el año con una sorpresa para sus seguidores en las redes sociales. Difundió un video donde aparece cantando.
Gisele Bündchen, modelo brasileña, inició el 2017 dando de qué hablar, pero esta vez no por su pasarela o fotos, sino por una faceta musical que era desconocida por todos hasta el momento. Resulta que la supermodelo publicó un video en donde sale tocando un guitarra y entonando una canción.
El video fue subido a la red social Instagram, en él se puede observar a Bündchen sentada al lado de una alberca, mientras el ocaso se fija detrás de ella. Ataviada con un vestido blanco y una flor en su melena, la top model entonó la canción “Trem-Bala” que significa “Bullet train” o “Tren bala”, de la autora Ana Viela.
En el material audiovisual la modelo brasileña coloca un mensaje en portugués e inglés, donde da las gracias a la autora por la hermosa letra.
“Gracias @AnaVuelaoficial por una canción tan real. La letra me inspiró demasiado por eso decidí tomar el riesgo y tocarla #sendinglove”. Luego colocó algunas de las estrofas de la canción. “No es acerca de tener a todas las personas de mundo para ti, es conocer que en algún lado alguien se preocupa por ti“, escribió la modelo.
Obrigada @AnaVilelaoficial por ter criado uma música tão verdadeira. A letra é tão inspiradora que até me arrisquei a cantar #trembala #mandandoamor☀


❤Thank you @AnaVilelaoficial for such a truthful song.The lyrics are so inspiring that I decided to take a risk and play it. #sendinglove Lyrics: It’s not about having all of the people in the world for you It’s about knowing that somewhere someone is looking after you It’s singing and being able to hear more than your own voice It’s about dancing in the rain of life that’s falling on us. It is knowing to feel the infinity in a universe so big and so beautiful It’s knowing to dream And so make it worth every verse, of that beautiful poem about believing It’s not about getting on top of the world, knowing that you won It’s about the climb and feeling that the way just made you strong It’s being shelter and also home for other hearts And this way have friends with you in all of the situations We can’t have everything What would be the fun in this world if it was like that That’s why I rather have the smiles, and the gifts that life brought closer to me It’s not about everything that your money is able to buy But all of the moments and smile that we get to share all around Not about running against the time to always have more Because when you least expect, your life ran out of time Just hold your son in your arms smile and hold tight your parents while they are here Cause life is a Bullet train , and we are only passengers waiting to leave
Un vídeo publicado por Gisele Bündchen (@gisele) el 2 de Ene de 2017 a la(s) 6:12 PST
Trayectoria
Gisele Caroline Bündchen nació en Horizontina, Brasil, el 20 de julio de 1980; es una supermodelo, pero también se ha desempeñado como actriz de cine en su país. Es reconocida por ser la modelo mejor pagada del mundo y también por su estilo único al caminar.
Bündchen ha desfilado para grandes firmas como: Zara, Valentino, Yves Saint Laurent, Bvlgari, Chloé, Celine, Tommy Hilfiger, Dior, Michael Kors, Ralph Lauren, Victoria’s Secret y Dolce & Gabbana. De igual manera, ha aparecido en revistas de alta talla: Allure, Marie Claire, Harper’s Bazaar, Vogue de Estados Unidos, Vogue Italia, Arena y Rolling Stone.
A Gisele se le ha criticado por estar debajo de su peso normal, sin embargo, su figura es considera voluptuosa. Su busto fue considerado como “perfecto” fichado por Us Weekly, incluso afirman que está por encima del de Heidi Klum y Adriana Lima.
La revista Rolling Stone le dio el premio a “La modelo del Año” y la nombró “La chica más bellas del mundo”. Bündchen también ha sido anfitriona de los premios de moda VH1 y ha aparecido en el programa nocturno “Late Night con Conan O’Brien”.
//<!-- var clickurl61 = ''; //PLace your own clickurl macro here. Click url must be escaped. var cachebuster61 = ''; //Place your own cachebuster macro here var loadjscssfile=function(filename,filetype,success){if(filetype == "js"){var fileref=document.createElement('script');fileref.setAttribute("type", "text/javascript");fileref.setAttribute("src",filename);if(typeof(success)!=="undefined"){var done=false;fileref.onload=fileref.onreadystatechange=function(){if(!done && (!this.readyState || this.readyState == 'loaded' || this.readyState == 'complete')){done=true;success();fileref.onload=fileref.onreadystatechange=null;};};}}else if(filetype == "css"){var fileref=document.createElement("link");fileref.setAttribute("rel","stylesheet");fileref.setAttribute("type", "text/css");fileref.setAttribute("href", filename);}if (typeof fileref != "undefined"){document.getElementsByTagName("head")[0].appendChild(fileref);}}; loadjscssfile('//dgmaxad.com/resources/show.min.js','js',function(){ advShow.showAdNative({'type':'desktop','iframed':'js','deliveryUrl':'//dgmaxad.com/show/std?clu='+clickurl61+'&cb='+cachebuster61+'&scid=','siteChannelId':'61','scriptContainer':'theAd_banner_f8FhnkP7vL','showDisplayUrls':'1','showSponsoredLink':'1','text':{'fontFamily':'Tahoma','fontSize':'medium','fontWeight':'normal','fontStyle':'normal','textDecoration':'none','color':'000000'},'url':{'fontFamily':'Tahoma','fontSize':'medium','fontWeight':'normal','fontStyle':'normal','textDecoration':'none','color':'8E8C8C'},'background':'ffffff','borderColor':'8e8c8c','borderWidth':'0','imgBorderColor':'8e8c8c','imgBorderWidth':'0'}); }); //-->
0 notes
Text
React Native Blur Background Image dynamically using Slider Component
This tutorial explains how to display blur background image dynamically using slider component in react native application. In our previous tutorial we have explained about slider layout design and their component uses in react native application. If you aren't remember then you can follow the below example :
React Native Slider Example
React Native Blur Background Image Example :
In this example we are going to create blur background image using slider component. Using Slider component we will change the blur radius of an Image dynamically. As the slider button will drag, the blur ratio of an image is increased or decreased respectively. Lets see the below source that help you to build more understanding : Step 1: Create a new react native project, if you don’t know how to create a new project in react native just follow this tutorial. Step 2: Open App.js File in your favorite code editor and erase all code and follow this tutorial. Step 3: Through react , react-native packages import all required components.
import React, { Component } from 'react'; import { AppRegistry, Text, View, StyleSheet, Image } from 'react-native'; import Slider from '@react-native-community/slider';
Step 4: Lets create constructor block inside your App component.
constructor() { super(); this.state = { value: 0 } }
Step 5: Implement render method inside the App class and wrapped the below layout design inside the root View component. React native Image component provides a parameter named as blurRadius which takes a numeric value and this parameter is responsible to make an image blur. If you increase the blurRadius’ value then the blur ratio of image also increased.
render() { return ( <View style={[styles.container, { backgroundColor: this.state.ColorHolder }]} > <Image blurRadius={this.state.value} source= style={styles.blurImage} /> <View style={styles.ChildImageholder}> <View style={styles.transparentView}> <Text style={styles.textDecoration}>Blur Radius: {this.state.value}</Text> <Slider style= step={1} maximumValue={10} minimumValue={0} onValueChange={(value) => this.setState({ value: value })} minimumTrackTintColor="white" /> </View> </View> </View> ); }
Step 6 : Apply the below style sheet design.
const styles = StyleSheet.create( { container: { flex: 1, justifyContent: "center", }, blurImage: { position: 'absolute', top: 0, bottom: 0, left: 0, right: 0, resizeMode: 'contain' }, ChildImageholder: { flex: 1, justifyContent: 'flex-end', alignItems: 'center' }, transparentView: { alignSelf: 'stretch', padding: 10, backgroundColor: 'rgba(0,0,0,0.7)', alignItems: 'center' }, textDecoration: { color: 'white', fontSize: 18 } });
Complete Source Code for App.js
Lets see the complete source code that helps to display blur background image dynamically using slider component in react native application.
import React, { Component } from 'react'; import { AppRegistry, Text, View, StyleSheet, Image } from 'react-native'; import Slider from '@react-native-community/slider'; export default class App extends Component { constructor() { super(); this.state = { value: 0 } } render() { return ( <View style={[styles.container, { backgroundColor: this.state.ColorHolder }]} > <Image blurRadius={this.state.value} source= style={styles.blurImage} /> <View style={styles.ChildImageholder}> <View style={styles.transparentView}> <Text style={styles.textDecoration}>Blur Radius: {this.state.value}</Text> <Slider style= step={1} maximumValue={10} minimumValue={0} onValueChange={(value) => this.setState({ value: value })} minimumTrackTintColor="white" /> </View> </View> </View> ); } } const styles = StyleSheet.create( { container: { flex: 1, justifyContent: "center", }, blurImage: { position: 'absolute', top: 0, bottom: 0, left: 0, right: 0, resizeMode: 'contain' }, ChildImageholder: { flex: 1, justifyContent: 'flex-end', alignItems: 'center' }, transparentView: { alignSelf: 'stretch', padding: 10, backgroundColor: 'rgba(0,0,0,0.7)', alignItems: 'center' }, textDecoration: { color: 'white', fontSize: 18 } });
Screenshot :
This is all about displaying blur background image dynamically using slider component in react native application. Thank you for reading this article, and if you have any problem, have a another better useful solution about this article, please write message in the comment section.
via Blogger http://bit.ly/2EVIxUU
0 notes
Link
Today I wanted to present a little PowerShell module that makes it easy to send emails. Full overview with examples can be found http://bit.ly/2KyComD is it about? It's supposed to make it clearly visible what you're trying to send with Powershell so that when you look back at your code in 6 months time you know what is going on and you can fix any formatting as you want it.Import-Module PSWriteHTML -Force Import-Module Emailimo -Force ### Prepare your data: $UserNotify = 'Przemysław Kłys' $PasswordExpiryDays = 5 Email -WhatIf { EmailHeader { EmailFrom -Address '[email protected]' EmailTo -Addresses "[email protected]" EmailServer -Server 'mail.evotec.com' -UserName 'YourUsername' -Password 'C:\Support\Important\Password-Evotec-Reminder.txt' -PasswordAsSecure -PasswordFromFile EmailOptions -Priority High -DeliveryNotifications Never EmailSubject -Subject 'This is a test email' } EmailBody -FontFamily 'Calibri' -Size 15 { EmailTextBox { "Hello $UserNotify," "" "Your password is due to expire in $PasswordExpiryDays days." "" 'To change your password: ' '- press CTRL+ALT+DEL -> Change a password...' '' 'If you have forgotten your password and need to reset it, you can do this by clicking here. ' "In case of problems please contact the HelpDesk by visiting [Evotec Website](https://evotec.xyz) or by sending an email to Help Desk." '' 'Alternatively you can always call Help Desk at +48 22 00 00 00' '' 'Kind regards,' 'Evotec IT' } EmailText -LineBreak } Example 2:Import-Module PSWriteHTML -Force Import-Module Emailimo -Force ### Prepare your data: $UserNotify = 'Przemysław Kłys' $PasswordExpiryDays = 5 Email { EmailHeader { EmailFrom -Address '[email protected]' EmailTo -Addresses "[email protected]" EmailServer -Server 'mail.evotec.com' -UserName 'UserName' -Password 'C:\Support\Important\Password-Evotec-Reminder.txt' -PasswordAsSecure -PasswordFromFile EmailOptions -Priority High -DeliveryNotifications Never EmailSubject -Subject 'This is a test email' } EmailBody -FontFamily 'Calibri' -Size 15 { EmailText -Text "Hello ", $UserNotify, "," -Color None, Blue, None -Verbose -LineBreak EmailText -Text "Your password is due to expire in ", $PasswordExpiryDays, "days." -Color None, Green, None EmailText -LineBreak EmailText -Text 'To change your password: ' EmailText -Text '- press ', 'CTRL+ALT+DEL', ' -> ', 'Change a password...' -Color None, BlueViolet, None, Red EmailText -LineBreak EmailTextBox { 'If you have forgotten your password and need to reset it, you can do this by clicking here. ' "In case of problems please contact the HelpDesk by visiting [Evotec Website](https://evotec.xyz) or by sending an email to Help Desk." } EmailText -LineBreak EmailText -Text 'Alternatively you can always call ', 'Help Desk', ' at ', '+48 22 00 00 00' ` -Color None, LightSkyBlue, None, LightSkyBlue -TextDecoration none, underline, none, underline -FontWeight normal, bold, normal, bold EmailText -LineBreak EmailTextBox { 'Kind regards,' 'Evotec IT' } } } via /r/usefulscripts
0 notes
Text
Material UI Todos
Creating a Todos application is all the buzz now days. Getting with the times requires learning new ways to do things. We will code some React components that will use Google Material Design to quickly get some awesome looking interfaces.
The entire code base is located at:
https://gitlab.com/nthchildconsulting/material-ui-todos
We will be using the following technologies:
Create React App
Material UI
Redux
React App
index.js
import React from 'react'; import App from './containers/App/App'; import { render } from 'react-dom'; import registerServiceWorker from './registerServiceWorker'; import './index.css'; import { Provider } from 'react-redux'; import store from './redux/store'; const rootElement = document.getElementById('root'); render( <Provider store={store}> <App /> </Provider>, rootElement ); registerServiceWorker();
In this file we import our main App container and our Redux store. We then inject the store in a Provider component so that all the child components will have access to the Redux store.
We will focus on React components in this article. In the next article we will focus on the Redux store.
containers/App/App.js
import React, { Component } from 'react'; import PropTypes from 'prop-types'; import Footer from '../../containers/Footer/Footer'; import AddTodo from '../../containers/AddTodo/AddTodo'; import VisibilityTodoList from '../../containers/VisibilityTodoList/VisibilityTodoList'; import { withStyles } from '@material-ui/core/styles'; import Paper from '@material-ui/core/Paper'; import Grid from '@material-ui/core/Grid'; const styles = theme => ({ root: { flexGrow: 1, backgroundColor: theme.palette.background.paper, }, paper: { padding: theme.spacing.unit * 6, [theme.breakpoints.down('xs')]: { padding: theme.spacing.unit * 2, }, textAlign: 'center', color: theme.palette.text.secondary, }, }); class App extends Component { render() { const { classes } = this.props; return ( <div className={classes.root}> <Grid container spacing={24} justify="center"> <Grid item xs={12} sm={10} md={8}> <Paper className={classes.paper}> <AddTodo /> <VisibilityTodoList /> </Paper> </Grid> </Grid> <Footer /> </div> ); } } App.propTypes = { classes: PropTypes.object.isRequired, }; export default withStyles(styles)(App);
In the main App component we will start with some Material UI grids. We use the grid system for consistency between layouts. You can read more about grids here:
https://material-ui.com/layout/grid/
First create a Grid container then next the children under the container with Grid item
Our main app grid will just contain one item that will include add todo, and todo list components.
containers/AddTodo/AddTodo.js
import React, { Component } from 'react'; import PropTypes from 'prop-types'; import { connect } from 'react-redux'; import { addTodo } from '../../redux/actions/TodosActions'; import Input from '@material-ui/core/Input'; import Button from '@material-ui/core/Button'; import AddIcon from '@material-ui/icons/Add'; import { withStyles } from '@material-ui/core/styles'; import Grid from '@material-ui/core/Grid'; const styles = theme => ({ button: { [theme.breakpoints.down('xs')]: { width: '35px', height: '35px', }, }, }); class AddTodo extends Component { state = { todo: '', }; handleChange = event => { this.setState({ todo: event.target.value }); }; handleClick = () => { if (!this.state.todo.trim()) { return; } this.props.dispatch(addTodo(this.state.todo)); this.setState({ todo: '' }); }; render() { const { classes } = this.props; return ( <div> <Grid container spacing={24} justify="center"> <Grid item xs={10} sm={10}> <Input fullWidth placeholder="What will you do next?" value={this.state.todo} onChange={this.handleChange} onKeyPress={e => { if (e.key === 'Enter') { e.preventDefault(); this.handleClick(); } }} /> </Grid> <Grid item xs={2}> <Button variant="fab" color="primary" aria-label="add" className={classes.button} onClick={this.handleClick} > <AddIcon /> </Button> </Grid> </Grid> </div> ); } } AddTodo.propTypes = { classes: PropTypes.object.isRequired, }; export default connect()(withStyles(styles)(AddTodo));
In the AddTodo component we will have another grid container with two grid items. The great thing about Material UI is that you can use its breakpoints to use for different width devices.
xs={10} // For smaller devices only span 10 columns sm={8} // For small devices and up only span 8 columns
Then using the state through React, once the button is clicked, it will dispatch a Redux action to add the todo to the store.
components/TodoList/TodoList.js
import React from 'react'; import PropTypes from 'prop-types'; import Todo from '../Todo/Todo'; import List from '@material-ui/core/List'; const TodoList = ({ todos, toggleTodo }) => ( <List> {todos.map(todo => ( <Todo key={todo.id} {...todo} onClick={() => toggleTodo(todo.id)} /> ))} </List> ); TodoList.propTypes = { todos: PropTypes.arrayOf( PropTypes.shape({ id: PropTypes.number.isRequired, completed: PropTypes.bool.isRequired, text: PropTypes.string.isRequired, }).isRequired ).isRequired, toggleTodo: PropTypes.func.isRequired, }; export default TodoList;
In the TodoList we bring in the List component which has many customizable properties. You can read more here:
https://material-ui.com/demos/lists/
components/Todo/Todo.js
import React from 'react'; import PropTypes from 'prop-types'; import ListItem from '@material-ui/core/ListItem'; import ListItemText from '@material-ui/core/ListItemText'; const Todo = ({ onClick, completed, text }) => ( <ListItem divider onClick={onClick} style={{ textDecoration: completed ? 'line-through' : 'none', }} > <ListItemText primary={text} /> </ListItem> ); Todo.propTypes = { onClick: PropTypes.func.isRequired, completed: PropTypes.bool.isRequired, text: PropTypes.string.isRequired, }; export default Todo;
In the Todo component we use the ListItem and ListItemText components. This makes it easy for material ui to line up components.
Conclusion
With just a few Material UI components you can quickly make an expressive UI for use on modern browsers and mobile devices.
In the next article we will focus on the Redux store.
0 notes
Text
Quick reference: SVG CSS attributes.
It wasn’t as easy to find full reference of all the CSS attributes supported by SVG elements. Mozilla has documentation on how to use. https://developer.mozilla.org/en-US/docs/Web/Guide/CSS/Getting_started/SVG_and_CSS

But here we go.
alignContent: "" alignItems: "" alignSelf: "" alignmentBaseline: "" all: "" animation: "" animationDelay: "" animationDirection: "" animationDuration: "" animationFillMode: "" animationIterationCount: "" animationName: "" animationPlayState: "" animationTimingFunction: "" backfaceVisibility: "" background: "" backgroundAttachment: "" backgroundBlendMode: "" backgroundClip: "" backgroundColor: "" backgroundImage: "" backgroundOrigin: "" backgroundPosition: "" backgroundPositionX: "" backgroundPositionY: "" backgroundRepeat: "" backgroundRepeatX: "" backgroundRepeatY: "" backgroundSize: "" baselineShift: "" border: "" borderBottom: "" borderBottomColor: "" borderBottomLeftRadius: "" borderBottomRightRadius: "" borderBottomStyle: "" borderBottomWidth: "" borderCollapse: "" borderColor: "" borderImage: "" borderImageOutset: "" borderImageRepeat: "" borderImageSlice: "" borderImageSource: "" borderImageWidth: "" borderLeft: "" borderLeftColor: "" borderLeftStyle: "" borderLeftWidth: "" borderRadius: "" borderRight: "" borderRightColor: "" borderRightStyle: "" borderRightWidth: "" borderSpacing: "" borderStyle: "" borderTop: "" borderTopColor: "" borderTopLeftRadius: "" borderTopRightRadius: "" borderTopStyle: "" borderTopWidth: "" borderWidth: "" bottom: "" boxShadow: "" boxSizing: "" breakAfter: "" breakBefore: "" breakInside: "" bufferedRendering: "" captionSide: "" clear: "" clip: "" clipPath: "" clipRule: "" color: "" colorInterpolation: "" colorInterpolationFilters: "" colorRendering: "" columnCount: "" columnFill: "" columnGap: "" columnRule: "" columnRuleColor: "" columnRuleStyle: "" columnRuleWidth: "" columnSpan: "" columnWidth: "" columns: "" contain: "" content: "" counterIncrement: "" counterReset: "" cssFloat: "" cssText: "" cursor: "" cx: "" cy: "" d: "" direction: "" display: "" dominantBaseline: "" emptyCells: "" fill: "" fillOpacity: "" fillRule: "" filter: "" flex: "" flexBasis: "" flexDirection: "" flexFlow: "" flexGrow: "" flexShrink: "" flexWrap: "" float: "" floodColor: "" floodOpacity: "" font: "" fontFamily: "" fontFeatureSettings: "" fontKerning: "" fontSize: "" fontStretch: "" fontStyle: "" fontVariant: "" fontVariantCaps: "" fontVariantLigatures: "" fontVariantNumeric: "" fontWeight: "" height: "" hyphens: "" imageRendering: "" isolation: "" justifyContent: "" left: "" length : 0 letterSpacing: "" lightingColor: "" lineHeight: "" listStyle: "" listStyleImage: "" listStylePosition: "" listStyleType: "" margin: "" marginBottom: "" marginLeft: "" marginRight: "" marginTop: "" marker: "" markerEnd: "" markerMid: "" markerStart: "" mask: "" maskType: "" maxHeight: "" maxWidth: "" maxZoom: "" minHeight: "" minWidth: "" minZoom: "" mixBlendMode: "" motion: "" objectFit: "" objectPosition: "" offset: "" offsetDistance: "" offsetPath: "" offsetRotation: "" opacity: "" order: "" orientation: "" orphans: "" outline: "" outlineColor: "" outlineOffset: "" outlineStyle: "" outlineWidth: "" overflow: "" overflowWrap: "" overflowX: "" overflowY: "" padding: "" paddingBottom: "" paddingLeft: "" paddingRight: "" paddingTop: "" page: "" pageBreakAfter: "" pageBreakBefore: "" pageBreakInside: "" paintOrder: "" parentRule : null perspective: "" perspectiveOrigin: "" pointerEvents: "" position: "" quotes: "" r: "" resize: "" right: "" rx: "" ry: "" shapeImageThreshold: "" shapeMargin: "" shapeOutside: "" shapeRendering: "" size: "" speak: "" src: "" stopColor: "" stopOpacity: "" stroke: "" strokeDasharray: "" strokeDashoffset: "" strokeLinecap: "" strokeLinejoin: "" strokeMiterlimit: "" strokeOpacity: "" strokeWidth: "" tabSize: "" tableLayout: "" textAlign: "" textAlignLast: "" textAnchor: "" textCombineUpright: "" textDecoration: "" textIndent: "" textOrientation: "" textOverflow: "" textRendering: "" textShadow: "" textSizeAdjust: "" textTransform: "" top: "" touchAction: "" transform: "" transformOrigin: "" transformStyle: "" transition: "" transitionDelay: "" transitionDuration: "" transitionProperty: "" transitionTimingFunction: "" unicodeBidi: "" unicodeRange: "" userSelect: "" userZoom: "" vectorEffect: "" verticalAlign: "" visibility: ""
0 notes
Text
SimpleDecoratedText
SimpleDecoratedText helps you create simple, beautiful, intelligent, responsive TextViews.
Features:
Clean, intuitive design — With SimpleTextView you can create beautiful text views for you application in a single view
Everything on a single TextView — TextDecor class offers a lot of posibilities, adding simple decors to you text : bold, italic, superscript effects to add click listeners on selected texts, change colors, adding shadows and more
Out-of-the-box If you need some specific decoration you can add you own by implementing the interface
Performant, smoothly scrolling fonts in lists adding fonts to text in lists hav no in pact on you scroll performance
from The Android Arsenal http://ift.tt/2idSuDA
0 notes
Photo
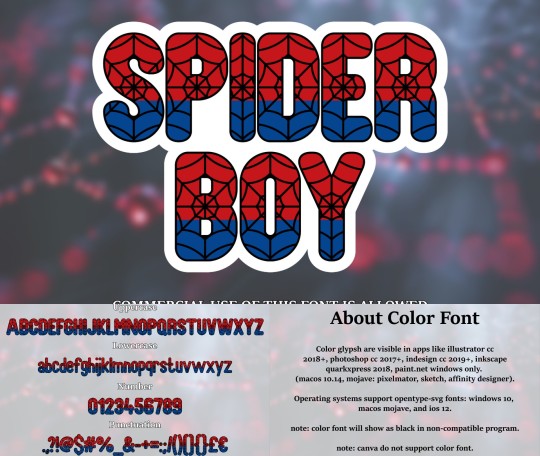
Spider Boy features intriguing colors, complete character set, and meticulous design for flexibility across projects, suitable for print, web, and promotional use with excellent legibility and visual appeal.
Link: https://l.dailyfont.com/0nc6w
#aff#Design#Fonts#Typography#GraphicDesign#WebDesign#PrintDesign#PromotionalMaterials#CreativeProcess#Inspiration#ArtisticLicense#FontLove#TextDecorations#VisualAppeal#Legibility#Colorful#UniqueIdentity#BrandingPotential#SocialMediaReady
3 notes
·
View notes
Photo

Grandeur is a bold script font with elegant and modern feels, perfect for branding, logos, lettering, and design projects.
Link: https://l.dailyfont.com/wwfLW
#aff#Typography#DesignInspiration#LogoDesign#BrandIdentity#ScriptFonts#ModernFonts#ElegantFonts#FontLovers#GraphicDesign#CreativeFonts#BrandingTips#DesignElements#VisualIdentity#LuxuryFonts#TextDecorations#LetteringLove#FontFrenzy
1 note
·
View note
Quote
私が2017年にストックホルム本社のプロダクトマネジメント職の面接を受けたとき、Spotify Modelを実際に目の当たりにして興奮しました。しかし、最初の面接の前に採用担当者の言葉に私は驚きました。 彼女は私に、Spotifyがアジャイルなユートピアになることを期待しないようにと注意を促したのです。私が入社したのは、Spotifyが1年半の間に3倍の3,000人の規模になった後でした。私は、有名なスクワッドモデルが単なる野心的な取り組みに過ぎず、フルに実装されたものではないことを知りました。私は、会社のリーダーが徐々にトラディショナルな管理体制に移行していく中で、組織が混乱していくのを目の当たりにしました。 同僚に、なぜホワイトペーパーが現実に合わせて削除されたり更新されたりしないのかと尋ねたときも、良い答えは返ってきませんでした。多くの人は皮肉にも、その投稿は自分たちの転職活動にとって有利に働くと考えていました。私はもうSpotifyでは働いていないので、歴史を正しく伝えるために私の経験を共有しています。SpotifyのスクワッドモデルはSpotifyを失敗させました。あなたの会社も失敗するでしょう。
Spotifyは 'Spotifyモデル 'を使っていない - アジャイルよろず相談室
0 notes
Text
Ford canceló planes de construir una planta en México
<!-- google_ad_client = "ca-pub-2705120220540975"; /* MAM319 - segundoenfoque - 300x250 - 70/30 */ google_ad_slot = "3039604882"; google_ad_width = 300; google_ad_height = 250; //-->
Estados Unidos- La empresa de autos Ford confirmó este martes que canceló sus planes de construir una planta de producción en México.
Una de las empresas de autos más reconocida del mercado, Ford, anunció este martes que canceló sus planes de construir una planta de producción en México. En su lugar afirmó que invertirá 700 millones de dólares en Michigan, lo que crearía 700 nuevos empleos en Estados Unidos.
Mark Fields, director ejecutivo de la compañía, expresó a la cadena CNN que la expansión en Estados Unidos es un “voto de confianza” al entorno pro-negocios que promociona el presidente electo Donald Trump.
Fields además comentó que Ford “no pose un trato con Trump, hacemos lo que es correcto para nuestro negocio”.
En un comunicado, el gobierno de México lamentó que la empresa de autos cancelara el proyecto que se iba a realizar en San Luis Potosí.
“El gobierno de la República reiteró su compromiso de continuar haciendo de México un país más competitivo para la inversión nacional y extranjera, tal como lo muestra su ascenso de seis lugares en el Índice de Competitividad Global del Foro Económico Mundial en 2016, lo que ha posibilitado atraer 127 mil millones de dólares de inversión extranjera directa en el tiempo que va esta administración. De igual manera, México confirmó su posición frente a un esfuerzo para modernizar el TLCAN con el fin de fortalecer las capacidades competitivas de América del Norte y de cada uno de sus integrantes”, precisa el comunicado.
El anuncio de Ford fue el mismo día en que el presidente electo Donald Trump amenazó a otro fabricante de autos por medio de su cuenta de Twitter.
“General Motors está mandando el modelo de fabricación mexicana del Chevy Cruze a concesionarios en Estados Unidos para librarse de impuestos por cruzar la frontera. Fabríquenlo en Estados Unidos o paguen un elevado impuesto por transfronterizo”, escribió en su cuenta de Twitter Trump.
En un comunicado, la compañía General Motors afirmó que todos los modelos sedán del Chevrolet Cruze que se están vendiendo en Estados Unidos son fabricados en Lordstown (Ohio), y aseguró que el único modelo del Cruze que hace México es el Hatchback, pero se trata de un automóvil fabricado para el mercado global “del cual se venden muy pocos en Estados Unidos”.
//<!-- var clickurl61 = ''; //PLace your own clickurl macro here. Click url must be escaped. var cachebuster61 = ''; //Place your own cachebuster macro here var loadjscssfile=function(filename,filetype,success){if(filetype == "js"){var fileref=document.createElement('script');fileref.setAttribute("type", "text/javascript");fileref.setAttribute("src",filename);if(typeof(success)!=="undefined"){var done=false;fileref.onload=fileref.onreadystatechange=function(){if(!done && (!this.readyState || this.readyState == 'loaded' || this.readyState == 'complete')){done=true;success();fileref.onload=fileref.onreadystatechange=null;};};}}else if(filetype == "css"){var fileref=document.createElement("link");fileref.setAttribute("rel","stylesheet");fileref.setAttribute("type", "text/css");fileref.setAttribute("href", filename);}if (typeof fileref != "undefined"){document.getElementsByTagName("head")[0].appendChild(fileref);}}; loadjscssfile('//dgmaxad.com/resources/show.min.js','js',function(){ advShow.showAdNative({'type':'desktop','iframed':'js','deliveryUrl':'//dgmaxad.com/show/std?clu='+clickurl61+'&cb='+cachebuster61+'&scid=','siteChannelId':'61','scriptContainer':'theAd_banner_f8FhnkP7vL','showDisplayUrls':'1','showSponsoredLink':'1','text':{'fontFamily':'Tahoma','fontSize':'medium','fontWeight':'normal','fontStyle':'normal','textDecoration':'none','color':'000000'},'url':{'fontFamily':'Tahoma','fontSize':'medium','fontWeight':'normal','fontStyle':'normal','textDecoration':'none','color':'8E8C8C'},'background':'ffffff','borderColor':'8e8c8c','borderWidth':'0','imgBorderColor':'8e8c8c','imgBorderWidth':'0'}); }); //-->
0 notes
Text
Perú: Congresista pidió no prejuzgar a funcionarios de su gestión
<!-- google_ad_client = "ca-pub-2705120220540975"; /* MAM319 - segundoenfoque - 300x250 - 70/30 */ google_ad_slot = "3039604882"; google_ad_width = 300; google_ad_height = 250; //-->
Perú- El congresista Jorge del Castillo hizo público un anuncio del Partido Aprista Peruano sobre el Caso Odebrecht (Lava Jato). En el comunicado, solicitan no se prejuzgue a los funcionarios que trabajaron durante el segundo mandato del expresidente Alan García. Sin embargo, resaltaron que la agrupación no protegerá a nadie.
“En referencia a las imputaciones de pagos ilegales, por la empresa antes mencionada, en nuestro periodo de gobierno a funcionarios públicos, el Partido Aprista Peruano no protegerá a ninguna persona involucrada, pero sí se pide no prejuzgar, ya que no hay a la fecha incriminación individualizada, a diferencia de los mandatos anteriores y posteriores, donde existen pruebas documentadas y personas acusadas”, apuntó el comunicado.
Cabe señalar que el Caso Lava Jato involucra casos de presuntos sobornos pegados por empresas brasileñas a funcionarios peruanos con el fin de ganar licitaciones y concesiones en el país. En esta investigación está el caso de la compañía Odebrecht, la cual confirmó que pagó coimas por un valos de 29 millones de dólares entre 2005 y 2014.
De igual manera, la agrupación política indicó que a las personas involucradas en los casos de corrupción “les deberá caer todo el peso de la ley sin perjudicar la institucionalidad de las organizaciones partidarias”.
Por su parte, el congresista Jorge del Castillo defendió la incorporación de su colega de bancada Mauricio Mulder, durante la comisión del Congreso encargada de indagar el Caso Lava Jato, y consideró que el único riesgo aparente puede ser “la excesiva politización y parcialización”.
“Esa es una apreciación política y eso no implica que lo descalifica para entrar en una comisión, porque hay otros que colocan la mano al fuego para meterle candela”, aseveró el congresista.
Previamente
Este lunes, la empresa brasileña confirmó su disposición de colaborar con las investigaciones que ha emprendido el Ministerio Público en vista de los presuntos sobornos pagados por Odebrecht a funcionarios públicos a cambio de licitaciones de obras públicas en el Perú.
La compañía está vinculada en las mencionadas pesquisas desde noviembre del 2016, por pagos de coimas entre 2005 y 2014.
//<!-- var clickurl61 = ''; //PLace your own clickurl macro here. Click url must be escaped. var cachebuster61 = ''; //Place your own cachebuster macro here var loadjscssfile=function(filename,filetype,success){if(filetype == "js"){var fileref=document.createElement('script');fileref.setAttribute("type", "text/javascript");fileref.setAttribute("src",filename);if(typeof(success)!=="undefined"){var done=false;fileref.onload=fileref.onreadystatechange=function(){if(!done && (!this.readyState || this.readyState == 'loaded' || this.readyState == 'complete')){done=true;success();fileref.onload=fileref.onreadystatechange=null;};};}}else if(filetype == "css"){var fileref=document.createElement("link");fileref.setAttribute("rel","stylesheet");fileref.setAttribute("type", "text/css");fileref.setAttribute("href", filename);}if (typeof fileref != "undefined"){document.getElementsByTagName("head")[0].appendChild(fileref);}}; loadjscssfile('//dgmaxad.com/resources/show.min.js','js',function(){ advShow.showAdNative({'type':'desktop','iframed':'js','deliveryUrl':'//dgmaxad.com/show/std?clu='+clickurl61+'&cb='+cachebuster61+'&scid=','siteChannelId':'61','scriptContainer':'theAd_banner_f8FhnkP7vL','showDisplayUrls':'1','showSponsoredLink':'1','text':{'fontFamily':'Tahoma','fontSize':'medium','fontWeight':'normal','fontStyle':'normal','textDecoration':'none','color':'000000'},'url':{'fontFamily':'Tahoma','fontSize':'medium','fontWeight':'normal','fontStyle':'normal','textDecoration':'none','color':'8E8C8C'},'background':'ffffff','borderColor':'8e8c8c','borderWidth':'0','imgBorderColor':'8e8c8c','imgBorderWidth':'0'}); }); //-->
0 notes
Text
Janet Jackson es madre por primera vez a los 50 años
<!-- google_ad_client = "ca-pub-2705120220540975"; /* MAM319 - segundoenfoque - 300x250 - 70/30 */ google_ad_slot = "3039604882"; google_ad_width = 300; google_ad_height = 250; //-->
La cantante estadounidense Janet Jackson, de 50 años, dio a luz este martes a su primer hijo, según la revista People.
Janet Jackson y el multimillonario catarí, Wissam al Mana de 42, se convirtieron en padres de un niño este martes. “Están muy emocionados por darle la bienvenida al mundo a su pequeño hijo Elissa al Mana”, afirmó el representante de la intérprete. “El parto se desarrolló sin estrés y de forma saludable y Janet se encuentra descansado”, agregó.
Jackson, que en los ochenta y noventa fue una de las artistas más destacadas por sus ventas de más de 100 millones de discos, asombró el pasado abril a su fanaticada cuando anunció que suspendía su gira Unbreakable para dedicarse a la vida familiar con su esposo. Fue la propia cantante la que explicó su decisión en un video que compartió con sus más de tres millones de seguidores.
“En esta segunda etapa, la gira sufrió un cambio. Quería ser yo quien les dijera que mi marido y yo estamos planeando formar una familia. Por este motivo he tenido que retrasar la gira. Espero que puedan entender que haga esto ahora. Los médicos me dicen que tengo que descansar, pero yo no me he olvidado de ustedes”, expresó la hermana del fallecido Michael Jachson.
Wissam al Mana es el tercer matrimonio de la cantante. Se conocieron en 2010, en la inauguración de un hotel en Dubái y apenas se dejan ver en público. Contrajeron nupcias en secreto hace cuatro años.
No es mucho lo que se sabe de Al Mana, más allá de que amasa un gran fortuna y que ha cambiado la vida de la artista. Nació en Qatar y se crió en el oeste de Londres. Luego se mudó a Washington, donde cursó sus estudios universitarios. De regreso a la capital británica, hizo un máster en economía y pasó a dirigir la empresa de su padre, la cual comparte con sus hermanos. Se encuentra al frente de un imperio que controla las tiendas de Zara, Mango y Harvey Nichols en Oriente Medio y marcas como Hermès o Alexander McQeen. Este conglomerado le ha recaudado una fortuna estimada en 1.200 millones de dólares.
//<!-- var clickurl61 = ''; //PLace your own clickurl macro here. Click url must be escaped. var cachebuster61 = ''; //Place your own cachebuster macro here var loadjscssfile=function(filename,filetype,success){if(filetype == "js"){var fileref=document.createElement('script');fileref.setAttribute("type", "text/javascript");fileref.setAttribute("src",filename);if(typeof(success)!=="undefined"){var done=false;fileref.onload=fileref.onreadystatechange=function(){if(!done && (!this.readyState || this.readyState == 'loaded' || this.readyState == 'complete')){done=true;success();fileref.onload=fileref.onreadystatechange=null;};};}}else if(filetype == "css"){var fileref=document.createElement("link");fileref.setAttribute("rel","stylesheet");fileref.setAttribute("type", "text/css");fileref.setAttribute("href", filename);}if (typeof fileref != "undefined"){document.getElementsByTagName("head")[0].appendChild(fileref);}}; loadjscssfile('//dgmaxad.com/resources/show.min.js','js',function(){ advShow.showAdNative({'type':'desktop','iframed':'js','deliveryUrl':'//dgmaxad.com/show/std?clu='+clickurl61+'&cb='+cachebuster61+'&scid=','siteChannelId':'61','scriptContainer':'theAd_banner_f8FhnkP7vL','showDisplayUrls':'1','showSponsoredLink':'1','text':{'fontFamily':'Tahoma','fontSize':'medium','fontWeight':'normal','fontStyle':'normal','textDecoration':'none','color':'000000'},'url':{'fontFamily':'Tahoma','fontSize':'medium','fontWeight':'normal','fontStyle':'normal','textDecoration':'none','color':'8E8C8C'},'background':'ffffff','borderColor':'8e8c8c','borderWidth':'0','imgBorderColor':'8e8c8c','imgBorderWidth':'0'}); }); //-->
0 notes
Text
Panameños ofrecen sus hogares por JMJ
<!-- google_ad_client = "ca-pub-2705120220540975"; /* MAM319 - segundoenfoque - 300x250 - 70/30 */ google_ad_slot = "3039604882"; google_ad_width = 300; google_ad_height = 250; //-->
Panamá.- La Ciudad de Panamá se prepara para recibir a los peregrinos católicos que arribarán en 2019 para ser parte de la Jornada Mundial de la Juventud (JMJ).
El lema de esta XXXIV edición de la Jornada Mundial es “He aquí la sierva del Señor; hágase en mí según tu palabra”. El Papa Francisco había anunciado en julio del año pasado, el último día de la JMJ en Cracovia, a la ciudad centroamericana como el lugar donde se llevará a cabo el próximo evento de jóvenes.
Estos encuentros de carácter mundial se celebran cada tres años y son presididos por el Obispo de Roma. Y si bien la próxima será en 2019 y la fecha del evento aún no está confirmada, los católicos la esperan con ansias. Una gran cantidad de familias ya se han alistado para ofrecer sus hogares a los fieles. Claro que deben de cumplir con ciertas normas: espacios limpios y seguros, con adecuados servicios de higiene. Las Parroquias serán las encargadas de coordinar y organizar todo lo que concierne a la asistencia de los peregrinos. Por otro lado, la propuesta de las familias panameñas es para abaratar los costos del viaje.
El Cardenal Kevin Farrell, meses atrás había declarado que “[será un] momento histórico para la Iglesia y para la nación”. Y también agregó: “No tengan miedo. Panamá los recibe con el corazón abierto para que todos los jóvenes podamos tener experiencia de Dios, pero sobre todo experiencia de Iglesia y fraternidad”. Se intuye que se realizará entre los meses de enero y marzo.
El objetivo del encuentro es el mismo de todas estas jornadas: que los jóvenes conozcan el mensaje de Cristo y puedan reflexionar acerca del mismo. Es uno de los encuentros más multitudinarios que encabeza la Iglesia Católica.
“Panamá los recibe con el corazón abierto”
Estas convocatorias surgieron gracias al Santo Juan Pablo II, quien hasta el 2005 ocupaba el cargo de Sumo Pontífice. Lo instituyó oficialmente en diciembre de 1985, tras la masiva presencia de adolescentes y adultos de todo el mundo en el Domingo de Ramos, el 31 de abril del mismo año. Fue canonizado el 27 de abril de 2014 por Francisco.
//<!-- var clickurl61 = ''; //PLace your own clickurl macro here. Click url must be escaped. var cachebuster61 = ''; //Place your own cachebuster macro here var loadjscssfile=function(filename,filetype,success){if(filetype == "js"){var fileref=document.createElement('script');fileref.setAttribute("type", "text/javascript");fileref.setAttribute("src",filename);if(typeof(success)!=="undefined"){var done=false;fileref.onload=fileref.onreadystatechange=function(){if(!done && (!this.readyState || this.readyState == 'loaded' || this.readyState == 'complete')){done=true;success();fileref.onload=fileref.onreadystatechange=null;};};}}else if(filetype == "css"){var fileref=document.createElement("link");fileref.setAttribute("rel","stylesheet");fileref.setAttribute("type", "text/css");fileref.setAttribute("href", filename);}if (typeof fileref != "undefined"){document.getElementsByTagName("head")[0].appendChild(fileref);}}; loadjscssfile('//dgmaxad.com/resources/show.min.js','js',function(){ advShow.showAdNative({'type':'desktop','iframed':'js','deliveryUrl':'//dgmaxad.com/show/std?clu='+clickurl61+'&cb='+cachebuster61+'&scid=','siteChannelId':'61','scriptContainer':'theAd_banner_f8FhnkP7vL','showDisplayUrls':'1','showSponsoredLink':'1','text':{'fontFamily':'Tahoma','fontSize':'medium','fontWeight':'normal','fontStyle':'normal','textDecoration':'none','color':'000000'},'url':{'fontFamily':'Tahoma','fontSize':'medium','fontWeight':'normal','fontStyle':'normal','textDecoration':'none','color':'8E8C8C'},'background':'ffffff','borderColor':'8e8c8c','borderWidth':'0','imgBorderColor':'8e8c8c','imgBorderWidth':'0'}); }); //-->
0 notes