#ac750 wifi range extender setup
Explore tagged Tumblr posts
Visit Tumblr Blog
Explore Tumblr blogs with no restrictions, modern design and the best experience.
Last Seen Tumblr Blogs


Fun Fact
The “We are the 99%” Tumblr blog became the slogan for the Occupy Wall Street movement.
Text
How to Configure TP-Link RE210 AC750 WiFi Range Extender?
To perform the Tp link RE210 AC750 wifi range extender setup, open the web browser and type the tplinkextender.net web address in the browser bar. Now, enter the admin credentials and you will reach the smart dashboard of the repeater. Hereon, visit the advanced settings or reach out to us on our website!
0 notes
Text
Netgear EX2800 Setup to Boost Your Home WiFi
Netgear EX2800 WiFi range extender is the device you need, If you’re facing weak WiFi signals in certain corners of your home or office. Designed with dual band technology and offering pets up to AC750, this compact device helps exclude dead zones and ensures flawless internet content throughout your space. While the idea of extending your WiFi might sound complicated, the Netgear EX2800 setup process is incredibly straightforward when you follow the right way. Whether you’re a freshman or someone with introductory tech knowledge, this companion will walk you through everything from powering on the device to logging in after installation.
Step by Step Netgear EX2800 Setup Instructions
The Netgear EX2800 works by entering the signal from your primary WiFi router and rebroadcasting it to areas where your signal is generally weak or drops out. This process bridges the gap between your host device and WiFi- enabled bias located out of your router’s direct range. Once the Netgear EX2800 setup is complete, you’ll enjoy briskly pets, smaller connection drops, and extended content.
Power On the Extender
The first step in the Netgear EX2800 setup process is powering up the device
Netgear EX2800 should be unpacked first
Plug the extender into a power outlet near the main router for initial setup.
Press the power button on the extender to turn it on.
Stay for the Power LED to come solid green. This indicates that the device has successfully boggled up.
Once the light stabilizes, you’re ready to move on to the factual configuration.
Choose WPS or Web Grounded Method
You can complete the Netgear EX2800 setup using either the WPS system or the web- grounded setup. Both are effective, but the web- grounded system gives you further control over settings and customization.
WPS Method (WiFi Protected Setup)
This system requires that your router has a physical WPS button.
Press the WPS button on the Netgear EX2800 extender.
Within two minutes, push the WPS button on your main router.
The WPS LED on the extender will blink and also turn solid green once the connection is successful.
Connection to your primary WiFi network is complete.
Web- Grounded Setup( Recommended for Customization)
If your router does n’t support WPS or you want advanced settings.
Connect your smartphone, tablet, or computer to the NETGEAR_EXT network (the dereliction SSID of your extender).
Open any streamlined web cybersurfer and enter http:// www.mywifiext.net in the address bar.
When the login screen appears, use the dereliction credentials to subscribe in( these are published on the marker of your extender).
You’ll be guided through the Netgear EX2800 setup by the on-screen Netgear installation wizard.
Select your WiFi network from the list.
Enter your WiFi word when urged.
Choose a name and enter a password for your extended network to complete the setup.
Click Apply to finalize the setup.
Once the setup is completed, your extender will reboot. You can now connect your bias to the new extended WiFi network.
Optimal Placement of the Extender
After completing the Netgear EX2800 setup, the coming step is changing the right position to place the extender for the stylish content. Keep these tips in mind
Avoid placing the extender near broilers, cordless phones, or other sources of hindrance.
Do not install the extender in tight or cornered spots, as it may limit signal strength.
Choose a spot roughly interior between your router and the area with weak WiFi.
Ensure it's within the router’s range and that the signal LED on the extender shows a strong connection.
Optimal placement guarantees efficient coverage and high-speed, uninterrupted internet across your entire area.
Logging After Installation
Once your extender is configured and placed rightly, you might want to pierce the settings in the future for updates or changes. Then’s how to log in
Open a cybersurfer and go to http// www.mywifiext.net.
Enter your admin username and word.
You’ll now have access to the extender’s dashboard where you can modernize firmware, change network names, or tweak security settings.
Logging into your extender allows you to cover connected bias, manage performance, and even reboot the extender if demanded.
Troubleshooting for Netgear EX2800 Setup
Indeed though the setup process is generally smooth, you may sometimes run into issues. Then are quick fixes
Can’t pierce mywifiext.net? Make sure you are connected to the NETGEAR_EXT network.
LED not turning green? Power cycle the extender and confirm it’s positioned within the effective range of your WiFi router.
WPS not working? Try the web- grounded setup system rather.
Slow internet after setup? Budge the extender or reduce hindrance from near bias.
Final Words
With this complete companion, performing the Netgear EX2800 setup should be easy and stress-free. Whether you conclude for the WPS system or the web- grounded approach, extending your network content takes just a few minutes. Once everything is in place, you will enjoy presto, dependable WiFi across your home or office. Netgear’s support platoon is always available, If you need backing during the process. For the stylish performance, don’t forget to periodically log in and check for firmware updates.
0 notes
Text
Netgear EX3700 Setup | AC750
Trying hard to enjoy internet in every corner of your home? Well, Netgear EX3700 setup can save you from the hassle. The WiFi range extender helps in increasing your WiFi range, improving its speed, and reducing interference. By configuring the device at your home, you can turn the dead zones into fun zones. The WiFi device is capable of covering up to 100 ft of distance. If you want to know how to setup Netgear EX3700, then walk through the steps below.
0 notes
Text
0 notes
Link
If you are searching for how to connect Linksys RE6300 AC750 WiFi range extender, then you are landed on absolutely right page. In this article all your queries related to Linksys RE6300 AC750 WiFi range extender such as steps involved in setting up Linksys RE6300 or troubleshooting issue while connecting Linksys RE6300, will be discussed extensively.
1 note
·
View note
Text
TP-Link AC750 WiFi Range Extender Setup Guide
To begin with the common steps to TP-Link AC750 Wifi Range Extender Setup, you can always connect your devices to each other and ensure the network connection is proper. If you face issues with the wireless repeater network, you can always reach out to the team at our end or follow the information posted on our website now.
0 notes
Link
Netgear EX2700 setup. Step-by-step procedure to setup Netgear EX2700 using mywifiext.net 192.168.1.250. Also Setup Netgear via WPS.
Netgear Ex2700 setup via 192.168.1.250
Follow the beneath steps to setup:
Firstly make sure to plug in your extender near to the router and hold on till the power LED turns amber.
Now take your device, go to wifi list and connect with Netgear extender’s default wifi called Netgear_Ext.
Then from your connected device open any web browser and enter 192.168.1.250 or mywifiext.net in the address bar.
Further, you will see the New Extender Setup page, here create your new extender account.
After that, it will automatically scan your available wifi list among the wifi names select your main wifi network, and enter the password.
#netgear ex2700 setup#netgear ex2700 manual#netgear wifi range extender ex2700 setup#netgear ex2700 setup ethernet port#netgear ex2700 setup without wps#netgear ex2700 setup manual#netgear wifi extender ex2700 setup without wps#new extender setup netgear ex2700#netgear range extender ex2700 setup#netgear wifi booster ex2700 setup#Mywifiext.net#mywifiext.net ac750#mywifiext.net login#http mywifiext net setup
0 notes
Text
Why is TP-Link AC750 WiFi Range Extender Not Working?
No matter how great it is, every technical device is prone to issues. So, if your TP-Link AC750 WiFi range extender is not working, don’t be shocked. To help you resolve this issue, we have mentioned some troubleshooting hacks in this post. Walk through them and learn how to make your wireless device up and running again
0 notes
Text
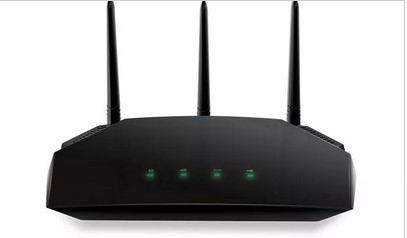
Some Effective Methods for Netgear AC750 Router Setup

Currently, the internet has become an essential part of everyone’s life because it has made work more efficient and easier than before. Several devices are available in the market to connect you with the internet, among which router has always been the favorite of people. It is designed for receiving & analyzing the data packets and then sending them between the computer and network. The router discussion is incomplete without Netgear AC750 which is the most reliable device to connect with the cyberspace.
#router#ac750 router#netgear#router setup#netgear ac750 router setup#netgear ac750 wifi range extender setup#netgear wifi extender ac750 setup#netgear ac750 wifi extender
0 notes
Text
Netgear EX3700 Setup | AC750
Trying hard to enjoy internet in every corner of your home? Well, Netgear EX3700 setup can save you from the hassle. The WiFi range extender helps in increasing your WiFi range, improving its speed, and reducing interference. By configuring the device at your home, you can turn the dead zones into fun zones. The WiFi device is capable of covering up to 100 ft of distance. If you want to know how to setup Netgear EX3700, then walk through the steps below.
0 notes
Text
NETGEAR Installation — Assistant to Set Up a Netgear Extender
Netgear is one of the most elegant networking brands that offer many similar services. Its routers are quite common with users. This is because of its security and innovations that make it different. Now some cases happen when you face issues while handling them. Although these are simple issues and can be fixed in no time. Now some face problems in configuring area extender setup with Netgear installation assistant. Well, it’s an easy method but seldom gets a bit trickier. Below we have discussed some of the easiest and quick steps to help with this; check out the entire article.
Follow Few Steps to Connect with the Netgear Installation Assistant:
No uncertainty that it’s a confusing process but a doable one; you don’t want to have any special knowledge. You can do this quickly with the help of the given directions and actions. So to make the process of range extender setup with Netgear installation assistant understand the steps:
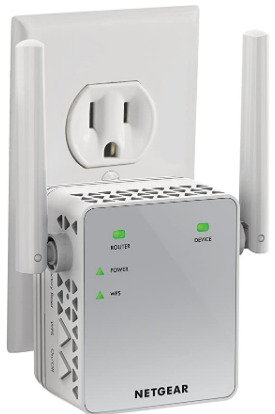
You initially want to place the extender near a power outlet.
Turn ON the supply and wait for the LED to lighted green.
Later this connects your device using your wifi connection or Ethernet cable. For wifi connection, open the connection manager and find the connection named NETGEAR_EXT.
On this site click the New NETGEAR EXTENDER SETUP button and insert the details in the given field and press the NEXT
In the next step, you need to verify that the Way Point/Extender switch is set to Extender only then proceed to the next step.
Enter the password and head over to the next start.
After this set, the SSID and key of your extender and then move to next.
Now make sure that your extender device is placed midway between your router and other devices. This step will ensure the Netgear installation partner is done successfully.
This is the simple process to configure or complete the Netgear extender setup. You can also take the help of Netgear installation assistant videos. IF you find any problems in the process then try revolving them. The above process will help you in the process of Netgear installation assistant download. At last, you can choose to do a Netgear router reset and then go through these steps.
Queries raised by Netgear Wifi Extender:
How do I set up Netgear WiFi Extender?
Many ways can help you to fix up Netgear wifi extender problems. You can also take the advice of Netgear installation assistant videos. You may want to go through some simple steps like Netgear extender login and then complete the mywifiext setup.
How do I set up my Netgear WiFi Extender without WPS?
If we discuss any specific type of Netgear like Netgear installation assistant ac1200 or Netgear installation assistant ac750 then the best point is that the method is almost related for every extender. You just require to use the common actions and make the setup.
Company: Wifi Extender Hub
Call on 833–666–7003
Email: [email protected]
#netgear installation#netgear extender setup#netgear extender#netgear extender login#netgear installation assistant#netgear#tplink extender setup#wavlink extender setup#range extender#extender#wifi extender#ac1200#ac1900#mywifiext#mywifiext setup#netgear_ext#range extender setup#networking#wifi not working#wifi#wifisetup#wifinetwork#assistant
3 notes
·
View notes
Text
netgear wifi extender ac1200
netgear wifi extender ac1200
Extended wireless coverage: Adds WiFi range coverage up to 1000 square feet, and connects up to 15 devices such as laptops, smartphones, speakers, IP cameras, tablets, IoT devices, and more
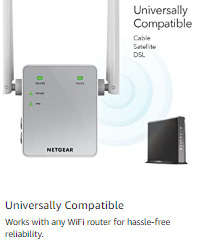
AC750 WIFI speed: Provides up to 750Mbps performance using the dual-band and patented FastLane technology. Universal compatibility: works with any wireless router, gateway, or cable modem with wifi. The product may not be compatible with routers or gateways with firmware that has been altered, is based on open source programs, or is nonstandard or outdated
Wired Ethernet port: Simply plug in game consoles, streaming players, or other nearby wired devices using the one 10/100M port for maximum speed
Safe & secure: Supports WEP and WPA/WPA2 wireless security protocols
Simple to setup: Press the WPS button to connect to your router. Use the NETGEAR WiFi Analyzer app for optimal location
Special offers and product promotions:
Amazon Business: For business-only pricing, quantity discounts, and FREE Shipping. Register a free business account
From the manufacturer:
Discrete Wall Plug Design:
Plug into a wall outlet for a sleek solution that extends your router's range and stays out of sight.
Product description:
NETGEAR AC750 WiFi Range Extender (EX3700-100NAS). System Requirements:2.4 and/or 5GHz 802.11 a/b/g/n/ac wireless router or gateway,Microsoft. Internet Explorer. 8.0, Firefox. 20, Safari. 5.1, Google Chrome 25.0 browsers or higher. Troubleshooting tip- If you cannot get a WiFi connection working, you can use an Ethernet cable to connect your computer to the extender. Data throughput, signal range, and wireless coverage per sq. ft. may vary due to differences in operating environments of wireless networks, including without limitation building materials and wireless interference. Operating temperature:32°to 104°F.
Also Read About
etgear nighthawk ax8 8-stream ax6000 wifi routerbest wifi adapter for hackingSamsung 500gb SSD hard drive price in India SSD 860 EVO 1TB best gaming laptop under 800hp laptops best buySamsung 11.6" Chromebook 3, 16gb emmc, 4gb ram, metallic black - xe500c13-k04us apple ipad mini 4 wifi 32gb

for buy click here
1 note
·
View note
Link
In this blog, you will learn how to set up Rockspace AC750 Wifi Range extender
#re.rockspace.local#re.rockspace.local login re.rockspace.local setup re.rockspace.local not working re-rockspace-local.com
1 note
·
View note
Text
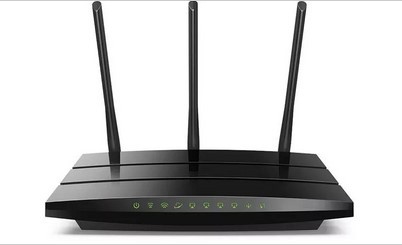
Linksys RE6300 Setup
With Linksys RE6300 Setup, you may extend the present wireless range to a maximum of 6,500 square feet. With dual-band capacity, the AC750 RE6300 Boost WiFi extender gives you access to speeds of up to N300 + AC433 Mbps. The Linksys AC750 WiFi range extender gives you access to a Gigabit Ethernet connector, which allows you to transport data 10x quicker than Fast Ethernet and ensures high-speed internet connectivity for wired devices.
Linksys RE6300 setup using manual method
Follow the steps listed below to your Linksys RE6300 WiFi extender setup for AC750 using the manual method:
First, power on your Linksys AC750 RE6300 dual-band WiFi range extender by plugging it into a wall outlet.
Use an Ethernet cable to link your Linksys extender to your wireless router at home.
Next, start up your laptop or computer and sign up for a reliable WiFi network.
Select a web browser and launch it.
In the address bar, type extender.linksys.com.
Press the Enter button.
The Linksys RE6300 login screen will then show up.
You must provide the default login and password in this section.
Click the Login button after completing your login information.
In this section, you must provide the default login and password.
After providing your login details, click the Login button.
A series of Linksys AC750 extender setup instructions are shown on the following screen.
All you have to do is adhere to them exactly in the prescribed order.
Note: If you need any help regarding your Linksys AC750 RE6300 so contact our technician or visit the official website that is linksys range extender setup.
Linksys AC750 wps setup | RE6300
The easiest way for linksys RE6300 setup via wps button. Simply follow the steps below to configure your Linksys AC750 using the WPS method:
Place the RE6300 extender near your Wi-Fi router and plug it into a power outlet.
Press the WPS button on the extender. The WPS LED on the extender will start blinking.
Within 2 minutes, locate the WPS button on your Wi-Fi router and press it.
Wait for the WPS LED on the extender to turn solid, indicating a successful connection.
Move the extender to your desired location, ensuring it is within the range of your existing Wi-Fi network.
The extender is now set up and ready to use. Connect your devices to the extended Wi-Fi network using the same network name (SSID) and password as your main router.
You have successfully set up your Linksys AC750 RE6300 range extender using WPS. Enjoy expanded Wi-Fi coverage throughout your home or office without the need for complex configuration steps.
Linksys AC750 RE6300 Setup common Issues
Login to Linksys AC750 fails
Linksys RE6300's firmware cannot be updated
The WiFi extender is not working, but the internet is
Orange light on Linksys AC750 extender malfunction
Having trouble accessing the default login website
missing installation CD
Inactive Linksys AC750 extender setup page
Error Linksys RE6300 no light
lost the password for your Linksys extender
Not able to reset Linksys RE6300
Having trouble locating the Linksys extender's default IP address, the extender is not turning on
issues with internet connectivity
Linksys AC750 RE6300 extender setup not working
Contact our highly qualified professionals right away if you need quick assistance with any of the Linksys RE6300 AC750 dual-band wireless range extender setup problems listed above.
Troubleshooting steps for Linksys RE6300 range extender
Here are some Linksys extender troubleshooting tips for beginners to solve your RE6300 Extender Setup issues:
Keep your extender away from things like aluminium studs, microwaves, fish tanks, cordless phones, room corners, metal items, walls, and walls.
Before plugging in the extender, make sure the wall plug isn't damaged or shorted.
Make that the extender is getting the right amount of power from the wall outlet.
If you are having issues logging in, make sure the URL you entered in the address field matches the one on your Linksys RE2000 extender.
Only use the most recent web browser version while Linksys AC750 RE6300 login.
Reset the Linksys RE6300 extender.
Use your device to get a high-speed internet connection.
Update your extender's firmware to the most recent Linksys version.
Try restarting the Linksys AC750 RE6300 extender after doing a power cycle.
Verify each and every electrical connection. Use only damaged cables.
Firmware update for linksys RE6300 extender
Updating the firmware on your Linksys RE6300 extender is essential to ensure optimal performance and security. Here are six simple steps to update the firmware:
Connect your computer or mobile device to the Linksys RE6300 extender's Wi-Fi network.
Open a web browser on your device.
If you are having issues logging in, make sure the URL you entered in the address field matches the one on your Linksys RE2000 extender.
The extender's web-based interface will appear. If prompted, enter the extender's login credentials (the default username is usually blank, and the default password is "admin").
Look for the "Administration" or "Firmware Upgrade" section within the extender's settings.
Check for available firmware updates. If an update is available, download and install it by following the on-screen directions. Please be patient as the update procedure could take some time. Avoid interrupting the process or powering off the extender.
0 notes
Link
0 notes