#authenticationManager
Explore tagged Tumblr posts
Visit Tumblr Blog
Explore Tumblr blogs with no restrictions, modern design and the best experience.
Last Seen Tumblr Blogs


Fun Fact
Tumblr has been banned in Indonesia for providing people with access to pornographic content.
Text
Fixed - Access Denied (CryptographicException) on calling SharePoint Online APIs using Azure AD App-Only
While trying to call SharePoint Online APIs using Azure AD App-Only using Certificate Auth we were getting the Access Denied exception. We were creating the ClientContext using the AuthenticationManager class of PnP the Framework and were using Certificate Auth as shown below. This was because the console app was trying to create a key in the machinekeys folder and the user did not have Write…
0 notes
Text
Connect MFA enabled SharePoint site using CSOM
Connect MFA enabled SharePoint site using CSOM

Hello SharePointers, Today we are going to discuss How to connect MFA enabled SharePoint site using CSOM in SharePoint Online.
Introduction
Usually, we write new scripts and utilities to perform certain tasks or to automate the business process in SharePoint Online.
We often implement some tools which always run with particular credentials (usually SharePoint administrator or Site…
View On WordPress
0 notes
Text
RedHat Certified System Administrator - RHCSA


Red-Hat-Enterprise-Linux An IT professional who has earned the RedHat Certified System Administrator (RHCSA®) is able to perform the core system administration skills required in Red Hat Enterprise Linux environments. The credential is earned after successfully passing the Red Hat Certified System Administrator (RHCSA) Exam (EX200). Prove your skills and knowledge A Red Hat Certified System Administrator (RHCSA) is able to perform the following tasks: Understand and use essential tools for handling files, directories, command-line environments, and documentationOperate running systems, including booting into different run levels, identifying processes, starting and stopping virtual machines, and controlling servicesConfigure local storage using partitions and logical volumesCreate and configure file systems and file system attributes, such as permissions, encryption, access control lists, and network file systemsDeploy, configure, and maintain systems, including software installation, update, and core servicesManage users and groups, including use of a centralized directory for authenticationManage security, including basic firewall and SELinux configuration Is this certification right for you? The RedHat Certified System Administratorcertification is designed for: Experienced Red Hat Enterprise Linux system administrators seeking validation of their skillsStudents who have attended Red Hat System Administration I and II and are on the path to earn RHCSA certificationExperienced Linux system administrators who require a certification either by their organization or based on a mandate (DOD 8570 directive)IT professionals who are on the path to earn a Red Hat Certified Engineer (RHCE®) certificationRHCEs who are non-current or who are about to become non-current and wish to re-certify as RHCEs The best way to learn is to do In preparation to earn the RedHat Certified System Administrator (RHCSA) Red Hat recommends the following: For Windows system administrators Red Hat System Administration I (RH124)Red Hat System Administration II (RH134) For Linux or UNIX administrators RHCSA Rapid Track Course (RH199)
Course content summary
Managing users and groups, files, and file permissions Updating software packages with yum Managing and troubleshooting SystemD during the bootNetwork configuration and basic troubleshooting Managing local storage and creating and using file systems Firewall management with firewalld Managing kernel-based virtual machines (KVMs) Automating installation of Red Hat Enterprise Linux using Kickstart In preparation for RHCSA Exam RHCSA exam candidates should be able to accomplish the tasks below without assistance. These have been grouped into several categories. Understand and use essential tools Access a shell prompt and issue commands with correct syntaxUse input-output redirection (>, >>, |, 2>, etc.)Use grep and regular expressions to analyze textAccess remote systems using SSHLog in and switch users in multiuser targetsArchive, compress, unpack, and uncompress files using tar, star, gzip, and bzip2Create and edit text filesCreate, delete, copy, and move files and directoriesCreate hard and soft linksList, set, and change standard ugo/rwx permissionsLocate, read, and use system documentation including man, info, and files in /usr/share/doc Operate running systems Boot, reboot, and shut down a system normallyBoot systems into different targets manuallyInterrupt the boot process in order to gain access to a systemIdentify CPU/memory intensive processes and kill processesAdjust process schedulingLocate and interpret system log files and journalsPreserve system journalsStart, stop, and check the status of network servicesSecurely transfer files between systems Configure local storage List, create, delete partitions on MBR and GPT disksCreate and remove physical volumesAssign physical volumes to volume groupsCreate and delete logical volumesConfigure systems to mount file systems at boot by universally unique ID (UUID) or labelAdd new partitions and logical volumes, and swap to a system non-destructively Create and configure file systems Create, mount, unmount, and use vfat, ext4, and xfs file systemsMount and unmount network file systems using NFSExtend existing logical volumesCreate and configure set-GID directories for collaborationConfigure disk compressionManage layered storageDiagnose and correct file permission problems Deploy, configure, and maintain systems Schedule tasks using at and cronStart and stop services and configure services to start automatically at bootConfigure systems to boot into a specific target automaticallyConfigure time service clientsInstall and update software packages from Red Hat Network, a remote repository, or from the local file systemWork with package module streamsModify the system bootloader Manage basic networking Configure IPv4 and IPv6 addressesConfigure hostname resolutionConfigure network services to start automatically at bootRestrict network access using firewall-cmd/firewall Manage users and groups Create, delete, and modify local user accountsChange passwords and adjust password aging for local user accountsCreate, delete, and modify local groups and group membershipsConfigure superuser access Manage security Configure firewall settings using firewall-cmd/firewalldConfigure key-based authentication for SSHSet enforcing and permissive modes for SELinuxList and identify SELinux file and process contextRestore default file contextsUse boolean settings to modify system SELinux settingsDiagnose and address routine SELinux policy violations As with all Red Hat performance-based exams, configurations must persist after reboot without intervention. Red Hat reserves the right to add, modify, and remove objectives. Such changes will be made public in advance through revisions to this document. https://www.redhat.com/en/services/training/ex200-red-hat-certified-system-administrator-rhcsa-exam Read the full article
0 notes
Text
Securing Angular 7 application with Spring Boot JWT Security
As we have secured our angular application using spring boot basic security. In this article , i will take you through all the steps to secure your angular application with spring boot JWT(JSON Web Token) security. Using Spring boot basic security , we can provide in token based authentication and authorization to our application. We need to configure users and their roles in in separate configuration file. We are creating two projects here - Spring boot JWT security application - This will handle the authentication and authorization for our UI application. UI for Todo manager in angular - This is the Todo manager application which will leverage the spring boot security feature. In this part , we will be creating a spring boot application which provides JWT security. Its basically a RESTful webservice which has endpoints to access and modify Todos information. To access the Todo information through API , user needs to authenticate himself. Below configuration enables basic security. SecurityConfig.java package com.myjavablog.config; import org.springframework.beans.factory.annotation.Autowired; import org.springframework.context.annotation.Bean; import org.springframework.context.annotation.Configuration; import org.springframework.http.HttpMethod; import org.springframework.security.authentication.AuthenticationManager; import org.springframework.security.config.annotation.authentication.builders.AuthenticationManagerBuilder; import org.springframework.security.config.annotation.method.configuration.EnableGlobalMethodSecurity; import org.springframework.security.config.annotation.web.builders.HttpSecurity; import org.springframework.security.config.annotation.web.configuration.EnableWebSecurity; import org.springframework.security.config.annotation.web.configuration.WebSecurityConfigurerAdapter; import org.springframework.security.config.http.SessionCreationPolicy; import org.springframework.security.core.userdetails.UserDetailsService; import org.springframework.security.crypto.bcrypt.BCryptPasswordEncoder; import org.springframework.security.crypto.password.PasswordEncoder; import org.springframework.security.web.authentication.UsernamePasswordAuthenticationFilter; @Configuration @EnableWebSecurity @EnableGlobalMethodSecurity(prePostEnabled = true) public class WebSecurityConfig extends WebSecurityConfigurerAdapter { @Autowired private JwtAuthenticationEntryPoint jwtAuthenticationEntryPoint; @Autowired private UserDetailsService jwtUserDetailsService; @Autowired private JwtRequestFilter jwtRequestFilter; @Autowired public void configureGlobal(AuthenticationManagerBuilder auth) throws Exception { // configure AuthenticationManager so that it knows from where to load // user for matching credentials // Use BCryptPasswordEncoder auth.userDetailsService(jwtUserDetailsService).passwordEncoder(passwordEncoder()); } @Bean public PasswordEncoder passwordEncoder() { return new BCryptPasswordEncoder(); } @Bean @Override public AuthenticationManager authenticationManagerBean() throws Exception { return super.authenticationManagerBean(); } @Override protected void configure(HttpSecurity httpSecurity) throws Exception { // We don't need CSRF for this example httpSecurity.csrf().disable() // dont authenticate this particular request .authorizeRequests().antMatchers("/authenticate").permitAll().antMatchers(HttpMethod.OPTIONS, "/**") .permitAll(). // all other requests need to be authenticated anyRequest().authenticated().and(). // make sure we use stateless session; session won't be used to // store user's state. exceptionHandling().authenticationEntryPoint(jwtAuthenticationEntryPoint).and().sessionManagement() .sessionCreationPolicy(SessionCreationPolicy.STATELESS); // Add a filter to validate the tokens with every request httpSecurity.addFilterBefore(jwtRequestFilter, UsernamePasswordAuthenticationFilter.class); } } JwtAuthenticationController.java Below is JwtAuthenticationController.java which has API endpoint to authenticate the user and provides us with JWT. createAuthenticationToken() method validates the user and generated the token for us which has expiration of 5*60*60 (5 Hours). package com.myjavablog.controller; import java.util.Objects; import org.springframework.beans.factory.annotation.Autowired; import org.springframework.http.ResponseEntity; import org.springframework.security.authentication.AuthenticationManager; import org.springframework.security.authentication.BadCredentialsException; import org.springframework.security.authentication.DisabledException; import org.springframework.security.authentication.UsernamePasswordAuthenticationToken; import org.springframework.security.core.userdetails.UserDetails; import org.springframework.security.core.userdetails.UserDetailsService; import org.springframework.web.bind.annotation.CrossOrigin; import org.springframework.web.bind.annotation.RequestBody; import org.springframework.web.bind.annotation.RequestMapping; import org.springframework.web.bind.annotation.RequestMethod; import org.springframework.web.bind.annotation.RestController; import com.myjavablog.config.JwtTokenUtil; import com.myjavablog.model.JwtRequest; import com.myjavablog.model.JwtResponse; @RestController @CrossOrigin public class JwtAuthenticationController { @Autowired private AuthenticationManager authenticationManager; @Autowired private JwtTokenUtil jwtTokenUtil; @Autowired private UserDetailsService jwtInMemoryUserDetailsService; @RequestMapping(value = "/authenticate", method = RequestMethod.POST) public ResponseEntity createAuthenticationToken(@RequestBody JwtRequest authenticationRequest) throws Exception { authenticate(authenticationRequest.getUsername(), authenticationRequest.getPassword()); final UserDetails userDetails = jwtInMemoryUserDetailsService .loadUserByUsername(authenticationRequest.getUsername()); final String token = jwtTokenUtil.generateToken(userDetails); return ResponseEntity.ok(new JwtResponse(token)); } private void authenticate(String username, String password) throws Exception { Objects.requireNonNull(username); Objects.requireNonNull(password); try { authenticationManager.authenticate(new UsernamePasswordAuthenticationToken(username, password)); } catch (DisabledException e) { throw new Exception("USER_DISABLED", e); } catch (BadCredentialsException e) { throw new Exception("INVALID_CREDENTIALS", e); } } } TodoController.java Below is the Rest controller class for managing Todo's information - package com.myjavablog.controller; import com.myjavablog.model.Todo; import com.myjavablog.model.User; import com.myjavablog.repository.TodoRepository; import org.springframework.beans.factory.annotation.Autowired; import org.springframework.web.bind.annotation.*; import java.util.ArrayList; import java.util.List; @CrossOrigin(origins = "http://localhost:4200") @RestController @RequestMapping("/api") public class TodoController { //@Autowired //private TodoRepository todoRepository; static List list = new ArrayList(); @GetMapping(produces = "application/json") @RequestMapping({ "/validateLogin" }) public User validateLogin() { return new User("User successfully authenticated"); } @GetMapping(produces = "application/json") @RequestMapping("/todos") public List getTodos(){ return list; } TodoController(){ list.add(new Todo(1l,"Badminton", "Badminton at 6 am", "Pending")); list.add(new Todo(2l,"Cricket", "Cricket at 7 am", "Pending")); list.add(new Todo(3l,"Football", "Football at 8 am", "Pending")); list.add(new Todo(4l,"Cards", "Cards at 6 am", "Pending")); list.add(new Todo(5l,"TT", "TT at 6 am", "Completed")); list.add(new Todo(6l,"Golf", "Golf at 6 am", "Pending")); list.add(new Todo(7l,"Running", "Running at 6 am", "Pending")); list.add(new Todo(8l,"Walking", "Walking at 6 am", "Pending")); list.add(new Todo(9l,"Swimming", "Swimming at 6 am", "Completed")); list.add(new Todo(10l,"Reading", "Reading at 6 am", "Pending")); //return list; } @GetMapping("/todo/{id}") public Todo getTodo(@PathVariable Long id) { //return todoRepository.findById(id); for(Todo todo : list){ if(todo.getId() == id){ return todo; } } return null; } @DeleteMapping("/todo/{id}") public boolean deleteTodo(@PathVariable Long id){ //todoRepository.deleteById(id); for(Todo todo : list){ if(todo.getId() == id){ list.remove(todo); } } return true; } @PostMapping("/todo") public Todo createTodo(@RequestBody Todo todo){ list.add(todo); return todo; //return todoRepository.save(todo); } @PutMapping("/todo") public Todo updateTodo(@RequestBody Todo todo){ for(Todo t : list){ if(todo.getId() == t.getId()){ list.remove(t); list.add(todo); return todo; } } return null; //return todoRepository.save(todo); } } JwtTokenUtil.java - This class is responsible for token generation. JwtRequestFilter.java - All request to REST API are filtered through this class. Token is validated in each request for user authorization. We can call the webservice through POSTMAN as below -

Get the Authentication Token

Call to todo API using Authentication token Source code can be downloaded from below link - Download All the REST service calls are authenticated and authorized using the spring boot JWT security. Before calling todo services , we need to pass authorization header with all requests from UI. In JWT token based security , we pass on base 64 encoded string of username and password to server as authorization header in below format - Authorization Header = "Bearer " + Base64Encoder(username:password) Step 1: Create new angular application Refer below post for creating new angular application - http://myjavablog.com/2019/04/13/angular-installation-and-setup/ Step 2: Create modules for material and primeng components Create two modules for material(material.module.ts) and primeng( primeng.module.ts ) to define all the related components required in application. These two modules are also required to be imported in main module (app.module.ts) Please refer below link for primeng and material configuration - http://myjavablog.com/2019/07/28/crud-operations-using-primeng-datatable-and-material-design/ Create components named header, footer, login,logout and todo components for Todo Manager application. Todo manager application shows all todos in primeng datatable . Also we are allowed to perform CRUD operations on all todos. All CRUD operations are done in todo component as below - Todo component - components\todo\todo.component.html components\todo\todo.component.ts Step 4: Add the routing for application (Application Navigation/Routing) We have to create a route for the application navigation. Below file contains routing configuration - src\app\app-routing.module.ts import { NgModule, ViewChildren } from '@angular/core'; import { Routes, RouterModule } from '@angular/router'; import { TodoComponent } from './components/todo/todo.component'; import { TodoAddComponent } from './components/todo-add/todo-add.component'; import { TodoEditComponent } from './components/todo-edit/todo-edit.component'; import { AuthGaurdService } from './services/auth-gaurd.service'; import { LogoutComponent } from './components/logout/logout.component'; import { LoginComponent } from './components/login/login.component'; const routes: Routes = }, { path: 'todo-add', component: TodoAddComponent ,canActivate: }, { path: 'todo-edit/:id', component: TodoEditComponent ,canActivate:}, { path: '', component: TodoComponent,canActivate: }, { path: 'login', component: LoginComponent }, { path: 'logout', component: LogoutComponent,canActivate: } ]; @NgModule({ imports: , exports: }) export class AppRoutingModule { } All the routes are guarded by auth guard service. AuthGuardService checks ,if user is logged in to the application and then only it activates those routes configured in app-routing.module.ts . AuthGuardService has canActivate() method which returns true if user is already logged into the application. If user is not logged into the application then it returns false and redirect him to login page. import { Injectable } from '@angular/core'; import { Router, ActivatedRouteSnapshot, RouterStateSnapshot, CanActivate } from '@angular/router'; import { AuthenticationService } from './authentication.service'; @Injectable({ providedIn: 'root' }) export class AuthGaurdService implements CanActivate { constructor(private router: Router, private authService: AuthenticationService) { } canActivate(route: ActivatedRouteSnapshot, state: RouterStateSnapshot) { if (this.authService.isUserLoggedIn()) return true; this.router.navigate(); return false; } } Step 5: Authentication and Todo service (Service Layer) AuthenticationService (authentication.service.ts) - It handles user authentication into the application. It has authenticate( username, password ) method which receives username and password entered on login page and authenticate user using spring basic authentication method. Whenever you hit webservice , SecurityConfig.java comes into picture. If you remember, we have configured JWT security in spring boot application created earlier . When we hit todo service then every the time we are authenticated against spring boot JWT security. We need to pass authorization header all the time while hitting webservice from UI. Authorization header contains user credentials and JSON Web Token which has some expiry value upto which we can make request to TODO API. Also it stores user information in session for checking user logged in status. import { Injectable } from '@angular/core'; import { HttpClient, HttpHeaders } from '@angular/common/http'; import { map } from 'rxjs/operators'; export class User{ constructor( public status:string, ) {} } export class JwtResponse{ constructor( public jwttoken:string, ) {} } @Injectable({ providedIn: 'root' }) export class AuthenticationService { constructor(private httpClient: HttpClient){ } authenticate(username, password) { return this.httpClient.post('http://localhost:8081/authenticate',{username,password}).pipe( map( userData => { sessionStorage.setItem('username',username); let tokenStr= 'Bearer '+userData.token; sessionStorage.setItem('token', tokenStr); return userData; } ) ); } isUserLoggedIn() { let user = sessionStorage.getItem('username') console.log('Is User Logged in: '+ !(user === null)) return !(user === null) } logOut() { sessionStorage.removeItem('username') } } We also have TodoService (todo.service.ts) to perform various operations on Todo information. import { Injectable } from '@angular/core'; import { HttpClient, HttpHeaders } from '@angular/common/http'; import { Observable, of, throwError } from 'rxjs'; import { map, catchError, tap, retry } from 'rxjs/operators'; import { Todo } from './../domain/Todo'; @Injectable({ providedIn: 'root' }) export class TodoService { endpoint = 'http://localhost:8081/api'; username = 'myjavablog'; password = 'password'; constructor(private httpClient: HttpClient) { } // Http Options httpOptions = { headers: new HttpHeaders({ 'Content-Type': 'application/json' }) } public deleteTodo(todoId) { const headers = new HttpHeaders({ Authorization: 'Bearer ' + btoa(this.username + ':' + this.password) }); return this.httpClient.delete("http://localhost:8081/api/todo" + "/" + todoId, { headers }); } public createTodo(todo) { const headers = new HttpHeaders({ Authorization: 'Bearer ' + btoa(this.username + ':' + this.password) }); return this.httpClient.post("http://localhost:8081/api/todo", todo, { headers }); } // To Get List Of Todos getTodoList(): Observable { const headers = new HttpHeaders({ Authorization: 'Bearer ' + btoa(this.username + ':' + this.password) }); return this.httpClient.get('http://localhost:8081/api/todos', { headers }); } // HttpClient API get() method => Fetch Todo getTodo(id): Observable { const headers = new HttpHeaders({ Authorization: 'Bearer ' + btoa(this.username + ':' + this.password) }); return this.httpClient.get(this.endpoint + '/todos/' + id, { headers }); } // HttpClient API put() method => Update Todo updateTodo(id, todo): Observable { const headers = new HttpHeaders({ Authorization: 'Bearer ' + btoa(this.username + ':' + this.password) }); return this.httpClient.put(this.endpoint + '/todo' , JSON.stringify(todo), { headers }); } } You can download source code for this application from below link - Download Step 6: Run the application ng serve Login page

Login page Home page

Home Page

Generated Token during login Add todo -
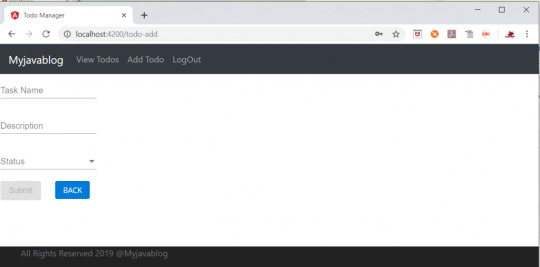
Add Todo Read the full article
0 notes
Text
Webflux의 spring security formlogin에서 IP 받기
결론부터 말하면 간단히 되지 않는다.
인증에 username, password 외에 IP가 필요하���. 처음엔 ReactiveAuthenticationManager를 수정해서 IP만 받아오면 되겠다고 생각했다. 근데 Reactive가 어디 그런 정보를 어디서 주던가? method 체인으로 받아오지 않으면 안된다. 그래서 이 ReactiveAuthenticationManager의 authenticate를 호출하는 곳은 어디인가 찾아봤다.
그것은 AuthenticationFilter였다. FormLoginSpec은 내부에 ReactiveAuthenticationManager를 가지고 있다가 AuthenticationFilter에게 넘겨주어 SecurityWebFiltersOrder.FORM_LOGIN에서 사용하게 만든다. 아! 이제 찾았군.
filter에서 뭘하는지 보니 ReactiveAuthenticationManagerResolver가 ReactiveAuthenticationManager에게 token을 넘겨주고 있다.
private Mono<Void> authenticate(ServerWebExchange exchange, WebFilterChain chain, Authentication token) { WebFilterExchange webFilterExchange = new WebFilterExchange(exchange, chain); return this.authenticationManagerResolver.resolve(exchange.getRequest()) .flatMap(authenticationManager -> authenticationManager.authenticate(token)) .switchIfEmpty(Mono.defer(() -> Mono.error(new IllegalStateException("No provider found for " + token.getClass())))) .flatMap(authentication -> onAuthenticationSuccess(authentication, webFilterExchange)) .onErrorResume(AuthenticationException.class, e -> this.authenticationFailureHandler .onAuthenticationFailure(webFilterExchange, e)); }
이제 조금만 찾으면 된다. 이 token은 어디서 만드는거지? 아! filter에서 authenticationConverter를 통해서 만드는구나. 거기서 아마 username, password를 파싱해서 token을 만드는거겠군.
@Override public Mono<Void> filter(ServerWebExchange exchange, WebFilterChain chain) { return this.requiresAuthenticationMatcher.matches(exchange) .filter( matchResult -> matchResult.isMatch()) .flatMap( matchResult -> this.authenticationConverter.convert(exchange)) .switchIfEmpty(chain.filter(exchange).then(Mono.empty())) .flatMap( token -> authenticate(exchange, chain, token)); }
이제 다 찾았다고 생각했다. 이제 그 converter만 교체하면 된다. 근데...
protected void configure(ServerHttpSecurity http) { // ... AuthenticationWebFilter authenticationFilter = new AuthenticationWebFilter( this.authenticationManager); authenticationFilter.setRequiresAuthenticationMatcher(this.requiresAuthenticationMatcher); authenticationFilter.setAuthenticationFailureHandler(this.authenticationFailureHandler); authenticationFilter.setAuthenticationConverter(new ServerFormLoginAuthenticationConverter()); authenticationFilter.setAuthenticationSuccessHandler(this.authenticationSuccessHandler); authenticationFilter.setSecurityContextRepository(this.securityContextRepository); http.addFilterAt(authenticationFilter, SecurityWebFiltersOrder.FORM_LOGIN); }
다른 건 다 외부에서 받아와서 넘겨주는데 converter만 new ServerFormLoginAuthenticationConverter()로 넣고 있다. filter마저도 local변수다. 이걸 교체할 방법은? 없다. 직접 SecurityWebFiltersOrder.FORM_LOGIN를 처리하는 filter를 만드는 방법 뿐이다. ㅠㅠ
어디서부터 얼마나 만들어서 넣어야 하는지 이제부터 봐야한다.
0 notes
Text
Authorization on a PreAuthenticated spring-security scenario (Round 2)
In my previous post we explored authorization in a preauthenticated scenario and spotted that it seems not working easily out of the box. It seems like there is a hole between the PreAuthenticatedGrantedAuthoritiesUserDetails service and the RequestHeaderAuthenticationFilter which makes no possible to use a request header based preauthenticated authentication system without additional classes.
Now, the good thing is that it is very easy to fix this. Lets see how!
As we saw, the main problem is that “user details service” expects a GrantedAuthoritiesContainer object in the “details” attribute of the PreAuthenticatedAuthenticationToken but no one puts it there (to understand why is this required, when there is a GrantedAuthorities collection present in the token, is a different story).
By default RequestHeaderAuthenticationFilter makes use of WebAuthenticationDetailsSource to provide WebAuthenticationDetails object with additional information present in the request, so we can extend WebAuthenticationDetailsSource with a replacement that makes use of, the more convenient, PreAuthenticatedGrantedAuthoritiesWebAuthenticationDetails which already has an attribute holding a collection of granted authorities. Our replacement will also take care about looking for an authorization header in the request, read authorization information there, and setting it up inside our new authentication details object.
One important thing that makes PreAuthenticatedGrantedAuthoritiesWebAuthenticationDetails very convenient is that it implements GrantedAuthoritiesContainer interface as well as extends WebAuthenticationDetails so it fits perfectly in the puzzle … just a little piece is missing to make it all works.
One simplistic implementation of that piece would be something like:
public class RequestHeaderAuthenticationDetailsSource extends WebAuthenticationDetailsSource { private static final String authorityHeader = "X-authority"; @Override public WebAuthenticationDetails buildDetails(HttpServletRequest context) { ArrayList<SimpleGrantedAuthority> authorities = new ArrayList<>(); String header = context.getHeader(authorityHeader); if (header != null) { authorities.add(new SimpleGrantedAuthority(header)); } return new PreAuthenticatedGrantedAuthoritiesWebAuthenticationDetails(context, authorities); } }
Now you just needs to configure RequestHeaderAuthenticationFilter to use our new class declaring it at the `WebSecurityConfigurerAdapter` configuration file, like this:
@Bean public RequestHeaderAuthenticationFilter requestHeaderAuthenticationFilter( final AuthenticationManager authenticationManager) { RequestHeaderAuthenticationFilter filter = new RequestHeaderAuthenticationFilter(); filter.setAuthenticationDetailsSource(new RequestHeaderAuthenticationDetailsSource()); filter.setAuthenticationManager(authenticationManager); filter.setExceptionIfHeaderMissing(false); return filter; }
So ... the good thing here is that we can have full spring-security authorization working with just one very simple class. The bad thing is that class should be not even required, in my opinion.
Happy Coding!
0 notes
Text
RedHat Certified System Administrator - RHCSA

An IT professional who has earned the RedHat Certified System Administrator (RHCSA®) is able to perform the core system administration skills required in Red Hat Enterprise Linux environments. The credential is earned after successfully passing the Red Hat Certified System Administrator (RHCSA) Exam (EX200). Prove your skills and knowledge A Red Hat Certified System Administrator (RHCSA) is able to perform the following tasks: Understand and use essential tools for handling files, directories, command-line environments, and documentationOperate running systems, including booting into different run levels, identifying processes, starting and stopping virtual machines, and controlling servicesConfigure local storage using partitions and logical volumesCreate and configure file systems and file system attributes, such as permissions, encryption, access control lists, and network file systemsDeploy, configure, and maintain systems, including software installation, update, and core servicesManage users and groups, including use of a centralized directory for authenticationManage security, including basic firewall and SELinux configuration Is this certification right for you? The RedHat Certified System Administratorcertification is designed for: Experienced Red Hat Enterprise Linux system administrators seeking validation of their skillsStudents who have attended Red Hat System Administration I and II and are on the path to earn RHCSA certificationExperienced Linux system administrators who require a certification either by their organization or based on a mandate (DOD 8570 directive)IT professionals who are on the path to earn a Red Hat Certified Engineer (RHCE®) certificationRHCEs who are non-current or who are about to become non-current and wish to re-certify as RHCEs The best way to learn is to do In preparation to earn the RedHat Certified System Administrator (RHCSA) Red Hat recommends the following: For Windows system administrators Red Hat System Administration I (RH124)Red Hat System Administration II (RH134) For Linux or UNIX administrators RHCSA Rapid Track Course (RH199)
Course content summary
Managing users and groups, files, and file permissions Updating software packages with yum Managing and troubleshooting SystemD during the bootNetwork configuration and basic troubleshooting Managing local storage and creating and using file systems Firewall management with firewalld Managing kernel-based virtual machines (KVMs) Automating installation of Red Hat Enterprise Linux using Kickstart In preparation for RHCSA Exam RHCSA exam candidates should be able to accomplish the tasks below without assistance. These have been grouped into several categories. Understand and use essential tools Access a shell prompt and issue commands with correct syntaxUse input-output redirection (>, >>, |, 2>, etc.)Use grep and regular expressions to analyze textAccess remote systems using SSHLog in and switch users in multiuser targetsArchive, compress, unpack, and uncompress files using tar, star, gzip, and bzip2Create and edit text filesCreate, delete, copy, and move files and directoriesCreate hard and soft linksList, set, and change standard ugo/rwx permissionsLocate, read, and use system documentation including man, info, and files in /usr/share/doc Operate running systems Boot, reboot, and shut down a system normallyBoot systems into different targets manuallyInterrupt the boot process in order to gain access to a systemIdentify CPU/memory intensive processes and kill processesAdjust process schedulingLocate and interpret system log files and journalsPreserve system journalsStart, stop, and check the status of network servicesSecurely transfer files between systems Configure local storage List, create, delete partitions on MBR and GPT disksCreate and remove physical volumesAssign physical volumes to volume groupsCreate and delete logical volumesConfigure systems to mount file systems at boot by universally unique ID (UUID) or labelAdd new partitions and logical volumes, and swap to a system non-destructively Create and configure file systems Create, mount, unmount, and use vfat, ext4, and xfs file systemsMount and unmount network file systems using NFSExtend existing logical volumesCreate and configure set-GID directories for collaborationConfigure disk compressionManage layered storageDiagnose and correct file permission problems Deploy, configure, and maintain systems Schedule tasks using at and cronStart and stop services and configure services to start automatically at bootConfigure systems to boot into a specific target automaticallyConfigure time service clientsInstall and update software packages from Red Hat Network, a remote repository, or from the local file systemWork with package module streamsModify the system bootloader Manage basic networking Configure IPv4 and IPv6 addressesConfigure hostname resolutionConfigure network services to start automatically at bootRestrict network access using firewall-cmd/firewall Manage users and groups Create, delete, and modify local user accountsChange passwords and adjust password aging for local user accountsCreate, delete, and modify local groups and group membershipsConfigure superuser access Manage security Configure firewall settings using firewall-cmd/firewalldConfigure key-based authentication for SSHSet enforcing and permissive modes for SELinuxList and identify SELinux file and process contextRestore default file contextsUse boolean settings to modify system SELinux settingsDiagnose and address routine SELinux policy violations As with all Red Hat performance-based exams, configurations must persist after reboot without intervention. Red Hat reserves the right to add, modify, and remove objectives. Such changes will be made public in advance through revisions to this document. https://www.redhat.com/en/services/training/ex200-red-hat-certified-system-administrator-rhcsa-exam Read the full article
0 notes
Text
Securing Angular 7 application with Spring Boot JWT Security
As we have secured our angular application using spring boot basic security. In this article , i will take you through all the steps to secure your angular application with spring boot JWT(JSON Web Token) security. Using Spring boot basic security , we can provide in token based authentication and authorization to our application. We need to configure users and their roles in in separate configuration file. We are creating two projects here - Spring boot JWT security application - This will handle the authentication and authorization for our UI application. UI for Todo manager in angular - This is the Todo manager application which will leverage the spring boot security feature. In this part , we will be creating a spring boot application which provides JWT security. Its basically a RESTful webservice which has endpoints to access and modify Todos information. To access the Todo information through API , user needs to authenticate himself. Below configuration enables basic security. SecurityConfig.java package com.myjavablog.config; import org.springframework.beans.factory.annotation.Autowired; import org.springframework.context.annotation.Bean; import org.springframework.context.annotation.Configuration; import org.springframework.http.HttpMethod; import org.springframework.security.authentication.AuthenticationManager; import org.springframework.security.config.annotation.authentication.builders.AuthenticationManagerBuilder; import org.springframework.security.config.annotation.method.configuration.EnableGlobalMethodSecurity; import org.springframework.security.config.annotation.web.builders.HttpSecurity; import org.springframework.security.config.annotation.web.configuration.EnableWebSecurity; import org.springframework.security.config.annotation.web.configuration.WebSecurityConfigurerAdapter; import org.springframework.security.config.http.SessionCreationPolicy; import org.springframework.security.core.userdetails.UserDetailsService; import org.springframework.security.crypto.bcrypt.BCryptPasswordEncoder; import org.springframework.security.crypto.password.PasswordEncoder; import org.springframework.security.web.authentication.UsernamePasswordAuthenticationFilter; @Configuration @EnableWebSecurity @EnableGlobalMethodSecurity(prePostEnabled = true) public class WebSecurityConfig extends WebSecurityConfigurerAdapter { @Autowired private JwtAuthenticationEntryPoint jwtAuthenticationEntryPoint; @Autowired private UserDetailsService jwtUserDetailsService; @Autowired private JwtRequestFilter jwtRequestFilter; @Autowired public void configureGlobal(AuthenticationManagerBuilder auth) throws Exception { // configure AuthenticationManager so that it knows from where to load // user for matching credentials // Use BCryptPasswordEncoder auth.userDetailsService(jwtUserDetailsService).passwordEncoder(passwordEncoder()); } @Bean public PasswordEncoder passwordEncoder() { return new BCryptPasswordEncoder(); } @Bean @Override public AuthenticationManager authenticationManagerBean() throws Exception { return super.authenticationManagerBean(); } @Override protected void configure(HttpSecurity httpSecurity) throws Exception { // We don't need CSRF for this example httpSecurity.csrf().disable() // dont authenticate this particular request .authorizeRequests().antMatchers("/authenticate").permitAll().antMatchers(HttpMethod.OPTIONS, "/**") .permitAll(). // all other requests need to be authenticated anyRequest().authenticated().and(). // make sure we use stateless session; session won't be used to // store user's state. exceptionHandling().authenticationEntryPoint(jwtAuthenticationEntryPoint).and().sessionManagement() .sessionCreationPolicy(SessionCreationPolicy.STATELESS); // Add a filter to validate the tokens with every request httpSecurity.addFilterBefore(jwtRequestFilter, UsernamePasswordAuthenticationFilter.class); } } JwtAuthenticationController.java Below is JwtAuthenticationController.java which has API endpoint to authenticate the user and provides us with JWT. createAuthenticationToken() method validates the user and generated the token for us which has expiration of 5*60*60 (5 Hours). package com.myjavablog.controller; import java.util.Objects; import org.springframework.beans.factory.annotation.Autowired; import org.springframework.http.ResponseEntity; import org.springframework.security.authentication.AuthenticationManager; import org.springframework.security.authentication.BadCredentialsException; import org.springframework.security.authentication.DisabledException; import org.springframework.security.authentication.UsernamePasswordAuthenticationToken; import org.springframework.security.core.userdetails.UserDetails; import org.springframework.security.core.userdetails.UserDetailsService; import org.springframework.web.bind.annotation.CrossOrigin; import org.springframework.web.bind.annotation.RequestBody; import org.springframework.web.bind.annotation.RequestMapping; import org.springframework.web.bind.annotation.RequestMethod; import org.springframework.web.bind.annotation.RestController; import com.myjavablog.config.JwtTokenUtil; import com.myjavablog.model.JwtRequest; import com.myjavablog.model.JwtResponse; @RestController @CrossOrigin public class JwtAuthenticationController { @Autowired private AuthenticationManager authenticationManager; @Autowired private JwtTokenUtil jwtTokenUtil; @Autowired private UserDetailsService jwtInMemoryUserDetailsService; @RequestMapping(value = "/authenticate", method = RequestMethod.POST) public ResponseEntity createAuthenticationToken(@RequestBody JwtRequest authenticationRequest) throws Exception { authenticate(authenticationRequest.getUsername(), authenticationRequest.getPassword()); final UserDetails userDetails = jwtInMemoryUserDetailsService .loadUserByUsername(authenticationRequest.getUsername()); final String token = jwtTokenUtil.generateToken(userDetails); return ResponseEntity.ok(new JwtResponse(token)); } private void authenticate(String username, String password) throws Exception { Objects.requireNonNull(username); Objects.requireNonNull(password); try { authenticationManager.authenticate(new UsernamePasswordAuthenticationToken(username, password)); } catch (DisabledException e) { throw new Exception("USER_DISABLED", e); } catch (BadCredentialsException e) { throw new Exception("INVALID_CREDENTIALS", e); } } } TodoController.java Below is the Rest controller class for managing Todo's information - package com.myjavablog.controller; import com.myjavablog.model.Todo; import com.myjavablog.model.User; import com.myjavablog.repository.TodoRepository; import org.springframework.beans.factory.annotation.Autowired; import org.springframework.web.bind.annotation.*; import java.util.ArrayList; import java.util.List; @CrossOrigin(origins = "http://localhost:4200") @RestController @RequestMapping("/api") public class TodoController { //@Autowired //private TodoRepository todoRepository; static List list = new ArrayList(); @GetMapping(produces = "application/json") @RequestMapping({ "/validateLogin" }) public User validateLogin() { return new User("User successfully authenticated"); } @GetMapping(produces = "application/json") @RequestMapping("/todos") public List getTodos(){ return list; } TodoController(){ list.add(new Todo(1l,"Badminton", "Badminton at 6 am", "Pending")); list.add(new Todo(2l,"Cricket", "Cricket at 7 am", "Pending")); list.add(new Todo(3l,"Football", "Football at 8 am", "Pending")); list.add(new Todo(4l,"Cards", "Cards at 6 am", "Pending")); list.add(new Todo(5l,"TT", "TT at 6 am", "Completed")); list.add(new Todo(6l,"Golf", "Golf at 6 am", "Pending")); list.add(new Todo(7l,"Running", "Running at 6 am", "Pending")); list.add(new Todo(8l,"Walking", "Walking at 6 am", "Pending")); list.add(new Todo(9l,"Swimming", "Swimming at 6 am", "Completed")); list.add(new Todo(10l,"Reading", "Reading at 6 am", "Pending")); //return list; } @GetMapping("/todo/{id}") public Todo getTodo(@PathVariable Long id) { //return todoRepository.findById(id); for(Todo todo : list){ if(todo.getId() == id){ return todo; } } return null; } @DeleteMapping("/todo/{id}") public boolean deleteTodo(@PathVariable Long id){ //todoRepository.deleteById(id); for(Todo todo : list){ if(todo.getId() == id){ list.remove(todo); } } return true; } @PostMapping("/todo") public Todo createTodo(@RequestBody Todo todo){ list.add(todo); return todo; //return todoRepository.save(todo); } @PutMapping("/todo") public Todo updateTodo(@RequestBody Todo todo){ for(Todo t : list){ if(todo.getId() == t.getId()){ list.remove(t); list.add(todo); return todo; } } return null; //return todoRepository.save(todo); } } JwtTokenUtil.java - This class is responsible for token generation. JwtRequestFilter.java - All request to REST API are filtered through this class. Token is validated in each request for user authorization. We can call the webservice through POSTMAN as below -

Get the Authentication Token

Call to todo API using Authentication token Source code can be downloaded from below link - Download All the REST service calls are authenticated and authorized using the spring boot JWT security. Before calling todo services , we need to pass authorization header with all requests from UI. In JWT token based security , we pass on base 64 encoded string of username and password to server as authorization header in below format - Authorization Header = "Bearer " + Base64Encoder(username:password) Step 1: Create new angular application Refer below post for creating new angular application - http://myjavablog.com/2019/04/13/angular-installation-and-setup/ Step 2: Create modules for material and primeng components Create two modules for material(material.module.ts) and primeng( primeng.module.ts ) to define all the related components required in application. These two modules are also required to be imported in main module (app.module.ts) Please refer below link for primeng and material configuration - http://myjavablog.com/2019/07/28/crud-operations-using-primeng-datatable-and-material-design/ Create components named header, footer, login,logout and todo components for Todo Manager application. Todo manager application shows all todos in primeng datatable . Also we are allowed to perform CRUD operations on all todos. All CRUD operations are done in todo component as below - Todo component - components\todo\todo.component.html components\todo\todo.component.ts Step 4: Add the routing for application (Application Navigation/Routing) We have to create a route for the application navigation. Below file contains routing configuration - src\app\app-routing.module.ts import { NgModule, ViewChildren } from '@angular/core'; import { Routes, RouterModule } from '@angular/router'; import { TodoComponent } from './components/todo/todo.component'; import { TodoAddComponent } from './components/todo-add/todo-add.component'; import { TodoEditComponent } from './components/todo-edit/todo-edit.component'; import { AuthGaurdService } from './services/auth-gaurd.service'; import { LogoutComponent } from './components/logout/logout.component'; import { LoginComponent } from './components/login/login.component'; const routes: Routes = }, { path: 'todo-add', component: TodoAddComponent ,canActivate: }, { path: 'todo-edit/:id', component: TodoEditComponent ,canActivate:}, { path: '', component: TodoComponent,canActivate: }, { path: 'login', component: LoginComponent }, { path: 'logout', component: LogoutComponent,canActivate: } ]; @NgModule({ imports: , exports: }) export class AppRoutingModule { } All the routes are guarded by auth guard service. AuthGuardService checks ,if user is logged in to the application and then only it activates those routes configured in app-routing.module.ts . AuthGuardService has canActivate() method which returns true if user is already logged into the application. If user is not logged into the application then it returns false and redirect him to login page. import { Injectable } from '@angular/core'; import { Router, ActivatedRouteSnapshot, RouterStateSnapshot, CanActivate } from '@angular/router'; import { AuthenticationService } from './authentication.service'; @Injectable({ providedIn: 'root' }) export class AuthGaurdService implements CanActivate { constructor(private router: Router, private authService: AuthenticationService) { } canActivate(route: ActivatedRouteSnapshot, state: RouterStateSnapshot) { if (this.authService.isUserLoggedIn()) return true; this.router.navigate(); return false; } } Step 5: Authentication and Todo service (Service Layer) AuthenticationService (authentication.service.ts) - It handles user authentication into the application. It has authenticate( username, password ) method which receives username and password entered on login page and authenticate user using spring basic authentication method. Whenever you hit webservice , SecurityConfig.java comes into picture. If you remember, we have configured JWT security in spring boot application created earlier . When we hit todo service then every the time we are authenticated against spring boot JWT security. We need to pass authorization header all the time while hitting webservice from UI. Authorization header contains user credentials and JSON Web Token which has some expiry value upto which we can make request to TODO API. Also it stores user information in session for checking user logged in status. import { Injectable } from '@angular/core'; import { HttpClient, HttpHeaders } from '@angular/common/http'; import { map } from 'rxjs/operators'; export class User{ constructor( public status:string, ) {} } export class JwtResponse{ constructor( public jwttoken:string, ) {} } @Injectable({ providedIn: 'root' }) export class AuthenticationService { constructor(private httpClient: HttpClient){ } authenticate(username, password) { return this.httpClient.post('http://localhost:8081/authenticate',{username,password}).pipe( map( userData => { sessionStorage.setItem('username',username); let tokenStr= 'Bearer '+userData.token; sessionStorage.setItem('token', tokenStr); return userData; } ) ); } isUserLoggedIn() { let user = sessionStorage.getItem('username') console.log('Is User Logged in: '+ !(user === null)) return !(user === null) } logOut() { sessionStorage.removeItem('username') } } We also have TodoService (todo.service.ts) to perform various operations on Todo information. import { Injectable } from '@angular/core'; import { HttpClient, HttpHeaders } from '@angular/common/http'; import { Observable, of, throwError } from 'rxjs'; import { map, catchError, tap, retry } from 'rxjs/operators'; import { Todo } from './../domain/Todo'; @Injectable({ providedIn: 'root' }) export class TodoService { endpoint = 'http://localhost:8081/api'; username = 'myjavablog'; password = 'password'; constructor(private httpClient: HttpClient) { } // Http Options httpOptions = { headers: new HttpHeaders({ 'Content-Type': 'application/json' }) } public deleteTodo(todoId) { const headers = new HttpHeaders({ Authorization: 'Bearer ' + btoa(this.username + ':' + this.password) }); return this.httpClient.delete("http://localhost:8081/api/todo" + "/" + todoId, { headers }); } public createTodo(todo) { const headers = new HttpHeaders({ Authorization: 'Bearer ' + btoa(this.username + ':' + this.password) }); return this.httpClient.post("http://localhost:8081/api/todo", todo, { headers }); } // To Get List Of Todos getTodoList(): Observable { const headers = new HttpHeaders({ Authorization: 'Bearer ' + btoa(this.username + ':' + this.password) }); return this.httpClient.get('http://localhost:8081/api/todos', { headers }); } // HttpClient API get() method => Fetch Todo getTodo(id): Observable { const headers = new HttpHeaders({ Authorization: 'Bearer ' + btoa(this.username + ':' + this.password) }); return this.httpClient.get(this.endpoint + '/todos/' + id, { headers }); } // HttpClient API put() method => Update Todo updateTodo(id, todo): Observable { const headers = new HttpHeaders({ Authorization: 'Bearer ' + btoa(this.username + ':' + this.password) }); return this.httpClient.put(this.endpoint + '/todo' , JSON.stringify(todo), { headers }); } } You can download source code for this application from below link - Download Step 6: Run the application ng serve Login page

Login page Home page

Home Page

Generated Token during login Add todo -

Add Todo Read the full article
0 notes
Text
Authorization on a PreAuthenticated spring-security scenario (Round 1)
ONE of the most used scenario for a PreAuthenticated authentication in spring-security involves retrieving principal information from the header of the HTTP request using RequestHeaderAuthenticationFilter
Filter role is the creation of the PreAuthenticatedAuthenticationToken to pass it through the rest of the security process. Note that this filter inherits from AbstractPreAuthenticatedProcessingFilter which uses WebAuthenticationDetailsSource as default AuthenticationDetailsSource. In this point the method “buildDetails” is called on AuthenticationDetailsSource returning a WebAuthenticationDetails which is setted on the details attribute of the token and passed as attribute to the authenticate method of the AuthenticationManager.
PreAuthenticatedAuthenticationToken authRequest = new PreAuthenticatedAuthenticationToken(principal, credentials); authRequest.setDetails(this.authenticationDetailsSource.buildDetails(request)); Authentication authResult = this.authenticationManager.authenticate(authRequest); this.successfulAuthentication(request, response, authResult);
Now note that WebAuthenticationDetails is a simple POJO holding two attributes: remoteAddress, and sessionId which are took from the request object. When authenticate method is called on AuthenticationManager, security process starts trying all available AuthenticationProviders until one of them succeeds. PreAuthenticatedAuthenticationToken inherits from Authentication so it can fit as argument for authenticate method, so, eventually, our PreAuthenticatedAuthenticationProvider will be called and out token will be processed by PreAuthenticatedGrantedAuthoritiesUserDetailsService.
The problem is that when PreAuthenticatedGrantedAuthoritiesUserDetailsService receives the PreAuthenticatedAuthenticationToken it tries to cast, as GrantedAuthoritiesContainer, the content of the “details” field!!
This is very weird since PreAuthenticatedAuthenticationToken inherits from AbstractAuthenticationToken so there is a formal “authorities” attribute of type `Collection<GrantedAuthority>` in the class … but for some reasonWebAuthenticationDetails this is not used and the userdetails service expects a GrantedAuthoritiesContainer object in the details attribute:
((GrantedAuthoritiesContainer)token.getDetails()).getGrantedAuthorities()
However, as we’ve seen, the content of the details attribute in the PreAuthenticatedAuthenticationToken is a WebAuthenticationDetails object which is not a GrantedAuthoritiesContainer!!
Am i missing something here?
0 notes
Text
Preauthenticated principals with spring-security on spring-boot
TODAY i want to share how to set up spring-security over spring-boot application on a preauthenticated scenario.
Preauthentication is a spring-security scenario supported for quite a long time. It is often used when the authentication is provided using X.509 certificates, or when you relay in an external authentication system.
Imgaine a microservice architecture implementing an api-gateway pattern. In this case you might want to avoid implementing authentication in all microservices and rely on a perimetral authentication implemented at the api-gateway component. There are many ways to implement this, and we can talk about that in a different post, but the important thing is that even when you want to avoid authentication in all microservices you might want to know the principal. Probably to implement authorization of some kind. This can be from role based endpoint access to filtering information to be sure principal only access his own data.
There are several handy classes already available in the spring security under the package: org.springframework.security.web.authentication.preauth you may take a look at, like:
PreAuthenticatedAuthenticationProvider
PreauthenticatedGrantedAuthoritiesUserDetailsService
RequestHeaderAuthenticationFilter
With all those pieces you should have already an idea of what comes here: The plan is api-gateway component will place the result of the authentication as custom headers, and rest of the services will transform those headers in a principal object that will be injected in the securityContext where it could be used in @Secured, @PreAuthorize, or any other authorization method you like.
Now lets see the code!
All you need to do in order to confugure preauthenticated filtering in spring-boot is a usual configuration bean extending WebSecurityConfigurerAdapter
@Configuration @EnableWebSecurity @EnableGlobalMethodSecurity(securedEnabled = true, prePostEnabled = true) public class WebSecurityConfiguration extends WebSecurityConfigurerAdapter
Then you need to set the PreAuthenticatedAuthenticationProvider. e.g. like this:
@Autowired public void configureGlobal(AuthenticationManagerBuilder auth) throws Exception { auth.authenticationProvider(preauthAuthProvider()); }
@Bean public PreAuthenticatedAuthenticationProvider preauthAuthProvider() { PreAuthenticatedAuthenticationProvider preauthAuthProvider = new PreAuthenticatedAuthenticationProvider(); preauthAuthProvider.setPreAuthenticatedUserDetailsService( new PreAuthenticatedGrantedAuthoritiesUserDetailsService() ); return preauthAuthProvider; }
Now you shall declare a RequestHeaderAuthenticationFilter
@Bean public RequestHeaderAuthenticationFilter requestHeaderAuthenticationFilter( final AuthenticationManager authenticationManager) { RequestHeaderAuthenticationFilter filter = new RequestHeaderAuthenticationFilter(); }
There are many configuration options in this class, like customizing the principal header name. Look at the documentation for addtional details. NOTE the standard header for the principal id is SM_USER (this is related an external authentication provider called SiteMinder)
Finally you can configure the FilterChainProxy like this:
@Override protected void configure(final HttpSecurity http) throws Exception { http.authorizeRequests() .antMatchers("/**").authenticated() .and() .sessionManagement() .sessionCreationPolicy(SessionCreationPolicy.STATELESS) .and().securityContext() .and() .addFilterBefore(requestHeaderAuthenticationFilter(authenticationManager() LogoutFilter.class); }
With this simple configuration you can retrieve the principal id from standard or custom header and inject it in security context. There are plenty customization options on how the security process must behave depending on your needs, like what to do if header is absent, what HTTP status code should be used, and so on.
In next entry post i will write how to deal with authorization since there are a couple of tricky things to have in mind there.
Happy coding!!
0 notes