#bea.explain
Explore tagged Tumblr posts
Visit Tumblr Blog
Explore Tumblr blogs with no restrictions, modern design and the best experience.
Last Seen Tumblr Blogs


Fun Fact
Tumblr Inc. is using 66 technologies for its website.
Note
hiya! I did check if you had a resource page but couldn't find one (sorry if I missed it!) I was wondering what re/gshade preset your using? Also how did you make your weather/task templates for gameplay like here (post/736165530204028928/completed-task-swim-for-1-hour-in-wakabas) I wouldn't even know where to start in photoshop lol Thank you!
hello, hello!! I don't have a resource page yet so don't worry! l'm using a personal, sorry.
how i make my templates under the cuts (reminder that english is not my first language and that i have photoshop in spanish so i don't know the actual name of things in english)
we'll be creating the simple one from here:

Now, for the templates, it depends on what i want to do, but i usually try to keep them simple, so I use mainly 2 photoshop tools: as you can see here, the weather template I made has (1) a rectangle layer, (2) an image and (3) text layers.

keeping this in mind, let's create a thing (a bank notification) together so I can show you the steps I follow:
(0) Create a new file
There's no size I ALWAYS use, but i usually choose a bigger size since i can always resize it down later when I use it (if it's too small and you have to resize it to be bigger, it might end up looking pixelated). You can also open one of your screenies in the size you usually edit them, and deciding how big your template has to be.
(0.1)
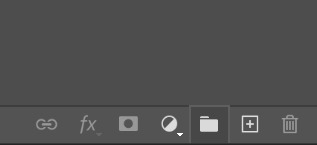
I recommend creating a group (using the little folder icon) where you will drop all the layers of the template so you can move it around and all that
(1) Shapes
This is the first thing I always do for this type of templates, just create a base shape that will contain all the other stuff on top. In this case i created a rectangle with rounded corners.
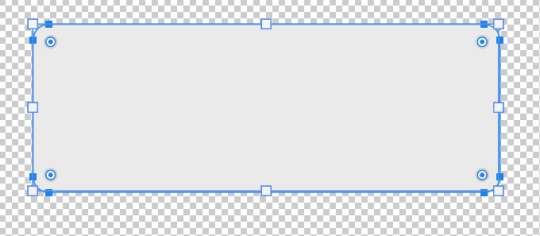
you can use those circles in the corners to round them or make them pointy. If you press alt while doing it, you can round corners individually.
I added a parallel shadow so it integrates better with the whole screenie, but that's a personal preference.
(2) Now, if you want to have icons/images/etc. I recommend creating another shape (in another color, just so you can see it), and positioning it where you want your image to go.

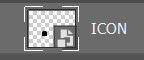
Now you want to transform that shape to an intelligent object (right click the layer and click that option). This way, if you double click the layer image, it will open in another tab: you can add your image/icon there, click save, and when you go back to the other tab, it will be there. Much easier to edit it! An intelligent object layer will look like this:
(2) Text is literally what MAKES most of templates. When you're creating templates, i recommend looking for inspo AND getting fitting fonts for it. Let's say I want to create a netflix template: i'd do a quick google search to find what fonts does netflix use. Sometimes fonts are not free, but try looking for similar ones.
I'm using manrope for this one because it's simple and easy to read, but when i'm doing this kind of phone notifications i also use fonts that are usually called something UI.
Now you only have to move things around until you like it. Then save it as a .psd so you can edit it and use it whenever you want and that's it!
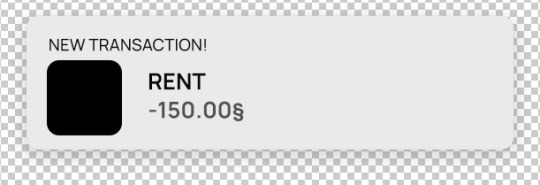
(4) This is how it looks like

you can now edit it as you want, lower the base rectangle opacity, add more shadow, change the colors...
From this simple thing, i created another version using... you guessed it: another shape, another icon and another text layer. Here you can see the final templates being used in a screenie:

Honestly, don't let the big amount of tools and options photoshop scare you! As you can see, you don't need much to create something like this
Hope this was helpful enough! Let me know if you have questions 🧡
110 notes
·
View notes
Note
Hi Bea !! I hope your exams are going well 💌 sorry bc I have a feeling this has been asked before but I couldn’t find it :(( how do you get the grain effect on your screenies ? I see other people use that effect as well and I love is sm 😭
Hii, I'm not even sure i've answered this already, so don't worry!
I use a reShade shader called film grain, and that mostly does everything. Also, when I edit the screenies I sometimes use one action from these softpine actions called Noise V2
Plus, the dust overlays I use have a little bit of noise, which also adds to the grain effect (I know, a lot of noise here, i like it that way)
13 notes
·
View notes
Note
Question for ya Bea! When using the dust overlays on your pics, what method do you use to apply them? I guess this depends on if you use photoshop, but if you do, do you use multiply, overlay, soft light? I can't seem to find the right blend!
Hi! honestly, i usually check which option fits the most between these:

I usually end up using screen or linear dodge, sometimes color dodge too.
What i do is lower the oppacity of the dust overlay until it looks how i want it to look. Then I erase the part of the dust layer that's on top of a sim or on the parts that i don't like (sometimes there's a single white dot that's not doing it for me lmao)
Sorry if this wasn't much help 😅
7 notes
·
View notes
Note
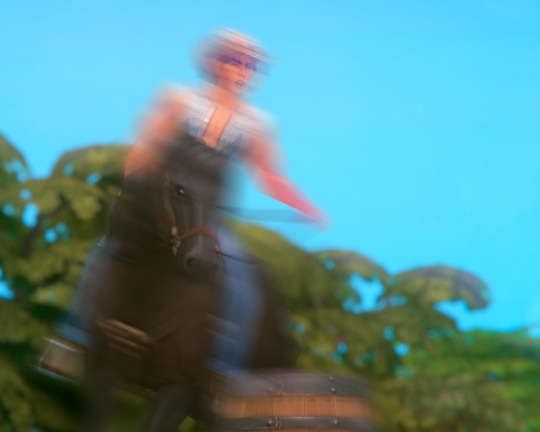
hey! i was wondering how you edited a pic from a long time ago in this post /post/713085926742605824/8-months-earlier-translation-l%C3%A1zaro-im-coming where it looks like she is falling off the horse and like blurry? thanks in advance
Hello! Sorry for the long wait, but in case you still want to know, here's a quick tutorial(??):
I used photoshop to edit the pic.
Duplicate the layer
This is basically in case we make a mistake, we will not use the first layer lmao
2. Add motion blur to the top layer: Filter > Blur > Motion Blur
Make sure you change the direction of the blur so it fits the movement. Also, add how much you want, I usually add a lot if i want the movement to be really obvious but that way you won't really be able to see faces/details.

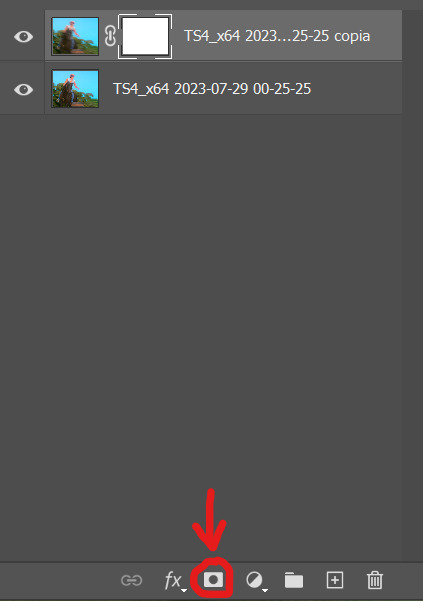
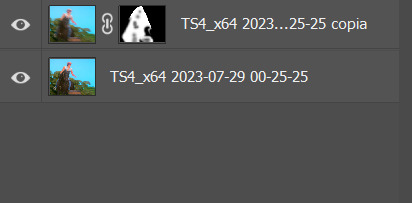
3. Add layer mask (not sure if this is the actual translation, but here's a screenshot)
4. Now you have two choices, a) erase the whole mask with the eraser tool and then paint the parts you want the blur effect to go or b) erase only the parts that are not moving. Basically, do what's easier/quicker to do. You can also play around with oppacity. You'll get something like this.
5. You're done. Admire your masterpiece and remember, if it doesn't follow the laws of physics (or whatever) it's ok, if it looks good it looks good
16 notes
·
View notes
Note
thank so much for the answer! merging the layers worked! if i could ask a follow up question, in the post you used this template for, i see in the 2nd pic the sim is partially blocking the screen. how would i go about fitting it as you do in that pic? i thought layer>create clipping mask would work, but had no luck. thank you again, i hope im not a bother!
No problem, I'm putting a small tutorial under the cut (disclaimer: i didn't have any pic with a screen so I'm just using a random one, but it's the same)
here's what I have at first: just the screenie and the template on top.

Now you want to select the template layer and create a mask


Once that's done, I went ahead and selected the sim (or whatever you want to be on top of the template) It doesn't have to be perfect bc you'll be fixing it later

Now you select the mask you created and press ctrl+x. Your sim will now be on top of the template.

You can now use the eraser and the pen tool to fix the edges to your linking. It's definitely easier when it's just like a corner or the template, but this is all i think! Feel free to ask again if you need something else 🧡
6 notes
·
View notes