#can you have a router without a modem
Explore tagged Tumblr posts
Visit Tumblr Blog
Explore Tumblr blogs with no restrictions, modern design and the best experience.
Last Seen Tumblr Blogs


Fun Fact
Tumblr.com rank in the US is 25.
Text
How to Dlink Router Setup Without Modem?
The problem might occur if you're utilising your router to build a private local network, increase the range of your Wi-Fi, or for some other particular reasons.

This thorough guide will show you how to configure your "D-Link router without a modem" so that it functions as a potent tool for local networking.
1. Determine Your Router's Capabilities
The first step is to see if this configuration is supported by your D-Link router. Not every router is made to function without a modem. For details on the router's capabilities, check the manual or go to the D-Link website. These routers are frequently referred to as "bridge mode" or "router mode."
2. Hardware Setup
It's time to begin the hardware installation once you've determined that your router is appropriate for this configuration.

Turn on the router by plugging it into an electrical outlet. Connect your computer to one of the LAN (Local Area Network) ports on the router using an Ethernet connection. The initial configuration requires this connected connection.
3. Access the Router's Web Interface
You must visit the router's web-based setup page in order to configure it. The default IP address of the router should be typed into the address bar of an open web browser on your computer. Common IP addresses for D-Link routers include 192.168.0.1 and 192.168.1.1. For the precise IP address, consult the user guide for your router.
4. Login to the Router
A username and password must be entered in order to access the router's settings. Try entering "admin" for both fields if you haven't modified the default values for these credentials. The login credentials should be changed for security reasons.
5. Internet Configuration
You will have to manually enter your Internet Service Provider (ISP) information into the router because you are configuring the router without a modem.
To get the relevant information, which normally includes the IP address, subnet mask, and DNS server details, get in touch with your ISP. Put these parameters in the router's configuration.
6. Local Network Settings
Adjust the router's local network settings as needed. You can enable the DHCP (Dynamic Host Configuration Protocol) server to automatically assign IP addresses to devices on your local network. Ensure that your router's DHCP server is activated.
7. Wireless Network Configuration
Set your SSID (Network Name) and password to configure your Wi-Fi network. For wireless device connections to your router, this is essential.
8. Security Measures
Put security measures in place to prevent unauthorised access to your network. Use WPA3 encryption on your Wi-Fi network and set a strong administrator password.

9. Testing Your Network
Test your network after configuring the router to make sure everything is working as it should. Check internet connectivity on a variety of devices connected to your Wi-Fi network, and make sure all settings are being used as intended.
Conclusion
For a number of networking requirements, setting up a "D-Link router without a modem" can be a workable alternative. This post has showed you how to set up a private local network, increase your Wi-Fi range, or experiment with various network setups. You may efficiently administer your network without a typical modem using the correct D-Link router and the instructions provided here, giving you flexibility and control over your network environment.
#how to setup a router without a modem#wifi router without modem#can you have a router without a modem#wireless router without modem#dlink modem setup
0 notes
Text
does hughes net offer a vpn for router
does hughes net offer a vpn for router
HughesNet VPN Router Compatibility
Title: Ensuring HughesNet VPN Router Compatibility: What You Need to Know
In today's digitally interconnected world, safeguarding your online activities is paramount. Virtual Private Networks (VPNs) serve as a vital tool in protecting your internet privacy and security. However, for individuals utilizing HughesNet satellite internet services, ensuring VPN router compatibility is essential for seamless integration and optimal performance.
HughesNet, known for its reliable satellite internet connectivity, offers users high-speed internet access in areas where traditional cable or DSL services may be unavailable. While HughesNet's satellite internet service operates differently from terrestrial broadband connections, it is still compatible with VPN routers.
When selecting a VPN router to use with HughesNet, it's crucial to consider certain factors to ensure compatibility and performance. Firstly, opt for a VPN router that supports satellite internet technology and is compatible with HughesNet's network infrastructure. This compatibility ensures smooth data transmission and minimal latency, maintaining your internet speed and reliability.
Additionally, prioritize VPN routers with robust security features and encryption protocols to fortify your online privacy and protect sensitive information from potential cyber threats. Features such as firewall protection, intrusion detection, and VPN passthrough capabilities enhance the overall security of your internet connection.
Moreover, verify that the VPN router is compatible with your specific HughesNet modem model to avoid any compatibility issues or connectivity disruptions. Consult the manufacturer's specifications or contact HughesNet customer support for guidance on compatible VPN router options.
By selecting a VPN router that is compatible with HughesNet satellite internet services, you can enjoy the benefits of enhanced online security and privacy without sacrificing internet performance. Prioritize compatibility, security features, and reliable connectivity when choosing a VPN router for your HughesNet internet connection. With the right VPN router in place, you can navigate the digital landscape with confidence and peace of mind.
HughesNet VPN Service Availability
Title: Exploring HughesNet VPN Service Availability: What Users Need to Know
In today's digital age, where online privacy and security are paramount concerns, Virtual Private Networks (VPNs) have become essential tools for internet users. They encrypt internet traffic, ensuring confidentiality and anonymity while browsing. However, for those relying on satellite internet services like HughesNet, questions often arise about VPN compatibility and performance.
HughesNet, a leading provider of satellite internet services, offers internet access to users in rural and remote areas where traditional broadband options may be limited. While HughesNet provides reliable internet connectivity, some users wonder about the compatibility of VPNs with satellite internet and whether HughesNet supports VPN usage.
The good news is that HughesNet does support VPN usage. Users can connect to VPN services to enhance their online security and privacy, just like with any other internet service provider. Whether for personal use, business needs, or accessing geo-restricted content, HughesNet users can enjoy the benefits of VPN technology.
However, it's essential to consider some factors that may affect VPN performance over satellite internet. Due to the inherent latency and occasional network congestion associated with satellite connections, users may experience slower VPN speeds compared to terrestrial broadband. Additionally, data caps and Fair Access Policy (FAP) limits imposed by HughesNet may impact VPN usage, particularly for activities requiring large amounts of data.
Despite these potential limitations, many HughesNet users find VPNs to be valuable tools for safeguarding their online activities. By encrypting data transmissions and masking IP addresses, VPNs help mitigate security risks and preserve privacy, even over satellite internet connections.
In conclusion, HughesNet users can take advantage of VPN services to enhance their online security and privacy. While some performance considerations exist, the compatibility of VPNs with HughesNet enables users to enjoy the benefits of secure and anonymous browsing, regardless of their location.
HughesNet VPN Router Integration
Title: Seamless Integration: HughesNet VPN Router Enhances Connectivity
In today's digital landscape, ensuring secure and reliable connectivity is paramount, especially for users of satellite internet services like HughesNet. With the increasing emphasis on online privacy and data security, integrating a Virtual Private Network (VPN) with your HughesNet router can offer enhanced protection and flexibility for internet usage.
HughesNet, known for its high-speed satellite internet solutions, recognizes the importance of safeguarding users' online activities. By incorporating a VPN router into the HughesNet network setup, users can encrypt their internet traffic, shielding it from prying eyes and potential cyber threats.
One of the primary advantages of integrating a VPN router with HughesNet is the ability to establish a secure connection regardless of the user's location. Whether accessing the internet from the comfort of home or on the go, users can enjoy peace of mind knowing that their data is encrypted and their privacy is preserved.
Moreover, the integration of a VPN router can help bypass certain restrictions imposed by internet service providers (ISPs) or geographical limitations on content access. This means HughesNet users can enjoy unrestricted access to online content, services, and streaming platforms, regardless of their physical location.
Another benefit of HughesNet VPN router integration is the added layer of security it provides for sensitive online transactions, such as online banking or shopping. With encryption protocols in place, users can conduct financial transactions with confidence, minimizing the risk of unauthorized access to their personal information.
In conclusion, the integration of a VPN router with HughesNet offers users a comprehensive solution for enhancing online security, privacy, and flexibility. By encrypting internet traffic and circumventing restrictions, users can enjoy a seamless online experience while safeguarding their digital footprint.
HughesNet VPN Subscription Options
Title: Exploring HughesNet VPN Subscription Options
In today's interconnected world, online security and privacy are paramount concerns for internet users. HughesNet, a leading provider of satellite internet services, recognizes the importance of protecting its customers' data. To address this need, HughesNet offers VPN (Virtual Private Network) subscription options to enhance online security and privacy for its users.
A VPN encrypts internet traffic, routing it through a secure server, thus shielding sensitive information from potential threats such as hackers, identity thieves, and data snoopers. HughesNet understands the value of safeguarding its users' online activities, especially in remote or underserved areas where internet access may be limited.
HughesNet VPN subscription options cater to varying needs and preferences. Whether users require basic protection for casual browsing or advanced features for business use, HughesNet offers flexible plans to suit diverse requirements. Users can choose from monthly or yearly subscription plans, depending on their usage frequency and budget constraints.
One of the key advantages of opting for HughesNet VPN is its seamless integration with HughesNet's satellite internet services. Subscribers can enjoy uninterrupted internet connectivity while benefiting from enhanced security features offered by the VPN.
Moreover, HughesNet VPN boasts a user-friendly interface and reliable customer support, ensuring a hassle-free experience for users seeking assistance or troubleshooting guidance.
In conclusion, HughesNet VPN subscription options empower users to take control of their online security and privacy. By encrypting internet traffic and shielding sensitive information from prying eyes, HughesNet VPN offers peace of mind in an increasingly digitized world. Whether for personal or business use, HughesNet VPN provides a comprehensive solution for safeguarding online activities and data.
HughesNet VPN Router Setup Instructions
Title: Easy Steps for HughesNet VPN Router Setup
In today's digital age, ensuring your online security and privacy is paramount. One effective way to achieve this is by setting up a VPN (Virtual Private Network) router, especially if you're using HughesNet satellite internet service. By encrypting your internet connection, a VPN router protects your data from prying eyes and enhances your online anonymity.
Here's a comprehensive guide on how to set up a VPN router with your HughesNet internet connection:
Choose a Compatible VPN Router: Before diving into the setup process, make sure you have a VPN-compatible router. Not all routers support VPN configurations, so it's essential to check compatibility beforehand.
Access Router Settings: Connect your computer to the router either via Wi-Fi or Ethernet cable. Open a web browser and enter the router's IP address in the address bar. Typically, the default IP address is 192.168.1.1 or 192.168.0.1. Log in using the router's admin credentials.
Install VPN Firmware: If your router doesn't come pre-installed with VPN firmware, you'll need to flash it with compatible firmware. Follow the manufacturer's instructions to download and install the VPN firmware onto your router.
Configure VPN Settings: Once the firmware is installed, navigate to the router's VPN settings. Enter the VPN server details provided by your VPN service provider, including the server address, username, and password.
Enable VPN Connection: After entering the VPN details, save the settings and enable the VPN connection on your router. This will establish a secure connection between your devices and the VPN server.
Test the Connection: Once the VPN is set up, it's crucial to test the connection to ensure everything is working correctly. Visit a website like whatismyip.com to verify that your IP address has changed to the VPN server's IP.
Enjoy Secure Browsing: With the VPN router successfully configured, you can now enjoy secure and private browsing sessions without worrying about potential threats or data breaches.
By following these steps, you can set up a VPN router with your HughesNet internet service and enjoy enhanced online security and privacy.
2 notes
·
View notes
Text
Resolving Storage and Internet Issues
Computers are indispensable tools in our daily lives, but they can sometimes present frustrating challenges, such as running out of storage space or losing internet connectivity. These issues can disrupt productivity and cause significant inconvenience. This article explores practical solutions for two common problems: managing a nearly full startup disk on a Mac and addressing internet access issues on a Windows system. By following these steps, users can restore their devices to optimal performance and maintain seamless operation.
Addressing a Full Startup Disk on Mac
When a Mac displays a warning that the startup disk is nearly full, it signals that the primary drive, which houses the operating system and user files, is running out of space. This can lead to sluggish performance, application crashes, and an inability to save new files. How to Fix Your Startup Disk Is Almost Full on Mac begins with understanding the root cause and taking systematic steps to free up space.
The first step is to check how much storage is being used. Navigate to the system menu, select "About This Mac," and click on the storage tab to view a breakdown of space usage. This visual representation helps identify which file categories—such as applications, documents, or media—are consuming the most space. Once you have this overview, prioritize clearing out unnecessary files. Start by emptying the trash, as deleted files often linger there, taking up valuable space. Next, review the downloads folder, where temporary or forgotten files like installers or duplicates tend to accumulate. Deleting these can quickly reclaim space.
Another effective strategy is to manage large files, such as videos or archived projects, which often occupy significant portions of the disk. Use the built-in storage management tool to locate these files and consider moving them to an external drive or cloud storage. For users with extensive photo or video libraries, optimizing storage by enabling cloud-based syncing can offload files while keeping them accessible. Additionally, uninstall unused applications, as they not only consume disk space but may also run background processes that slow down the system.
Clearing system clutter is another critical step. Temporary files, caches, and logs can accumulate over time. Use trusted cleanup tools available in the Mac’s application store to safely remove these without affecting system stability. For advanced users, manually deleting cache files from the library folder can free up space, but caution is advised to avoid deleting essential system files. Regularly performing these maintenance tasks ensures the startup disk remains manageable, preventing future warnings.
Troubleshooting Internet Connectivity on Windows
Losing internet access on a Windows computer can be equally disruptive, whether it’s due to a misconfigured setting, hardware issue, or network problem. How to Fix No Internet Access in Windows involves a step-by-step approach to diagnose and resolve the issue, restoring connectivity efficiently.
Begin by verifying the physical connections. Ensure the Ethernet cable is securely plugged in or that the Wi-Fi adapter is enabled. Restarting the router and modem can resolve temporary glitches, as these devices sometimes encounter conflicts that disrupt connectivity. After rebooting, check the network status in the Windows taskbar. If the system indicates a connection but still shows no internet access, proceed to deeper troubleshooting.
Run the built-in network troubleshooter by accessing the network settings and selecting the option to diagnose problems. This tool automatically detects common issues, such as incorrect IP configurations or disabled services, and applies fixes where possible. If the troubleshooter doesn’t resolve the issue, manually reset the network settings. This can be done by navigating to the network and internet settings, selecting the reset option, and restarting the computer. Be aware that this resets all network adapters, requiring you to reconnect to Wi-Fi networks afterward.
Another potential cause of internet issues is outdated or corrupted network drivers. Visit the device manager, locate the network adapters, and check for any warning indicators. Updating drivers through the system or downloading the latest versions from the manufacturer’s website can resolve connectivity problems. If the issue persists, check for conflicts with security software. Firewalls or antivirus programs sometimes block connections inadvertently. Temporarily disabling these programs can help identify if they are the culprit, but ensure they are re-enabled after testing to maintain system security.
For persistent problems, consider external factors like network congestion or service provider outages. Contacting the internet service provider to confirm the status of the connection can clarify whether the issue is local or network-wide. Testing the connection on another device can also help determine if the problem is specific to the Windows system or a broader network issue.
Proactive Maintenance for Long-Term Performance
Preventing these issues from recurring requires proactive habits. For Mac users, regularly monitoring storage usage and setting up automatic cloud backups can prevent the startup disk from filling up. Scheduling monthly cleanups to remove redundant files and optimizing storage settings ensures the system runs smoothly. For Windows users, maintaining updated drivers and routinely checking network settings can prevent connectivity disruptions. Keeping security software updated and avoiding unnecessary applications also contributes to stable performance.
0 notes
Text
Disney Plus Bundles in 2025: Are Hulu, ESPN+, and Disney Worth the Combo?

Disney Plus bundles in 2025 continue to grow in popularity as more households seek value from streaming services. Combining Disney+, Hulu, and ESPN+ in one plan seems like a smart move—but is the combo really worth the price?
Interestingly, even areas such as industrial supply play a vital role in supporting the seamless delivery of bundled entertainment. This article explores the pros, cons, and hidden factors behind Disney’s bundling strategy and how it connects to streaming technology and infrastructure.
“Disney’s 2025 bundle offers more content than ever—but is it the right fit for your budget and viewing habits?”
What’s in the Disney Bundle?
The 2025 Disney bundle includes three main platforms: Disney+, Hulu, and ESPN+. Each offers different content:
Disney+: Family-friendly movies, Marvel, Star Wars, and Pixar originals.
Hulu: Popular TV shows, original series, and next-day airing from major networks.
ESPN+: Sports coverage including UFC, NFL, NBA, and exclusive documentaries.
The bundle costs $19.99/month for the ad-supported version and $29.99/month for the ad-free tier. This pricing makes it cheaper than subscribing to each service separately.
How INDUSTRIAL SUPPLY Powers Streaming Infrastructure
Streaming isn't just about content—it's also about performance. Behind the scenes, industrial supply supports large-scale data centers with servers, cooling systems, and electric machinery.
For example, each time you click play on a Disney+ show, your device connects to a server that may be thousands of miles away. That server runs on machines cooled by HVAC units and powered through high-performance backup systems—all part of the industrial supply chain.
“Industrial supply isn’t visible, but it keeps your streaming smooth and uninterrupted.”
Pros of the Disney Plus Bundle
There are several clear benefits to the bundle:
Cost Savings Subscribing to all three platforms individually would cost around $35/month. The bundle saves you over 30%.
Variety of Content For example, you can watch The Mandalorian on Disney+, Only Murders in the Building on Hulu, and live sports on ESPN+—all in one place.
Ease of Use The bundle works under one billing system and offers shared parental controls, helping families manage content access.
INDUSTRIAL SUPPLY and Streaming Devices
To enjoy 4K streaming, viewers need fast internet and compatible hardware. Many routers, modems, and streaming sticks are built using parts sourced from industrial supply chains. These components ensure that smart TVs and mobile devices run efficiently.
Moreover, high-speed streaming uses a lot of energy. That’s why power-efficient industrial machines play a role in reducing the carbon footprint of digital services.
Is the Bundle Right for Families?
Families benefit most from the Disney Plus bundle. It offers safe, educational content for kids, engaging dramas for adults, and sports for everyone.
For example, a family can use Hulu for current TV shows, Disney+ for weekend movie nights, and ESPN+ for live football. Moreover, shared profiles make it easy to track viewing history and resume playback.
INDUSTRIAL SUPPLY in Content Delivery Networks (CDNs)
Content delivery networks—or CDNs—are essential for distributing data quickly across the globe. These networks rely on industrial-grade equipment to route, store, and transmit video content.
Each node in the CDN system includes an industrial machine that ensures fast data speeds and low buffering. Without this, streaming bundles wouldn’t be reliable during peak times.
Drawbacks of the Bundle
However, the bundle may not suit everyone. Here’s why:
Content Overlap: If you already have another streaming service like Netflix or Amazon Prime, you may not watch all three Disney bundle platforms regularly.
Ad Disruption: The cheaper bundle includes ads, which can interrupt viewing. The ad-free version is more expensive.
Sports Limitations: ESPN+ does not offer live NFL or NBA games for all teams, which may disappoint sports fans.
Still, for many, the combined content and price make the bundle worthwhile.
Comparing Bundle Tiers
Plan TypePrice/MonthAdsOffline ViewingKey BenefitBasic Bundle$19.99YesLimitedBudget-friendlyPremium Bundle$29.99NoYesBest for families and binge-watchers
For example, if you hate ads and want to download shows for travel, the premium plan makes more sense.
How the Bundle Compares to Competitors
Compared to Netflix, Apple TV+, and HBO Max, Disney’s bundle offers more genres and options in a single plan.
Moreover, the bundle focuses on both on-demand and live content—something few other platforms offer.
“Disney’s bundle strategy combines entertainment and live action like no other service today.”
How INDUSTRIAL SUPPLY Prepares for Streaming Growth
As streaming demand grows, infrastructure must scale. That’s where industrial supply comes in. From climate-controlled warehouses to high-efficiency GPUs and processors, suppliers are innovating to handle future loads.
In 2025, Disney is investing more in server farms that use energy-saving industrial cooling systems and backup generators to maintain uptime during major releases.
Who Should Subscribe to the Bundle?
If you:
Watch Marvel, Pixar, or Star Wars content
Enjoy trending TV series
Follow sports closely
Want a wide variety of programming at a lower cost
Then the bundle may be perfect for you.
However, if you only watch one type of content, like sports or kids’ shows, a standalone subscription might be more affordable.
Conclusion: Worth It for Most Viewers
The Disney Plus bundle in 2025 offers strong value, especially for families and content lovers. You get something for everyone—movies, live sports, trending TV shows—all under one subscription.
With industrial supply systems ensuring reliable delivery, and Disney’s unmatched library, the bundle delivers high-quality entertainment that keeps evolving.
“More than just content—Disney’s bundle is built on smart technology and industrial support that keeps streaming running 24/7.”
0 notes
Text
Anxious
Event -just how it goes
Thoughts-Am I going to be at Home Depot forever?
Feeling- body tired
Behavior- put my hat on, did my job, and worked on my resume
Confident
Event - appointment for a new client
Thoughts: I’m the cabinet guy lol
Feeling- tall (?)
Behavior- gave them a lot of information and paid attention
Ease
Event -putting effort into everything
Thoughts- this is really important
Feeling- vulnerable, tall, and confident that I can do better
Behavior- reflection and asking myself important questions about my intentions and truths. While anxiety makes me want to act fast, I know it is very late right now and I had to reserve space for cleaning so I can be present in a important space without distraction
——-
Tonight was interesting. I cleaned because roommates are out of town but Internet went down . I knew it was the cord by testing the cord to the router which is the same voltage . I have other cords with same output. Did research, wouldn’t be safe due to the input of 1ah . After an hour of looking through cords I have and testing the existing cord again, I decided to hook up my ps4 to the tv to watch a movie (always need noise, alone at night) and the internet started to work again. The cord needs to be replaced, it’s weak but what is interesting is I never gave up trying to find a solution.
While the cord definitely needs replacing, I saw my video game and now I’ll play it again all due to this experience. I also saw how patient I was with the situation and didn’t get frustrated but tackled the issue. That being said the modem taught a lesson in patience with things beyond control but I can do my best and when it comes time for something to exist again (like internet turning back on) it’ll happened and if it doesn’t , you still do your best and take a deep breath and continue . And while it does take time, you can discover things along the way (like Red Deaf Redemption) and be happy regardless
0 notes
Text
Exploring Hidden Storage Options in False Ceilings

Have you ever looked up at your ceiling and thought, "If only I could use that empty space for something useful"? Well, you're not alone! False ceilings aren’t just about aesthetics—they can be fantastic for hidden storage solutions. Whether you live in a compact apartment or simply want to maximize every square inch of your home, the right false ceiling can offer clever ways to stow away essentials while keeping your space looking sleek and uncluttered.
Why Consider Hidden Storage in False Ceilings?
Most homes are filled with things we need but don’t use daily. Think seasonal décor, travel gear, important documents, or even emergency supplies. Instead of stuffing everything into overfilled closets or cramming items under the bed, false ceilings provide an innovative way to hide storage without affecting the look of your interiors.
The beauty of false ceiling storage is that it's completely concealed—out of sight but accessible when needed. Plus, it keeps clutter at bay and contributes to a minimalist, spacious vibe in your home.
Types of Hidden Storage You Can Create
Here’s where things get exciting! False ceilings can be modified to incorporate different types of concealed storage depending on your needs. Let’s explore some smart ways to use this overhead space creatively.
1. Hidden Cabinets & Compartments
One of the simplest yet most effective storage options is built-in cabinets within the false ceiling structure. These compartments can store rarely used items like holiday decorations, old books, or sentimental keepsakes. Designed with hinged doors or sliding panels, these storage spots blend seamlessly into the ceiling without anyone noticing a thing.
2. Retractable Storage Units
For those who need accessible storage but don’t want to climb up on ladders every time, retractable storage units are a game-changer. These can be fitted with a pulley system or motorized controls, allowing you to lower the unit when needed and retract it back into the ceiling when not in use.
Imagine a retractable shelf storing important files in a study room or an overhead shoe rack in a bedroom—no more clutter on the floor, and everything is neatly tucked away.
3. False Ceiling Storage for Kitchen Supplies
Kitchens often feel cluttered, but your ceiling can help! Slim false ceiling compartments can store extra plates, cookware, or bulk groceries. Install concealed sliding panels or push-to-open doors to keep these compartments sleek and functional.
4. Hidden Safe for Valuables
Looking for a clever way to store valuable documents or jewelry? False ceilings can double as secure storage for valuables, keeping them safe from burglars or prying eyes. A small lockable compartment can be disguised as a simple ceiling panel, ensuring easy access while maintaining discretion.
5. Concealed Storage for Wires & Tech Gadgets
No one likes tangled wires running across their living space. False ceilings can help keep everything hidden—from Wi-Fi routers and modem units to projector screens and smart home control panels. Concealing technology within a false ceiling keeps the aesthetics clean while ensuring functionality remains intact.
Design Considerations Before Installing False Ceiling Storage
Before jumping into hidden storage solutions, here are some important things to keep in mind:
Weight Limit: False ceilings are often constructed using lightweight materials like gypsum or PVC, so the storage shouldn’t be too heavy. Discuss with your contractor about weight restrictions before planning storage installations.
Accessibility: Ensure that the hidden compartments are easy to access with pull-down panels, concealed hinges, or automated controls. There's no point in having storage you struggle to retrieve!
Ventilation & Safety: If storing perishable items, ensure proper ventilation in the ceiling compartment. Also, avoid placing heavy storage directly above seating areas or beds for safety reasons.
Aesthetic Integration: False ceiling storage should blend seamlessly with your interior design. Opt for colors and finishes that match the ceiling panels so the storage remains invisible.
Final Thoughts
False ceilings are no longer just decorative elements—they can be highly functional when designed for hidden storage. From retractable units to discreet compartments, this overhead space can be transformed into a valuable storage solution for modern homes. If you're considering installing one, it's worth consulting professionals to ensure smart execution.
You can also check false ceiling contractors in Hyderabad to get expert advice and custom solutions tailored to your space! Whether it’s for a small apartment or a spacious home, false ceiling storage can be a game-changer when done right.
Author: Sarath
#false ceiling#false ceiling contractors in hyderabad#false ceiling services in hyderabad#false ceiling work in hyderabad#VDF Flooring#VDF Engineers
0 notes
Text
Home Network Setup can Boost your Productivity
Everyone, starting from a child to an elderly person is heavily dependent on the Internet. No matter whether you just want to stream Netflix, play games or do online learning, home networks are an essential need of an hour. But if the Wi-Fi system is weak then the slow Internet makes everything difficult. Hence, it is necessary to understand how a Home Network Installation Melbourne should be installed for maximized productivity.

What is the use of a home network?
A Home Networking Installation Services is a system that helps in connecting all the devices including laptops, smart TV's, security cameras, phones and more to the Internet.
1. Modems help in connecting to the Internet
2. Router helps in spreading the Internet around the house.
3. Wired connections or Wi-Fi signals?
4. Security setup for smart home devices.
What is the importance of home network installation?
1. There is an increase in the number of people working or starting from home.
2. Streaming of videos in HD or 4K.
3. A stable connection is required for playing games with fast connection.
4. Smart devices such as alarms, lights and cameras are able to run on Wi-Fi.
In all of this, if your network becomes unable to meet the required speed, then the videos might start buffering, leading to decreased productivity.
Some common issues in home networks & the solution:
1. Difficulty in Wi-Fi reaching every room
If your house has thick walls then there can be a blockage in the signals as a solution, you can start using a mesh Wi-Fi system leading to a boost in signal.
2. Slow internet speed
This can be an outcome of using an old router or your Internet plan. You can choose to update your router with a newer model that easily supports high speed Wi-Fi and Insurance at the NBN plan will fulfill all your usage needs.
3. Excessive devices connected together
Mobiles, Smart TV's , and smart gadgets can make the connection speed slow. You can opt for a Tri band router or maybe a dual band. This will help in handling more devices without slowing it down.

The last lines
Having a strong and low boost home network system will make your life a whole lot easier. Home networking installation services will be easy to manage, relax and work altogether. It is just that you need to choose the correct setup for your home network system and get it done by a team of professionals.
#Home Network Installation Melbourne#Home Network Installation#Home Networking Installation Services
0 notes
Text
Wifi Router
Businesses and sophisticated home users require routers that provide more than just basic access in the modern digital environment. They need to be dependable and space-efficient, with the capacity to manage intricate networking duties, performance, and adaptability. The Mikrotik L009UiGS-2HaxD-IN is a clever solution that combines enterprise-grade functionality in a small, reasonably priced device, making it perfect for managed service providers, workplaces, and remote work environments.
Part of MikroTik's next-generation portfolio, the L009UiGS-2HaxD-IN is designed to replace older models, such as the hEX series, but with major improvements. This router can easily manage sophisticated setups including VPNs, VLANs, firewall filtering, and bandwidth control thanks to its dual-core ARM CPU and 1 GB of RAM. This device is designed to grow with your demands, whether you're running a high-performance home lab or an expanding business network.
The unique feature of the Mikrotik L009UiGS-2HaxD-IN is its multipurpose functionality. It has a 2.5G combination connector (RJ45/SFP), eight gigabit Ethernet ports, and built-in dual-band Wi-Fi 5 (802.11ac + 802.11n). This implies that you have both wired and wireless connectivity right out of the box, with sufficient power to provide a strong and dependable signal throughout homes or small to medium-sized companies. In many configurations, it is a comprehensive solution that does away with the requirement for an additional access point or switch.
Its passive PoE output on port 8 provides an additional benefit. This eliminates the need for an additional power source by enabling the Mikrotik L009UiGS-2HaxD-IN to power a camera, VoIP phone, or other MikroTik device. Additionally, the device has a USB 3.0 port for local file storage or external LTE modems. Its small desktop case offers low power consumption and good thermal design, making it perfect for spaces that are constrained.
This router is equipped with MikroTik's robust RouterOS software, which gives you extensive control over every part of your network. Configuring VPN tunnels (with IPsec and WireGuard), load balancing, firewall rules, dynamic routing, complex QoS, and remote access is simple. Because to MikroTik's thorough documentation and vibrant user community, the L009UiGS-2HaxD-IN accommodates both novice and expert users.
The L009UiGS-2HaxD-IN provides a seamless upgrade route for consumers wishing to move from simple home networking to more secure and professional-grade systems. MSPs and small business IT teams who require a robust, adaptable router at a price that won't break the bank will also find it to be a great option.
In conclusion, by integrating wired, wireless, and sophisticated routing features into a single, effective device, the Mikrotik L009UiGS-2HaxD-IN offers outstanding value. For people who desire professional-level performance without the bulk or expense of corporate systems, this is the ideal option.
We have the authorization to sell the Mikrotik L009UiGS-2HaxD-IN. For information on costs, availability, or help locating the ideal MikroTik solution for your network, get in touch with us right now.

#Routers#Networking#WiFi#WirelessRouter#HomeNetworking#Tech#Internet#RouterSetup#NetworkingDevices#WifiRouter#TechSolutions#SmartHome#NetworkSecurity#Broadband#RouterReview#HomeOffice#TechSavvy#InternetSpeed#NetworkingGear#TechCommunity#GigabitRouter#MeshNetwork
0 notes
Text
Stop Renting, Start Saving: Best Verizon Fios Approved Modems for Faster Internet in 2025
If you use Verizon FiOS for Internet you are likely to pay a monthly fee for the router or gateway. With time the rental fee adds up sometimes even more than $15 per month which is almost $200 a year. The good news is that you can now buy your own VERIZON FIOS APPROVED MODEMS and save a lot of money while getting faster and more reliable service.

What do you need to know about Verizon Fios ?
Unlike cable Internet service providers like Xfinity Verizon Fios users fiber optic technology. That means there is no traditional modem like you would have used with a cable provider like XFINITY TRIPLEPLAY MODEM. You need to know that optical network terminal easily converts fiber optic signals into Internet data or phone signals. It is basically installed on a wall inside or outside your home. Router connects to the Ont and broadcasts Wi-Fi in your home. So when you talk about like that Verizon Fios you actually mean routers that are compatible with Verizon Fios . The ONT stays in place you only replace the router.
Why you must own router for Verizon Fios ?
You can stop paying Verizon Fios s $15 month router rental fee. A1 time router purchase can save you hundreds with time. Some routers are older models with limited range and speed. Or modern router can give you must speed and cover more of your home. You can also get complete access to more settings parental control guest networks and better security features. With your own router you can just upgrade whenever you want without dealing with the equipment swaps.
How to set up your router with Verizon Fios ?
Firstly you need to disconnect the old router and power it off. Plug your new routers Wan port into the ont using Ethernet cable. Plug in the power using adapter and turn the router on. Verizon Fios might require you to release the old Mac address. You can do this by logging into the old router then releasing the IP address or you can also call Verizon Fios support to reset the connection. You can also use Verizon Fios app or web interface to set your Wi-Fi name and password.
So above all you need to know that buying your own Verizon Fios compatible router is one of the safest and smartest things that you can do to save money and improve your home Internet. You will stop paying rental fees enjoy faster speeds and also have better control over your network.
To know more about these products please visit our website buyyourownmodem.com
#BRIGHTSPEED APPROVED MODEMS#VERIZON FIOS APPROVED MODEMS#CENTURYLINK COMPATIBLE MODEMS#XFINITY APPROVED MODEMS#SPECTRUM APPROVED MODEMS#CENTURYLINK APPROVED MODEMS#WINDSTREAM APPROVED MODEMS#TDS APPROVED MODEMS#XFINITY TRIPLEPLAY MODEM#BRIGHTSPEED COMPATIBLE MODEMS
0 notes
Text
Powering Your Digital World: BPE's Uninterrupted Solutions
In an increasingly digital world, power outages can disrupt everything from critical business operations to your personal productivity and entertainment. Battery Power Equipment (BPE) offers a comprehensive range of Uninterruptible Power Supply (UPS) solutions designed to safeguard your valuable equipment and prevent data loss, catering to diverse needs from large-scale data centers to your home office.

For businesses that rely heavily on their digital infrastructure, downtime is not an option. Data centers, the very backbone of our interconnected world, demand the most robust and reliable power protection. BPE understands these critical requirements and provides cutting-edge UPS FOR DATA CENTERS that go beyond simple battery backup. Our solutions are engineered for scalability, redundancy, and maximum uptime, ensuring your data and operations remain secure and uninterrupted, even during prolonged power outages or fluctuations.
BPE's UPS FOR DATA CENTERS offer advanced features such as:
High Efficiency: Minimizing energy consumption and operational costs.
Scalability: Allowing you to expand your power protection as your data center grows.
Redundancy: Ensuring continuous operation even if individual components fail.
Intelligent Monitoring: Providing real-time insights into power conditions and battery health.
Seamless Integration: Designed to work harmoniously with your existing data center infrastructure.
With BPE's UPS FOR DATA CENTERS, you can have peace of mind knowing your critical digital assets are protected by a power solution you can trust.
On the other end of the spectrum, the need for reliable power at home is also paramount. Whether you work remotely, enjoy online entertainment, or simply rely on your desktop for everyday tasks, a sudden power cut can lead to frustration and potential data loss. BPE offers ups power supply for home designed to provide dependable backup power for your essential electronics.
Our ups power supply for home range includes compact and user-friendly units that can protect your:
Desktop Computers and Peripherals: Preventing data loss and allowing you to safely shut down during outages.
Routers and Modems: Maintaining your internet connection, crucial for communication and work.
Gaming Consoles and Entertainment Systems: Ensuring uninterrupted enjoyment.
Security Systems: Keeping your home protected even when the power goes out.
BPE's ups power supply for home offers a cost-effective way to safeguard your valuable electronics and maintain productivity and connectivity during power disruptions.
Understanding the varying needs of our customers, BPE also offers solutions for extended backup times. For users who require prolonged operation of their desktop during power outages, we provide UPS systems capable of delivering 8 hours backup ups for desktop. These extended-duration UPS units are ideal for situations where power outages are frequent or last for longer periods, allowing you to continue working, studying, or staying connected without interruption.
The 8 hours backup ups for desktop solutions from BPE are engineered with high-capacity batteries and efficient power management systems to provide reliable power for an extended duration. This ensures that you are not left in the dark and can continue your critical tasks until the power is restored.
Choosing BPE for your UPS needs means investing in reliability, performance, and peace of mind. Whether you require robust power protection for a data center, a dependable ups power supply for home, or an 8 hours backup ups for desktop, BPE has a solution tailored to your specific requirements. Stay powered, stay productive, and stay connected with BPE's uninterrupted power solutions. Explore our range today and experience the difference reliable power can make.
#UPS FOR DATA CENTERS#8 hours backup ups for desktop#ups power supply for home#buy ups online for home#buy ups online for office#best online ups brands in india#best ups manufacturers company in india#best ups manufacturers india#smart power backup for hospitals#smart power backup for office#ups for home & office electronics#best online ups manufacturers in india
0 notes
Text
Netgear Router Setup Using Nighthawk App: Step By Step
Netgear router devices can easily be set up using the nighthawk app. Now you can manage the network from your smartphone very conveniently. Confused how to do it? Don’t know where to start? No worries, check out the further section of this article to get detailed information about the Netgear Router Setup Using Nighthawk App. Also in the next segment you will get installation information and troubleshoot common errors. Just scroll the page and configure your router now without any technical expertise.
Netgear Router Installation
Installation of the netgear router is a very easy task. First step is unboxing the router. Look for the placement closer to the host modem. Connect the router with the modem using ethernet. Must cut the power of the modem device before connecting the ethernet cable. Make sure the connection is secured. Then connect the modem and the router with the power. Wait for the LED light on the router device to get stable and then proceed with the netgear router setup process as specified below.
Netgear Router Setup
Begin the setup by using a smartphone, modem and working internet connection. Check out the steps you need to follow:
Download The Nighthawk App
Embark with the downloading of the nighthawk app on your smartphone device. You can use either android or iOS system devices. Open the store on your smartphone. Search for the nighthawk app. Then click on the install button and let the application download and install in the smartphone device. Before initiating the download make sure your device is connected with a stable internet connection.
Connect Smartphone With Router
After downloading the app you have to connect the same device with the router’s wireless network. Use the default SSID & password details mentioned on the device label.
First of all you have to go to the settings in your smartphone.
Next, you have to go to the WiFi option and turn it on.
Scan the router’s network name and choose it
Mention the password as on the label of the router.
Click on the connect option.
Let the device connect to the network.
Launch The App
Now, launch the nighthawk app you recently installed and follow the on screen instructions to proceed with the network configuration.
Configure Your Router
Initiate the configuration by choosing the language. After that you have to follow the on screen guide. Create a password for your wireless network. Also perform firmware updates, make additional security settings, and many more. After making all the important changes, submit the changes by clicking the apply option.
Troubleshoot Common Issues
Is your netgear router troubling you? Don’t know what the issue is? Don’t know how to resolve the problem? No worries, just follow the troubleshoot guide mentioned here:
No Internet Connection
One of the most common problems users face with the netgear router is a lack of internet access. If your netgear router is connected to the router but there's no internet then try following troubleshooting:
Restart your router and modem. Unplug both devices from power. Wait for about 30 seconds. Plug the device back again and wait for it to boot up.
Check the ISP connection. Many times the issue lies with your ISP. Try connecting directly via modem to confirm.
Update the firmware. Log in to your router via the Netgear web interface (usually 192.168.1.1) and check for firmware updates under the settings.
Slow Internet Speeds
In case your router network speed is slow then you should try following:
Reposition the router. Place it in a central location away from network troublers including walls, electronics, heavy metal objects etc.
Limit connected devices. Too many devices can strain bandwidth. Disconnect those not in use.
Use the 5GHz band. If your router is dual-band, switch to 5GHz for faster speeds (ideal for streaming or gaming).
Router Keeps Disconnecting
Facing sudden disconnections? Is your router keep disconnecting then follow below troubleshoots:
Check cables and connections. Loose or damaged Ethernet cables can cause drops.
Change the channel. WiFi interference from nearby can cause issue. Login to your router’s admin panel and switch the wireless channels to resolve the issue.
Factory reset. If issues persist, perform a factory reset by pressing and holding the reset button for 10 seconds.
Can't Access Router Login Page
If you are unable to access the router’s login page then follow these instructions:
Check the IP address. The default is often 192.168.1.1 or 192.168.0.1. Confirm it's correct.
Use a wired connection. Sometimes Wi-Fi won't allow access, connect your PC via Ethernet and try again.
Clear browser cache or use a different browser.
Forgot Wi-Fi Password
Lastly if you forgot the password of your wireless network then you can proceed with these troubleshootings:
Login to the router settings using any browser.
Navigate to Wireless Settings and view/change your Wi-Fi credentials.
Conclusion
Hope the above sanctioned information related to the netgear router setup is very useful for you. You can follow the steps to configure your router using the nighthawk app. Also you can easily troubleshoot the common errors by following the above tips.
0 notes
Text
Setup Orbi Mesh Network Using www.orbilogin.com
Orbi devices are widely used to create a robust network at home or offices by the people. Orbi networking devices are very popular among users. The devices are known for their performance. You can easily create orbi mesh network setup using orbi router & satellites. Buying orbi wifi systems & setting up the device at home will convert your home into a WiFi hub. Let’s check out the installation and setup of orbi mesh network using www.orbilogin.com web address. In the further segment of this article you will find the breakdown of the process into easy to understand steps. Read the article till the end to do the configuration by yourself.
Orbi Mesh WiFi Installation
Orbi mesh WiFi system installation is a very simple process. You just have to follow the below specified steps of hardware installation.
Begin with the orbi router device setup. Firstly unplug the modem device and place the router closer to the modem. Use the yellow ethernet cable you got with the router device and connect it with the modem. Then power up your modem device. Also connect the router device with the power and begin the router setup.
Once the router device setup is complete, you can start adding satellites into the network. Place the satellites closer to the router to configure them. Power up the satellites and begin to add them into the network.
Orbi Mesh WiFi Setup
Initiate the orbi mesh network setup using the www.orbilogin.com. Before initiating, make sure you have a modem device with working internet, computer/ laptop with the latest browser installed in it, and ethernet cable. If you have all, you can initiate the setup process. Setup process is divided into four parts which are further splitted into steps to let the user understand it better.
Access Web Interface
Start with connecting your computer/ laptop device with the router network. You can connect it using the ethernet or wireless method.
After that, launch the web browser to get access to the web interface.
In the URL bar mention www.orbilogin.com web address and hit enter key on your keyboard.
As the site opens, you have to enter the login credentials. Default login credentials are admin for username and password for password field.
Further click on the login option and then you will get access to the login page.
While typing the login credentials be careful, any mistake in the credentials lead to failure.
Configure Router
Configure orbi router by choosing the language and then move ahead to change the admin login details.
Thereafter create SSID & password for your router’s wireless network.
Complete the configuration and then add the satellite to the network.
Add Satellites
There are three ways to add the satellites into the network. You can connect the satellites using a wireless sync button, using ethernet cable or using a switch.
Wireless Method: To add the satellite into your home network without cable, you have to press the sync button if you purchase satellites separately. In case you got the satellite with the wireless system then you need not to do anything except powering them.
Wired method: To create wired setup there are two ways to connect a satellite with a router. First and primary way is to take the ethernet cable and connect the satellite directly to the router. Secondly, you can connect the primary satellite to the router and then second satellites to the primary satellite and so on.
Switch: You can also connect the satellites with the router using switch. For this connection you need to use the ethernet cable and connect the router with the switch first. After that connect the satellites with the switch using the ethernet.
Finalize Setup & Optimize.
Once all the satellites are added, you have to make changes in the other security settings and then setup guest network. Also you have to enable or disable WiFi Multimedia Quality of Service, daisy-chain topology, implicit beamforming, MU-MIMO or fast roaming feature. Once you optimize all the settings and secure the network you can leave the web interface. Last step of the setup process is testing the network. For testing you have to use a wireless enabled device. Connect to the new network and browse the internet. Play online games and watch videos to check the network speed. In case required then place the satellites strategically to new locations.
Conclusion
From the crux of the above description it has been concluded by me that the setup of orbi mesh wifi system is not a hard task using www.orbilogin.com. By following the steps mentioned in this article anyone can easily configure the system. You can enjoy seamless network coverage at your home after the orbi mesh network setup. Whether you are living in a multi story house or in a big home, you will get network coverage everywhere. From the basement area to the top of your house, you can enjoy a high speed network everywhere. In case you got stuck somewhere while performing setup and don’t know how to proceed further then you can take help of technical experts.
0 notes
Text
Altice Extender Setup Using WPS or Ethernet
If you're searching for a reliable and straightforward guide to set up your Urant WiFi Extender, you've come to the right place. This article provides clear, step-by-step instructions to help you install and configure your extender effortlessly at home.
Urant WiFi Extender Installation Guide
You can easily install and configure your Urant WiFi Extender without professional assistance. The setup involves connecting the extender to your existing router and configuring it through its web interface.
How to Install the Urant WiFi Extender
Power off your modem and main router before starting.
Place the extender close to your router for a strong connection.
Use an Ethernet cable to link the extender to the router.
Plug the extender into a power outlet.
Turn the modem and router back on.
Once you've completed these steps, proceed to configure the extender through your computer.
Configuring the Extender Using a Computer
Connect your computer to the extender's network, typically named “WiFi-Repeater.”
Open a web browser and enter 192.168.10.1 in the address bar.
When prompted, input the default username and password (these are usually found on a label on the extender).
Click the login button to access the settings dashboard.
Choose "Repeater Mode," select the WiFi network you want to boost, and enter its password.
Click "Apply" and set a password for the extended network.
After completing the setup, relocate the extender to an area where your WiFi signal is weak or doesn't reach well.
Setting Up the Extender Using the WPS Button
If you don’t have an Ethernet cable available, you can connect the extender wirelessly using the WPS (Wi-Fi Protected Setup) method. Both your router and extender must have WPS buttons.
WPS Setup Steps:
Turn on both the router and the Urant WiFi Extender.
Press the WPS button on your router.
Within two minutes, press the WPS button on the extender.
Wait a few seconds for the devices to establish a wireless connection.
Once paired, the extender will use your router’s existing password, allowing you to connect your devices to the extended network seamlessly.
Final Thoughts
This guide has walked you through the entire process of setting up and logging into your Urant WiFi Extender. As you’ve seen, the installation is straightforward and can be completed in just a few minutes, whether through a wired connection or the WPS method.
1 note
·
View note
Text
A Brief Guide to Configure Netgear Orbi 850 Mesh WiFi System
In today's hyper-connected world, strong and reliable internet coverage throughout your home or office is no longer a luxury—it's a necessity. If you're struggling with dead zones, buffering, or inconsistent Wi-Fi performance, the Netgear Orbi 850 Mesh WiFi System is an excellent solution. With its high-performance tri-band technology, support for Wi-Fi 6, and sleek design, it ensures seamless connectivity across every corner of your space.
If you're new to mesh networks or just looking to set up your new Orbi 850 system, this blog is the perfect starting point. In this brief yet comprehensive guide, we’ll walk you through how to configure your Netgear Orbi 850 Mesh WiFi System step-by-step.
What is the Netgear Orbi 850 Mesh WiFi System?
The Netgear Orbi 850 series is a high-end mesh WiFi system that includes a main router and one or more satellite units. The system uses Wi-Fi 6 (802.11ax), offering faster speeds, higher capacity, and better performance in high-traffic environments. It’s ideal for large homes or offices, capable of covering up to 5,000 square feet with a 2-pack system, and more with additional satellites.
Key Features of the Orbi 850
Before diving into the configuration, let’s look at some standout features of the Orbi 850:
Tri-Band WiFi: One dedicated 5GHz band for backhaul ensures faster and more reliable connections between router and satellites.
Wi-Fi 6 Technology: Up to 6Gbps total speed with support for multiple simultaneous devices.
Seamless Roaming: Switch between satellites without drops in connection.
High Security: Includes WPA3 encryption, NETGEAR Armor, and parental controls.
App-based Setup: The Orbi app simplifies the entire setup process.
What’s in the Box?
When you purchase the Orbi 850 system (usually the RBK852 or RBK853 model), you will find:
1 Orbi WiFi Router (RBR850)
1 or 2 Orbi Satellites (RBS850)
Ethernet cable
Power adapters for each unit
Quick start guide
Prerequisites Before Setup
Before you begin configuring the Orbi 850, make sure:
You have a working internet connection.
You know your ISP login details (if required).
Your modem is compatible and working correctly.
You’ve downloaded the Orbi App on your smartphone (available for iOS and Android).
Step-by-Step Guide to Configure Netgear Orbi 850 Mesh WiFi System
Step 1: Disconnect Old Hardware
Start by powering off your modem and disconnecting any existing routers. If you're replacing an existing Wi-Fi network, it’s important to avoid signal interference.
Step 2: Connect the Orbi Router
Connect the Orbi router’s WAN port to your modem using the supplied Ethernet cable.
Power on both the modem and the Orbi router.
Wait for the LED ring on the Orbi router to pulse white and then turn solid white, indicating it's ready for setup.
Step 3: Install the Orbi App
Download and install the Orbi app from the Apple App Store or Google Play Store.
Launch the app and create or log into your NETGEAR account.
Step 4: Start the Setup Process
The app will detect the Orbi device and prompt you to start setup.
Follow the on-screen instructions:
Confirm the router is powered on.
The app will automatically detect your Orbi router.
Assign a Wi-Fi name (SSID) and password.
Wait for the configuration to complete.
Step 5: Add Orbi Satellites
Place the satellites within range of the router for optimal signal.
Plug in and power on the satellite units.
The LED will pulse white while syncing and turn blue when connected successfully.
Blue: Strong connection
Amber: Fair connection
Magenta: No connection (move closer to the router)
The app will guide you through syncing and positioning each satellite.
Step 6: Test Your Network
Once the setup is complete, walk around your home or office with your phone to test signal strength and speed.
The Orbi app includes tools to check signal strength, connected devices, and run speed tests.
Advanced Configuration (Optional)
If you’re a more advanced user, you can tweak your Orbi 850 system further:
Access Web Interface
Open a browser and go to http://orbilogin.com
Login using the default credentials (found on the router) or the ones you set during setup.
Set Up Guest Network
Navigate to “Guest Network” and enable it.
Assign a unique SSID and password for visitors.
Enable Parental Controls
Use the Orbi app to configure Smart Parental Controls.
Set screen time limits, content filters, and schedules.
Firmware Updates
Regularly check for firmware updates to ensure the best performance and security.
The app usually prompts for updates, or you can manually check in the settings menu.
Troubleshooting Tips
LED Glows Magenta? Satellite can’t connect—try moving it closer to the router.
Internet Not Working? Check modem status and cabling. Reboot all devices.
App Won’t Detect Orbi? Ensure your phone is connected to the Orbi’s temporary setup network.
Firmware Update Fails? Restart both router and satellite, then try again.
Why Choose the Netgear Orbi 850?
Aside from its powerful performance, here are a few reasons why the Orbi 850 stands out:
Handles dozens of devices with ease (perfect for smart homes).
Professional-looking design blends well with home interiors.
Easy-to-use mobile app with powerful configuration options.
Strong backhaul connection improves satellite efficiency.
Final Thoughts
The Netgear Orbi 850 Mesh WiFi System is an investment in future-ready connectivity. Whether you’re a remote worker, a gamer, a streamer, or managing a smart home, the Orbi 850 ensures fast, reliable internet throughout your space.
Setting it up is easier than ever thanks to the user-friendly Orbi app and intuitive design. By following this brief guide, you'll have your home or office WiFi up and running in no time.
If you’ve just unboxed your Orbi 850 or are considering upgrading your home network, this guide should have you covered from start to finish. Say goodbye to dead zones and hello to smooth, high-speed internet.
1 note
·
View note
Text
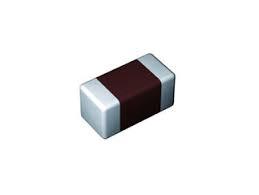
What is an MLCC Ceramic Capacitor and Why is It Crucial in Modern Electronics?

In the world of electronics, where space, stability, and performance matter more than ever, MLCC Ceramic Capacitors have become the go-to choice for engineers and designers. Found in everything from smartphones and laptops to automotive systems and industrial control panels, MLCCs (Multi-Layer Ceramic Capacitors) are essential for power regulation, signal filtering, and energy storage.
In this blog, we’ll explore what MLCC Ceramic Capacitors are, how they work, where they’re used, and why they’ve become so vital in tools, gadgets, and other advanced technology applications.
What is an MLCC Ceramic Capacitor?
An MLCC (Multi-Layer Ceramic Capacitor) is a type of capacitor that consists of multiple layers of ceramic dielectric and metal electrodes stacked together. This layered design allows MLCCs to offer higher capacitance in a compact size, making them perfect for modern miniaturized electronics.
How It Works:
The capacitor is built by stacking alternating layers of ceramic dielectric and conductive metal electrodes.
These layers are fired and compressed to form a compact, durable component.
When connected in a circuit, the MLCC stores and releases electrical energy, filters signals, and stabilizes power supply.
The result is a high-performance capacitor that can handle high-frequency applications, temperature changes, and compact circuit requirements with ease.
Common Applications of MLCC Ceramic Capacitors
Because of their size, performance, and cost-effectiveness, MLCCs are used in nearly every modern electronic device or system. They’re also found in control environments where safety, stability, and signal clarity are crucial.
Common applications include:
Mobile Devices – smartphones, tablets, and laptops for power management and signal filtering
Automotive Electronics – engine control units (ECUs), infotainment, lighting, and sensors
Industrial Automation – used in PLCs, relays, motor drives, and thermal monitoring tools
Communication Equipment – routers, modems, and wireless transceivers
Medical Devices – used in patient monitoring and diagnostic equipment for signal stability
Consumer Electronics – televisions, gaming consoles, and home gadgets
LED Lighting Systems – to stabilize current and prevent flicker
Power Supply Units – smooth voltage and eliminate noise across circuits
Wherever stable capacitance and compact design are needed, MLCC capacitors are a reliable solution.
Why Choose an MLCC Ceramic Capacitor?
When working with advanced electronics or high-performance systems, MLCCs provide unmatched efficiency and durability. Here’s why they're preferred across industries:
High Capacitance in Small Size: MLCCs pack a lot of capacitance into a tiny footprint, ideal for space-saving circuit boards.
Low ESR (Equivalent Series Resistance): Enables fast response and low power loss during high-frequency operation.
Wide Voltage Ratings: Available in various voltage ratings suitable for both low and high-power applications.
Non-Polarized: Can be installed in either direction, simplifying layout and reducing installation errors.
Affordable for Mass Production: Low cost per unit makes them ideal for consumer electronics and large-scale manufacturing.
Whether you’re designing a compact wearable gadget or a high-performance industrial board, MLCCs are a practical and powerful choice.
Key Features of MLCC Ceramic Capacitors
Understanding the characteristics of MLCCs helps you select the right one for your application. Their construction and material choices define how they behave under different electrical and environmental conditions.
Important Features:
Multi-Layer Design – Enhances capacitance and performance while saving space
High Dielectric Strength – Tolerates high voltage without breakdown
Excellent Frequency Response – Suitable for RF, power supply, and signal filtering circuits
Thermal Stability – Maintains capacitance across a wide temperature range
Surface-Mount Packages – Available in various sizes for automated assembly
These features allow MLCC capacitors to perform reliably across demanding electronic and electrical systems.
How to Install an MLCC Ceramic Capacitor?
Installing an MLCC Ceramic Capacitor is easy and straightforward, especially if you're working with standard surface-mount technology (SMT).
Installation Steps:
Choose the Right MLCC – Select based on voltage rating, capacitance, and dielectric class (e.g., C0G, X7R)
Prepare the Pads – Clean and prep the PCB pads or through-hole points
Position the Capacitor – Align the MLCC on the pads with precision tools or pick-and-place machines
Solder Securely – Use reflow soldering for SMT or manual soldering for larger MLCCs
Inspect the Joint – Ensure no cold joints, solder bridges, or cracks in the ceramic
Proper installation ensures long-term reliability and reduces the risk of circuit failure due to physical or thermal stress.
Benefits of Using MLCC Ceramic Capacitors in Electrical Systems
MLCC capacitors offer various benefits, making them superior to other capacitor types in many applications.
Energy Efficiency: Helps stabilize power delivery and reduce current ripple
Reliable Signal Filtering: Filters high-frequency noise in sensitive circuits
Heat Tolerance: Performs well in environments with thermal cycling or high operating temperatures
Minimal Signal Loss: Low ESR results in efficient power transfer and signal clarity
Mechanical Durability: Resistant to vibration and mechanical stress
These advantages are why MLCC capacitors are used in everything from home electronics to high-performance communication systems.
Future Trends in MLCC Ceramic Capacitor Technology
As the demand for compact and powerful electronic devices increases, the MLCC market is evolving rapidly. Manufacturers are pushing limits in terms of size, power, and integration.
Upcoming Trends:
Nano-Sized MLCCs – For ultra-compact devices such as wearables and implantable medical equipment
Flexible Ceramic Capacitors – To support curved surfaces and flexible circuit boards
Higher Capacitance in Smaller Footprints – Enabling more functionality in smaller packages
Lead-Free and RoHS Compliant Materials – Improving environmental and health safety
AI Integration for Predictive Health Monitoring – MLCCs in smart systems will help monitor circuit conditions in real-time
These innovations will open new possibilities in energy systems, IoT gadgets, communication gear, and beyond.
Conclusion: Should You Use an MLCC Ceramic Capacitor?
If your application demands compact size, high efficiency, and long-term stability, the MLCC Ceramic Capacitor is a smart and reliable choice. With benefits ranging from excellent thermal resistance to consistent energy regulation, these capacitors are vital components in modern technology.
Whether you’re developing a smart sensor, building an automation panel, or repairing a piece of high-performance electronics, MLCCs ensure your circuits run smoothly and efficiently. Pair them with quality cables, safety relays, installation kits, and modern tools to complete your electronic project with confidence.
0 notes
Text
Routing Mess
Well, I got a router to get better control over my network. I have an ISP that shall not be named that wouldn't let me get certain perks unless I use their router/modem hybrid motherfucker. It has a disgusting lack of configuration, so I bit the bullet and got a TP-Link AX1800 router from Wal-Mart. I hear these things die after a few years BUT it already has granted so much more control over my network than the other thing. I can finally route all DNS through Lenny (Raspberry Pi) so I'm utilizing Pi-hole to its fullest.
UNFORTUNATELY I did not prepare properly for the move, so I ended up blowing up my Proxmox cluster. I just acquired a very old Gateway PC from like, 2012, and I've been using it as a second member of my cluster (the Nuclear cluster). His name is Nicholas and he's got a 5 dollar terabyte drive that's used but passes the smart check. However, after switching over to the new router and following some instructions improperly for the Proxmox install on Julian (Gateway PC) and Adelle (Dell PC), the Nuclear Cluster royally broke and I had to reinstall on Julian and remove Adelle from the cluster. I also had to update Caddy and a bunch of other services to make everything work again because I moved from one IP address scheme to another.
Anyway, let me tell you about getting Julian (Gateway). I found this computer part store that's just full of computer junk. Anything and everything. My boyfriend drove me over there and I went in with him and the place is LINED with COMPUTERS and computer parts and computers running without cases and it was just BEAUTIFUL. I'm poking through PCs, trying to find a cheap one I can make into a NAS, and it's kinda hard because I'm in a wheelchair and all the PCs are on the ground and it's a small place, so my boyfriend starts poking around too. And then he goes, "HEY LOOK", and he rotates a desktop PC around and IT'S A GATEWAY! An old-ass Gateway. And I just had to bring it home!
Then today I found a PC for like 10 bucks, but it doesn't have RAM. It's once again a Dell.
I also brought home another Dell that I plan to make my media server. Any ideas on names?
1 note
·
View note