#constructor injection with set collection
Explore tagged Tumblr posts
Visit Tumblr Blog
Explore Tumblr blogs with no restrictions, modern design and the best experience.
Last Seen Tumblr Blogs


Fun Fact
Tumblr’s reach among the 26-to-35-year-olds in the US is 11%.
Text
10 Must-Know Java Libraries for Developers
Java remains one of the most powerful and versatile programming languages in the world. Whether you are just starting your journey with Java or already a seasoned developer, mastering essential libraries can significantly improve your coding efficiency, application performance, and overall development experience. If you are considering Java as a career, knowing the right libraries can set you apart in interviews and real-world projects. In this blog we will explore 10 must-know Java libraries that every developer should have in their toolkit.

1. Apache Commons
Apache Commons is like a Swiss Army knife for Java developers. It provides reusable open-source Java software components covering everything from string manipulation to configuration management. Instead of reinventing the wheel, you can simply tap into the reliable utilities offered here.
2. Google Guava
Developed by Google engineers, Guava offers a wide range of core libraries that include collections, caching, primitives support, concurrency libraries, common annotations, string processing, and much more. If you're aiming for clean, efficient, and high-performing code, Guava is a must.
3. Jackson
Working with JSON data is unavoidable today, and Jackson is the go-to library for processing JSON in Java. It’s fast, flexible, and a breeze to integrate into projects. Whether it's parsing JSON or mapping it to Java objects, Jackson gets the job done smoothly.
4. SLF4J and Logback
Logging is a critical part of any application, and SLF4J (Simple Logging Facade for Java) combined with Logback offers a powerful logging framework. SLF4J provides a simple abstraction for various logging frameworks, and Logback is its reliable, fast, and flexible implementation.
5. Hibernate ORM
Handling database operations becomes effortless with Hibernate ORM. It maps Java classes to database tables, eliminating the need for complex JDBC code. For anyone aiming to master backend development, getting hands-on experience with Hibernate is crucial.
6. JUnit
Testing your code ensures fewer bugs and higher quality products. JUnit is the leading unit testing framework for Java developers. Writing and running repeatable tests is simple, making it an essential part of the development workflow for any serious developer.
7. Mockito
Mockito helps you create mock objects for unit tests. It’s incredibly useful when you want to test classes in isolation without dealing with external dependencies. If you're committed to writing clean and reliable code, Mockito should definitely be in your toolbox.
8. Apache Maven
Managing project dependencies manually can quickly become a nightmare. Apache Maven simplifies the build process, dependency management, and project configuration. Learning Maven is often part of the curriculum in the best Java training programs because it’s such an essential skill for developers.
9. Spring Framework
The Spring Framework is practically a requirement for modern Java developers. It supports dependency injection, aspect-oriented programming, and offers comprehensive infrastructure support for developing Java applications. If you’re planning to enroll in the best Java course, Spring is something you’ll definitely want to master.
10. Lombok
Lombok is a clever little library that reduces boilerplate code in Java classes by automatically generating getters, setters, constructors, and more using annotations. This means your code stays neat, clean, and easy to read.
Conclusion
Choosing Java as a career is a smart move given the constant demand for skilled developers across industries. But mastering the language alone isn't enough—you need to get comfortable with the libraries that real-world projects rely on. If you are serious about becoming a proficient developer, make sure you invest in the best Java training that covers not only core concepts but also practical usage of these critical libraries. Look for the best Java course that blends hands-on projects, mentorship, and real-world coding practices. With the right skills and the right tools in your toolkit, you'll be well on your way to building powerful, efficient, and modern Java applications—and securing a bright future in this rewarding career path.
0 notes
Text
Taking Flutter to the Next Level: Advanced Concepts and Patterns
Introduction:
Flutter has revolutionized cross-platform app development with its simplicity and efficiency. Its popularity stems from its rich set of features and ease of use. However, mastering Flutter goes beyond the basics. To truly excel in Flutter development, one must delve into advanced concepts and patterns. In this blog post, we'll explore how to take your Flutter skills to the next level by diving into advanced concepts and patterns. We are providing the best Flutter App development services to the customer.

1. State Management:
State management is a crucial aspect of any Flutter application, especially as the app grows in complexity. While Flutter provides built-in state management options like setState, Provider, and Riverpod, advanced state management patterns like BLoC (Business Logic Component) and Redux offer more robust solutions. BLoC separates the business logic from the UI, promoting a clean and scalable architecture. Redux, inspired by the Flux architecture, enforces a unidirectional data flow, making it easier to manage application state. Understanding these patterns and when to use them can greatly enhance the maintainability and scalability of your Flutter apps.
2. Reactive Programming:
Reactive programming is another advanced concept that can significantly improve the performance and responsiveness of Flutter apps. With libraries like RxDart and Streams, developers can implement reactive programming patterns such as observables and streams to handle asynchronous data streams effectively. This approach simplifies complex asynchronous operations and facilitates real-time data updates, making your app more dynamic and efficient.
3. Custom Widgets and Animations:
While Flutter offers a rich collection of built-in widgets and animations, creating custom widgets and animations allows developers to tailor the user experience to their specific requirements. Advanced widget composition techniques like CustomPaint and CustomClipper enable developers to create highly customized UI elements, while animation controllers and tweens provide precise control over animations. Mastering these techniques empowers developers to create visually stunning and interactive interfaces that set their apps apart from the competition.
4. Performance Optimization:
Performance is paramount in mobile app development, and Flutter provides several tools and techniques for optimizing app performance. From minimizing widget rebuilds with keys and const constructors to optimizing layout performance with LayoutBuilder and CustomMultiChildLayout, there are numerous ways to ensure smooth and responsive user experiences. Additionally, profiling tools like the Flutter Performance Monitor and Dart DevTools help identify performance bottlenecks and optimize app performance effectively.
5. Design Patterns:
Applying design patterns in Flutter development promotes code reusability, maintainability, and scalability. Patterns like Dependency Injection, Singleton, and Factory Method facilitate modular and testable codebases, while the MVVM (Model-View-ViewModel) and MVP (Model-View-Presenter) patterns separate concerns and improve code organization. By leveraging these design patterns, developers can write cleaner, more maintainable code that is easier to debug and extend.
Conclusion:
Mastering advanced concepts and patterns is essential for taking your Flutter development skills to the next level. By understanding state management patterns, embracing reactive programming, creating custom widgets and animations, optimizing app performance, and applying design patterns effectively, developers can build high-quality Flutter apps that deliver exceptional user experiences. Continuous learning and experimentation are key to staying ahead in the ever-evolving world of Flutter development. So, keep exploring, keep innovating, and unlock the full potential of Flutter!
1 note
·
View note
Text
Constructor Injection With Collection
Constructor Injection With Collection
Spring framework provides support of collection framework. The collection in the sense, list, set, map and properties interfaces are included. In this post, we will see how this collection framework will be handled in spring through constructor injection.
Constructor Injection With List Collection:
List allows to add duplicate elements and ‘null’ elements. To set values to list collection then…
View On WordPress
#constructor injection#constructor injection with list collection#constructor injection with map collection#constructor injection with props collection#constructor injection with set collection#spring core#Spring Framework
0 notes
Text
Php training course
PHP Course Overview
PHP is a widely-used general-purpose scripting language that is especially suited for Web development and can be embedded into HTML.
PHP can generate the dynamic page content
PHP can create, open, read, write, and close files on the server
PHP can collect form data
PHP can send and receive cookies
PHP can add, delete, modify data in your database
PHP can restrict users to access some pages on your website
PHP can encrypt data
With PHP you are not limited to output HTML. You can output images, PDF files, and even Flash movies. You can also output any text, such as XHTML and XML.
PHP Training Course Prerequisite
HTML
CSS
Javascript
Objectives of the Course
PHP runs on different platforms (Windows, Linux, Unix, Mac OS X, etc.)
PHP is compatible with almost all servers used today (Apache, IIS, etc.)
PHP has support for a wide range of databases
PHP is free. Download it from the official PHP resource: www.php.net
PHP is easy to learn and runs efficiently on the server-side
PHP Training Course Duration
45 Working days, daily 1.30 hours
PHP Training Course Overview
An Introduction to PHP
History of PHP
Versions and Differences between them
Practicality
Power
Installation and configuring Apache and PHP
PHP Basics
Default Syntax
Styles of PHP Tags
Comments in PHP
Output functions in PHP
Datatypes in PHP
Configuration Settings
Error Types
Variables in PHP
Variable Declarations
Variable Scope
PHP’s Superglobal Variables
Variable Variables
Constants in PHP
Magic Constants
Standard Pre-defined Constants
Core Pre-defined Languages
User-defined Constants
Control Structures
Execution Control Statements
Conditional Statements
Looping Statements with Real-time Examples
Functions
Creating Functions
Passing Arguments by Value and Reference
Recursive Functions
Arrays
What is an Array?
How to create an Array
Traversing Arrays
Array Functions
Include Functions
Include, Include_once
Require, Require_once
Regular Expressions
Validating text boxes,emails,phone number,etc
Creating custom regular expressions
Object-Oriented Programming in PHP
Classes, Objects, Fields, Properties, _set(), Constants, Methods
Encapsulation
Inheritance and types
Polymorphism
Constructor and Destructor
Static Class Members, Instance of Keyword, Helper Functions
Object Cloning and Copy
Reflections
PHP with MySQL
What is MySQL
Integration with MySQL
MySQL functions
Gmail Data Grid options
SQL Injection
Uploading and downloading images in Database
Registration and Login forms with validations
Pegging, Sorting,…..
Strings and Regular Expressions
Declarations styles of String Variables
Heredoc style
String Functions
Regular Expression Syntax(POSIX)
PHP’s Regular Expression Functions(POSIX Extended)
Working with the Files and Operating System
File Functions
Open, Create and Delete files
Create Directories and Manipulate them
Information about Hard Disk
Directory Functions
Calculating File, Directory and Disk Sizes
Error and Exception Handling
Error Logging
Configuration Directives
PHP’s Exception Class
Throw New Exception
Custom Exceptions
Date and Time Functions
Authentication
HTTP Authentication
PHP Authentication
Authentication Methodologies
Cookies
Why Cookies
Types of Cookies
How to Create and Access Cookies
Sessions
Session Variables
Creating and Destroying a Session
Retrieving and Setting the Session ID
Encoding and Decoding Session Data
Auto-Login
Recently Viewed Document Index
Web Services
Why Web Services
RSS Syntax
SOAP
How to Access Web Services
XML Integration
What is XML
Create an XML file from PHP with Database records
Reading Information from XML File
MySQL Concepts
Introduction
Storage Engines
Functions
Operators
Constraints
DDL commands
DML Commands
DCL Command
TCL Commands
Views
Joins
Cursors
Indexing
Stored Procedures
Mysql with PHP Programming
Mysql with Sqlserver(Optional)
SPECIAL DELIVERY
Protocols
HTTP Headers and types
Sending Mails using PHP
Email with Attachment
File Uploading and Downloading using Headers
Implementing Chating Applications using PHP
and Ajax
SMS Gateways and sending SMS to Mobiles
Payments gateways and How to Integrate them
With Complete
MVC Architecture
DRUPAL
JOOMLA
Word Press
AJAX
CSS
JQUERY (Introduction and few plugins only)
1 note
·
View note
Text
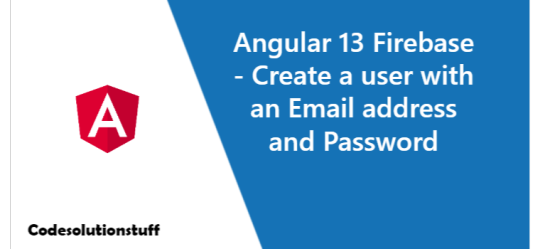
Angular 13 Firebase - Create a user with an Email address and Password
Good day, everyone! In this article, we'll learn how to create a user in Firebase with an email address and a password using the Angular 13 framework. You may utilise Firebase Authentication to allow your users log in to Firebase using their email addresses and passwords, as well as manage the password-based accounts in your app. With Firebase's huge API collection, you can develop a fast and secure authentication system. The process of creating a user in Firebase is simple and straightforward. You can utilise Firebase's AngularFire2 library in your Angular application to take advantage of its amazing capabilities. For this example, I'll be utilising the AngularFire2 library from the node package manager (NPM) and the most recent Angular version.
Setup Angular App
ng new angularfirebaseproject After that, remember to enter into the project directory by running the following command. cd angularfirebaseproject Let's make some components for our Angular application. ng g c sign-in ng g c sign-up Set "strict": false in the compilerOptions field of the tsconfig.json file to disable strict type warnings or errors.
Setup AngularFire2 Library in Angular
Now, in your Angular project, enable Firebase (AngularFire2 library). npm install firebase @angular/fire --save Make the connection between your Firebase account and your Angular app once you've finished setting up this library. Go to the src/environments/enviorment.ts file in the enviornments folder of your project. Then, in the environment file, enter the firebase configuration details. export const environment = { production: false, firebase: { apiKey: "xxxxxxxx-xxxxxxxx", authDomain: "xxxxxxxxxxxxxxxxxxxxxxxx", databaseURL: "xxxxxxxxxxxxxxxxxxxxxxxx", projectId: "xxxxxxxx", storageBucket: "xxxxxxxx", messagingSenderId: "xxxxxx", appId: "xxxxx", measurementId: "xxxxxxxxxxxxxxxx" } }; Create Auth Service authentication.service.ts ng generate service shared/services/authentication Open the file app.module.ts and register the service there. import { NgModule } from '@angular/core'; import { BrowserModule } from '@angular/platform-browser'; import { AppComponent } from './app.component'; import { AuthenticationService } from './shared/services/authentication.service'; import { SignInComponent } from './sign-in/sign-in.component'; import { SignUpComponent } from './sign-up/sign-up.component'; import { environment } from '../environments/environment'; import { AngularFireModule } from '@angular/fire/compat'; import { AngularFireAuthModule } from '@angular/fire/compat/auth'; @NgModule({ declarations: , imports: , providers: , bootstrap: , }) export class AppModule {}
Generate Authentication Service Core File
Open the authentication.service.ts file and paste the code below into it. import { Injectable } from '@angular/core'; import { AngularFireAuth } from '@angular/fire/compat/auth'; @Injectable({ providedIn: 'root', }) export class AuthenticationService { constructor( public afAuth: AngularFireAuth // Inject Firebase auth service ) {} // Sign up with email/password SignUp(email, password) { return this.afAuth .createUserWithEmailAndPassword(email, password) .then((result) => { window.alert('You have been successfully registered!'); console.log(result.user); }) .catch((error) => { window.alert(error.message); }); } // Sign in with email/password SignIn(email, password) { return this.afAuth .signInWithEmailAndPassword(email, password) .then((result) => { console.log(result); }) .catch((error) => { window.alert(error.message); }); } } The authentication.service.ts file was successfully built. I used the FirebasecreateUserWithEmailAndPassword(email, password) and signInWithEmailAndPassword(email, password) APIs to create two methods. - SignUp(email, password): Using the Firebase API with Angular, this method creates a new user with an email address and a password. - SignIn(email, password): This technique allows a user to sign in using only his or her email address and password.
Set Up Auth Components
We're going to use our own API to sign up. Add the following code to your signup.component.ts file. import { Component } from '@angular/core'; import { AuthenticationService } from '../shared/services/authentication.service'; @Component({ selector: 'app-sign-up', template: ` Sign Up `, }) export class SignUpComponent { constructor(public authenticationService: AuthenticationService) {} } We're going to use our own API to log in. Add the following code to your signin.component.ts file. import { Component } from '@angular/core'; import { AuthenticationService } from '../shared/services/authentication.service'; @Component({ selector: 'app-sign-in', template: ` Sign Up `, }) export class SignInComponent { constructor(public authenticationService: AuthenticationService) {} } Ensure that the auth components are invoked by adding the appropriate tags to the app.component.ts file. I hope you will like the content and it will help you to learn Angular 13 Firebase - Create a user with an Email address and Password If you like this content, do share. Read the full article
0 notes
Text
Spring Digging Road 1 - Basic introduction of Spring framework
## Spring Brief Introduction
Spring is an open source framework, which was first created by Rod Johnson. It solves the problem of loose coupling between business logic layer and other layers. At the beginning of its birth, the main graveyard of Spring was to replace the more heavyweight enterprise Java technology, especially EJB. Compared with EJB, Spring provides a lighter and simpler programming model.
After decades of development, Spring is expanding into other fields, such as mobile development, social API integration, NoSQL database, cloud computing, big data and micro-service architecture.
### Four strategies adopted by Spring to simplify development:
> Lightweight and minimally invasive programming based on POJO(POJO)
>
> Loose coupling through dependency injection and interface orientation(IOC)
>
> Declarative programming based on cuts and conventions(AOP)
>
> Reduce boilerplate code through cuts and templates(Template)
#### Spring--Lightweight and minimally invasive programming based on POJO
Many frameworks force applications to inherit the specified classes or implement the specified interfaces, so as to realize the corresponding functions, which leads to the forced coupling between applications and frameworks.
Spring does not force the implementation of the interface of Spring specification or the class that inherits the specification. On the contrary, in the application built based on Spring framework, its class usually has no trace that Spring has been used. The worst-case scenario is to use Spring annotations, but it is still a simple POJO class that can do anything else.
#### Spring--Loose coupling through dependency injection and interface orientation
Class A depends on class B, and must use B's instance, so:
>1.Pass in class B through the interface of class A.{(A implements B) => A}
>
>2.Pass B in through the constructor of class A{(new A(B)) => A}
>
>3.Pass B in by setting the properties of class A{new A().setB(B) => A}
This process is called dependency injection(DI)
#### Spring--Declarative programming based on cuts and conventions
IOC can keep the cooperative software components loosely coupled, while AOP allows **to separate the functions all over the system to form reusable components**.
Aspect-oriented programming is often defined as a separation technology that promotes software systems to realize concerns. The system consists of many different components, each of which is responsible for a specific function. In addition to implementing their core functions, these components often take on additional responsibilities. System services, such as log, transaction management and security, are often integrated into components with core business logic. These system services are usually regarded as crosscutting concerns because they span multiple components of the system.
If these concerns are dispersed among multiple components, the code will bring double complexity.
>**The code that implements the system focus function will appear repeatedly in multiple components**
>
>**Components get confused by code that has nothing to do with their core business**
#### Spring--Reduce boilerplate code through cuts and templates
When coding, in order to achieve common and simple tasks, it is necessary to write similar codes over and over again, which is called boilerplate code. A common example of template code is to use JDBC to access database to query data. It is also common that JSM, JNDI and REST services also involve a large number of duplicate codes
>**Spring aims to eliminate boilerplate code through template encapsulation**
### Spring Container
In Spring-based applications, **application objects are located in the Spring container**, which is responsible for creating, assembling, configuring and managing the life cycle of objects from birth to death.
Spring container uses IOC to manage the components that make up the application, and it will create the association between the components that cooperate with each other. Make these objects simpler, cleaner, easier to understand, easier to reuse and easier to carry out unit testing.
There is not only one container, but Spring comes with several container implementations, which can be classified into two different types.
>Bean factory (defined by org.springframework.beans.factory.beanfactory interface) is the simplest container and provides basic DI support.
BeanFactory:Provides the basic dependency injection function, and when a bean object is called, it will be instantiated (delayed loading form)
>The context of application (defined by org. springframework.context.applicationcontext interface) **is built based on** BeanFactory and provides application framework level services
ApplicationContext:Higher-level context objects built on BeanFactory are more powerful than BeanFactory. Loaded when the container is started (all objects will be instantiated when the container is started)
```
ClassPathXmlApplicationContext:Load configuration file build context from classpath
FileSystemXmlApplicationContext:Load configuration file build context from file system
XmlWebApplicationContext:Build context from the configuration file loaded in the web system
```
**PS: Bean factory is often too low-level for most applications, so application context is more popular than Bean factory**
### The life cycle of Bean
In traditional Java applications, the life cycle of a bean is very simple, and the bean can be used after being instantiated by Java keywords such as new and reflection. Once the bean is no longer used, it will be automatically garbage collected by Java virtual machine. By contrast, the life cycle of bean in Spring container is much more complicated.
>1.Spring instantiates bean;
>
>2.Spring injects values and bean references into the bean's corresponding properties;
>
>3.If the bean implements the BeanNameAware interface, Spring passes the bean's ID to the setBeanName () method;
>
>4.If the bean implements the BeanFactoryAware interface, Spring will call the setBeanFactory () method to pass in the BeanFactory container instance;
>
>5.If the bean implements the ApplicationContext interface, Spring will call the setApplicationContext () method to pass in the reference of the ApplicationContextAware the bean is located;
>
>6.If bean implement the BeanPostProcessor interface, Spring will call their post-ProcessBeforeInitialization() method;
>
>7.If beans implement the Initializing bean interface, Spring will call their after-PropertiesSet () method. Similarly, if a bean declares an initialization method using init-method, the method will also be called;
>
>8.If bean implement the BeanPostProcessor interface, Spring will call their post-ProcessAfterInitialization() method;
>
>9.At this point, the bean are ready to be used by the application, and they will stay in the application context until the application context is destroyed;
>
>10.If the bean implements the DisposableBean interface, Spring will call its destroy () interface method. Similarly, if a bean declares a destruction method using the destory-method, the method will also be called.

0 notes
Text
Exploring the .NET Core library Coravel for Task Scheduling, Caching, Mailing and more
Coravel claims it is a "Near-zero config .NET Core library that makes Task Scheduling, Caching, Queuing, Mailing, Event Broadcasting (and more) a breeze!" A lovely claim, that is, in fact, true! It's open source and on Github at https://github.com/jamesmh/coravel so give Coravel a star!
Coravel is available on NuGet as a package - as are all things - or you can also install it's helper CLI with a simple dotnet tool install --global coravel-cli. After this, using coravel easy, early, and often is as simple as:
coravel install
A nice teach that makes it easy, the coravel CLI adds the package reference, restores your project, and reminds you to set it up in ConfigureServices() in Startup.cs. A nice example of a thoughtful library that is trying to make onboarding simpler.
The Coravel CLI is also a nice scaffolder to get you started with item templates:
> coravel Usage: coravel [options] [command] Options: -?|-h|--help Show help information Commands: event install invocable mail
But what is it?
With a somewhat vague name and a list of cool features that may not seem related, you may find yourself wondering WHAT is this and WHY do I need it?
When you start thinking about layering and responsibilities of real production software, you'll note that there are arguably some gaps in the BCL (Base Class Libraries) that .NET makes available, particularly as you move up into the Application Development space.
Scheduled jobs and tasks, simple emailing with Razor Templates, a lightweight event dispatcher, easily queueable background tasks are just some of the higher level primitives you'll find yourself wanting when creating business apps. Coravel collects those buildable elements and allows you to string them together very quickly.
For example, I'll create an "Invocable." Basically just a method that is more 'job-like.' It has business scope and I need to have it invoked later by some schedule or process within my app.
Here I'll register one in my Startup.cs.
services.AddScoped<SendNightlyReportsEmailJob>();
So I need to send a nightly report. That's an invocable thing, and it's also an IMailer because it mails things. Note the injected IMailer in the constructor. All very natural in ASP.NET Core, using Dependency Injection.
public class SendNightlyReportsEmailJob : IInvocable { private IMailer _mailer; public SendNightlyReportsEmailJob(IMailer mailer) { this._mailer = mailer; } public async Task Invoke() { Console.WriteLine("NightlyReportMailable Started...."); await Task.Delay(10000); // You could grab multiple users from a DB query ;) var mailable = new NightlyReportMailable(new UserModel { Name = "Coravel is lovely!", Email = "[email protected]" }); await this._mailer.SendAsync(mailable); Console.WriteLine($"NightlyReportMailable was sent at {DateTime.UtcNow}."); } }
Then I can have this mailed every evening with the Coravel Scheduler:
scheduler.Schedule<SendNightlyReportsEmailJob>().Daily();
But when, right? Easy:
scheduler .Schedule<SendNightlyReportsEmailJob>() .DailyAt(1, 30) .Zoned(TimeZoneInfo.Local);
What if you have a task that needs to happen, but maybe it's either long-running or happening often. You don't want two tasks going at the same time, so PreventOverlapping! Clever.
scheduler .Schedule<DoAThingOften>() .EveryMinute() .PreventOverlapping("DoAThingOften");
And that's just the scheduler. That mail you have to send? You can use Razor Pages to create reach HTML emails! That makes New User Sign Up, or Completed Order very easy to create. All self-contained in your app. I dig it.
Finally note that there's Pro paid version of Coravel that gives you a very professional UI for Jobs and Invocables, and allows you to visually configure your back-end job schedules. A nice way to support open source - especially when you start using it and really depending on it - is to explore very reasonable Pro licenses like those that Pro Coravel has. Impressive stuff, truly.
*I have no relationship with Coravel the project or the Pro licenses, I'm just a fan.
Sponsor: Suffering from a lack of clarity around software bugs? Give your customers the experience they deserve and expect with error monitoring from Raygun.com. Installs in minutes, try it today!
© 2020 Scott Hanselman. All rights reserved.


Exploring the .NET Core library Coravel for Task Scheduling, Caching, Mailing and more published first on https://deskbysnafu.tumblr.com/
0 notes
Text
Exploring the .NET Core library Coravel for Task Scheduling, Caching, Mailing and more
Coravel claims it is a "Near-zero config .NET Core library that makes Task Scheduling, Caching, Queuing, Mailing, Event Broadcasting (and more) a breeze!" A lovely claim, that is, in fact, true! It's open source and on Github at https://github.com/jamesmh/coravel so give Coravel a star!
Coravel is available on NuGet as a package - as are all things - or you can also install it's helper CLI with a simple dotnet tool install --global coravel-cli. After this, using coravel easy, early, and often is as simple as:
coravel install
A nice teach that makes it easy, the coravel CLI adds the package reference, restores your project, and reminds you to set it up in ConfigureServices() in Startup.cs. A nice example of a thoughtful library that is trying to make onboarding simpler.
The Coravel CLI is also a nice scaffolder to get you started with item templates:
> coravel Usage: coravel [options] [command] Options: -?|-h|--help Show help information Commands: event install invocable mail
But what is it?
With a somewhat vague name and a list of cool features that may not seem related, you may find yourself wondering WHAT is this and WHY do I need it?
When you start thinking about layering and responsibilities of real production software, you'll note that there are arguably some gaps in the BCL (Base Class Libraries) that .NET makes available, particularly as you move up into the Application Development space.
Scheduled jobs and tasks, simple emailing with Razor Templates, a lightweight event dispatcher, easily queueable background tasks are just some of the higher level primitives you'll find yourself wanting when creating business apps. Coravel collects those buildable elements and allows you to string them together very quickly.
For example, I'll create an "Invocable." Basically just a method that is more 'job-like.' It has business scope and I need to have it invoked later by some schedule or process within my app.
Here I'll register one in my Startup.cs.
services.AddScoped<SendNightlyReportsEmailJob>();
So I need to send a nightly report. That's an invocable thing, and it's also an IMailer because it mails things. Note the injected IMailer in the constructor. All very natural in ASP.NET Core, using Dependency Injection.
public class SendNightlyReportsEmailJob : IInvocable { private IMailer _mailer; public SendNightlyReportsEmailJob(IMailer mailer) { this._mailer = mailer; } public async Task Invoke() { Console.WriteLine("NightlyReportMailable Started...."); await Task.Delay(10000); // You could grab multiple users from a DB query ;) var mailable = new NightlyReportMailable(new UserModel { Name = "Coravel is lovely!", Email = "[email protected]" }); await this._mailer.SendAsync(mailable); Console.WriteLine($"NightlyReportMailable was sent at {DateTime.UtcNow}."); } }
Then I can have this mailed every evening with the Coravel Scheduler:
scheduler.Schedule<SendNightlyReportsEmailJob>().Daily();
But when, right? Easy:
scheduler .Schedule<SendNightlyReportsEmailJob>() .DailyAt(1, 30) .Zoned(TimeZoneInfo.Local);
What if you have a task that needs to happen, but maybe it's either long-running or happening often. You don't want two tasks going at the same time, so PreventOverlapping! Clever.
scheduler .Schedule<DoAThingOften>() .EveryMinute() .PreventOverlapping("DoAThingOften");
And that's just the scheduler. That mail you have to send? You can use Razor Pages to create reach HTML emails! That makes New User Sign Up, or Completed Order very easy to create. All self-contained in your app. I dig it.
Finally note that there's Pro paid version of Coravel that gives you a very professional UI for Jobs and Invocables, and allows you to visually configure your back-end job schedules. A nice way to support open source - especially when you start using it and really depending on it - is to explore very reasonable Pro licenses like those that Pro Coravel has. Impressive stuff, truly.
*I have no relationship with Coravel the project or the Pro licenses, I'm just a fan.
Sponsor: Suffering from a lack of clarity around software bugs? Give your customers the experience they deserve and expect with error monitoring from Raygun.com. Installs in minutes, try it today!
© 2020 Scott Hanselman. All rights reserved.


Exploring the .NET Core library Coravel for Task Scheduling, Caching, Mailing and more published first on http://7elementswd.tumblr.com/
0 notes
Text
Toys for adults

UGEARS wooden mechanical constructors are adult toys that are not ashamed to show to children. In 6 short paragraphs we explain why you would like to buy such a 3D puzzle and give it to your birthday or other holiday.
1. All hands
UGEARS are mechanical models that assemble without glue. Each detail with precision program is cut from a sheet of wooden plywood. In the catalog of our online store locomotives, wagons, tractors, trucks and mechanical boxes.
Creating, for example, a locomotive can take up to 12 hours. But after that you will have a wonderful handmade wooden locomotive in your hands. Which can be run. If you were the very successful person who, for complete happiness, lacked only a radio-controlled helicopter, now you will become a successful person who needs a wooden composition from his nose.
2. Nothing but wood and gum
All finished models work at the expense of mechanics. In sets there is nothing but wooden parts and elastic bands. Parts of the designer are attached to each other, and the elastic bands act as springs and starting elements. For each kit, manufacturers put detailed assembly instructions, and all details are numbered.
You can get confused, but only if you prefer the method of scientific poking. If the instruction is lost (torn, burned, deaths of the brave in an unequal battle with domestic animals), it can always be downloaded on the site. The file is attached to the description of each model.
Wooden elements are subjected to special laser processing, which allows you to remove splinter and make the surface of the wooden part perfectly smooth. You will not find wiring diagrams or servo motors in any kit - pure mechanics. Everything is natural and “terribly fashionable”, like any beautiful handmade.
3. The models you build work
For those who love everything technological and useful. UGEARS are not just another stupid figurines on your shelf: the gears move one by one and set in motion the wheels of a steam locomotive, a combine harvester bucket and even a safe lock. Yes, a safe made of wood and rubber bands.
One of the latest models is the perfect gift for a man on February 23rd. Fully working truck with a 4-cylinder injection engine, independent front wheel suspension and rear-wheel drive. He collects all the stuffing of the miracle machine himself, and it works: you can see how the cylinders move under the hood, the crown with the help of gears starts the driveshaft, which transmits rotation to the rear wheels.
4. Thank God, there is something to give partners
At first glance, UGEARS seems not serious fun, but only until you see three adult uncles enthusiastically assembling a tractor (we saw, if that). Such a gift fulfills three tasks at once: it answers the eternal question “what to present”, hints at originality and, of course, directly tells your business partner: “I consider you incredibly smart, put together a safe.”
5. Assembled constructors do not break
No, of course, if you take a wooden card holder, swing it and throw it at the wall, then it will fly apart. If not to smithereens, then he will definitely lose some detail. But if you do not behave like a barbarian, but simply collect models and rejoice, then they will last quite a long time. We give a guarantee for each set - 30 days.
6. About adults we lied
Of course, from the very beginning we deceived a little. Wooden models are a great entertainment not only for adults. Assembly develops fine motor skills and mindfulness.
And if you were looking for a simulator of patience for your children, then you should pay attention to UGEARS. It’s not necessary to immediately take up the railway - you can start with simpler models (for example, collect “Tribes” or “Mechanical Flower”).
Most models are subject to an age limit of 14 years. We really recommend leaving the child alone with the toy only if he is older than 14. But this does not mean that for those younger, access to wooden constructors is closed. Children can collect UGEARS together with their parents - this is a great occasion to spend another magical family evening together.
0 notes
Text
Original Post from Amazon Security Author: Sepehr Samiei
AWS Secrets Manager now has a client-side caching library for.NET that makes it easier to access secrets from .NET applications. This is in addition to client-side caching libraries for Java, JDBC, Python, and Go. These libraries help you improve availability, reduce latency, and reduce the cost of retrieving your secrets. Secrets Manager cache library does this by serving secrets out of a local cache and eliminating frequent Secrets Manager API calls.
AWS Secrets Manager enables you to automatically rotate, manage, and retrieve secrets throughout their lifecycle. Users and applications can access secrets through a call to Secrets Manager APIs, eliminating the need to hardcode sensitive information in plain text. It offers secret rotation with built-in integration for AWS services such as Amazon Relational Database Service (Amazon RDS) and Amazon Redshift, and it’s also extensible to other types of secrets. Secrets Manager enables you to control access to secrets using fine-grained permissions, and all actions on secrets, including retrievals, are traceable and auditable through AWS CloudTrail.
AWS Secrets Manager client-side caching for .NET extends benefits of the AWS Secrets Manager to wider use cases in .NET applications. These extra benefits are now available without having to spend precious time and effort on developing your own caching solution.
In this post, I’ll discuss the following topics:
The benefits offered by Secrets Manager client-side caching library for .NET
How Secrets Manager client-side caching library for .NET works
How to use Secrets Manager client-side library in .NET applications
How to extend Secrets Manager client-side library with your own custom logic
The benefits offered by Secrets Manager client-side caching library for .NET
Client-side caching is benefitial in following ways:
Availability: Network links sometimes suffer slowdowns or intermittent breaks. Client-side caching can significantly improve availability by eliminating a large number of API calls.
Latency: Retrieving secrets through API calls includes the network latency. Retrieving secrets from the local cache eliminates that latency and, therefore, improves performance.
Cost: Each API call to a Secrets Manager endpoint encounters a small charge. Using a local cache saves costs associated with API calls.
Using a client-side cache is a best practice; however, in the same way that you don’t want to reinvent the wheel everytime you need one, crafting your own client-side caching solution is suboptimal. The Secrets Manager client-side caching library relieves you from writing your own client-side caching solution while still giving you its benefits. Furthermore, it includes best practices such as:
Automatically refreshing cached secrets: the library periodically updates secrets to ensure your application gets the most recent version of a secret. You can control and change refresh intervals using configuration properties.
Integration with your applications: To use this library, just add the dependency to your .NET project and provide the identifier to the secret you want to access in your code.
How Secrets Manager client-side caching library for .NET works
The library is implemented in .NET Standard. This means you can reuse the same library in projects of all flavors of .NET, including .NET Framework, .NET Core, and Xamarin.
Note: Because the AWS Secrets Manager client-side caching library depends on Microsoft.Extensions.caching.memory, make sure you add it to your project dependencies.
As an extension to Secrets Manager .NET SDK, the cache library provides you an alternative to direct invocation of Secrets Manager API methods. You invoke cache library methods, and if the value doesn’t exist in the cache, the cache library invokes Secrets Manager methods on your behalf.
The default refresh interval for “current” version of secrets (the latest value stored in Secrets Manager for that secret) is 1 hour. This is because latest version may change from time to time. The library allows you to configure this frequency to higher or lower per your specific application requirements.
If you request a specific version of a secret by specifying both secret ID and secret version parameters, by default the library sets refresh interval to 48 hours. Since each version of a secret is immutable, there is no need to refresh them frequently.
You can also enable “Last known good value caching” to provide some protection in cases of transient network issues or service outages. If this is enabled, the cache will keep track of the last known good secret value, and in the event of an error occurring while refreshing a secret value from the service, the cache will return the last known good value. This feature is disabled by default, and can be enabled by setting the EnableLastKnownGoodValueCaching property of SecretsManagerCacheOptions class to true. You can pass your instance of SecretsManagerCacheOptions to SecretsManagerCache constructor.
The cache library provides a thread-safe implementation for both cache-check as well as entry populations. Therefore, simultaneous requests for a secret that is not available in the cache will result in a single API request to SecretsManager.
How to use Secrets Manager client-side caching library in .NET applications
You can add Secrets Manager client-side caching library to your projects either directly or through dependency injection. The dependency package is also available through NuGet. In this example, I use NuGet to add the library to my project. Open the NuGet Package Manager console and browse for AWSSDK.SecretsManager.Caching. Select the library and install it.
Figure 1: Select the AWSSDK.SecretsManager.Caching library
Before using the cache, you need to have at least one secret stored in your account using AWS Secrets Manager. To create a test secret:
Go to the AWS Console, and then select AWS Secrets Manager.
Select Store a new secret.
For secret type, select Other type of secret, and then add three key/value pairs as shown here:
{ "Domain": "", "UserName": "", "Password": "" }
Next, create a cache object, and then invoke its methods with appropriate parameters. Below is a code snippet using AWS Secrets Manager client-side cache library to access our secret. Notice this snippet assumes you’ve added Newtonsoft.Json library to your project:
public MyClass : IDisposable { private readonly IAmazonSecretsManager secretsManager; private readonly ISecretsManagerCache cache; public MyClass() { this.secretsManager = new AmazonSecretsManagerClient(); this.cache = new SecretsManagerCache(this.secretsManager); } public void Dispose() { this.secretsManager.Dispose(); this.cache.Dispose(); } public async Task GetNetworkCredential(string secretId) { var sec = await this.cache.GetSecretAsync(secretId); var jo = Newtonsoft.Json.Linq.JObject.Parse(sec.SecretString); return new NetworkCredential( domain: jo["Domain"].ToObject<string>(), userName: jo["Username"].ToObject<string>(), password: jojo["Password"].ToObject<string>()); } }
For ASP.NET projects, you can use the library with dependency-injection. To do this, you first have to register Secrets Manager caching to the dependency injection service collection in the Startup class of your ASP.NET project:
public class Startup { public void ConfigureServices(IServiceCollection services) { services.AddSecretsManagerCaching(); } }
Then, you’ll be able to consume the cache using constructor injection in your classes.
public MyClass : IDisposable { private readonly ISecretsManagerCache cache; public MyClass(ISecretsManagerCache cache) { this.cache = cache; } public async Task GetNetworkCredential(string secretId) { var sec = await this.cache.GetSecretAsync(secretId); var jo = Newtonsoft.Json.Linq.JObject.Parse(sec.SecretString); return new NetworkCredential( domain: jo["Domain"].ToObject<string>(), userName: jo["Username"].ToObject<string>(), password: jojo["Password"].ToObject<string>()); } }
How to add in-memory encryption and other custom extensions
The Secrets Manager caching library is designed to be extendable with your own custom logic. One possibility is to extend its implementation to include in-memory encryption of cached secrets to add another layer of protection on your retrieved secrets. For this purpose, you have to manually implement two of the interfaces included in the library. The library includes SecretCacheEntry class, implementing the interface ISecretCacheEntry. This is the object that stores secrets in memory. You could create another class implementing the same ISecretCacheEntry interface to add in-memory encryption/decryption.
public class EncryptedSecretCacheEntry : ISecretCacheEntry { public EncryptedSecretCacheEntry(GetSecretValueResponse response, TimeSpan expiry) { this.VersionId = response.VersionId; this.LastRetreived = DateTime.UtcNow; this.Name = response.Name; this.Expires = this.LastRetreived.Add(expiry); if (response.SecretBinary != null && response.SecretBinary.Length > 0) { using (var ms = response.SecretBinary) { this.SecretBinary = ms.ToArray(); } } else { this.SecretString = response.SecretString; } } private byte[] _EncryptedSecretString; public string SecretString { get { return MyCustomCipherService.DecryptString(_EncryptedSecretString); } set { _EncryptedSecretString = MyCustomCipherService.EncryptString(value); } } private byte[] _EncryptedSecretBinary; public byte[] SecretBinary { get { return MyCustomCipherService.Decrypt(_EncryptedSecretBinary); } set { _EncryptedSecretBinary = MyCustomCipherService.Encrypt(value); } } public string VersionId { get; private set; } public string Name { get; private set; } public string LocalId => $"{this.Name}:{this.VersionId}"; public DateTime LastRetreived { get; private set; } public DateTime Expires { get; private set; } }
The second step is to implement the ISecretCacheEntryFactory class:
public class EncryptedSecretCacheEntryFactory : ISecretCacheEntryFactory { public ISecretCacheEntry CreateEntry(GetSecretValueResponse response, TimeSpan expiry) { return new EncryptedSecretCacheEntry(response, expiry); } }
Having these two classes, I can now modify the constructor of my SecretsUserClass to add my custom encryption logic to Secrets Manager cache library:
public SecretsUserClass() { this.secretsManager = new AmazonSecretsManagerClient(); this.cache = new SecretsManagerCache(this.secretsManager, new EncryptedSecretCacheEntryFactory(), new SecretsManagerCacheOptions(), null); }
You could even go further and fully customize the cache by implementing ISecretsManagerCache or implementing a child class that inherits functionality of SecretsManagerCache and adds new methods to it.
Conclusion
It’s critical for enterprises to protect secrets from unauthorized access and adhere to various industry or legislative compliance requirements. Mitigating the risk of compromise often involves complex techniques, significant effort, and costs, such as applying encryption, managing vaults and HSM modules, rotating secrets, audit access, and so on. Because the level of effort is high, many developers tend to use the much simpler, but substantially riskier, alternative of hard-coding secrets in application code, or simply storing secrets in plain-text format. These practices are problematic from the security and compliance point of view, but they need to be understood as symptoms of the more fundamental problem of complexity in the systems enterprises have built. To address the problem of weak security and compliance practices, you have to address the problem of complexity. Complex systems can be simplified and made more secure when they are reusable, accessible, and are automated, needing no human interaction.
In this post, I’ve shown how you can improve availability, reduce latency, and reduce the cost of using your secrets by using the Secrets Manager client-side caching library for .NET. I also showed how to extend it by implementing your own custom logic for more advanced use-cases, such as in-memory encryption of secrets.
To get started managing secrets, open the Secrets Manager console. To learn more, read How to Store, Distribute, and Rotate Credentials Securely with Secret Manager or refer to the Secrets Manager documentation. See AWS Region Table for the list of AWS regions where Secrets Manager is available.
If you have feedback about this blog post, submit comments in the Comments section below. If you have questions about this blog post, start a new thread in the Secrets Manager forum.
Want more AWS Security how-to content, news, and feature announcements? Follow us on Twitter.
Sepehr Samiei
Sepehr is currently a Senior Solutions Architect at AWS. He started his professional career as a .Net developer, which continued for more than 10 years. Early on, he quickly became a fan of cloud computing and loves to help customers utilise the power of Microsoft tech on AWS. His wife and daughter are the most precious parts of his life, and he and his wife expect to have a son soon!
#gallery-0-5 { margin: auto; } #gallery-0-5 .gallery-item { float: left; margin-top: 10px; text-align: center; width: 33%; } #gallery-0-5 img { border: 2px solid #cfcfcf; } #gallery-0-5 .gallery-caption { margin-left: 0; } /* see gallery_shortcode() in wp-includes/media.php */
Go to Source Author: Sepehr Samiei How to use AWS Secrets Manager client-side caching in .NET Original Post from Amazon Security Author: Sepehr Samiei AWS Secrets Manager now has a client-side caching library for.NET…
0 notes
Text
A very scattered C# post
Reflection
Mutable - can change, immutable - cannot change string is immutable - you actually create a new string when you append etc StringBuilder is physically modified when you append so its cheaper on memory
For everything, research pros and cons
Angular + very declarative, you know what element is bound to what as its clear in markup -everything has ng- in jQuery, it uses CSS selectors and you may not always be clear what is going where... + Directive can manipulate the DOM
Incremental Database Backups
Automated Testing, Automated Deploying
Factory Pattern
Repository Pattern
Red Green Refactor
SOLID Principles: http://www.codeproject.com/Articles/703634/SOLID-architecture-principles-using-simple-Csharp
S rp Single Responsibility Principle - ensure your classes are used for single responsibilities e.g a class person can have methods to add, remove, update, delete people - however dont sneak things in there like SendEmail and hasAccessTo
O cp Open Closed Principle - once you have written a class and deployed it, dont make changes to it if a new feature is required - extend it instead
L sp Liskov Substitution Principle - Personalised Prospectus Application is not a student yet it is just a lead - however it is saved to the database as a person -
I sp Interface Segragation Principle - similar to OCP - a good example is INEwsCollection which must implement getNewsCollection - if you decide that a new INewsCollection consumer needs a checkNewsCollection method - dont add the method to INewsCollection because you will have to implement in MoodleForumNewsCollection and TestNewsCollection - extend the INewsCollection with INewsCollectionVerifed and your new class should implement the INewsCollectionVerified
D ip Dependency Inversion Principle - IOC sits above:Service Locato, Events, Delegates and DI (Dependency Inversion OR Injection?) - have implemented by inverting control of which db connector to load to a DBConnector class - an early example https://onedrive.live.com/?cid=289FADB32C0AB5D3&id=289FADB32C0AB5D3%2138959 (demonstrates my thinking) - have implemented this using IOC for databases where you dont know which database you will need till runtime so I used polymorphism to call methods from the parent class yet I passed the child class in to call the method - however to really implement this, you combine with SRP and dont create different instances of the interface implementor when you get into your class, inject the Interface in through the constructor, method or property
http://prodinner.aspnetawesome.com/ ASP.NET MVC Ajax
Static Classes: Really just a bucket of methods (somewhere to store things that dont belong to objects). If you declare
fields/properties in here at class level then you must make them static to be accessible in a static method.
Abstract class: Model something in a type hierarchy e.g. Vehicle is abstract and all children must inherit it and implement its methods
(almost like an interface but you can code the methods or choose not to).
Polymorphism: A collection can only hold people. You can add an employee or a student...so long as it is derived from class people.
Overloading: Multiple methods, same name, different arguments.
Overriding: Multiple methods, same name, same arguments. Use in child to override parent method. Its the same as overriding in Java
except you have to use the keyword...
Virtual keyword on method: this revolves around overriding parent methods The virtual modifier tells the compiler that when any class derived from class A is used, an override method should be called. So the child should use the override keyword
virtual keyword on property
Indexer
Multi threading:
Race condition: Occurs in multithreading - when two threads access a shared variable at the same time. The first reads the var and the
second reads same value. They then both perform their operations on the value and they race to see which can update the value last.
Whichever thread writes last wins.
Deadlock - stalemate: two threads lock different variables then try to lock the variable that is already locked by the other thread. So they both wait till each other is free before continuing. Stalemate!
Struct: a lightweight class - use when you just want to structurally store a collection of objects. Its like new stdClass in PHP (but more organised). Its better than creating a dictionary and assigning kvps to store your lightweight collection as i have done in the past. They have limitations compared to classes and you would normally use a class. Classes are reference types while struct are value type objects. If passing a struct in place of an object, you must use the ref keyword to tell the method that the variable should be populated by reference and not value.. Only use if there is a specific need to pass an object by value and not reference.
Enum: you have a set of constants that will never change. e.g. sun - sat, jan - dec. You can declare these at namespace level so it can
be used by all classes. By default, the type of items in list are ints but these can be any primitive type except char
Delegate: used to treat a method like an object. I dont think it has any real use in the example I saw http://aspnetcentral.com/aspnet45/expert/video/0410%20Understand%20delegate%20methods.html
Fields: are basically what you thought were variables. These should be accessed via getters and setters because they abstract the field and allow you to make change...tbc
Properties: are the way you declare variables in Models with the get; set; They expose fields
Using {} - use this whenever: The using statement is only useful for objects with a lifetime that does not extend beyond the method in which the objects are constructed. Remember that the objects you instantiate must implement the System.IDisposable interface. E.G SQLConnection
FluentValidation is an alternative to data annotations. Some feel it is easier to read and maintain. http://stackoverflow.com/questions/16678625/asp-net-mvc-4-ef5-unique-property-in-model-best-practice In the example i studied, it felt like writing unnecessary code e.g. making a field unique...
Boxing: int x = 1; object y = x; Unboxing: y = 1; x = (int)y; The above work with casting when unboxing and generalisation (almost polymorphism) when boxing
hash region: allow you to collape blocks of code in long code and add a description so you know what each region is for
hash pragma: use to disable warnings and reenable later on
Yield:
Technical Debt: When you make a change, there is often other changes to make in other parts to ensure the integrity of your application. These other changes are called debt.
Use of interfaces:
IDisposable: a way to dispose of unmanaged resources - used most for db connections and talking to db via EF. Use if you are directly accessing an unmanaged resource
IEnumerable vs ICollection
Repository pattern: Why?
Internal keyword vs private http://stackoverflow.com/questions/3813485/internal-vs-private-access-modifiers
IOC - passing the decision making away from the class to an external entity e.g. constructor should not decide which database type to instantiate. You can use DI to implement IOC. You can also use delegates, events, and service locators https://www.facebook.com/video.php?v=690253231015623
DI - Dependency Injection
Know your versions: Visual Studio: 2013 (v12) - help about ASP.NET: 4.5 - search targetFramework in web.config C# : 5 MVC: 5 - search system.data.mvc in web.config EF: 6 - search system.data.entity in web.config
0 notes
Photo

Creating Strictly Typed Arrays and Collections in PHP
One of the language features announced back in PHP 5.6 was the addition of the ... token to denote that a function or method accepts a variable length of arguments.
Something I rarely see mentioned is that it’s possible to combine this feature with type hints to essentially create typed arrays.
For example, we could have a Movie class with a method to set an array of air dates that only accepts DateTimeImmutable objects:
<?php class Movie { private $dates = []; public function setAirDates(\DateTimeImmutable ...$dates) { $this->dates = $dates; } public function getAirDates() { return $this->dates; } }
We can now pass a variable number of separate DateTimeImmutable objects to the setAirDates() method:
<?php $movie = new Movie(); $movie->setAirDates( \DateTimeImmutable::createFromFormat('Y-m-d', '2017-01-28'), \DateTimeImmutable::createFromFormat('Y-m-d', '2017-02-22') );
If we were to pass something else than a DateTimeImmutable, a string for example, a fatal error would be thrown:
If we instead already had an array of DateTimeImmutable objects that we wanted to pass to setAirDates(), we could again use the ... token, but this time to unpack them:
<?php $dates = [ \DateTimeImmutable::createFromFormat('Y-m-d', '2017-01-28'), \DateTimeImmutable::createFromFormat('Y-m-d', '2017-02-22'), ]; $movie = new Movie(); $movie->setAirDates(...$dates);
If the array were to contain a value that is not of the expected type, we would still get the fatal error mentioned earlier.
Additionally, we can use scalar types the same way starting from PHP 7. For example, we can add a method to set a list of ratings as floats on our Movie class:
<?php declare(strict_types=1); class Movie { private $dates = []; private $ratings = []; public function setAirDates(\DateTimeImmutable ...$dates) { /* ... */ } public function getAirDates() : array { /* ... */ } public function setRatings(float ...$ratings) { $this->ratings = $ratings; } public function getAverageRating() : float { if (empty($this->ratings)) { return 0; } $total = 0; foreach ($this->ratings as $rating) { $total += $rating; } return $total / count($this->ratings); } }
Again, this ensures that the ratings property will always contain floats without us having to loop over all the contents to validate them. So now we can easily do some math operations on them in getAverageRating(), without having to worry about invalid types.
Problems with This Kind of Typed Arrays
One of the downsides of using this feature as typed arrays is that we can only define one such array per method. Let’s say we wanted to have a Movie class that expects a list of air dates together with a list of ratings in the constructor, instead of setting them later via optional methods. This would be impossible with the method used above.
Another problem is that when using PHP 7, the return types of our get() methods would still have to be “array”, which is often too generic.
Solution: Collection Classes
To fix both problems, we can simply inject our typed arrays inside so-called “collection” classes. This also improves our separation of concerns, because we can now move the calculation method for the average rating to the relevant collection class:
<?php declare(strict_types=1); class Ratings { private $ratings; public function __construct(float ...$ratings) { $this->ratings = $ratings; } public function getAverage() : float { if (empty($this->ratings)) { return 0; } $total = 0; foreach ($this->ratings as $rating) { $total += $rating; } return $total / count($this->ratings); } }
Notice how we’re still using a list of typed arguments with a variable length in our constructor, which saves us the trouble of looping over each rating to check its type.
Continue reading %Creating Strictly Typed Arrays and Collections in PHP%
by Bert Ramakers via SitePoint http://ift.tt/2oehxoH
0 notes
Text
How To Create A Node.js Microservice For Your Ionic App
In my previous post I created an Ionic 2 app that reads the posts from a Facebook Page and displays them in the app. I also mentioned that hard coding the Access Token for the Facebook Graph API within the app wasn't ideal, since it can be stolen by anyone who decompiles your app.
In this post we'll create a very simple Node.js service that will handle the call to the Facebook Graph API for us, so we don't need to include the Access Token in our Ionic app anymore.
The source code can be found on GitHub.
Node.js and microservices
Node.js is a JavaScript runtime that you can use on a server to run JavaScript code. This enables frontend developers to create web services using JavaScript.
There are a couple of different frameworks built on top of Node.js that you can use to create web services, the most popular one being Express.
However, I recently stumbled upon this excellent post about building microservices with Node.js using micro, a lightweight library that's very easy to use.
A microservice is a service that does just one thing and can be deployed independently from other (micro)services.
I thought it was a perfect fit for the service I wanted to create in this tutorial. So, enough background information, let's code!
Setup service
We'll start by creating a directory for our service and creating a package.json file in it.
$ mkdir nodejs-tutorial-micro $ cd nodejs-tutorial-micro $ npm init -y
That last command will create a package.json file for us with some default values, you can leave out the -y and it will then guide you through setting up the package.json.
Install dependencies
Next, we'll install the micro package and the request package. This last one we'll use to do the request to the Facebook Graph API.
$ npm install micro request --save
Configure package.json
In the scripts section add this line "start": "micro" so we can use npm start later to fire up our service.
Your package.json file should now look like this:
{ "name": "nodejs-tutorial-micro", "version": "1.0.0", "description": "", "main": "index.js", "scripts": { "start": "micro", "test": "echo \"Error: no test specified\" && exit 1" }, "keywords": [], "author": "", "license": "ISC", "dependencies": { "micro": "^7.0.6", "request": "^2.79.0" } }
Create index.js
As you can see in the package.json, our main entry point for the service is index.js, so let's go ahead and create that file. We can write our code in ES6/ES2015, because it's supported by Node.js. If you want to use TypeScript, you'll have to set up the transpilation to ES6/ES2015.
I'm not going to go through the details of the Facebook Graph API here, you can learn more about it in my previous tutorial.
const request = require('request'); const url = require('url'); module.exports = function (req, res) { const accessToken = '<your access token>'; const query = `?access_token=${accessToken}&date_format=U&fields=posts{from,created_time,message,attachments}`; const pageName = url.parse(req.url).pathname.substring(1); request(`http://ift.tt/2kysdw7}`).pipe(res); }
We're using require to import the request module we installed earlier and we're also importing url which is a core Node.js module.
To create the microservice we only need to export a function that takes in a request and a response parameter.
We parse the request url with url.parse to get the name of the Facebook Page we want to query and then we use request to do the request to the Facebook Graph API and pipe the output into the response of our microservice.
So that means we're just passing through whatever we received from the Facebook API. You don't have to do it that way, you can also do some processing on the response from Facebook before you make your own response to send back to the client.
Well, that's it, our service is ready, let's test it!
$ npm start
This command will fire up our service on http://localhost:3000/. So if you go to your browser now and type in http://localhost:3000/unsplash, you should receive the JSON data from the Facebook Page.
You can also use curl on the command line to test the service.
$ curl http://localhost:3000/unsplash
Modify Ionic app
So now we have our service working, let's modify our Ionic app to call our own service instead of the Facebook API and remove the Access Token.
import { Http } from '@angular/http'; import { Injectable } from '@angular/core'; import { Observable } from 'rxjs/Rx'; import 'rxjs/add/operator/map'; @Injectable() export class FacebookService { constructor(private http: Http) { } getPosts(pageName: string): Observable<any[]> { const url = `http://localhost:3000/${pageName}`; return this.http .get(url) .map(response => response.json().posts.data); } }
And now we're done, test the app in the browser with the command below. Make sure your service is up and running.
$ ionic serve --lab
Error handling and configuration
I've kept the service very simple, but you should obviously take into consideration how you want to handle errors.
micro handles errors for you by returning a 500 status code, if you want different behavior you can override that. You can find more information on error handling on the github page.
If you want to use a different port than the default 3000, you can change npm start to use micro -p <portnumber> in package.json.
Deploying service to server
Now that you have your own microservice, you'll need a server to deploy it on.
I personally use Digital Ocean, it's also what this blog is hosted on. You can get your own private server starting at $5 a month and get $10 credit if you sign up with this link.
One of the things I like about Digital Ocean, is that they have an amazing collection of tutorials on how to set up your server. This one is especially useful for deploying your microservice: How To Set Up a Node.js Application for Production on Ubuntu 16.04.
The source code can be found on GitHub.
Have fun creating your own microservices and let me know in the comments if you have any questions.
via Gone Hybrid http://ift.tt/2lkalsU
0 notes