#delete wordpress plugin from cpanel
Explore tagged Tumblr posts
Visit Tumblr Blog
Explore Tumblr blogs with no restrictions, modern design and the best experience.
Last Seen Tumblr Blogs


Fun Fact
The average Tumblr user visits about 67 pages every month.
Text
What Causes WordPress 500 Errors and How to Fix Them Step-by-Step Getting a “500 Internal Server Error” on your WordPress website can be frustrating especially when it shows no clear message about what went wrong. The good news? It’s usually fixable with a few simple steps.
In this guide, we’ll explain what a WordPress 500 error is, what causes it, and how to fix it quickly.
💡 What is a WordPress 500 Error?
The 500 Internal Server Error is a general server-side error that means something went wrong, but the server can’t tell you exactly what. It could be a misconfigured file, a plugin conflict, or even a memory issue.
Common Causes of WordPress 500 Errors
Corrupt .htaccess file
PHP memory limit exhaustion
Faulty plugin or theme
Server configuration issues
Corrupted WordPress core files
How to Fix WordPress 500 Errors
1. Rename or Delete Your .htaccess File
Access your site using FTP or cPanel and rename the .htaccess file (e.g., .htaccess_old). Then try loading your website again.
2. Increase PHP Memory Limit
In your wp-config.php, add:
phpCopy
Edit
define('WP_MEMORY_LIMIT', '256M');
3. Deactivate All Plugins
Rename your /plugins/ folder to something like /plugins_backup to disable all plugins at once. If the site works, activate plugins one by one to find the culprit.
4. Switch to a Default Theme
Temporarily change your theme to a default one like Twenty Twenty-One.
5. Re-upload Core Files
Download a fresh copy of WordPress and re-upload the /wp-admin/ and /wp-includes/ folders via FTP.
🚨 When to Contact Your Hosting Provider
If none of the above solutions work, the issue could be on your server. Reach out to your hosting support and ask them to check server logs for the root cause.
✅ Use a Well-Coded Theme to Avoid Errors
Sometimes themes can cause server errors too. That’s why we recommend using reliable and secure themes like those from VWThemes optimized for performance, security, and compatibility.
Final Thoughts
WordPress 500 errors can look scary, but they’re usually easy to fix if you follow the right steps. Don’t forget to back up your website before making changes!
0 notes
Text
Fixing WordPress Update Issues Made Easy: A Beginner’s Guide to Smooth Website Maintenance

Keeping your WordPress website updated is one of the smartest things you can do for better security, performance, and features. But what happens when those updates don’t go as planned?
If you’ve ever seen your website freeze, crash, or show strange errors after clicking "Update," don’t worry—you’re not alone, and you don’t need to be a developer to fix it.
In this guide, we’ll explain why WordPress updates fail and share simple, beginner-friendly solutions to get your website back on track—quickly and safely.
⚠️ Common Reasons Why WordPress Updates Fail
WordPress is built on multiple moving parts—your core WordPress files, themes, and plugins. An update may fail if just one part doesn’t play nicely with the others.
Here are the top reasons why updates might not go through:
🌐 Weak or unstable internet connection
🔌 Plugin conflicts that interfere with the update
🎨 Themes that aren’t compatible with the latest WordPress version
🧠 Low server memory or execution time limits
🔒 Incorrect folder or file permissions
📁 Corrupted or incomplete update downloads
🛠️ Simple Fixes for WordPress Update Problems
✅ Step 1: Always Back Up Your Website
Before making any changes, install a backup plugin like UpdraftPlus or BackupBuddy and save a complete version of your site. This ensures that if something goes wrong, you can restore your site in minutes.
✅ Step 2: Clear Your Cache
Sometimes, the issue isn’t with the update—it’s with what your browser is showing.
Clear your browser cache (Ctrl+Shift+R or Command+Shift+R)
If you use a caching plugin (like WP Super Cache or W3 Total Cache), clear your site’s cache from the plugin dashboard
Then, try the update again.
✅ Step 3: Troubleshoot Plugin Conflicts
If an update causes your site to break, the issue might be a plugin.
Here’s how to find out:
Install the Health Check & Troubleshooting plugin.
Enable “Troubleshooting Mode”—this temporarily disables all plugins for you only.
Try running the update again.
If the update works now, reactivate your plugins one at a time. The one that breaks the update is your troublemaker.
✅ Step 4: Check Hosting Limits
Your hosting environment might be too limited for updates to complete properly.
Ask your hosting provider these questions:
Is my PHP memory limit at least 256MB?
Is my maximum execution time at least 300 seconds?
Can these settings be increased if needed?
If not, consider upgrading to a better hosting plan for smoother WordPress performance.
✅ Step 5: Perform a Manual WordPress Update
When automatic updates fail, a manual update is a reliable workaround:
Download the latest WordPress version from WordPress.org
Unzip the files on your computer
Use FTP software (like FileZilla) to access your site files
Replace the wp-admin and wp-includes folders with the new versions
Leave the wp-content folder as-is (it holds your themes and plugins)
Open your site and follow any update prompts for the database
This process ensures a clean, fresh installation—without losing content or settings.
✅ Step 6: Fix File Permissions
Improper file permissions can block updates.
Use a plugin like WP File Manager or ask your host to set:
All folders to 755
All files to 644
These settings help WordPress update safely without risking your site’s security.
✅ Step 7: Remove Stuck Maintenance Mode
If you see the message:
“Briefly unavailable for scheduled maintenance. Check back in a minute.” …your site update was interrupted and left in maintenance mode.
Here’s how to fix it:
Access your site files through FTP or your hosting file manager (like cPanel)
Go to your website’s root folder
Delete the file called .maintenance
Refresh your site—it should be back to normal
This takes less than a minute and often solves the issue instantly.
💡 When to Call in the Pros
If these solutions don’t work—or if you feel unsure about any step—don’t hesitate to get help from professionals.
Here are your options:
Contact your web hosting support
Hire a trusted WordPress expert
Reach out to a reputable company like Websenor for quick, affordable help
🎯 Final Word: Let Websenor Handle Your WordPress Maintenance
WordPress update problems are common—but they don’t have to be stressful. With some basic know-how and a methodical approach, you can often fix these issues yourself.
But if you'd rather skip the hassle, Websenor is here to help. Our team specializes in:
WordPress core and plugin updates
Website backups and security
Speed optimization and error fixes
We'll keep your website running smoothly, so you can focus on your business, not your backend.
👉 Ready to stop worrying about WordPress updates? Contact Websenor today and let us take care of everything behind the scenes.
0 notes
Text
13 Routine Maintenance Tasks that You Should Do on WordPress and WooCommerce

Maintaining a WooCommerce store is a lot of work. There are a lot of routine maintenance tasks for WordPress and WooCommerce that need to be done on a regular basis. In this post, we list down the most important tasks that you should do on your WooCommerce store.
1. Create Regular Website Backups

2. Update WordPress, WooCommerce, Themes and Plugins
Updating all elements of your WooCommerce store should be done on a regular basis. Do this weekly if you have the time. If not, monthly updates are good enough. Updates include updating WordPress Core, themes, WooCommerce and all other installed plugins. Remember to backup up your site before proceeding with updates since updates could cause your website to break. If you have a development site, it would be best to test the updates first on this staging environment. Then, do some user testing to make sure that there are no errors.
After that, you can proceed to update your live site. When that’s done, you will need to do another round of testing. Some important elements to test include checkout, add to cart, contact form emails, opt-in forms and other customizations that were done on the site.
3. Update WooCommerce Template Files
After updating WooCommerce, you will sometimes get an error notifying you of outdated WooCommerce template files. This just means that your theme has not updated to include the latest WooCommerce template files. In some cases, this could cause some formatting issues on your store. If there are no errors on your store, you can simply wait for your theme to release an update that includes the most recent template files. Or you can also fix this manually by following the steps in this documentation from WooCommerce.
4. Change User Passwords
It is important to use strong passwords. However, it is just as important to change passwords on a regular basis. There are times when security breaches can go undetected for a long time. Changing your password regularly blocks out these security breaches that you might not realize are there. You should change your password for WordPress admin, FTP, database and cPanel. And a pro-tip, never use “admin” as your username. This is the first username that hackers try out when brute forcing into websites.
5. Optimize Your Product Images
We’ve always emphasized the importance of optimizing images for your WooCommerce store to keep your site running fast.
If you have uploaded any product image that is more than 100KB in size, it might be a good idea to replace that image with an optimized product image. To learn more, you can check out our blog post on how to optimize images.
6. Approve and Respond to Product Reviews

7. Approve and Respond to Blog Comments
If you have a blog that is made to drive customer engagement, then your blog will most likely attract comments. Same with product reviews; don’t delete the negative comments. Rather, address them positively. Remove any spam comments as this will negatively impact the user experience of your blog. If you are using Akismet: Anti Spam plugin, this will block out most spam comments. However, some spam comments can still get through and you will need to manage them manually.
8. Test Your Contact Forms and Email Opt-in Forms
Every now and then, you will need to make sure that your contact forms and email opt-in forms are working. Just fill in your forms and send. If you receive it in your email, then you’re all good. But if you don’t, there’s something wrong and you need to do something about it. Have your developer look into it.
9. Optimize Your Database
Over time, your database accumulates a lot of gunk and you need to clean it to make sure your website runs fast. Before you go about this task, make sure you create a backup. You can choose to clean your database manually if you are comfortable and familiar with working on your database. Otherwise, you can use a plugin to do the optimizations for you. Notable plugins include WP-DBManager and WP-Optimize. You can check out our guide on how to clean your database.
10. Test Your WooCommerce Store’s Speed
If you have not yet made optimizations to your WooCommerce store’s speed, you should consider doing it now. Site speed has become increasingly important for WooCommerce store owners. Google now considers site speed as a ranking factor for SEO. Also, if you have a slow site, this will negatively impact the customer’s experience on your site. It is easy for your customers to buy instead from your competitors. You can test your site speed on Google’s Page Speed test and Google will provide you with recommendations on how you can improve your site’s speed. Other notable tools that you can use to test your site are Pingdom Website Speed Test and GTmetrix.
11. Scan Your Site for Malware
One way to keep on top of your website’s security is to regularly test your site for any malware. If you are connected to Google Search Console, it will let you know if malware is detected on your site. If your site has been found to have any form of malware, Google Chrome will actually alert your visitors that your site is dangerous. This can have devastating effects on your traffic and conversion rate.
No one will want to enter their payment information on a site that has malware. In extreme cases, Google may block your site from appearing in the Google search results page. You want to prevent this from happening. It would be best to invest on your site’s security by installing a security plugin such as Sucuri Security and WordFence. Even if you have those plugins installed, it is still a good idea to a manual scan. You can scan your website at Sucuri’s Website Malware and Security Scanner, or at SiteGuarding. If any manual scans detect anything malicious, you can contact your developer to fix the issue. You should get it fixed before Google applies any penalties. Wooassist also offers a security hardening service to improve the security of your site so you can prevent this from happening.
12. Fix Broken Links

13. Test Your Checkout Process
Last but definitely not the least; you should regularly test your checkout process. If you suddenly experience loss of sales, it’s a good idea to test your checkout. There might be an error that prevents your customers from checking out. Testing also gives you a feel of what your customers go through so you can optimize your checkout. Once you’ve determined that your checkout has problems, you can check out our post on how to fix the most common checkout problems in WooCommerce.
Final Notes
By doing these tasks on a regular basis, you can keep yourself on top of any issues that may occur on your WooCommerce store. If you find yourself overwhelmed by the all these, you can hire someone else to do it. You can also contact us and our team will be glad to assist with any of these tasks.
Are there any other routine maintenance tasks for WordPress and WooCommerce you think should be done on a regular basis? Do you have any suggestions? Let us know in the comments.
0 notes
Text
BigCloudy's Christmas Hosting Extravaganza: Unwrap Web-tastic Deals!

Introduction
Ho-ho-ho, website builders! The holidays are upon us, and BigCloudy's got a gift under the virtual tree that'll make your website jingle. Buckle up, because we're unwrapping a Christmas hosting sale so merry and bright, your website will be dancing on the digital dance floor.
That's right, BigCloudy's Christmas Hosting Sale is here, bringing you up to 99% discounts on both WordPress and cPanel hosting. But wait, there's more! This ain't your average stocking stuffer – we're talking free premium features, lightning-fast performance, and peace-of-mind security, all wrapped up in a user-friendly package that'll make managing your website a breeze.
Introducing to BigCloudy Hosting
BigCloudy stands as a leader in providing customized web hosting solutions designed to empower online businesses of all sizes. From blogs to e-commerce stores, we enable our clients to maximise their return on investment through increased web traffic and enhanced online visibility.
At BigCloudy, we embrace the challenge of exceeding expectations and setting the standard for hosting excellence. Whether you're just starting your online journey or seeking to scale your existing business, we offer the tools and expertise to propel your success.
Power of WordPress with BigCloudy's Optimized Platform

This holiday season, unleash the full potential of your WordPress website with BigCloudy's unmissable Christmas Extravaganza! Enjoy discounts of up to 99% on our premium WordPress hosting plans, packed with features that will propel your website to new heights.
i. Say goodbye to storage limitations Our unlimited NVMe storage ensures your website has ample room to grow, whether you're adding captivating visuals, expanding your content library, or building a thriving online store. Break free from the shackles of cramped hosting and watch your website flourish!
ii. Build trust and boost security With a FREE SSL certificate included in every plan, you'll establish secure connections with your visitors and enhance their online experience. Show them you care about their data and privacy, and watch your brand reputation soar!
iii. Transition seamlessly, stress-free
Migrating your WordPress website can be daunting, but not with BigCloudy. We offer FREE WordPress migrations, expertly transferring your content and settings without any downtime or technical headaches. Sit back, relax, and let us handle the heavy lifting!
iv. Experiment with confidence Want to test out new themes or plugins before committing them to your live site? Our one-click staging feature lets you create a secure testing environment, play around without risking your website's performance, and make informed decisions with peace of mind.
v. Rest easy knowing your website is protected With daily backups and Jetpack included, you can sleep soundly knowing your valuable content is always safe and secure. Unexpected crashes or accidental deletions are a thing of the past!
vi. Experience unmatched reliability
We stand behind our commitment to uptime. Enjoy a 99.9% uptime guarantee, ensuring your website is always accessible to your visitors, even during peak traffic times. Never worry about downtime again!

vii. Try BigCloudy risk-free
We're so confident you'll love our service that we offer a generous 30-day money-back guarantee. If you're not completely satisfied, simply let us know within the first 30 days, and we'll refund your payment in full. Experience the BigCloudy difference with complete confidence!
BigCloudy's cPanel Sale Lights Up Your Hosting Dreams
Unleash your entrepreneurial spirit and build your online empire with the power of BigCloudy's cPanel Hosting Christmas Sale! Forget limitations and experience the freedom and flexibility of managing multiple websites, projects, and emails all under one roof.
i. 5 Subdomains Multiply your online presence without multiplying your costs. Host several websites or landing pages, separate personal projects from professional ventures, and experiment with new ideas – all under one BigCloudy account.
ii. 50 GB Disk Storage Let your creativity flow without storage anxiety. Upload high-resolution images, store essential files, and build a robust online space for your projects, all with ample room to grow.
iii. 500 GB Bandwidth Accommodate even the most ambitious traffic without hiccups. Whether you're running an e-commerce store, a bustling blog, or a resource-intensive web application, BigCloudy's generous bandwidth ensures smooth sailing.

iv. 2,00,000 Inode Limit Manage hundreds of files and emails with ease. Organize your website content, create custom email accounts, and handle everything from documents to images to media files without worry.
v. Daily Backups/Jetpack
Rest easy knowing your precious data is always protected. Automatic daily backups and Jetpack's comprehensive security features offer a safety net so you can focus on what matters most: building your online success.
vii. Unmatched control The intuitive cPanel interface empowers you to manage your websites, emails, files, and databases with ease.
viii. Scalability for growth
As your online ambitions expand, BigCloudy's flexible plans seamlessly adapt. Upgrade your resources effortlessly to accommodate increasing traffic and evolving needs.
viii. 24/7 Expert Support
Our friendly and knowledgeable team is always here to assist you, no matter your questions or concerns. We're dedicated to your success and happy to offer guidance along the way.
BigCloudy Reseller Hosting: Scale your Business, not your Budget.
Discover unbeatable value and a wide range of features this holiday season with BigCloudy's exclusive Christmas Reseller Hosting offer.
i. Incredible 99% Discount
Make the most of your holiday savings with an amazing 99% discount on your first year. This means significant cost savings, giving you the opportunity to increase profitability or offer expanded services.
ii. 5 cPanel Accounts
Effortlessly manage up to five separate websites or projects with dedicated cPanel accounts. Each account comes with personalized settings, resource allocation, and user management, making it perfect for client work or internal departmental needs.
iii. 100 GB Bandwidth
Handle high volumes of traffic with ease, thanks to a generous 100 GB bandwidth allowance. iv. 10 GB Disk Space
Get plenty of storage space for your website files, databases, and media with a dedicated 10 GB disk space.
v. Softaculous App Installer
Effortlessly install popular web applications with the convenient Softaculous installer that comes included.
vi. 24/7 Lightning Fast Support
Rest easy knowing that BigCloudy's dedicated support team is available 24/7 to provide proactive and swift assistance.
Conclusion
Don't miss out on this incredible opportunity! Unleash the power of your WordPress website with BigCloudy's Christmas Extravaganza today. Visit our website to explore our plans and claim your discount before the offer ends!
0 notes
Text
How to Delete Wordpress Site
Deleting a WordPress site should be done with caution, as it permanently removes all of your site's content, settings, and data. Make sure you have a backup of any data you want to keep before proceeding. Here's a step-by-step guide on how to delete a WordPress site:
Before you begin:
Backup your site: Use a WordPress backup plugin or your hosting provider's backup feature to create a backup of your site's content and database. This is crucial in case you change your mind or need to restore your site later.
Export Content: If you want to save any posts, pages, or other content, export it using the WordPress export tool. This will create an XML file you can import into another WordPress site if needed.

#how to delete wordpress site#how to delete wordpress site and start over#how to delete wordpress site hostinger#how to delete wordpress site from cpanel#how to delete wordpress site 2022#how to delete wordpress site from localhost#how to delete wordpress site godaddy#how to delete wordpress site 2023#how to delete your wordpress site and start again#how to delete a wordpress site on bluehost
1 note
·
View note
Text
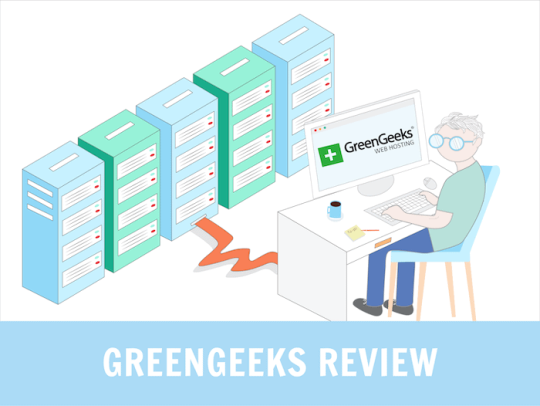
GreenGeeks Best WebHosting Service
Fun fact: do you know why Facebook moved its massive data center to Northern Sweden?
That’s because servers run hot, and cooling them down is expensive. Might as well keep them in a cold part of the world.
But more to the point in this GreenGeeks review: maintaining servers uses a ton of energy.
In fact, the Internet is one of the largest polluters in the world. Data centers account for 2% of the world’s CO2 emissions, about the same as the airline industry.
Well, if that’s a concern for you, I’ve got good news because the ‘green’ in GreenGeeks refers to their commitment to providing eco-friendly web hosting.
This is how it works, according to their website:
The platform is designed with a maximum use, no waste mindset.
For every amperage the company pulls from the grid, it matches it x3 in the form of renewable energy via the Bonneville Environmental Foundation
So they claim your website could be operating on a 300% green hosting platform!
While a growing number of hosting providers take the problem of energy seriously, (here’s an example from DreamHost), GreenGeeks really puts their ethos front and forward.
But what about other pros and cons, features and alternatives? Let’s put GreenGeeks through the wringer to see how it fares.
Table of Contents
GreenGeeks Prices
GreenGeeks Pros & Cons
What is GreenGeeks used for?
When not to use GreenGeeks hosting?
GreenGeeks Backups
GreenGeeks and WordPress
Final GreenGeeks Review Comments
Frequently Asked Quesitons
GreenGeeks Prices
Let’s first look at how much it costs per month to host your website on GreenGeeks. The first option is for shared hosting (the one most website owners need). You’ll also find that they offer WordPress web hosting. As far as I could tell, there is absolutely no difference between the WordPress and the shared hosting option.
As always, we’ll only be mentioning the regular price, which is what you pay after a first year at a discounted price. The first 12 months can be 50 – 70% cheaper.
Ecosite LiteEcosite ProEcosite Premium
Price (after renewal)$10.95 / month$15.95 / month$25.95 / month
You can purchase the plans for 12, 24 or 36 months. There is a significant discount for the longer terms, as you can see below:
GreenGeeks also offers VPS hosting, which comes with better performance, but a lot of limits depending on the plan you choose.
Price$39.95 / month$59.95 / month$109.95 / month
Finally, I should also mention that GreenGeeks has a few add-ons you can purchase to expand your hosting capabilities. These include:
Dedicated IP address: $48 per year
Premium AlphaSSL Wildcard: to secure SSL on multiple subdomains all at once.
WHMCS license: useful for resellers who want to bill hosting to their clients (note that GreenGeeks does offer a reselling option).
Last but not least, you’ll have to pay $25 for every backup restore, if you do it more than once per month (the first one is free).
What can you expect from each GreenGeeks plan?
As you can see in the above table, there’s a lot of unlimited stuff with their shared hosting and WordPress plans. That includes:
Unlimited bandwidth (or data transfer, which means the same thing)
Unlimited disk storage
Unlimited databases
Unlimited email accounts
Free SSL
The key limits to keep an eye on are maybe the number of ionodes, which is another way of saying the number of files on your site. It’s a very large number, mostly there to ensure you don’t abuse GreenGeeks’ generosity by hosting a file sharing website.
GreenGeeks Pros & Cons
Pros:
Green-minded: GreenGeeks is attempting to offset their server’s electricity consumption by using as much renewable energy as possible.
Unlimited data bandwidth: you can host one or multiple sites with complete peace of mind when it comes to visitor numbers and bandwidth.
Unlimited data storage: your site can be as large as you like, so good for video, high-res photos and ecommerce with loads of products. Just keep an eye on the number of files. Hosting more than 150,000 could void your plan’s contract.
Server locations: three continents to choose from, the US, Canada and Europe.
Heavily reduced long term plans: it’s not unusual to pay less for 24 or 36 month plans, but GreenGeeks is slashing their monthly prices by up to 70% for long term users.
Cons:
Missing advanced features: serious website owners and developers will need to look elsewhere for staging or premium DNSs.
No team management: it’s not possible to add multiple account users and to give permissions.
Lack of free backups: you get one automatic backup every 24 hours. One free restore per month, but the rest are paid. Not good enough.
Outdated design: Not a deal-breaker, but the whole system could do with a new coat of paint, which could also help with the user experience.
What is GreenGeeks used for?
I’d say GreenGeeks is best for website owners with green goals in mind. You can even show one of their green badges, to highlight on your site.
The generous bandwidth and storage is advantageous for those who own multiple sites. As far as the performance to price ratio goes, it’s good, and becomes more acceptable when you buy a long term contract of 24 or 36 months.
When not to use GreenGeeks hosting?
Anyone managing a team should consider that inviting others to join the account isn’t possible, and the lack of developer-friendly features could be a big no-no for certain businesses.
Developers with complicated workflows that need staging areas probably won’t be big fans of GreenGeeks’s platform either.
GreenGeeks Backups
Backups and restore are one of the areas I start considering a lot more these days when it comes to choosing a web host. A Sod’s law states: if something wrong can happen, it probably will, and at the worst possible times. This happened to us, and please learn from our mistakes when I say you should backup as often as possible.
GreenGeeks cPanel Backup Feature
Anyways, this is how it works with GreenGeeks. Option 1 is to use the cPanel backup tool. I’s a bit clunky and manual but by no means too difficult to do:
Login and click on the appropriate site’s cPanel button
Click Backup in the Files section
Click Home Directory under Download a Home Director
You can also download a database instead, or a full Zipped account backup, which is what you’ll need to keep on your local drives.
A couple of important things to note:
If your account is larger than 10GB in size, the whole cPanel backup option will be disabled. You’ll have to pay $5 per backup.
cPanel backups saved to your home directory will be deleted automatically after 48 hours, so it’s better to download the ZIP file locally.
The first monthly restore is free. After that, each restore costs $25. Note that it’s not unusual to restore at least a couple of times if there’s an issue (e.g. you chose the wrong backup to restore).
Option number two is to download files manually using an FTP program. If you use a CMS like WordPress or Drupal that also means you’ll need to backup databases. I always find that a big pain to do, and also slow. Which is why a better backup tool would have been useful.
GreenGeeks and WordPress
Although GreenGeeks has a special section on their website for WordPress hosting, I couldn’t find a difference between these plans and the share hosting ones.
In any case, here’s what you get for both if you want to install the world’s most popular CMS.
Easy installation: it’s not 1-click, but they use an install app called Softaculous, which simplifies the process for you. Maybe 4 or 5 steps, which you can read about here.
LiteSpeed Cache plugin: it’s a caching plugin that will make WordPress run faster on your site when properly configured. Be aware this is not GreenGeek’s own solution, but just a generic plugin they recommend.
LiteSpeed Cache Settings
To be honest, I feel like all the WordPress-optimized stuff is mostly there for marketing purposes. If you are really serious about WordPress experts (and you have the budget for it), I’d consider other options like Kinsta or WP Engine. SiteGround is also a great option if you need something a bit more affordable.
Final GreenGeeks Review Comments
GreenGeeks is certainly the provider we’ve tested that’s the most committed to protecting the environment. It’s an admirable choice, and businesses with a green goal will certainly be pleased to hear that they can host a website with a reliable performance, price, and low carbon footprint.
But there are nevertheless a few downsides to consider. The lack of advanced options like staging and team management features can be a dealbreaker for professional business owners. The limited backup features may be not enough for most.
And if you need a top-performing host, other (and more expensive) solutions like SiteGround, Kinsta or WP Engine could be considered.
It’s also not the cheapest provider out there. For example, at renewal DreamHost is more affordable and offers similar performance levels.
> Try GreenGeeks risk-free for 30 days
Frequently Asked Quesitons
How Do I Pay for GreenGeeks?
You can pay via all major credit cards and PayPal. No checks, money orders, wire transfers or Western Union payments.
Is Everything Really Unlimited?
Yes. Just keep in mind that there is a limit on the amount of files you can keep on your sites, though. It’s a really high number, so mostly a precaution against file-sharing websites.
Can I Get My Money Back?
There is an unconditional 30-day money back guarantee offer.
Is There an Uptime Service Guarantee?
Yes, if your website hosting drops below a 99.9% rate, GreenGeeks will refund some of your hosting fees.
Is GreenGeeks Really Environmentally-Friendly?
They’re certainly advertising as such. In practice this is how it works: GreenGeeks tells the Bonneville Environmental Foundation (BEF) how much electricity they use. The foundation calculates how much green energy they’ll need to use to make up for it. GreenGeeks purchases that amount in renewable energy.
So it’s not like their servers use less energy than standard hosting. However, they are certainly committed to making up for what they consume, and using as much green energy as possible.
Get GreenGeeks Now
#Best Web Hosting Services#Best Web Hosting Providers#best web hosts#web hosting#web host#web hosting provider#web hosting services#wordpress hosting#hosting
1 note
·
View note
Text
Bluehost : Is It The Best Choice for Your Site?🤔lets know that👇
Website Tool Tester is supported by readers like yourself. We may earn an affiliate commission when you purchase through our links. Of course, this won't increase the price you are paying.
Bluehost is part of a massive corporation, Endurance International Group (EiG), which owns various hosting providers (e.g. HostGator
or
iPage
) and has a colossal market share.
They obviously have the financial muscle to pour millions into marketing. That probably accounts for the huge amount of (overly) positive Bluehost reviews online.
I read several of those reviews and most talk about their fabulous support (really?), good prices and scalability options. But in those reviews, there’s very little about their actual flaws.
Hey, even WordPress recommends Bluehost
.
📷
But does this mean that Bluehost is a reliable service and a good match for your project?
Check out this Bluehost video-review if you don’t feel like reading the whole article:
📷
Let’s look around under Bluehost’s hood and intensively test their (shared) hosting.
Table of Contents
What Products Does Bluehost Offer?
Bluehost Pricing: What Do Their Shared Plans Include?
Bluehost Pros & Cons
Bluehost Shared Hosting Details
Bluehost Performance Tests
Bluehost Review: Do I Recommend It?
Bluehost Alternatives
Review Updates
What Products Does Bluehost Offer?
This US-based hosting provider offers loads of different hosting-related products,from domain names to dedicated servers. Let me quickly go over their large catalog.
📷
as it’s cheaper and easier to manage.
go from $8.99 to $25.99 per month.
.
Domain names: Although they are not the cheapest domain name registrar, you can buy domain names directly from Bluehost. They start at $17.99 a year at renewal. A personal all-time favorite of mine for domain names is Name cheap
Shared hosting: Unless you are managing a really large project or you need to geek around with your server’s configuration, a shared hosting plan is the one you ought to consider. Think of this as sharing a flat; you’ll share a server (flat), but you’ll have your own hosting space (room) – cheaper but noisier. At Bluehost their shared prices
WordPress hosting: Bluehost has a WordPress focused hosting service. It’s optimized for WordPress sites and comes with several perks like a staging area. It’s a bit pricey as it starts at $29.99 a month, more expensive than Site Ground
VPS: A Virtual Private Server is something in between a shared hosting and a dedicated one (read below). You’ll share a server with other clients, but there’s a (virtual) wall between your projects and theirs. This type of hosting is recommended for those needing special server configurations (e.g. using a particular programming language). VPS hosting plans go from $29.99 to $119.99 a month at Bluehost.
Dedicated servers: Adequate for those websites that generate tons of traffic and/or need a top-performing server. You can think of this as having your own house; no neighbors or roommates to bother you. Dedicated hosting plans start at $124.99 per month.
These are the most important hosting related products that Bluehost offers. I was surprised to see that they don’t have cloud hosting services.
Note: This Bluehost review focuses on their shared hosting services, so from now on I’ll be sharing my own experience and knowledge about this Bluehost product.
Bluehost Pricing: What Do Their Shared Plans Include?
The first thing to notice about Bluehost prices is that they have enormous discounts during the first year. Bear in mind that the renewal costs are much higher and they may put you off. Here I mention both prices so you can compare them and decide.
Basic Plus Choice PlusProWebsites1 website Unlimited Allowed domains1UnlimitedUnlimitedUnlimitedSupportPhone and live chat Phone and live chat Phone and live chat Performance Standard High Max. files amount
200,000200,000200,000300,000Storage50 GB Unlimited Unlimited Unlimited Database
Max. DB size
20
5GB
Unlimited
5GB
Unlimited
5GB
Unlimited
5GB
Back up Basic Advanced *
(for 1 year)
Advanced *First-term prices$2.95/month$5.45/month$5.45/month$13.95/month Renewal price$8.99/month$12.99/month$16.99/month$25.99/month
* Integrated system that lets you create and restore your own backups.
The Basic plan is good if you are only going to have 1 website and 50 GB of storage is enough for your project.
With the Plus plan, you can have as many websites as you need and the storage is unmetered. It also comes with unlimited email accounts.
If you get the Choice Plus package, you’ll be awarded with the Plus features, plus free domain privacy and better backup options.
The Pro tier is suitable for those looking for higher performances. The maximum files you can host with this plan jumps from 200,000 to 300,000.
For more information about Bluehost’s products and prices, please check our guide
.Bluehost Pros & Cons
Let me quickly tell you what I think are the most important advantages and disadvantages of Bluehost shared hosting:
ProsCons
with Bluehost have always been good. But unlike other providers, they don’t offer an SLA (Service Level Agreement) that guarantees a minimum uptime.
The first term is cheap: But be aware of the renewal rates, they are high.
Solid uptime: Generally speaking, my uptime tests
Generous storage: Their shared hosting plans offer loads of storage.
Unmetered bandwidth: Bluehost won’t limit the traffic that your website(s) can get.
Constant upsells: Their system is packed with continuous upsell pitches, which gets annoying.
Speed could be better: In our tests, Bluehost’s speed didn’t exactly come out at the top of the table. However, it isn’t terrible.
Only US-servers: Unlike other providers, you only have the option to host your site in the US. If your readers come from other regions, they could face having a (very) slow site.
Poor backup options: The entry-level plans don’t have a good backup solution.
When to Use Bluehost Hosting?
If you are looking to host a small-medium project (e.g. a bakery site) and you won’t be getting tons of traffic, Bluehost can be an OK alternative
.
But being 100% honest, I think there are similar alternatives with better prices.
When Not to Use Bluehost?
If you are managing a project that depends on your website and you need the best performance, Bluehost isn’t for you. Look for alternatives if you own an ecommerce, are a thriving blogger or provide Software as a Service.
Bluehost shared hosting won’t be for those looking for advanced hosting features like staging areas or Git repositories either.
Bluehost Shared Hosting Details
criterion rating comments
Ease of Use
The registration process is somehow challenging, I find their form not intuitive and designed to trick you into buying expensive extras that you won’t need. Their backend was redesigned in 2019, it’s an easy-to-use cPanel customized version. But I really dislike their constant upsell proposal banners, popups and sneaky links. Once you are used to all these, it’s fine.
Domain Names
Bluehost includes a free domain name registration the first year. After that, you’ll have to pay $17.99 per year. Be aware that their Basic plan only allows you to have 1 site (domain name), the other plans offer unlimited sites (domains).
Email Rating
With the Basic tier, you are limited to 5 email accounts, unlimited with higher plans. Be warned that you won’t be able to send more than 500 emails per hour – not suitable for sending bulk emails
.
Databases
With the Basic package, you can create up to 20 databases. Unlimited databases with the other plans. There is a generous maximum database size of 5 GB.
Applications
Using their automatic installer, you can add all sorts of software: WordPress, Drupal, Joomla, Magento and many more.
Bear in mind that their WordPress installer will add some plugins you most likely won’t want, make sure you delete them after the installation.
Web space Limit
The Basic shared plan comes with 50 GB of web space, not bad at all. The other plans don’t meter the storage. However, the maximum amount of files allowed is 200,000 (300,000 files for the Pro plan).
Monthly Data Transfer Limit
Not metered.
FTP Accounts and Secure FTP
Create as many FTP accounts as you wish. However, be aware that SFTP (secure) is only allowed with the main FTP account.
Server Location
They only seem to have data centers in the US. This may not be ideal for clients outside North America – your site could load very slow outside the US and Canada.
Security Features
Bluehost offers a couple of extra paid add-ons to enhance security. For example, Site Lock prevents hacker attacks and Code Guard gives you more backup options. I liked the fact that they have an optional two-factor authentication system, even if a hacker breaks your password, they won’t gain automatic access to your Bluehost account.
Server Speed
In my experience, Bluehost’s speed isn’t terrible, but it’s not the best either. Difficult to understand their l wish performance as they are quite expensive – more about this below.
Uptime
In our tests, Bluehost showed solid uptime results, it wasn’t the best one though. This is important to offer solid user experiences and SEO.
Backups
‘As a courtesy’, Bluehost creates monthly, weekly and daily backups that you’ll be able to download and restore. So yes, only 3 backups and they can’t assure you they’ll have them – other providers offer over 20 backups to choose from.
If you want extra backup options (e.g. on-demand backups), you can purchase their pricey backup add-on.
CDN
Bluehost don’t offer a CDN themselves, however, Cloud Flare is pre-integrated so you can easily enable it – I would suggest you do.
Server Features
It’s possible to use PHP 5.6, 7.0, 7.1, 7.2, 7.3 and 7.4. Databases run on MySQL 5.6. Other programming languages like Perl or Ruby on Rails are also allowed.
Refunds and Guarantees
There is a 30-day money-back policy, no questions asked. Unlike top hosting providers, they don’t seem to offer any uptime guarantees.
Assistance and Support
You can contact support via live chat and phone. The support agents were nice and helpful, I wish they had an easier way to verify the account owners.
Overall Rating
4/5
Although Bluehost’s
performance is acceptable and their system OK ish, I think they are a bit overpriced. But for me, their support is a clear no-go if you think you’ll need their help often. Bluehost Performance Tests
Is Bluehost a slow provider? Is their uptime OK?
To be able to answer all these questions, I’ve closely monitored Blueshot speed and uptime for months. Let me show you my findings
.Bluehost Speed Test
As a website owner, I don’t have to tell you how important speed is for providing the best user experience and improving your search engine rankings.
I compared Bluehost speed to the most popular (shared hosting) competitors. I used GT metrix, Pingdom and Web page test to check their loading times.
Let me sum up the results.
Test Average Loading Time5 GTmetrix test3.04 s5 Pingdom test3.76 s**5 Page Speed Insights (Google)**2.84 s
These tests were carried out under the same circumstances (e.g. same page and content) spread out over almost 2 months.
As you can see, Bluehost isn’t top of the class when it comes to speed. Several providers outperformed them in our tests. If you are concerned about speed, Site Ground
and
Dream Host
are, in my experience, are good performing providers .Is Bluehost’s Uptime Good?
Believe it or not, your hosting provider (most likely) won’t have a 100% uptime. Due to technical reasons (e.g. server maintenance), your site will be down for (hopefully) short instances of time.
A bad uptime is terrible as your visitors and search engines won’t be able to reach your site. Your goal should be to have an uptime higher than 99.95%.
2019
(Percentage)
2020
(Percentage)
Kinsta (3 months test)No data100Cloudways (3 months test)No data100DreamHost10099.99A2 Hosting99.9399.99WP Engine No data99.99GreenGeeks (3 months test)No data99.98SiteGround99.9899.97Bluehost99.9899.96HostGator99.9499.91GoDaddy99.9799.90InMotion99.9799.73Hostinger99.6299.48iPage99.6698.45
To monitor uptime I use Status Cake, a tool that checks each website every 5 minutes.
As you can see, Bluehost offer solid uptime results. I am quite happy with Bluehost’s performance here. However, be aware that they don’t offer any uptime warranty, other hosting providers will compensate you (e.g. a free month) if their global uptime drops below certain levels (usually 99.9%).
Bluehost Review: Do I Recommend It?
You’ve probably noticed already that Bluehost is not my favorite provider. However, if you want a hosting service with unmetered storage and unlimited bandwidth, Bluehost
could be a suitable option.
As you can see in the above tests, their speed wasn’t the best. However, I was impressed with their uptime scores as they got similar results to top providers like Site Ground and Dream Host (compare it with Bluehost
).
Their (first-year) pricing is remarkably cheap, but please consider the renewal prices as these sky-rocket.
> Try Bluehost 30 days for free
Bluehost Alternatives
Alright, if you go with Bluehost, your site is probably going to be OK, at least if your visitors are mainly located in North America.
However, it’s not the cheapest option out there, and I think for the same money you could get better performing providers that come with advanced options (e.g. backup or staging areas).
or Dream Host. They are a bit cheaper and perform similarly or better than Bluehost.
, In Motion and (again) Dream Host.
, A2 Hosting, Green Geeks and Dream Host. In my opinion, Site Ground comes with a couple of features that make it slightly better (e.g. more backup options).
has the best system to empower WordPress site owners (e.g. built-in caching plugin and speed optimization options).
If you are looking for a balanced hosting service (low price and good performance), I’d suggest you check out A2 Hosting
In my experience, you’ll find the best support at Site Ground
Without a doubt, the best (affordable) performing providers are Site Ground
You’ll be able to run WordPress in all these providers. However, Site Ground
> But, if you still want to use Bluehost, remember that you can try Bluehost for free for 30 days
before you take your decision.
Click here to Get Instant Access And To Know More
1 note
·
View note
Text
Guide - How to remove a Virus from WordPress
Beginner's Guide to Removing a Virus from a Hacked WordPress Site
A sad reality about website management is that sometimes these could be hacked.
It has all happened to us that our WordPress site was hacked a few times in the past, and we know exactly how stressful this can be. Not to mention the impact it has on your work and readers. In recent years, we have helped hundreds of users recover hacked WordPress sites, including several well-known companies. In this article, we will share a step-by-step guide to remove viruses from your compromised WordPress site.
Fix your hacked WordPress site
Some things to know before you start
First of all, regardless of the platform you use, WordPress, Drupal, Joomla, Magento etc., know that any site can be hacked!
When your WordPress site is hacked, you can lose, search engine rankings, expose your readers and customers to viruses, destroy your reputation due to redirects to porn sites or other tacky websites and even worse, lose the data of the whole site.
If your website is corporate, security should be one of your top priorities.
That's why it's essential to have a good WordPress hosting company. Surely a Managed Host would be much better for making you sleep soundly.
Make sure you always have a good WordPress backup solution available such as BackupBuddy .
Last but probably also the most important, having a robust firewall for web applications like Sucuri . For example, we use their services on our websites.
All the above information is great if you haven't been hacked yet , but chances are that if you are reading this article, it is too late to add the precautions we mentioned above. So before doing anything, try to stay as calm as possible.
Let's take a look at the step-by-step guide on how to remove a Virus from your compromised WordPress site.
Step 0 - Get it done by a professional
Security is a serious matter, and if you are not comfortable with codes and servers, it is almost always better to consult an expert in WordPress Consulting .
Why consult an expert?
Because hackers hide their scripts in multiple locations, allowing viruses to return over and over again.
Although we will show you how to find and remove them later in this article, there are those who need certainty, and want to have the peace of mind of knowing that an expert has properly cleaned their website, and it is a good way to think about it if the your website supports your business.
Security experts usually cost € 100 to € 250 an hour, which is expensive for a small business or young entrepreneur.
However, for readers of the WPB-assistance Blog, we offer € 199 for cleaning up your website from Virus and Malware and in addition we can include a monitoring service for a whole year.
Now this may sound like self promotion, but it's actually an honest recommendation. We know very well how many technical implications there are on WordPress and many more flock to the world of WordPress security and web spaces so we recommend you read this guide and also get an expert to intervene.
So use them if you appreciate your time, are not tech savvy, or just want peace of mind.
For all DIY people, follow the steps below to clean up your compromised WordPress site.
Step 1. Identify the hack
When dealing with a virus on the website, you are very stressed out. The first thing to do is to try to stay calm and write a list of everything you know about virusl.
Below is a list of things to check:
· Can you access your WordPress admin panel?
· Is your WordPress site redirected to another website?
· Does your WordPress site contain illegitimate links?
· Does Google mark your website as unsafe?
Write down everything in the list because this will help you while talking to your hosting company or even while following the steps below to fix your site.
In addition, it is essential that you change your passwords before you start cleaning. You'll have to change your passwords, even when you're done cleaning the virus.
Step 2. Check with the hosting company
The best hosting providers are very useful in these situations. They have an experienced staff that takes care of this kind of thing on a daily basis and they know their hosting environment, which means they can guide you better. Start by contacting your web host and follow their instructions.
Sometimes the virus may have affected even more of your site, especially if you are on shared hosting. Your hosting provider may also be able to provide you with more information about the type of virus, such as how it originated, or where the backdoor is hiding, etc.
You may also be lucky and the host may clean up the virus for you.
Step 3. Restore from backup
If you have backups for your WordPress site, then it may be best to restore a backup from an earlier point in time when the site was hacked. If you can do it, this can be worth gold.
However, if you have a blog where you post daily content, you risk losing blog posts, new comments, etc. In these cases, evaluate the pros and cons.
In the worst case, if you don't have a backup or if the website has been compromised for a long time and you don't want to lose the content, you can manually remove the virus.
Step 4. Scan for and remove malware
View your WordPress site and remove any inactive WordPress themes and plugins. Most often, this is where hackers hide their backdoors.
The term Backdoor refers to a method of ignoring standard authentication and obtaining the ability to remotely access the server without being detected. Most smarter hackers upload the backdoor as their first action. This allows them to recover access even after you have found and removed the virus.
Once you're done, go ahead and scan your website for viruses.
You should install the following free plug-ins on your website: Sucuri WordPress Auditing and Theme Authenticity Checker (TAC) .
When you set them up, the Sucuri scanner will scan the integrity status of all files in the WordPress core. In other words, it shows you where the virus is hiding.
The most common places where viruses nestle are plug-in themes and directories, upload directories, wp-config.php, wp-include directory, and .htaccess files.
If the theme's authenticity controller finds a suspicious or malicious code in your themes, it will show a details button next to the theme with the reference to the infected theme file. It will also show you the malicious code it has found.
Here you have two options for fixing the virus. You can manually remove the code or you can replace that file with the original file.
For example, if they have modified the WordPress core files, you can upload the WordPress files again by extracting them from a new download or you can replace all the files in the WordPress core.
The same goes for theme files. Download a new copy and replace the damaged files with new ones. Remember to do this only if you have not made changes to the WordPress theme codes otherwise you will lose those changes.
Repeat this step also for plugins if interested.
You will also need to make sure that the plugin's theme and folder match the original ones. Sometimes hackers add additional files that look like the original plugins in the name and it is easy to ignore them, such as: hell0.php, Adm1n.php, etc.
We have a detailed guide on how to find a backdoor on WordPress and remove it.
Keep repeating this step until the hack is gone.
Step 5. Check user permissions
Search the WordPress users section to make sure that only you and your trusted team members have administrator access to the site.
If you see a suspicious user ... delete it!
Read our beginner's guide to WordPress user roles.
Step 6. Change your secret keys
Since version 3.1 came out, WordPress generates a set of security keys that encrypts your passwords. Now if a user has stolen your password, d is still logged on the site, he will remain logged because his cookies are valid. To disable cookies, you need to create a new set of secret keys. You need to generate a new security key and add it to your wp-config.php file.
Step 7. Change your passwords again
Yes it's true, you changed the passwords in step 1. Now do it again!
You need to update your WordPress password, cPanel / FTP / MySQL password, and practically wherever you have used passwords.
We strongly recommend that you use a strong password. Read our article on the best way to manage passwords. If there are many users on your site, it is better to push them to reset their password.
Go ahead - Strengthen the security of your WordPress site
Improve WordPress security
It goes without saying that no more secure thing than a good backup solution. If you don't have one, we encourage you to do something to back up your site every day.
Other than that, here are some other things you can do to better protect your site from viruses - this list is not in order and you should do as many things as possible!
Website firewall configuration and monitoring system - Sucuri is the provider we use because, in most cases, they block attacks before they reach your server.
Switch to Managed WordPress Hosting - Most WordPress hosting companies do everything they can to keep your site secure. We recommend WP-Hosting.it .
Disable theme editor and plugins : it's a best practice. [Here's how to disable editing files in WordPress.]
Limit login attempts in WordPress - We recently discussed its importance and you should read how to limit login attempts in WordPress.
Password Protect your Admin Directory - Add an additional level of password to the WordPress administrative area. See how to add Htpasswd to the WordPress administrator.
Disable PHP execution in certain directories - Adds additional layer of security - Here's how to disable PHP execution via .htaccess.
And whatever you do, always keep your core, WordPress plugins and themes up to date!
Remember Google announced that it has added an algorithm change that affects hacked sites that do spam. So be sure to keep your site protected.
We hope this guide has helped you fix your compromised WordPress site. If you still have problems, consult a WordPress expert .
2 notes
·
View notes
Link
Get help for Plugin Installation, upload & uninstallation errors in your WordPress website. Call 8886061808 (US Toll free) to get urgent help for WordPress plugin issues.
#woocommerce installation failed#wordpress plugin install update failed#wordpress installation failed#destination file already exists wordpress#wordpress uninstall plugin hook#can't delete plugin wordpress#how to remove elementor from wordpress#delete wordpress plugin from cpanel#wordpress all plugins deactivated#how to activate wordpress plugin from cpanel#how to remove plugin from wordpress#uninstall wordpress plugin command line#Troubleshooting for wordpress plugin#wordpress plugin installation failed destination folder already exists
0 notes
Text
Protect my site from hosting
I am a freelance developer with over a decade’s experience in bespoke WordPress sites. I recently finished a small job on a freelance website for a client who basically wanted some minor updates and a blog post added. Easy to do, asked for access to the dashboard and hosting but only got access to the dashboard and although there are 18 updates (including WordPress itself) my client refused access to the hosting control panel.
I advised that I needed access to this to run a backup but again was refused. I did the best I could and my new client seemed happy with this and paid me the full amount on time. I rang the client out of courtesy and to explain that for me to be more effective in my job that I would need access to the hosting to run backups and then Update all the plugins, WordPress and generally optimize the site and make it more secure.
What follows is the most surreal telephone conversation I have ever experienced:
Client: Thank you for helping with my site. I am more than happy. I have settled your invoice in full. Please leave the updates as they will break my site and make it less secure.
Me: Are you sure as it’s insecure as it is? The updates include security patches which will make your site less vulnerable than it already is. It’s this reason why I need access to your hosting cpanel.
Client: No that’s ok, thank you for your help on my site, but we have been hacked loads of times over the past 2 years and was told by our friend who built our sites to never give out hosting info to anyone as it’s his. My husband wishes to talk with you about his website now….
Me: Ok….
Client’s Husband: Thank you for working on my wife’s site. Can you help with mine as well? I just need some info as I can do the job myself. I have been locked out of my site for over 3 years now. WordFence has permanently locked me out. I need you to protect my site from hosting.
Me: Have you filled out the form on the WordFence lock screen? This will unlock it for you by sending an email and you will be able to gain access to the admin area of the website.
Client’s Husband: That email does not exist anymore. My friend moved hosting 3 years back, He has told me never to give out hosting info to anyone which is why I am refusing access as we don’t want to be hacked again.
Me: …
I go onto explain that in order to gain full access of the website I WILL NEED full cpanel access and that I will have to delete WordFence itself and then I can reset it for him. That is the only way you can get full access.
Client’s Husband: No my friend told me never to delete WordFence as it’s protecting my site and that I should never give anyone hosting access EVER. I have done it before, I just need to change a line of code, do you know how to do this or not? What is the line of code?
Me: Yes, I know how to do it, But again I need access to hosting. As I deal with thousands of lines of code every day, I need to refresh my memory and I cannot see the code in front of me as I do not have access to your hosting.
Client’s Husband: Forget it, you clearly do not know what you are talking about and are a cowboy, you cannot tell me what line of code I need to change. I will have to figure it out myself, thanks for nothing.
Me: …..
I think that from memory all he has to do it whitelist his IP address. That’s usually the blocking mechanism in these security plugins
I send them both an email with links to my Facebook, Yelp, Google and Trustpilot reviews and a link to a blog post on how to gain access to WordPress by deleting WordFence. I guess his site is so well protected that even he cannot get access. I doubt I will hear of him again in the future.
778 notes
·
View notes
Text
WordPress Update Problems? Here’s How to Fix Them (No Tech Skills Needed)

Keeping your WordPress website up to date is critical for security, speed, and access to new features. But let’s face it—when an update fails, it can feel like the whole site is crashing down, especially if you don’t have a technical background.
Don’t panic.
Most WordPress update errors are easy to fix with a bit of guidance. In this beginner-friendly guide, we’ll break down why updates fail and what you can do to resolve them—no developer required.
🛑 Why Do WordPress Updates Fail?
WordPress runs on a system of interconnected parts: the core platform, themes, and plugins. If one of these components doesn’t align properly during an update, things can break.
Here are some of the most common causes:
📡 Poor internet connection that interrupts the update
🔌 Conflicts between plugins
🎨 Theme incompatibility
💾 Insufficient server memory or time limits
🔐 Incorrect file and folder permissions
🧩 Corrupted or incomplete update files
The first step toward fixing any problem is understanding where it’s coming from.
🛠️ How to Fix WordPress Update Errors (Step by Step)
✅ 1. Back Up Your Site First
Before trying anything, create a full backup of your website using a plugin like UpdraftPlus or BackupBuddy. This gives you a safety net in case something goes wrong during the troubleshooting process.
✅ 2. Clear Your Cache (It Might Be That Simple)
Sometimes, your browser or caching plugin is the culprit—not the update itself.
Clear your browser cache (Ctrl+Shift+R or Command+Shift+R on most browsers)
If you use a caching plugin (like WP Super Cache or W3 Total Cache), clear your site cache too
Now try updating WordPress again.
✅ 3. Use Troubleshooting Mode to Find Plugin Conflicts
Conflicting plugins are a frequent reason for failed updates.
You can use the Health Check & Troubleshooting plugin to safely test your site:
Install and activate the plugin
Enable troubleshooting mode—this disables all plugins temporarily (just for you)
Try updating again
If it works, re-enable plugins one by one until the error returns
That last plugin activated is your likely culprit.
✅ 4. Check Your Hosting Settings
Shared hosting plans often limit memory and execution time, which can stop updates mid-process.
Ask your host:
What’s the PHP memory limit? (It should be at least 256MB)
What’s the maximum execution time? (Aim for 300 seconds)
Can they increase these limits for better stability?
Sometimes, simply switching to a better hosting plan solves everything.
✅ 5. Try a Manual WordPress Update
If automatic updates aren’t working, a manual update might do the trick.
Here’s a simple guide:
Download the latest WordPress version from WordPress.org
Unzip the files on your computer
Use FTP software like FileZilla to connect to your website
Replace the wp-admin and wp-includes folders with the new ones
Do not touch the wp-content folder (it holds your themes and plugins)
Open your site—if needed, it will ask to update the database. Just click the button
Done right, this is a safe and effective fix.
✅ 6. Adjust File Permissions (If You’re Getting Permission Errors)
WordPress needs the correct file permissions to update itself.
Use a plugin like WP File Manager or ask your hosting provider to set:
Folders to 755
Files to 644
These permissions allow WordPress to work smoothly without opening security risks.
✅ 7. Stuck in Maintenance Mode? Here’s How to Exit
Sometimes an update gets interrupted, leaving your site stuck in maintenance mode with this message:
“Briefly unavailable for scheduled maintenance. Check back in a minute.”
To fix this:
Log into your hosting account (e.g., cPanel or via FTP)
Go to the root folder of your WordPress site
Delete the file named .maintenance
Refresh your site—it should return to normal
This is one of the easiest fixes on the list.
💬 When You Should Call in the Experts
If you’ve tried everything and the update still won’t work—or if you're unsure about any step—it’s perfectly okay to ask for help.
Here’s who you can turn to:
Your web hosting support team
A WordPress specialist
Or a reliable web development company like Websenor
✅ Final Thoughts: Keep WordPress Simple with Websenor
WordPress update errors can seem intimidating, but most are fixable with a calm, step-by-step approach—even if you're not a tech expert. The key is to:
Back up first
Rule out the simple causes
Test safely before changing live settings
Know when to ask for help
If managing updates or troubleshooting problems ever feels like too much, Websenor is here to take the weight off your shoulders. Our team specializes in WordPress maintenance, bug fixing, and website performance tuning—so you can focus on growing your brand while we handle the backend.
Let Websenor be your WordPress safety net. With us, your website stays secure, updated, and stress-free.
0 notes
Text
Remove sample page wordpress

#REMOVE SAMPLE PAGE WORDPRESS HOW TO#
#REMOVE SAMPLE PAGE WORDPRESS UPDATE#
#REMOVE SAMPLE PAGE WORDPRESS FULL#
If you don’t know your database name, go to cPanel > File Manager > public_html. Alternatively, you can click on Databases on the right panel at the top of the screen, and select your database. Click on your database to expand its contents. Step 2: In the left column, you’ll see database names. Step 1: Log into your web hosting account. Ensure you’ve backed up your files and database, then we can proceed.
#REMOVE SAMPLE PAGE WORDPRESS FULL#
We caution you to first take a full backup of your WordPress site. This method requires some amount of technical expertise as you need to go into your WordPress database to fetch the content. You can then use the content to create a new page or post. Using this method, you won’t be able to recover your deleted pages and posts in WordPress, however, you can retrieve their content. Check Your Database For Deleted Pages And Posts If you aren’t, we recommend taking a full backup of your website in its present state before you proceed to restore your backup copy.Ģ. If you’re using BlogVault, you can use the in-built test restore function. If you revert to an old backup copy, chances are you’ll lose the more recent updates to your site. This includes the deleted posts and pages as well as the new ones you’ve recently added to your site. Important: Before you restore your backup, you need to test the backup copy to ensure it has all the content you want.
#REMOVE SAMPLE PAGE WORDPRESS HOW TO#
We’ll show you how to restore your backup using three methods: If you haven’t taken a backup copy with a backup plugin like BlogVault, you can try contacting your web host or using cPanel. If you’ve used a backup service like BlogVault, you can easily restore your backup with a few clicks. The easiest way to recover deleted pages or blog posts in WordPress is to restore your website’s backup. Recover Deleted Pages or Posts from Backup in WordPress
Restore Deleted Pages or Post from backup in WordPressġ.
You can try a few other methods to get your pages or posts back: If you find yourself in these situations, there is no way to recover permanently deleted pages or posts from the WP admin panel.
#REMOVE SAMPLE PAGE WORDPRESS UPDATE#
A random glitch during an update or modification on your website causes a few posts to disappear.
Hackers access your site and delete pages or posts.
A user deletes the main administrator account which leads to the deletion of pages or posts created under the admin username.
A user selects the posts and chooses to ‘Delete Permanently’.
Some of the common situations that lead to this are: You may find yourself in a situation where your pages or posts have been permanently deleted and aren’t in the Trash folder. How To Restore Permanently Deleted Pages Or Posts In WordPress Restoring deleted pages or posts in WordPress will not be possible using this option. Or, it has been more than 30 days since you deleted it or you’ve chosen to permanently delete those pages. Note: If you don’t see the Trash option on your dashboard, it means there are no deleted pages or posts stored on your site. Your page or post is now restored to normal. Go back to Pages or Posts, it will appear here.
Select Restore and the page will disappear from the list of items in the Trash folder.
Select the page you want to restore, and two options will appear under it – Restore and Delete Permanently.
Click on Trash and you’ll be redirected to all your deleted pages and posts.
Log into your WordPress admin panel and go to Pages or Posts (Depending on which one you want to restore).
Here are the steps for restoring a deleted page from trash: So you can recover deleted pages or posts from the trash in WordPress easily, but you have to do it within 30 days. Any page or post you delete will stay inside the trash folder for 30 days. WordPress sends it to a folder called Trash. When you delete a page or post, it isn’t wiped out from your website immediately. If you’ve deleted a post or page and a few hours or days have gone by, you’ll need to follow a different route to restore it. Simply click on this button and your post or page will be restored.
0 notes
Text
How to Backup WordPress Website From cPanel
How to Backup WordPress Website From cPanel To backup your WordPress website, you need to have the right tools. There are several programs available, including phpMyAdmin, BackupBuddy, and Adminer. All of these programs will let you back up and reinstall your website. If you're looking for a simpler way, you can just use a file manager like Dropbox or Google Drive. Using an FTP client, you can export and import your files. phpMyAdmin To make a backup of your WordPress website, you will need access to cPanel. This is the control panel that is provided with your web hosting plan. This is where you will find all of the tools that are needed to manage your website's MySQL database. Once you've logged in to cPanel, you will want to navigate through it to the phpMyAdmin section. This will allow you to make manual backups and even change passwords. To backup your WordPress website, you'll need to access your control panel's phpMyAdmin interface. From there, navigate to the Databases tab. Here, you'll want to select the file that you'd like to backup. Once you've selected the file, wait for it to import the database. The process will take some time, depending on a variety of variables. Backups of your WordPress website will be stored in the backup folder. This folder can be found in the wp-content folder or the wp-config file. You can then extract these backup files from their location in a zip or GZIP file. Then, you can upload them to a Dropbox account or a Google Drive account. Remember to make multiple backups so that you never lose any important information. UpdraftPlus If you want to back up your WordPress website on a regular basis, you should install the UpdraftPlus backup plugin. It will enable you to schedule automatic backups and select a remote location where your backups will be stored. It also allows you to create a backup schedule based on when you plan to make changes to your site. To create a backup, visit the UpdraftPlus settings page and click the Backups tab. You will see several options including the ability to back up your entire database or specific parts of your website, such as the theme and plugin files. After you have selected your backup type, click the "Backup Now" button. The next screen will show you the progress of the backup. The backup may take some time, depending on the size of your website. Once the process is complete, your files and database will be backed up offsite. Once you have chosen the backup location, you can set a backup schedule for the files and database. You should choose a backup schedule that matches the frequency of changes to your website. You can also choose to send backup files to an email address. This can be a great way to keep your website safe while you are not in front of your computer. BackupBuddy BackupBuddy is a great service that creates automatic backups for WordPress websites. It stores backups to remote cloud storage, and offers various backup types. You can choose to download individual files or your entire site, and backups can be stored in the cloud or on your computer. It also supports site migration, so you can restore your site without losing anything. You can backup your entire WordPress website with BackupBuddy, and it's easy to restore it if anything goes wrong. You can customize your backups to back up specific categories or posts, and set up automatic backups. It's easy to use, and even more important, it's free. BackupBuddy also includes security features. It scans your backup files for viruses and malware. You can also back up your website for as long as you like. You can even schedule your backups to run on a regular basis. BackupBuddy has more than half a million websites that trust it with their data. Adminer To backup your WordPress website, you can use cPanel. This control panel is available on many web hosts. However, the backup process for this panel is quite complex. First, you must download a ZIP file of your backup. Next, you must delete your server copy of the backup. Finally, you can copy the backup file into a new text file. In cPanel, there is an option called Backup that allows you to create a partial backup. This backup can be for a single directory, the MySQL database, or email accounts. However, full backups can't be restored via cPanel and must be downloaded and stored on your computer or a third-party cloud platform. Another option is to backup the database manually. This method is free, but requires considerable time and attention. You need to secure the files with passwords and encryption, and you need to periodically delete old backup files. Additionally, the backups should contain the database of your website. How to Backup WordPress Website From cPanel Read the full article
0 notes
Text
Click Here To Watch Full Tutorial
🔥🔥🔥🔥🔥🔥🔥🔥🔥🔥🔥🔥
Create a free Logo for Business or for a Website | Create a Logo for 100% free | Logo like pro | Hindi
Sometimes it may happen that after updating the WordPress website or after updating plugins website shows an error that is "Briefly unavailable for scheduled maintenance. Check back in a minute". this is a very common error and no need to worry about this.
In this video, we are going to learn how to resolve this error step by step step:1: Login to cPanel of the Website Step:2: Open file manager from cPanel Step:3: you have to find the ".maintenance " file and download it. Step:4: select the ".maintenance " file and delete it.
#ScheduledMaintenance, #WordPress, #ErrorInWordPressWebsite, #RemoveMaintenance, #MrCoding, #MrCoding33
#Scheduled Maintenance#WordPress#Error In WordPress Website#Remove Maintenance#Mr Coding#Mr Coding33
0 notes
Text
3 Common WordPress Bug Fixing- You Should Read
When you use WordPress you probably face different types of wordpress bug fixing error issues. And it is quite normal for all WordPress users to face error issues on their website. So, you do not need to be upset. Among these bugs, you can identify some problems and some are really difficult to find out.
In this situation, you have to get enough knowledge about WordPress bugs and fixing ability. So today we are going to have an extensive discussion about three common WordPress bug fixing which may help you to solve your WordPress critical facts.
Have a careful read before correcting your WordPress fault-
WordPress Bug Fixing
There are so many WordPress bugs. In the below, we refer to three common issues and solutions, which will help you to solve your WordPress bugs.
1. Internal Server Error In WordPress:
Our first topic is- how to fix internal server errors? This is a misty issue of WordPress. This problem is something like that- you have gone to the hospital and said to the doctor to rescue your pain. But you do not say where you are in pain. Like that, your server does not identify where the error occurred and also you can not understand where caused this problem by any error message.
Solution:
So, today we will solve this problem in four ways and describe them in a super easy process.
Corrupt. htaccess file.
Increasing PHP memory limit.
Deactivated all plugins.
Re-uploading core files.
Corrupt. htaccess file:
For this, first of all, you need to go to the website domain cPanel. After that go to the file manager, then enter where the WordPress is installed. Here you should find the .htaccess file. Now you need to rename this file to add underscore _ old. After that go to your website and reload it. Then check that, is the error finished or exist? Also, you can be making a new .htaccess file.
If your problem does not solve then, you can apply the next step to debug your error. Go to your dashboard with a little effort! Then go to the setting and enter the permalink. After arriving at the permalink, click on the post name option and then save it. Then reload your website once again. Then your problem will be solved magically!
Increase Your PHP Memory Limit:
If you do not settle your WordPress bug then can apply our second method the PHP memory limit increasing. For this process, you need to go to the cPanel once again. Then go to the wp-admin file. Here we are going to create a new file and name it php. ini. Then enter the file and edit through writing (memory_limit=128 MB) and save the file. After saving, visit your website to confirm that, is it fixed or not?
Deactivated All Plugins:
Our third method to fix internal server errors is to deactivate all plugins. If the second option does not work to solve your WordPress internal server error, then you need to use our third step to debug it.
So first we will go to the dashboard, then enter the plugin option. Going to the plugin option deactivates all plugins from your WordPress. Then go to your website and check it.
Re- Uploading Core Files:
The fourth option to fixing internal bugs is re- updating core files. For this step, you need to re-upload two core files like wp-admin and wp-includes.
You can go to google to upload these files and search for the WordPress download option. Then download the new WordPress default version. Afterward, you can update wp-admin and wp- include from default and delete the previous two files from cPanel. This updating process can solve internal WordPress bugs.
Note:
If those methods don’t fix your problem you must contact your hosting provider or contact us.
2. Syntax Error Fixing:
This is the most common problem for all WordPress users. But don’t be scared because we will give you clear instructions to fix this issue. Why does syntax error occur? When you write incorrect code like punctuation, phrase or spelling then the error happens.
For this error, you will get a notification from PHP. There you can find out, where did you make the mistake? To solve this problem you need to write the correct syntax.
Solution:
First of all, you should use the cPanel to fix this problem, because you can’t enter the login panel or function. PHP file. You can also fix it by using FTP. But today we are showing you the process through cPanel.
So, all you need to do is enter the cPanel, then select file manager and go, where WordPress is installed. Then enter the wp-content file and select the theme option. Then go to your 2021 theme to edit your function dot PHP file and fix errors.
After editing, according to the image, find out the 230 number line where you made a mistake. Then correct the issues and update the file. After reloading your site, your syntax error will be solved. Now you can go easy on your function page or wp-login panel.
3. WordPress Mixed Content Error:
This is another important bug in WordPress that you may face. For the setting of HTTPS or SSL, this error happens. In this situation your website will not be ranked perfectly on the google search engine, also your functionality will not work exactly. How do you know that your website has mixed content errors? Normally go to your website and click on the inspect bar then go to the console. Here you can see the error.
The main domain is HTTPS but in the image, you can see the ‘S’ is missing. For this issue here occurred the mixed content error.
Solution:
You need to go to the website dashboard to solve this problem. Now select the setting option then go to the WordPress address URL and site address URL. After that edit the HTTPS from both URLs and save it.Then you need to log in again. You have to do another task. Go to the cPanel then file manager and domain. Then edit the htaccess file to insert this code-
Now reload your website and you can see the mixed content error vanishes smoothly!
Once again we want to say that, don’t do this by yourself if you don’t have sufficient confidence to fix errors. Even though you failed to fix the crisis then you must contact your website hosting support team. They will solve them.
So, if your website will fall among these three problems, we hope that our article helps you to figure out and fix the issue effortlessly. Because we have discussed the WordPress bug fixing in such a simple way. Which helps you to learn and fix the troubles.
Meta: We have talked over internal server, syntax and mixed content WordPress bug fixing issues in our article. Which will help the readers to solve errors easily.
0 notes
Text
How to Get Rid of Malware from Your WordPress Site

Security is essential while operating and administering a website.
Hackers frequently target people's websites from all over the internet, and some use malware to do it.
This is the blog for you if you've been seeking a tutorial to remove spyware from your website.
We'll go through six measures you can take to maintain your WordPress site clean and malware-free.
Step 1: Back up your WordPress site and database.
To begin, you should always back up your WordPress site before cleaning it up.
This is done to guarantee that if something goes wrong while resetting settings, themes, or plugins during the cleanup process, you will have a backup to assist you to restore your website quickly.
Having a robust backup procedure in place is essential since it will help you remember to take frequent site backups regularly.
This ensures that if malware or another security assault occurs, you can always roll back to the backup copy, saving you time and money.
Backup plugins for WordPress include JetPack Backups, BackupBuddy, and UpdraftPlus.
Here are a few recommended readings to help you with the WordPress backup process:
Creating a backup of your WordPress site
How to Use Jetpack to Manage WordPress Backups
How to Use cPanel to Manage Backups
Installing and configuring the UpdraftPlus plugin
How to Upload a Softaculous-Installed Application to Google Drive
Step 2: Scan your WordPress site and database.
Following that, you should perform a comprehensive scan of all the files on your site.
This will assist you in determining which of your files are contaminated, as in certain circumstances, this process may not necessitate a complete site eradication.
Use WordPress Plugins to check your site for malware if you are the administrator or have backend access to it.
To discover how to run virus or malware detection on your WordPress site, read the following articles:
How to Scan Websites for Malware Using Immunity
How to Use cPanel's Virus Scanner
How to Use Patchman to Get Free Vulnerability and Malware Scanners
Sucuri Site check may also be used to search your WordPress site for malware.
Step 3: Remove or fix the infected WordPress files and database.
Once you've identified the infected files, delete them via Filezilla, FTP, or a cPanel file management or editor.
To remove the viruses from the WordPress database, use PHPMyAdmin.
Read on for step-by-step instruction on how to delete dangerous files following a site hack: How to Repair and Secure a Hacked Site.
Step 4: Close the vulnerability.
Next, examine all pertinent PHP files for backdoor entry points.
Some of the PHP functions typically utilized by hackers can be found in theme files, plugin folders, or other directories:
base64
eval
preg_replace (with /e/)
exec
str_rot13
stripslashes
gzuncompress
system
move_uploaded_file
assert
Conclusion
So those are the procedures for removing malware from your WordPress site.
Although there are just a few steps to removing malware, it can be a daunting undertaking if you are also attempting to run your business and deal with spyware. You may contact us for the finest digital marketing service since we are the best digital marketing agency in Bangalore.
#How to Get Rid of Malware from Your WordPress Site#Digital Marketing Tips#Digital Marketing Strategy
0 notes