#dynamics nav tools preview
Explore tagged Tumblr posts
Visit Tumblr Blog
Explore Tumblr blogs with no restrictions, modern design and the best experience.
Last Seen Tumblr Blogs


Fun Fact
Average visit duration of Tumblr.com is 10 mins and 25 secs.
Text
Elevate Your Model Railroading with Advanced Model Train Layout Software
Model train enthusiasts can take their hobby to new heights with the latest model train layout software. This specialized software provides powerful tools for designing, planning, and visualizing intricate model railroads. Whether you’re a seasoned modeler or a beginner, model train layout software allows you to create detailed layouts with precision and ease. You can plan every aspect of your train layout, from track placement and scenery to lighting and electrical systems. Advanced features often include 3D visualization, which lets you see your layout from different angles before starting construction. This software not only simplifies the design process but also helps in optimizing space and resources, ensuring that your model train setup is both functional and aesthetically pleasing. By leveraging the capabilities of model train layout software, you can bring your railroad dreams to life with greater accuracy and creativity.
Features of Model Train Layout Software
Model train layout software offers a range of features designed to enhance your modeling experience. Key features include drag-and-drop functionality for easy track arrangement, customizable scenery options, and detailed component libraries. Advanced software may also include 3D visualization tools, allowing you to preview your layout from multiple perspectives before physical construction. These features help streamline the design process, ensuring that every detail of your model railroad is precisely planned.
Benefits of Using Model Train Layout Software
Using model train layout software provides several benefits, including improved accuracy in design and efficient use of space. The software allows for detailed planning of track layouts, scenery, and electrical systems, helping to avoid costly mistakes. It also enables you to experiment with different configurations and visualizations, ensuring that your final model railroad meets your expectations. Overall, this software enhances the planning process, making it easier to create a functional and visually appealing model railroad.
How to Choose the Right Model Train Layout Software?
Selecting the right model train layout software depends on several factors, including your skill level, budget, and specific needs. Look for software that offers features relevant to your modeling projects, such as 3D visualization, ease of use, and comprehensive libraries. Reading user reviews and trying out demo versions can also help determine which software best suits your requirements. By evaluating these aspects, you can choose the software that will effectively support your model railroading goals.
Getting Started with Model Train Layout Software
Getting started with model train layout software involves installing the program and familiarizing yourself with its interface. Begin by exploring the software’s tutorials and documentation to understand its features and functions. Start designing simple layouts to gain confidence before tackling more complex projects. Utilizing the software’s tools for track planning, scenery design, and component arrangement will help you build a solid foundation for creating detailed and accurate model railroads.
Enhancing Your Layout with Model Train Layout Software
Model train layout software allows you to enhance your layout by incorporating detailed features and realistic elements. Use the software to add intricate scenery, functional lighting, and dynamic electrical systems. The ability to visualize and adjust these elements before construction ensures that your model railroad is not only aesthetically pleasing but also operationally efficient. Leveraging the software’s capabilities can elevate the quality and realism of your model train setup.
Troubleshooting Common Issues with Model Train Layout Software
Common issues with model train layout software include compatibility problems, software crashes, and difficulty navigating features. To address these issues, ensure your computer meets the software’s system requirements and check for software updates or patches. Consult the user manual or online forums for troubleshooting tips and solutions. If problems persist, reaching out to customer support or seeking assistance from the software’s community can help resolve issues effectively.
Advanced Techniques for Model Train Layout Software
Advanced techniques for using model train layout software include creating complex track arrangements, incorporating automated features, and using advanced scenery options. Experiment with layering techniques for more realistic landscapes and utilize the software’s advanced tools to simulate operational elements like train movements and signal systems. Mastering these techniques will allow you to create highly detailed and functional model railroads that showcase your skills and creativity.
Conclusion
Model train layout software is an invaluable tool for both novice and experienced hobbyists, offering advanced features that significantly enhance the design and planning process. By providing detailed track planning, realistic scenery options, and 3D visualization, this software allows you to create intricate and visually appealing model railroads with precision. The ability to experiment with different layouts and components before physical construction helps avoid costly mistakes and ensures that your final design meets your expectations. As technology continues to advance, model train layout software is evolving to include even more sophisticated tools and integrations, such as virtual and augmented reality. These innovations promise to offer more immersive and interactive experiences, further enhancing the model railroading hobby. By leveraging these advancements, you can achieve greater accuracy and creativity in your model railroad projects.
0 notes
Text
Did You Get A Preview Of The New Dynamics NAV Development Tools?
Microsoft has introduced New NAV Development Tools. These help build extensions and apps in and for Microsoft Dynamics NAV.
The first one is the In-Client Designer with an appropriate screenshot given below.

This development tool in Microsoft Dynamics Navision helps make an extension in the client itself. Business consultants and UX designers will have the time of their lives working on this drag and drop interface. They will be enabled to rearrange fields, rename groups and reposition elements. All this, in order to build the ideal extension which supports an industry-specific solution and does its bit to endorse business process optimization.
The other one is Visual Studio Code. A snapshot of the same, has again been given below:
Visual Studio Code

This development tool in the premier ERP Software for Small Business enterprises facilitates use of the AL Extension, which helps build powerful extensions based on tables, pages and code units with the help of new objects such as Page Extensions and Table Extensions. End users get to build rich extensions which can be reused. They also get to extend core business logic in their applications.
Both of these tools in the premier enterprise resource planning solution for small business enterprises are available in Azure VM. Hence, there is a need to create a New VM in Azure. Microsoft has already created a deployment template for end users, a snapshot of which has been given below. As it happens, once that deployment template has been created, the blanks have to be simply filled up and after that VM will automatically be deployed.
The entire process has been bifurcated in steps.
1. Create Azure Subscription: In case the end user does not have an Azure account, then a free account can be tried out. A new free subscription can be created on https://azure.microsoft.com/free/.

2. Deploy Azure VM: All that the end user has to do is click on the below link, which will redirect him/her to the custom development template on Azure. Doing this will prompt the end user to enter his Azure Subscription login credentials. The link would be http://aka.ms/navdeveloperpreview.
The moment the deployment process is complete, it will halt for 10-15 minutes before the Virtual Machine is initialized and VS Code gets installed and configured.
Connecting to the Virtual Machine: The Virtual Machine has to be selected (Server 1), a screenshot of which has been shown below and the screen below it shows that the next thing to do is simply click on “Connect”. The moment this gets done, the download of the “Remote Desktop Connection” begins.
The “vmadmin” password has to be entered to connect to the Virtual Machine.

Once this has been done, then the desktop icons visible below will help you to open the Web Client of Microsoft Dynamics NAV and also that of Visual Studio Code.

This was all about the new NAV Development Tools and the usage they have to offer and the manner in which they are to be used.
#nav development tools#nav development tools preview#dynamics nav tools preview#dynamics nav development tools
0 notes
Text
Unveiling the Purpose and Power of HTML Tags

When it comes to web development, HTML tags play a pivotal role in shaping the structure and content of web pages. These tags act as powerful building blocks that define the purpose and behavior of various elements within a webpage. In this blog, we will explore why HTML tags are used and their significance in the realm of web development.
The Purpose of HTML Tags:
Structure and Organization:
HTML tags provide the framework for structuring and organizing the content of a webpage. Tags like <header>, <nav>, <section>, <article>, and <footer> help create a logical hierarchy and improve the overall readability and accessibility of the page.
Content Presentation:
HTML tags determine how content is presented and displayed on a webpage. Tags such as <h1> to <h6> define different levels of headings, <p> denotes paragraphs, <ul> and <ol> establish unordered and ordered lists, while <img> embeds images. These tags contribute to the visual layout and enhance the user experience.
Hyperlinks and Navigation:
HTML tags like <a> enable the creation of hyperlinks, allowing users to navigate between web pages or external resources. These tags provide the essential functionality for seamless navigation within websites.
Form Input and Interaction:
HTML tags such as <input>, <select>, <textarea>, and <button> enable the creation of interactive forms, allowing users to input data, make selections, and submit information. These tags are crucial for user engagement and interaction.
Significance of HTML Tags:
Standardization:
HTML tags provide a standardized and consistent way to define elements and their behavior across different web browsers and platforms. This ensures that web pages render consistently and are accessible to users worldwide.
Compatibility:
HTML tags are universally supported by web browsers, making them a reliable and cross-platform solution for building web pages. This compatibility ensures that websites can reach a broad audience without any compatibility issues.
Extensibility:
HTML tags can be extended and customized through the use of attributes and additional markup languages such as CSS (Cascading Style Sheets) and JavaScript. This allows developers to enhance the functionality and visual presentation of web pages.
Conclusion:
HTML tags are the backbone of web development, serving a crucial purpose in shaping the structure, presentation, and interactivity of web pages. They provide a standardized and cross-platform solution for organizing content, creating hyperlinks, and enabling user interaction. HTML tags empower developers to create visually appealing and engaging websites that cater to the needs of users.
In the journey of web development, online html compiler have emerged as valuable tools. These platforms offer a convenient and interactive environment for writing, testing, and refining HTML code. With an online compiler for html, developers can experiment with different tags, preview real-time changes, and ensure the correctness and efficiency of their code.
Whether you are a novice exploring the world of web development or an experienced developer seeking efficiency and productivity, utilizing an html compiler online can significantly enhance your workflow. These tools provide an accessible and user-friendly platform to learn, practice, and refine HTML skills.
So, embrace the power of HTML tags, leverage their versatility to structure content, create dynamic interactions, and enhance user experiences. Combine your HTML knowledge with the convenience of an online html editor to unlock your full potential as a web developer. Start building stunning web pages that leave a lasting impression on visitors.
0 notes
Text
Mac App Sale

New
The QuickBooks App provides you the power of QuickBooks Online with the speed and ease you expect on your desktop! Here's a quick guide to installing and using QuickBooks App for Windows and Mac. What can I do with the QuickBooks App for QBO? The QuickBooks app lets you speed through common tasks an.
Once, the iTunes 12.6.3 downloaded on your Mac, click on Install iTunes.pkg. Follow on-screen instructions. How to get the App Store back into iTunes. Once you have downloaded the iTunes 12.6.3, you can access App Store, apps, or Tones in the same way as before. Launch iTunes and select the pulldown menu located at the top left corner.
MacBook Air

New
13-inch modelMacBook Pro
New
Have you got what it takes to become the manager of a high-performance motorsport team? Motorsport Manager is a highly detailed, best-in-class management game for fans of motorsport. You’ll hire the drivers, build the cars and embed yourself in the dynamic world of racing.
Mac mini
Which Mac notebook is right for you?

13.3” Retina display1
Apple M1 chip
Up to 16GB memory
Up to 2TB storage2
Up to 18 hours battery life3
13.3” Retina display1
Apple M1 chip Also available with Intel Core i5 or i7 processor
Up to 16GB memory4
Up to 2TB storage4
Up to 20 hours battery life5
16” Retina display1
Intel Core i7 or i9 processor
Up to 64GB memory
Up to 8TB storage2
Up to 11 hours battery life6
Apple Trade In
Turn the Mac you have into the one you want.
Just trade in your eligible computer for credit or recycle it for free. It’s good for you and the planet.7

Free, contactless delivery
And free returns. See checkout for delivery dates.
Learn more
Get help buying
Have a question? Call a Specialist or chat online. Call 1800 92 38 98.
Chat now
macOS Big Sur
Doing it all, in all-new ways.
iCloud
Store it all. Access it anywhere.
Built-in Apps
Powerful creativity and productivity tools live inside every Mac — apps that help you explore, connect and work more efficiently.
Safari has innovative features that let you enjoy more of the web. In even more ways. Built-in privacy features help protect your information and keep your Mac secure. An updated start page helps you easily and quickly save, find and share your favourite sites. And Siri suggestions indicate bookmarks, links from your reading list, iCloud Tabs, links you receive in Messages and more.
Keep your growing library organised and accessible. Perfect your images and create beautiful gifts for sharing. And with iCloud Photos, you can store a lifetime’s worth of photos and videos in the cloud.
Tell stories like never before. A simple design and intuitive editing features make it easy to create beautiful 4K movies and Hollywood-style trailers. Microsoft windows 10 download usb.
The easiest way to create great-sounding songs on your Mac. With an intuitive interface and access to a complete sound library, it’s never been easier to learn, play, record and share music like a pro.
This powerful word processor gives you everything you need to create documents that look beautiful. And read beautifully. It lets you work seamlessly across Mac, iOS and iPadOS devices. And work effortlessly with people who use Microsoft Word.
Create sophisticated spreadsheets with dramatic interactive charts, tables and images that paint a revealing picture of your data. Work seamlessly across Mac, iOS and iPadOS devices. And work effortlessly with people who use Microsoft Excel.
Mac App Sale
Bring your ideas to life with beautiful presentations. Employ powerful tools and dazzling effects that keep your audience engaged. Work seamlessly across Mac, iOS and iPadOS devices. And work effortlessly with people who use Microsoft PowerPoint.
Pro Apps
For professionals ready to push their creativity, these industry-leading apps offer maximum control over editing, processing and output of music and film.
Logic Pro puts a complete recording and MIDI production studio on your Mac, with everything you need to write, record, edit and mix like never before. And with a huge collection of fully featured plug-ins along with thousands of sounds and loops, you’ll have everything you need to go from first inspiration to final master, no matter what kind of music you want to create.
Mac App Sensei
Take your Mac to the stage with a full-screen interface optimised for live performance, flexible hardware control, and a massive collection of plug-ins and sounds that are fully compatible with Logic Pro.
Built to meet the needs of today’s creative editors, Final Cut Pro offers revolutionary video editing, powerful media organisation and incredible performance, optimised for Mac computers and macOS Big Sur.
Motion is a powerful motion graphics tool that makes it easy to create cinematic 2D and 3D titles, fluid transitions and realistic effects in real time.
Add power and flexibility for exporting projects from Final Cut Pro. Customise output settings, work faster with distributed encoding, and easily package your film for the iTunes Store.
Global Nav Open Menu Global Nav Close Menu; Apple; Shopping Bag +. Powered by the WebKit engine, Safari offers leading performance, compatibility, and a great set of built-in web development tools. Download Safari Technology Preview. Safari for Mac has a condensed and minimalistic interface that offers mac users faster, private browsing with fewer interruptions and extended battery life. When you download Safari for Mac you will get enhanced protection against invasive malicious software and customizable private browsing options to protect your information. Safari 12 download for mac.
The Mac App Store features rich editorial content and great apps for Mac. Explore the Mac App Store
Apple One
Bundle four Apple services. And enjoy more for less.
Try it free8

Apple TV Plus
Get one year of Apple TV+ free when you buy a Mac.
Try it free9
Apple Arcade
Paprika Mac App Sale
Get three months of Apple Arcade free when you buy a Mac.
Try it free10
Mac Salesforce App
Apple and Education
Empowering educators and students to move the world forward.
Mac for Business
Get the power to take your business to the next level.
Upgrade to start your free trial.
0 notes
Text
Create A Responsive Dashboard With Angular Material And ng2-Charts
Create A Responsive Dashboard With Angular Material And ng2-Charts
Zara Cooper
2020-07-27T10:00:00+00:002020-07-27T11:33:48+00:00
Creating a dashboard from scratch is often pretty complicated. You have to create tools to collect data on items of interest. Once collected this data has to be presented in an easy to understand and meaningful way to your users. It involves intricate planning of what data to include and how to display it effectively. Once you have a plan, implementing the design is a massive task especially since it involves building multiple components.
With Angular Material and ng2-charts, you can take advantage of schematics to cut down the effort and time you may spend building a dashboard. Angular Material ships with a number of schematics that you could use to generate a dashboard. Similarly, ng2-charts provides schematics for generating multiple chart components. In this article, I’ll illustrate how to use both ng2-charts and Angular Material to set up a dashboard fairly quickly.
An Example
To illustrate how to build a dashboard, we’ll take the example of an online store selling leather goods like bags, wallets, key holders, and so on. The store owner would like to track information such as where customers come from to their online store, how their products sell, how traffic sources relate to sales, among other things.
We’ll build a dashboard to display this information and help the store owner analyze it. The dashboard will contain four small summary cards, four different kinds of charts, and a table listing most recent orders made. The four summary cards will display information such as total revenue from sales, average order value, the total number of orders, and number of returning customers. The charts will display the number of units sold for each product, sales by traffic source, online store sessions over time, and sales for the week.
Prerequisites
To follow along, you’ll need to have Angular CLI installed. If you do not have it installed, you can find out how to get it at cli.angular.io. If you’re not starting from a pre-existing Angular project, you need to generate one by running ng new <your project name>. For instance, to create an admin panel for the aforementioned store, we’ll run:
ng new store-admin-panel
Your project also needs to have routes configured for it. If you’re starting from a new app, select yes when prompted on whether to add an Angular Routing module during your project setup above.
Add Angular Material And Ng2-Charts To Your Project
Angular Material ships with various schematics for generating a variety of useful components like address books, trees, tables, navigation, and so on. To add Angular Material to your project, run:
ng add @angular/material
Pick a theme from the options provided in subsequent prompts. Next, you’ll be prompted to choose whether to add Angular Material typography styles and browser animations. You do not need these and could just respond no.
Next, you’ll need to install ng2-charts. ng2-charts requires charts.js as a dependency. To install ng2-charts run:
npm install ng2-charts --save
Then install charts.js:
npm install chart.js --save
To access the charts, add the ChartsModule to the AppModule’s imports.
import { ChartsModule } from 'ng2-charts'; @NgModule({ imports: [ … ChartsModule, … ] })
Lastly, install ng2-charts schematics as a dev dependency because they do not ship with ng2-charts by default.
npm install --save-dev ng2-charts-schematics
Generating A Navigation Component
First off, we’ll need to add a navigation component to help users maneuver through the app comfortably. The navigation should contain links to the dashboard and other pages that will be part of the admin panel. Angular material provides a schematic that generates a navigation component. We’ll name this component nav. Adding a side nav to the application is accomplished by running:
ng generate @angular/material:navigation nav
To link other routes in the navigation, use the routerLink directive and change the page name in the toolbar depending on what route a user is on.
// nav.component.ts ... menuItems = ['dashboard', ’sales', 'orders', 'customers', 'products'];
<!--nav.component.html--> ... <mat-nav-list> <a *ngFor="let item of menuItems" mat-list-item [routerLink]="'/'+item"> </a> ...
To see this component, add it to app.component.html.
<!--app.component.html--> <app-nav></app-nav>
This is what the NavComponent looks like.
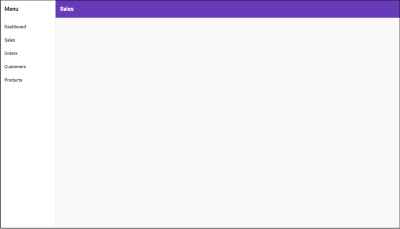
Navigation component (Large preview)
Since the nav will be displayed alongside other components, adding a router-outlet to it would help switch between the other different components. In the nav.component.html template, just after the closing </mat-toolbar>, replace the <!-- Add Content Here --> comment with <router-outlet></router-outlet>.
<!--nav.component.html--> <mat-sidenav-container> ... <mat-sidenav-content> <mat-toolbar> ... </mat-toolbar> <router-outlet></router-outlet> </mat-sidenav-content> </mat-sidenav-container>
In the screenshots that follow in this article, this nav component will be omitted to better highlight the dashboard we’ll be generating for the sake of the tutorial. If you’re following along while building this dashboard, the nav will still appear as pictured above in your browser with the dashboard within it.
Generate The Dashboard
The most important part of the dashboard is its layout. It needs to hold all the components mentioned earlier and be responsive when displayed on different devices. To generate the dashboard layout, you’ll need to run the @angular/material:dashboard schematic. It will generate a responsive dashboard component. Pass the preferred name for your dashboard to the schematic. In this instance, let’s name it dash.
ng generate @angular/material:dashboard dash
To view the newly generated dashboard within the nav component, add a route for it to the router.
// app-routing.module.ts import { DashComponent } from './dash/dash.component'; const routes: Routes = [{ path: 'dashboard', component: DashComponent }]; @NgModule({ imports: [RouterModule.forRoot(routes)], exports: [RouterModule] })
Once done, to see the results, run npm start and head on over to localhost:4200/dashboard. You should see this:
Generated dashboard component (Large preview)
The schematic generates four cards in the template and displays them in a responsive grid. The Angular Material CDK uses the Layout package to style this responsive card grid. The BreakpointObserver utility of the Layout package assesses media queries and makes UI changes based on them. There are various breakpoints available but within the generated component, only two categories are catered for. The Breakpoints.Handset and other queries that do not match it. The Layout package specifies 14 breakpoint states that you can use to customize the responsiveness of your dashboard.
// dashboard.component.js ... cards = this.breakpointObserver.observe(Breakpoints.Handset).pipe( map(({ matches }) => { if (matches) { ... } ... }) );
Going back to the dashboard, since four summary cards, four charts, and a table will be on the dashboard, we need nine cards in total. Breakpoints.Handset and Breakpoints.Tablet matches will display in a one-column grid where:
The four summary cards will span one row.
The charts will span two rows.
The table will span four rows.
Non-Breakpoints.Handset and non-Breakpoints.Tablet matches will display in four columns where:
The four summary cards will span one row and one column.
The charts will span two rows and two columns.
The table will span four rows and four columns.
It should look something like the screenshot below in non-Breakpoints.Handset and non-Breakpoints.Tablet matches. On Breakpoints.Handset and Breakpoints.Tablet matches, everything will just display in one column.

Dashboard component with additional cards (Large preview)
Create A Card Component
In the dashboard component, all the cards are generated through iteration. To prevent repetition, when adding all the new components, we’ll create a reusable card component. The card component will accept a title as input and use ng-content to dynamically add the rest of the content. To create the card component, run:
ng g c card -m app --style css
From the dashboard component template, we’ll just take the markup enclosed within the <mat-card> tag and place it In the card template:
<!--card.component.html--> <mat-card class="dashboard-card"> <mat-card-header> <mat-card-title> <button mat-icon-button class="more-button" [matMenuTriggerFor]="menu" aria-label="Toggle menu"> <mat-icon>more_vert</mat-icon> </button> <mat-menu #menu="matMenu" xPosition="before"> <button mat-menu-item>Expand</button> <button mat-menu-item>Remove</button> </mat-menu> </mat-card-title> </mat-card-header> <mat-card-content class="dashboard-card-content"> <ng-content></ng-content> </mat-card-content> </mat-card>
To add the title as input to the card:
// card.component.ts import { Component, Input } from '@angular/core'; ... export class CardComponent{ @Input() title: string; ... }
To style the card:
/*card.component.css*/ .more-button { position: absolute; top: 5px; right: 10px; } .dashboard-card { position: absolute; top: 15px; left: 15px; right: 15px; bottom: 15px; } .dashboard-card-content { text-align: center; flex-grow: 1; display: flex; flex-direction: column; align-items: center; max-height: 100%; justify-content: center; align-items: stretch; } mat-card { display: flex; flex-direction: column; }
Adding Cards To The Dashboard
Since the dashboard elements will be added individually and not through iteration, the dashboard component needs to be modified to account for this. In dashboard.component.ts, remove the cards property and replace it with a cardLayout property instead. The cardLayout variable will define the number of columns for the material grid list and how many rows and columns each of the dashboard cards will span. Breakpoints.Handset and Breakpoints.Tablet query matches will display in 1 column and those that do not match will display in 4 columns.
// dashboard.component.js ... cardLayout = this.breakpointObserver.observe(Breakpoints.Handset).pipe( map(({ matches }) => { if (matches) { return { columns: 1, miniCard: { cols: 1, rows: 1 }, chart: { cols: 1, rows: 2 }, table: { cols: 1, rows: 4 }, }; } return { columns: 4, miniCard: { cols: 1, rows: 1 }, chart: { cols: 2, rows: 2 }, table: { cols: 4, rows: 4 }, }; }) ); ...
In the dash.component.html template, replace the colspan and rowspan values of mat-grid-tile elements and the cols property of the mat-grid-list element.
<!--dash.component.html--> <div class="grid-container"> <h1 class="mat-h1">Dashboard</h1> <mat-grid-list cols="" rowHeight="200px"> <!--Mini Cards--> <mat-grid-tile *ngFor="let i of [1, 2, 3, 4]" [colspan]="( cardLayout | async )?.miniCard.cols" [rowspan]="( cardLayout | async )?.miniCard.rows"> <app-card title="Card "><div>Mini Card Content Here</div></app-card> </mat-grid-tile> <!--Charts--> <mat-grid-tile *ngFor="let i of [5, 6, 7, 8]" [colspan]="( cardLayout | async )?.chart.cols" [rowspan]="( cardLayout | async )?.chart.rows"> <app-card title="Card "><div>Chart Content Here</div></app-card> </mat-grid-tile> <!--Table--> <mat-grid-tile [colspan]="( cardLayout | async )?.table.cols" [rowspan]="( cardLayout | async )?.table.rows"> <app-card title="Card 9"><div>Table Content Here</div></app-card> </mat-grid-tile> </mat-grid-list> </div>
The dashboard will end up looking exactly like the most recent screenshot linked above.
Generating The Charts
The four charts that we need for the dashboard are:
A radar chart of products by unit sold.
A pie chart of sales by traffic source.
A bar chart of online store sessions.
A line chart of sales across the year.
Similar to creating the dashboard, generating chart components involves running a schematic. Using the ng2-charts schematics, generate the four different charts. We’ll place them in a folder called charts. Run ng generate ng2-charts-schematics:<chart type> <chart name>.
ng generate ng2-charts-schematics:radar charts/product-sales-chart ng generate ng2-charts-schematics:pie charts/sales-traffic-chart ng generate ng2-charts-schematics:line charts/annual-sales-chart ng generate ng2-charts-schematics:bar charts/store-sessions-chart
After running these commands, all four chart components are generated and are populated with sample data ready for display. Depending on what data you’d like to show, pick charts that most suit your data visualization needs. For each of the charts generated above, add the chartContainer class to the divs that enclose the canvas element in the chart templates.
<div class="chartContainer"> <canvas baseChart width="400" height="400"> ...
Next, add this styling to styles.css so that they could be accessible to all the chart components.
/*styles.css*/ ... .chartContainer canvas { max-height: 250px; width: auto; } .chartContainer{ height: 100%; display: flex; flex-direction: column; align-items: center; justify-content: center; }
Adding Data To The Charts
The generated chart components come with sample data already plugged in. If you have pre-existing services that provide your own data, you can add this data from them to the chart components. The charts take labels for the x-axis, data or data sets, a chart type, colors, a legend as well as other customization options. To provide the data and labels to the charts, create a service that will fetch data from a source of your choice and return it in a form that the charts accept. For instance, the AnnualSalesChartComponent receives its dataset and labels from the SalesService’s getSalesByMonth method which returns an array of sales for each month for the current year. You can find this service here and data it returns here. Inject the service as a private property to the AnnualSalesChartComponent constructor. Call the method that returns the required chart data from the service within the ngOnInit lifecycle hook.
// annual-sales-chart.component.ts import { SalesService } from ’src/app/sales/sales.service'; ... export class AnnualSalesChartComponent implements OnInit { public salesChartData: ChartDataSets[] = [ { data: [], label: 'Total Sales' }, ]; public salesChartLabels: Label[] = []; ... constructor(private salesService: SalesService) { } ngOnInit() { this.salesService.getSalesByMonth().subscribe({ next: salesItems => { salesItems.forEach(li => { this.salesChartData[0].data.push(li.revenue); this.salesChartLabels.push(li.month); }); }, ... }); } }
Adding Charts To The Dashboard
The next step involves adding the charts to the dashboard, in dash.component.html. Here’s what that looks like:
<!--dash.component.html--> ... <!--Charts--> <mat-grid-tile [colspan]="( cardLayout | async )?.chart.cols" [rowspan]="( cardLayout | async )?.chart.rows"> <app-card title="Monthly Revenue"> <app-annual-sale-chart></app-annual-sale-chart> </app-card> </mat-grid-tile> <mat-grid-tile [colspan]="( cardLayout | async )?.chart.cols" [rowspan]="( cardLayout | async )?.chart.rows"> <app-card title="Product Sales"> <app-product-sales-chart></app-product-sales-chart> </app-card> </mat-grid-tile> <mat-grid-tile [colspan]="( cardLayout | async )?.chart.cols" [rowspan]="( cardLayout | async )?.chart.rows"> <app-card title="Sales by Traffic Source"> <app-sales-traffic-chart></app-sales-traffic-chart> </app-card> </mat-grid-tile> <mat-grid-tile [colspan]="( cardLayout | async )?.chart.cols" [rowspan]="( cardLayout | async )?.chart.rows"> <app-card title="Online Store Sessions by Traffic Source"> <app-store-sessions-chart></app-store-sessions-chart> </app-card> </mat-grid-tile> ...
This is what the resultant responsive dashboard looks like.
Dashboard with charts (Large preview)
Generating A Table
We’ll add an orders table to give the shop owner an overview of the most recent orders placed and their status. To generate the orders table component, run the schematic:
ng generate @angular/material:table orders-table
This will generate a table component that will look like this.

Table generated by Angular Material schematic (Large preview)
Tables with many columns may be difficult to make responsive for handset and tablet views. When adding the table to a card, make it horizontally scrollable so that all the data can be viewed properly and is not obstructed. You can do this by adding the styling below to your table component:
<!--table.component.html--> <div class="mat-elevation-z8 small-table"> <table mat-table class="full-width-table" matSort aria-label="Elements"> ...
/*table.component.css*/ ... .small-table{ overflow-x: scroll !important; }
To add the table to the dash component:
<!-- dashboard.component.html> ... <mat-grid-tile [colspan]="( cardLayout | async )?.table.cols" [rowspan]="( cardLayout | async )?.table.rows"> <app-card title="Latest Orders"> <app-orders-table></app-orders-table> </app-card> </mat-grid-tile> ...
Adding Data To The Table
Like with charts, you can add data to the table in the ngOnInit method from a service. Additionally, you will need to modify your table’s generated data source to consume data from the service. To start off, inject the service in the table’s class constructor. Let’s take the example of a table listing the latest orders for this dashboard. To get data for the table, let’s inject the OrderService in the OrdersTableComponent constructor, change the MatTable type assertion of the table view child, and amend the list of displayed columns to reflect an order interface. If you’re interested in the data being added to the table, you can find it here. The last thing involves getting the total length of the data items available to be used to set the total in the table’s <mat-paginator>.
// orders-table.component.ts import { OrderService } from '../orders.service'; import { Order } from '../order'; ... export class OrdersTableComponent implements AfterViewInit, OnInit { ... @ViewChild(MatTable) table: MatTable
via Articles on Smashing Magazine — For Web Designers And Developers https://ift.tt/2P5mU8Z
0 notes
Text
PowerShellGet & waldo’s PowerShell Modules
Since Microsoft Dynamics NAV 2017, the VM images that Microsoft (Freddy) makes available on Azure, contains the PowerShellGet module. Freddy mentioned that in one of his blogposts about the Azure images. For me this was quite new, but sounded interesting, so I looked into it.
What is “PowerShellGet”?
Well, PowerShellGet is a module that is now by default present on Windows 10 (and I assume also on Windows Server 2016 – which is by the way the new OS for all the upcoming demo environments!) that makes it much easier for you to find, download and install PowerShell modules that are made available in the PowerShell Gallery: http://ift.tt/1uEcqfP . If PowerShellGet not available on your OS, you can download it from that web page.
So, when you installed the module, you get PowerShell CmdLets that can search for PowerShell modules, install them, load them, and make them available. So in a way, from within a script, you can make available PowerShell modules.
The thing really makes me think of the way we installed stuff on Linux many years ago, with the apt-get command.
I made my PowerShell modules available on the PowerShell Gallery
Which you might have expected – hence the title :-). You can find them easily when you search for “waldo” on the PowerShell Gallery. But that’s not really how you should use it. You have to use it from PowerShell (in my opinion).
Let’s show that in this small walkthrough
I just created myself an image of The NAV Development Tools Preview – January Update (oh yes, there is a new update on the New DEV tools! ). But as said, this should work on any Win10 or WinServer2016 – or any system where you installed the PowerShellGet module.
Just open PowerShell as an administrator (since you’re installing modules, it seems like a good idea to do that as admin…). Let’s first search for my modules from within PowerShell:
Find-Module | where Author -eq waldo
The “Find-Module” is part of the “PowerShellGet” module, which is going to search for modules in the gallery. So in this case, I will search of all my modules in the gallery.
So if we execute this:
Find-Module | where Author -eq waldo | Install-Module
with the “install-module” (also part of the “PowerShellGet” module), it will “install all waldo’s modules :-)”. So when you get this:
You simply say “yes to all”, since you trust me (IF you trust me :-)). It will download and install the modules. You’ll find the downloaded files in “C:\Program Files\WindowsPowerShell\Modules”.
Since it will just have downloaded them, you need to still import them like you have to import any module before you can use them in your runspace .. So therefore:
Import-Module Cloud.Ready.Software.NAV
With this line, you can show all the functions that you have just made available by downloading the modules from the PowerShell Gallery.
get-command -Module Cloud.Ready.Software.*
So, let’s see if it works
Ok, let’s try some of my functions on this Azure image.
In order to do that, we will first import the standard NAV commandlets. And I made that somewhat easier with this function:
Import-NAVModules
This function will put all the commands that are necessary to load the default NAV CmdLets to your clipboard. Simply past and execute. I haven’t managed to import the module in the global context from within the function (seems like a bug in PowerShell) – but this did the trick quite nicely as well :-). So paste the content of the clipboard in the shell, and execute!
Now, let’s set up a new sandbox environment (database and NST) by simply copy everything from the “NAV” instance:
Get-NAVServerInstance -ServerInstance 'NAV' | Copy-NAVEnvironment -ToServerInstance sandbox
And start the development environment:
Start-NAVIdeClient sandbox
This is how I always build my development environments on dev images – local or in the cloud. To remove, you can simply do:
Remove-NAVEnvironment -ServerInstance sandbox
Be careful with that one. It’s removing the database and server instance – so be sure you have a backup when needed :-).
What if you have updated your modules?
Well, you can imagine there is a PowerShellGet function for that as well: Update-Module. You can simply do:
Find-Module | where author -eq waldo | Update-Module
This PowerShellGet-module is awesome! :-). Thanks, Freddy, for introducing me :-).
Bron: waldo's blog http://ift.tt/2jtrlMC
0 notes
Text
Create A Responsive Dashboard With Angular Material And ng2-Charts
About The Author
Zara Cooper is a software developer and technical writer who enjoys sharing what she learns as a developer with others. When she’s got time to spare, she enjoys … More about Zara …
Schematics in Angular 9 are code generators that can create components and patterns in projects using predetermined templates and layouts. In this article, Zara Cooper explains how to take advantage of schematics in Angular Material and ng2-charts to substantially reduce the time and work that goes into building a dashboard.
Creating a dashboard from scratch is often pretty complicated. You have to create tools to collect data on items of interest. Once collected this data has to be presented in an easy to understand and meaningful way to your users. It involves intricate planning of what data to include and how to display it effectively. Once you have a plan, implementing the design is a massive task especially since it involves building multiple components.
With Angular Material and ng2-charts, you can take advantage of schematics to cut down the effort and time you may spend building a dashboard. Angular Material ships with a number of schematics that you could use to generate a dashboard. Similarly, ng2-charts provides schematics for generating multiple chart components. In this article, I’ll illustrate how to use both ng2-charts and Angular Material to set up a dashboard fairly quickly.
An Example
To illustrate how to build a dashboard, we’ll take the example of an online store selling leather goods like bags, wallets, key holders, and so on. The store owner would like to track information such as where customers come from to their online store, how their products sell, how traffic sources relate to sales, among other things.
We’ll build a dashboard to display this information and help the store owner analyze it. The dashboard will contain four small summary cards, four different kinds of charts, and a table listing most recent orders made. The four summary cards will display information such as total revenue from sales, average order value, the total number of orders, and number of returning customers. The charts will display the number of units sold for each product, sales by traffic source, online store sessions over time, and sales for the week.
Prerequisites
To follow along, you’ll need to have Angular CLI installed. If you do not have it installed, you can find out how to get it at cli.angular.io. If you’re not starting from a pre-existing Angular project, you need to generate one by running ng new <your project name>. For instance, to create an admin panel for the aforementioned store, we’ll run:
ng new store-admin-panel
Your project also needs to have routes configured for it. If you’re starting from a new app, select yes when prompted on whether to add an Angular Routing module during your project setup above.
Add Angular Material And Ng2-Charts To Your Project
Angular Material ships with various schematics for generating a variety of useful components like address books, trees, tables, navigation, and so on. To add Angular Material to your project, run:
ng add @angular/material
Pick a theme from the options provided in subsequent prompts. Next, you’ll be prompted to choose whether to add Angular Material typography styles and browser animations. You do not need these and could just respond no.
Next, you’ll need to install ng2-charts. ng2-charts requires charts.js as a dependency. To install ng2-charts run:
npm install ng2-charts --save
Then install charts.js:
npm install chart.js --save
To access the charts, add the ChartsModule to the AppModule’s imports.
import { ChartsModule } from 'ng2-charts'; @NgModule({ imports: [ … ChartsModule, … ] })
Lastly, install ng2-charts schematics as a dev dependency because they do not ship with ng2-charts by default.
npm install --save-dev ng2-charts-schematics
Generating A Navigation Component
First off, we’ll need to add a navigation component to help users maneuver through the app comfortably. The navigation should contain links to the dashboard and other pages that will be part of the admin panel. Angular material provides a schematic that generates a navigation component. We’ll name this component nav. Adding a side nav to the application is accomplished by running:
ng generate @angular/material:navigation nav
To link other routes in the navigation, use the routerLink directive and change the page name in the toolbar depending on what route a user is on.
// nav.component.ts ... menuItems = ['dashboard', ’sales', 'orders', 'customers', 'products'];
<!--nav.component.html--> ... <mat-nav-list> <a *ngFor="let item of menuItems" mat-list-item [routerLink]="'/'+item"> </a> ...
To see this component, add it to app.component.html.
<!--app.component.html--> <app-nav></app-nav>
This is what the NavComponent looks like.
Navigation component (Large preview)
Since the nav will be displayed alongside other components, adding a router-outlet to it would help switch between the other different components. In the nav.component.html template, just after the closing </mat-toolbar>, replace the <!-- Add Content Here --> comment with <router-outlet></router-outlet>.
<!--nav.component.html--> <mat-sidenav-container> ... <mat-sidenav-content> <mat-toolbar> ... </mat-toolbar> <router-outlet></router-outlet> </mat-sidenav-content> </mat-sidenav-container>
In the screenshots that follow in this article, this nav component will be omitted to better highlight the dashboard we’ll be generating for the sake of the tutorial. If you’re following along while building this dashboard, the nav will still appear as pictured above in your browser with the dashboard within it.
Generate The Dashboard
The most important part of the dashboard is its layout. It needs to hold all the components mentioned earlier and be responsive when displayed on different devices. To generate the dashboard layout, you’ll need to run the @angular/material:dashboard schematic. It will generate a responsive dashboard component. Pass the preferred name for your dashboard to the schematic. In this instance, let’s name it dash.
ng generate @angular/material:dashboard dash
To view the newly generated dashboard within the nav component, add a route for it to the router.
// app-routing.module.ts import { DashComponent } from './dash/dash.component'; const routes: Routes = [{ path: 'dashboard', component: DashComponent }]; @NgModule({ imports: [RouterModule.forRoot(routes)], exports: [RouterModule] })
Once done, to see the results, run npm start and head on over to localhost:4200/dashboard. You should see this:
Generated dashboard component (Large preview)
The schematic generates four cards in the template and displays them in a responsive grid. The Angular Material CDK uses the Layout package to style this responsive card grid. The BreakpointObserver utility of the Layout package assesses media queries and makes UI changes based on them. There are various breakpoints available but within the generated component, only two categories are catered for. The Breakpoints.Handset and other queries that do not match it. The Layout package specifies 14 breakpoint states that you can use to customize the responsiveness of your dashboard.
// dashboard.component.js ... cards = this.breakpointObserver.observe(Breakpoints.Handset).pipe( map(({ matches }) => { if (matches) { ... } ... }) );
Going back to the dashboard, since four summary cards, four charts, and a table will be on the dashboard, we need nine cards in total. Breakpoints.Handset and Breakpoints.Tablet matches will display in a one-column grid where:
The four summary cards will span one row.
The charts will span two rows.
The table will span four rows.
Non-Breakpoints.Handset and non-Breakpoints.Tablet matches will display in four columns where:
The four summary cards will span one row and one column.
The charts will span two rows and two columns.
The table will span four rows and four columns.
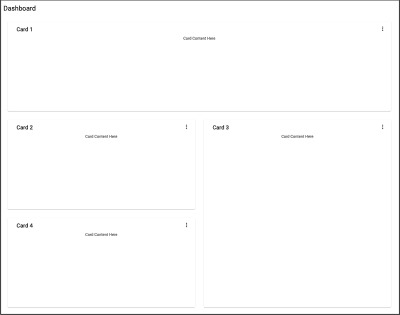
It should look something like the screenshot below in non-Breakpoints.Handset and non-Breakpoints.Tablet matches. On Breakpoints.Handset and Breakpoints.Tablet matches, everything will just display in one column.
Dashboard component with additional cards (Large preview)
Create A Card Component
In the dashboard component, all the cards are generated through iteration. To prevent repetition, when adding all the new components, we’ll create a reusable card component. The card component will accept a title as input and use ng-content to dynamically add the rest of the content. To create the card component, run:
ng g c card -m app --style css
From the dashboard component template, we’ll just take the markup enclosed within the <mat-card> tag and place it In the card template:
<!--card.component.html--> <mat-card class="dashboard-card"> <mat-card-header> <mat-card-title> <button mat-icon-button class="more-button" [matMenuTriggerFor]="menu" aria-label="Toggle menu"> <mat-icon>more_vert</mat-icon> </button> <mat-menu #menu="matMenu" xPosition="before"> <button mat-menu-item>Expand</button> <button mat-menu-item>Remove</button> </mat-menu> </mat-card-title> </mat-card-header> <mat-card-content class="dashboard-card-content"> <ng-content></ng-content> </mat-card-content> </mat-card>
To add the title as input to the card:
// card.component.ts import { Component, Input } from '@angular/core'; ... export class CardComponent{ @Input() title: string; ... }
To style the card:
/*card.component.css*/ .more-button { position: absolute; top: 5px; right: 10px; } .dashboard-card { position: absolute; top: 15px; left: 15px; right: 15px; bottom: 15px; } .dashboard-card-content { text-align: center; flex-grow: 1; display: flex; flex-direction: column; align-items: center; max-height: 100%; justify-content: center; align-items: stretch; } mat-card { display: flex; flex-direction: column; }
Adding Cards To The Dashboard
Since the dashboard elements will be added individually and not through iteration, the dashboard component needs to be modified to account for this. In dashboard.component.ts, remove the cards property and replace it with a cardLayout property instead. The cardLayout variable will define the number of columns for the material grid list and how many rows and columns each of the dashboard cards will span. Breakpoints.Handset and Breakpoints.Tablet query matches will display in 1 column and those that do not match will display in 4 columns.
// dashboard.component.js ... cardLayout = this.breakpointObserver.observe(Breakpoints.Handset).pipe( map(({ matches }) => { if (matches) { return { columns: 1, miniCard: { cols: 1, rows: 1 }, chart: { cols: 1, rows: 2 }, table: { cols: 1, rows: 4 }, }; } return { columns: 4, miniCard: { cols: 1, rows: 1 }, chart: { cols: 2, rows: 2 }, table: { cols: 4, rows: 4 }, }; }) ); ...
In the dash.component.html template, replace the colspan and rowspan values of mat-grid-tile elements and the cols property of the mat-grid-list element.
<!--dash.component.html--> <div class="grid-container"> <h1 class="mat-h1">Dashboard</h1> <mat-grid-list cols="" rowHeight="200px"> <!--Mini Cards--> <mat-grid-tile *ngFor="let i of [1, 2, 3, 4]" [colspan]="( cardLayout | async )?.miniCard.cols" [rowspan]="( cardLayout | async )?.miniCard.rows"> <app-card title="Card "><div>Mini Card Content Here</div></app-card> </mat-grid-tile> <!--Charts--> <mat-grid-tile *ngFor="let i of [5, 6, 7, 8]" [colspan]="( cardLayout | async )?.chart.cols" [rowspan]="( cardLayout | async )?.chart.rows"> <app-card title="Card "><div>Chart Content Here</div></app-card> </mat-grid-tile> <!--Table--> <mat-grid-tile [colspan]="( cardLayout | async )?.table.cols" [rowspan]="( cardLayout | async )?.table.rows"> <app-card title="Card 9"><div>Table Content Here</div></app-card> </mat-grid-tile> </mat-grid-list> </div>
The dashboard will end up looking exactly like the most recent screenshot linked above.
Generating The Charts
The four charts that we need for the dashboard are:
A radar chart of products by unit sold.
A pie chart of sales by traffic source.
A bar chart of online store sessions.
A line chart of sales across the year.
Similar to creating the dashboard, generating chart components involves running a schematic. Using the ng2-charts schematics, generate the four different charts. We’ll place them in a folder called charts. Run ng generate ng2-charts-schematics:<chart type> <chart name>.
ng generate ng2-charts-schematics:radar charts/product-sales-chart ng generate ng2-charts-schematics:pie charts/sales-traffic-chart ng generate ng2-charts-schematics:line charts/annual-sales-chart ng generate ng2-charts-schematics:bar charts/store-sessions-chart
After running these commands, all four chart components are generated and are populated with sample data ready for display. Depending on what data you’d like to show, pick charts that most suit your data visualization needs. For each of the charts generated above, add the chartContainer class to the divs that enclose the canvas element in the chart templates.
<div class="chartContainer"> <canvas baseChart width="400" height="400"> ...
Next, add this styling to styles.css so that they could be accessible to all the chart components.
/*styles.css*/ ... .chartContainer canvas { max-height: 250px; width: auto; } .chartContainer{ height: 100%; display: flex; flex-direction: column; align-items: center; justify-content: center; }
Adding Data To The Charts
The generated chart components come with sample data already plugged in. If you have pre-existing services that provide your own data, you can add this data from them to the chart components. The charts take labels for the x-axis, data or data sets, a chart type, colors, a legend as well as other customization options. To provide the data and labels to the charts, create a service that will fetch data from a source of your choice and return it in a form that the charts accept. For instance, the AnnualSalesChartComponent receives its dataset and labels from the SalesService’s getSalesByMonth method which returns an array of sales for each month for the current year. You can find this service here and data it returns here. Inject the service as a private property to the AnnualSalesChartComponent constructor. Call the method that returns the required chart data from the service within the ngOnInit lifecycle hook.
// annual-sales-chart.component.ts import { SalesService } from ’src/app/sales/sales.service'; ... export class AnnualSalesChartComponent implements OnInit { public salesChartData: ChartDataSets[] = [ { data: [], label: 'Total Sales' }, ]; public salesChartLabels: Label[] = []; ... constructor(private salesService: SalesService) { } ngOnInit() { this.salesService.getSalesByMonth().subscribe({ next: salesItems => { salesItems.forEach(li => { this.salesChartData[0].data.push(li.revenue); this.salesChartLabels.push(li.month); }); }, ... }); } }
Adding Charts To The Dashboard
The next step involves adding the charts to the dashboard, in dash.component.html. Here’s what that looks like:
<!--dash.component.html--> ... <!--Charts--> <mat-grid-tile [colspan]="( cardLayout | async )?.chart.cols" [rowspan]="( cardLayout | async )?.chart.rows"> <app-card title="Monthly Revenue"> <app-annual-sale-chart></app-annual-sale-chart> </app-card> </mat-grid-tile> <mat-grid-tile [colspan]="( cardLayout | async )?.chart.cols" [rowspan]="( cardLayout | async )?.chart.rows"> <app-card title="Product Sales"> <app-product-sales-chart></app-product-sales-chart> </app-card> </mat-grid-tile> <mat-grid-tile [colspan]="( cardLayout | async )?.chart.cols" [rowspan]="( cardLayout | async )?.chart.rows"> <app-card title="Sales by Traffic Source"> <app-sales-traffic-chart></app-sales-traffic-chart> </app-card> </mat-grid-tile> <mat-grid-tile [colspan]="( cardLayout | async )?.chart.cols" [rowspan]="( cardLayout | async )?.chart.rows"> <app-card title="Online Store Sessions by Traffic Source"> <app-store-sessions-chart></app-store-sessions-chart> </app-card> </mat-grid-tile> ...
This is what the resultant responsive dashboard looks like.
Dashboard with charts (Large preview)
Generating A Table
We’ll add an orders table to give the shop owner an overview of the most recent orders placed and their status. To generate the orders table component, run the schematic:
ng generate @angular/material:table orders-table
This will generate a table component that will look like this.
Table generated by Angular Material schematic (Large preview)
Tables with many columns may be difficult to make responsive for handset and tablet views. When adding the table to a card, make it horizontally scrollable so that all the data can be viewed properly and is not obstructed. You can do this by adding the styling below to your table component:
<!--table.component.html--> <div class="mat-elevation-z8 small-table"> <table mat-table class="full-width-table" matSort aria-label="Elements"> ...
/*table.component.css*/ ... .small-table{ overflow-x: scroll !important; }
To add the table to the dash component:
<!-- dashboard.component.html> ... <mat-grid-tile [colspan]="( cardLayout | async )?.table.cols" [rowspan]="( cardLayout | async )?.table.rows"> <app-card title="Latest Orders"> <app-orders-table></app-orders-table> </app-card> </mat-grid-tile> ...
Adding Data To The Table
Like with charts, you can add data to the table in the ngOnInit method from a service. Additionally, you will need to modify your table’s generated data source to consume data from the service. To start off, inject the service in the table’s class constructor. Let’s take the example of a table listing the latest orders for this dashboard. To get data for the table, let’s inject the OrderService in the OrdersTableComponent constructor, change the MatTable type assertion of the table view child, and amend the list of displayed columns to reflect an order interface. If you’re interested in the data being added to the table, you can find it here. The last thing involves getting the total length of the data items available to be used to set the total in the table’s <mat-paginator>.
// orders-table.component.ts import { OrderService } from '../orders.service'; import { Order } from '../order'; ... export class OrdersTableComponent implements AfterViewInit, OnInit { ... @ViewChild(MatTable) table: MatTable; dataLength: number; displayedColumns = [ "id", "date", "name", "status", "orderTotal", "paymentMode", ]; ... constructor(private orderService: OrderService){} ngOnInit() { this.datasource = new OrdersTableDataSource(this.orderService); this.orderService.getOrderCount().subscribe({ next: orderCount => { this.dataLength = orderCount; }, ... }); } ... }
Next, we’ll need to modify the OrdersTableDataSource class to accept the OrderService as a parameter in its constructor. We’ll have to modify its connect and destroy methods as well. The connect method connects the data source to the table and updates the table when new data items are emitted from the stream it returns, in this case, an orders array observable. The dataMutations constant combines the first data load, pagination, and sorting events into one stream for the table to consume. Pagination and sorting are handled by the OrderService server-side. So we need to pass the offset and page size from paginator and the active sort field and sort direction of the sort property to the getOrders method of the OrderService. The disconnect method should be used to close any connections made and release resources held up in the connect method.
// orders-table.datasource.ts ... export class OrdersTableDataSource extends DataSource<Order> { paginator: MatPaginator; sort: MatSort; constructor(private orderService: OrderService) { super(); } connect(): Observable<Order[]> { const dataMutations = [ of('Initial load'), this.paginator.page, this.sort.sortChange ]; return merge(...dataMutations).pipe(mergeMap(() => { return this.orderService.getOrders( this.paginator.pageIndex * this.paginator.pageSize, this.paginator.pageSize, this.sort.active, this.sort.direction ); })); } disconnect() {} }
In the orders table template, insert the new columns and bind the length property of <mat-paginator> to the dataLength property. For the status column, use a <mat-chip> element for better visualization of the order status. To have access to <mat-chip>, add the MatChipsModule as an import to AppModule.
<!-- orders-table.component.html --> <div class="mat-elevation-z8"> <table mat-table class="full-width-table" matSort aria-label="Elements"> <!-- Id Column --> <ng-container matColumnDef="id"> <th mat-header-cell *matHeaderCellDef mat-sort-header>Id</th> <td mat-cell *matCellDef="let row"></td> </ng-container> <!-- Date Column --> <ng-container matColumnDef="date"> <th mat-header-cell *matHeaderCellDef mat-sort-header>Date</th> <td mat-cell *matCellDef="let row">Liquid error: wrong number of arguments (given 1, expected 2)</td> </ng-container> <!-- Name Column --> <ng-container matColumnDef="name"> <th mat-header-cell *matHeaderCellDef mat-sort-header>Name</th> <td mat-cell *matCellDef="let row"></td> </ng-container> <!-- Order Total Column --> <ng-container matColumnDef="orderTotal"> <th mat-header-cell *matHeaderCellDef mat-sort-header>Order Total</th> <td mat-cell *matCellDef="let row"></td> </ng-container> <!-- Payment Mode Column --> <ng-container matColumnDef="paymentMode"> <th mat-header-cell *matHeaderCellDef mat-sort-header>Payment Mode</th> <td mat-cell *matCellDef="let row"></td> </ng-container> <!-- Status Column --> <ng-container matColumnDef="status"> <th mat-header-cell *matHeaderCellDef mat-sort-header>Status</th> <td mat-cell *matCellDef="let row"> <mat-chip-list> <mat-chip color="" selected> </mat-chip> </mat-chip-list> </td> </ng-container> <tr mat-header-row *matHeaderRowDef="displayedColumns"></tr> <tr mat-row *matRowDef="let row; columns: displayedColumns;"></tr> </table> <mat-paginator #paginator [length]="dataLength" [pageIndex]="0" [pageSize]="5" [pageSizeOptions]="[5, 10, 15, 20]"> </mat-paginator> </div>
Once data has been added to the table, this is what the dashboard will look like:
Dashboard with charts and table (Large preview)
Creating A Mini Card Component
All that’s left to complete the dashboard is to populate the four small cards that sit at the top. Having smaller summary cards as part of the dashboard makes it easy to highlight brief pieces of information that do not need whole charts or tables. In this example, the four mini cards will display total sales, average order value, the total number of orders, and the number of returning customers that visited the store for the day. This is just an example. These mini cards cannot be generated like with the navigation, dashboard layout, charts, and the table. They have no schematics. Below we’ll briefly go through how to create them. Although we’re going to add data specific to the example, you can add whatever you want to them or decide to do away with them altogether. To start off, generate the mini-card component, run:
ng g c mini-card -m app --style css
You can find the template for the component linked here and its styling here. This component has eight input properties that you can find out how to add here. To get data to the mini card components, inject the service that provides data to them in the DashComponent constructor. Assign data received from the service to a property of the DashComponent. In this instance, we’ll get data from the StoreSummaryService and assign it to the miniCardData property. Here’s how:
// dash.component.ts export class DashComponent implements OnInit{ ... miniCardData: StoreSummary[]; constructor(private breakpointObserver: BreakpointObserver, private summaryService: StoreSummaryService) {} ngOnInit() { this.summaryService.getStoreSummary().subscribe({ next: summaryData => { this.miniCardData = summaryData; } }); } }
To add the mini-cards to the dash component and have them populated with data from the service:
<!--dash.component.html--> ... <!--Mini Cards--> <mat-grid-tile *ngFor="let mc of miniCardData" [colspan]="( cardLayout | async )?.miniCard.cols" [rowspan]="( cardLayout | async )?.miniCard.rows"> <app-mini-card [title]="mc.title" [textValue]="mc.textValue" [value]="mc.value" [color]="mc.color" [percentValue]="mc.percentValue"></app-mini-card> </mat-grid-tile> ...
The screenshot below is what the dashboard will look like with the mini cards populated.
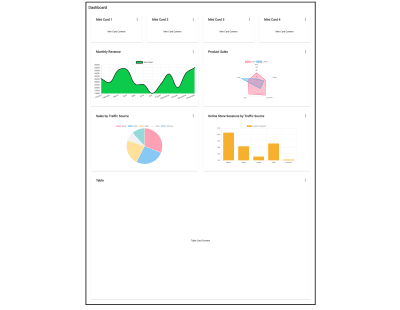
Dashboard with charts, tables, and mini-cards. (Large preview)
Putting All Together
In the end, the dashboard component template should contain:
<!-- dashboard.component.html --> <div class="grid-container"> <h1 class="mat-h1">Dashboard</h1> <mat-grid-list cols="" rowHeight="200px"> <!--Mini Cards--> <mat-grid-tile *ngFor="let mc of miniCardData" [colspan]="( cardLayout | async )?.miniCard.cols" [rowspan]="( cardLayout | async )?.miniCard.rows"> <app-mini-card [icon]="mc.icon" [title]="mc.title" [value]="mc.value" [color]="mc.color" [isIncrease]="mc.isIncrease" duration="since last month" [percentValue]="mc.percentValue" [isCurrency]="mc. isCurrency"></app-mini-card> </mat-grid-tile> <!--Charts--> <mat-grid-tile [colspan]="( cardLayout | async )?.chart.cols" [rowspan]="( cardLayout | async )?.chart.rows"> <app-card title="Monthly Revenue"> <app-annual-sale-chart></app-annual-sale-chart> </app-card> </mat-grid-tile> <mat-grid-tile [colspan]="( cardLayout | async )?.chart.cols" [rowspan]="( cardLayout | async )?.chart.rows"> <app-card title="Product Sales"> <app-product-sales-chart></app-product-sales-chart> </app-card> </mat-grid-tile> <mat-grid-tile [colspan]="( cardLayout | async )?.chart.cols" [rowspan]="( cardLayout | async )?.chart.rows"> <app-card title="Sales by Traffic Source"> <app-sales-traffic-chart></app-sales-traffic-chart> </app-card> </mat-grid-tile> <mat-grid-tile [colspan]="( cardLayout | async )?.chart.cols" [rowspan]="( cardLayout | async )?.chart.rows"> <app-card title="Online Store Sessions by Traffic Source"> <app-store-sessions-chart></app-store-sessions-chart> </app-card> </mat-grid-tile> <!--Table--> <mat-grid-tile [colspan]="( cardLayout | async )?.table.cols" [rowspan]="( cardLayout | async )?.table.rows"> <app-card title="Latest Orders"> <app-orders-table></app-orders-table> </app-card> </mat-grid-tile> </mat-grid-list> </div>
Here’s what the resultant dashboard contains.
Completed dashboard (Large preview)
Conclusion
Creating dashboards involves a fair amount of work and planning. A way to make building them faster is to use the various schematics provided by Angular Material and ng2-charts. With these schematics, running a command will generate a wholly complete component and can result in having a dashboard up and running fairly quickly. This leaves you a lot more time to focus on creating data services and adding them to your dashboard components.
If you want to learn more about some of the schematics provided by Angular Material, visit material.angular.io, and for those provided by ng2-charts, visit their site linked here.
(ra, yk, il)
Website Design & SEO Delray Beach by DBL07.co
Delray Beach SEO
source http://www.scpie.org/create-a-responsive-dashboard-with-angular-material-and-ng2-charts/ source https://scpie.tumblr.com/post/624890722983804928
0 notes
Text
Create A Responsive Dashboard With Angular Material And ng2-Charts
About The Author
Zara Cooper is a software developer and technical writer who enjoys sharing what she learns as a developer with others. When she’s got time to spare, she enjoys … More about Zara …
Schematics in Angular 9 are code generators that can create components and patterns in projects using predetermined templates and layouts. In this article, Zara Cooper explains how to take advantage of schematics in Angular Material and ng2-charts to substantially reduce the time and work that goes into building a dashboard.
Creating a dashboard from scratch is often pretty complicated. You have to create tools to collect data on items of interest. Once collected this data has to be presented in an easy to understand and meaningful way to your users. It involves intricate planning of what data to include and how to display it effectively. Once you have a plan, implementing the design is a massive task especially since it involves building multiple components.
With Angular Material and ng2-charts, you can take advantage of schematics to cut down the effort and time you may spend building a dashboard. Angular Material ships with a number of schematics that you could use to generate a dashboard. Similarly, ng2-charts provides schematics for generating multiple chart components. In this article, I’ll illustrate how to use both ng2-charts and Angular Material to set up a dashboard fairly quickly.
An Example
To illustrate how to build a dashboard, we’ll take the example of an online store selling leather goods like bags, wallets, key holders, and so on. The store owner would like to track information such as where customers come from to their online store, how their products sell, how traffic sources relate to sales, among other things.
We’ll build a dashboard to display this information and help the store owner analyze it. The dashboard will contain four small summary cards, four different kinds of charts, and a table listing most recent orders made. The four summary cards will display information such as total revenue from sales, average order value, the total number of orders, and number of returning customers. The charts will display the number of units sold for each product, sales by traffic source, online store sessions over time, and sales for the week.
Prerequisites
To follow along, you’ll need to have Angular CLI installed. If you do not have it installed, you can find out how to get it at cli.angular.io. If you’re not starting from a pre-existing Angular project, you need to generate one by running ng new <your project name>. For instance, to create an admin panel for the aforementioned store, we’ll run:
ng new store-admin-panel
Your project also needs to have routes configured for it. If you’re starting from a new app, select yes when prompted on whether to add an Angular Routing module during your project setup above.
Add Angular Material And Ng2-Charts To Your Project
Angular Material ships with various schematics for generating a variety of useful components like address books, trees, tables, navigation, and so on. To add Angular Material to your project, run:
ng add @angular/material
Pick a theme from the options provided in subsequent prompts. Next, you’ll be prompted to choose whether to add Angular Material typography styles and browser animations. You do not need these and could just respond no.
Next, you’ll need to install ng2-charts. ng2-charts requires charts.js as a dependency. To install ng2-charts run:
npm install ng2-charts --save
Then install charts.js:
npm install chart.js --save
To access the charts, add the ChartsModule to the AppModule’s imports.
import { ChartsModule } from 'ng2-charts'; @NgModule({ imports: [ … ChartsModule, … ] })
Lastly, install ng2-charts schematics as a dev dependency because they do not ship with ng2-charts by default.
npm install --save-dev ng2-charts-schematics
Generating A Navigation Component
First off, we’ll need to add a navigation component to help users maneuver through the app comfortably. The navigation should contain links to the dashboard and other pages that will be part of the admin panel. Angular material provides a schematic that generates a navigation component. We’ll name this component nav. Adding a side nav to the application is accomplished by running:
ng generate @angular/material:navigation nav
To link other routes in the navigation, use the routerLink directive and change the page name in the toolbar depending on what route a user is on.
// nav.component.ts ... menuItems = ['dashboard', ’sales', 'orders', 'customers', 'products'];
<!--nav.component.html--> ... <mat-nav-list> <a *ngFor="let item of menuItems" mat-list-item [routerLink]="'/'+item"> </a> ...
To see this component, add it to app.component.html.
<!--app.component.html--> <app-nav></app-nav>
This is what the NavComponent looks like.
Navigation component (Large preview)
Since the nav will be displayed alongside other components, adding a router-outlet to it would help switch between the other different components. In the nav.component.html template, just after the closing </mat-toolbar>, replace the <!-- Add Content Here --> comment with <router-outlet></router-outlet>.
<!--nav.component.html--> <mat-sidenav-container> ... <mat-sidenav-content> <mat-toolbar> ... </mat-toolbar> <router-outlet></router-outlet> </mat-sidenav-content> </mat-sidenav-container>
In the screenshots that follow in this article, this nav component will be omitted to better highlight the dashboard we’ll be generating for the sake of the tutorial. If you’re following along while building this dashboard, the nav will still appear as pictured above in your browser with the dashboard within it.
Generate The Dashboard
The most important part of the dashboard is its layout. It needs to hold all the components mentioned earlier and be responsive when displayed on different devices. To generate the dashboard layout, you’ll need to run the @angular/material:dashboard schematic. It will generate a responsive dashboard component. Pass the preferred name for your dashboard to the schematic. In this instance, let’s name it dash.
ng generate @angular/material:dashboard dash
To view the newly generated dashboard within the nav component, add a route for it to the router.
// app-routing.module.ts import { DashComponent } from './dash/dash.component'; const routes: Routes = [{ path: 'dashboard', component: DashComponent }]; @NgModule({ imports: [RouterModule.forRoot(routes)], exports: [RouterModule] })
Once done, to see the results, run npm start and head on over to localhost:4200/dashboard. You should see this:
Generated dashboard component (Large preview)
The schematic generates four cards in the template and displays them in a responsive grid. The Angular Material CDK uses the Layout package to style this responsive card grid. The BreakpointObserver utility of the Layout package assesses media queries and makes UI changes based on them. There are various breakpoints available but within the generated component, only two categories are catered for. The Breakpoints.Handset and other queries that do not match it. The Layout package specifies 14 breakpoint states that you can use to customize the responsiveness of your dashboard.
// dashboard.component.js ... cards = this.breakpointObserver.observe(Breakpoints.Handset).pipe( map(({ matches }) => { if (matches) { ... } ... }) );
Going back to the dashboard, since four summary cards, four charts, and a table will be on the dashboard, we need nine cards in total. Breakpoints.Handset and Breakpoints.Tablet matches will display in a one-column grid where:
The four summary cards will span one row.
The charts will span two rows.
The table will span four rows.
Non-Breakpoints.Handset and non-Breakpoints.Tablet matches will display in four columns where:
The four summary cards will span one row and one column.
The charts will span two rows and two columns.
The table will span four rows and four columns.
It should look something like the screenshot below in non-Breakpoints.Handset and non-Breakpoints.Tablet matches. On Breakpoints.Handset and Breakpoints.Tablet matches, everything will just display in one column.
Dashboard component with additional cards (Large preview)
Create A Card Component
In the dashboard component, all the cards are generated through iteration. To prevent repetition, when adding all the new components, we’ll create a reusable card component. The card component will accept a title as input and use ng-content to dynamically add the rest of the content. To create the card component, run:
ng g c card -m app --style css
From the dashboard component template, we’ll just take the markup enclosed within the <mat-card> tag and place it In the card template:
<!--card.component.html--> <mat-card class="dashboard-card"> <mat-card-header> <mat-card-title> <button mat-icon-button class="more-button" [matMenuTriggerFor]="menu" aria-label="Toggle menu"> <mat-icon>more_vert</mat-icon> </button> <mat-menu #menu="matMenu" xPosition="before"> <button mat-menu-item>Expand</button> <button mat-menu-item>Remove</button> </mat-menu> </mat-card-title> </mat-card-header> <mat-card-content class="dashboard-card-content"> <ng-content></ng-content> </mat-card-content> </mat-card>
To add the title as input to the card:
// card.component.ts import { Component, Input } from '@angular/core'; ... export class CardComponent{ @Input() title: string; ... }
To style the card:
/*card.component.css*/ .more-button { position: absolute; top: 5px; right: 10px; } .dashboard-card { position: absolute; top: 15px; left: 15px; right: 15px; bottom: 15px; } .dashboard-card-content { text-align: center; flex-grow: 1; display: flex; flex-direction: column; align-items: center; max-height: 100%; justify-content: center; align-items: stretch; } mat-card { display: flex; flex-direction: column; }
Adding Cards To The Dashboard
Since the dashboard elements will be added individually and not through iteration, the dashboard component needs to be modified to account for this. In dashboard.component.ts, remove the cards property and replace it with a cardLayout property instead. The cardLayout variable will define the number of columns for the material grid list and how many rows and columns each of the dashboard cards will span. Breakpoints.Handset and Breakpoints.Tablet query matches will display in 1 column and those that do not match will display in 4 columns.
// dashboard.component.js ... cardLayout = this.breakpointObserver.observe(Breakpoints.Handset).pipe( map(({ matches }) => { if (matches) { return { columns: 1, miniCard: { cols: 1, rows: 1 }, chart: { cols: 1, rows: 2 }, table: { cols: 1, rows: 4 }, }; } return { columns: 4, miniCard: { cols: 1, rows: 1 }, chart: { cols: 2, rows: 2 }, table: { cols: 4, rows: 4 }, }; }) ); ...
In the dash.component.html template, replace the colspan and rowspan values of mat-grid-tile elements and the cols property of the mat-grid-list element.
<!--dash.component.html--> <div class="grid-container"> <h1 class="mat-h1">Dashboard</h1> <mat-grid-list cols="" rowHeight="200px"> <!--Mini Cards--> <mat-grid-tile *ngFor="let i of [1, 2, 3, 4]" [colspan]="( cardLayout | async )?.miniCard.cols" [rowspan]="( cardLayout | async )?.miniCard.rows"> <app-card title="Card "><div>Mini Card Content Here</div></app-card> </mat-grid-tile> <!--Charts--> <mat-grid-tile *ngFor="let i of [5, 6, 7, 8]" [colspan]="( cardLayout | async )?.chart.cols" [rowspan]="( cardLayout | async )?.chart.rows"> <app-card title="Card "><div>Chart Content Here</div></app-card> </mat-grid-tile> <!--Table--> <mat-grid-tile [colspan]="( cardLayout | async )?.table.cols" [rowspan]="( cardLayout | async )?.table.rows"> <app-card title="Card 9"><div>Table Content Here</div></app-card> </mat-grid-tile> </mat-grid-list> </div>
The dashboard will end up looking exactly like the most recent screenshot linked above.
Generating The Charts
The four charts that we need for the dashboard are:
A radar chart of products by unit sold.
A pie chart of sales by traffic source.
A bar chart of online store sessions.
A line chart of sales across the year.
Similar to creating the dashboard, generating chart components involves running a schematic. Using the ng2-charts schematics, generate the four different charts. We’ll place them in a folder called charts. Run ng generate ng2-charts-schematics:<chart type> <chart name>.
ng generate ng2-charts-schematics:radar charts/product-sales-chart ng generate ng2-charts-schematics:pie charts/sales-traffic-chart ng generate ng2-charts-schematics:line charts/annual-sales-chart ng generate ng2-charts-schematics:bar charts/store-sessions-chart
After running these commands, all four chart components are generated and are populated with sample data ready for display. Depending on what data you’d like to show, pick charts that most suit your data visualization needs. For each of the charts generated above, add the chartContainer class to the divs that enclose the canvas element in the chart templates.
<div class="chartContainer"> <canvas baseChart width="400" height="400"> ...
Next, add this styling to styles.css so that they could be accessible to all the chart components.
/*styles.css*/ ... .chartContainer canvas { max-height: 250px; width: auto; } .chartContainer{ height: 100%; display: flex; flex-direction: column; align-items: center; justify-content: center; }
Adding Data To The Charts
The generated chart components come with sample data already plugged in. If you have pre-existing services that provide your own data, you can add this data from them to the chart components. The charts take labels for the x-axis, data or data sets, a chart type, colors, a legend as well as other customization options. To provide the data and labels to the charts, create a service that will fetch data from a source of your choice and return it in a form that the charts accept. For instance, the AnnualSalesChartComponent receives its dataset and labels from the SalesService’s getSalesByMonth method which returns an array of sales for each month for the current year. You can find this service here and data it returns here. Inject the service as a private property to the AnnualSalesChartComponent constructor. Call the method that returns the required chart data from the service within the ngOnInit lifecycle hook.
// annual-sales-chart.component.ts import { SalesService } from ’src/app/sales/sales.service'; ... export class AnnualSalesChartComponent implements OnInit { public salesChartData: ChartDataSets[] = [ { data: [], label: 'Total Sales' }, ]; public salesChartLabels: Label[] = []; ... constructor(private salesService: SalesService) { } ngOnInit() { this.salesService.getSalesByMonth().subscribe({ next: salesItems => { salesItems.forEach(li => { this.salesChartData[0].data.push(li.revenue); this.salesChartLabels.push(li.month); }); }, ... }); } }
Adding Charts To The Dashboard
The next step involves adding the charts to the dashboard, in dash.component.html. Here’s what that looks like:
<!--dash.component.html--> ... <!--Charts--> <mat-grid-tile [colspan]="( cardLayout | async )?.chart.cols" [rowspan]="( cardLayout | async )?.chart.rows"> <app-card title="Monthly Revenue"> <app-annual-sale-chart></app-annual-sale-chart> </app-card> </mat-grid-tile> <mat-grid-tile [colspan]="( cardLayout | async )?.chart.cols" [rowspan]="( cardLayout | async )?.chart.rows"> <app-card title="Product Sales"> <app-product-sales-chart></app-product-sales-chart> </app-card> </mat-grid-tile> <mat-grid-tile [colspan]="( cardLayout | async )?.chart.cols" [rowspan]="( cardLayout | async )?.chart.rows"> <app-card title="Sales by Traffic Source"> <app-sales-traffic-chart></app-sales-traffic-chart> </app-card> </mat-grid-tile> <mat-grid-tile [colspan]="( cardLayout | async )?.chart.cols" [rowspan]="( cardLayout | async )?.chart.rows"> <app-card title="Online Store Sessions by Traffic Source"> <app-store-sessions-chart></app-store-sessions-chart> </app-card> </mat-grid-tile> ...
This is what the resultant responsive dashboard looks like.
Dashboard with charts (Large preview)
Generating A Table
We’ll add an orders table to give the shop owner an overview of the most recent orders placed and their status. To generate the orders table component, run the schematic:
ng generate @angular/material:table orders-table
This will generate a table component that will look like this.
Table generated by Angular Material schematic (Large preview)
Tables with many columns may be difficult to make responsive for handset and tablet views. When adding the table to a card, make it horizontally scrollable so that all the data can be viewed properly and is not obstructed. You can do this by adding the styling below to your table component:
<!--table.component.html--> <div class="mat-elevation-z8 small-table"> <table mat-table class="full-width-table" matSort aria-label="Elements"> ...
/*table.component.css*/ ... .small-table{ overflow-x: scroll !important; }
To add the table to the dash component:
<!-- dashboard.component.html> ... <mat-grid-tile [colspan]="( cardLayout | async )?.table.cols" [rowspan]="( cardLayout | async )?.table.rows"> <app-card title="Latest Orders"> <app-orders-table></app-orders-table> </app-card> </mat-grid-tile> ...
Adding Data To The Table
Like with charts, you can add data to the table in the ngOnInit method from a service. Additionally, you will need to modify your table’s generated data source to consume data from the service. To start off, inject the service in the table’s class constructor. Let’s take the example of a table listing the latest orders for this dashboard. To get data for the table, let’s inject the OrderService in the OrdersTableComponent constructor, change the MatTable type assertion of the table view child, and amend the list of displayed columns to reflect an order interface. If you’re interested in the data being added to the table, you can find it here. The last thing involves getting the total length of the data items available to be used to set the total in the table’s <mat-paginator>.
// orders-table.component.ts import { OrderService } from '../orders.service'; import { Order } from '../order'; ... export class OrdersTableComponent implements AfterViewInit, OnInit { ... @ViewChild(MatTable) table: MatTable; dataLength: number; displayedColumns = [ "id", "date", "name", "status", "orderTotal", "paymentMode", ]; ... constructor(private orderService: OrderService){} ngOnInit() { this.datasource = new OrdersTableDataSource(this.orderService); this.orderService.getOrderCount().subscribe({ next: orderCount => { this.dataLength = orderCount; }, ... }); } ... }
Next, we’ll need to modify the OrdersTableDataSource class to accept the OrderService as a parameter in its constructor. We’ll have to modify its connect and destroy methods as well. The connect method connects the data source to the table and updates the table when new data items are emitted from the stream it returns, in this case, an orders array observable. The dataMutations constant combines the first data load, pagination, and sorting events into one stream for the table to consume. Pagination and sorting are handled by the OrderService server-side. So we need to pass the offset and page size from paginator and the active sort field and sort direction of the sort property to the getOrders method of the OrderService. The disconnect method should be used to close any connections made and release resources held up in the connect method.
// orders-table.datasource.ts ... export class OrdersTableDataSource extends DataSource<Order> { paginator: MatPaginator; sort: MatSort; constructor(private orderService: OrderService) { super(); } connect(): Observable<Order[]> { const dataMutations = [ of('Initial load'), this.paginator.page, this.sort.sortChange ]; return merge(...dataMutations).pipe(mergeMap(() => { return this.orderService.getOrders( this.paginator.pageIndex * this.paginator.pageSize, this.paginator.pageSize, this.sort.active, this.sort.direction ); })); } disconnect() {} }
In the orders table template, insert the new columns and bind the length property of <mat-paginator> to the dataLength property. For the status column, use a <mat-chip> element for better visualization of the order status. To have access to <mat-chip>, add the MatChipsModule as an import to AppModule.
<!-- orders-table.component.html --> <div class="mat-elevation-z8"> <table mat-table class="full-width-table" matSort aria-label="Elements"> <!-- Id Column --> <ng-container matColumnDef="id"> <th mat-header-cell *matHeaderCellDef mat-sort-header>Id</th> <td mat-cell *matCellDef="let row"></td> </ng-container> <!-- Date Column --> <ng-container matColumnDef="date"> <th mat-header-cell *matHeaderCellDef mat-sort-header>Date</th> <td mat-cell *matCellDef="let row">Liquid error: wrong number of arguments (given 1, expected 2)</td> </ng-container> <!-- Name Column --> <ng-container matColumnDef="name"> <th mat-header-cell *matHeaderCellDef mat-sort-header>Name</th> <td mat-cell *matCellDef="let row"></td> </ng-container> <!-- Order Total Column --> <ng-container matColumnDef="orderTotal"> <th mat-header-cell *matHeaderCellDef mat-sort-header>Order Total</th> <td mat-cell *matCellDef="let row"></td> </ng-container> <!-- Payment Mode Column --> <ng-container matColumnDef="paymentMode"> <th mat-header-cell *matHeaderCellDef mat-sort-header>Payment Mode</th> <td mat-cell *matCellDef="let row"></td> </ng-container> <!-- Status Column --> <ng-container matColumnDef="status"> <th mat-header-cell *matHeaderCellDef mat-sort-header>Status</th> <td mat-cell *matCellDef="let row"> <mat-chip-list> <mat-chip color="" selected> </mat-chip> </mat-chip-list> </td> </ng-container> <tr mat-header-row *matHeaderRowDef="displayedColumns"></tr> <tr mat-row *matRowDef="let row; columns: displayedColumns;"></tr> </table> <mat-paginator #paginator [length]="dataLength" [pageIndex]="0" [pageSize]="5" [pageSizeOptions]="[5, 10, 15, 20]"> </mat-paginator> </div>
Once data has been added to the table, this is what the dashboard will look like:
Dashboard with charts and table (Large preview)
Creating A Mini Card Component
All that’s left to complete the dashboard is to populate the four small cards that sit at the top. Having smaller summary cards as part of the dashboard makes it easy to highlight brief pieces of information that do not need whole charts or tables. In this example, the four mini cards will display total sales, average order value, the total number of orders, and the number of returning customers that visited the store for the day. This is just an example. These mini cards cannot be generated like with the navigation, dashboard layout, charts, and the table. They have no schematics. Below we’ll briefly go through how to create them. Although we’re going to add data specific to the example, you can add whatever you want to them or decide to do away with them altogether. To start off, generate the mini-card component, run:
ng g c mini-card -m app --style css
You can find the template for the component linked here and its styling here. This component has eight input properties that you can find out how to add here. To get data to the mini card components, inject the service that provides data to them in the DashComponent constructor. Assign data received from the service to a property of the DashComponent. In this instance, we’ll get data from the StoreSummaryService and assign it to the miniCardData property. Here’s how:
// dash.component.ts export class DashComponent implements OnInit{ ... miniCardData: StoreSummary[]; constructor(private breakpointObserver: BreakpointObserver, private summaryService: StoreSummaryService) {} ngOnInit() { this.summaryService.getStoreSummary().subscribe({ next: summaryData => { this.miniCardData = summaryData; } }); } }
To add the mini-cards to the dash component and have them populated with data from the service:
<!--dash.component.html--> ... <!--Mini Cards--> <mat-grid-tile *ngFor="let mc of miniCardData" [colspan]="( cardLayout | async )?.miniCard.cols" [rowspan]="( cardLayout | async )?.miniCard.rows"> <app-mini-card [title]="mc.title" [textValue]="mc.textValue" [value]="mc.value" [color]="mc.color" [percentValue]="mc.percentValue"></app-mini-card> </mat-grid-tile> ...
The screenshot below is what the dashboard will look like with the mini cards populated.
Dashboard with charts, tables, and mini-cards. (Large preview)
Putting All Together
In the end, the dashboard component template should contain:
<!-- dashboard.component.html --> <div class="grid-container"> <h1 class="mat-h1">Dashboard</h1> <mat-grid-list cols="" rowHeight="200px"> <!--Mini Cards--> <mat-grid-tile *ngFor="let mc of miniCardData" [colspan]="( cardLayout | async )?.miniCard.cols" [rowspan]="( cardLayout | async )?.miniCard.rows"> <app-mini-card [icon]="mc.icon" [title]="mc.title" [value]="mc.value" [color]="mc.color" [isIncrease]="mc.isIncrease" duration="since last month" [percentValue]="mc.percentValue" [isCurrency]="mc. isCurrency"></app-mini-card> </mat-grid-tile> <!--Charts--> <mat-grid-tile [colspan]="( cardLayout | async )?.chart.cols" [rowspan]="( cardLayout | async )?.chart.rows"> <app-card title="Monthly Revenue"> <app-annual-sale-chart></app-annual-sale-chart> </app-card> </mat-grid-tile> <mat-grid-tile [colspan]="( cardLayout | async )?.chart.cols" [rowspan]="( cardLayout | async )?.chart.rows"> <app-card title="Product Sales"> <app-product-sales-chart></app-product-sales-chart> </app-card> </mat-grid-tile> <mat-grid-tile [colspan]="( cardLayout | async )?.chart.cols" [rowspan]="( cardLayout | async )?.chart.rows"> <app-card title="Sales by Traffic Source"> <app-sales-traffic-chart></app-sales-traffic-chart> </app-card> </mat-grid-tile> <mat-grid-tile [colspan]="( cardLayout | async )?.chart.cols" [rowspan]="( cardLayout | async )?.chart.rows"> <app-card title="Online Store Sessions by Traffic Source"> <app-store-sessions-chart></app-store-sessions-chart> </app-card> </mat-grid-tile> <!--Table--> <mat-grid-tile [colspan]="( cardLayout | async )?.table.cols" [rowspan]="( cardLayout | async )?.table.rows"> <app-card title="Latest Orders"> <app-orders-table></app-orders-table> </app-card> </mat-grid-tile> </mat-grid-list> </div>
Here’s what the resultant dashboard contains.
Completed dashboard (Large preview)
Conclusion
Creating dashboards involves a fair amount of work and planning. A way to make building them faster is to use the various schematics provided by Angular Material and ng2-charts. With these schematics, running a command will generate a wholly complete component and can result in having a dashboard up and running fairly quickly. This leaves you a lot more time to focus on creating data services and adding them to your dashboard components.
If you want to learn more about some of the schematics provided by Angular Material, visit material.angular.io, and for those provided by ng2-charts, visit their site linked here.
(ra, yk, il)
Website Design & SEO Delray Beach by DBL07.co
Delray Beach SEO
source http://www.scpie.org/create-a-responsive-dashboard-with-angular-material-and-ng2-charts/
0 notes
Text
Create A Responsive Dashboard With Angular Material And ng2-Charts
About The Author
Zara Cooper is a software developer and technical writer who enjoys sharing what she learns as a developer with others. When she’s got time to spare, she enjoys … More about Zara …
Schematics in Angular 9 are code generators that can create components and patterns in projects using predetermined templates and layouts. In this article, Zara Cooper explains how to take advantage of schematics in Angular Material and ng2-charts to substantially reduce the time and work that goes into building a dashboard.
Creating a dashboard from scratch is often pretty complicated. You have to create tools to collect data on items of interest. Once collected this data has to be presented in an easy to understand and meaningful way to your users. It involves intricate planning of what data to include and how to display it effectively. Once you have a plan, implementing the design is a massive task especially since it involves building multiple components.
With Angular Material and ng2-charts, you can take advantage of schematics to cut down the effort and time you may spend building a dashboard. Angular Material ships with a number of schematics that you could use to generate a dashboard. Similarly, ng2-charts provides schematics for generating multiple chart components. In this article, I’ll illustrate how to use both ng2-charts and Angular Material to set up a dashboard fairly quickly.
An Example
To illustrate how to build a dashboard, we’ll take the example of an online store selling leather goods like bags, wallets, key holders, and so on. The store owner would like to track information such as where customers come from to their online store, how their products sell, how traffic sources relate to sales, among other things.
We’ll build a dashboard to display this information and help the store owner analyze it. The dashboard will contain four small summary cards, four different kinds of charts, and a table listing most recent orders made. The four summary cards will display information such as total revenue from sales, average order value, the total number of orders, and number of returning customers. The charts will display the number of units sold for each product, sales by traffic source, online store sessions over time, and sales for the week.
Prerequisites
To follow along, you’ll need to have Angular CLI installed. If you do not have it installed, you can find out how to get it at cli.angular.io. If you’re not starting from a pre-existing Angular project, you need to generate one by running ng new <your project name>. For instance, to create an admin panel for the aforementioned store, we’ll run:
ng new store-admin-panel
Your project also needs to have routes configured for it. If you’re starting from a new app, select yes when prompted on whether to add an Angular Routing module during your project setup above.
Add Angular Material And Ng2-Charts To Your Project
Angular Material ships with various schematics for generating a variety of useful components like address books, trees, tables, navigation, and so on. To add Angular Material to your project, run:
ng add @angular/material
Pick a theme from the options provided in subsequent prompts. Next, you’ll be prompted to choose whether to add Angular Material typography styles and browser animations. You do not need these and could just respond no.
Next, you’ll need to install ng2-charts. ng2-charts requires charts.js as a dependency. To install ng2-charts run:
npm install ng2-charts --save
Then install charts.js:
npm install chart.js --save
To access the charts, add the ChartsModule to the AppModule’s imports.
import { ChartsModule } from 'ng2-charts'; @NgModule({ imports: [ … ChartsModule, … ] })
Lastly, install ng2-charts schematics as a dev dependency because they do not ship with ng2-charts by default.
npm install --save-dev ng2-charts-schematics
Generating A Navigation Component
First off, we’ll need to add a navigation component to help users maneuver through the app comfortably. The navigation should contain links to the dashboard and other pages that will be part of the admin panel. Angular material provides a schematic that generates a navigation component. We’ll name this component nav. Adding a side nav to the application is accomplished by running:
ng generate @angular/material:navigation nav
To link other routes in the navigation, use the routerLink directive and change the page name in the toolbar depending on what route a user is on.
// nav.component.ts ... menuItems = ['dashboard', ’sales', 'orders', 'customers', 'products'];
<!--nav.component.html--> ... <mat-nav-list> <a *ngFor="let item of menuItems" mat-list-item [routerLink]="'/'+item"> </a> ...
To see this component, add it to app.component.html.
<!--app.component.html--> <app-nav></app-nav>
This is what the NavComponent looks like.
Navigation component (Large preview)
Since the nav will be displayed alongside other components, adding a router-outlet to it would help switch between the other different components. In the nav.component.html template, just after the closing </mat-toolbar>, replace the <!-- Add Content Here --> comment with <router-outlet></router-outlet>.
<!--nav.component.html--> <mat-sidenav-container> ... <mat-sidenav-content> <mat-toolbar> ... </mat-toolbar> <router-outlet></router-outlet> </mat-sidenav-content> </mat-sidenav-container>
In the screenshots that follow in this article, this nav component will be omitted to better highlight the dashboard we’ll be generating for the sake of the tutorial. If you’re following along while building this dashboard, the nav will still appear as pictured above in your browser with the dashboard within it.
Generate The Dashboard
The most important part of the dashboard is its layout. It needs to hold all the components mentioned earlier and be responsive when displayed on different devices. To generate the dashboard layout, you’ll need to run the @angular/material:dashboard schematic. It will generate a responsive dashboard component. Pass the preferred name for your dashboard to the schematic. In this instance, let’s name it dash.
ng generate @angular/material:dashboard dash
To view the newly generated dashboard within the nav component, add a route for it to the router.
// app-routing.module.ts import { DashComponent } from './dash/dash.component'; const routes: Routes = [{ path: 'dashboard', component: DashComponent }]; @NgModule({ imports: [RouterModule.forRoot(routes)], exports: [RouterModule] })
Once done, to see the results, run npm start and head on over to localhost:4200/dashboard. You should see this:
Generated dashboard component (Large preview)
The schematic generates four cards in the template and displays them in a responsive grid. The Angular Material CDK uses the Layout package to style this responsive card grid. The BreakpointObserver utility of the Layout package assesses media queries and makes UI changes based on them. There are various breakpoints available but within the generated component, only two categories are catered for. The Breakpoints.Handset and other queries that do not match it. The Layout package specifies 14 breakpoint states that you can use to customize the responsiveness of your dashboard.
// dashboard.component.js ... cards = this.breakpointObserver.observe(Breakpoints.Handset).pipe( map(({ matches }) => { if (matches) { ... } ... }) );
Going back to the dashboard, since four summary cards, four charts, and a table will be on the dashboard, we need nine cards in total. Breakpoints.Handset and Breakpoints.Tablet matches will display in a one-column grid where:
The four summary cards will span one row.
The charts will span two rows.
The table will span four rows.
Non-Breakpoints.Handset and non-Breakpoints.Tablet matches will display in four columns where:
The four summary cards will span one row and one column.
The charts will span two rows and two columns.
The table will span four rows and four columns.
It should look something like the screenshot below in non-Breakpoints.Handset and non-Breakpoints.Tablet matches. On Breakpoints.Handset and Breakpoints.Tablet matches, everything will just display in one column.
Dashboard component with additional cards (Large preview)
Create A Card Component
In the dashboard component, all the cards are generated through iteration. To prevent repetition, when adding all the new components, we’ll create a reusable card component. The card component will accept a title as input and use ng-content to dynamically add the rest of the content. To create the card component, run:
ng g c card -m app --style css
From the dashboard component template, we’ll just take the markup enclosed within the <mat-card> tag and place it In the card template:
<!--card.component.html--> <mat-card class="dashboard-card"> <mat-card-header> <mat-card-title> <button mat-icon-button class="more-button" [matMenuTriggerFor]="menu" aria-label="Toggle menu"> <mat-icon>more_vert</mat-icon> </button> <mat-menu #menu="matMenu" xPosition="before"> <button mat-menu-item>Expand</button> <button mat-menu-item>Remove</button> </mat-menu> </mat-card-title> </mat-card-header> <mat-card-content class="dashboard-card-content"> <ng-content></ng-content> </mat-card-content> </mat-card>
To add the title as input to the card:
// card.component.ts import { Component, Input } from '@angular/core'; ... export class CardComponent{ @Input() title: string; ... }
To style the card:
/*card.component.css*/ .more-button { position: absolute; top: 5px; right: 10px; } .dashboard-card { position: absolute; top: 15px; left: 15px; right: 15px; bottom: 15px; } .dashboard-card-content { text-align: center; flex-grow: 1; display: flex; flex-direction: column; align-items: center; max-height: 100%; justify-content: center; align-items: stretch; } mat-card { display: flex; flex-direction: column; }
Adding Cards To The Dashboard
Since the dashboard elements will be added individually and not through iteration, the dashboard component needs to be modified to account for this. In dashboard.component.ts, remove the cards property and replace it with a cardLayout property instead. The cardLayout variable will define the number of columns for the material grid list and how many rows and columns each of the dashboard cards will span. Breakpoints.Handset and Breakpoints.Tablet query matches will display in 1 column and those that do not match will display in 4 columns.
// dashboard.component.js ... cardLayout = this.breakpointObserver.observe(Breakpoints.Handset).pipe( map(({ matches }) => { if (matches) { return { columns: 1, miniCard: { cols: 1, rows: 1 }, chart: { cols: 1, rows: 2 }, table: { cols: 1, rows: 4 }, }; } return { columns: 4, miniCard: { cols: 1, rows: 1 }, chart: { cols: 2, rows: 2 }, table: { cols: 4, rows: 4 }, }; }) ); ...
In the dash.component.html template, replace the colspan and rowspan values of mat-grid-tile elements and the cols property of the mat-grid-list element.
<!--dash.component.html--> <div class="grid-container"> <h1 class="mat-h1">Dashboard</h1> <mat-grid-list cols="" rowHeight="200px"> <!--Mini Cards--> <mat-grid-tile *ngFor="let i of [1, 2, 3, 4]" [colspan]="( cardLayout | async )?.miniCard.cols" [rowspan]="( cardLayout | async )?.miniCard.rows"> <app-card title="Card "><div>Mini Card Content Here</div></app-card> </mat-grid-tile> <!--Charts--> <mat-grid-tile *ngFor="let i of [5, 6, 7, 8]" [colspan]="( cardLayout | async )?.chart.cols" [rowspan]="( cardLayout | async )?.chart.rows"> <app-card title="Card "><div>Chart Content Here</div></app-card> </mat-grid-tile> <!--Table--> <mat-grid-tile [colspan]="( cardLayout | async )?.table.cols" [rowspan]="( cardLayout | async )?.table.rows"> <app-card title="Card 9"><div>Table Content Here</div></app-card> </mat-grid-tile> </mat-grid-list> </div>
The dashboard will end up looking exactly like the most recent screenshot linked above.
Generating The Charts
The four charts that we need for the dashboard are:
A radar chart of products by unit sold.
A pie chart of sales by traffic source.
A bar chart of online store sessions.
A line chart of sales across the year.
Similar to creating the dashboard, generating chart components involves running a schematic. Using the ng2-charts schematics, generate the four different charts. We’ll place them in a folder called charts. Run ng generate ng2-charts-schematics:<chart type> <chart name>.
ng generate ng2-charts-schematics:radar charts/product-sales-chart ng generate ng2-charts-schematics:pie charts/sales-traffic-chart ng generate ng2-charts-schematics:line charts/annual-sales-chart ng generate ng2-charts-schematics:bar charts/store-sessions-chart
After running these commands, all four chart components are generated and are populated with sample data ready for display. Depending on what data you’d like to show, pick charts that most suit your data visualization needs. For each of the charts generated above, add the chartContainer class to the divs that enclose the canvas element in the chart templates.
<div class="chartContainer"> <canvas baseChart width="400" height="400"> ...
Next, add this styling to styles.css so that they could be accessible to all the chart components.
/*styles.css*/ ... .chartContainer canvas { max-height: 250px; width: auto; } .chartContainer{ height: 100%; display: flex; flex-direction: column; align-items: center; justify-content: center; }
Adding Data To The Charts
The generated chart components come with sample data already plugged in. If you have pre-existing services that provide your own data, you can add this data from them to the chart components. The charts take labels for the x-axis, data or data sets, a chart type, colors, a legend as well as other customization options. To provide the data and labels to the charts, create a service that will fetch data from a source of your choice and return it in a form that the charts accept. For instance, the AnnualSalesChartComponent receives its dataset and labels from the SalesService’s getSalesByMonth method which returns an array of sales for each month for the current year. You can find this service here and data it returns here. Inject the service as a private property to the AnnualSalesChartComponent constructor. Call the method that returns the required chart data from the service within the ngOnInit lifecycle hook.
// annual-sales-chart.component.ts import { SalesService } from ’src/app/sales/sales.service'; ... export class AnnualSalesChartComponent implements OnInit { public salesChartData: ChartDataSets[] = [ { data: [], label: 'Total Sales' }, ]; public salesChartLabels: Label[] = []; ... constructor(private salesService: SalesService) { } ngOnInit() { this.salesService.getSalesByMonth().subscribe({ next: salesItems => { salesItems.forEach(li => { this.salesChartData[0].data.push(li.revenue); this.salesChartLabels.push(li.month); }); }, ... }); } }
Adding Charts To The Dashboard
The next step involves adding the charts to the dashboard, in dash.component.html. Here’s what that looks like:
<!--dash.component.html--> ... <!--Charts--> <mat-grid-tile [colspan]="( cardLayout | async )?.chart.cols" [rowspan]="( cardLayout | async )?.chart.rows"> <app-card title="Monthly Revenue"> <app-annual-sale-chart></app-annual-sale-chart> </app-card> </mat-grid-tile> <mat-grid-tile [colspan]="( cardLayout | async )?.chart.cols" [rowspan]="( cardLayout | async )?.chart.rows"> <app-card title="Product Sales"> <app-product-sales-chart></app-product-sales-chart> </app-card> </mat-grid-tile> <mat-grid-tile [colspan]="( cardLayout | async )?.chart.cols" [rowspan]="( cardLayout | async )?.chart.rows"> <app-card title="Sales by Traffic Source"> <app-sales-traffic-chart></app-sales-traffic-chart> </app-card> </mat-grid-tile> <mat-grid-tile [colspan]="( cardLayout | async )?.chart.cols" [rowspan]="( cardLayout | async )?.chart.rows"> <app-card title="Online Store Sessions by Traffic Source"> <app-store-sessions-chart></app-store-sessions-chart> </app-card> </mat-grid-tile> ...
This is what the resultant responsive dashboard looks like.
Dashboard with charts (Large preview)
Generating A Table
We’ll add an orders table to give the shop owner an overview of the most recent orders placed and their status. To generate the orders table component, run the schematic:
ng generate @angular/material:table orders-table
This will generate a table component that will look like this.
Table generated by Angular Material schematic (Large preview)
Tables with many columns may be difficult to make responsive for handset and tablet views. When adding the table to a card, make it horizontally scrollable so that all the data can be viewed properly and is not obstructed. You can do this by adding the styling below to your table component:
<!--table.component.html--> <div class="mat-elevation-z8 small-table"> <table mat-table class="full-width-table" matSort aria-label="Elements"> ...
/*table.component.css*/ ... .small-table{ overflow-x: scroll !important; }
To add the table to the dash component:
<!-- dashboard.component.html> ... <mat-grid-tile [colspan]="( cardLayout | async )?.table.cols" [rowspan]="( cardLayout | async )?.table.rows"> <app-card title="Latest Orders"> <app-orders-table></app-orders-table> </app-card> </mat-grid-tile> ...
Adding Data To The Table
Like with charts, you can add data to the table in the ngOnInit method from a service. Additionally, you will need to modify your table’s generated data source to consume data from the service. To start off, inject the service in the table’s class constructor. Let’s take the example of a table listing the latest orders for this dashboard. To get data for the table, let’s inject the OrderService in the OrdersTableComponent constructor, change the MatTable type assertion of the table view child, and amend the list of displayed columns to reflect an order interface. If you’re interested in the data being added to the table, you can find it here. The last thing involves getting the total length of the data items available to be used to set the total in the table’s <mat-paginator>.
// orders-table.component.ts import { OrderService } from '../orders.service'; import { Order } from '../order'; ... export class OrdersTableComponent implements AfterViewInit, OnInit { ... @ViewChild(MatTable) table: MatTable; dataLength: number; displayedColumns = [ "id", "date", "name", "status", "orderTotal", "paymentMode", ]; ... constructor(private orderService: OrderService){} ngOnInit() { this.datasource = new OrdersTableDataSource(this.orderService); this.orderService.getOrderCount().subscribe({ next: orderCount => { this.dataLength = orderCount; }, ... }); } ... }
Next, we’ll need to modify the OrdersTableDataSource class to accept the OrderService as a parameter in its constructor. We’ll have to modify its connect and destroy methods as well. The connect method connects the data source to the table and updates the table when new data items are emitted from the stream it returns, in this case, an orders array observable. The dataMutations constant combines the first data load, pagination, and sorting events into one stream for the table to consume. Pagination and sorting are handled by the OrderService server-side. So we need to pass the offset and page size from paginator and the active sort field and sort direction of the sort property to the getOrders method of the OrderService. The disconnect method should be used to close any connections made and release resources held up in the connect method.
// orders-table.datasource.ts ... export class OrdersTableDataSource extends DataSource<Order> { paginator: MatPaginator; sort: MatSort; constructor(private orderService: OrderService) { super(); } connect(): Observable<Order[]> { const dataMutations = [ of('Initial load'), this.paginator.page, this.sort.sortChange ]; return merge(...dataMutations).pipe(mergeMap(() => { return this.orderService.getOrders( this.paginator.pageIndex * this.paginator.pageSize, this.paginator.pageSize, this.sort.active, this.sort.direction ); })); } disconnect() {} }
In the orders table template, insert the new columns and bind the length property of <mat-paginator> to the dataLength property. For the status column, use a <mat-chip> element for better visualization of the order status. To have access to <mat-chip>, add the MatChipsModule as an import to AppModule.
<!-- orders-table.component.html --> <div class="mat-elevation-z8"> <table mat-table class="full-width-table" matSort aria-label="Elements"> <!-- Id Column --> <ng-container matColumnDef="id"> <th mat-header-cell *matHeaderCellDef mat-sort-header>Id</th> <td mat-cell *matCellDef="let row"></td> </ng-container> <!-- Date Column --> <ng-container matColumnDef="date"> <th mat-header-cell *matHeaderCellDef mat-sort-header>Date</th> <td mat-cell *matCellDef="let row">Liquid error: wrong number of arguments (given 1, expected 2)</td> </ng-container> <!-- Name Column --> <ng-container matColumnDef="name"> <th mat-header-cell *matHeaderCellDef mat-sort-header>Name</th> <td mat-cell *matCellDef="let row"></td> </ng-container> <!-- Order Total Column --> <ng-container matColumnDef="orderTotal"> <th mat-header-cell *matHeaderCellDef mat-sort-header>Order Total</th> <td mat-cell *matCellDef="let row"></td> </ng-container> <!-- Payment Mode Column --> <ng-container matColumnDef="paymentMode"> <th mat-header-cell *matHeaderCellDef mat-sort-header>Payment Mode</th> <td mat-cell *matCellDef="let row"></td> </ng-container> <!-- Status Column --> <ng-container matColumnDef="status"> <th mat-header-cell *matHeaderCellDef mat-sort-header>Status</th> <td mat-cell *matCellDef="let row"> <mat-chip-list> <mat-chip color="" selected> </mat-chip> </mat-chip-list> </td> </ng-container> <tr mat-header-row *matHeaderRowDef="displayedColumns"></tr> <tr mat-row *matRowDef="let row; columns: displayedColumns;"></tr> </table> <mat-paginator #paginator [length]="dataLength" [pageIndex]="0" [pageSize]="5" [pageSizeOptions]="[5, 10, 15, 20]"> </mat-paginator> </div>
Once data has been added to the table, this is what the dashboard will look like:
Dashboard with charts and table (Large preview)
Creating A Mini Card Component
All that’s left to complete the dashboard is to populate the four small cards that sit at the top. Having smaller summary cards as part of the dashboard makes it easy to highlight brief pieces of information that do not need whole charts or tables. In this example, the four mini cards will display total sales, average order value, the total number of orders, and the number of returning customers that visited the store for the day. This is just an example. These mini cards cannot be generated like with the navigation, dashboard layout, charts, and the table. They have no schematics. Below we’ll briefly go through how to create them. Although we’re going to add data specific to the example, you can add whatever you want to them or decide to do away with them altogether. To start off, generate the mini-card component, run:
ng g c mini-card -m app --style css
You can find the template for the component linked here and its styling here. This component has eight input properties that you can find out how to add here. To get data to the mini card components, inject the service that provides data to them in the DashComponent constructor. Assign data received from the service to a property of the DashComponent. In this instance, we’ll get data from the StoreSummaryService and assign it to the miniCardData property. Here’s how:
// dash.component.ts export class DashComponent implements OnInit{ ... miniCardData: StoreSummary[]; constructor(private breakpointObserver: BreakpointObserver, private summaryService: StoreSummaryService) {} ngOnInit() { this.summaryService.getStoreSummary().subscribe({ next: summaryData => { this.miniCardData = summaryData; } }); } }
To add the mini-cards to the dash component and have them populated with data from the service:
<!--dash.component.html--> ... <!--Mini Cards--> <mat-grid-tile *ngFor="let mc of miniCardData" [colspan]="( cardLayout | async )?.miniCard.cols" [rowspan]="( cardLayout | async )?.miniCard.rows"> <app-mini-card [title]="mc.title" [textValue]="mc.textValue" [value]="mc.value" [color]="mc.color" [percentValue]="mc.percentValue"></app-mini-card> </mat-grid-tile> ...
The screenshot below is what the dashboard will look like with the mini cards populated.
Dashboard with charts, tables, and mini-cards. (Large preview)
Putting All Together
In the end, the dashboard component template should contain:
<!-- dashboard.component.html --> <div class="grid-container"> <h1 class="mat-h1">Dashboard</h1> <mat-grid-list cols="" rowHeight="200px"> <!--Mini Cards--> <mat-grid-tile *ngFor="let mc of miniCardData" [colspan]="( cardLayout | async )?.miniCard.cols" [rowspan]="( cardLayout | async )?.miniCard.rows"> <app-mini-card [icon]="mc.icon" [title]="mc.title" [value]="mc.value" [color]="mc.color" [isIncrease]="mc.isIncrease" duration="since last month" [percentValue]="mc.percentValue" [isCurrency]="mc. isCurrency"></app-mini-card> </mat-grid-tile> <!--Charts--> <mat-grid-tile [colspan]="( cardLayout | async )?.chart.cols" [rowspan]="( cardLayout | async )?.chart.rows"> <app-card title="Monthly Revenue"> <app-annual-sale-chart></app-annual-sale-chart> </app-card> </mat-grid-tile> <mat-grid-tile [colspan]="( cardLayout | async )?.chart.cols" [rowspan]="( cardLayout | async )?.chart.rows"> <app-card title="Product Sales"> <app-product-sales-chart></app-product-sales-chart> </app-card> </mat-grid-tile> <mat-grid-tile [colspan]="( cardLayout | async )?.chart.cols" [rowspan]="( cardLayout | async )?.chart.rows"> <app-card title="Sales by Traffic Source"> <app-sales-traffic-chart></app-sales-traffic-chart> </app-card> </mat-grid-tile> <mat-grid-tile [colspan]="( cardLayout | async )?.chart.cols" [rowspan]="( cardLayout | async )?.chart.rows"> <app-card title="Online Store Sessions by Traffic Source"> <app-store-sessions-chart></app-store-sessions-chart> </app-card> </mat-grid-tile> <!--Table--> <mat-grid-tile [colspan]="( cardLayout | async )?.table.cols" [rowspan]="( cardLayout | async )?.table.rows"> <app-card title="Latest Orders"> <app-orders-table></app-orders-table> </app-card> </mat-grid-tile> </mat-grid-list> </div>
Here’s what the resultant dashboard contains.
Completed dashboard (Large preview)
Conclusion
Creating dashboards involves a fair amount of work and planning. A way to make building them faster is to use the various schematics provided by Angular Material and ng2-charts. With these schematics, running a command will generate a wholly complete component and can result in having a dashboard up and running fairly quickly. This leaves you a lot more time to focus on creating data services and adding them to your dashboard components.
If you want to learn more about some of the schematics provided by Angular Material, visit material.angular.io, and for those provided by ng2-charts, visit their site linked here.
(ra, yk, il)
Website Design & SEO Delray Beach by DBL07.co
Delray Beach SEO
source http://www.scpie.org/create-a-responsive-dashboard-with-angular-material-and-ng2-charts/ source https://scpie1.blogspot.com/2020/07/create-responsive-dashboard-with.html
0 notes
Text
Getting Started With Nuxt
About The Author
Front-end developer based in Lagos, Nigeria. He enjoys converting designs into code and building things for the web. More about Timi …
Developers often worry about the SEO Company of their SPAs (Single Page Applications) and how well they would do on Google searches (blogs, portfolio websites, product websites, and so on). Sometimes, they also worry about how complex building a server-side rendered application might be. In this tutorial, we’re going to learn how to create server-side rendered applications by using NUXt.js, how to configure your application for development, and how to deploy to Heroku.
Web developers build a lot of Single Page Applications using JavaScript frameworks (Angular, React, Vue). SPAs dynamically populate the contents of their pages on load which means by the time Google crawls their site, the important content is yet to be injected into the site. Part of this problem can be solved by pre-rendering your application’s content. This is where server-side applications come in, and for Vuejs developers, we can build server-side applications using NUXt.js.
We’re going to assume that you have not used it before, as such it will start from the ground-up — introducing you to NUXt.js, its file structure and how routing works. While also touching how you can get it to work with Vuex.
At the end of this tutorial, you should be able to go on to build basic web applications in NUXt.js, and if you have been wondering how to get started with NUXt.js, this will do justice to that.
This article is targeted at those that are fairly familiar with Vue.js and it’s a concept, For those without knowledge of Vue.js, consider starting from the official Vuejs documentation and The Net Ninja’s Vuejs playlist.
What Is Nuxt.js?
According to their official page:
“NUXt is a progressive framework based on Vue.js to create modern web applications. It is based on Vue.js official libraries (vue, vue-router and vuex) and powerful development tools (webpack, Babel and PostCSS). NUXt’s goal is to make web development powerful and performant with great developer experience in mind.”
It allows you to create three types of applications, depending on the purpose it’s intended for:
Static Generated pages (Pre-rendering) Static generated applications do not require API requests to fetch the contents of the pages, i.e. the contents are already included in the HTML file. An example of a static site is a portfolio website or a landing page for a product.
Single Page Application Most JavaScript frameworks (React, Angular, Emberjs, Vue, etc) are single page application whose contents are dynamically populated with faster transitions. Most SPAs make use of the HTML5 history API or the location Hash for routing.
Server Side Rendered Applications (SSR) Server-Side Rendering is a technique used to fetch and display client-side data on the server to send a fully rendered page to the client. This is a good approach to get good SEO Company for your application.
Creating Your First Nuxt.js Application
You can create a NUXt.js application in two ways:
Using the scaffolding tool create-nUXt-app.
From scratch.
In case you just want to see the finished app that we would be building, here’s a link to the GitHub repo.
In this tutorial, we would be focused on using create-nUXt-app so let’s get started. If you have npx installed, open your terminal and run this command:
$ npx create-nUXt-app nUXt-tutorial-app
or
$ yarn create nUXt-app nUXt-tutorial-app
For the purpose of this tutorial, nUXt-tutorial-app is the name of the application but feel free to name yours differently.
This would be followed by a list of options that help in configuring your application with what you might need for development.
Here’s what my configuration looks like:
NUXt conguration options. (Large preview)
For the purpose of this tutorial, we do not need axios, linting and Prettier configurations.
Once that is done, we’ll run the following command in our terminal:
$ cd nUXt-tutorial-app$ npm run dev
Your app should now be running on http://localhost:3000 and this is what you should see:
NUXt scaffolding default landing page. (Large preview)
At this point, your app is ready for development.
Understanding Nuxt Folder Structure
Scaffolding the application as we did creates different files and folders which we can start working with. For someone who hasn’t work with NUXt before, this might throw you off balance. So we’ll be looking at the folders, getting to understand their importance.
Assets This folder is for un-compiled files such as images, font files, SASS, LESS or JavaScript files. Let us add create a styles folder and a main.css file and copy and paste the following in it.
a { text-decoration: none; color: inherit; cursor: pointer;}.header { width: 100%; max-width: 500px; margin-left: auto; margin-right: auto; height: 60px; top: 0; position: sticky; background-color: #fff; display: flex; justify-content: space-between; align-items: center;}.logo { width: 40%; max-width: 200px; height: 40px;}.logo .NUXtLogo { max-width: 30px; margin-left: 10px; max-height: 40px;}.nav { width: 60%; height: 40px; display: flex; justify-content: space-between; padding-right: 10px; max-width: 300px;}.nav__link { width: 80px; display: flex; align-items: center; border-radius: 4px; justify-content: center; height: 100%; border: 1px solid #00c58e; cursor: pointer;}.nav__link:active { background-color: #00c58e; border: 1px solid #00c58e; color: #fff; box-shadow: 5px 3px 5px 2px #3f41468c;}.home { padding-top: 30px;}.home__heading { text-align: center;}.directories { display: flex; box-sizing: border-box; padding: 10px; max-width: 1000px; margin: 0 auto; flex-wrap: wrap; justify-content: center;}@media (min-width: 768px) { .directories { justify-content: space-between; }}.directory__container { width: 100%; max-width: 220px; cursor: pointer; border-radius: 4px; border: 1px solid #00c58e; display: flex; height: 60px; margin: 10px 5px; margin-right: 0; justify-content: center; align-items: center;}.directory__name { text-align: center;}.directory { width: 100%; margin: 50px auto; max-width: 450px; border-radius: 4px; border: 1px solid #00c58e; box-sizing: border-box; padding: 10px 0;}.directory__info { padding-left: 10px; line-height: 22px; padding-right: 10px;}
The styles above will be used across the application for what we’ll be building. As you can see we have styles for the navigation and other aspects which we’ll plug into the application as we progress.
Components This folder is one we’re familiar with from Vue.js, it contains your reusable components.
Now, let’s create our first component and name it navBar.vue, and add the following code to it. We want the navbar of the site to display the logo and link to the Home and About pages which we will create in future. This navbar will be visible across the application. It will also make use of some styles that we have added above.
<template> <header class="header"> <div class="logo"> <nUXt-link to="/"> <Logo /> </nUXt-link> </div> <nav class="nav"> <div class="nav__link"> <nUXt-link to="/">Home</nUXt-link> </div> <div class="nav__link"> <nUXt-link to="/About">About</nUXt-link> </div> </nav> </header></template><script>import Logo from "@/components/Logo";export default { name: "nav-bar", components: { Logo }};</script><style></style>
The template section contains what will be visible to the user. We have a header element which contains our logo and nav links. For us to link to the pages, we make use of nUXt-link which provides navigation between component pages.
In the script section, we import the logo component using Nuxt alias @ and declared it in our component for use by adding it as a component. This makes it possible for us to render it in the template.
Layout Here, we’ll be storing our application layouts. This is particularly useful if your application’s design calls for two or more layouts, e.g. one for authenticated users and another for guests or admins. For the purpose of this tutorial, we’ll be sticking to the default layout.
Let us open our default.vue file and add our navBar component to the layout of our application.
<template> <div> <Nav /> <nUXt /> </div></template><script>import Nav from "~/components/navBar.vue";export default { components: { Nav }};</script>
In the template section, we’ve added our Nav component inside the layout container to always appear at the top after importing it into the file and declaring it in the script section.
The next thing after our Nav component is <nUXt />, which tells NUXt where to render all its routes.
This Nav component is the one we created above. By adding it here, the Nav component will be used across the application.
Middleware This folder was created to house JavaScript files that are required to run before a page(s) is rendered. If you’ve ever used the Vuejs navigation guard, this folder was created for files like that.
Pages This is another folder that developers with Vuejs background would not be familiar with. It works in such a way that every *.vue file is created as a route in your application so it serves as both views and a router folder at the same time, we’ll talk more about this in the next section.
Plugins This is where you store files that you want to run before mounting the root Vue.js application. It is not a required folder so it can be deleted.
nUXt.config.js This file is used to configure your application, it is usually pre-populated based on the config when creating your app. An ideal nUXt.config.js file should look like this by default:
export default { mode: 'universal', /* ** Headers of the page */ head: { title: process.env.npm_package_name || '', meta: [ { charset: 'utf-8' }, { name: 'viewport', content: 'width=device-width, initial-scale=1' }, { hid: 'description', name: 'description', content: process.env.npm_package_description || '' } ], link: [ { rel: 'icon', type: 'image/x-icon', href: '/favicon.ico' } ] }, /* ** Customize the progress-bar color */ loading: { color: '#fff' }, /* ** Global CSS */ css: [ ], /* ** Plugins to load before mounting the App */ plugins: [ ], /* ** NUXt.js dev-modules */ buildModules: [ ], /* ** NUXt.js modules */ modules: [ ], /* ** Build configuration */ build: { /* ** You can extend webpack config here */ extend (config, ctx) { } }}
Each time a change is made to this file, your application will automatically restart to reflect the changes. Let’s go over what the properties used in the file mean.
Mode The type of application; either universal or spa. By selecting universal, you’re telling NUXt that you want your app to be able to run on both the server-side and the client-side.
Head All the default meta tags properties and favicon link found inside the head tag in your app is found here. This is because NUXt.js doesn’t have a default index.html file, unlike Vue.js.
loading All NUXt applications come with a default loader component and the color can be customized here.
css You’re expected to enter the link to all your global CSS files so your application can take it into account when mounting the application. We’re going to add the link to our css file to this and restart our application.
/* ** Global CSS */ css: ["~/assets/styles/main.css"]
plugins This is where you connect all the plugins in your plugins folder to the application. It takes in an object with properties such as src that accepts the file path to the plugin and a mode that configures how your application treats such plugin; either as a server-side plugin or a client-side plugin. For example:
{ src: '~/plugins/universal-plugin.js' }, // for server and client plugins{ src: '~/plugins/client-side.js', mode: 'client' }, // for client only plugins{ src: '~/plugins/server-side.js', mode: 'server' }, // for server side only plugins
This is important to avoid error either on the server-side or client-side especially if your plugin requires something like localStorage that is not available on the server-side.
For more info about the nUXt.config.js file, check out the official doc.
Nuxt Pages And Routing System
The pages folder in your NUXt application is used to configure your application’s routes, i.e. your route name is dependent on the name of each file in this folder, e.g. if you have an about.vue file inside your pages file, it means you now have an /about route in your app, but that’s not all. What happens if you want a dynamic route for your application? Or a nested route? How do you go about it? let’s find out.
Basic Routes
Basic routes can be classified as routes that do not require extra configuration for them to work. For example, a direct route /work or a /contact route. So if your pages folder looks like this:
pages/--| me/ -----| index.vue -----| about.vue--| work.vue--| contact.vue--| index.vue
NUXt would automatically generate a router config that looks like this:
router: { routes: [ { name: 'index', path: '/', component: 'pages/index.vue' }, { name: 'work', path: '/work', component: 'pages/work' }, { name: 'contact', path: '/contact', component: 'pages/contact' }, { name: 'me', path: '/me', component: 'pages/me/index.vue' }, { name: 'me-about', path: '/me/about', component: 'pages/me/about.vue' } ]}
These paths can then be used to access the components tied to them. You can see that the path does not contain pages. And NUXt handles the components named index.vue as it should without an additional config for that.
Nested Routes
To create a nested route, create a folder called dashboard inside the pages folder. This folder should contain all the files you want to nest in it. For example, user.vue and settings.vue. Then at the root of pages folder, create a file called dashboard.vue.
pages/ --| me/ -----| index.vue -----| about.vue --| dashboard/ -----| user.vue -----| settings.vue --| dashboard.vue --| work.vue --| contact.vue --| index.vue
This would automatically generate a router with routes that look like this:
router: { routes: [ { name: 'index', path: '/', component: 'pages/index.vue' }, { name: 'work', path: '/work', component: 'pages/work' }, { name: 'contact', path: '/contact', component: 'pages/contact' }, { name: 'me', path: '/me', component: 'pages/me/index.vue' }, { name: 'me-about', path: '/me/about', component: 'pages/me/about.vue' }, { name: 'dashboard', path: '/dashboard', component: 'pages/dashboard.vue', children: [ { name: 'dashboard-user', path: '/dashboard/user', component: 'pages/dashboard/user.vue' }, { name: 'dashboard-settings', path: '/dashboard/settings', component: 'pages/dashboard/settings.vue' } ] } ]}
Notice that the route name always follows a regular pattern:
name of the folder + '-' + name of the file
With this, you can be sure that each route will have a unique name.
Dynamic Routes
Dynamic routes are routes that are defined by a variable, this variable can either be a name, number or an id gotten from client data on the app. This comes in handy when working with an API, where the id will likely be the id of the item coming from the database.
In NUXt, dynamic routes are defined by appending an _ to a file name or folder name in the pages folder. For instance, if you want a dynamic route whose variable name is id, all you need is to name your file _id.vue and NUXt automatically creates a dynamic route for you. For example:
pages/--| me/-----| index.vue-----| about.vue-----| _routeName-------| index.vue-------| info.vue--| dashboard/-----| user.vue-----| settings.vue--| dashboard.vue--| work.vue--| _id.vue--| contact.vue--| index.vue
This would automatically create a router file with the following routes,
{ name: 'work', path: '/work', component: 'pages/work' }, { name: 'contact', path: '/contact', component: 'pages/contact' }, { name: 'id', path: '/:id', component: 'pages/_id.vue' } { name: 'me', path: '/me', component: 'pages/me/index.vue' }, { name: 'me-about', path: '/me/about', component: 'pages/me/about.vue' }, { name: 'me-routeName', path: '/me/:routeName', component: 'pages/me/_routeName/index.vue' }, { name: 'me-routeName-info', path: '/me/:routeName/info', component: 'pages/me/route.vue' }, { name: 'dashboard', path: '/dashboard', component: 'pages/dashboard.vue', children: [ { name: 'dashboard-user', path: '/dashboard/user', component: 'pages/dashboard/user.vue' }, { name: 'dashboard-settings', path: '/dashboard/settings', component: 'pages/dashboard/settings.vue' } ] } ]}
Although some of the Vue.js router tags work in NUXt and can be used interchangeably, it is recommended that we use NUXt router components. Here are some of the differences between the NUXt Router tags and Vue.js Router tags.
VueJsNUXtJSrouter-linknUXt-linkrouter-view (for nested routes)nUXt-childrouter-view(default)nUXt
Difference between vue.js router and nUXt.js router
At this point, Here’s what your app should look like this, with the navigation shown at the top.
The Landing page. (Large preview)
Now that we understand how NUXt pages and Routes work, let’s add our first page and route about.vue. This page would list some directories in the application with a link to a new page that shows more information about such directory.
Let us add the following code to it:
<template> <section class="home"> <h1 class="home__heading">About NUXtjs Directory Structure</h1> <div class="directories"> <div class="directory__container" v-for="directory in directories" :key="directory.id"> <p class="directory__name"> <nUXt-link :to="{ name: 'id', params: { id: directory.id, dir: directory } }" ></nUXt-link> </p> </div> </div> </section></template><script>export default { name: "about-nUXt", data() { return { directories: [ { id: 0, name: "The Assets Directory", info: "By default, NUXt uses vue-loader, file-loader and url-loader webpack loaders for strong assets serving. You can also use the static directory for static assets. This folder is for un-compiled files such as images, font files, SASS, LESS or JavaScript files" }, { id: 1, name: "The Components Directory", info: "The components directory contains your Vue.js Components. You can’t use asyncData in these components." }, { id: 2, name: "The Layouts Directory", info: "The layouts directory includes your application layouts. Layouts are used to change the look and feel of your page (for example by including a sidebar). Layouts are a great help when you want to change the look and feel of your NUXt.js app. Whether you want to include a sidebar or having distinct layouts for mobile and desktop" }, { id: 3, name: "The Middleware Directory", info: "The middleware directory contains your Application Middleware. Middleware lets you define custom functions that can be run before rendering either a page or a group of pages (layouts)." }, { id: 4, name: "The Pages Directory", info: "The pages directory contains your Application Views and Routes. The framework reads all the .vue files inside this directory and creates the application router. Every Page component is a Vue component but NUXt.js adds special attributes and functions to make the development of your universal application as easy as possible" }, { id: 5, name: "The Plugins Directory", info: "The plugins directory contains your Javascript plugins that you want to run before instantiating the root Vue.js Application. This is the place to register components globally and to inject functions or constants. NUXt.js allows you to define JavaScript plugins to be run before instantiating the root Vue.js Application. This is especially helpful when using your own libraries or external modules." }, { id: 6, name: "The Static Directory", info: "The static directory is directly mapped to the server root (/static/robots.txt is accessible under http://localhost:3000/robots.txt) and contains files that likely won’t be changed (e.g. the favicon). If you don’t want to use Webpack assets from the assets directory, you can create and use the static directory (in your project root folder)." }, { id: 7, name: "The Store Directory", info: "The store directory contains your Vuex Store files. The Vuex Store comes with NUXt.js out of the box but is disabled by default. Creating an index.js file in this directory enables the store. Using a store to manage the state is important for every big application. That’s why NUXt.js implements Vuex in its core." } ] }; }};</script><style></style>
Starting from the script section, we created an array which we store in the directories variable. Each array contains an object with id, name, and info. This is the data we’ll show to the user when this page is opened. We want to show it to the user such that the names are clickable.
We do that in the template section, using v-for to loop through the array. This makes it possible to get each item in the array, which we can access using directory. In the loop, we use nUXt-link to handle the linking of each time. Using nUXt-link, we pass the details (id, name and info) of each directory item via nUXt router. We do this because we want to be able to display this on the show page when the user clicks on an item.
If you navigate to the /about route using your browser, you should see something like this:
About page. (Large preview)
Now, let’s create a new file and name it _id.vue. This would automatically create a dynamic route that takes the id param from the link display a little information about any directory clicked on from the About page.
Let us add this to our file:
<template> <section class="directory"> <h1 class="directory__name"></h1> <p class="directory__info"></p> </section></template><script>export default { name: "directory-info", data() { return { directory: this.$route.params.dir }; }};</script><style></style>
What we have done is to create a page that fetches data from the route param dir using the this.$route.params. This gets us the name and info of the clicked directory, which we then display to the user.
So if you click on any directory link (e.g. store directory), you should see this.
What the ID page looks like. (Large preview)
But there’s a problem, if you refresh this page, your directory info gets lost and you get an error. This would be fixed using our Vuex Store so let’s dive into it.
Using Vuex Store In Nuxt
Vuex can be accessed in NUXt using two modes:
Classic mode (deprecated).
Modules mode.
Modules mode
NUXt automatically creates a Store folder upon the creation of your app. In Modules mode, NUXt would treat every file inside this folder as a module but index.js is required for Vuex store to be activated in your app. So let’s create an index.js file in our store folder and set it up for use. Let us add the following to our file.
index.js
export const state = () => ({ }) export const getters = { } export const mutations = { } export const actions = { }
All we have done is to set up the store for our file with all we might need; the state for storing data, getters for performing extra manipulation to our state, mutations for modifying our state and actions for committing mutations.
NUXt also allows users to separate each core concept into different files which means we can have store.js, getters.js, mutation.js and action.js and this is good as it makes for easy maintainability. Now, we fix the problem of directory disappearing on refresh, we’ll use the store, but first, we need to install and set up Vuex persist for our store.
Install Vuex persist from npm using either command below, depending on your preference.
$ npm install --save vuex-persist
or
$ yarn add vuex-persist
After installing, we’re going to create a vuex-persist.js file in our plugins folder and add the following:
import VuexPersistence from 'vuex-persist' export default ({ store}) => { window.onNUXtReady(() => { new VuexPersistence({ storage: window.localStorage }).plugin(store); });}
Here, we import our plugin from node-modules and configure it to save your store in localStorage. This plugin allows you to choose other storage options such as sessionStorage too so feel free to explore their documentation for more info.
Remember to add it to your nUXt.config.js file.
/* ** Plugins to load before mounting the App */ plugins: [{ src: '~/plugins/vuex-persist', mode: 'client' }],
Here, we added the file path to our plugin and told NUXt to only run this plugin on the client side of this application.
Now, we can set our store up to accept and store directory info. Update your store to handle directory info like this:
export const state = () => ({ directory: ''})export const getters = {}export const mutations = { saveInfo(state, payload) { state.directory = payload.directory }}export const actions = {}
What we’ve done is to add a directory state to our store and a mutation function saveInfo that modifies the value of the directory state we added to our store in anticipation of the data we’d be passing it soon.
Next, in your about.vue file, update it to look like this.
<template> <section class="home"> <h1 class="home__heading">About NUXtjs Directory Structure</h1> <div class="directories"> <div class="directory__container" v-for="directory in directories" :key="directory.id" @click.prevent="storeDirectoryInfo(directory)" > <p class="directory__name"> <nUXt-link :to="{ name: 'id', params: { id: directory.id, dir: directory } }" ></nUXt-link> </p> </div> </div> </section></template><script>export default { name: "about-nUXt", data() { return { directories: [ //remains the same ] }; }, methods: { storeDirectoryInfo(dir) { this.$store.commit("saveInfo", { directory: dir }); } }};</script><style></style>
Now, we’ve added a click event to every directory container that passes the directory info as an argument to the storeDirectoryInfo. In this function, we commit the directory object to our store.
Finally, we would go back to our _id.vue file and replace the directory variable with our data from the store like this:
<template> <section class="directory" v-if="directory"> <h1 class="directory__name"></h1> <p class="directory__info"></p> </section></template><script>import { mapState } from "vuex";export default { name: "directory-info", computed: { ...mapState(["directory"]) }};</script><style></style>
Here, we refactor our code to use directory object directly from our store by first importing mapState from Vuex.
import { mapState } from 'vuex';
Instead of first checking if this.$route.params.dir is undefined before accessing the data from our store, we decide to use our store by reading the data that’s in the store.
<script>import { mapState } from "vuex";export default { name: "directory-info", computed: { ...mapState(["directory"]) }};</script>
Then we update our template to make sure it doesn’t render while directory is undefined.
<template> <section class="directory" v-if="directory"> <h1 class="directory__name"></h1> <p class="directory__info"></p> </section></template>
On doing this, no matter how many times we refresh our app, our directory object is safe in our store and can be easily accessed using the …mapState(['stateVariable']) method.
Deploying To Heroku
Now that our nUXt-tutorial-app app is complete, what’s next? Deploying our shiny new app to production.
We’ll be deploying our NUXt.js app to Heroku using Github for easy deployment so if you’ve not set up a repository for your app, now would be a time to do so. The next thing would be to open Heroku and create a new app, choose a name and connect it to GitHub and the repo created above. Next, go to your settings, you should see something like this.
Heroku App settings page. (Large preview)
Now, add the following config variables.
NPM_CONFIG_PRODUCTION=falseHOST=0.0.0.0NODE_ENV=production
The next thing we have to do is to create a Procfile in the root folder of our app (same level as nUXt.config.js) and enter this command:
web: nUXt start
This will run the nUXt start command and tell Heroku to direct external HTTP traffic to it.
After adding the Procfile to your app, commit and push your changes to your repo. If you have automatic deploys enabled for your app, your app should be live and accessible from its URL. If you can see your app live, congratulations! you have successfully built and deployed your first NUXt.js application.
Conclusion
Now that we know how to create a basic NUXt application and deploy to Heroku, what’s next? Here are some resources that cover things like using Axios in NUXt and implementing authentication in your app.
Using the axios module.
Implementing Authentication in Nuxt.
NUXt.js official documentation.
nUXt-tutorial-app Github repo.
(ks, ra, yk, il)
Website Design & SEO Delray Beach by DBL07.co
Delray Beach SEO
Via http://www.scpie.org/getting-started-with-nuxt/
source https://scpie.weebly.com/blog/getting-started-with-nuxt
0 notes
Text
Crafts & Arts - Handmade Artist WordPress
New Post has been published on https://intramate.com/wordpress-themes/crafts-arts-handmade-artist-wordpress/
Crafts & Arts - Handmade Artist WordPress
LIVE PREVIEWGet it now for only $49
Handicraft WordPress Portfolio Theme
Welcome to Crafts Work& Arts theme.
Reviving the traditional handicrafts with improved designs for showcasing your master pieces of creation, Crafts & Arts theme comes with 3 astonishing home page designs namely an artist’s demo, a full-width craft demo, and an elegant crafts demo. The sheer variety of presentation is amazing in Crafts & Arts theme for Fashion Designer Portfolio, Art Portfolio etc., Apart from the versatile home pages, you have 2 options for About Us page that will further augment your showcasing needs in engrossing ways. The blog section and the portfolio section adorn your theme with mesmerizing content which is going to be the key in retaining the attention of the visitors.
Content is king:
Everyone knows that engrossing content on your site is the key. How to build contents that let your visitor stay on your site for a longer time? In Crafts & Arts theme, we have incorporated the Slider Revolution Plugin. Therefore, creating content using the animated content creation tool, would ensure your site will have an edge over the other sites. Let us check their role in depth here.
Visual Composer:
The power of Visual Composer is integrated into Crafts & Arts theme. First of all the Visual Composer Plugin, makes the job of designing a site into a simple drag and drop affair that everyone would love to get their hands on. Using the WYSIWYG–what you see is what you get-interface, it is a piece of cake to design your website like a professional!
Visual Composer Ultimate Addon:
We have taken the next step by including the Visual Composer premium addon Plugin, the Ultimate Addon. The elements like Icon boxes, model Popups, Info Box, Interactive Banner, Flip Box, Info List & Counter are included. Best of all, it provides A Font Icon Manager allowing users to upload/delete custom icon fonts. Parallax, Video Backgrounds, Row effects, CSS3 animations, icon fonts and much more are available in Ultimate Addon. Enjoy!
No coding needed:
The drag and drop page builder makes everyone a designer without the coding know-how! Create pages quickly with few clicks in few minutes with the help of Visual Composer and custom shortcodes.
Single Click Import:
Using the single click demo import, you would be able to download all the demo content and use it as your own after adding your logo and customizing it to suit your craft or art requirements.
WooCommerce:
WooCommerce is a free eCommerce plugin that allows you to sell anything, beautifully. The WooCommerce Plugin would enable you to sell online and receive payments in multiple currencies as soon as your site is configured! Built to integrate seamlessly with WordPress themes, WooCommerce is the world’s favorite eCommerce solution that gives both store owners and developers complete control. With endless flexibility and access to hundreds of free and premium WordPress extensions, WooCommerce now powers 30% of all online stores — more than any other platform.
Unyson:
Unyson is a free Plugin that is easy to configure offering the drag and drop framework coming as it does with a bundle of extensions which will work from the backend fast and easy. Using Unyson, you can create backup and import demo content besides archiving the demo content for migration. You don’t need separate slider Plugins as Unyson comes with 3 built in sliders for images and video. Moreover, you can create amazing Mega Menu to display your menu configurations as a drop-down. In addition, using Unyson, you can create dynamic sidebars, filtering animations in portfolios, breadcrumbs, forms, SEO analysis, feedback and event management functions without opting for those Plugins! A simple and easy way to build a powerful website.
Designthemes Core Features Plugin:
A simple WordPress plugin designed to implement core features of DesignThemes. Version 1.0 of this Plugin is integrated into the themes by DesignThemes. You designing of the layout and pages become a lot simpler with this Plugin.
Slider Revolution:
Slider Revolution is an innovative, responsive WordPress Slider Plugin that displays your content the beautiful way. Whether it’s a Slider, Carousel, Hero Scene … even a whole Front Page, the visual, drag & drop editor will let you tell your own stories in no time! Build Modern & Mobile-Friendly Presentations. In Crafts & Arts theme it’s easier than you think!
Google Maps:
Using Google map, display multiple markers on each map and multiple maps on each page. Google Maps comes with a shortcode builder together with 50 colorful map styles. The shortcode is very easy to generate and the map is very easy to use. In addition, you can easily edit a previously created shortcode!
Regenerate Thumbnails:
Regenerate Thumbnails lets you regenerate the thumbnails for your image attachments. This is particularly useful if you’ve changed any of your thumbnail dimensions. Or had changed to a new theme with different featured post image dimensions. You can either regenerate the thumbnails for all image uploads, individual image uploads, or specific multiple image uploads.
Contact Form 7:
Using contact form 7 design as many forms with an unlimited number of input row fields in your form. You can design your own forms and limit spam and increase conversion. When you are running a site, there may be different requirements for forms to be configured from time to time. In Crafts & Arts theme, Contact Form 7 would handle all.
Typography:
With more than 600+ Google webfonts and the FontAwesome icons, you can set any color or size on your site and design your pages at will.
Legendary Support:
Using the extensive documentation, knowledge base and video tutorials you can get any clarification you may require about Crafts & Arts theme, 24/7. Go for Crafts & Arts theme and showcase your masterpieces to the world. Good luck.
Note: Images used in the demo are not included for download, these images are copyrighted, if you are planning to use the photos we can provide the links to buy license.
*Crafts And Arts WordPress Theme Changelog *
2019.06.10 – version 1.4
* Gutenberg Latest update compatible * Fixed - GDPR Product single page comment box issue * Fixed - nice scroll issue * Updated wpml xml file * Updated latest version of all third party plugins * Updated - language pot files * Some design tweaks
2018.12.28 – version 1.3
* Gutenberg Compatible * Latest wordpress version 5.0.2 compatible * Updated latest version of all third party plugins * Updated documentation
2018.06.18 – version 1.2
* Fix - Bulk plugins install issue * Fix - Woocommerce outdated files * Fix - Updated the no link menu issue * Fix - Iphone sidebar issue * Fix - Add target attribute for social media * Fix - Option for change the site title color * Fix - Unyson Page Bilder Conflict * Fix - Nav Menu Role Plugin compatible. * Fix - Added the smile fonts folder * Fix - Updated theme options save issue * Fix - Woocommerce custom sidebar issue * Updated documentation * Updated language files * Updated all third party plugins * Updated designthemes core features plugin * Fix - All theme functions updated for child theme support * Fix - Buddypress issue * Fix - Event Category text added * Fix - Twitter feeds links issue * Fix - Color Picker Issue * Fix - BuddhaPanel Files update * Fix - youtube and vimeo video issue in https * Fix - Event Category text added
2017.08.17 – version 1.1
* Updated dummy data
2017.08.10 – version 1.0
* First release!
LIVE PREVIEWGet it now for only $49
0 notes
Link
Web Designing Course Syllabus
Best Web Designing Training institution is SkillXpert. Learn Web Designing Training with onf of the software industry expert, who have been dealing with Testing Applications since a decade.
Introduction to Web Technologies
How the Website Works? Types of Websites (Static, Dynamic and CMS Websites) Responsive Web Designing Client and Server Scripting Languages Domains and Hosting Web Standards and W3C recommendations Careers in Web Technologies and Job Roles
Adobe Photoshop
Introduction to Adobe Photoshop Interface Tour of Photoshop Document settings – Dimensions,Color Modes,Resolution and Presets Move Tool Marque Tool Lasso Tool Quick Selection, Magic Wand Crop, Slicing Tool Healing Brush, Patch Tool Brush Tool History Brush Eraser Tool Pattern Stamp, Clone Stamp Gradient Tool Blur and Exposure Tool Pen Tool, Shape Tool Text Tool Other Photoshop Tools Layers, Groups and Smart Object Blending Options Filter Effects Client requirement Analysis Realtime Website Layout Design Responsive Design with Grids Practical Task in Layout Design
HTML 4.01
Introduction to HTML Basic Structure of HTML Difference Between HTML and XHTML Head Section and its Elements Meta, CSS, Script, Title and Favicon HTML 4 tags Table tag and div tag Headings, Paragraph, Lists, Pre and Span Tags Anchor Links and Named Anchors Image Tag,Object Tag,Iframe Tag Form Tag and its attributes POST and GET Method Fieldset and Legend Text input, Text area Checkbox and Radio Button Dropdown, List and Optgroup File Upload and Hidden Fields Submit, Image, Normal, Reset Button
HTML 5
HTML 5 tags Header,Nav,Main,Section,Article tags Aside,Figure,Dialog,Details,Summary and Footer tags Mark,Figcaption,Code and Cite tags Audio and Video tags Input tag new attributes and values Buttons,Datalist,Required,Placeholder and Autofocus Using HTML tags in realtime websites HTML Validators
Adobe Dreamweaver CC
Introduction to Adobe Dreamweaver Dreamweaver Interface Basics Creating new documents Working with modes Definging a Site Creating root-site folder and its elements Working with previews Designing interface using Insert tools Properties Panel Template Design in DW Editable and Non-Editable Regions Defining the DWT for project. Working with errors, validating code
CSS 2
Introduction to Cascading Style Sheets Defining CSS CSS Selectors Universal Selector ID Selector Tag Selector Class Selector Sub Selector Child Selector Adjacent Sibling Selector Attribute Selector Group selector CSS 2 Properties Type Properties Background Properties Block Properties Box Properties List Properties Border Properties Positioning Propeties Realtime Implementation CSS Menu Design (Horizontal, Vertical and Drop-down menus) Form Designing
CSS 3 Advanced Selectors
nth-child() and nth-of-type first-of-type and last-of-type first-child and last-child first-line and first-letter before and after CSS 3 Properties Rounded corners Advanced Background Properties Shadow property New Font properties Opacity Gradients Transition and Transform properties Animation properties
Responsive Web Design + BootStrap
Introduction to Responsive Design Devices and their dimension ranges View-port tag Using css media queries Basic Custom Layout Introduction to Bootstrap Installation of Bootstrap Grid System Forms Buttons Tables and Images Image sliders Icons Integration Realtime page design using bootstrap
Java Script
Introduction to Client Side Scripting Introduction to Java Script Javascript Types Variables in JS Datatypes in JS Operators in JS Conditional Statements Java Script Loops JS Popup Boxes JS Events JS Arrays JS Objects JS Functions Using Java Script in Realtime Validation of Forms
jQuery and jQuery UI
Introduction to jQuery jQuery Features Installing jQuery jQuery Syntax jQuery Ready Function jQuery Selectors jQuery Actions jQuery plugins jQuery Validation plugin jQuery Slideshow jQuery Dropdown jQuery UI Working with jQueryUI jQuery Accordions jQuery Tabs jQuery Tooltips jQuery Autocomplete
Domain and Hosting
Web Hosting Basics Types of Hosting Packages Registering domains Defining Name Servers Using Control Panel Creating Emails in Cpanel Using FTP Client Maintaining a Website
Wordpress
Introduction to CMS Introduction to WordPress Installation of wordpress application Installing a theme Using Dashboard and its components Creating Pages Setting Menu Installing plugins Editing content Customizing Techniques
Angular Javascript
Introduction to AngularJS Installation of angularJS application Components in angularJS Directives Modules Expressions Controllers Built-in-directives Filters and Tabs Examples for applications
Website Design Project
Clients Requirement Analysis Planning the Website Creating the HTML/CSS Structure Creating project using Bootstrap Integration of Features using JS and jQuery Project Testing
Web Designing Resources and Material
Graphics (Icon, Buttons, Backgrounds) Photoshop (Brushes, Patterns, Textures, Styles, Gradients, Actions) PSD Templates Study Material in PDF Daily Notes in Class All class examples files on our FTP server space for easy access Professional CSS Templates Professional Flash Templates 100 Stock Photos for Website Work Java Scripts and Jquery Files (Date, Slideshow, Dropdowns, Modal and Ajax Scripts) 100% Job Assistance till you get placed Demo Project in course Email Support for any issues after the course
0 notes
Text
Getting Started With Nuxt
About The Author
Front-end developer based in Lagos, Nigeria. He enjoys converting designs into code and building things for the web. More about Timi …
Developers often worry about the SEO Company of their SPAs (Single Page Applications) and how well they would do on Google searches (blogs, portfolio websites, product websites, and so on). Sometimes, they also worry about how complex building a server-side rendered application might be. In this tutorial, we’re going to learn how to create server-side rendered applications by using NUXt.js, how to configure your application for development, and how to deploy to Heroku.
Web developers build a lot of Single Page Applications using JavaScript frameworks (Angular, React, Vue). SPAs dynamically populate the contents of their pages on load which means by the time Google crawls their site, the important content is yet to be injected into the site. Part of this problem can be solved by pre-rendering your application’s content. This is where server-side applications come in, and for Vuejs developers, we can build server-side applications using NUXt.js.
We’re going to assume that you have not used it before, as such it will start from the ground-up — introducing you to NUXt.js, its file structure and how routing works. While also touching how you can get it to work with Vuex.
At the end of this tutorial, you should be able to go on to build basic web applications in NUXt.js, and if you have been wondering how to get started with NUXt.js, this will do justice to that.
This article is targeted at those that are fairly familiar with Vue.js and it’s a concept, For those without knowledge of Vue.js, consider starting from the official Vuejs documentation and The Net Ninja’s Vuejs playlist.
What Is Nuxt.js?
According to their official page:
“NUXt is a progressive framework based on Vue.js to create modern web applications. It is based on Vue.js official libraries (vue, vue-router and vuex) and powerful development tools (webpack, Babel and PostCSS). NUXt’s goal is to make web development powerful and performant with great developer experience in mind.”
It allows you to create three types of applications, depending on the purpose it’s intended for:
Static Generated pages (Pre-rendering) Static generated applications do not require API requests to fetch the contents of the pages, i.e. the contents are already included in the HTML file. An example of a static site is a portfolio website or a landing page for a product.
Single Page Application Most JavaScript frameworks (React, Angular, Emberjs, Vue, etc) are single page application whose contents are dynamically populated with faster transitions. Most SPAs make use of the HTML5 history API or the location Hash for routing.
Server Side Rendered Applications (SSR) Server-Side Rendering is a technique used to fetch and display client-side data on the server to send a fully rendered page to the client. This is a good approach to get good SEO Company for your application.
Creating Your First Nuxt.js Application
You can create a NUXt.js application in two ways:
Using the scaffolding tool create-nUXt-app.
From scratch.
In case you just want to see the finished app that we would be building, here’s a link to the GitHub repo.
In this tutorial, we would be focused on using create-nUXt-app so let’s get started. If you have npx installed, open your terminal and run this command:
$ npx create-nUXt-app nUXt-tutorial-app
or
$ yarn create nUXt-app nUXt-tutorial-app
For the purpose of this tutorial, nUXt-tutorial-app is the name of the application but feel free to name yours differently.
This would be followed by a list of options that help in configuring your application with what you might need for development.
Here’s what my configuration looks like:
NUXt conguration options. (Large preview)
For the purpose of this tutorial, we do not need axios, linting and Prettier configurations.
Once that is done, we’ll run the following command in our terminal:
$ cd nUXt-tutorial-app $ npm run dev
Your app should now be running on http://localhost:3000 and this is what you should see:
NUXt scaffolding default landing page. (Large preview)
At this point, your app is ready for development.
Understanding Nuxt Folder Structure
Scaffolding the application as we did creates different files and folders which we can start working with. For someone who hasn’t work with NUXt before, this might throw you off balance. So we’ll be looking at the folders, getting to understand their importance.
Assets This folder is for un-compiled files such as images, font files, SASS, LESS or JavaScript files. Let us add create a styles folder and a main.css file and copy and paste the following in it.
a { text-decoration: none; color: inherit; cursor: pointer; } .header { width: 100%; max-width: 500px; margin-left: auto; margin-right: auto; height: 60px; top: 0; position: sticky; background-color: #fff; display: flex; justify-content: space-between; align-items: center; } .logo { width: 40%; max-width: 200px; height: 40px; } .logo .NUXtLogo { max-width: 30px; margin-left: 10px; max-height: 40px; } .nav { width: 60%; height: 40px; display: flex; justify-content: space-between; padding-right: 10px; max-width: 300px; } .nav__link { width: 80px; display: flex; align-items: center; border-radius: 4px; justify-content: center; height: 100%; border: 1px solid #00c58e; cursor: pointer; } .nav__link:active { background-color: #00c58e; border: 1px solid #00c58e; color: #fff; box-shadow: 5px 3px 5px 2px #3f41468c; } .home { padding-top: 30px; } .home__heading { text-align: center; } .directories { display: flex; box-sizing: border-box; padding: 10px; max-width: 1000px; margin: 0 auto; flex-wrap: wrap; justify-content: center; } @media (min-width: 768px) { .directories { justify-content: space-between; } } .directory__container { width: 100%; max-width: 220px; cursor: pointer; border-radius: 4px; border: 1px solid #00c58e; display: flex; height: 60px; margin: 10px 5px; margin-right: 0; justify-content: center; align-items: center; } .directory__name { text-align: center; } .directory { width: 100%; margin: 50px auto; max-width: 450px; border-radius: 4px; border: 1px solid #00c58e; box-sizing: border-box; padding: 10px 0; } .directory__info { padding-left: 10px; line-height: 22px; padding-right: 10px; }
The styles above will be used across the application for what we’ll be building. As you can see we have styles for the navigation and other aspects which we’ll plug into the application as we progress.
Components This folder is one we’re familiar with from Vue.js, it contains your reusable components.
Now, let’s create our first component and name it navBar.vue, and add the following code to it. We want the navbar of the site to display the logo and link to the Home and About pages which we will create in future. This navbar will be visible across the application. It will also make use of some styles that we have added above.
<template> <header class="header"> <div class="logo"> <nUXt-link to="/"> <Logo /> </nUXt-link> </div> <nav class="nav"> <div class="nav__link"> <nUXt-link to="/">Home</nUXt-link> </div> <div class="nav__link"> <nUXt-link to="/About">About</nUXt-link> </div> </nav> </header> </template> <script> import Logo from "@/components/Logo"; export default { name: "nav-bar", components: { Logo } }; </script> <style> </style>
The template section contains what will be visible to the user. We have a header element which contains our logo and nav links. For us to link to the pages, we make use of nUXt-link which provides navigation between component pages.
In the script section, we import the logo component using Nuxt alias @ and declared it in our component for use by adding it as a component. This makes it possible for us to render it in the template.
Layout Here, we’ll be storing our application layouts. This is particularly useful if your application’s design calls for two or more layouts, e.g. one for authenticated users and another for guests or admins. For the purpose of this tutorial, we’ll be sticking to the default layout.
Let us open our default.vue file and add our navBar component to the layout of our application.
<template> <div> <Nav /> <nUXt /> </div> </template> <script> import Nav from "~/components/navBar.vue"; export default { components: { Nav } }; </script>
In the template section, we’ve added our Nav component inside the layout container to always appear at the top after importing it into the file and declaring it in the script section.
The next thing after our Nav component is <nUXt />, which tells NUXt where to render all its routes.
This Nav component is the one we created above. By adding it here, the Nav component will be used across the application.
Middleware This folder was created to house JavaScript files that are required to run before a page(s) is rendered. If you’ve ever used the Vuejs navigation guard, this folder was created for files like that.
Pages This is another folder that developers with Vuejs background would not be familiar with. It works in such a way that every *.vue file is created as a route in your application so it serves as both views and a router folder at the same time, we’ll talk more about this in the next section.
Plugins This is where you store files that you want to run before mounting the root Vue.js application. It is not a required folder so it can be deleted.
nUXt.config.js This file is used to configure your application, it is usually pre-populated based on the config when creating your app. An ideal nUXt.config.js file should look like this by default:
export default { mode: 'universal', /* ** Headers of the page */ head: { title: process.env.npm_package_name || '', meta: [ { charset: 'utf-8' }, { name: 'viewport', content: 'width=device-width, initial-scale=1' }, { hid: 'description', name: 'description', content: process.env.npm_package_description || '' } ], link: [ { rel: 'icon', type: 'image/x-icon', href: '/favicon.ico' } ] }, /* ** Customize the progress-bar color */ loading: { color: '#fff' }, /* ** Global CSS */ css: [ ], /* ** Plugins to load before mounting the App */ plugins: [ ], /* ** NUXt.js dev-modules */ buildModules: [ ], /* ** NUXt.js modules */ modules: [ ], /* ** Build configuration */ build: { /* ** You can extend webpack config here */ extend (config, ctx) { } } }
Each time a change is made to this file, your application will automatically restart to reflect the changes. Let’s go over what the properties used in the file mean.
Mode The type of application; either universal or spa. By selecting universal, you’re telling NUXt that you want your app to be able to run on both the server-side and the client-side.
Head All the default meta tags properties and favicon link found inside the head tag in your app is found here. This is because NUXt.js doesn’t have a default index.html file, unlike Vue.js.
loading All NUXt applications come with a default loader component and the color can be customized here.
css You’re expected to enter the link to all your global CSS files so your application can take it into account when mounting the application. We’re going to add the link to our css file to this and restart our application.
/* ** Global CSS */ css: ["~/assets/styles/main.css"]
plugins This is where you connect all the plugins in your plugins folder to the application. It takes in an object with properties such as src that accepts the file path to the plugin and a mode that configures how your application treats such plugin; either as a server-side plugin or a client-side plugin. For example:
{ src: '~/plugins/universal-plugin.js' }, // for server and client plugins { src: '~/plugins/client-side.js', mode: 'client' }, // for client only plugins { src: '~/plugins/server-side.js', mode: 'server' }, // for server side only plugins
This is important to avoid error either on the server-side or client-side especially if your plugin requires something like localStorage that is not available on the server-side.
For more info about the nUXt.config.js file, check out the official doc.
Nuxt Pages And Routing System
The pages folder in your NUXt application is used to configure your application’s routes, i.e. your route name is dependent on the name of each file in this folder, e.g. if you have an about.vue file inside your pages file, it means you now have an /about route in your app, but that’s not all. What happens if you want a dynamic route for your application? Or a nested route? How do you go about it? let’s find out.
Basic Routes
Basic routes can be classified as routes that do not require extra configuration for them to work. For example, a direct route /work or a /contact route. So if your pages folder looks like this:
pages/ --| me/ -----| index.vue -----| about.vue --| work.vue --| contact.vue --| index.vue
NUXt would automatically generate a router config that looks like this:
router: { routes: [ { name: 'index', path: '/', component: 'pages/index.vue' }, { name: 'work', path: '/work', component: 'pages/work' }, { name: 'contact', path: '/contact', component: 'pages/contact' }, { name: 'me', path: '/me', component: 'pages/me/index.vue' }, { name: 'me-about', path: '/me/about', component: 'pages/me/about.vue' } ] }
These paths can then be used to access the components tied to them. You can see that the path does not contain pages. And NUXt handles the components named index.vue as it should without an additional config for that.
Nested Routes
To create a nested route, create a folder called dashboard inside the pages folder. This folder should contain all the files you want to nest in it. For example, user.vue and settings.vue. Then at the root of pages folder, create a file called dashboard.vue.
pages/ --| me/ -----| index.vue -----| about.vue --| dashboard/ -----| user.vue -----| settings.vue --| dashboard.vue --| work.vue --| contact.vue --| index.vue
This would automatically generate a router with routes that look like this:
router: { routes: [ { name: 'index', path: '/', component: 'pages/index.vue' }, { name: 'work', path: '/work', component: 'pages/work' }, { name: 'contact', path: '/contact', component: 'pages/contact' }, { name: 'me', path: '/me', component: 'pages/me/index.vue' }, { name: 'me-about', path: '/me/about', component: 'pages/me/about.vue' }, { name: 'dashboard', path: '/dashboard', component: 'pages/dashboard.vue', children: [ { name: 'dashboard-user', path: '/dashboard/user', component: 'pages/dashboard/user.vue' }, { name: 'dashboard-settings', path: '/dashboard/settings', component: 'pages/dashboard/settings.vue' } ] } ] }
Notice that the route name always follows a regular pattern:
name of the folder + '-' + name of the file
With this, you can be sure that each route will have a unique name.
Dynamic Routes
Dynamic routes are routes that are defined by a variable, this variable can either be a name, number or an id gotten from client data on the app. This comes in handy when working with an API, where the id will likely be the id of the item coming from the database.
In NUXt, dynamic routes are defined by appending an _ to a file name or folder name in the pages folder. For instance, if you want a dynamic route whose variable name is id, all you need is to name your file _id.vue and NUXt automatically creates a dynamic route for you. For example:
pages/ --| me/ -----| index.vue -----| about.vue -----| _routeName -------| index.vue -------| info.vue --| dashboard/ -----| user.vue -----| settings.vue --| dashboard.vue --| work.vue --| _id.vue --| contact.vue --| index.vue
This would automatically create a router file with the following routes,
{ name: 'work', path: '/work', component: 'pages/work' }, { name: 'contact', path: '/contact', component: 'pages/contact' }, { name: 'id', path: '/:id', component: 'pages/_id.vue' } { name: 'me', path: '/me', component: 'pages/me/index.vue' }, { name: 'me-about', path: '/me/about', component: 'pages/me/about.vue' }, { name: 'me-routeName', path: '/me/:routeName', component: 'pages/me/_routeName/index.vue' }, { name: 'me-routeName-info', path: '/me/:routeName/info', component: 'pages/me/route.vue' }, { name: 'dashboard', path: '/dashboard', component: 'pages/dashboard.vue', children: [ { name: 'dashboard-user', path: '/dashboard/user', component: 'pages/dashboard/user.vue' }, { name: 'dashboard-settings', path: '/dashboard/settings', component: 'pages/dashboard/settings.vue' } ] } ] }
Although some of the Vue.js router tags work in NUXt and can be used interchangeably, it is recommended that we use NUXt router components. Here are some of the differences between the NUXt Router tags and Vue.js Router tags.
VueJsNUXtJSrouter-linknUXt-linkrouter-view (for nested routes)nUXt-childrouter-view(default)nUXt
Difference between vue.js router and nUXt.js router
At this point, Here’s what your app should look like this, with the navigation shown at the top.
The Landing page. (Large preview)
Now that we understand how NUXt pages and Routes work, let’s add our first page and route about.vue. This page would list some directories in the application with a link to a new page that shows more information about such directory.
Let us add the following code to it:
<template> <section class="home"> <h1 class="home__heading">About NUXtjs Directory Structure</h1> <div class="directories"> <div class="directory__container" v-for="directory in directories" :key="directory.id"> <p class="directory__name"> <nUXt-link :to="{ name: 'id', params: { id: directory.id, dir: directory } }" ></nUXt-link> </p> </div> </div> </section> </template> <script> export default { name: "about-nUXt", data() { return { directories: [ { id: 0, name: "The Assets Directory", info: "By default, NUXt uses vue-loader, file-loader and url-loader webpack loaders for strong assets serving. You can also use the static directory for static assets. This folder is for un-compiled files such as images, font files, SASS, LESS or JavaScript files" }, { id: 1, name: "The Components Directory", info: "The components directory contains your Vue.js Components. You can’t use asyncData in these components." }, { id: 2, name: "The Layouts Directory", info: "The layouts directory includes your application layouts. Layouts are used to change the look and feel of your page (for example by including a sidebar). Layouts are a great help when you want to change the look and feel of your NUXt.js app. Whether you want to include a sidebar or having distinct layouts for mobile and desktop" }, { id: 3, name: "The Middleware Directory", info: "The middleware directory contains your Application Middleware. Middleware lets you define custom functions that can be run before rendering either a page or a group of pages (layouts)." }, { id: 4, name: "The Pages Directory", info: "The pages directory contains your Application Views and Routes. The framework reads all the .vue files inside this directory and creates the application router. Every Page component is a Vue component but NUXt.js adds special attributes and functions to make the development of your universal application as easy as possible" }, { id: 5, name: "The Plugins Directory", info: "The plugins directory contains your Javascript plugins that you want to run before instantiating the root Vue.js Application. This is the place to register components globally and to inject functions or constants. NUXt.js allows you to define JavaScript plugins to be run before instantiating the root Vue.js Application. This is especially helpful when using your own libraries or external modules." }, { id: 6, name: "The Static Directory", info: "The static directory is directly mapped to the server root (/static/robots.txt is accessible under http://localhost:3000/robots.txt) and contains files that likely won’t be changed (e.g. the favicon). If you don’t want to use Webpack assets from the assets directory, you can create and use the static directory (in your project root folder)." }, { id: 7, name: "The Store Directory", info: "The store directory contains your Vuex Store files. The Vuex Store comes with NUXt.js out of the box but is disabled by default. Creating an index.js file in this directory enables the store. Using a store to manage the state is important for every big application. That’s why NUXt.js implements Vuex in its core." } ] }; } }; </script> <style> </style>
Starting from the script section, we created an array which we store in the directories variable. Each array contains an object with id, name, and info. This is the data we’ll show to the user when this page is opened. We want to show it to the user such that the names are clickable.
We do that in the template section, using v-for to loop through the array. This makes it possible to get each item in the array, which we can access using directory. In the loop, we use nUXt-link to handle the linking of each time. Using nUXt-link, we pass the details (id, name and info) of each directory item via nUXt router. We do this because we want to be able to display this on the show page when the user clicks on an item.
If you navigate to the /about route using your browser, you should see something like this:
About page. (Large preview)
Now, let’s create a new file and name it _id.vue. This would automatically create a dynamic route that takes the id param from the link display a little information about any directory clicked on from the About page.
Let us add this to our file:
<template> <section class="directory"> <h1 class="directory__name"></h1> <p class="directory__info"></p> </section> </template> <script> export default { name: "directory-info", data() { return { directory: this.$route.params.dir }; } }; </script> <style> </style>
What we have done is to create a page that fetches data from the route param dir using the this.$route.params. This gets us the name and info of the clicked directory, which we then display to the user.
So if you click on any directory link (e.g. store directory), you should see this.
What the ID page looks like. (Large preview)
But there’s a problem, if you refresh this page, your directory info gets lost and you get an error. This would be fixed using our Vuex Store so let’s dive into it.
Using Vuex Store In Nuxt
Vuex can be accessed in NUXt using two modes:
Classic mode (deprecated).
Modules mode.
Modules mode
NUXt automatically creates a Store folder upon the creation of your app. In Modules mode, NUXt would treat every file inside this folder as a module but index.js is required for Vuex store to be activated in your app. So let’s create an index.js file in our store folder and set it up for use. Let us add the following to our file.
index.js
export const state = () => ({ }) export const getters = { } export const mutations = { } export const actions = { }
All we have done is to set up the store for our file with all we might need; the state for storing data, getters for performing extra manipulation to our state, mutations for modifying our state and actions for committing mutations.
NUXt also allows users to separate each core concept into different files which means we can have store.js, getters.js, mutation.js and action.js and this is good as it makes for easy maintainability. Now, we fix the problem of directory disappearing on refresh, we’ll use the store, but first, we need to install and set up Vuex persist for our store.
Install Vuex persist from npm using either command below, depending on your preference.
$ npm install --save vuex-persist
or
$ yarn add vuex-persist
After installing, we’re going to create a vuex-persist.js file in our plugins folder and add the following:
import VuexPersistence from 'vuex-persist' export default ({ store }) => { window.onNUXtReady(() => { new VuexPersistence({ storage: window.localStorage }).plugin(store); }); }
Here, we import our plugin from node-modules and configure it to save your store in localStorage. This plugin allows you to choose other storage options such as sessionStorage too so feel free to explore their documentation for more info.
Remember to add it to your nUXt.config.js file.
/* ** Plugins to load before mounting the App */ plugins: [{ src: '~/plugins/vuex-persist', mode: 'client' }],
Here, we added the file path to our plugin and told NUXt to only run this plugin on the client side of this application.
Now, we can set our store up to accept and store directory info. Update your store to handle directory info like this:
export const state = () => ({ directory: '' }) export const getters = { } export const mutations = { saveInfo(state, payload) { state.directory = payload.directory } } export const actions = { }
What we’ve done is to add a directory state to our store and a mutation function saveInfo that modifies the value of the directory state we added to our store in anticipation of the data we’d be passing it soon.
Next, in your about.vue file, update it to look like this.
<template> <section class="home"> <h1 class="home__heading">About NUXtjs Directory Structure</h1> <div class="directories"> <div class="directory__container" v-for="directory in directories" :key="directory.id" @click.prevent="storeDirectoryInfo(directory)" > <p class="directory__name"> <nUXt-link :to="{ name: 'id', params: { id: directory.id, dir: directory } }" ></nUXt-link> </p> </div> </div> </section> </template> <script> export default { name: "about-nUXt", data() { return { directories: [ //remains the same ] }; }, methods: { storeDirectoryInfo(dir) { this.$store.commit("saveInfo", { directory: dir }); } } }; </script> <style> </style>
Now, we’ve added a click event to every directory container that passes the directory info as an argument to the storeDirectoryInfo. In this function, we commit the directory object to our store.
Finally, we would go back to our _id.vue file and replace the directory variable with our data from the store like this:
<template> <section class="directory" v-if="directory"> <h1 class="directory__name"></h1> <p class="directory__info"></p> </section> </template> <script> import { mapState } from "vuex"; export default { name: "directory-info", computed: { ...mapState(["directory"]) } }; </script> <style></style>
Here, we refactor our code to use directory object directly from our store by first importing mapState from Vuex.
import { mapState } from 'vuex';
Instead of first checking if this.$route.params.dir is undefined before accessing the data from our store, we decide to use our store by reading the data that’s in the store.
<script> import { mapState } from "vuex"; export default { name: "directory-info", computed: { ...mapState(["directory"]) } }; </script>
Then we update our template to make sure it doesn’t render while directory is undefined.
<template> <section class="directory" v-if="directory"> <h1 class="directory__name"></h1> <p class="directory__info"></p> </section> </template>
On doing this, no matter how many times we refresh our app, our directory object is safe in our store and can be easily accessed using the …mapState(['stateVariable']) method.
Deploying To Heroku
Now that our nUXt-tutorial-app app is complete, what’s next? Deploying our shiny new app to production.
We’ll be deploying our NUXt.js app to Heroku using Github for easy deployment so if you’ve not set up a repository for your app, now would be a time to do so. The next thing would be to open Heroku and create a new app, choose a name and connect it to GitHub and the repo created above. Next, go to your settings, you should see something like this.
Heroku App settings page. (Large preview)
Now, add the following config variables.
NPM_CONFIG_PRODUCTION=false HOST=0.0.0.0 NODE_ENV=production
The next thing we have to do is to create a Procfile in the root folder of our app (same level as nUXt.config.js) and enter this command:
web: nUXt start
This will run the nUXt start command and tell Heroku to direct external HTTP traffic to it.
After adding the Procfile to your app, commit and push your changes to your repo. If you have automatic deploys enabled for your app, your app should be live and accessible from its URL. If you can see your app live, congratulations! you have successfully built and deployed your first NUXt.js application.
Conclusion
Now that we know how to create a basic NUXt application and deploy to Heroku, what’s next? Here are some resources that cover things like using Axios in NUXt and implementing authentication in your app.
Using the axios module.
Implementing Authentication in Nuxt.
NUXt.js official documentation.
nUXt-tutorial-app Github repo.
(ks, ra, yk, il)
Website Design & SEO Delray Beach by DBL07.co
Delray Beach SEO
source http://www.scpie.org/getting-started-with-nuxt/ source https://scpie1.blogspot.com/2020/04/getting-started-with-nuxt.html
0 notes
Text
Getting Started With Nuxt
About The Author
Front-end developer based in Lagos, Nigeria. He enjoys converting designs into code and building things for the web. More about Timi …
Developers often worry about the SEO Company of their SPAs (Single Page Applications) and how well they would do on Google searches (blogs, portfolio websites, product websites, and so on). Sometimes, they also worry about how complex building a server-side rendered application might be. In this tutorial, we’re going to learn how to create server-side rendered applications by using NUXt.js, how to configure your application for development, and how to deploy to Heroku.
Web developers build a lot of Single Page Applications using JavaScript frameworks (Angular, React, Vue). SPAs dynamically populate the contents of their pages on load which means by the time Google crawls their site, the important content is yet to be injected into the site. Part of this problem can be solved by pre-rendering your application’s content. This is where server-side applications come in, and for Vuejs developers, we can build server-side applications using NUXt.js.
We’re going to assume that you have not used it before, as such it will start from the ground-up — introducing you to NUXt.js, its file structure and how routing works. While also touching how you can get it to work with Vuex.
At the end of this tutorial, you should be able to go on to build basic web applications in NUXt.js, and if you have been wondering how to get started with NUXt.js, this will do justice to that.
This article is targeted at those that are fairly familiar with Vue.js and it’s a concept, For those without knowledge of Vue.js, consider starting from the official Vuejs documentation and The Net Ninja’s Vuejs playlist.
What Is Nuxt.js?
According to their official page:
“NUXt is a progressive framework based on Vue.js to create modern web applications. It is based on Vue.js official libraries (vue, vue-router and vuex) and powerful development tools (webpack, Babel and PostCSS). NUXt’s goal is to make web development powerful and performant with great developer experience in mind.”
It allows you to create three types of applications, depending on the purpose it’s intended for:
Static Generated pages (Pre-rendering) Static generated applications do not require API requests to fetch the contents of the pages, i.e. the contents are already included in the HTML file. An example of a static site is a portfolio website or a landing page for a product.
Single Page Application Most JavaScript frameworks (React, Angular, Emberjs, Vue, etc) are single page application whose contents are dynamically populated with faster transitions. Most SPAs make use of the HTML5 history API or the location Hash for routing.
Server Side Rendered Applications (SSR) Server-Side Rendering is a technique used to fetch and display client-side data on the server to send a fully rendered page to the client. This is a good approach to get good SEO Company for your application.
Creating Your First Nuxt.js Application
You can create a NUXt.js application in two ways:
Using the scaffolding tool create-nUXt-app.
From scratch.
In case you just want to see the finished app that we would be building, here’s a link to the GitHub repo.
In this tutorial, we would be focused on using create-nUXt-app so let’s get started. If you have npx installed, open your terminal and run this command:
$ npx create-nUXt-app nUXt-tutorial-app
or
$ yarn create nUXt-app nUXt-tutorial-app
For the purpose of this tutorial, nUXt-tutorial-app is the name of the application but feel free to name yours differently.
This would be followed by a list of options that help in configuring your application with what you might need for development.
Here’s what my configuration looks like:
NUXt conguration options. (Large preview)
For the purpose of this tutorial, we do not need axios, linting and Prettier configurations.
Once that is done, we’ll run the following command in our terminal:
$ cd nUXt-tutorial-app $ npm run dev
Your app should now be running on http://localhost:3000 and this is what you should see:
NUXt scaffolding default landing page. (Large preview)
At this point, your app is ready for development.
Understanding Nuxt Folder Structure
Scaffolding the application as we did creates different files and folders which we can start working with. For someone who hasn’t work with NUXt before, this might throw you off balance. So we’ll be looking at the folders, getting to understand their importance.
Assets This folder is for un-compiled files such as images, font files, SASS, LESS or JavaScript files. Let us add create a styles folder and a main.css file and copy and paste the following in it.
a { text-decoration: none; color: inherit; cursor: pointer; } .header { width: 100%; max-width: 500px; margin-left: auto; margin-right: auto; height: 60px; top: 0; position: sticky; background-color: #fff; display: flex; justify-content: space-between; align-items: center; } .logo { width: 40%; max-width: 200px; height: 40px; } .logo .NUXtLogo { max-width: 30px; margin-left: 10px; max-height: 40px; } .nav { width: 60%; height: 40px; display: flex; justify-content: space-between; padding-right: 10px; max-width: 300px; } .nav__link { width: 80px; display: flex; align-items: center; border-radius: 4px; justify-content: center; height: 100%; border: 1px solid #00c58e; cursor: pointer; } .nav__link:active { background-color: #00c58e; border: 1px solid #00c58e; color: #fff; box-shadow: 5px 3px 5px 2px #3f41468c; } .home { padding-top: 30px; } .home__heading { text-align: center; } .directories { display: flex; box-sizing: border-box; padding: 10px; max-width: 1000px; margin: 0 auto; flex-wrap: wrap; justify-content: center; } @media (min-width: 768px) { .directories { justify-content: space-between; } } .directory__container { width: 100%; max-width: 220px; cursor: pointer; border-radius: 4px; border: 1px solid #00c58e; display: flex; height: 60px; margin: 10px 5px; margin-right: 0; justify-content: center; align-items: center; } .directory__name { text-align: center; } .directory { width: 100%; margin: 50px auto; max-width: 450px; border-radius: 4px; border: 1px solid #00c58e; box-sizing: border-box; padding: 10px 0; } .directory__info { padding-left: 10px; line-height: 22px; padding-right: 10px; }
The styles above will be used across the application for what we’ll be building. As you can see we have styles for the navigation and other aspects which we’ll plug into the application as we progress.
Components This folder is one we’re familiar with from Vue.js, it contains your reusable components.
Now, let’s create our first component and name it navBar.vue, and add the following code to it. We want the navbar of the site to display the logo and link to the Home and About pages which we will create in future. This navbar will be visible across the application. It will also make use of some styles that we have added above.
<template> <header class="header"> <div class="logo"> <nUXt-link to="/"> <Logo /> </nUXt-link> </div> <nav class="nav"> <div class="nav__link"> <nUXt-link to="/">Home</nUXt-link> </div> <div class="nav__link"> <nUXt-link to="/About">About</nUXt-link> </div> </nav> </header> </template> <script> import Logo from "@/components/Logo"; export default { name: "nav-bar", components: { Logo } }; </script> <style> </style>
The template section contains what will be visible to the user. We have a header element which contains our logo and nav links. For us to link to the pages, we make use of nUXt-link which provides navigation between component pages.
In the script section, we import the logo component using Nuxt alias @ and declared it in our component for use by adding it as a component. This makes it possible for us to render it in the template.
Layout Here, we’ll be storing our application layouts. This is particularly useful if your application’s design calls for two or more layouts, e.g. one for authenticated users and another for guests or admins. For the purpose of this tutorial, we’ll be sticking to the default layout.
Let us open our default.vue file and add our navBar component to the layout of our application.
<template> <div> <Nav /> <nUXt /> </div> </template> <script> import Nav from "~/components/navBar.vue"; export default { components: { Nav } }; </script>
In the template section, we’ve added our Nav component inside the layout container to always appear at the top after importing it into the file and declaring it in the script section.
The next thing after our Nav component is <nUXt />, which tells NUXt where to render all its routes.
This Nav component is the one we created above. By adding it here, the Nav component will be used across the application.
Middleware This folder was created to house JavaScript files that are required to run before a page(s) is rendered. If you’ve ever used the Vuejs navigation guard, this folder was created for files like that.
Pages This is another folder that developers with Vuejs background would not be familiar with. It works in such a way that every *.vue file is created as a route in your application so it serves as both views and a router folder at the same time, we’ll talk more about this in the next section.
Plugins This is where you store files that you want to run before mounting the root Vue.js application. It is not a required folder so it can be deleted.
nUXt.config.js This file is used to configure your application, it is usually pre-populated based on the config when creating your app. An ideal nUXt.config.js file should look like this by default:
export default { mode: 'universal', /* ** Headers of the page */ head: { title: process.env.npm_package_name || '', meta: [ { charset: 'utf-8' }, { name: 'viewport', content: 'width=device-width, initial-scale=1' }, { hid: 'description', name: 'description', content: process.env.npm_package_description || '' } ], link: [ { rel: 'icon', type: 'image/x-icon', href: '/favicon.ico' } ] }, /* ** Customize the progress-bar color */ loading: { color: '#fff' }, /* ** Global CSS */ css: [ ], /* ** Plugins to load before mounting the App */ plugins: [ ], /* ** NUXt.js dev-modules */ buildModules: [ ], /* ** NUXt.js modules */ modules: [ ], /* ** Build configuration */ build: { /* ** You can extend webpack config here */ extend (config, ctx) { } } }
Each time a change is made to this file, your application will automatically restart to reflect the changes. Let’s go over what the properties used in the file mean.
Mode The type of application; either universal or spa. By selecting universal, you’re telling NUXt that you want your app to be able to run on both the server-side and the client-side.
Head All the default meta tags properties and favicon link found inside the head tag in your app is found here. This is because NUXt.js doesn’t have a default index.html file, unlike Vue.js.
loading All NUXt applications come with a default loader component and the color can be customized here.
css You’re expected to enter the link to all your global CSS files so your application can take it into account when mounting the application. We’re going to add the link to our css file to this and restart our application.
/* ** Global CSS */ css: ["~/assets/styles/main.css"]
plugins This is where you connect all the plugins in your plugins folder to the application. It takes in an object with properties such as src that accepts the file path to the plugin and a mode that configures how your application treats such plugin; either as a server-side plugin or a client-side plugin. For example:
{ src: '~/plugins/universal-plugin.js' }, // for server and client plugins { src: '~/plugins/client-side.js', mode: 'client' }, // for client only plugins { src: '~/plugins/server-side.js', mode: 'server' }, // for server side only plugins
This is important to avoid error either on the server-side or client-side especially if your plugin requires something like localStorage that is not available on the server-side.
For more info about the nUXt.config.js file, check out the official doc.
Nuxt Pages And Routing System
The pages folder in your NUXt application is used to configure your application’s routes, i.e. your route name is dependent on the name of each file in this folder, e.g. if you have an about.vue file inside your pages file, it means you now have an /about route in your app, but that’s not all. What happens if you want a dynamic route for your application? Or a nested route? How do you go about it? let’s find out.
Basic Routes
Basic routes can be classified as routes that do not require extra configuration for them to work. For example, a direct route /work or a /contact route. So if your pages folder looks like this:
pages/ --| me/ -----| index.vue -----| about.vue --| work.vue --| contact.vue --| index.vue
NUXt would automatically generate a router config that looks like this:
router: { routes: [ { name: 'index', path: '/', component: 'pages/index.vue' }, { name: 'work', path: '/work', component: 'pages/work' }, { name: 'contact', path: '/contact', component: 'pages/contact' }, { name: 'me', path: '/me', component: 'pages/me/index.vue' }, { name: 'me-about', path: '/me/about', component: 'pages/me/about.vue' } ] }
These paths can then be used to access the components tied to them. You can see that the path does not contain pages. And NUXt handles the components named index.vue as it should without an additional config for that.
Nested Routes
To create a nested route, create a folder called dashboard inside the pages folder. This folder should contain all the files you want to nest in it. For example, user.vue and settings.vue. Then at the root of pages folder, create a file called dashboard.vue.
pages/ --| me/ -----| index.vue -----| about.vue --| dashboard/ -----| user.vue -----| settings.vue --| dashboard.vue --| work.vue --| contact.vue --| index.vue
This would automatically generate a router with routes that look like this:
router: { routes: [ { name: 'index', path: '/', component: 'pages/index.vue' }, { name: 'work', path: '/work', component: 'pages/work' }, { name: 'contact', path: '/contact', component: 'pages/contact' }, { name: 'me', path: '/me', component: 'pages/me/index.vue' }, { name: 'me-about', path: '/me/about', component: 'pages/me/about.vue' }, { name: 'dashboard', path: '/dashboard', component: 'pages/dashboard.vue', children: [ { name: 'dashboard-user', path: '/dashboard/user', component: 'pages/dashboard/user.vue' }, { name: 'dashboard-settings', path: '/dashboard/settings', component: 'pages/dashboard/settings.vue' } ] } ] }
Notice that the route name always follows a regular pattern:
name of the folder + '-' + name of the file
With this, you can be sure that each route will have a unique name.
Dynamic Routes
Dynamic routes are routes that are defined by a variable, this variable can either be a name, number or an id gotten from client data on the app. This comes in handy when working with an API, where the id will likely be the id of the item coming from the database.
In NUXt, dynamic routes are defined by appending an _ to a file name or folder name in the pages folder. For instance, if you want a dynamic route whose variable name is id, all you need is to name your file _id.vue and NUXt automatically creates a dynamic route for you. For example:
pages/ --| me/ -----| index.vue -----| about.vue -----| _routeName -------| index.vue -------| info.vue --| dashboard/ -----| user.vue -----| settings.vue --| dashboard.vue --| work.vue --| _id.vue --| contact.vue --| index.vue
This would automatically create a router file with the following routes,
{ name: 'work', path: '/work', component: 'pages/work' }, { name: 'contact', path: '/contact', component: 'pages/contact' }, { name: 'id', path: '/:id', component: 'pages/_id.vue' } { name: 'me', path: '/me', component: 'pages/me/index.vue' }, { name: 'me-about', path: '/me/about', component: 'pages/me/about.vue' }, { name: 'me-routeName', path: '/me/:routeName', component: 'pages/me/_routeName/index.vue' }, { name: 'me-routeName-info', path: '/me/:routeName/info', component: 'pages/me/route.vue' }, { name: 'dashboard', path: '/dashboard', component: 'pages/dashboard.vue', children: [ { name: 'dashboard-user', path: '/dashboard/user', component: 'pages/dashboard/user.vue' }, { name: 'dashboard-settings', path: '/dashboard/settings', component: 'pages/dashboard/settings.vue' } ] } ] }
Although some of the Vue.js router tags work in NUXt and can be used interchangeably, it is recommended that we use NUXt router components. Here are some of the differences between the NUXt Router tags and Vue.js Router tags.
VueJs NUXtJS router-link nUXt-link router-view (for nested routes) nUXt-child router-view(default) nUXt
Difference between vue.js router and nUXt.js router
At this point, Here’s what your app should look like this, with the navigation shown at the top.
The Landing page. (Large preview)
Now that we understand how NUXt pages and Routes work, let’s add our first page and route about.vue. This page would list some directories in the application with a link to a new page that shows more information about such directory.
Let us add the following code to it:
<template> <section class="home"> <h1 class="home__heading">About NUXtjs Directory Structure</h1> <div class="directories"> <div class="directory__container" v-for="directory in directories" :key="directory.id"> <p class="directory__name"> <nUXt-link :to="{ name: 'id', params: { id: directory.id, dir: directory } }" ></nUXt-link> </p> </div> </div> </section> </template> <script> export default { name: "about-nUXt", data() { return { directories: [ { id: 0, name: "The Assets Directory", info: "By default, NUXt uses vue-loader, file-loader and url-loader webpack loaders for strong assets serving. You can also use the static directory for static assets. This folder is for un-compiled files such as images, font files, SASS, LESS or JavaScript files" }, { id: 1, name: "The Components Directory", info: "The components directory contains your Vue.js Components. You can’t use asyncData in these components." }, { id: 2, name: "The Layouts Directory", info: "The layouts directory includes your application layouts. Layouts are used to change the look and feel of your page (for example by including a sidebar). Layouts are a great help when you want to change the look and feel of your NUXt.js app. Whether you want to include a sidebar or having distinct layouts for mobile and desktop" }, { id: 3, name: "The Middleware Directory", info: "The middleware directory contains your Application Middleware. Middleware lets you define custom functions that can be run before rendering either a page or a group of pages (layouts)." }, { id: 4, name: "The Pages Directory", info: "The pages directory contains your Application Views and Routes. The framework reads all the .vue files inside this directory and creates the application router. Every Page component is a Vue component but NUXt.js adds special attributes and functions to make the development of your universal application as easy as possible" }, { id: 5, name: "The Plugins Directory", info: "The plugins directory contains your Javascript plugins that you want to run before instantiating the root Vue.js Application. This is the place to register components globally and to inject functions or constants. NUXt.js allows you to define JavaScript plugins to be run before instantiating the root Vue.js Application. This is especially helpful when using your own libraries or external modules." }, { id: 6, name: "The Static Directory", info: "The static directory is directly mapped to the server root (/static/robots.txt is accessible under http://localhost:3000/robots.txt) and contains files that likely won’t be changed (e.g. the favicon). If you don’t want to use Webpack assets from the assets directory, you can create and use the static directory (in your project root folder)." }, { id: 7, name: "The Store Directory", info: "The store directory contains your Vuex Store files. The Vuex Store comes with NUXt.js out of the box but is disabled by default. Creating an index.js file in this directory enables the store. Using a store to manage the state is important for every big application. That’s why NUXt.js implements Vuex in its core." } ] }; } }; </script> <style> </style>
Starting from the script section, we created an array which we store in the directories variable. Each array contains an object with id, name, and info. This is the data we’ll show to the user when this page is opened. We want to show it to the user such that the names are clickable.
We do that in the template section, using v-for to loop through the array. This makes it possible to get each item in the array, which we can access using directory. In the loop, we use nUXt-link to handle the linking of each time. Using nUXt-link, we pass the details (id, name and info) of each directory item via nUXt router. We do this because we want to be able to display this on the show page when the user clicks on an item.
If you navigate to the /about route using your browser, you should see something like this:
About page. (Large preview)
Now, let’s create a new file and name it _id.vue. This would automatically create a dynamic route that takes the id param from the link display a little information about any directory clicked on from the About page.
Let us add this to our file:
<template> <section class="directory"> <h1 class="directory__name"></h1> <p class="directory__info"></p> </section> </template> <script> export default { name: "directory-info", data() { return { directory: this.$route.params.dir }; } }; </script> <style> </style>
What we have done is to create a page that fetches data from the route param dir using the this.$route.params. This gets us the name and info of the clicked directory, which we then display to the user.
So if you click on any directory link (e.g. store directory), you should see this.
What the ID page looks like. (Large preview)
But there’s a problem, if you refresh this page, your directory info gets lost and you get an error. This would be fixed using our Vuex Store so let’s dive into it.
Using Vuex Store In Nuxt
Vuex can be accessed in NUXt using two modes:
Classic mode (deprecated).
Modules mode.
Modules mode
NUXt automatically creates a Store folder upon the creation of your app. In Modules mode, NUXt would treat every file inside this folder as a module but index.js is required for Vuex store to be activated in your app. So let’s create an index.js file in our store folder and set it up for use. Let us add the following to our file.
index.js
export const state = () => ({ }) export const getters = { } export const mutations = { } export const actions = { }
All we have done is to set up the store for our file with all we might need; the state for storing data, getters for performing extra manipulation to our state, mutations for modifying our state and actions for committing mutations.
NUXt also allows users to separate each core concept into different files which means we can have store.js, getters.js, mutation.js and action.js and this is good as it makes for easy maintainability. Now, we fix the problem of directory disappearing on refresh, we’ll use the store, but first, we need to install and set up Vuex persist for our store.
Install Vuex persist from npm using either command below, depending on your preference.
$ npm install --save vuex-persist
or
$ yarn add vuex-persist
After installing, we’re going to create a vuex-persist.js file in our plugins folder and add the following:
import VuexPersistence from 'vuex-persist' export default ({ store }) => { window.onNUXtReady(() => { new VuexPersistence({ storage: window.localStorage }).plugin(store); }); }
Here, we import our plugin from node-modules and configure it to save your store in localStorage. This plugin allows you to choose other storage options such as sessionStorage too so feel free to explore their documentation for more info.
Remember to add it to your nUXt.config.js file.
/* ** Plugins to load before mounting the App */ plugins: [{ src: '~/plugins/vuex-persist', mode: 'client' }],
Here, we added the file path to our plugin and told NUXt to only run this plugin on the client side of this application.
Now, we can set our store up to accept and store directory info. Update your store to handle directory info like this:
export const state = () => ({ directory: '' }) export const getters = { } export const mutations = { saveInfo(state, payload) { state.directory = payload.directory } } export const actions = { }
What we’ve done is to add a directory state to our store and a mutation function saveInfo that modifies the value of the directory state we added to our store in anticipation of the data we’d be passing it soon.
Next, in your about.vue file, update it to look like this.
<template> <section class="home"> <h1 class="home__heading">About NUXtjs Directory Structure</h1> <div class="directories"> <div class="directory__container" v-for="directory in directories" :key="directory.id" @click.prevent="storeDirectoryInfo(directory)" > <p class="directory__name"> <nUXt-link :to="{ name: 'id', params: { id: directory.id, dir: directory } }" ></nUXt-link> </p> </div> </div> </section> </template> <script> export default { name: "about-nUXt", data() { return { directories: [ //remains the same ] }; }, methods: { storeDirectoryInfo(dir) { this.$store.commit("saveInfo", { directory: dir }); } } }; </script> <style> </style>
Now, we’ve added a click event to every directory container that passes the directory info as an argument to the storeDirectoryInfo. In this function, we commit the directory object to our store.
Finally, we would go back to our _id.vue file and replace the directory variable with our data from the store like this:
<template> <section class="directory" v-if="directory"> <h1 class="directory__name"></h1> <p class="directory__info"></p> </section> </template> <script> import { mapState } from "vuex"; export default { name: "directory-info", computed: { ...mapState(["directory"]) } }; </script> <style></style>
Here, we refactor our code to use directory object directly from our store by first importing mapState from Vuex.
import { mapState } from 'vuex';
Instead of first checking if this.$route.params.dir is undefined before accessing the data from our store, we decide to use our store by reading the data that’s in the store.
<script> import { mapState } from "vuex"; export default { name: "directory-info", computed: { ...mapState(["directory"]) } }; </script>
Then we update our template to make sure it doesn’t render while directory is undefined.
<template> <section class="directory" v-if="directory"> <h1 class="directory__name"></h1> <p class="directory__info"></p> </section> </template>
On doing this, no matter how many times we refresh our app, our directory object is safe in our store and can be easily accessed using the …mapState(['stateVariable']) method.
Deploying To Heroku
Now that our nUXt-tutorial-app app is complete, what’s next? Deploying our shiny new app to production.
We’ll be deploying our NUXt.js app to Heroku using Github for easy deployment so if you’ve not set up a repository for your app, now would be a time to do so. The next thing would be to open Heroku and create a new app, choose a name and connect it to GitHub and the repo created above. Next, go to your settings, you should see something like this.
Heroku App settings page. (Large preview)
Now, add the following config variables.
NPM_CONFIG_PRODUCTION=false HOST=0.0.0.0 NODE_ENV=production
The next thing we have to do is to create a Procfile in the root folder of our app (same level as nUXt.config.js) and enter this command:
web: nUXt start
This will run the nUXt start command and tell Heroku to direct external HTTP traffic to it.
After adding the Procfile to your app, commit and push your changes to your repo. If you have automatic deploys enabled for your app, your app should be live and accessible from its URL. If you can see your app live, congratulations! you have successfully built and deployed your first NUXt.js application.
Conclusion
Now that we know how to create a basic NUXt application and deploy to Heroku, what’s next? Here are some resources that cover things like using Axios in NUXt and implementing authentication in your app.
Using the axios module.
Implementing Authentication in Nuxt.
NUXt.js official documentation.
nUXt-tutorial-app Github repo.
(ks, ra, yk, il)
Website Design & SEO Delray Beach by DBL07.co
Delray Beach SEO
source http://www.scpie.org/getting-started-with-nuxt/ source https://scpie.tumblr.com/post/616566323517980672
0 notes
Text
Getting Started With Nuxt
About The Author
Front-end developer based in Lagos, Nigeria. He enjoys converting designs into code and building things for the web. More about Timi …
Developers often worry about the SEO Company of their SPAs (Single Page Applications) and how well they would do on Google searches (blogs, portfolio websites, product websites, and so on). Sometimes, they also worry about how complex building a server-side rendered application might be. In this tutorial, we’re going to learn how to create server-side rendered applications by using NUXt.js, how to configure your application for development, and how to deploy to Heroku.
Web developers build a lot of Single Page Applications using JavaScript frameworks (Angular, React, Vue). SPAs dynamically populate the contents of their pages on load which means by the time Google crawls their site, the important content is yet to be injected into the site. Part of this problem can be solved by pre-rendering your application’s content. This is where server-side applications come in, and for Vuejs developers, we can build server-side applications using NUXt.js.
We’re going to assume that you have not used it before, as such it will start from the ground-up — introducing you to NUXt.js, its file structure and how routing works. While also touching how you can get it to work with Vuex.
At the end of this tutorial, you should be able to go on to build basic web applications in NUXt.js, and if you have been wondering how to get started with NUXt.js, this will do justice to that.
This article is targeted at those that are fairly familiar with Vue.js and it’s a concept, For those without knowledge of Vue.js, consider starting from the official Vuejs documentation and The Net Ninja’s Vuejs playlist.
What Is Nuxt.js?
According to their official page:
“NUXt is a progressive framework based on Vue.js to create modern web applications. It is based on Vue.js official libraries (vue, vue-router and vuex) and powerful development tools (webpack, Babel and PostCSS). NUXt’s goal is to make web development powerful and performant with great developer experience in mind.”
It allows you to create three types of applications, depending on the purpose it’s intended for:
Static Generated pages (Pre-rendering) Static generated applications do not require API requests to fetch the contents of the pages, i.e. the contents are already included in the HTML file. An example of a static site is a portfolio website or a landing page for a product.
Single Page Application Most JavaScript frameworks (React, Angular, Emberjs, Vue, etc) are single page application whose contents are dynamically populated with faster transitions. Most SPAs make use of the HTML5 history API or the location Hash for routing.
Server Side Rendered Applications (SSR) Server-Side Rendering is a technique used to fetch and display client-side data on the server to send a fully rendered page to the client. This is a good approach to get good SEO Company for your application.
Creating Your First Nuxt.js Application
You can create a NUXt.js application in two ways:
Using the scaffolding tool create-nUXt-app.
From scratch.
In case you just want to see the finished app that we would be building, here’s a link to the GitHub repo.
In this tutorial, we would be focused on using create-nUXt-app so let’s get started. If you have npx installed, open your terminal and run this command:
$ npx create-nUXt-app nUXt-tutorial-app
or
$ yarn create nUXt-app nUXt-tutorial-app
For the purpose of this tutorial, nUXt-tutorial-app is the name of the application but feel free to name yours differently.
This would be followed by a list of options that help in configuring your application with what you might need for development.
Here’s what my configuration looks like:
NUXt conguration options. (Large preview)
For the purpose of this tutorial, we do not need axios, linting and Prettier configurations.
Once that is done, we’ll run the following command in our terminal:
$ cd nUXt-tutorial-app $ npm run dev
Your app should now be running on http://localhost:3000 and this is what you should see:
NUXt scaffolding default landing page. (Large preview)
At this point, your app is ready for development.
Understanding Nuxt Folder Structure
Scaffolding the application as we did creates different files and folders which we can start working with. For someone who hasn’t work with NUXt before, this might throw you off balance. So we’ll be looking at the folders, getting to understand their importance.
Assets This folder is for un-compiled files such as images, font files, SASS, LESS or JavaScript files. Let us add create a styles folder and a main.css file and copy and paste the following in it.
a { text-decoration: none; color: inherit; cursor: pointer; } .header { width: 100%; max-width: 500px; margin-left: auto; margin-right: auto; height: 60px; top: 0; position: sticky; background-color: #fff; display: flex; justify-content: space-between; align-items: center; } .logo { width: 40%; max-width: 200px; height: 40px; } .logo .NUXtLogo { max-width: 30px; margin-left: 10px; max-height: 40px; } .nav { width: 60%; height: 40px; display: flex; justify-content: space-between; padding-right: 10px; max-width: 300px; } .nav__link { width: 80px; display: flex; align-items: center; border-radius: 4px; justify-content: center; height: 100%; border: 1px solid #00c58e; cursor: pointer; } .nav__link:active { background-color: #00c58e; border: 1px solid #00c58e; color: #fff; box-shadow: 5px 3px 5px 2px #3f41468c; } .home { padding-top: 30px; } .home__heading { text-align: center; } .directories { display: flex; box-sizing: border-box; padding: 10px; max-width: 1000px; margin: 0 auto; flex-wrap: wrap; justify-content: center; } @media (min-width: 768px) { .directories { justify-content: space-between; } } .directory__container { width: 100%; max-width: 220px; cursor: pointer; border-radius: 4px; border: 1px solid #00c58e; display: flex; height: 60px; margin: 10px 5px; margin-right: 0; justify-content: center; align-items: center; } .directory__name { text-align: center; } .directory { width: 100%; margin: 50px auto; max-width: 450px; border-radius: 4px; border: 1px solid #00c58e; box-sizing: border-box; padding: 10px 0; } .directory__info { padding-left: 10px; line-height: 22px; padding-right: 10px; }
The styles above will be used across the application for what we’ll be building. As you can see we have styles for the navigation and other aspects which we’ll plug into the application as we progress.
Components This folder is one we’re familiar with from Vue.js, it contains your reusable components.
Now, let’s create our first component and name it navBar.vue, and add the following code to it. We want the navbar of the site to display the logo and link to the Home and About pages which we will create in future. This navbar will be visible across the application. It will also make use of some styles that we have added above.
<template> <header class="header"> <div class="logo"> <nUXt-link to="/"> <Logo /> </nUXt-link> </div> <nav class="nav"> <div class="nav__link"> <nUXt-link to="/">Home</nUXt-link> </div> <div class="nav__link"> <nUXt-link to="/About">About</nUXt-link> </div> </nav> </header> </template> <script> import Logo from "@/components/Logo"; export default { name: "nav-bar", components: { Logo } }; </script> <style> </style>
The template section contains what will be visible to the user. We have a header element which contains our logo and nav links. For us to link to the pages, we make use of nUXt-link which provides navigation between component pages.
In the script section, we import the logo component using Nuxt alias @ and declared it in our component for use by adding it as a component. This makes it possible for us to render it in the template.
Layout Here, we’ll be storing our application layouts. This is particularly useful if your application’s design calls for two or more layouts, e.g. one for authenticated users and another for guests or admins. For the purpose of this tutorial, we’ll be sticking to the default layout.
Let us open our default.vue file and add our navBar component to the layout of our application.
<template> <div> <Nav /> <nUXt /> </div> </template> <script> import Nav from "~/components/navBar.vue"; export default { components: { Nav } }; </script>
In the template section, we’ve added our Nav component inside the layout container to always appear at the top after importing it into the file and declaring it in the script section.
The next thing after our Nav component is <nUXt />, which tells NUXt where to render all its routes.
This Nav component is the one we created above. By adding it here, the Nav component will be used across the application.
Middleware This folder was created to house JavaScript files that are required to run before a page(s) is rendered. If you’ve ever used the Vuejs navigation guard, this folder was created for files like that.
Pages This is another folder that developers with Vuejs background would not be familiar with. It works in such a way that every *.vue file is created as a route in your application so it serves as both views and a router folder at the same time, we’ll talk more about this in the next section.
Plugins This is where you store files that you want to run before mounting the root Vue.js application. It is not a required folder so it can be deleted.
nUXt.config.js This file is used to configure your application, it is usually pre-populated based on the config when creating your app. An ideal nUXt.config.js file should look like this by default:
export default { mode: 'universal', /* ** Headers of the page */ head: { title: process.env.npm_package_name || '', meta: [ { charset: 'utf-8' }, { name: 'viewport', content: 'width=device-width, initial-scale=1' }, { hid: 'description', name: 'description', content: process.env.npm_package_description || '' } ], link: [ { rel: 'icon', type: 'image/x-icon', href: '/favicon.ico' } ] }, /* ** Customize the progress-bar color */ loading: { color: '#fff' }, /* ** Global CSS */ css: [ ], /* ** Plugins to load before mounting the App */ plugins: [ ], /* ** NUXt.js dev-modules */ buildModules: [ ], /* ** NUXt.js modules */ modules: [ ], /* ** Build configuration */ build: { /* ** You can extend webpack config here */ extend (config, ctx) { } } }
Each time a change is made to this file, your application will automatically restart to reflect the changes. Let’s go over what the properties used in the file mean.
Mode The type of application; either universal or spa. By selecting universal, you’re telling NUXt that you want your app to be able to run on both the server-side and the client-side.
Head All the default meta tags properties and favicon link found inside the head tag in your app is found here. This is because NUXt.js doesn’t have a default index.html file, unlike Vue.js.
loading All NUXt applications come with a default loader component and the color can be customized here.
css You’re expected to enter the link to all your global CSS files so your application can take it into account when mounting the application. We’re going to add the link to our css file to this and restart our application.
/* ** Global CSS */ css: ["~/assets/styles/main.css"]
plugins This is where you connect all the plugins in your plugins folder to the application. It takes in an object with properties such as src that accepts the file path to the plugin and a mode that configures how your application treats such plugin; either as a server-side plugin or a client-side plugin. For example:
{ src: '~/plugins/universal-plugin.js' }, // for server and client plugins { src: '~/plugins/client-side.js', mode: 'client' }, // for client only plugins { src: '~/plugins/server-side.js', mode: 'server' }, // for server side only plugins
This is important to avoid error either on the server-side or client-side especially if your plugin requires something like localStorage that is not available on the server-side.
For more info about the nUXt.config.js file, check out the official doc.
Nuxt Pages And Routing System
The pages folder in your NUXt application is used to configure your application’s routes, i.e. your route name is dependent on the name of each file in this folder, e.g. if you have an about.vue file inside your pages file, it means you now have an /about route in your app, but that’s not all. What happens if you want a dynamic route for your application? Or a nested route? How do you go about it? let’s find out.
Basic Routes
Basic routes can be classified as routes that do not require extra configuration for them to work. For example, a direct route /work or a /contact route. So if your pages folder looks like this:
pages/ --| me/ -----| index.vue -----| about.vue --| work.vue --| contact.vue --| index.vue
NUXt would automatically generate a router config that looks like this:
router: { routes: [ { name: 'index', path: '/', component: 'pages/index.vue' }, { name: 'work', path: '/work', component: 'pages/work' }, { name: 'contact', path: '/contact', component: 'pages/contact' }, { name: 'me', path: '/me', component: 'pages/me/index.vue' }, { name: 'me-about', path: '/me/about', component: 'pages/me/about.vue' } ] }
These paths can then be used to access the components tied to them. You can see that the path does not contain pages. And NUXt handles the components named index.vue as it should without an additional config for that.
Nested Routes
To create a nested route, create a folder called dashboard inside the pages folder. This folder should contain all the files you want to nest in it. For example, user.vue and settings.vue. Then at the root of pages folder, create a file called dashboard.vue.
pages/ --| me/ -----| index.vue -----| about.vue --| dashboard/ -----| user.vue -----| settings.vue --| dashboard.vue --| work.vue --| contact.vue --| index.vue
This would automatically generate a router with routes that look like this:
router: { routes: [ { name: 'index', path: '/', component: 'pages/index.vue' }, { name: 'work', path: '/work', component: 'pages/work' }, { name: 'contact', path: '/contact', component: 'pages/contact' }, { name: 'me', path: '/me', component: 'pages/me/index.vue' }, { name: 'me-about', path: '/me/about', component: 'pages/me/about.vue' }, { name: 'dashboard', path: '/dashboard', component: 'pages/dashboard.vue', children: [ { name: 'dashboard-user', path: '/dashboard/user', component: 'pages/dashboard/user.vue' }, { name: 'dashboard-settings', path: '/dashboard/settings', component: 'pages/dashboard/settings.vue' } ] } ] }
Notice that the route name always follows a regular pattern:
name of the folder + '-' + name of the file
With this, you can be sure that each route will have a unique name.
Dynamic Routes
Dynamic routes are routes that are defined by a variable, this variable can either be a name, number or an id gotten from client data on the app. This comes in handy when working with an API, where the id will likely be the id of the item coming from the database.
In NUXt, dynamic routes are defined by appending an _ to a file name or folder name in the pages folder. For instance, if you want a dynamic route whose variable name is id, all you need is to name your file _id.vue and NUXt automatically creates a dynamic route for you. For example:
pages/ --| me/ -----| index.vue -----| about.vue -----| _routeName -------| index.vue -------| info.vue --| dashboard/ -----| user.vue -----| settings.vue --| dashboard.vue --| work.vue --| _id.vue --| contact.vue --| index.vue
This would automatically create a router file with the following routes,
{ name: 'work', path: '/work', component: 'pages/work' }, { name: 'contact', path: '/contact', component: 'pages/contact' }, { name: 'id', path: '/:id', component: 'pages/_id.vue' } { name: 'me', path: '/me', component: 'pages/me/index.vue' }, { name: 'me-about', path: '/me/about', component: 'pages/me/about.vue' }, { name: 'me-routeName', path: '/me/:routeName', component: 'pages/me/_routeName/index.vue' }, { name: 'me-routeName-info', path: '/me/:routeName/info', component: 'pages/me/route.vue' }, { name: 'dashboard', path: '/dashboard', component: 'pages/dashboard.vue', children: [ { name: 'dashboard-user', path: '/dashboard/user', component: 'pages/dashboard/user.vue' }, { name: 'dashboard-settings', path: '/dashboard/settings', component: 'pages/dashboard/settings.vue' } ] } ] }
Although some of the Vue.js router tags work in NUXt and can be used interchangeably, it is recommended that we use NUXt router components. Here are some of the differences between the NUXt Router tags and Vue.js Router tags.
VueJs NUXtJS router-link nUXt-link router-view (for nested routes) nUXt-child router-view(default) nUXt
Difference between vue.js router and nUXt.js router
At this point, Here’s what your app should look like this, with the navigation shown at the top.
The Landing page. (Large preview)
Now that we understand how NUXt pages and Routes work, let’s add our first page and route about.vue. This page would list some directories in the application with a link to a new page that shows more information about such directory.
Let us add the following code to it:
<template> <section class="home"> <h1 class="home__heading">About NUXtjs Directory Structure</h1> <div class="directories"> <div class="directory__container" v-for="directory in directories" :key="directory.id"> <p class="directory__name"> <nUXt-link :to="{ name: 'id', params: { id: directory.id, dir: directory } }" ></nUXt-link> </p> </div> </div> </section> </template> <script> export default { name: "about-nUXt", data() { return { directories: [ { id: 0, name: "The Assets Directory", info: "By default, NUXt uses vue-loader, file-loader and url-loader webpack loaders for strong assets serving. You can also use the static directory for static assets. This folder is for un-compiled files such as images, font files, SASS, LESS or JavaScript files" }, { id: 1, name: "The Components Directory", info: "The components directory contains your Vue.js Components. You can’t use asyncData in these components." }, { id: 2, name: "The Layouts Directory", info: "The layouts directory includes your application layouts. Layouts are used to change the look and feel of your page (for example by including a sidebar). Layouts are a great help when you want to change the look and feel of your NUXt.js app. Whether you want to include a sidebar or having distinct layouts for mobile and desktop" }, { id: 3, name: "The Middleware Directory", info: "The middleware directory contains your Application Middleware. Middleware lets you define custom functions that can be run before rendering either a page or a group of pages (layouts)." }, { id: 4, name: "The Pages Directory", info: "The pages directory contains your Application Views and Routes. The framework reads all the .vue files inside this directory and creates the application router. Every Page component is a Vue component but NUXt.js adds special attributes and functions to make the development of your universal application as easy as possible" }, { id: 5, name: "The Plugins Directory", info: "The plugins directory contains your Javascript plugins that you want to run before instantiating the root Vue.js Application. This is the place to register components globally and to inject functions or constants. NUXt.js allows you to define JavaScript plugins to be run before instantiating the root Vue.js Application. This is especially helpful when using your own libraries or external modules." }, { id: 6, name: "The Static Directory", info: "The static directory is directly mapped to the server root (/static/robots.txt is accessible under http://localhost:3000/robots.txt) and contains files that likely won’t be changed (e.g. the favicon). If you don’t want to use Webpack assets from the assets directory, you can create and use the static directory (in your project root folder)." }, { id: 7, name: "The Store Directory", info: "The store directory contains your Vuex Store files. The Vuex Store comes with NUXt.js out of the box but is disabled by default. Creating an index.js file in this directory enables the store. Using a store to manage the state is important for every big application. That’s why NUXt.js implements Vuex in its core." } ] }; } }; </script> <style> </style>
Starting from the script section, we created an array which we store in the directories variable. Each array contains an object with id, name, and info. This is the data we’ll show to the user when this page is opened. We want to show it to the user such that the names are clickable.
We do that in the template section, using v-for to loop through the array. This makes it possible to get each item in the array, which we can access using directory. In the loop, we use nUXt-link to handle the linking of each time. Using nUXt-link, we pass the details (id, name and info) of each directory item via nUXt router. We do this because we want to be able to display this on the show page when the user clicks on an item.
If you navigate to the /about route using your browser, you should see something like this:
About page. (Large preview)
Now, let’s create a new file and name it _id.vue. This would automatically create a dynamic route that takes the id param from the link display a little information about any directory clicked on from the About page.
Let us add this to our file:
<template> <section class="directory"> <h1 class="directory__name"></h1> <p class="directory__info"></p> </section> </template> <script> export default { name: "directory-info", data() { return { directory: this.$route.params.dir }; } }; </script> <style> </style>
What we have done is to create a page that fetches data from the route param dir using the this.$route.params. This gets us the name and info of the clicked directory, which we then display to the user.
So if you click on any directory link (e.g. store directory), you should see this.
What the ID page looks like. (Large preview)
But there’s a problem, if you refresh this page, your directory info gets lost and you get an error. This would be fixed using our Vuex Store so let’s dive into it.
Using Vuex Store In Nuxt
Vuex can be accessed in NUXt using two modes:
Classic mode (deprecated).
Modules mode.
Modules mode
NUXt automatically creates a Store folder upon the creation of your app. In Modules mode, NUXt would treat every file inside this folder as a module but index.js is required for Vuex store to be activated in your app. So let’s create an index.js file in our store folder and set it up for use. Let us add the following to our file.
index.js
export const state = () => ({ }) export const getters = { } export const mutations = { } export const actions = { }
All we have done is to set up the store for our file with all we might need; the state for storing data, getters for performing extra manipulation to our state, mutations for modifying our state and actions for committing mutations.
NUXt also allows users to separate each core concept into different files which means we can have store.js, getters.js, mutation.js and action.js and this is good as it makes for easy maintainability. Now, we fix the problem of directory disappearing on refresh, we’ll use the store, but first, we need to install and set up Vuex persist for our store.
Install Vuex persist from npm using either command below, depending on your preference.
$ npm install --save vuex-persist
or
$ yarn add vuex-persist
After installing, we’re going to create a vuex-persist.js file in our plugins folder and add the following:
import VuexPersistence from 'vuex-persist' export default ({ store }) => { window.onNUXtReady(() => { new VuexPersistence({ storage: window.localStorage }).plugin(store); }); }
Here, we import our plugin from node-modules and configure it to save your store in localStorage. This plugin allows you to choose other storage options such as sessionStorage too so feel free to explore their documentation for more info.
Remember to add it to your nUXt.config.js file.
/* ** Plugins to load before mounting the App */ plugins: [{ src: '~/plugins/vuex-persist', mode: 'client' }],
Here, we added the file path to our plugin and told NUXt to only run this plugin on the client side of this application.
Now, we can set our store up to accept and store directory info. Update your store to handle directory info like this:
export const state = () => ({ directory: '' }) export const getters = { } export const mutations = { saveInfo(state, payload) { state.directory = payload.directory } } export const actions = { }
What we’ve done is to add a directory state to our store and a mutation function saveInfo that modifies the value of the directory state we added to our store in anticipation of the data we’d be passing it soon.
Next, in your about.vue file, update it to look like this.
<template> <section class="home"> <h1 class="home__heading">About NUXtjs Directory Structure</h1> <div class="directories"> <div class="directory__container" v-for="directory in directories" :key="directory.id" @click.prevent="storeDirectoryInfo(directory)" > <p class="directory__name"> <nUXt-link :to="{ name: 'id', params: { id: directory.id, dir: directory } }" ></nUXt-link> </p> </div> </div> </section> </template> <script> export default { name: "about-nUXt", data() { return { directories: [ //remains the same ] }; }, methods: { storeDirectoryInfo(dir) { this.$store.commit("saveInfo", { directory: dir }); } } }; </script> <style> </style>
Now, we’ve added a click event to every directory container that passes the directory info as an argument to the storeDirectoryInfo. In this function, we commit the directory object to our store.
Finally, we would go back to our _id.vue file and replace the directory variable with our data from the store like this:
<template> <section class="directory" v-if="directory"> <h1 class="directory__name"></h1> <p class="directory__info"></p> </section> </template> <script> import { mapState } from "vuex"; export default { name: "directory-info", computed: { ...mapState(["directory"]) } }; </script> <style></style>
Here, we refactor our code to use directory object directly from our store by first importing mapState from Vuex.
import { mapState } from 'vuex';
Instead of first checking if this.$route.params.dir is undefined before accessing the data from our store, we decide to use our store by reading the data that’s in the store.
<script> import { mapState } from "vuex"; export default { name: "directory-info", computed: { ...mapState(["directory"]) } }; </script>
Then we update our template to make sure it doesn’t render while directory is undefined.
<template> <section class="directory" v-if="directory"> <h1 class="directory__name"></h1> <p class="directory__info"></p> </section> </template>
On doing this, no matter how many times we refresh our app, our directory object is safe in our store and can be easily accessed using the …mapState(['stateVariable']) method.
Deploying To Heroku
Now that our nUXt-tutorial-app app is complete, what’s next? Deploying our shiny new app to production.
We’ll be deploying our NUXt.js app to Heroku using Github for easy deployment so if you’ve not set up a repository for your app, now would be a time to do so. The next thing would be to open Heroku and create a new app, choose a name and connect it to GitHub and the repo created above. Next, go to your settings, you should see something like this.
Heroku App settings page. (Large preview)
Now, add the following config variables.
NPM_CONFIG_PRODUCTION=false HOST=0.0.0.0 NODE_ENV=production
The next thing we have to do is to create a Procfile in the root folder of our app (same level as nUXt.config.js) and enter this command:
web: nUXt start
This will run the nUXt start command and tell Heroku to direct external HTTP traffic to it.
After adding the Procfile to your app, commit and push your changes to your repo. If you have automatic deploys enabled for your app, your app should be live and accessible from its URL. If you can see your app live, congratulations! you have successfully built and deployed your first NUXt.js application.
Conclusion
Now that we know how to create a basic NUXt application and deploy to Heroku, what’s next? Here are some resources that cover things like using Axios in NUXt and implementing authentication in your app.
Using the axios module.
Implementing Authentication in Nuxt.
NUXt.js official documentation.
nUXt-tutorial-app Github repo.
(ks, ra, yk, il)
Website Design & SEO Delray Beach by DBL07.co
Delray Beach SEO
source http://www.scpie.org/getting-started-with-nuxt/
0 notes
Text
Implementing Infinite Scroll And Image Lazy Loading In React
About The Author
Awesome frontend developer who loves everything coding. I’m a lover of choral music and I’m working to make it more accessible to the world, one upload at a … More about Chidi …
In this tutorial, we’re going to learn how to use the HTML Intersection Observer API to implement infinite scrolling and image lazy loading in a React functional component. In the process, we’ll learn how to use some of React’s hooks and how to create Custom Hooks.
If you have been looking for an alternative to pagination, infinite scroll is a good consideration. In this article, we’re going to explore some use cases for the Intersection Observer API in the context of a React functional component. The reader should possess a working knowledge of React functional components. Some familiarity with React hooks will be beneficial but not required, as we will be taking a look at a few.
Our goal is that at the end of this article, we will have implemented infinite scroll and image lazy loading using a native HTML API. We would also have learned a few more things about React Hooks. With that you can be able to implement infinite scroll and image lazy loading in your React application where necessary.
Let’s get started.
Creating Maps With React And Leaflet
Grasping information from a CSV or a JSON file isn’t only complicated, but is also tedious. Representing the same data in the form of visual aid is simpler. Shajia Abidi explains how powerful of a tool Leaflet is, and how a lot of different kinds of maps can be created. Read article →
The Intersection Observer API
According to the MDN docs, “the Intersection Observer API provides a way to asynchronously observe changes in the intersection of a target element with an ancestor element or with a top-level document’s viewport”.
This API allows us to implement cool features such as infinite scroll and image lazy loading. The intersection observer is created by calling its constructor and passing it a callback and an options object. The callback is invoked whenever one element, called the target, intersects either the device viewport or a specified element, called the root. We can specify a custom root in the options argument or use the default value.
let observer = new IntersectionObserver(callback, options);
The API is straightforward to use. A typical example looks like this:
var intObserver = new IntersectionObserver(entries => { entries.forEach(entry => { console.log(entry) console.log(entry.isIntersecting) // returns true if the target intersects the root element }) }, { // default options } ); let target = document.querySelector('#targetId'); intObserver.observe(target); // start observation
entries is a list of IntersectionObserverEntry objects. The IntersectionObserverEntry object describes an intersection change for one observed target element. Note that the callback should not handle any time-consuming task as it runs on the main thread.
The Intersection Observer API currently enjoys broad browser support, as shown on caniuse.
Intersection Observer browser support. (Large preview)
You can read more about the API in the links provided in the resources section.
Let us now look at how to make use of this API in a real React app. The final version of our app will be a page of pictures that scrolls infinitely and will have each image loaded lazily.
Making API Calls With The useEffect Hook
To get started, clone the starter project from this URL. It has minimal setup and a few styles defined. I’ve also added a link to Bootstrap’s CSS in the public/index.html file as I’ll be using its classes for styling.
Feel free to create a new project if you like. Make sure you have yarn package manager installed if you want to follow with the repo. You can find the installation instructions for your specific operating system here.
For this tutorial, we’re going to be grabbing pictures from a public API and displaying them on the page. We will be using the Lorem Picsum APIs.
For this tutorial, we’ll be using the endpoint, https://picsum.photos/v2/list?page=0&limit=10, which returns an array of picture objects. To get the next ten pictures, we change the value of page to 1, then 2, and so on.
We will now build the App component piece by piece.
Open up src/App.js and enter the following code.
import React, { useEffect, useReducer } from 'react'; import './index.css'; function App() { const imgReducer = (state, action) => { switch (action.type) { case 'STACK_IMAGES': return { ...state, images: state.images.concat(action.images) } case 'FETCHING_IMAGES': return { ...state, fetching: action.fetching } default: return state; } } const [imgData, imgDispatch] = useReducer(imgReducer,{ images:[], fetching: true}) // next code block goes here }
Firstly, we define a reducer function, imgReducer. This reducer handles two actions.
The STACK_IMAGES action concatenates the images array.
FETCHING_IMAGES action toggles the value of the fetching variable between true and false.
The next step is to wire up this reducer to a useReducer hook. Once that is done, we get back two things:
imgData, which contains two variables: images is the array of picture objects. fetching is a boolean which tells us if the API call is in progress or not.
imgDispatch, which is a function for updating the reducer object.
You can learn more about the useReducer hook in the React documentation.
The next part of the code is where we make the API call. Paste the following code below the previous code block in App.js.
// make API calls useEffect(() => { imgDispatch({ type: 'FETCHING_IMAGES', fetching: true }) fetch('https://picsum.photos/v2/list?page=0&limit=10') .then(data => data.json()) .then(images => { imgDispatch({ type: 'STACK_IMAGES', images }) imgDispatch({ type: 'FETCHING_IMAGES', fetching: false }) }) .catch(e => { // handle error imgDispatch({ type: 'FETCHING_IMAGES', fetching: false }) return e }) }, [ imgDispatch ]) // next code block goes here
Inside the useEffect hook, we make a call to the API endpoint with fetch API. We then update the images array with the result of the API call by dispatching the STACK_IMAGES action. We also dispatch the FETCHING_IMAGES action once the API call completes.
The next block of code defines the return value of the function. Enter the following code after the useEffect hook.
return ( <div className=""> <nav className="navbar bg-light"> <div className="container"> <a className="navbar-brand" href="/#"> <h2>Infinite scroll + image lazy loading</h2> </a> </div> </navv <div id='images' className="container"> <div className="row"> {imgData.images.map((image, index) => { const { author, download_url } = image return ( <div key={index} className="card"> <div className="card-body "> <img alt={author} className="card-img-top" src={download_url} /> </div> <div className="card-footer"> <p className="card-text text-center text-capitalize text-primary">Shot by: {author}</p> </div> </div> ) })} </div> </div> </div> );
To display the images, we map over the images array in the imgData object.
Now start the app and view the page in the browser. You should see the images nicely displayed in a responsive grid.
The last bit is to export the App component.
export default App;
Pictures in responsive grid. (Large preview)
The corresponding branch at this point is 01-make-api-calls.
Let’s now extend this by displaying more pictures as the page scrolls.
Implementing Infinite Scroll
We aim to present more pictures as the page scrolls. From the URL of the API endpoint, https://picsum.photos/v2/list?page=0&limit=10, we know that to get a new set of photos, we only need to increment the value of page. We also need to do this when we have run out of pictures to show. For our purpose here, we’ll know we have run out of images when we hit the bottom of the page. It’s time to see how the Intersection Observer API helps us achieve that.
Open up src/App.js and create a new reducer, pageReducer, below imgReducer.
// App.js const imgReducer = (state, action) => { ... } const pageReducer = (state, action) => { switch (action.type) { case 'ADVANCE_PAGE': return { ...state, page: state.page + 1 } default: return state; } } const [ pager, pagerDispatch ] = useReducer(pageReducer, { page: 0 })
We define only one action type. Each time the ADVANCE_PAGE action is triggered, the value of page is incremented by 1.
Update the URL in the fetch function to accept page numbers dynamically as shown below.
fetch(`https://picsum.photos/v2/list?page=${pager.page}&limit=10`)
Add pager.page to the dependency array alongside imgData. Doing this ensures that the API call will run whenever pager.page changes.
useEffect(() => { ... }, [ imgDispatch, pager.page ])
After the useEffect hook for the API call, enter the below code. Update your import line as well.
// App.js import React, { useEffect, useReducer, useCallback, useRef } from 'react'; useEffect(() => { ... }, [ imgDispatch, pager.page ]) // implement infinite scrolling with intersection observer let bottomBoundaryRef = useRef(null); const scrollObserver = useCallback( node => { new IntersectionObserver(entries => { entries.forEach(en => { if (en.intersectionRatio > 0) { pagerDispatch({ type: 'ADVANCE_PAGE' }); } }); }).observe(node); }, [pagerDispatch] ); useEffect(() => { if (bottomBoundaryRef.current) { scrollObserver(bottomBoundaryRef.current); } }, [scrollObserver, bottomBoundaryRef]);
We define a variable bottomBoundaryRef and set its value to useRef(null). useRef lets variables preserve their values across component renders, i.e. the current value of the variable persists when the containing component re-renders. The only way to change its value is by re-assigning the .current property on that variable.
In our case, bottomBoundaryRef.current starts with a value of null. As the page rendering cycle proceeds, we set its current property to be the node <div id='page-bottom-boundary'>.
We use the assignment statement ref={bottomBoundaryRef} to tell React to set bottomBoundaryRef.current to be the div where this assignment is declared.
Thus,
bottomBoundaryRef.current = null
at the end of the rendering cycle, becomes:
bottomBoundaryRef.current = <div id="page-bottom-boundary" style="border: 1px solid red;"></div>
We shall see where this assignment is done in a minute.
Next, we define a scrollObserver function, in which to set the observer. This function accepts a DOM node to observe. The main point to note here is that whenever we hit the intersection under observation, we dispatch the ADVANCE_PAGE action. The effect is to increment the value of pager.page by 1. Once this happens, the useEffect hook that has it as a dependency is re-run. This re-run, in turn, invokes the fetch call with the new page number.
The event procession looks like this.
Hit intersection under observation → call ADVANCE_PAGE action → increment value of pager.page by 1 → useEffect hook for fetch call runs → fetch call is run → returned images are concatenated to the images array.
We invoke scrollObserver in a useEffect hook so that the function will run only when any of the hook’s dependencies change. If we didn’t call the function inside a useEffect hook, the function would run on every page render.
Recall that bottomBoundaryRef.current refers to <div id="page-bottom-boundary" style="border: 1px solid red;"></div>. We check that its value is not null before passing it to scrollObserver. Otherwise, the IntersectionObserver constructor would return an error.
Because we used scrollObserver in a useEffect hook, we have to wrap it in a useCallback hook to prevent un-ending component re-renders. You can learn more about useCallback in the React docs.
Enter the below code after the <div id='images'> div.
// App.js <div id='image'> ... </div> {imgData.fetching && ( <div className="text-center bg-secondary m-auto p-3"> <p className="m-0 text-white">Getting images</p> </div> )} <div id='page-bottom-boundary' style= ref={bottomBoundaryRef}></div>
When the API call starts, we set fetching to true, and the text Getting images becomes visible. As soon as it finishes, we set fetching to false, and the text gets hidden. We could also trigger the API call before hitting the boundary exactly by setting a different threshold in the constructor options object. The red line at the end lets us see exactly when we hit the page boundary.
The corresponding branch at this point is 02-infinite-scroll.
We will now implement image lazy loading.
Implementing Image Lazy Loading
If you inspect the network tab as you scroll down, you’ll see that as soon as you hit the red line (the bottom boundary), the API call happens, and all the images start loading even when you haven’t gotten to viewing them. There are a variety of reasons why this might not be desirable behavior. We may want to save network calls until the user wants to see an image. In such a case, we could opt for loading the images lazily, i.e., we won’t load an image until it scrolls into view.
Open up src/App.js. Just below the infinite scrolling functions, enter the following code.
// App.js // lazy loads images with intersection observer // only swap out the image source if the new url exists const imagesRef = useRef(null); const imgObserver = useCallback(node => { const intObs = new IntersectionObserver(entries => { entries.forEach(en => { if (en.intersectionRatio > 0) { const currentImg = en.target; const newImgSrc = currentImg.dataset.src; // only swap out the image source if the new url exists if (!newImgSrc) { console.error('Image source is invalid'); } else { currentImg.src = newImgSrc; } intObs.unobserve(node); // detach the observer when done } }); }) intObs.observe(node); }, []); useEffect(() => { imagesRef.current = document.querySelectorAll('.card-img-top'); if (imagesRef.current) { imagesRef.current.forEach(img => imgObserver(img)); } }, [imgObserver, imagesRef, imgData.images]);
As with scrollObserver, we define a function, imgObserver, which accepts a node to observe. When the page hits an intersection, as determined by en.intersectionRatio > 0, we swap the image source on the element. Notice that we first check if the new image source exists before doing the swap. As with the scrollObserver function, we wrap imgObserver in a useCallback hook to prevent un-ending component re-render.
Also note that we stop observer an img element once we’re done with the substitution. We do this with the unobserve method.
In the following useEffect hook, we grab all the images with a class of .card-img-top on the page with document.querySelectorAll. Then we iterate over each image and set an observer on it.
Note that we added imgData.images as a dependency of the useEffect hook. When this changes it triggers the useEffect hook and in turn imgObserver get called with each <img className='card-img-top'> element.
Update the <img className='card-img-top'/> element as shown below.
<img alt={author} data-src={download_url} className="card-img-top" src={'https://picsum.photos/id/870/300/300?grayscale&blur=2'} />
We set a default source for every <img className='card-img-top'/> element and store the image we want to show on the data-src property. The default image usually has a small size so that we’re downloading as little as possible. When the <img/> element comes into view, the value on the data-src property replaces the default image.
In the picture below, we see the default lighthouse image still showing in some of the spaces.
Images being lazily loaded. (Large preview)
The corresponding branch at this point is 03-lazy-loading.
Let’s now see how we can abstract all these functions so that they’re re-usable.
Abstracting Fetch, Infinite Scroll And Lazy Loading Into Custom Hooks
We have successfully implemented fetch, infinite scroll, and image lazy loading. We might have another component in our application that needs similar functionality. In that case, we could abstract and reuse these functions. All we have to do is move them inside a separate file and import them where we need them. We want to turn them into Custom Hooks.
The React documentation defines a Custom Hook as a JavaScript function whose name starts with "use" and that may call other hooks. In our case, we want to create three hooks, useFetch, useInfiniteScroll, useLazyLoading.
Create a file inside the src/ folder. Name it customHooks.js and paste the code below inside.
// customHooks.js import { useEffect, useCallback, useRef } from 'react'; // make API calls and pass the returned data via dispatch export const useFetch = (data, dispatch) => { useEffect(() => { dispatch({ type: 'FETCHING_IMAGES', fetching: true }); fetch(`https://picsum.photos/v2/list?page=${data.page}&limit=10`) .then(data => data.json()) .then(images => { dispatch({ type: 'STACK_IMAGES', images }); dispatch({ type: 'FETCHING_IMAGES', fetching: false }); }) .catch(e => { dispatch({ type: 'FETCHING_IMAGES', fetching: false }); return e; }) }, [dispatch, data.page]) } // next code block here
The useFetch hook accepts a dispatch function and a data object. The dispatch function passes the data from the API call to the App component, while the data object lets us update the API endpoint URL.
// infinite scrolling with intersection observer export const useInfiniteScroll = (scrollRef, dispatch) => { const scrollObserver = useCallback( node => { new IntersectionObserver(entries => { entries.forEach(en => { if (en.intersectionRatio > 0) { dispatch({ type: 'ADVANCE_PAGE' }); } }); }).observe(node); }, [dispatch] ); useEffect(() => { if (scrollRef.current) { scrollObserver(scrollRef.current); } }, [scrollObserver, scrollRef]); } // next code block here
The useInfiniteScroll hook accepts a scrollRef and a dispatch function. The scrollRef helps us set up the observer, as already discussed in the section where we implemented it. The dispatch function gives a way to trigger an action that updates the page number in the API endpoint URL.
// lazy load images with intersection observer export const useLazyLoading = (imgSelector, items) => { const imgObserver = useCallback(node => { const intObs = new IntersectionObserver(entries => { entries.forEach(en => { if (en.intersectionRatio > 0) { const currentImg = en.target; const newImgSrc = currentImg.dataset.src; // only swap out the image source if the new url exists if (!newImgSrc) { console.error('Image source is invalid'); } else { currentImg.src = newImgSrc; } intObs.unobserve(node); // detach the observer when done } }); }) intObs.observe(node); }, []); const imagesRef = useRef(null); useEffect(() => { imagesRef.current = document.querySelectorAll(imgSelector); if (imagesRef.current) { imagesRef.current.forEach(img => imgObserver(img)); } }, [imgObserver, imagesRef, imgSelector, items]) }
The useLazyLoading hook receives a selector and an array. The selector is used to find the images. Any change in the array triggers the useEffect hook that sets up the observer on each image.
We can see that it is the same functions we have in src/App.js that we have extracted to a new file. The good thing now is that we can pass arguments dynamically. Let’s now use these custom hooks in the App component.
Open src/App.js. Import the custom hooks and delete the functions we defined for fetching data, infinite scroll, and image lazy loading. Leave the reducers and the sections where we make use of useReducer. Paste in the below code.
// App.js // import custom hooks import { useFetch, useInfiniteScroll, useLazyLoading } from './customHooks' const imgReducer = (state, action) => { ... } // retain this const pageReducer = (state, action) => { ... } // retain this const [pager, pagerDispatch] = useReducer(pageReducer, { page: 0 }) // retain this const [imgData, imgDispatch] = useReducer(imgReducer,{ images:[], fetching: true }) // retain this let bottomBoundaryRef = useRef(null); useFetch(pager, imgDispatch); useLazyLoading('.card-img-top', imgData.images) useInfiniteScroll(bottomBoundaryRef, pagerDispatch); // retain the return block return ( ... )
We have already talked about bottomBoundaryRef in the section on infinite scroll. We pass the pager object and the imgDispatch function to useFetch. useLazyLoading accepts the class name .card-img-top. Note the . included in the class name. By doing this, we don’t need to specify it document.querySelectorAll. useInfiniteScroll accepts both a ref and the dispatch function for incrementing the value of page.
The corresponding branch at this point is 04-custom-hooks.
Conclusion
HTML is getting better at providing nice APIs for implementing cool features. In this post, we’ve seen how easy it is to use the intersection observer in a React functional component. In the process, we learned how to use some of React’s hooks and how to write our own hooks.
Resources
“Infinite Scroll + Image Lazy Loading,” Orji Chidi Matthew, GitHub
“Infinite Scrolling, Pagination Or “Load More” Buttons? Usability Findings In eCommerce,” Christian Holst, Smashing Magazine
“Lorem Picsum,” David Marby & Nijiko Yonskai
“IntersectionObserver’s Coming Into View,” Surma, Web Fundamentals
Can I Use…IntersectionObserver
“Intersection Observer API,” MDN web docs
“Components And Props,” React
“useCallback,” React
“useReducer,” React
(ks, ra, yk, il)
Website Design & SEO Delray Beach by DBL07.co
Delray Beach SEO
source http://www.scpie.org/implementing-infinite-scroll-and-image-lazy-loading-in-react/ source https://scpie.tumblr.com/post/612768472428052480
0 notes