#eero firmware update
Explore tagged Tumblr posts
Visit Tumblr Blog
Explore Tumblr blogs with no restrictions, modern design and the best experience.
Last Seen Tumblr Blogs


Fun Fact
25% of US internet users with an annual income of $80-100K use Tumblr.
Text
Eero setup: A Complete Guide For New Users
Wish to add eero devices into your network? Confused how to proceed with the setup? Looking for a guide that can help you? You reach the right destination this article will help you configure eero devices into your home network. People think eero setup is difficult to perform. But in reality anyone can configure the eero device who knows what to do and how. This article is specially meant to guide our readers. Check the step by step information of the setup process and follow it to complete the eero setup. With the information in this article you can customize your own network without any technical help.
Eero Setup Process
To start the eero setup process you need following:
Host networking device
Working internet connection
Eero system
Ethernet cable
Power source
Smartphone or tablet
Host networking device password and network name
After accumulating everything mentioned about you can initiate the setup by follow the steps mansion below:
Place and Power Eero
Unbox the eero device. Begin the search for the placement of the eero. Keep it next to the host networking device. This is required for the cable connection. Also make sure a power source is available nearby.
Download Eero App
The Eero app is available for both Android and iOS devices. You can simply visit the Google Play Store or Apple App Store and search for the "Eero" app. Download and install the eero app on phone or tablet whichever you are using. This app will guide you through the entire Eero setup process in a step-by-step manner. Without this app, the Eero setup cannot be completed successfully.
Create Eero Account
Once you’ve installed the app, the next step in your Eero setup is to create an Eero account. Open the eero app and tap the Get Started option. You’ll be prompted to enter details such as your name, email ID, and mobile number. After entering the required information, verify your email through the link sent to your inbox. This account will be used to manage your Eero network, settings, and firmware updates. Make sure to use a valid email ID that you have easy access to, as all notifications and alerts will be sent there.
Connect Smartphone With Eero Network
Now that your account is ready, the next Eero setup step is to connect your smartphone to the Eero network. Plug in your Eero device and wait for the LED light to start blinking, which indicates that the device is ready for setup. The eero app will try to detect the device. Once detected, the app will automatically connect your phone to the temporary Eero Wi-Fi for configuration purposes. This connection is required to proceed with the rest of the setup steps.
Configure Your Eero
With the temporary connection established, now it��s time to configure your Eero. The app will ask you to select your location type, such as Living Room, Bedroom, or Office. Then you’ll be prompted to enter your Wi-Fi network name (SSID) and a strong password. These credentials will be used to connect all your devices to the new Eero network. After entering the information, the Eero device will take a moment to apply the settings. This step is crucial in ensuring your Eero setup provides a secure and personalized network experience.
Update Firmware
Firmware updates are an essential part of maintaining a healthy and secure network. The app may prompt you to update the firmware. Updating the firmware during the Eero setup process will help fix potential bugs, patch security vulnerabilities, and improve performance. Simply tap on the “Update Now” option if available, and wait while the update is installed. Make sure not to unplug the Eero device or close the app during the update process.
Finalize Setup And Test Network
After the firmware update is complete, the final step in your Eero setup is to finalize the configuration and test the network. The app will display a confirmation message once the setup is done successfully. You can now run a speed test through the app to ensure the connection is stable and delivering the expected performance. The Eero app will also allow you to monitor the number of connected devices and signal strength in real time. Make sure all your devices can connect to the network and access the internet without issues.
Relocate Eero
In case your Eero device is not delivering a strong signal in certain areas, you may need to relocate it. During the Eero setup, place the Eero device in a central, open location away from large metal objects or other electronic devices. If you are using multiple Eero units, position them at appropriate distances to ensure full home coverage. The app can help you determine the best placement by showing signal strength between nodes. Proper placement will ensure seamless coverage and improved network performance across your space.
0 notes
Text
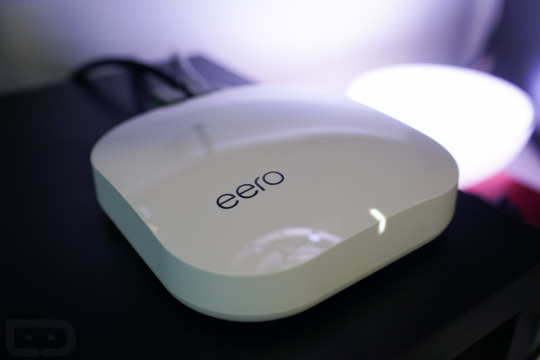
Eero Firmware Update
How to Eero Firmware update To maintain a smooth operation of your mesh system, you can update the firmware on your eero. You must have finished the eero self-installation process before you may update the firmware on your device. The eero will be linked to your network after everything is finished. Log in to the eero app, then select Devices > Your Devices to see if it is linked. On the screen, a tile representing your eero should display.
0 notes
Text
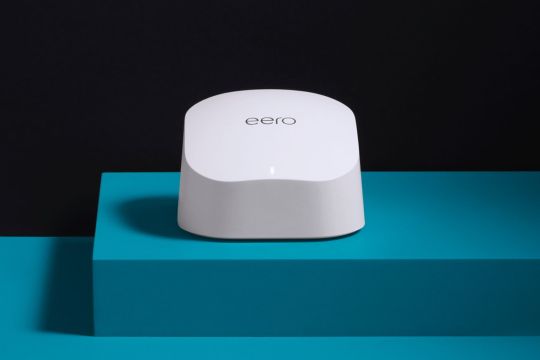
Eero firmware update
First, you will want to make sure that you are running the latest version of the eero app, version 1.3.1. If you're running an older version of the eero app, your mobile device will notify you that a new update is available. You can also check for an update by going to the Settings menu. For Android users, tap Menu > Apps. On iOS devices, tap the Settings icon > General > Software Update. Once you've updated the app, you can check for new eero firmware update by opening the eero app and tapping Settings > Devices and then tapping the action button next to your eero device.
0 notes
Text
Orbi Home WiFi System
What's a Wi-Fi System?

Wi-Fi System are half breeds of sorts. They offer a simple method to cover your home in Wi-Fi without the requirement for extra wiring, range extenders, or passages. For a few, setting up a passage is not feasible, as it requires running links. Reach extenders are remote and genuinely simple to arrange, however their sign yield is ordinarily half as solid as the sign coming from your switch.
The most recent yield of Wi-Fi System uses expansion hubs, or satellites, to expand your Wi-Fi signal. A portion of these System use network innovation, where the satellites speak with one another to give inclusion all through your home, however the Orbi switch utilizes a committed Wi-Fi band to speak with its satellite. The greatest benefit that Wi-Fi System have over range extenders is that the satellites are all essential for a similar arrange and give consistent network as you meander all through the house, and needn't bother with any setup or the executives. Most reach extenders, then again, make an auxiliary Wi-Fi network that requires some level of the board and should be signed in to for Wi-Fi access. All things considered, you normally have more power over your organization when utilizing a switch/extender arrangement.
Design and Features

The Orbi framework accompanies a switch and one satellite; they are indistinguishable in appearance and are encased in a white, delicate touch walled in area that resembles a somewhat crushed chamber. At 8.8 by 6.7 by 3.1 inches (HWD), they are fundamentally bigger than the hexagon-molded Luma parts (4.1 by 4.6 by 1.1 inches) and the square Eero segments (4.7 by 4.7 by 1.3 inches). While not ugly, they unquestionably don't offer the smooth feel of the Ubiquiti Amplifi HD, the Google OnHub, and the Starry Station, which are all intended to be found where they can be seen. The Orbi is accessible as a two-piece pack that offers 4,000 square feet of inclusion. Netgear additionally has an individual independent switch ($249.99) that conceals to 2,000 square feet, and it will in the end deliver singular satellites ($249.99 every) that give up to 2,000 square feet of inclusion.
A tri-band AC3000 gadget, the Orbi switch has six inner recieving wires and can convey hypothetical throughputs paces of 1,266Mbps to customers (400Mbps on the 2.4GHz band and 866Mbps on the 5GHz band). The third band is which isolates the Orbi from the opposition; it's viewed as a backhaul band since it is committed simply to interchanges between the switch and the satellite. This is a 5GHz band that can arrive at most extreme rates of 1,733Mbps. The Ubiquiti, the Luma, and the Eero are double band frameworks and don't utilize a devoted band for switch to-satellite transmissions.
At the highest point of every part is a LED light ring. On the switch, the ring is strong white while booting up and squints golden when it loses its Internet association. A flickering blue and maroon light shows that you've arrived at your Internet traffic edge (more on this later), and when the light is out, everything is working appropriately. Around back, at the base of the switch, are three Gigabit LAN ports, a WAN port, a USB 2.0 port, and Sync, Power, and Reset catches. Regardless of Netgear's promoted claims that the USB port can be utilized to associate peripherals, like hard drives and printers, it was not working at the hour of this survey, and a representative couldn't affirm a date when a firmware update would fix the issue.
The satellite part likewise has a light ring that flickers white while the satellite is booting up and turns strong blue when the association with the switch is acceptable, golden when it's reasonable, and maroon when it loses its association. The lights make it simple to put the satellite in a focal area that will give a solid connect to the switch. At the back of the base are four Gigabit LAN ports, Reset, Sync, and Power catches, and a USB 2.0 port that doesn't work.
Though the Luma, Ubiquiti, and Eero frameworks are totally arranged and controlled utilizing a portable application, the Orbi utilizes a Web-based comfort, albeit a versatile application is in progress. The comfort is not difficult to utilize, and not at all like the opposition, it offers the sort of essential and progressed settings that you get with a conventional switch. The landing page incorporates tabs for Basic and Advanced settings, and presentations essential status data for Internet, Wireless, Attached Devices, and Parental Controls. Here, you can get to fundamental Internet (Dynamic or Static IP, DNS, and MAC Address) and Wireless (SSID name and Security) settings and see which customers are associated and their IP address. You can likewise set up visitor organizations, an element that was missing when the Orbi was first delivered.
On the off chance that you need more command over your organization, the Advanced tab takes you to an Advanced Security area, where you can set up Parental Controls to hinder admittance to sites, limit admittance to clients, and have email cautions sent when somebody attempts to get to an impeded site. You can likewise get to Advanced Wireless settings that let you change communicate power, empower beamforming and MU-MIMO, utilize the switch as a passage, and design things like Static Routing, VPN Service, and Port Forwarding.
Remembered for the Advanced settings is a Traffic Meter that allows you to see Internet traffic insights and spot limits on month to month transfer and download limits. At the point when the meter sees that it's arrived at its edge, you can have it closed down Internet admittance to all customers. You can likewise utilize Advanced settings to design things like IPv6 burrowing, see framework logs, and update the switch's firmware.
Installation and Performance

The Orbi framework is exceptionally simple to introduce. I connected the switch to my modem and associated it to my PC, fueled it up, and composed http://orbilogin.com in my program's location bar to dispatch the arrangement wizard. Following 10 seconds or somewhere in the vicinity, it effectively associated with the Internet and provoked me to set up the satellite or to avoid this progression and do it later, which I did. I was then approached to make a secret word and answer two security questions, and was given the alternative to change the switch's SSID name. The switch required around 90 seconds to refresh its firmware and was all set.
To install the satellite, I put it around 30 feet from the Orbi switch in my lounge, connected it, and stuck around two minutes while it adjusted with the switch. During this time, the light ring squinted white and maroon and afterward turned strong blue, demonstrating a decent sign with the switch. That is it.
I played out a progression of throughput tests on both the switch and the satellite. Likewise with the Luma and Eero frameworks, the Orbi utilizes a type of programmed band controlling that doesn't permit you to isolate the 2.4GHz band from the 5GHz band, so my outcomes depend on consolidated throughput speeds. On account of its utilization of a devoted backhaul band, throughput on the Orbi satellite module was almost indistinguishable from that on the switch. With the other Wi-Fi frameworks, satellite throughput was fundamentally not as much as switch throughput.
In my single-client closeness (same-room) tests, the Orbi switch turned in an entirely decent score of 480Mbps, and the satellite conveyed a similarly great 470Mbps. The Luma switch conveyed 457Mbps, however its satellite finished out at 106Mbps, and the Eero could just deal with a top score of 188.7Mbps from any module. The Ubiquiti Amplifi HD scored 459Mbps in the nearness test when associated with the switch and 193Mbps when associated with its most grounded satellite.
A good ways off of 30 feet, the Orbi switch scored 223Mbps, and the satellite scored 220Mbps. The Ubiquiti Amplifi HD switch likewise showed a throughput of 223Mbps, however its satellite maximized at 168Mbps. The Luma switch acquired 76.1Mbps, and its satellite scored 77.2Mbps, while the Eero scored 71.2Mbps. Via examination, our Editors' Choice midrange switch, the Linksys EA7500 Max-Stream AC1900 MU-MIMO Gigabit Router, had a throughput of 495Mbps (nearness) and 298Mbps (30 feet), and our top pick for top of the line switches, the D-Link DIR-895L/R, scored 515Mbps and 324Mbps, separately.
I tried the Orbi's MU-MIMO throughput utilizing three indistinguishable Acer Aspire R13 PCs furnished with Qualcomm's QCA61x4A MU-MIMO hardware. The switch arrived at the midpoint of 128Mbps in the closeness test, and the satellite scored 127.6Mbps. At 30 feet, both the switch and the satellite arrived at the midpoint of 124Mbps. These MU-MIMO scores can't coordinate with the scores from our top-performing top of the line switch, the D-Link DIR-895L/R (264.6Mbps and 134.5Mbps, individually), however they are absolutely good. The other Wi-Fi frameworks we've tried don't uphold MU-MIMO innovation.
Conclusion
Home Wi-Fi system offer an easy to understand option in contrast to the more mind boggling switch/extender arrangements used to cover your home with remote inclusion, and the Netgear Orbi High-Performance AC3000 Tri-Band Wi-Fi System (RBK50) is at present the best of the expanding crop. Both the switch and the satellite conveyed higher scores on our single-client throughput tests than the Luma, Eero, and Ubiquiti frameworks, and the Orbi system offers more LAN network and the board choices too.
Albeit the Orbi's MU-MIMO execution in testing was acceptable, it isn't exactly just about as quick as what you get from a top of the line switch like the D-Link DIR-895L/R, or even a midrange switch, for example, the Linksys EA7500, however in any event it upholds the innovation. All things considered, empowered USB ports would be welcome augmentations. We're anticipating trying the as of late declared frameworks from Amped Wireless (Ally), (Google Wifi), and Plume, yet right now the Netgear Orbi RBK50 is top pick for home Wi-Fi system.
1 note
·
View note
Text
Mesh Wi-Fi technology is a speciality of Eero. In place of standard routers, Wi-Fi extenders, and gateways, the device is used. When connected directly to a router or modem, the Eero router device acts as the primary gateway. Connecting more Eero devices or beacons will increase the coverage area. You may join all of your devices to a single wireless network by creating a single SSID. Utilising the Eero device has the benefit of a quick and simple setup. During the setup procedure, you must create an account and establish the necessary connections. This article is for you if you are working on the Eero setup and your Eero is stuck on registration. You will discover the reasons why your Eero setup is stopped on registration in this article, along with advice on how to quickly investigate and resolve the setup problem. Understanding Eero's "Registering" Process: When Eero gets stuck on registering, it means that the device is unable to complete the setup process and establish a connection with your network. This can happen due to various reasons, such as network issues, firmware glitches, or hardware malfunctions. Understanding these factors will help us navigate the troubleshooting steps effectively. How much time should Eero need to register? The Eero signup procedure is finished in 3 to 5 minutes. However, the modem normally determines how long it takes. If the registration procedure takes more than 15 minutes, there is probably a problem. The troubleshooting advice in this article will be helpful in this situation. Let's first investigate why your setup is unable to register. Why Is My Eero Setup Locked Up During Registration? Your Eero may be unable to register for a number of reasons. For instance, there can be a problem with the Eero app or a problem with the internet connection. Listed below is a breakdown of potential problems, whatever one it is: Internet Connection Error: It is recommended that your device have a data connection when going through the initial setup procedure. This is due to the possibility that briefly losing Wi-Fi connectivity may occur during the setup procedure. Problem With The Eero App: The Eero app can also be the source of a problem. The software may have a small issue, or maybe you are using an outdated version that needs to be updated. Minimal Device Bugs: Your device's bugs may interfere with the setup procedure. For instance, the setup procedure may be impacted if you haven't updated the firmware on your device in some time. Off Bluetooth: Additionally, it's possible that your device's Bluetooth settings are hidden or turned off. To link your Eero with your account, you must have Bluetooth enabled on your device. Read Also: How to Fix an overheating laptop | Complete Guide Troubleshooting Steps: To resolve the issue of Eero being stuck on registering, follow these steps: Power Cycle: Unplug all Eero devices from the power source. Wait for a minute to allow them to fully power down. Plug the devices back in and wait for them to reboot. Check if the registration process resumes successfully. Check Internet Connection: Verify that your modem is connected to the internet and functioning properly. Ensure your Eero is properly connected to the modem via Ethernet or through the designated setup process. Test your internet connection on other devices to rule out any connectivity issues. Reset Eero: Perform a factory reset on your Eero devices. This can usually be done by holding the reset button for about 10 seconds. Follow the instructions provided by Eero for resetting the devices. After the reset, attempt to register them again. Update Eero Firmware: Check for any available firmware updates for your Eero devices. Open the Eero mobile app and navigate to the settings section to check for updates. If an update is available, follow the instructions to install it. Retry the registering process after the firmware update.
Contact Eero Support: If none of the previous steps resolves the issue, it's time to reach out to Eero's customer support. Provide them with relevant details about your setup, the steps you've taken, and any error messages received. Eero's support team will guide you through further troubleshooting or discuss potential replacement options. Preventive Measures: To minimize the chances of encountering registration issues in the future, consider the following preventive measures: Regularly update your Eero devices to the latest firmware version to ensure optimal performance and bug fixes. Ensure your internet connection is stable and reliable, as network interruptions can disrupt the setup process. Avoid making frequent changes to your network configuration unless necessary. Keep your Eero devices in a well-ventilated area to prevent overheating, as excessive heat can lead to hardware issues. Conclusion Experiencing an Eero device stuck on registering can be frustrating, but with the troubleshooting steps outlined in this article, you can effectively resolve the issue. By power cycling, checking the internet connection, resetting Eero, updating firmware, and seeking support when needed, you can successfully complete the registration process and enjoy uninterrupted connectivity with your Eero mesh Wi-Fi system. [rank_math_rich_snippet id="s-9f727d8b-48bc-4d20-8c30-f36d96562eaa"]
0 notes
Text

If your Eero is stuck on blinking white, it can be a little bit confusing and worrying. At first glance, you might see it as a sign that the eero is messed up and does not want to turn on. However, Eero blinking white light is for a good reason. It means that you are either updating the eero’s firmware or it is restarting, which is a basic function that happens every once in a while.
0 notes
Text
Puts eero router its new home

#Puts eero router its new home update
#Puts eero router its new home Bluetooth
The Netgear Orbi is unique among new-school routers in that it has a three-port gigabit ethernet switch. The backhaul network uses the higher 5GHz channels (149 and up), leaving the lower channels (36 and up) to the router. The Orbi dedicates its higher-bandwidth 4×4 radio to backhaul, even if you operate it without a satellite. And a Velop network will automatically steer clients to one or the other network, choosing on-the-fly which 5GHz network will be used for data backhaul (i.e., sending packets back to the node that’s configured as a router). The Velop’s two 5GHz networks, in contrast, each offer the same max theoretical speed: 866Mbps. You’ll never see real-world speeds that high-as distance, protocol overhead, and other factors eat away at those theoretical maximums-but you can use them for the sake of comparison. But the Orbi’s three networks are very different from the Velop: The Orbi operates one network on the 2.4GHz band (with a 2×2 radio-two spatial streams up and two spatial streams down-offering speeds up to 400Mbps), one network on the 5GHz band (with a 2×2 radio offering maximum speed of 866Mbps), and a second 5GHz network with a 4×4 radio offering maximum speed of 1,733Mbps. The Netgear Orbi RBK50 is a tri-band router with six internal antennas, making the Linksys Velop its closest competitor. We recently reviewed seven and found some genuine bargains. And if you need network storage, buy a NAS box-you’ll be much happier. But if USB support is on your must-have list, don’t buy an Orbi until you know for sure what it will support.
#Puts eero router its new home update
My guess: Netgear will either release a firmware update that enables it for storage, or they’ll come out with a ZigBee or Z-Wave radio dongle and make a play in the Internet of Things/smart-home space.
#Puts eero router its new home Bluetooth
From left to right: Linksys Velop, Eero, Luma, Google Wifi, and Securifi Almond 3 (black).īut it’s there-as is an equally dormant Bluetooth radio-so Netgear must have plans for it. The Netgear Orbi has a comparatively large footprint compared to the competition. You can’t use it to connect a USB hard drive or a USB printer that you want to share over your network. But before you get too excited about the presence of a USB port on the Orbi, know that it is currently dormant. And many new-school routers don’t have USB ports at all (the Securifi Almond 3 is an exception on both counts-it has three ethernet ports and a USB port). The competition puts just two ethernet ports on their routers and satellites, which means you’ll need to buy an ethernet switch if you want to hardwire more than one device to them. And that’s okay, because Netgear is the only router company that hasn’t taken away the ethernet switch and USB port in order to make its product smaller and more stylish. It’s not ugly, if you like modern aesthetics, but it’s not going to disappear into the background as easily as those other routers do. A hollowed-out Orbi would be big enough to hold a whole bouquet of flowers, measuring 8.89 inches tall and 6.67 inches wide. Those first two products strike a very low profile, and the Velop looks like a bud vase. About that industrial design: The Orbi is not nearly as small or unobtrusive as the Eero, Google Wifi, or Linksys Velop.
0 notes
Text
How to Fix an Eero Blinking White Light ?
Whenever you are experiencing an eero blinking white light, it usually means one of two things: your device is failing to connect to the internet, or it has encountered some sort of connection issue. In either case, you will need to contact your service provider to get it fixed. If you are unable to fix this problem, you can try to contact your service provider and have them activate the services for you.
If the blinking white light appears on your Eero router, you have two options. If the device isn’t updated, you should contact the manufacturer and ask them to repair the device. If the router is under warranty, you can ask them to replace it. If they are not able to repair the issue, you can contact customer support for a replacement. In both cases, you need to follow the same steps to fix the problem.
The first option is to hard reset the device. This will erase all settings and your Eero will need to be reconfigured again. If you are using a mobile app, open it and press the reset button for 15 seconds. The blue LED should flash once and then go off. Then, you can start reconfiguring your device. If the white light is still blinking, you should try a soft reset. To do this, you need to press the reset button on your Eero for five to ten seconds. A yellow LED will light up and you can then follow the instructions in the app to save your settings.
Why is my eero blinking white?
The Eero router is a mesh networking solution that can have problems with your internet connection. The blinking white light on the back of your device will let you know if it is not receiving enough signals to connect to the network. This is a common problem and can be resolved by checking the firmware. If it is not, you may have to contact your internet service provider and have it reset.
Sometimes, the Eero will not be able to connect to the network, even after it is properly set up. In this case, you will have to contact your service provider to have them activate the services for you. If your service provider can’t fix the issue, you should contact them and ask them to reset the router. In addition to calling the support line, you should check whether the device has been switched off or has been turned on.
If you are having issues with your Eero device, you can try to soft reset it. This process will restore the device to normal function. Simply hold the reset button for five to 10 seconds and the device should now be working properly. If not, you should contact the manufacturer of the device for help. This can be a quick and easy fix. But if the problem persists, you should contact customer service and ask for help. eero blinking white
What does blinking eero mean?
When your eero is in the blue state, it means that it is in the network pairing mode. This allows you to connect to the Internet and set up a wireless connection between two locations. The eero LED light will also be blinking white when it is in the network pairing mode. However, if the eero is always blinking white, you should first try a hard reset to erase all your current settings.
The LED on an Eero should be solid white. If the light is blinking, this indicates that the router is booting up. A hard reset should clear this problem, but if the device still blinks, you need to try a different USB power source. Another problem you may have is that your eero is not connecting to the network. To find out the cause of your problem, you can use a website that can help you diagnose the problem.
If your eero is blinking while trying to connect to the network, the device is not connected to the internet. If this happens, you need to check your LAN connection. If it is not, you should contact your service provider. You should also try a different computer to determine the problem. Sometimes, a problem with your connection can cause your eero to blink. The best way to solve this problem is to contact the company that made the router.
What does solid white mean on eero?
If the LED on your eero is solid white, everything is good. If it is blinking, something is wrong. If it is solid red, something is wrong. The LED on your eero can be a sign that your internet connection has gone down. You can check to see if it is connected to the network by restarting it or by unplugging it.
The solid white light on an Eero is the router’s status indicator. The color of the LED on your Eero changes depending on what is happening with the wireless connection. During a service outage, a service provider’s maintenance may cause the network to be down. If you still see the solid white light on your Eero after restarting the device, you should contact your ISP to get it fixed.
If your Eero is flashing white and the LED is solid blue, the device is running a reboot cycle. The reboot process can take several minutes, and if the white light continues to blink, there is an issue. In this case, you will need to reset your Eero. To reset the Eero, simply connect it to the modem via Ethernet cable. If you see a pulsating white light, then you need to restart the Eero again.
#eero blinking white#eero pro 6 blinking white#eero blinking white light#why is my eero blinking white
0 notes
Text
Everything About amazon eero pro
Everything About amazon eero pro
The Configurations button takes you to a display screen in which you can edit the network title and password, permit visitor networking and notifications, and update the firmware. Advanced configurations include DHCP and NAT options, IPv6 and UPnP options, and port forwarding configurations.
Back again at the home display, at The underside, are buttons for Home, Activity, Explore, and Configurations. The Home button returns you again on the home monitor, as well as Action button can take you to definitely a display in which you can watch pace exam effects and protection information for instance the number of scans have transpired and the quantity of threats and adverts have already been blocked. The data is introduced in vibrant charts that happen to be straightforward to browse.
Matt has worked for tech publications for over ten years, in print and online, together with operating T3's print magazine and launching its most recent redesign.Mesh Wi-Fi systems are made for rapid and easy installation, and the Eero Professional six isn't any distinct.
I commenced by downloading the mobile application and generating an account. Next, I tapped Start Set up to the opening display screen and adopted the Recommendations to unplug my modem, connect an Eero Professional six node on the modem, and electrical power up the two the modem as well as the node.
Amazon's Eero Professional 6 can be a tri-band mesh Wi-Fi system that provides fairly good wi-fi protection and doubles being a home automation hub. It’s straightforward to create and manage, but provided characteristics are scarce.
0 notes
Text
Eero 6 and Pro 6 owners are now getting Apple’s HomeKit security features
Eero 6 and Pro 6 owners are now getting Apple’s HomeKit security features
Image: Eero Owners of Amazon’s Eero 6 and Pro 6 routers will now be able to isolate their HomeKit IoT devices from the rest of their home network and the wider internet, thanks to a new integration with Apple’s HomeKit that’s now rolling out (via MacRumors). The new feature is coming as part of a firmware update, and makes the routers some of the first Wi-Fi 6 systems that support Apple’s…

View On WordPress
0 notes
Text
Eero 6 and Pro 6 owners are now getting Apple’s HomeKit security features
Eero 6 and Pro 6 owners are now getting Apple’s HomeKit security features
Image: Eero Owners of Amazon’s Eero 6 and Pro 6 routers will now be able to isolate their HomeKit IoT devices from the rest of their home network and the wider internet, thanks to a new integration with Apple’s HomeKit that’s now rolling out (via MacRumors). The new feature is coming as part of a firmware update, and makes the routers some of the first Wi-Fi 6 systems that support Apple’s…
View On WordPress
0 notes
Text
14 Surefire Ways to Improve Your Internet Download Speed
Like most internet users, there is a good chance that you are also suffering from one of the many issues that cause your internet speed to slow down. Many factors can disrupt your connection, for instance, multiple devices, old hardware, external interference, etc. So, if you stuck with the problem of slow internet and do not know what to do, here are some ways you can use to enhance your connection.
Check your internet speed
Before learning about ways for speed improvement, you need to know about two things. The speed you are supposed to be getting from your provider The actual speed you are getting from your provider To find out about the speed of your internet, log on to the provider’s website and sign in to your account. There you will find all the details about your package plan. For instance, if you are using Spectrum Internet, you will find all the information regarding your package on the company’s website along with your billing details. In case you are unable to access your account, simply call your service provider and ask for the details directly. Once you have identified your package plan and the speed for which you have signed up, run a speed test. It is highly recommended that you close all the bandwidth-consuming programs running on your computer before running the download speed test, as it would enable you to get authentic results. When checking the speed of your internet, you will notice a lot of variation and different results, therefore, run multiple tests through different websites. One of the best download speed calculators is Ookla’s Speed Test. Although many other platforms enable you to check the speed of your internet connection, the two mentioned above are well-known for providing accurate analysis of your connection.
Disconnect all the unused devices
You might think that if your internet-enabled devices are sitting idle, they are not consuming bandwidth, but this is not the case. Since those devices are connected to the internet, they are consuming data. Many users set their devices to automatically download and install updates as soon as they are released. This does only include software updates but also application updates. Now imagine the amount of data that these devices will consume even if you are not using them. Therefore, it is always wise to disconnect the devices from the internet if you are not using them.
Disable unnecessary background processes
When you close an application on your computer, you expect it to cease functioning and stop drawing on your bandwidth. However, certain programs, like the web browser, Dropbox or other data backup service, keep on running in the background even when you are not using them, and they pull down your network’s strength. So, to close the background processes, first, open the Task Manager on your computer by searching it on the menu or by pressing the “CTRL+ALT+DEL” shortcut. Then, do a quick scan of your network’s performance. If the CPU usage falls at 0%, it would mean that no background application is hogging your internet. On the other hand, if some processes do show up, you can close them easily from the Task Manager and release choked up bandwidth instantly.
Find the ideal position for your modem
Wireless routers and modems work by transmitting radio signals to your devices. Since these signals are high in frequency, they have a very short distance range. In addition to this, these radio signals can easily get blocked with objects, which degrade the quality of the connection, ultimately reducing the speed of your internet. So, to boost the speed of your internet, relocate your modem to a place where there are no disruptions and obstacles. If you are unable to move your router to another place, try to minimize the obstacles that might cause the speed to slow down.
Address the firewall slowdowns
Firewalls are an important part of any operating system. They monitor the communication that takes place between your devices and the World Wide Web, regulate the traffic that passes through and block unauthorized access. However, overly active firewalls can also slow down your internet performance, in addition to VPNs and antivirus programs, which have security layers of their own. So, the easiest way to boost network speed is to remove excessive firewalls and come down to only one, which will be enough to protect your devices. You can also disable your VPN when it is not in use to further increase download speed.
Restart your modem for better connectivity
Smartphone companies like Samsung and Huawei highly recommend users to reboot their devices after every 4 to 5 days. This helps the phone clear the cached memory data and all the background processes, giving it a fresh start. Wireless routers are also machines that require a reboot to get rid of all the memory, background processes, and cached data. In addition to this, when you reboot a device, it installs all the updates that were waiting in the pending list, making it safer and faster.
Change the channel of your router
Wireless routers broadcast their signals on a particular channel. Most routers usually have 14 channels and they typically operate between 2400 and 2500 MHz radio bands. Since the channels are divided into 14 different parts, there is a lot of overlapping in almost all the channels except for three, which includes 1, 6 and 11. These three channels are less crowded and can easily broadcast the signals to your devices, provided that your router supports them. If you happen to live in an urban community with numerous wireless networks, you might experience slow internet during peak hours, therefore, try to change the channel of your router to enjoy fast and stable internet connectivity.
Increase the range of your router
If the main problem is the distance from your wireless router, here are some steps you can take to enhance the speed of your connection. Instead of purchasing a new router or a wireless extender (which we will discuss later), try to boost the signal range of your current router. You can do so by updating the firmware of the router, enabling it to transmit stronger signals. Firmware options like Tomato and DD-WRT allow you to exercise more control over functions that you can perform with your router. Although there are many other ways to improve the signal quality of your router, updating the firmware is regarded as the best one by the experts of the industry.
Extend your network’s range with extenders
Positioning matters a lot when it comes to your wireless router. If you place it in a remote corner surrounded by walls, you cannot possibly receive the full spectrum of signals, and therefore, suffer from slow internet performance. That is why you should move your Wi-Fi router to a more centralized location, so its signals can reach even the deadest zones in your house. Another way to further optimize this wireless network is to purchase a Wi-Fi extender or repeater or even a whole new mesh upgrade. Wi-Fi Extender – A Range Extender or Wi-Fi booster is a device that acts as a bridge, receives the signals from your router and rebroadcasts them to the weakest areas in your home. It does not enhance the signal breadth itself, but repeats and rolls out the Wi-Fi profile as it is. You can set it up by configuring the WPS button or by using the dedicated mobile app. The latest Wi-Fi Extenders come with top-notch security encryption and several Ethernet ports for a direct link. Some of the best models of 2020 are Linksys RE7000 Max-Stream AC1900+ WiFi Range Extender, TP-Link AC1750 WiFi Range Extender (RE450) and Netgear Nighthawk X4 AC2200 WiFi Range Extender (EX7300). Mesh Devices – A mesh system works when a cluster of devices are placed in several spots around the house, each giving off a wireless signal and creating an interconnected network with greater Wi-Fi coverage. Nest WiFi with faster speeds, Eero with an easy-to-use app, Netgear Orbi 6 with expansive range and Asus ZenWiFi AX with affordable pricing are some of the best mesh devices in the market as of now.
Keep your connection safe and secure
Always keep your network protected at all times. By doing so, you can significantly improve your download speed and save your data bandwidth at the same time. Furthermore, with password-enabled connections, you ensure that only you and your family members are using the internet without any interference from an outsider. Plus, when you secure your connection with a password, it becomes difficult for cybercriminals to invade your privacy. On an unrelated note, never connect your devices to open/public networks. With the emergence of technology, online threats have increased to a whole new level, making cybercriminals more dangerous than ever. Therefore, to keep your data safe from prying eyes, stay away from unsecured networks.
Used a wired internet connection
Wired connections are capable of delivering faster internet speeds than wireless connections. Since only one device is getting all the bandwidth, the concentration level is high and there are no external interruptions from other sources. To establish a wired connection, you can use an Ethernet cable, which would directly connect to your computer. Connecting the cable directly to your computer from the modem would generate better internet speed and bandwidth. Plus, with cable connections, there is no fear of lost signals and slow speeds during peak hours.
Purchase new equipment
One of the reasons why your internet is performing sub-par could be because of outdated equipment. It might include old laptops, PCs, smartphones, tablets or any other gadget that has not modified enough to handle high-end bandwidth. You can easily turn this around by getting your hands on the latest versions of devices, which can perfectly support faster internet speeds. Speaking of network, your wireless router has a huge role to play in the signal dispensation inside your house. If the router is five years old, has ancient wiring and does not use the newest wireless standards, then chances are you will experience throttled speeds. The more advanced your router’s technology, the better it’ll be able to run higher bitrates. 802.11ac is by far the finest router standard in the market. Alternatively, if you are a big fan of video streaming, then you can always upgrade your Roku or Amazon Fire TV Stick. The new wireless adapters will perfectly complement your rehabilitated Wi-Fi and give you a spectacular web experience.
Run software fixes for a change
You have upgraded your router and your devices, still, the internet speed shows frustrating lags. Then, what else could be creating network problems? The answer is software. The software consists of programs or operating data in general that powers the hardware. Your router might be running on an old update that does not protect your wireless network adequately, or your computer might have a dozen viruses infecting data left and right. If this is the case, then you can try the following protective measures to bring your software up to speed: Install an Antivirus – One of the best ways to detect the presence of malicious codes on your computer and deal with them effectively is by installing a certified antivirus program, like McAfee, Norton or Bitdefender. Such a program will scan your files and network, and remove all possible traces of malware while ensuring 360-degree protection. Once the virus is gone, your device will regain its processing power, resulting in a smoother bandwidth reception. Improve your Web Browser – An old browser will not be able to translate internet speeds well. That is why you need to upgrade it to the latest version or get a new browser altogether. Different browsers have their unique way of handling speeds. Update Router Firmware – Most of the routers are pre-programmed to install the latest firmware updates and bug fixes automatically. However, some might need manual installation. So, check to see if the manufacturer has issued any new updates by logging in to the router settings and processing the blocked updates. This step will make your router work more efficiently. Clear Away Cache & Cookies – Cache is the auxiliary memory, which helps your browser load webpages faster. In other words, your browser stores information in the form of cookies on your device so the next time you access a page, it will not have to run everything from the start. However, cache build-up can also hinder internet speeds and cause loading errors. By clearing away the accumulated memory, you can enhance the bitrate flow.
Change your Default DNS
DNS stands for Domain Name Server. It is a system that converts your textual domain address into an alphanumeric one or IP, which is easier for the browser to recognize, remember and read. Internet providers usually use a dedicated DNS that receives a lot of traffic. This over-occupied server slows down page loading time and renders a poor internet performance. An alternative to ISP-provided DNS is to change your PC’s settings, so it can use a different server when connecting to the web. Simply open your computer’s Control Panel. Head to the Network & Internet option. Open Network Sharing Center. Right-click on the current connection and select Properties. Find TCP/IPv4 and again click on Properties. Deselect “Obtain DNS server automatically” and enter the new protocols in “Use the following DNS addresses” to change your default setting. This way you will experience a 20 – 30% boost in your internet’s download speed. Two popular DNS servers are OpenDNS & Google Public DNS, just an FYI. After implementing these tips, run a download speed check to know if you successfully improved the speed of your connection or not. It is important to realize the fact that the speed of your connection depends on different technologies, which must be integrated properly to deliver the right bandwidth. The aforementioned methods will surely help you enhance your download speed if executed in the right manner. Read the full article
0 notes
Text
Google Mesh Home WiFi Makes our Internet Access MUCH faster
This is a review of the “Google WiFi system, 3-Pack – Router replacement for whole home coverage” (NLS-1304-25) product which I posted to Amazon today.

“Google Mesh WiFi” (CC BY 2.0) by Wesley Fryer
I have been wanting to purchase a mesh Wi-Fi system at home for many months, and finally pulled the trigger last month. Wow what a difference this makes! With our previous “Apple AirPort Extreme” router and WiFi unit, I could get a maximum of about 30 Mbps down in our living room, even though our cable modem over ethernet is rated for 300 Mbps downloads. With this Google WiFi mesh system, on the same MacBook laptop I can get 200 Mbps down in my living room, and over 100 Mbps down in all locations throughout our two-story house! Wow! The cost of this upgrade is well worth it for speed improvements alone.
I was actually contemplating the Eero mesh WiFi system, but since Amazon bought Eero recently I am wary of it, even with their pronounced commitments to customer privacy. We are both an Apple and a Google household, and we certainly order a lot from Amazon, but since we already have Google Home Mini’s and a Chromecast, and are looking at other Google IoT products, I thought this would be a good move. Plus, I have had great experiences with Google’s products in the past, at school I manage over 300 Chromebooks and Google’s administrative tools are phenomenal. The same is true for their home Wi-Fi product.
This last week was the first time I participated in the weekly YouTube live stream and podcast webshow I do with a friend in Montana, (edtechSR.com) and I was able to give my laptop priority during the videoconference on YouTube Live with a couple button taps on ef. I also loved, during initial set up of Google WiFi, how the app provided feedback to help me move the position of my home access point upstairs so it is optimized. This is an incredible improvement in our home Wi-Fi, and is making a daily difference in all of our lives.
Of course it is also important and critical that we have home routers with updated firmware and that receive regular security updates online. IoT security is a huge problem and will likely just grow as a security issue in the months to come. Hackers as well as commercial companies will continue to try and access / compromise our home routers, since that gives them access to all the data passing through our networks to the Internet. Google is excellent in this regard. Of course Google wants to have our data, but in our modern surveillance state environment Google is a company I actually trust, along with Apple. Not so for Facebook or Amazon. If you are not currently using a mesh router system, you should make the move, and I think Google Wi-Fi is an excellent choice.
I am a school technology director and do much more technical things with the enterprise Cisco Meraki WiFi we have. There are home mesh WiFi systems which allow for more technical set ups and configurations, but Google WiFi is all I need for home. This is an outstanding product and a great value, especially with the $100 discount I was able to use during a product sale.
If you enjoyed this post and found it useful, consider subscribing to Wes’ free, weekly newsletter. Generally Wes shares a new edition on Monday mornings, and it includes a TIP, a TOOL, a TEXT (article to read) and a TUTORIAL video. You can also check out past editions of Wes’ newsletter online free!
Did you know Wes has published several eBooks and “eBook singles?” 1 of them is available free! Check them out! Also visit Wes’ subscription-based tutorial VIDEO library supporting technology integrating teachers worldwide!
MORE WAYS TO LEARN WITH WES: Do you use a smartphone or tablet? Subscribe to Wes’ free magazine “iReading” on Flipboard! Follow Dr. Wesley Fryer on Twitter (@wfryer), Facebook and Google+. Also “like” Wes’ Facebook page for “Speed of Creativity Learning“. Don’t miss Wesley’s latest technology integration project, “Show With Media: What Do You Want to CREATE Today?“
Google Mesh Home WiFi Makes our Internet Access MUCH faster syndicated from https://sapsnkraguide.wordpress.com
0 notes
Text
Amplifying the WLAN signal: tips and tricks for the perfect home network
A young happy family, relaxing together on the sofa and surfing the Internet with a tablet, notebook & co. - a classic image from advertising, which Internet providers and router manufacturers like to use to highlight the advantages of the wireless network. But in many cases, WLAN (Wireless Local Area Network) not only provides wireless freedom, but also causes some annoyance: the connection to the router is disturbed, the Netflix stream does not run smoothly or the radio signals do not reach all floors of the house. He tells you how to solve WLAN problems, which functions will improve your wireless network and which devices will help you when you need to amplify the WLAN signal.
The best place for your router
Before you buy a new router, try a new place for your old one: There are a few things you should look out for when you set up your new router. It's best not to place it on the floor or even in the closed living room display case. Likewise, nearby cordless phones, speakers and metal objects can affect performance. Ideally, choose a slightly elevated position, such as on a cabinet. If possible, you can also mount the router on the wall - some manufacturers include a bracket for this purpose. If the router has external antennas, point them at different angles, such as 45 degrees or horizontally. If you have a poor wireless signal within a short distance of the wireless operator, it may also be a good idea to change the position of the router and the orientation of the antennas only slightly.
Why a WLAN-ac router is worthwhile
When buying a new router, you should definitely go for models with WLAN-ac standard, which transmit on two frequency bands - i.e. not only on the older 2.4 gigahertz, but also on the 5 gigahertz band at the same time. Many newer end devices such as smartphones from around 300 euros or all notebooks with WLAN-ac also use both bands - you can take advantage of this. Because the older 2.4 gigahertz band is often hopelessly overloaded in conurbations. By switching to the 5 gigahertz band, you can often get back on the road again if connections are faltering. But be careful: the 5 gigahertz band has a smaller range. If you move away from the router and go to another room, you may achieve better data transfer rates on the 2.4 gigahertz band. Besides the frequency band, the connection standard also plays a role. The older n standard can be used on both bands and is relatively slow. The newer ac standard uses only the 5 gigahertz band and is many times faster. However, both the router and the end device must master the standard if it is to be used.
Band Steering & Co: Power routers can do more
Some current dual-band routers in the higher price range, such as the FritzBox 7590, automatically push end devices to the fastest band. Prerequisite for this: Both bands must share a name (SSID) and the function must be activated in the router menu. At AVM the function is called "Band Steering", other manufacturers call it "Smart Connect". Also practical: If you activate the automatic channel search, the router switches to another WLAN channel when it is fully occupied - ideally not only at startup, but also during operation. If you want to use the higher channels, you must also activate automatic radar detection, because weather radars sometimes also transmit on these channels, which must not be affected by router operation. Before the channel assignment, the router must therefore ensure that it does not interfere. However, not all devices are capable of automatic radar detection. Also helpful: If applications or devices are to be faster on the road than others, they can be prioritized with some routers - they are then given preferential treatment. Many manufacturers call this function "Quality of Service (QoS)".
Telephone base and smarthome center
Analogue telephones can usually be connected to the router with built-in modem via cable. Many of the better-equipped devices also have an integrated DECT base and can connect several cordless phones such as the FritzFon or Gigaset phones via the DECT radio standard if desired. AVM's top models like the FritzBox 7590 also have an S0 connection for ISDN devices and systems. Some routers even offer smarthome functions. So you can use the FritzBoxes to control AVM's clever sockets and radiator thermostats if you wish. With the current FritzOS 7 operating system, you can even integrate all Smarthome devices that support the HAN-FUN protocol - such as those from Deutsche Telekom. Currently, the window sensors from Magenta SmartHome on the FritzBox only work with the AVM FritzDECT 200 and 210 sockets, but after an update, the window contacts should also be able to connect to the smart FritzDECT 310 radiator thermostat. Speaking of telecoms: Their router Speedport Smart 3 is a fully-fledged smart home basis for Magenta SmartHome, because it supports the wireless standards DECT-ULE and ZigBee - the latter via USB stick for retrofitting. This allows a large number of smart helpers from different manufacturers to be connected.
Amplify WLAN signal: WLAN repeater
If the radio signal from the router has to pass through more than three or four walls or several floors, the signal often becomes too weak. A WLAN amplifier, also known as a WLAN repeater, may help here. If you have a dual-band router, you should also use a dual-band-capable repeater that simultaneously uses the 2.4-Gigahertz and 5-Gigahertz bands when you buy a repeater. However, only devices such as the AVM FritzRepeater 2400, which are capable of so-called cross-band repeating, are really useful here. Behind this is an intelligent management of both WLAN frequencies: Normally the router sends data packets on the same band via the repeater to the terminal device. This roughly halves the speed on this band. With cross-band repeating, the data packets change bands halfway through so that no speed is lost. Some repeaters such as the AVM FritzRepeater 3000 and the Netgear Nighthawk X6S (EX8000) even have a second 5-GHz frequency that is used exclusively for communication with the router. This leaves more power for end devices.
Tip: The right place for the repeater
When looking for a suitable location for the repeater, many devices offer a practical aid: they indicate the connection strength to the router by LEDs. In principle, the repeater should be positioned as freely as possible and not in the corner of a room. Objects made of metal and water located between the router and the repeater can affect performance, as can other radio transmitters in the vicinity of the repeater (e.g. speakers, microwaves, baby monitors). If the repeater is too close to the router, it will not work; if it is too far away, it will not reach the router. A line of sight between the router and the repeater is usually a good indication. AVM recommends placing the repeater about halfway between the router and the end device. If a terminal device is also holding on to the weaker router signal, even though a repeater with much better signal strength is nearby, it may be worth changing the name (SSID) of the repeater. Disadvantage: The end devices probably do not succeed in switching automatically between repeater and router. A solution for this problem is offered by repeaters with access point steering (see next paragraph).
Mesh functions
To provide extensive apartments or large houses with WLAN coverage, there is a special type: mesh systems such as Google Nest Wifi, Amazon Eero Pro and Netgear Orbi consist of several special repeaters that can be distributed throughout the house and create an intelligent network among each other. Thanks to the Access Point Steering function, the network always automatically connects end devices to the access point that is currently delivering the best signal - even if you go from the ground floor to the attic. In the meantime, conventional repeaters and powerline adapters with WLAN have also been given this function. AVM devices, for example, have been able to handle them since the FritzOS 7.10 operating system version, the Devolo Magic 2 WiFi and Magic 1 WiFi powerline adapters have been able to handle WiFi ex works, and the older Devolo dLAN 1200+ WiFi ac and dLAN 550+ WiFi adapters have been able to handle them since a firmware update (at Devolo, the function is called Fast Roaming).
Powerline: When nothing else works
In the case of thick reinforced concrete walls or very long distances, even a repeater will not help. If you want to bridge long distances, you can send the data over the power line with a powerline adapter. The fastest devices use the speed class of theoretically 2,400 megabits per second and send data not only via the power line but also in parallel via the ground cable (neutral conductor). All you have to do is plug the clever devices into a power outlet. Attention: Inexpensive powerline adapters often come without WLAN and only have one socket for a network cable. For wireless connections, ideally use a powerline adapter with built-in WLAN. With WLAN-ac and powerline 1,200, the Devolo dLAN 1200+ WiFi ac and the AVM FritzPowerline 1260E performed well in the our test. The Devolo Magic 2 WiFi is even better: thanks to the latest chips, it achieves a much higher speed than previous powerline adapters from the manufacturer and won the last comparison test. Disadvantage: Because it uses the G.hn standard, it is not Homeplug AV compatible and therefore cannot be connected to older dLAN products from Devolo. Only parallel operation is possible.
Future dreams: Wi-Fi 6 (WLAN-ax)
The fastest standard to date, WLAN-ac, is now followed by Wi-Fi 6 (WLAN-ax). The fresh standard also uses the 2.4 and 5 gigahertz frequency bands, but is said to be significantly faster than WLAN-ac and have a higher range. It is also supposed to solve some common problems. For example, Wi-Fi 6 uses only certain channels for the 2.4 gigahertz radio, so that neighboring routers don't interfere with each other. And thanks to more intelligent timing of data transmissions, routers can transmit on the same channel without interfering with each other. Routers should also negotiate data rates individually for end devices that can be reached at different distances. Wi-Fi 6 routers have already been released with devices such as the Asus RT-AX88U and the Netgear Nighthawk AX12, and the first AVM router with Wi-Fi 6, the FritzBox 6660 Cable, is expected to go on sale in the first quarter of 2020. Top smartphone models with Qualcomm Snapdragon 835, 845 and 855 processors connect via Wi-Fi 6, provided the function is enabled. In addition, there are network cards with Wi-Fi 6 for PCs: such as the Intel AX200 or the TP-Link Archer TX3000E.
0 notes
Text
Date: June 24, 2019
We started the renovation on Feb 18, 2019. Finally, the renovation is completed after 3 months.
Here are the photo gallery of the new place. After the major overhaul.
Study Room
Me and the kids will take this room as our study room.
All of us love it.
As you can see, all our desks are from Ikea. All can go up and down by pressing the button.
I opt for a standing chair. As most of the time I will be standing up doing my work. That keeps me not to spent so much time at my iMac.
And we even move their messy bookshelves over here.
Store Room
The store room is much bigger, as we cut a room into half and make it into store room. The other side of the wall is the walk-in wardrobe.
I think we should be able to keep lots of things here. But may be I was wrong. Hahaha
Let’s see. I like to use the Ikea plastics drawers to keep things. Hahaha
It’s almost full. But let’s see what magic we can do later this week.
Master Bedroom
The master bed room also smaller than the old Park West. That is why we lost a lot of storage space here.
My king size bed fit just in nicely.
I moved the 65″ LG TV from my old Pack West home to here. So, let’s place it in my bedroom. Of course Apple TV is a must.
IoT is furnished with Philip Hue lights, Haiku Fan, Sensibo controlled air-conditioning.
Master Bedroom Toilet
Must bigger toilet.
No more bath tub. In our previous two homes, we had it. But seldom use it at all.
We moved the Diamond Water Spa here. Toilet Equip with Toto Washlet.
Lot’s of storage.
Walk-In Wardrobe
After you open the Toilet door, on your right is the door to the walk-in wardrobe.
I think I made a mistake here. Because whoever inside the toilet will prevent the entrance to the walk-in wardrobe. hahaha
But after the renovation, I like it. Equipped with Fan, and air-con.
The air-con is controlled by Tado. Tado has recently updated their firmware, and there is a feature where Tado will turn on and off the air-con to save energy. haha
This is an important room, because this is where I stored my Synology boxes here. The NAS is the most important equipment in the house. It stores all the photos of any kind for this family since 10 plus years ago until now. As you can guess, I have 2 Synology in backup configurations. I also had the movies I like in 1080p format stored here so that it can be accessed by all the TV as well as IOS, Apple TVOS devices.
The new walk-in wardrobe also house all my camera equipment, my lenses, by camera, etc.
Plenty of spaces to keep our clothing.
Kid’s Bedroom
Kay Kay requested the room to be painted yellow.
I bought the double decker bed from FortyTwo online furniture stores. Pretty good service. I bought more from there.
The double decker is Super Single on top and Queen Size below.
Of course we cannot install a Haiku fan here, so, we placed an antique fan on top.
Kid’s Bedroom Toilet
Simple toilet for the kids.
Will the 3D effect hexagon wall.
Did not install shower tampered glass door here as it is quite small the toilet.
Toto Waslet from our old Park West home.
They now have a proper closet. Big storage space for them.
Corridor
The long corridor that separate the Living Room to the bed rooms.
Well lid by natural light.
iRobot resting place at the middle.
On the ceiling, Eero is doing its job providing Internet to the house thru WiFi.
Door way to roof top.
There is a guest toilet here too.
Guest Toilet
With the guest toilet, I think there should not be any problem in accessing toilet within the household. hahaha
We moved the Diamond Water Spa to here too. Toto Washlet is installed here.
Stairs to Roof Top
Bought a fancy door to access to the roof top.
Changed the lights, as well as the stairs handle.
Roof Top
Perhaps one of the main feature is the roof top area. It is 1300 sq feet. Downstairs total area is 1700 sq feet.
This will be my wife main working area. Since she is doing some new aquaponics initiatives, she needs a good Feng Shui place to work.
After moved in, we still unpacking. But the roof top getting nicer.
My wife work area. My roof top kitchen.
Our exercise area.
My photograph area too at night.
Living Room
Simple Living Room.
This is where I chose to use the bigger tiles for my flooring. Looks nice when you have big tiles.
Bought a new Sony 75″ Android TV. Still trying to figure how to install other APK apps on it. The small attic area upstairs is the children play room.
A small book shelves to store their games and books.
The final configurations makes it looks nice and spacious.
Kid’s Play Room Attic
This small stairs leads to the playing area.
I bought a small chair or sofa bed here. Just in case some one stay over night.
A Xiaomi TV for the gaming console. I moved the Denon sound bar here too.
Dining Area
This is the dining area space.
We moved our Italian Dining Table here. As well as all the chairs.
But the chairs cushion looks old because of the cat claws.. hahaha But we love the chairs. So we keeping it.
A white Ikea cupboard to put all the wine glasses, plates, etc.
The Kitchen & Washing Area
The kitchen is much smaller.
It housed my NLT Fibre and internal cabling. Which I am very proud of. Hahaha
Smaller kitchen, but I have two, one downstairs and one upstairs.
The washing area is at the back.
Domestic Helper Bedroom
My domestic helper sleep behind this door with ventilation.
This is originally the bunker. But we changed the door.
Inside, is a high bed with lots of storage.
A mirror for her.
A Xiaomi TV for her with all Philippines channels loaded onto the Xiaomi TV OS.
My helper is glad to have this such nice place. hahahaha
Remember, treat your helper nice nice, then, she will treat you and family nice nice.
Domestic Helper Toilet
Although is smaller, but everything you need is there.
We already choose to move in on June 18, 2019. An auspicious day. Yeah!
Our New Home – The Madeira Date: June 24, 2019 We started the renovation on Feb 18, 2019. Finally, the renovation is completed after 3 months.
0 notes
Text
Change Router Settings, Safeguard Your Device
source: norton-setup.nethttps://norton-setup.net/change-router-settings-safeguard-your-device/ Nowadays, you might have heard about the malware that is believed to be Russia-linked. It is looking for the WiFi routers to gain the information of user around the world. The FBI request to all of the people to take strong action through resetting their routers immediately.
In short, at least 54 countries have already infected more than half a million routers, and this malware is growing continuously every day. It’s called VPN Filter and even security experts also not sure about who is vulnerable.
Only one thing in front of all, the router security is the priority more than anything, because all the critical data or information from the user computer system, their devices, flow right the best way for this malware. In short a word, user’s Facebook messages, their banking details, their credit card information, all goes by their router. So if there is any breach, then that is really not good for you.
To get immediately rid with this problem, the security team at Consumer Reports agrees with the Feds start through resetting user’s router. To do this, unplug your router; wait for 20 seconds or so after that start it up again. But don’t be stop there.
Reset your router’s administrative password is also a smart trick to fix this threat issue, that’s the password which you are using to log in to the router itself. Create this something strong. Also, move into the router’s settings and then turn off the remote active feature.
After that, update the firmware. As you are using a laptop or a smartphone, older routers don’t notify you if there’s an update available. So it’s really needed for you to check every three or four months to see whether there’s an update is available on your manufacturer’s website.
To avoid any more hassle, also you can replace your previous router with a new one that updates automatically. Routers from Netgear, Eero, Google, and Linksys all offer an option to keep an eye on updates for you. A latest updated router is less vulnerable to malware. Do it on the urgent basis to secure your data.
This entry was tagged
norton setup
,
norton.com/myaccount
,
norton.com/nu16
,
norton.com/setup
,
www.norton.com/setup
. Bookmark the
permalink
source: norton-setup.net
0 notes