#floating placeholder using html and css
Explore tagged Tumblr posts
Visit Tumblr Blog
Explore Tumblr blogs with no restrictions, modern design and the best experience.
Last Seen Tumblr Blogs


Fun Fact
Mobile US users spent an average of 115.8 minutes on Tumblr app monthly.
Text
Deiago Hero Section
Key Features
| LIVE DEMO | BUY NOW |

Perfect Responsiveness
Fully responsive layout optimized for all screen sizes
Mobile-first design with media queries for smooth adaptability
Flexible structure that adjusts to any container or section
Glossy & Modern Design
Elegant glossy background with soft gradient touches
Calming color palette for a professional look
Subtle floating elements with smooth CSS animations
Easy to Customize
Simple structure for quick edits to image, text, and layout
Clear placeholders for product visuals
Works effortlessly with any industry or niche
Modern UI Components
Animated product card with 3D tilt effect (pure CSS)
Stylish gradient buttons with interactive hover states
Feature icons designed for clarity and visual engagement
Performance-Optimized
Lightweight, clean HTML and CSS for faster loading
Efficient animation without extra libraries
Well-organized code, easy to maintain and extend

How to Use:
Just copy and paste the code into your project. Replace the image URL, text, and links as needed — and you're ready to go. Perfect for SaaS, product landing pages, or modern business websites.
. . . . .
#hero section#responsive hero#glossy hero#css hero section#html css landing section#animated hero#ui design#front-end#website template#product showcase#3d tilt effect#modern hero#easy customization#web design#mobile first#neifex#neifex store#html css template#landing page design#website header#animated ui#ui components#creative section#fast loading section#clean code#modern web layout#developer resources#ready to use section#css animation#website hero
0 notes
Text
(R6D040) 100 Days of Code - Back to Coursework
I can’t spend everyday working on getting my site up, so today I’m going back to coursework. 11:58 – I’m going through the float labels section again because I want to make sure I know how this works. It seems I need to start by using a blank placeholder element. It also seems the trick is to put the input before the label in the HTML and then run ‘reverse’ in the CSS for it. Here’s an example…

View On WordPress
0 notes
Text
Explore 32 JavaScript Input Text

Welcome to CSS Monster's extensive collection of JavaScript input text examples! Dive into a curated assortment of free vanilla JavaScript code snippets that showcase various features for input type text, including placeholders, float labels, and more. This update, from December 2019, brings you 16 new items to enhance your web development toolbox. In this compilation, you'll find innovative and user-friendly approaches to handling input text elements using pure JavaScript. Explore techniques for creating dynamic placeholders, implementing floating labels, and other interactive solutions to elevate your web forms. Whether you're a seasoned developer seeking inspiration or a newcomer looking to expand your JavaScript skills, our collection offers a diverse range of input text enhancements. Stay tuned for the latest trends and updates as we continue to grow our repository with fresh, creative solutions. Unleash the potential of your input text elements with CSS Monster's JavaScript examples. Elevate your user experience and add a touch of interactivity to your web forms. Happy coding! Author Aaron Iker December 21, 2020 Just Get The Demo Link How To Download - Article How To Download - Video Author HTML / CSS (SCSS) / JS CLEAR INPUT FIELD Compatible browsers: Chrome, Edge, Firefox, Opera, Safari Responsive: yes Dependencies: gsap.js Author Aaron Iker December 16, 2020 Just Get The Demo Link How To Download - Article How To Download - Video Author HTML / CSS (SCSS) / JS PASSWORD FIELD Compatible browsers: Chrome, Edge, Firefox, Opera, Safari Responsive: yes Dependencies: gsap.js Author Timothy Carambat November 24, 2020 Just Get The Demo Link How To Download - Article How To Download - Video Author HTML / CSS / JS COLOR CHANGING CURSOR IN TEXTAREA Compatible browsers: Chrome, Edge, Firefox, Opera, Safari Responsive: yes Dependencies: gsap.js Author Chris Smith August 19, 2020 Just Get The Demo Link How To Download - Article How To Download - Video Author HTML / CSS (SCSS) / JS FORM FOCUS Compatible browsers: Chrome, Edge, Firefox, Opera, Safari Responsive: yes Dependencies: gsap.js Author mayur punjabi August 1, 2020 Just Get The Demo Link How To Download - Article How To Download - Video Author HTML / CSS / JS NEUMORPHIC SHOW/HIDE PASSWORD INPUT FIELD Compatible browsers: Chrome, Edge, Firefox, Opera, Safari Responsive: yes Dependencies: gsap.js Author Manan Tank May 3, 2020 Just Get The Demo Link How To Download - Article How To Download - Video Author CSS / JS CYBERTYPE Compatible browsers: Chrome, Edge, Firefox, Opera, Safari Responsive: yes Dependencies: gsap.js Author Gabriele Corti February 23, 2020 Just Get The Demo Link How To Download - Article How To Download - Video Author HTML / CSS / JS INPUT TYPE PASSWORD Compatible browsers: Chrome, Edge, Firefox, Opera, Safari Responsive: yes Dependencies: gsap.js Author Aaron Iker February 19, 2020 Just Get The Demo Link How To Download - Article How To Download - Video Author HTML / CSS (SCSS) / JS EMAIL VALIDATION ANIMATION Compatible browsers: Chrome, Edge, Firefox, Opera, Safari Responsive: yes Dependencies: gsap.js Author Vast Rideside February 17, 2020 Just Get The Demo Link How To Download - Article How To Download - Video Author HTML / CSS (SCSS) / JS (Babel) PASSWORD GENERATOR Compatible browsers: Chrome, Edge, Firefox, Opera, Safari Responsive: yes Dependencies: gsap.js Author Milan Raring February 8, 2020 Just Get The Demo Link How To Download - Article How To Download - Video Author HTML / CSS (SCSS) / JS PASSWORD VALIDATE ANIMATION Compatible browsers: Chrome, Edge, Firefox, Opera, Safari Responsive: yes Dependencies: gsap.js Author Ryan Mulligan December 26, 2019 Just Get The Demo Link How To Download - Article How To Download - Video Author HTML (Pug) / CSS (SCSS) / JS PASSWORD INPUT LIGHT Compatible browsers: Chrome, Edge, Firefox, Opera, Safari Responsive: yes Dependencies: gsap.js Author Natalia Davydova December 25, 2019 Just Get The Demo Link How To Download - Article How To Download - Video Author HTML (Pug) / CSS (SCSS) / JS (Babel) PASSWORD STRENGTH VALIDATOR UI Compatible browsers: Chrome, Edge, Firefox, Opera, Safari Responsive: yes Dependencies: gsap.js Author Aaron Iker December 19, 2019 Just Get The Demo Link How To Download - Article How To Download - Video Author HTML / CSS (SCSS) / JS BIRTHDAY INPUT WITH ZODIAC Compatible browsers: Chrome, Edge, Firefox, Opera, Safari Responsive: yes Dependencies: gsap.js Author Florin Pop November 1, 2019 Just Get The Demo Link How To Download - Article How To Download - Video Author HTML / CSS / JS IMAGE PASSWORD STRENGTH Compatible browsers: Chrome, Edge, Firefox, Opera, Safari Responsive: yes Dependencies: gsap.js Author Jarrod Thibodeau July 17, 2019 Just Get The Demo Link How To Download - Article How To Download - Video Author HTML (Pug) / CSS (SCSS) / JS (Babel) ANIMATED INPUT LABELS Compatible browsers: Chrome, Edge, Firefox, Opera, Safari Responsive: yes Dependencies: gsap.js Author Steve Gardner October 30, 2018 Just Get The Demo Link How To Download - Article How To Download - Video Author HTML / CSS (SCSS) / JS (TypeScript) DROPPY WOPPY INPUT Compatible browsers: Chrome, Edge, Firefox, Opera, Safari Responsive: yes Dependencies: gsap.js Author David A. April 10, 2019 Just Get The Demo Link How To Download - Article How To Download - Video Author HTML / CSS (SCSS) / JS (Babel) FLOATY LABELS Compatible browsers: Chrome, Edge, Firefox, Opera, Safari Responsive: yes Dependencies: gsap.js Author Mikael Ainalem December 25, 2018 Just Get The Demo Link How To Download - Article How To Download - Video Author HTML / CSS / JS BUMP NAME Compatible browsers: Chrome, Edge, Firefox, Opera, Safari Responsive: yes Dependencies: gsap.js Author Jason Yeung October 3, 2018 Just Get The Demo Link How To Download - Article How To Download - Video Author HTML (Pug) / CSS (SCSS) / JS (Babel) TALKING GHOST CHAT INPUT Compatible browsers: Chrome, Edge, Firefox, Opera, Safari Responsive: yes Dependencies: gsap.js Author Tero Auralinna September 16, 2018 Just Get The Demo Link How To Download - Article How To Download - Video Author HTML / CSS (SCSS) / JS (Babel) MATERIAL DESIGN LIKE FORM INPUT TEXT FIELDS Compatible browsers: Chrome, Edge, Firefox, Opera, Safari Responsive: yes Dependencies: gsap.js Author @keyframers August 28, 2018 Just Get The Demo Link How To Download - Article How To Download - Video Author HTML / CSS (SCSS) / JS SHOW/HIDE PASSWORD Compatible browsers: Chrome, Edge, Firefox, Opera, Safari Responsive: yes Dependencies: gsap.js Author Elior Tabeka May 28, 2018 Just Get The Demo Link How To Download - Article How To Download - Video Author HTML / CSS (SCSS) / JS (TypeScript) PUSH TO HIDE Compatible browsers: Chrome, Edge, Firefox, Opera, Safari Responsive: yes Dependencies: gsap.js Author Trevor Eyre March 17, 2018 Just Get The Demo Link How To Download - Article How To Download - Video Author HTML / CSS (SCSS) / JS (Babel) AUTOCOMPLETE Compatible browsers: Chrome, Edge, Firefox, Opera, Safari Responsive: yes Dependencies: gsap.js Author Julien Dargelos January 15, 2017 Just Get The Demo Link How To Download - Article How To Download - Video Author HTML / CSS (Sass) / JS TAGS INPUT Compatible browsers: Chrome, Edge, Firefox, Opera, Safari Responsive: yes Dependencies: gsap.js Author Shehab Eltawel June 26, 2016 Just Get The Demo Link How To Download - Article How To Download - Video Author HTML / CSS / JS INPUT Compatible browsers: Chrome, Edge, Firefox, Opera, Safari Responsive: yes Dependencies: gsap.js

Author Text Mask May 22, 2016 Just Get The Demo Link How To Download - Article How To Download - Video No 'info.info-frontend' found TEXT MASK Compatible browsers: Chrome, Edge, Firefox, Opera, Safari Responsive: yes Dependencies: gsap.js Author Shehab Eltawel May 12, 2016 Just Get The Demo Link How To Download - Article How To Download - Video Author HTML / CSS / JS ANIMATED UI TEXT INPUT Compatible browsers: Chrome, Edge, Firefox, Opera, Safari Responsive: yes Dependencies: gsap.js Author Rik Schennink May 6, 2016 Just Get The Demo Link How To Download - Article How To Download - Video Author HTML / CSS (SCSS) / JS PIXIE DUST INPUT Compatible browsers: Chrome, Edge, Firefox, Opera, Safari Responsive: yes Dependencies: gsap.js Author Rachel Smith September 21, 2015 Just Get The Demo Link How To Download - Article How To Download - Video Author HTML / CSS / JS DYNAMIC 3D CONFETTI TEXT Compatible browsers: Chrome, Edge, Firefox, Opera, Safari Responsive: yes Dependencies: gsap.js Author Yuan Qing Lim June 14, 2015 Just Get The Demo Link How To Download - Article How To Download - Video No 'info.info-frontend' found AUTOSIZE INPUT Compatible browsers: Chrome, Edge, Firefox, Opera, Safari Responsive: yes Dependencies: gsap.js Author bartekd January 31, 2013 Just Get The Demo Link How To Download - Article Read the full article
0 notes
Text
How to create Floating Placeholder Text
How to create Floating Placeholder Text OR Label
Today we’ll show, how to make floating placeholder. Floating Placeholders are which does not disappear even when input field is clicked. These just change their position. So Take a look on code: <!DOCTYPE html> <html lang="en"> <head> <meta charset="UTF-8"> <meta name="viewport" content="width=device-width, initial-scale=1.0"> <script…

View On WordPress
#floating label#floating placeholder#floating placeholder css#floating placeholder text#floating placeholder using html and css#floating placeholder using html css#how to create a login form in html and css#how to create contact us page with html and css#how to make floating placeholder#how to move placeholder to top on focus and while typing#move placeholder text on focus#placeholder#placeholder text animation#slide placeholder text on focus
0 notes
Text
Good browsers for mac 10.7

#Good browsers for mac 10.7 mac os x#
#Good browsers for mac 10.7 archive#
#Good browsers for mac 10.7 plus#
#Good browsers for mac 10.7 free#
If there are multiple files in this folder, switch to list view. webarchive extension) that you just added. Once the Library folder is open, go to: ~/Library/Mail/V2/MailData/Signatures/.įind the signature (a file ending with a. On Finder’s top nav, drop down the Go menu and than hold down the Option key to see the hidden Library folder. Note: At this point you will not see your HTML signature design on the 3rd column yet. In the drop down menu, find and select your new signature. Select your preferred mail box in the first column and go down to Choose Signature at the bottom. Drag your new signature from column 2 into your preferred mail box in column 1.
#Good browsers for mac 10.7 plus#
Create a new placeholder signature by clicking on the plus icon at the bottom of the 2nd column and name it. There you will see 3 columns, the 1st one are your mail box accounts, the 2nd one are your custom signatures and the 3rd column is the signature detail preview. In Mail, open Preferences and click on the Signatures tab. Step 3: Create Placeholder Signature in Mail Give a name you can recognize and save it onto your desktop.
#Good browsers for mac 10.7 archive#
Make sure Web Archive is chosen as the format. Once you have created the HTML for your e-mail signature, the next step create a. Once you have created your HTML file, give it a name and save it to a directory that you will remember like on the Desktop. If you use another browser, find “View Source” somewhere under the browser navigation menu. Once you have the signature design opened in a browser, you may see the HTML codes by pressing down on Command + Option + U on Safari or Command + U in Firefox.
#Good browsers for mac 10.7 free#
If you use a DIV instead of a SPAN, each element will start in a new line.įeel free to use my HTML signature design as a starting point for your own signature creation. I placed each element inside its own SPAN division to have the text float left without it breaking off to its own line and so that I could use inline CSS to format each element. I have my logo on the left and the text on the right. When we get ready to save your HTML signature into Mail, make sure that only the relevant HTML is included in your document.įor my signature, I used a two-column table. Because of this, I recommend linking to your images by placing them on a web server rather than including them as attachments. I personally dislike e-mail signature images as attachments (it makes it easy to mistaken that image as a legitimate attachment). So all your links need to be absolute URLs. Relative paths won’t work for an e-mail signature. Campaign Monitor has a great summary of CSS support in e-mail to use for reference. E-mail clients tend to be very picky about which CSS properties they support. The style tag is not supported in Gmail, and support for CSS selectors is spotty. The CSS float property is not supported in Gmail or Outlook, making CSS layouts impractical. One major obstacle in designing HTML e-mail templates is that there are literally dozens of different e-mail clients out there (most if not all can’t handle CSS and HTML as well as our internet browsers can) so you have to keep your design and codes as simple and straightforward as possible. Step 1: Designing the HTML/CSSīefore we begin, here are some basic but important notes to keep in mind as you design your signature.
#Good browsers for mac 10.7 mac os x#
If you are still running on Mac OS X 10.6, please follow the instructions in my previous tutorial: Creating an attractive HTML Signature in Apple Mail. Just follow the instructions in this tutorial and you will have your own signature created in no time. On the latest version, Lion, Mac OS X 10.7, the setup has changed slightly. My original post was meant for Apple Mail in Snow Leopard, Mac OS X 10.6. For a small fee, I will design a few different options for you to choose from, write up the HTML codes, host your custom email images and help guide you through the installation process. If creating your own HTML signature seems a bit too much work or you just don’t have the time for it, please consider having me do it for you. This tutorial is for you! Many people have been having trouble setting up their own HTML signature for Apple Mail on Lion, Mac OS X 10.7 since the Library folder is now hidden making the signature folder hard to find. Are you are running your Mac on Lion, Mac OS X 10.7? You want to create your own HTML Signature in Apple Mail? You are in the right place.
0 notes
Text
Flex vs Grid — The Difference Between CSS Flexbox and Grid Explained With Examples
So which one is better? Grid or Flex? When to use which? What are the differences?
For me, I see both as fundamentally different ways of thinking about layout design. I don't think one as better or worse than the other. It is common to use them together.

This is not a comprehensive study. Just the key differences and similarities I found.
There may even be some mistakes I overlooked (let me know if you find any).
My goal is not to say whether one is better than the other. Instead, it's to help someone who is just starting out get some perspective on general use cases for both Flexbox and Grid.
Different Layout Models
Grid and flex follow different layout models.
Grid has column and row templates with assumed "ghost" items.
Flex is not designed to make grids. It is based around the idea of a flex line and direction. However, flex can still handle row and column using wrap:

Note: without flex-wrap: wrap flex would still render on a single line.

Grid is defined by grid-template-rows and grid-template-columns.
Grid assumes "ghost" placeholders for missing items (HTML elements).
Generally flex is not used to create grids but to align rows and columns.
But, to simulate a grid with flex you would have to set the flex-wrap property to wrap.
Grid gaps and lines vs. Flex lines
Grid has gaps and lines. Flex has flex lines but they are used in a different context.

Flex gives you only one flex line defining overall item direction. It is determined by flex-direction property set to row or column. There is a main (x) axis and cross-axis (y). flex-start and flex-end can change depending on flex-direction.
Grid allows you to change gap size. But you can't change size of individual gaps per dimension: once gap size is set with grid-row-gap all row gaps must be that size. Same goes for grid-column-gap.
To set all gap sizes at the same time you would use the grid-gap short hand.
Cells, Items and Content
When working with both flex and grid models it's important to understand the difference between cells, items and content.
Both Can Change Flow Direction
Both flex and grid can change flow direction of items.
By default grid-auto-flow and flex-direction are set to row:


Changing Direction Flow To Column
Here I also increased number of items in flex just to see how it works.

Same example as above, except with direction flow changed to column:

Another Minor Distinction
Let's take a look at actual render of the grid with all 9 items.
Grid adheres to size of the cell, but content will bleed (overlap) without resize.
Flex items pack as close together as possible and will resize to match content.
Notice how inner content of grid does not resize the cell. Flex content does.


In this flex example some margin was added to content. It's still densely packed.
What Are The Similarities?
They both do pretty much the same things when it comes to inner item align. Some properties even have exactly the same names (adjust-content and adjust-items for example serve exactly the same purpose of aligning inner content and/or items.)
Multi-directional float in Flex and Grid
I remember the time when we just used the float CSS property to "float" elements. And it only worked horizontally! Thankfully those days are long gone. Here's the 360 setup:


The justify-self and align-self properties work in exactly the same way in both.
If so many properties produce the same exact results in flex and grid, what is the difference? Basically there are three ways of thinking about aligning items.
See below.
Justify and Align
Sometimes things won't align as expected. This is because different align properties are tailored for specific situations.
This diagram explains relationship between the different justify and align properties.

-content based properties justify and align the content bulk.
-self properties justify and align individual items.
-items properties justify and align all items in the container.
Conclusion
Learn distinction between container, items, content and self.
Both grid and flex can flow in direction of row (default) and column.
Grid can span across multiple rows and columns. Flex cannot.
Items and their inner content align is exactly the same in flex and grid.
Grid has templates, gaps and lines. Flex has lines and non-default wrap.
Flex can be used to create grid-like layouts using an explicit item width and wrap.
Use grid for mapping out a responsive layout for larger layout areas.
You can use grid with flex items. Or flex with flex items.
With grid you can create responsive layouts without media queries if you learn how to use fr units together with min-max.
It is possible to use media queries with flex too, not just the grid.
You can still use flex-only layouts – items can also be flex containers.
In performance tests flex usually renders faster than grid. But if you're already good at grid I wouldn't worry about switching unless there is a good reason.
More Grid And Flex Tutorials
If you want to take a super detailed look at Flex or Grid in isolation:
The Ultimate Guide to Flex
The Ultimate Guide to Grid
Want To See All CSS Properties Explained Visually?
All diagrams were taken from my CSS Visual Dictionary book.
You can get it here bundled together with JavaScript Grammar.
Or you can just follow me on Twitter where I share more of my tutorials.
via freeCodeCamp.org https://ift.tt/2AcGts1
0 notes
Text
HOW TO ADD CUSTOM GOOGLE FORMS TO YOUR STATIC SITE?
Websites created with static site generators like Jekyll or Hugo are on the rise. Their popularity is not surprising. They’re fast and secure, as there’s no data on the server side. The web server builds and serves web pages on the fly. You don’t have to worry about databases and server-side security.
office setup is the best programming which is exhaustively utilized in globe .
It is a shocking association that causes you release your best contemplations, complete things, and stay related on the go.for more subtleties visit: office.com/setup today.
You can write your posts in Markdown or HTML that gets rendered nicely with the help of templating engines (Jekyll uses Liquid, while Hugo uses Go Templates). Everything is fine until you want to add dynamic functionality to your static site, such as a Contact form. But, you don’t have to worry, as you can use an external backend like Google Forms to implement such features.
USE GOOGLE FORMS TO EMBED A CONTACT FORM
Incoming data collected by forms need to be processed by a server and stored in a database. You can find many online tutorials that recommend Formspree as a free form backend for static websites. However, the free version of Formspree sometimes bumps into issues like not forwarding form submissions to your email address. As an alternative, you can use Google Forms to add custom forms to your Jekyll, Hugo, or another static site.
In this guide, we’ll show you how to create and add a Contact form to a static HTML page (that you can later convert to a Jekyll or Hugo template). However, Google Forms is not limited to Contact forms; you can create any kind of custom forms or surveys with it. Your users won’t even know that you’re using Google Forms, as the form you create can be completely integrated with your site’s design!
Google Forms Homepage
1. CREATE A NEW FORM ON GOOGLE’S PLATFORM
Sign in to the Google Forms platform with your Google account. You can either start a new form from scratch or use Google’s
pre-made templates. As Google has a fairly good Contact form template, we’ll use that rather than starting with a blank template.
Click the template called “Contact Information” in the Template Gallery on top of the page.
Google Forms Template Gallery
The default “Contact information” template has three required fields (Name, Email, Address) and two optional ones (Phone number, Comments). We’ll keep Name and Email but replace the rest with an optional Subject and a required Message field.You can delete any field you don’t want to use by clicking the little recycle bin icon that shows up after you click on the field.
Google Forms Delete Field
Then, you can add the new input fields by clicking the + icon in the floating menu on the right. You can choose from various input types such as short answer, checkbox, dropdown, paragraph, file upload, and others.
For our custom Subject field, we use the short answer input type. For Message, we choose paragraph as input type, that allows users to enter a multi-line message. We also set the latter to required using the little switcher at the bottom of the input box.
Google Forms Add New Form Fields
By default, Google Forms require respondents to sign into their Google accounts before they fill in the form. However, we don’t want this behavior when we embed the form into our website. So, click the gear icon next to the Send button on the top of the page to access the Settings and uncheck the “Limit to 1 response” option.
Google Forms Remove Required Login
Save your settings and your Google Form is done. You can test it by copying-pasting the URL into another browser where you are not logged into your Google Account. Here, you can fill in the form with test data.
Your test message will show up in the Responses tab where you can decide what to do with each response (download, print, delete, etc.). Google Forms Test Message
2. CREATE A SIMILAR FORM ON YOUR OWN SITE
Now, you need to mirror the Google Form you created in the previous step so that it can forward data from your website to the
Google backend. Create a basic HTML form with the same form fields: Name, Email, Subject, and Message.
<form action="" method="post"> <label>Name*</label> <input type="text" placeholder="Name*" name="" required> <label>Email Address*</label> <input type="email" placeholder="Email address*" name="" required> <label>Subject</label> <input type="text" placeholder="Subject" name=""> <label>Message*</label> <textarea rows="5" placeholder="Message*" name="" required></textarea> <button type="submit">Send</button> </form>
The HTML doesn’t have to be exactly the same as Google’s, but it needs to have exactly the same form fields. You can add your own CSS classes to the form so that it’ll match your site’s design.It’ll be the name and action fields that will tie your on-site form to the Google backend.
3. ADD NAME AND ACTION VALUES TO YOUR ON-SITE FORM
Google uses custom name and action values to identify each form. The action attribute belongs to the <form> tag, while the name attributes belong to the input fields. So, you need to find these custom values and add it to the HTML.
Log out of Google (or use a different browser), as if you stay logged in it’ll be hard to do the code inspection (Google adds a lot of extra stuff to logged-in users). Load your Google Form using the form’s URL and inspect it using your browser’s developer tools. In Firefox, you can do that by right-clicking the form and clicking the “Inspect Element” option. In Chrome, you need to choose the “Inspect” option after right-clicking the element.
You need to find the <form> tag in the HTML inspector and copy the value of the action attribute into your custom HTML.
Inspect Custom Google Form
You need to do the same thing with your four input fields, too. But now, you don’t have to copy the action attribute but the name attribute of each input field.
Inspect Google Forms Input Fields
Insert the custom action and name values into your HTML:
<form action="https://docs.google.com/forms/d/..." method="post">
<label>Name*</label>
<input type="text" placeholder="Name*" name="entry.895563655" required>
<label>Email Address*</label>
<input type="email" placeholder="Email address*" name="entry.772189125" required>
<label>Subject</label>
<input type="text" placeholder="Subject" name="entry.203645991">
<label>Message*</label>
<textarea rows="5" placeholder="Message*" name="entry.190021963" required></textarea>
<button type="submit">Send</button>
</form>
Now, your on-site form is bound to the Google backend. You can test it by entering some test data into your form. Sign back
to Google Forms and check if your test response has arrived.
Google Forms Second Test
4. REDIRECT TO A CUSTOM THANK YOU PAGE
While doing the test, you’ve surely noticed that your site has redirected the user to Google’s default thank you page. If you’d rather send your respondents to your custom thank you page add the following code to the top of your form, right before the <form> tag:
<script type="text/javascript">var submitted=false;</script>
<iframe name="hidden_iframe" id="hidden_iframe" style="display:none;"onload="if(submitted) {window.location='thankyou.html';}"></iframe>
<form action="https://docs.google.com/forms/d/..."
method="post" target="hidden_iframe" onsubmit="submitted=true;">...</form>
You need to add the path to your custom thank you page as a value of the window.location() property (it’s ‘thankyou.html’ in the example above).
Note that you also have to add the target=”hidden_iframe” and onsubmit=”submitted=true;” attributes to the <form> tag.
5. CONFIGURE YOUR FORM SETTINGS
You can further adjust your form settings to better manage your incoming responses. For example, you can get email notifications for each new submission.
Navigate to the Responses tab, click the three-dot icon, and check the “Get email notifications for new responses” option. It will send an email notification to the email tied to your Google account (usually a Gmail address) whenever a new respondent submits your Contact form.
Google Forms Get Email Notifications
You can also collect your responses in a Google Spreadsheet. To do so, select the “Select response destination” and specify the spreadsheet that should collect the data (or create a new one). You can download the responses as a .csv file or print them with a click, too.
WRAPPING UP
Static websites are excellent for anyone who needs a simple web presence but doesn’t want to use a CMS like WordPress or pay for hosting. With external backends, you can also add dynamic features to your static site.
Google Forms provide you with a free solution to embed a custom Contact form to your website. If you want to take a step further in form building, read our tips on how to build better Contact forms, too. And, if you’d rather stick to dynamic sites, don’t miss out our guide on how to increase server security, either.
0 notes
Text
よく使われるレイアウトやUIコンポーネント、それだけを実装するためのHTMLとCSSのシンプルなコードのまとめ
Webサイトやスマホアプリでよく使われるレイアウトやUIコンポーネント、それだけを実装するためのHTMLとCSSのコードがまとめられたコレクションを紹介します。
フレームワークなども便利ですが、それだけを実装するためのコードなので、非常にシンプルでカスタマイズも簡単だと思います。
CSS Layout CSS Layout -GitHub
CSS Layoutの特徴
CSS Layoutはよく使われるレイアウトやUIコンポーネントだけを実装するためのHTMLとCSSのコードがまとめられたコレクションです。 MITライセンスで、商用プロジェクトでも無料で利用できます。
CSS Layout
依存関係は一切無し
フレームワークは必要無し
Flexboxなど、現代の実装状況に合わせて使用
ピュアCSSで実装、CSSハックは無し
実際の使用例
MITライセンス
60種類以上のレイアウトやUIコンポーネントの実装コードが揃っています。
CSS Layout
コードは各デモページから、簡単にコピペで利用できます。
Sidebar
CSSで実装するレイアウト・UIコンポーネント
CSS Layoutには2019年12月現在、61種類のレイアウト・UIコンポーネントが揃っています。
CSS Layout Patterns
HTMLとCSSはそのレイアウトとUIコンポーネントだけを実装するためのコードで、余分なコードは一切ありません。その中からいくつか紹介します。
Sidebar
1
2
3
4
5
6
7
8
9
10
11
12
13
14
15
16
17
<div style="display: flex;">
<!-- Sidebar -->
<aside style="width: 30%;">
...
</aside>
<!-- Main -->
<main style="
/* Take the remaining width */
flex: 1;
/* Make it scrollable */
overflow: scroll;
">
...
</main>
</div>
Split screen
<div style="display: flex;">
<!-- Left content -->
<div style="flex: 1;">
...
</div>
<!-- Right content -->
<div style="flex: 1;">
...
</div>
</div>
Sticky header
<div>
<header style="
position: sticky;
top: 0;
">
...
</header>
<main>
...
</main>
</div>
Accordion
1
2
3
4
5
6
7
8
9
10
11
12
13
14
15
16
17
18
19
20
21
22
23
24
25
26
27
28
29
30
31
32
33
34
35
36
37
38
39
40
41
42
43
44
45
46
47
48
49
50
51
52
53
54
55
56
57
58
59
60
61
62
63
64
65
66
67
68
69
<!-- Container -->
<div style="
/* Border */
border: 1px solid rgba(0, 0, 0, 0.3);
border-bottom-color: transparent;
border-radius: 4px;
">
<!-- Each accordion item -->
<div style="
border-bottom: 1px solid rgba(0, 0, 0, 0.3);
">
<!-- Heading -->
<div style="
/* Center the content horizontally */
align-items: center;
display: flex;
cursor: pointer;
padding: 16px;
">
<!-- The toggle icon -->
<div style="margin-right: 12px;">...</div>
<!-- The title -->
<div style="
flex: 1; /* Take remaining width */
">
...
</div>
</div>
<!-- The content -->
<div style="
/* For selected item */
display: block;
/* For not selected item */
display: none;
border-top: 1px solid rgba(0, 0, 0, 0.3);
padding: 16px;
">
...
</div>
</div>
<!-- Repeat other item -->
...
</div>
<div style="
border-bottom: 1px solid rgba(0, 0, 0, 0.3);
">
<!-- Heading -->
<div style="
display: flex;
align-items: center;
justify-content: space-between;
">
<!-- Question -->
...
<!-- The toggle icon sticks to the right -->
...
</div>
<!-- Answer -->
</div>

Cookie banner
1
2
3
4
5
6
7
8
9
10
11
12
13
14
15
16
17
18
19
20
21
22
23
<div style="
/* Banner is displayed at the bottom */
bottom: 0;
left: 0;
position: fixed;
width: 100%;
/* Center the content */
align-items: center;
display: flex;
justify-content: center;
">
<!-- Tells visitors that the website uses cookie -->
<div style="
/* Take available width */
flex: 1;
">
...
</div>
<!-- Close button -->
...
</div>
Floating label
1
2
3
4
5
6
7
8
9
10
11
12
13
14
15
16
17
18
19
20
21
22
23
24
25
26
27
28
29
30
31
<style>
.p-floating-container {
position: relative;
}
.p-floating-container label {
/* Position the label */
left: 8px;
position: absolute;
top: 0;
/* Hide it by default */
opacity: 0;
transition: 'all 200ms',
}
/* Show the label at desired position when the placeholder of input isn't shown */
.p-floating-container input:not(:placeholder-shown) + label {
background: #FFF;
transform: translate(0, -50%);
opacity: 1;
}
</style>
<div class="p-floating-container">
<!-- The input -->
<input placeholder="Placeholder" />
<!-- The label -->
<label>Placeholder</label>
</div>
0 notes
Text
Explore 95+ CSS Forms

At CSS Monster, we recognize the pivotal role that forms play in shaping the user experience of a website. In our ongoing commitment to supporting designers and developers, we are excited to unveil our extensive collection of CSS forms. This curated compilation comprises a diverse array of free HTML and CSS form code examples meticulously sourced from reputable platforms such as CodePen, GitHub, and various other trusted resources. As of June 2023, our collection has undergone a significant expansion, welcoming seven new and innovative additions. These latest arrivals encapsulate the forefront of web form design, presenting you with cutting-edge trends and creative solutions. Why the emphasis on forms, you may wonder? Forms are the interactive gateway connecting your website and its users, facilitating communication, data collection, and engagement. A well-crafted form can be the linchpin in retaining user interest and fostering a positive interaction. It represents an opportunity to offer a seamless, intuitive, and visually pleasing experience for your audience. Within our updated collection, a rich tapestry of form designs awaits exploration. Whether you're drawn to sleek minimalism, crave a touch of playful creativity, or seek something entirely unique, our CSS form examples are poised to spark inspiration. Regardless of whether you're a web designer seeking fresh ideas or a developer eager to enhance project functionality, our collection stands as your comprehensive resource. Delve into the world of CSS forms, adapt these designs to your needs, and witness the transformative impact on your web creations. The realm of web forms brims with possibilities, and we're here to assist you in unlocking them. Explore, adapt, and elevate your web design endeavors with CSS Monster. Happy coding! Author Kevin Canlas July 13, 2021 Links Just Get The Demo Link How To Download - Article How To Download - Video Made with HTML / CSS (SCSS) About a code CSS-ONLY FLOATING LABELS Compatible browsers:Chrome, Edge, Firefox, Opera, Safari Responsive:yes Dependencies:- Author Metty June 8, 2021 Links Just Get The Demo Link How To Download - Article How To Download - Video Made with HTML / CSS About a code CONTACT US FORM Compatible browsers:Chrome, Edge, Firefox, Opera, Safari Responsive:yes Dependencies:- Author Thomas May 25, 2021 Links Just Get The Demo Link How To Download - Article How To Download - Video Made with HTML / CSS (SCSS) About a code BOOTSTRAP 5 LOGIN FORM Compatible browsers:Chrome, Edge, Firefox, Opera, Safari Responsive:yes Dependencies:bootstrap.css

Author Niels Voogt March 9, 2021 Links Just Get The Demo Link How To Download - Article How To Download - Video Made with HTML / CSS (SCSS) About a code NICE FORMS IN CSS Compatible browsers:Chrome, Edge, Firefox, Opera, Safari Responsive:yes Dependencies:- Author Stack Findover January 2, 2021 Links Just Get The Demo Link How To Download - Article How To Download - Video Made with HTML / CSS About a code ANIMATED LOGIN FORM Compatible browsers:Chrome, Edge, Firefox, Opera, Safari Responsive:yes Dependencies:-

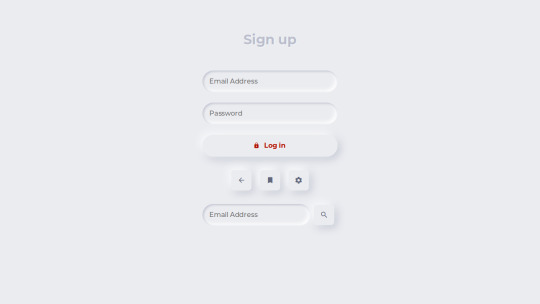
Author Pratham January 2, 2021 Links Just Get The Demo Link How To Download - Article How To Download - Video Made with HTML / CSS About a code NEUMORPHIC FORM Compatible browsers:Chrome, Edge, Firefox, Opera, Safari Responsive:yes Dependencies:-
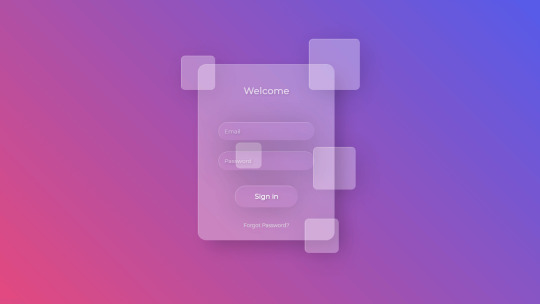
Author Shounak Das December 10, 2020 Links Just Get The Demo Link How To Download - Article How To Download - Video Made with HTML / CSS (SCSS) / JS About a code GLASSMORPHIC SIGN IN FORM Compatible browsers:Chrome, Edge, Firefox, Opera, Safari Responsive:no Dependencies:- Author Mikael Ainalem November 12, 2020 Links Just Get The Demo Link How To Download - Article How To Download - Video Made with HTML / CSS About a code PLACEHOLDERS Compatible browsers:Chrome, Edge, Firefox, Opera, Safari Responsive:yes Dependencies:-

Author Dicky AL Fattah October 2, 2020 Links Just Get The Demo Link How To Download - Article How To Download - Video Made with HTML / CSS (SCSS) About a code SLICING DESIGN SUBCRIBE MODAL Compatible browsers:Chrome, Edge, Firefox, Opera, Safari Responsive:no Dependencies:- Author Bilal.Rizwaan October 1, 2020 Links Just Get The Demo Link How To Download - Article How To Download - Video Made with HTML / CSS About a code CSS NEWSLETTER WITH ANIMATED FLOATING INPUT LABELS Compatible browsers:Chrome, Edge, Firefox, Opera, Safari Responsive:no Dependencies:- Author @BrawadaCom October 1, 2020 Links Just Get The Demo Link How To Download - Article How To Download - Video Made with HTML / CSS (Sass) About a code LOGIN FORM Compatible browsers:Chrome, Edge, Firefox, Opera, Safari Responsive:yes Dependencies:-

Author Arefeh hatami September 30, 2020 Links Just Get The Demo Link How To Download - Article How To Download - Video Made with HTML (Pug) / CSS About a code FORM Compatible browsers:Chrome, Edge, Firefox, Opera, Safari Responsive:yes Dependencies:font-awesome.css
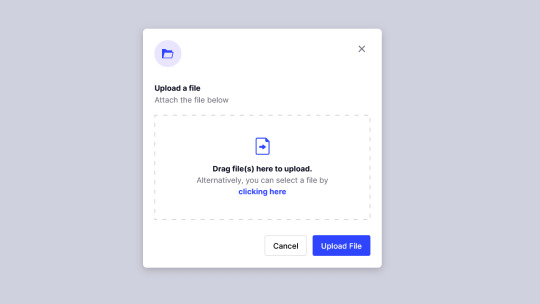
Author Håvard Brynjulfsen September 27, 2020 Links Just Get The Demo Link How To Download - Article How To Download - Video Made with HTML / CSS (SCSS) About a code FILE UPLOAD Compatible browsers:Chrome, Edge, Firefox, Opera, Safari Responsive:yes Dependencies:-

Author Håvard Brynjulfsen July 17, 2020 Links Just Get The Demo Link How To Download - Article How To Download - Video Made with HTML / CSS (SCSS) About a code CARD COMPONENT WITH FLOATING LABELS Compatible browsers:Chrome, Edge, Firefox, Opera, Safari Responsive:yes Dependencies:- Author Ivan Grozdic July 4, 2020 Links Just Get The Demo Link How To Download - Article How To Download - Video Made with HTML / CSS About a code LOG IN / SIGN UP Compatible browsers:Chrome, Edge, Firefox, Opera, Safari Responsive:yes Dependencies:bootstrap.css, unicons.css Author Soufiane Khalfaoui HaSsani April 8, 2020 Links Just Get The Demo Link How To Download - Article How To Download - Video Made with HTML / CSS About a code LOGIN FORM Compatible browsers:Chrome, Edge, Firefox, Opera, Safari Responsive:no Dependencies:-
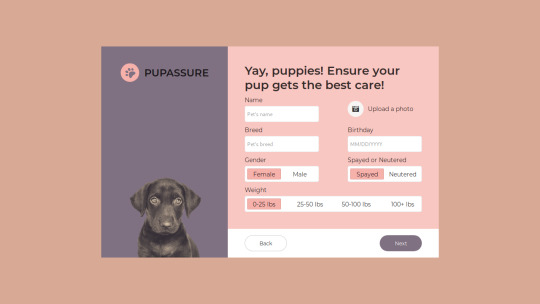
Author Ricky Eckhardt March 3, 2020 Links Just Get The Demo Link How To Download - Article How To Download - Video Made with HTML (Haml) / CSS (SCSS) About a code PUPASSURE SIGN UP FORM Compatible browsers:Chrome, Edge, Firefox, Opera, Safari Responsive:no Dependencies:font-awesome.css

Author Ricky Eckhardt March 1, 2020 Links Just Get The Demo Link How To Download - Article How To Download - Video Made with HTML (Slim) / CSS (Sass) About a code ABSTRACT SIGN UP FORM Compatible browsers:Chrome, Edge, Firefox, Opera, Safari Responsive:no Dependencies:-
Author Swapnil January 28, 2020 Links Just Get The Demo Link How To Download - Article How To Download - Video Made with HTML / CSS (SCSS) About a code NEOMORPHIC FORM Compatible browsers:Chrome, Edge, Firefox, Opera, Safari Responsive:no Dependencies:ionicons.css Read the full article
0 notes
Link
Hello everyone 👋, I hope you are doing great.
So, Today we are going to learn how to create a floating label using HTML and CSS 😎.
📄 HTML
Let's first set up our HTML.
<main> <form> <div> <input id="email" type="email" placeholder=" " /> <label for="email">Email</label> </div> <div> <input id="password" type="password" placeholder=" " /> <label for="password">Password</label> </div> <button>Login</button> </form> </main>
🎨 CSS
Now, let's set up our CSS.
div { display: flex; flex-direction: column-reverse; } input { border: none; padding: 1rem; margin-top: 2rem; font-size: 1.6rem; border-bottom: 0.2rem solid #bdbdbd; outline: none; } label { padding-left: 1rem; color: #bdbdbd; transform: translateY(4.8rem); transform-origin: left top; cursor: text; }
Now, let's set up the input functionality when the input is focused.
input:focus, input:not(:placeholder-shown) { border-bottom: 0.2rem solid #212121; } input:focus ~ label, input:not(:placeholder-shown) ~ label { padding: 0; color: #212121; transform: translateY(2rem) scale(0.8); }
That's It 😎.
Example
0 notes
Text
Cassio – AJAX Portfolio WordPress Theme
New Post has been published on https://intramate.com/wordpress-themes/cassio-ajax-portfolio-wordpress-theme/
Cassio – AJAX Portfolio WordPress Theme
LIVE PREVIEWGet it now for only $35
Cassio is a premium AJAX WordPress theme powered by Elementor page builder. It’s suitable for interior agencies, architects, home decoration and landscape designers who want to showcase their creative portfolio with a slick premium touch.
If you have any issues with preview – please try to view demo without Envato top frame.
Smooth scrolling [ON]
Smooth scrolling [OFF]
Cassio is focused to amaze your visitors with sophisticated look and feel. It has a large set of grids and showcase sliders that will serve to underline your best portfolio projects.
The theme supports seamless typographic AJAX transitions. The heading you click on will smoothly fly and land on the next page giving that seamless motion experience. This is an exclusive Cassio feature which you’re unlikely to find in other creative wordpress themes.
Cassio is spiced with silky smooth motion effects powered by WebGL and Greensock TweenMax. Those include parallax video backgrounds, sliders distorion effect, on-scroll typography reveal and many more.
The theme is driven by powerful front-end page builder Elementor. It’s easy to use and it allows to build an unlimited number of page layouts. Don’t limit your imagination with default predefined templates – create your own unique ones! Cassio has built-in more than 20 professionaly crafted Elementor widgets which you can use in building your new amazing website with ease.
Features
1. Typographic AJAX Transitions
Speedy Pages Navigation without Page Refresh
Exclusive Flying Headings Transitions
AJAX Compatibility with Google Analytics, Facebook Pixel, Yandex Metrika
Custom AJAX Code to Init for Advanced Users
2. Smooth Motion Effects
WebGL Distortion Transitions
Direction Aware Slider Transitions
Reveal Text Animations
Smooth Page Scrolling
Parallax Videos & Images
Mouse Cursor Follower
Sticky Header
3. Fluid Typography
Smooth Font Size Scale from Desktop to Mobile screens
Complete Control per each Heading from Customizer
Google Fonts Support
Adobe TypeKit Support
Self-hosted Custom Fonts Support
4. Fluid Design Spacing
Easy Consistent Spacing throughout All the Website on any Screen Size
Select Needed Spacing in Standard Elementor Section Widget
Create Fancy Section Offsets and Overlaps
Spacing Presets Adjustable from Customizer
5. Adjustable Theme Colors
Pre-designed Colors Themes per each Page Section
Adjustment per each Accent Color from Customizer
6. Fullscreen Overlay Menu
Morphing Letters Effect
Unlimited Submenus
Predefined Color Themes per each Page
Menu Custom Background
Optional Menu Text Widgets
Social Media Icons
Switch between Fullscreen / Classic Menus
7. Essential Theme Features
Customizable Preloader
Images Lazy Loading
Dual Logo Versions
Self-hosted Video Backgrounds
Upload and Use Custom SVG Graphics
Google Maps with Multiple Custom Markers
Slug Customization for Custom Post Types
Translation Ready
Multi-lingual Website Support
8. No Coding Knowledge Required
Build Your Website in Real-Time with Elementor Page Builder
One-Click Demo Import
Theme Wizard Setup
Automatic Theme Updates
Extensive Documentation Supplied
24-hours Turnaround Support
Plugins Compatibility
Autoptimize
Contact Form 7
Contact Form 7 – Conditional Fields
Elementor (both Free or Pro versions)
Facebook Pixel
Google Analytics
Loco Translate
Polylang
VDZ Yandex Metrika
WP Super Cache
WPML
Customers Reviews
Related Items
Cassio HTML Template
Cassio PSD Template
Cassio Sketch Template
Requirements
Clean WordPress 5.0+ Installation
PHP 7.0+ Enabled by Hosting Provider
Active Database in MySQL 5.0+
FTP Access to the Website Hosting or Credentials to the Hosting Panel
Changelog
11 Mar 2020 – version 1.6.2
* fixed: masthead animation glitch in Firefox * added: compatibility with Elementor 2.9.5+ * added: backward compatibility for Elementor 2.8.5 and below * added: fullwidth toggle in Elementor Parallax Background widget * added: markup formatting support for the lines split * improved: separated Elementor editor frontend from the main theme script * updated: SplitText library to the latest version
22 Feb 2020 – version 1.6.1
* added: control of zeros prefix for all the sliders * added: dragging cursor to Elementor lightbox * fixed: AJAX transition crash with enabled AdBlocker and Google Analytics
13 Feb 2020 – version 1.6.0
* added: widgets compatibility with Swiper 5.x * added: theme compatibility for upcoming Elementor 2.9.x
11 Feb 2020 – version 1.5.2
* added: scroll down button to "Hero" Elementor widget
30 Jan 2020 – version 1.5.1
* fixed: Elementor standart animations didn't run on the elements placed after the Masonry grids on a page * fixed: Elementor Pro sticky glitches when switching between pages via AJAX (only native scroll is currently supported for sticky effects) * fixed: form labels didn't float back on form submit & flush fields * added: AJAX compatibility for CF7 Conditional Fields plugin * added: +5 new social icons * added: editable "All" label for Portfolio Masonry Grid widget
20 Jan 2020 – version 1.5.0
* added: audio backgrounds feature * added: custom field for uploading a featured audio * added: new article in the theme docs https://docs.artemsemkin.com/cassio/wp/customization/audio-background.html
10 Jan 2020 – version 1.4.2
fixed: restore back "Theme Options / Smooth Scroll" panel in WP Customizer
07 Jan 2020 – version 1.4.1
* fixed: cursor progress didn't disappear in Edit with Elementor mode
01 Jan 2020 – version 1.4.0
* fixed: 'division by zero' PHP warning in Fullscreen Portfolio Sliders * fixed: Elementor Pro CSS style override <a> block in Portfolio Slider widget * added: styled modal windows for Contact Form 7 (error/submit events) * added: on/off option for new styled modal windows for Contact Form 7 (Customizer -> Theme Options -> Contact Form 7) * added: WordPress filters for changing query arguments in the dynamic widgets. This allows to display the posts of any type (including pages!) in dynamic widgets. See theme documentation for more info * added: new option for adjusting mouse follower trailing delay * added: mouse follower now expands when hover on form buttons, scroll down button * added: ACF fields for pages and services are now the same as for portfolio items * improved: cursor mouse follower now uses transforms instead of left/top to improve the performance </a>
28 Dec 2019 – version 1.3.1
* fixed: mobile menu scroll
28 Dec 2019 – version 1.3.0
* added: compatibility with Elementor Gallery widget from Elementor Pro * added: compatibility with parallax motion effects from Elementor Pro * added: keyboard control for the fullscreen sliders (on/off from widget options) * added: support for mobile touch gestures in fullscreen sliders * added: loading cursor during preloader * improved: smooth scrollbar now emits a native scroll window event instead of registering dozens of callbacks as event listeners * improved: page scroll and slider mousewheel now works even if mouse pointer is over the header area * improved: Contact 7 Form now will send data over AJAX after a page transition (was a page hard refresh) * improved: cleaned up unnecessary code * fixed: scrollbar thumb may become inaccessible in the top part of the page * fixed: Kirki plugin didn't activate automatically during theme wizard setup * fixed: OC Demo Import conflict with Merlin wizard setup. Now loads only 1 demo importer at the same time * fixed: incorrect footer widgets setup during the demo import
25 Nov 2019 – version 1.2.3
* fixed: setup wizard threw error message "Sorry, you are not allowed to access this page" after the theme initial activation in WordPress 5.3 * improved: handling placeholders in the form input fields
21 Nov 2019 – version 1.2.2
* fixed: Google Analytics may produce a console error with active AdBlock * fixed: menu text columns editor was inaccessible if "classic" menu style was selected in Customizer * added: new option for switching on/off flying heading transition per page (Elementor Document Settings -> Page Transition) * added: page styles handling for Essential Addons plugin
07 Nov 2019 – version 1.2.1
* fixed: posts amount limit function in Elementor dynamic widgets * improved: removed altering global posts per page value during wizard setup
30 Oct 2019 – version 1.2.0
* added: anchor scrolling handling support for smooth scrolling * added: options for mousewheel control in fullscreen/halfscreen sliders * added: choice for primary/secondary logo display in Customizer -> Footer -> Options * added: choice for primary/secondary logo display in Customizer -> Theme Options -> Preloader * added: choice for primary/secondary logo display in Page Footer -> Document Options * improved: page header and footer now use IDs to avoid interference with other page elements during AJAX * improved: better compatibility with EAE plugin
24 Oct 2019 – version 1.1.0
* added: Cassio Elementor widgets are now fully compatible with WPML's Translation Management * added: detecting of outdated PHP version * added: drag ratio factor control for slider images * improved: better code structure in Cassio Core Elementor extension class
20 Oct 2019 – version 1.0.6
* fixed: browser incompatibility message was displayed on supported mobile Firefox & Opera Touch
17 Oct 2019 – version 1.0.5
* fixed: <a></a> tags in subheadings may broke the fullscreen sliders * added: detecting of outdated browsers and advising users to upgrade to a new version
16 Oct 2019 – version 1.0.4
* fixed: incorrect button display in fullscreen sliders if no button title is set * added: ability to display the portfolio items subheadings in the fullscreen sliders
14 Oct 2019 – version 1.0.3
* fixed: incorrect work of custom CPT slug feature * added: font-display descriptor selection in custom fonts * added: increased global posts per page value during wizard setup
12 Oct 2019 – version 1.0.2
* fixed: HTML tag print in Elementor Services Line widget * added: support for custom fonts uploading (new option panel in admin menu) * added: AJAX loading spinner for better UX (seperate options for desktop and mobiles) * added: new typography controls for buttons, classic menu, preloader in Customizer * added: preloader custom image option
07 Oct 2019 – version 1.0.1
* fixed: masthead may not animate in Elementor editing mode * fixed: mobile header alignment issue with language switcher * fixed: prevent double texture loading in WebGL canvas * fixed: useless video background loading if distortion effect is enabled * fixed: incorrect flying heading position calculation from menu * added: new typography options for Elementor widgets (font-weight) * added: ability to adjust font-weight for theme typography from Customizer * added: new option for adjusting background color of the AJAX curtain from Customizer * added: new option for adjusting background color of the AJAX curtain from Document Settings
05 Oct 2019 – version 1.0.0
initial release
LIVE PREVIEWGet it now for only $35
0 notes
Text
The element type is also taken into account
The element type is also taken into account: for example, for form controls and tables use special frames.
https://adrenaline-studios.com/ In WebKit, if an element tries to create a special display object, The createRenderer method will be overridden. Display objects are pointing to style objects containing non-geometric information. How a mapping tree is associated with a DOM tree Processing objects correspond to DOM elements, but are not identical to them. Non-visual DOM elements are not included in the display tree (by example may be the head element). In addition, the tree does not include elements for which the display property is set to the attribute none (elements with the hidden attribute included). There are also elements of DOM that correspond to several at once. visual objects. These are usually elements with a complex structure that impossible to describe with a single rectangle. For example, the element select correspond three visual objects: one for the display area, another for the drop-down list, third for the button. Also, if the text is not
fits into one line and broken into fragments, new lines added as separate display objects. Another example where several display objects are used, is incorrectly written HTML code. According to the CSS specification, line element can contain either only block or only lower case items. If the content is mixed, then as a shell for lowercase objects are created anonymous block objects. Some display objects correspond to a DOM node, but their positions in tree do not match. Floating elements and elements with absolute coordinates are excluded from the overall process, placed in a separate part tree and then displayed in a standard frame, although in reality should be displayed in a frame placeholder.
0 notes
Text
Nem Kurutma | Nem Alma | Rutubet Kurutma | DYD 444 0 719
GoDaddy may be the biggest domain name registrar in the whole world. In addition to domain title enrollment and website hosting solutions, GoDaddy offers building that is website to its clients.
GoDaddy may be the biggest domain name registrar in the whole world. In addition to domain title enrollment and website hosting solutions, GoDaddy offers building that is website to its clients.
Overview of benefits
User friendly interface GoDaddy’s editor is minimalistic but during the same time intuitive. Most of the available tools are la >24/7/365 help via phone, reside talk and email With almost every other site builders, you should be subscribed into the greater intends to get phone help, however with GoDaddy, you can easily select your phone to get help from an actual individual, anytime, anywhere, in over 20 languages and irrespective of which plan you may be making use of. You will find the worldwide range of phone figures at GoDaddy Support Phone Numbers but note that not totally all help lines are 24/7; for instance, the help line for France is just available from 9am to 7pm, Monday to Fr >Backup and restore function< br />GoDaddy enables you to produce backup copies of the site if you want. In addition, you are able to save up to five copies of one’s site and there’s no right time frame on making use of the backups. By saving numerous copies of one’s internet site, you’re not limited to restoring just the most version that is recent.
Pre-populated templates All of GoDaddy’s templates come pre-populated with test content, not the standard “this can be a paragraph” or “Loren ipsum” placeholder text. You are able to just change the information with your. This might help save you lots of time, particularly if you are uncertain of the design abilities or operating away from >Photo options GoDaddy’s site builder comes having an substantial assortment of stock pictures. In addition, all images you upload are conserved in your online storage space to be used on all of your pages. You’ll be able to link your Facebook and Instagram reports to utilize your pictures on those solutions. on line photo modifying is given by Aviary, but this higher level image editor is only obtainable in business and Business Plus plans.
Overview of Cons
Cannot modification themes One regarding the major downsides of GoDaddy’s internet site builder is when you have selected a layout, you cannot switch it to a different one without the need for your articles. You will need to re-enter all your content if you need to switch to another template.
No e-Commerce tools There is no built-in e commerce tools into the internet site builder. GoDaddy delivers a website that is separate solution that is devoted particularly to web store. But, if all that’s necessary is merely a simple storefront and usage PayPal™ being a re re payment processor, you can easily update towards the company plan and make use of the integrated PayPal options.
Extremely fundamental mobile display GoDaddy’s internet sites are mobile-friendly, however responsive. Once you create a web site with GoDaddy’s internet site builder, a mobile form of your site is immediately produced. You can disable it as well if you don’t want to have a mobile version of your website. You additionally have the choice to h >No blogging GoDaddy’s web site builder does not provide any blog posting abilities and you also will not be in a position to develop we blog – all you have is integration to a blog feed that is external.
Plans & Rates
GoDaddy offers 3 website builder plans: Personal, Business and Business Plus.
The prices for the plans come in line along with other internet site builders with comparable abilities.
The private Plan provides you with usage of 50 design templates, along side a gigabyte of disk storage space and 150 GB of bandwidth. In addition is sold with a 1-year free domain title and free 1-year company e-mail from Microsoft workplace 365. The master plan is present for $5.99/month. Keep in mind that that you don’t obtain a version that is mobile of site about this plan.
Business Arrange develops upon the non-public Arrange but offers you complete use of their assortment of 300 templates. In addition features a mobile type of your web site. You will get 10GB of disk area and 500GB of bandwidth together with the 1-year free domain name and 1-yr free workplace 365 e-mail solution. This plan of action is provided by $9.99/month.
Business Plus plan includes anything from the business enterprise Arrange, plus search-engine optimization, social-media administration tools (to be able to produce a Facebook and Twitter web page that fits your site) and a 1-yr SSL official certification. This top tier plan is sold with 50GB of disk room and 1TB of bandwidth. This plan of action is offered by $14.99/month.
Besides the standard yearly payment, GoDaddy now offers a month-to-month billing choice in addition to a 2- and 3-yr payment terms for additional cost savings.
When you may choose the month-to-month option which means you don’t need to invest in one year of solution, the free website name offer is legitimate in the event that you subscribe to the yearly or multi-year terms also it just pertains to the original purchase term. Following the initial purchase term, domains will soon be renewed in the then-current renewal price.
Exact exact exact Same pertains to the SSL certification you will get using the Business Plus plan – it’s free for the very very first year, but following the initial free 12 months, it will likely be automatically renewed during the then-current cost through to the solution is terminated.
GoDaddy’s site builder will not have e-commerce capabilities. For you, or use their separate Online Store builder to create the online store yourself if you need to build an eCommerce website, your only options are to either pay GoDaddy $1,499 to create an eCommerce website. This web store builder is provided by $29.99/month and enables you to develop a full-feature online shop, including online coupons, safe checkouts, mobile-ready shops along with other e commerce choices.
GoDaddy’s number of templates homes 300 designs. Templates are made for assorted industry groups such as for instance company, finance, legislation, training, wellness, beauty, music, profile, wedding, restaurants and much more. Therefore opportunities are, you shall locate a design template that matches your requirements.
All GoDaddy’s templates come pre-structured and pre-populated with content websitebuilderexpert.net. Rather than the standard ” This is often a going” or “Loren ipsum” all templates include real content, rendering it simple if you are unsure of your design capabilities for you to just replace the content with your own and saving you time especially. Other internet site builders that provide pre-populated templates are Wix and IM Creator.
Nonetheless, you can find major downsides of GoDaddy’s web site builder and another of that will be when you’ve select a template, you cannot switch to another template without losing your articles.
Another problem to take into account is GoDaddy does not permit you to modify the HTML or CSS codes associated with the templates. But if you do not consider customizing a template through the HTML/CSS codes, then this would never be an issue for you personally.
And lastly, GoDaddy’s templates aren’t responsive. Rather, GoDaddy immediately produces a version that is mobile of site. If you want to change the layout or colors of your mobile website while you can disable or hide any elements from your mobile website, you will need to be on the Business or Business Plus plan.
GoDaddy’s web site builder utilizes the drag-and-drop technology, enabling you to literally drag and drop elements where they are wanted by you to how. Similar to the editors of Wix, Website.com and IM Creator, GoDaddy offers you control that is full the keeping of your articles.
The builder that is website program is extremely user-friendly. All tools are presented in the one-column toolbar that is floating you can also drag and put the sidebar anywhere from the editor window.
GoDaddy does not provide as big an array of tools and devices as Wix does, however you will find all of the tools that are basic want to build a webpage. Web web Site action controls are menus are observed from the header toolbar, including a Undo/Redo function.
https://www.nemkurutma.com/godaddy-may-be-the-biggest-domain-name-registrar/
NEM KURUTMA HİZMETLERİ
0 notes
Text
HOW TO ADD CUSTOM GOOGLE FORMS TO YOUR STATIC SITE?
Websites created with static site generators like Jekyll or Hugo are on the rise. Their popularity is not surprising. They’re fast and secure, as there’s no data on the server side. The web server builds and serves web pages on the fly. You don’t have to worry about databases and server-side security.
To know more: webroot.com/safe
You can write your posts in Markdown or HTML that gets rendered nicely with the help of templating engines (Jekyll uses Liquid, while Hugo uses Go Templates). Everything is fine until you want to add dynamic functionality to your static site, such as a Contact form. But, you don’t have to worry, as you can use an external backend like Google Forms to implement such features.
USE GOOGLE FORMS TO EMBED A CONTACT FORM Incoming data collected by forms need to be processed by a server and stored in a database. You can find many online tutorials that recommend Formspree as a free form backend for static websites. However, the free version of Formspree sometimes bumps into issues like not forwarding form submissions to your email address. As an alternative, you can use Google Forms to add custom forms to your Jekyll, Hugo, or another static site.
Get more information about:techwebpassion
In this guide, we’ll show you how to create and add a Contact form to a static HTML page (that you can later convert to a Jekyll or Hugo template). However, Google Forms is not limited to Contact forms; you can create any kind of custom forms or surveys with it. Your users won’t even know that you’re using Google Forms, as the form you create can be completely integrated with your site’s design!
Google Forms Homepage
1. CREATE A NEW FORM ON GOOGLE’S PLATFORM Sign in to the Google Forms platform with your Google account. You can either start a new form from scratch or use Google’s pre-made templates. As Google has a fairly good Contact form template, we’ll use that rather than starting with a blank template.
Click the template called “Contact Information” in the Template Gallery on top of the page.
Google Forms Template Gallery
The default “Contact information” template has three required fields (Name, Email, Address) and two optional ones (Phone number, Comments). We’ll keep Name and Email but replace the rest with an optional Subject and a required Message field.
You can delete any field you don’t want to use by clicking the little recycle bin icon that shows up after you click on the field.
Google Forms Delete Field
Then, you can add the new input fields by clicking the + icon in the floating menu on the right. You can choose from various input types such as short answer, checkbox, dropdown, paragraph, file upload, and others.
For our custom Subject field, we use the short answer input type. For Message, we choose paragraph as input type, that allows users to enter a multi-line message. We also set the latter to required using the little switcher at the bottom of the input box.
Google Forms Add New Form Fields
By default, Google Forms require respondents to sign into their Google accounts before they fill in the form. However, we don’t want this behavior when we embed the form into our website. So, click the gear icon next to the Send button on the top of the page to access the Settings and uncheck the “Limit to 1 response” option.
Google Forms Remove Required Login
Save your settings and your Google Form is done. You can test it by copying-pasting the URL into another browser where you are not logged into your Google Account. Here, you can fill in the form with test data.
Your test message will show up in the Responses tab where you can decide what to do with each response (download, print, delete, etc.).
Google Forms Test Message
2. CREATE A SIMILAR FORM ON YOUR OWN SITE Now, you need to mirror the Google Form you created in the previous step so that it can forward data from your website to the Google backend. Create a basic HTML form with the same form fields: Name, Email, Subject, and Message.
<form action="" method="post"> <label>Name*</label> <input type="text" placeholder="Name*" name="" required>
<label>Email Address*</label> <input type="email" placeholder="Email address*" name="" required>
<label>Subject</label> <input type="text" placeholder="Subject" name="">
<label>Message*</label> <textarea rows="5" placeholder="Message*" name="" required></textarea>
<button type="submit">Send</button> </form> The HTML doesn’t have to be exactly the same as Google’s, but it needs to have exactly the same form fields. You can add your own CSS classes to the form so that it’ll match your site’s design.
It’ll be the name and action fields that will tie your on-site form to the Google backend.
3. ADD NAME AND ACTION VALUES TO YOUR ON-SITE FORM Google uses custom name and action values to identify each form. The action attribute belongs to the <form> tag, while the name attributes belong to the input fields. So, you need to find these custom values and add it to the HTML.
Log out of Google (or use a different browser), as if you stay logged in it’ll be hard to do the code inspection (Google adds a lot of extra stuff to logged-in users). Load your Google Form using the form’s URL and inspect it using your browser’s developer tools. In Firefox, you can do that by right-clicking the form and clicking the “Inspect Element” option. In Chrome, you need to choose the “Inspect” option after right-clicking the element.
You need to find the <form> tag in the HTML inspector and copy the value of the action attribute into your custom HTML.
Inspect Custom Google Form
You need to do the same thing with your four input fields, too. But now, you don’t have to copy the action attribute but the name attribute of each input field.
Inspect Google Forms Input Fields
Insert the custom action and name values into your HTML:
<form action="https://docs.google.com/forms/d/e/safdalfjaISv65R6J11H0o_7FadflUm/formResponse" method="post"> <label>Name*</label> <input type="text" placeholder="Name*" name="entry.895563655" required>
<label>Email Address*</label> <input type="email" placeholder="Email address*" name="entry.772189125" required>
<label>Subject</label> <input type="text" placeholder="Subject" name="entry.203645991">
<label>Message*</label> <textarea rows="5" placeholder="Message*" name="entry.190021963" required></textarea>
<button type="submit">Send</button> </form> Now, your on-site form is bound to the Google backend. You can test it by entering some test data into your form. Sign back to Google Forms and check if your test response has arrived.
Google Forms Second Test
4. REDIRECT TO A CUSTOM THANK YOU PAGE While doing the test, you’ve surely noticed that your site has redirected the user to Google’s default thank you page. If you’d rather send your respondents to your custom thank you page add the following code to the top of your form, right before the <form> tag:
<script type="text/javascript">var submitted=false;</script> <iframe name="hidden_iframe" id="hidden_iframe" style="display:none;" onload="if(submitted) {window.location='thankyou.html';}"></iframe>
<form action="https://docs.google.com/forms/d/e/safdalfjaISv65R6J11H0o_7FadflUm/formResponse" method="post" target="hidden_iframe" onsubmit="submitted=true;"> ... </form> You need to add the path to your custom thank you page as a value of the window.location() property (it’s ‘thankyou.html’ in the example above).
Note that you also have to add the target=”hidden_iframe” and onsubmit=”submitted=true;” attributes to the <form> tag.
5. CONFIGURE YOUR FORM SETTINGS You can further adjust your form settings to better manage your incoming responses. For example, you can get email notifications for each new submission.
Navigate to the Responses tab, click the three-dot icon, and check the “Get email notifications for new responses” option. It will send an email notification to the email tied to your Google account (usually a Gmail address) whenever a new respondent submits your Contact form.
Google Forms Get Email Notifications
You can also collect your responses in a Google Spreadsheet. To do so, select the “Select response destination” and specify the spreadsheet that should collect the data (or create a new one). You can download the responses as a .csv file or print them with a click, too.
WRAPPING UP Static websites are excellent for anyone who needs a simple web presence but doesn’t want to use a CMS like WordPress or pay for hosting. With external backends, you can also add dynamic features to your static site.
Google Forms provide you with a free solution to embed a custom Contact form to your website. If you want to take a step further in form building, read our tips on how to build better Contact forms, too. And, if you’d rather stick to dynamic sites, don’t miss out our guide on how to increase server security, either.
0 notes
Text
40 Most Common WordPress Errors and How to Fix Them
While WordPress is really easy to use, there are some common WordPress errors that can make you panic. The good thing is that the WordPress error you are seeing on your site is most likely been reported and resolved by someone before you. At WPBeginner, we have written tutorials on how to fix several popular WordPress errors. In this article, we will cover the 40 most common WordPress errors along with showing you how to fix all of these common WordPress errors.
Important: Before trying to fix any WordPress error, make sure that you have a complete WordPress backup. You can use UpdraftPlus or use this tutorial to manually create a WordPress backup.
In case you are unable to resolve your issue from the steps mentioned in this article, then please contact your WordPress hosting company.
Since this is a lengthy article, we have created a table of contents below for easy navigation.
Table of Contents
How to fix internal server error
How to fix syntax error in WordPress
How to fix the error establishing database connection in WordPress
How to fix WordPress white screen of death
How to fix WordPress posts returning 404 error
How to fix sidebar below content error in WordPress
How to fix white text and missing buttons in WordPress visual editor
How to fix WordPress memory exhausted error by increasing PHP memory limit
What to do when you are locked out of WordPress admin area
How to fix WordPress login page refreshing/redirecting issue
How to fix image upload issue in WordPress
How to fix common image issues in WordPress
How to fix “Are you sure you want to do this” error in WordPress
How to fix briefly unavailable for scheduled maintenance error in WordPress
How to fix WordPress not sending email issue
How to fix WordPress RSS feed errors
How to fix 403 forbidden error in WordPress
How to fix error too many redirects issue in WordPress
How to fix “Upload: failed to write file to disk” error in WordPress
How to fix “This site ahead contains harmful programs” error in WordPress
How to fix missed scheduled post error in WordPress
How to fix fatal error: Maximum execution time exceeded in WordPress
How to fix Facebook incorrect thumbnail issue in WordPress
How to fix WordPress keeps logging out problem
How to Fix the Mixed Content Error in WordPress
How to Fix Add Media Button Not Working in WordPress
How to Fix the 502 Bad Gateway Error in WordPress
How to Fix 503 Service Unavailable Error in WordPress
How to Fix the 504 Gateway Timeout Error in WordPress
How to Fix the WordPress Failed to Open Stream Error
How to Fix the WordPress 429 Too Many Requests Error
How to Fix the 413 Request Entity Too large Error in WordPress
How to Turn Off PHP Errors in WordPress
How to Fix Secure Connection Error in WordPress
How to Fix Destination Folder Already Exists Error in WordPress
How to Fix ‘Another Update in Process’ Error in WordPress
How to Fix Password Reset Key Error in WordPress
How to Fix “Missing a Temporary Folder” Error in WordPress
How to Fix Pluggable.php File Errors in WordPress
Troubleshooting WordPress errors on your own
Let’s take a look at how to solve the most common WordPress errors (one by one).
1. How to Fix Internal Server Error
Perhaps the most confusing WordPress error that a beginner may come across is “Internal Server Error”, or sometimes “500 Internal Server Error”.
This error usually appears when there is something wrong, but the server is unable to identify where the problem is. Since the error message does not indicate where you should look for the error, it is pretty much up to you to figure this out.
We have compiled a list of solutions that you can try and one of them will help you resolve it. [Fix internal server error]
[Back to top ↑]
2. How to Fix Syntax Error in WordPress
This error usually occurs when you are trying to add code snippets into WordPress and have accidentally missed something or the code has incorrect syntax. This will result into a PHP parse error and you will see a notice like:
Parse error- syntax error, unexpected $end in /public_html/site1/wp-content/themes/my-theme/functions.php on line 278
The error message would indicate the unexpected thing found in the code and the location of the script where the error occurred with line number. To fix this issue you will have to correct the syntax. Most of the time it is a missing bracket, or some unexpected character in the code. [Fix syntax error in WordPress]
[Back to top ↑]
3. How to Fix the Error Establishing a Database Connection in WordPress
This error message is clear that your website is unable to connect to the database. However solving this error can be tricky for beginners.
Usually this occurs when a user has entered or modified their database credentials (database host, database username, and database password) incorrectly. Sometimes your database server could be unresponsive, or your database may have corrupted.
However, mostly it is incorrect database login credentials. Take a look at common solutions for this problem. [Fix error establishing database connection in WordPress]
[Back to top ↑]
4. How to Fix the WordPress White Screen of Death
This error usually results into a plain white screen with no error message. This makes it the most puzzling because you have no clue where to look and what to fix.
Most of the time it is caused when a script exhausts PHP memory limit. It can also happen due to a configuration on the server. It is also possible that a user would only see white screen of death on certain sections of their site. [See how to fix WordPress white screen of death]
[Back to top ↑]
5. How to Fix WordPress Posts Returning 404 Error
The symptoms of this error is that when a user visits a single post on their site they get a 404 page – not found error.
The user can browse all other sections of their site including the admin area. The most common cause of this issue is permalink settings in WordPress. To solve this issue a user would need to reconfigure their permalinks settings or manually update their rewrite rules. [Fix WordPress posts returning 404 error]
[Back to top ↑]
6. How to Fix the Sidebar Below Content Error in WordPress
Another common issue beginners face is when the sidebar appears below the content when it is supposed to appear next to the content. This issue is mostly caused by WordPress themes.
Sometimes when users are adding code snippets to their site, they may accidentally forget to close an html div tag or add an extra closing div which may result into breaking the theme layout. Another common cause is using disproportionate width in CSS or not clearing float properly. [Fix sidebar appearing below content error in WordPress]
[Back to top ↑]
7. How to Fix White Text and Missing Buttons in WordPress Visual Editor
Sometimes buttons from WordPress visual editor may disappear or start showing blank white spaces instead of buttons.
This problem may occur when concatenated JavaScript is not working. It may also caused by missing or corrupt TinyMCE files, or conflict with some other plugin that modifies or extends the TinyMCE shipped with WordPress. [Fix white text and missing buttons in WordPress visual editor]
[Back to top ↑]
8. Fix: WordPress Memory Exhausted Error – Increase PHP Memory
Indications of this error could be a white screen of death, or an error message like this one:
Fatal error: Allowed memory size of 33554432 bytes exhausted (tried to allocate 2348617 bytes) in /home/username/public_html/site1/wp-includes/plugin.php on line xxx
This error occurs when a WordPress script or a plugin exhausts the default allocated memory size limit. [Fix WordPress memory exhausted error]
[Back to top ↑]
9. What To Do When You Are Locked Out of WordPress Admin (wp-admin)
Sometimes you may find yourself locked out of the WordPress admin area. This could happen if you forgot your password and don’t have to access to password recovery email.
A plugin or code that incorrectly tries to make some changes into admin section can also lock you out. You may also lose access to admin area due to a hacked WordPress site. [Fix locked out of WordPress admin issue]
[Back to top ↑]
10. How to Fix WordPress Login Page Refreshing and Redirecting Issue
Symptoms of this issue are that when a user attempts to login to the WordPress dashboard, they are redirected by WordPress back to the login page.
Most of the time it happens due to incorrect values for site url and home url fields in WordPress options table. It can also be caused by poorly configured permalink settings or redirects setup in the .htaccess file. [Fix WordPress login page refreshing and redirecting issue]
[Back to top ↑]
11. How to Fix Image Upload Issue in WordPress
Sometimes a user would suddenly notice that all the images from their site are gone and are showing broken image placeholders. When the user tries to upload an image to a post using the media uploader, it results into an error.
All these files in the media library will appear as broken. This error occurs due to incorrect file and directory permissions in a WordPress installation. A number of factors may cause this issue. [Fix image upload issues in WordPress]
[Back to top ↑]
12. How to Fix Common Image Issues in WordPress
Uploading images to a WordPress site can be confusing for someone new to WordPress. A user may be unable to find out how to align images, resize or crop them, or display them in a gallery format.
This is not an error or issue in WordPress. You just need to familiarize yourself with how WordPress handles media. [Fix common image issues in WordPress]
[Back to top ↑]
13. How to Fix “Are You Sure You Want to Do This” Error in WordPress
Users may come across this error in WordPress admin area. The most common cause of this error is a plugin or theme failing to use Nonce properly.
Nonce are special security keys which may be appended to URLs when performing an admin action in WordPress. Sometimes a plugin or theme may use it incorrectly which may result into users seeing this error. [Fix are you sure you want to do this error in WordPress]
[Back to top ↑]
14. How to Fix Briefly Unavailable for Scheduled Maintenance Error in WordPress
Sometimes due to an unfinished or interrupted WordPress update, you might see “Briefly Unavailable for Scheduled Maintenance” error in WordPress.
What happens there is that WordPress puts your site in maintenance mode during an update. If for some reason the update is interrupted, then WordPress does not get the chance to put your site out of the maintenance mode. This error would lock down your entire site and make it unavailable for admins as well as visitors. [Fix briefly unavailable for scheduled maintenance error]
[Back to top ↑]
15. How to Fix WordPress Not Sending Email Issue
The most common symptom of this problem is not receiving any contact form or WordPress notification emails from your site.
This issue is usually caused because most shared hosting providers disable or limit the module used for sending emails to prevent their servers from abuse. [Fix WordPress not sending email issue]
[Back to top ↑]
16. How to Fix WordPress RSS Feed Errors
Most WordPress RSS feed errors are caused by poor formatting. You may see errors like these:
XML Parsing Error: XML or text declaration not at start of entity Location: http://example.com/feed Line Number 2, Column 1:
Depending on what browser you are using, your RSS feed error message may vary. You can also see this error message when visiting your feed in a browser.
Warning: Cannot modify header information – headers already sent by (output started at /home/username/example.com/wp-content/themes/twentysixteen/functions.php:433) in /home/username/example.com/wp-includes/pluggable.php on line 1228
WordPress outputs RSS feeds in XML which is a strict markup language. A missing line break or an extra tab can break your RSS feed. [Fix WordPress RSS feed errors]
[Back to top ↑]
17. How to Fix 403 Forbidden Error in WordPress
403 Forbidden error code is shown when your server permissions don’t allow access to a specific page. This is why the error is usually accompanied by the text:
403 Forbidden – You don’t have permission to access ‘/’ on this server. Additionally, a 403 Forbidden error was encountered while trying to use an ErrorDocument to handle the request.
There are different scenarios when you can see this error. Incorrect file permissions, poorly coded security plugins, or server configuration are the most common culprits. [Fix 403 Forbidden error in WordPress]
[Back to top ↑]
18. How to Fix Error Too Many Redirects Issue in WordPress
This error usually occurs due to a misconfigured redirection issue. As you know that WordPress has SEO friendly URL Structure which uses the redirect function. Several other popular WordPress plugins also use the redirect functionality as well.
Due to a misconfiguration in any of these redirection tools, your site may end up redirecting users to a URL that is actually redirecting them back to the referring URL. In that case the user’s browser is trapped between two pages causing a redirect loop. [Fix too many redirects issue in WordPress]
[Back to top ↑]
19. How to Fix “Upload: Failed to Write File to Disk” Error in WordPress
This error can occur due to a number of reasons. However, the most common one is incorrect folder permissions.
Each file and folder on your website has a set of permissions. Your web server controls access to the files based on these permissions. Incorrect permissions to a folder can take away your ability to write files on server. This means your web server cannot create or add new files to that particular folder. [Fix Upload: Failed to write file to disk error]
[Back to top ↑]
20. How to Fix “This site ahead contains harmful programs” Error in WordPress
Google marks a website with this warning if they find any suspicious code that could be a malware or trojan. Sometimes the reason for this is that your website is hacked and is now used to distribute malicious code.
Another common reason for this error is showing ads from low quality advertising networks. These networks may sometime display ads linking to websites distributing malicious code. [Fix site ahead contains harmful programs error in WordPress]
[Back to top ↑]
21. How to Fix the Missed Schedule Post Error in WordPress
WordPress has this wonderful feature that allows you to schedule posts to be automatically published at a specified time. Most bloggers rely on the future to manage their publishing schedule.
However, sometimes WordPress can miss scheduled posts due to a number of reasons. If this has happened to you more than a few times then you need to address this issue. [Fix missed schedule post error in WordPress]
[Back to top ↑]
22. How to Fix Fatal Error: Maximum Execution Time Exceeded in WordPress
WordPress is coded mainly in PHP programming language. To protect web servers from abuse, there is a time limit set for how long a PHP script can run.
Some WordPress hosting providers have set this value to a higher level while others may have set it to a lower level. When a script reaches the maximum execution time limit, it results into maximum execution time exceeded error. [Fix maximum execution time exceeded error in WordPress]
[Back to top ↑]
23. How to Fix Facebook Incorrect Thumbnail Issue in WordPress
There are many reasons that can prevent Facebook from correctly guessing the right thumbnail image. One of the most common reason is having multiple images set in the og:image tag where your featured image is smaller than rest of the images.
Facebook uses Open Graph (og) tags, and plugins like Yoast SEO automatically adds them to your site to prevent missing thumbnail issue. [Fix Facebook incorrect thumbnail issue in WordPress]
[Back to top ↑]
24. How to Fix WordPress Keeps Logging Out Problem
WordPress sets a cookie in your browser to authenticate a login session. This cookie is set for the WordPress URL stored in your settings section. If you are accessing from a URL that does not match the one in your WordPress settings, then WordPress will not be able to authenticate your session. [Fix WordPress keeps logging out problem]
[Back to top ↑]
25. How to Fix the Mixed Content Error in WordPress
Mixed content errors are caused by incorrect HTTPs / SSL settings on your WordPress site. They may or may not affect your website’s functionality, but they can affect your website’s SEO and user experience.
Basically, on an SSL enabled website all resources should be loaded using an HTTPs URL. Your site may have content with HTTP URLs, or a plugin or theme may be loading a file with HTTP. This causes the mixed content error as those resources are not loaded using a secure protocol.
To fix this, you need to find out which resources are loaded insecurely, and then fix their URLs. You can do this with a plugin or you can do this manually as well. [Fix mixed content errors in WordPress]
[Back to top ↑]
26. How to Fix Add Media Button Not Working in WordPress
Add Media button in WordPress post edit screens uses JavaScript to launch the media library and uploader. However, sometimes a plugin or theme’s code conflict with WordPress core can prevent JavaScript from working.
What happens is that WordPress combines all scripts inside the WordPress admin area to improve performance. A plugin or theme’s script can disrupt this which will make other code in the script stop working. [Fix add media button not working in WordPress]
[Back to top ↑]
27. How to Fix the 502 Bad Gateway Error in WordPress
502 Bad gateway error is another puzzling error that may appear on your WordPress website. It is usually caused when a user’s request to a server takes too long to process without giving any other error.
This delay can be a temporary glitch caused by high traffic. It could also be caused by a poorly coded WordPress theme or plugin. Last but not least, a server misconfiguration can also produce this error. [Fix 502 bad gateway error in WordPress]
[Back to top ↑]
28. How to Fix 503 Service Unavailable Error in WordPress
The 503 ‘service unavailable’ error is often caused by an unresponsive PHP script. This could be a WordPress plugin, a theme, or a misbehaving custom code snippet.
It can also be triggered by heavy server load, a server glitch, or a brute force attack. In that case, it could automatically disappear in a few minutes. If it doesn’t disappear, then you would need to troubleshoot and fix it. [Fix 503 service unavailable error in WordPress]
[Back to top ↑]
29. How to Fix the 504 Gateway Timeout Error in WordPress
The 504 gateway timeout error is often caused when a request to your server is processed through a proxy or firewall but fails to connect with the upstream server.
You are more likely to see this error, if you are using a WordPress firewall like Sucuri or Cloudflare. [Fix 504 gateway timeout error in WordPress]
[Back to top ↑]
30. How to Fix the WordPress Failed to Open Stream Error
The ‘Failed to open stream’ error occurs when WordPress is unable to load a file mentioned in website code. Sometimes WordPress will continue loading the site and only show a warning message, while other times it would result in a fatal error.
The error message can be different, depending on where the error is triggered in the code and what caused it. In each instance, failed to open stream phrase would be followed by a reason. For example, permission denied, no such file or directory, operation failed, and more. [Fix the WordPress failed to open stream error]
[Back to top ↑]
31. How to Fix the WordPress 429 Too Many Requests Error
The 429 error is a preventive measure to protect servers from abuse. This error is triggered when a bot, script, or a user is making too many requests to the server.
However, if it is not properly configured, then it can block search engines and other APIs from accessing your website. To fix this you will need to find the misbehaving code, plugin, or service that’s causing the error. [Fix WordPress 429 too many requests error]
[Back to top ↑]
32. How to Fix the 413 Request Entity Too large Error in WordPress
Normally, most WordPress hosting companies have their servers configured, so that WordPress users can easily upload large images and other media. However, sometimes this setting is not high enough to upload large theme or plugin files.
It would also stop you from uploading large files in the media library. In that case, you will see a different message, clearly stating that the file size exceeds maximum allowed limit. [Fix 414 request entity too large error in WordPress]
[Back to top ↑]
33. How to Turn Off PHP Errors in WordPress
Your WordPress site may sometimes show errors and warnings inside WordPress admin area or your website. These errors do not stop WordPress from displaying your website. They are helpful in debugging issues but your website will look really unprofessional if it is showing these errors on the front-end.
WordPress comes with easy configuration tricks to control PHP errors and how they are displayed or logged on your website. You just need to turm them off and PHP errors will disappear from your site. [Fix PHP Errors in WordPress]
[Back to top ↑]
34. How to Fix Secure Connection Error in WordPress
WordPress comes with an updates management system which regularly checks for available updates on WordPress.org website. Your website may fail to connect with WordPress.org website, due to a misconfiguration on your hosting server, which will cause the secure connection error.
Updates play an important role in WordPress security and performance. This is why you need to fix this error to resume WordPress updates. [Fix secure connection error in WordPress]
[Back to top ↑]
35. How to Fix Destination Folder Already Exists Error in WordPress
This error occurs during the installation of a WordPress theme or plugin. WordPress extracts your plugin or theme’s zip file into a folder named after the file itself.
If a folder with the same name already exists, then WordPress aborts the installation with the following error message.
Destination folder already exists. /home/user/example.com/wp-content/plugins/wpforms/
Plugin install failed.
To fix this, you simply need to delete the existing folder and then continue installation. [Fix folder already exists error in WordPress]
[Back to top ↑]
36. How to Fix ‘Another Update in Process’ Error in WordPress
This error usually appears during the WordPress core update process. If a user initiates another update process while an update is already underway, then you’ll see this error message.
What happens is that WordPress automatically sets an update lock option in the database. This database option prevents you from running simultaneous updates on your website. This option automatically disappears after a while. However, if it doesn’t or you don’t want to wait, then you can also manually fix it. [Fix another update in process error in WordPress]
[Back to top ↑]
37. How to Fix Password Reset Key Error in WordPress
This error forces the login page to keep refreshing and wouldn’t allow you to save the password reset key. While the front-end of your website works normally, you wouldn’t be able to login and work on your website.
It is caused by the lack of disk space on your WordPress hosting account. Since there is no more disk space, WordPress fails to save new data into the database. The easy way to fix this is to simply delete a few unnecessary files from your website. [Fix password reset key error in WordPress]
[Back to top ↑]
38. How to Fix “Missing a Temporary Folder” Error in WordPress
This error is caused when WordPress does not have access to the folder PHP uses to store temporary files. The error disrupts your WordPress media uploads, plugins, and theme installations.
To fix this error, you will need to define a temporary folder for WordPress to use or ask your WordPress hosting provider to fix it for you. [Fix missing a temporary folder error in WordPress]
[Back to top ↑]
39. How to Fix Pluggable.php File Errors in WordPress
Pluggable.php file contains some core WordPress functions that users and developers can override in their own code. However, if a WordPress plugin or a custom code snippet fails to correctly handle one of these functions, then you will see an error like this one:
Warning: Cannot modify header information – headers already sent by (output started at /home/username/demosite/wp-content/themes/mytheme/functions.php:1035) in /home/username/demosite/wp-includes/pluggable.php on line 1179
Sometimes you would be able to continue working on your site despite the error, sometimes the error would be fatal and make your site completely inaccessible. [Fix pluggable.php file errors in WordPress]
[Back to top ↑]
40. Troubleshooting WordPress Errors on Your Own
We have covered some of the most common WordPress errors in this article. However, the real power of WordPress comes from thousands of plugins and themes that you can use on your site. Any plugin or theme installed on your site can cause errors.
It could become really hard for beginners to find out what is causing the problem on their site and how they can fix it.
We have compiled complete step by step guide on troubleshooting WordPress errors for beginners. It will help you learn how to diagnose WordPress issues and how to fix them like a pro.
[Back to top ↑]
That’s all, we hope that this guide helped you find and fix the WordPress error that you were encountering.
If you liked this article, then please subscribe to our YouTube Channel for WordPress video tutorials. You can also find us on Twitter and Facebook.
The post 40 Most Common WordPress Errors and How to Fix Them appeared first on WPBeginner.
from WPBeginner https://www.wpbeginner.com/beginners-guide/14-most-common-wordpress-errors-and-how-to-fix-them/
0 notes
Text
How to Create a Custom Gutenberg Block in WordPress (Easy Way)
Do you want to create a custom Gutenberg block for your WordPress site? After the WordPress 5.0 update, you need to use blocks to create content in the new WordPress block editor.
WordPress ships with several useful blocks that you can use when writing content. Many WordPress plugins also come with their own blocks that you can use.
However, sometimes you may want to create your own custom Gutenberg block to do something specific.
If you’re looking for an easy solution to create custom Gutenberg blocks for your WordPress site, then you’re in the right place.
In this step by step tutorial, we’ll show you the easy way to create a custom WordPress block for Gutenberg.
Note: This article is for intermediate users. You’ll need to be familiar with HTML and CSS to create custom Gutenberg blocks.
Step 1: Get Started
The first thing you need to do is install and activate the Block Lab plugin.
It’s a WordPress plugin that allows you to create custom blocks from your admin panel without much hassle.
To install the plugin, you may follow our beginner’s guide on how to install a WordPress plugin.
Once the plugin is activated, you can proceed to the next step of creating your first custom block.
Step 2: Create a New Block
For the sake of this tutorial, we will build a ‘testimonials’ block.
First, head over to Block Lab » Add New from the left sidebar of your admin panel.
On this page, you need to give a name to your block. You can write any name of your choice in the “Enter block name here” textbox.
We will name our custom block: Testimonials.
On the right side of the page, you’ll find the block properties. Here you can choose an icon for your block and select a block category from the Category dropdown box.
The slug will be auto-filled based on your block’s name, so you don’t have to change it. However, you may write up to 3 keywords in the Keywords text field, so that your block can be easily found.
Now let’s add some fields to our block. You can add different types of fields like text, numbers, email, URL, color, image, checkbox, radio buttons, and much more.
We’ll add 3 fields to our custom testimonial block: an image field for the image of the reviewer, a textbox for the reviewer name, and a textarea field for the testimonial text.
Click on the + Add Field button to insert the first field.
This will open up some options for the field. Let’s take a look at each of them.
Field Label: You can use any name of your choice for the field label. Let’s name our first field as Reviewer Image.
Field Name: The field name will be generated automatically based on the field label. We’ll use this field name in the next step, so make sure it’s unique for every field.
Field Type: Here you can select the type of field. We want our first field to be an image, so we’ll select Image from the dropdown menu.
Field Location: You can decide whether you want to add the field to the editor or the inspector.
Help Text: You can add some text to describe the field. This is not required if you’re creating this block for your personal use.
You may also get some additional options based on the field type you choose. For example, if you select a text field, then you’ll get extra options like placeholder text and character limit.
You can click on the Close Field button once you’re done with the image field.
Following the above process, let’s add 2 other fields for our testimonials block by clicking the + Add Field button.
In case you want to reorder the fields, then you can do that by dragging them using the hamburger icon on the left side of each field label.
To edit or delete a particular field, you need to hover your mouse over the field label to get the edit and delete options.
Once you’re done, click on the Publish button, present on the right side of the page, to save your custom Gutenberg block.
Step 3: Create a Block Template
Although you’ve created the custom WordPress block in the last step, it’ll not work until you create a block template named block-testimonials.php and upload it to your current theme folder.
The block template file will tell the plugin how to do display your block fields inside the editor. The plugin will look for the template file and then use it to display the block content.
If you don’t have this file, then it’ll display an error saying “Template file blocks/block-testimonials.php not found”.
Let’s create our block’s template file.
First, go ahead and create a folder in your desktop and name it blocks. You’ll create your block template file inside this folder and then upload it to your current WordPress theme directory.
To create the template file, you can use a plain text editor like Notepad.
Every time you add a new field to your custom block, you need to add the following PHP code to your block template file:
<?php block_field( 'add-your-field-name-here' ); ?>
Just remember to replace add-your-field-name-here with the field name.
For example, the name of our first field is reviewer-image, so we will add the following line to the template file:
<?php block_field( 'reviewer-image' ); ?>
Simple, isn’t it? Let’s do the same for the rest of our fields:
<?php block_field( 'reviewer-image' ); ?> <?php block_field( 'reviewer-name' ); ?> <?php block_field( 'testimonial-text' ); ?>
Next, we’ll add some HTML tags to the above code for styling purposes.
For example, you can wrap the reviewer image inside an img tag to display the image. Otherwise, WordPress will display the image URL which is not what you want, right?
You can also add class names to your HTML tags and wrap your code inside a div container to style your block content (which we’ll do in this next step).
So here’s our final code for our block template:
<div class="testimonial-block clearfix"> <div class="testimonial-image"> <img src ="<?php block_field( 'reviewer-image' ); ?>"> </div> <div class="testimonial-box"> <h4><?php block_field( 'reviewer-name' ); ?></h4> <p><?php block_field( 'testimonial-text' ); ?></p> </div> </div>
Finally, name the file as block-testimonials.php and save it inside the blocks folder.
Step 4: Style Your Custom Block
Want to style your custom block? You can do that with the help of CSS.
Open a plain text editor like Notepad and add the following code:
.testimonial-block { width: 100%; margin-bottom: 25px; } .testimonial-image { float: left; width: 25%; padding-right: 15px; } .testimonial-box { float: left; width: 75%; } .clearfix::after { content: ""; clear: both; display: table; }
Once done, name the file as block-testimonials.css and save it inside the blocks folder.
Step 5: Upload Block Template File to Theme Folder
Now let’s upload the blocks folder containing our custom block template file to our WordPress theme folder.
To do that, you need to connect to your WordPress site using an FTP client. For help, you may check out our guide on how to upload files to your WordPress site using FTP.
Once you’re connected, go to the /wp-content/themes/ folder. From here you need to open your current theme folder.
Now upload the blocks folder, containing the block template file and the CSS file, to your theme directory.
Once done, you can proceed to the final step to test your custom block.
Note: Block Lab plugin allows you to create theme-specific blocks. If you change your WordPress theme, then you need to copy the blocks folder to your new theme directory.
Step 6: Test Your New Block
It’s time to test our custom testimonials block. You can do this by heading over to Pages » Add New to create a new page.
Next, click on the Add Block (+) icon and search for the Testimonials block. Once you find it, click on it to add the custom block to your page editor.
You can now add a testimonial to this page using your custom block. To add more testimonials, you can always insert new testimonial blocks.
Once you’re done, you can preview or publish the page to check whether it’s working properly or not.
That’s all! You’ve successfully created your first custom WordPress block for your site.
Did you know that you can save time with reusable blocks in your editor? Check out our guide on how to easily create reusable blocks in the WordPress block editor and use them on other websites.
You may also want to see our guide on how to create a custom WordPress theme without writing any code.
If you liked this article, then please subscribe to our YouTube Channel for WordPress video tutorials. You can also find us on Twitter and Facebook.
The post How to Create a Custom Gutenberg Block in WordPress (Easy Way) appeared first on WPBeginner.
😉SiliconWebX | 🌐WPBeginner
0 notes