#fun experimenting with editing techniques too which is still a work in progress of course
Explore tagged Tumblr posts
Visit Tumblr Blog
Explore Tumblr blogs with no restrictions, modern design and the best experience.
Last Seen Tumblr Blogs


Fun Fact
28.6 is the average number of monthly visits per US mobile user.
Text

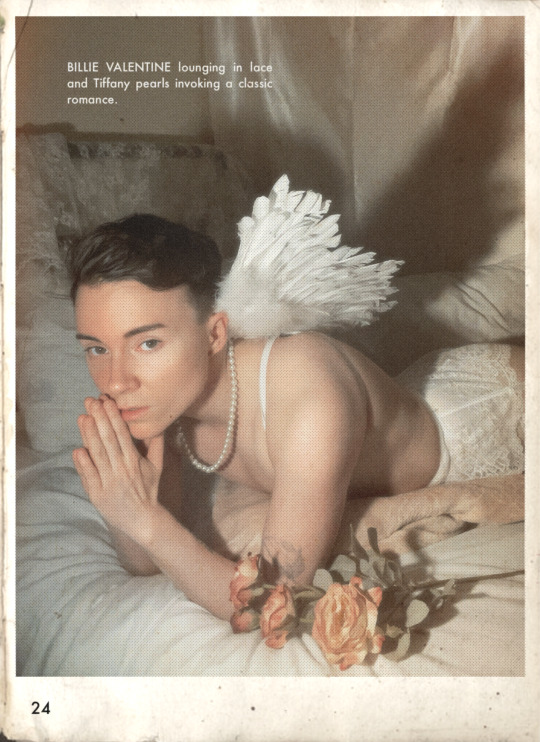


A fun photo session and a little character backstory inspired by a hidden piece of gay history: beefcake magazines. Throughout the 1950s and 1960s, these simple photo-heavy men's "health" magazines showcased the figures and routines of muscle boys and body builders. But what the public didn't exactly catch was that the magazines were mostly made by and for gay and bisexual men in an age where queer content had to find ways around censorship and laws targeting LGBTQ+ people. Many of the images featured were as saucy as they could get away with! And while I'm no strongman, it was fun to try out the concept!
♡ ig iheartbillievalentine
#definitely going to be doing more of these#fun experimenting with editing techniques too which is still a work in progress of course#I swear I use these wings sm#mirror image#eros magazine#<- not actually real but if I do more mock issues they’ll be under this#lgbtq history#gay history#1950s#vintage aesthetic#vintage gay#vintage photography
358 notes
·
View notes
Text
Rosedale. Herkimer 2009. Some friends and I had followed Honor Bright; The Doppler Effect and Lacerda to a show in Herkimer, NY. We'd never seen Rosedale, or heard of them. We didn't know what to expect when we saw them setting up. I was in awe of the sheer height of their front-man, Mike. (I am a over a foot shorter than he is, and at that point he was the tallest person I'd ever met.)When they started playing, I was in awe of their drummer, Emerson Tavares (he played faster than most drummer I'd seen). After the show, we saw a big purple bus, and we had the chance to hang out with Mike and Emmo. A week later, we'd get to meet Mitch and Zan in Watertown, NY. We were hooked. Soon after, we got them to our college in Northern New York.Since then, I've watched Mike progress from the 4 man band to the last solo act in Toronto in 2018. He is multi-talented, and probably one of the most down to earth people I've met. He takes time before, during, and after shows to talk with as many people/fans as he can, and has been an inspiration to many that have followed his journey.Today, we're going to take a look at where he came from, and where he plans to go. Take a few and read through. It's the anniversary feature for Notes on Notes! What better way to celebrate that with the one who inspired it all?!
NON: Rosedale was an early project of yours as a teenager in Brampton, ON. What brought you and your then band mates together?
ML: Pretty much skateboarding sparked it all. The skate scene was really booming in Brampton (and everywhere) as I was becoming an adolescent. Tony Hawk Pro Skater was huge, all the skate magazines were doing well, all the local skate parks were packed and hosting contests, pro skaters were celebrities- it was wild! I've always been pretty awkward on a skateboard and could never really improve past the basics, but I was definitely making progress on the piano so my parents finally granted my wishes to switch to classical guitar, as I'd been begging for years and the skate culture was surrounded by a lot of guitar music. After about a year of struggling to figure out how to play "cool guitar" I started convincing my friends to learn drums and bass and would try to jam with them. That led me to connecting with a friend I hadn't really seen since kindergarten; Nick, who was a pretty solid drummer. So I started showing him songs I'd written and we'd jam at his place on weekends. I think it started lighting a fire for a few of my school and skater friends as they started getting more serious about learning instruments and starting bands. We'd eventually teamed up with Mitch and Jon's band, as their drummer, Emerson, was still figuring out how to drum. Fun fact, there was about a month or two where I was kicked out of the band because my squeaky voice, cheesy lyrics, shrill guitar tone, awkward stage presence, and thick wavy blond mushroom cut were all just too unbearable. (They were very blunt and honest with me on that phone call...) So Jon started singing and they eventually called me back into the new band to play guitar, piano, and sing super high emo backup vocals. From there; we replaced Nick with Sam, named the band Rosedale (because when our gear was stuck at Nick's house we'd walk up Rosedale ave to the local music store to practice and write). Then we eventually replaced Sam with Emerson. Me and Jon started taking vocal lessons from our friend Steve, who was a drummer and backup singer in one of our favourite local bands, By Permit Only. Eventually we just asked him to be our lead singer and after recording our first EP with him, he quit the band and I took over lead vocals again. I met Zan in our high school, Mayfield. He was a bassist in the music program so I'd jam with him from time to time during lunch in our school's practice rooms. He eventually replaced Jon... I guess I could have just summed it up with "Skateboarding and school" but we all have a little more time these days so why not take a trip down nostalgia lane!
NON: You've had 5 EP's and albums over the years; could you describe the progression of your creative process through the years?
ML: It's pretty crazy for me to look back on. We recorded Past Times With Old Friends in Sean Andrew's little bedroom on a Line 6 bean-shaped Pod with Cue-base on his laptop. We'd tried to record about 3 demos with 3 different producers prior to that EP but nothing ever got finished. Each time we'd record I'd learn a few more things about how to engineer. Back when we had Sam in the band, one of his dad's friends "Stereo Mario" (one of the 3 producers that we'd demo with) would teach me the basics of Pro Tools and I was very eager to learn more. Before ever using any real recording equipment/DAW I'd multi-track covers of my favorite songs onto three-and-a-half inch floppy discs with my Yamaha Clavinova (a multi-patch midi amplified keyboard from the mid 90s), drums and all! So I kinda came full circle back to being a solo, multi tracker, multi-instrumentalist after having several different band mates and methods. The big turning point in my progression as an artist and producer, though, came when I started an internship at Drive Studios in my senior year of high school. I believe everyone needs a roll model and mentor to really progress and the owner of that studio, Steve Rizun, took me under his wing and pulled me in the right direction. Not only did he train me to be a sound engineer and let me work with some world class punk/prog/metal/emo bands, but he also would show me how to make additional production for Rosedale's sound and how to bring it to our live show. I became obsessed with songwriting and production and as soon as I graduated I worked to save up for a Macbook and an audio interface...and a lot of other gear! Had it not been for Steve, I probably would have wasted a lot of money going to a college to learn a fraction of what he was teaching me for free; hands on in the most punk rock environment! Since that internship he's mixed and mastered all the Rosedale records, mixed a handful of my live shows, he even showed me the ropes of being a live sound engineer, and continues to be a great ear to for mixing and advice! I've had a lot of other great friends show me how to edit video, hold a drumstick, where to book shows, gear advice etc. Even though I'm kind of a "Lone Wolf" I guess my process has always been to keep creating and ask for help and advice along the way from those who are more experienced (and YouTube tutorials, of course). Now that I'm in a new market playing with a new band (Mainsail in San Diego) I feel like I'm teaching and working more often than I'm learning. And that's been really healthy too!
NON: How has the journey from "Past Times" to your most recent projects helped you grow/learn as a musician/artist?
ML: What a journey it has been! As I'm sure any artist or even entrepreneur could relate, The Faces sang it best; "I wish that I knew what I know now when I was younger!" I think the biggest difference is the decision making ability. I used to take so damn long to make such bad decisions! Debating who, what, where why- it's important to think things through but sometimes you gotta just leap and learn from it. If you keep questioning things you'll never know. Also, the more I learn the more I realize how much more I still don't know! And that's part of the climb. Even now, being in the beginning stages of getting my 10,000 hours on the drums, I look back to how I used to play, say, 100 hours ago- and shake my head. That can sometimes be humiliating and demotivating while knowing you're still at the bottom of the mountain- or even just dealing with the ongoing yin and yang of confidence/hope vs. doubt. But what usually gets me to keep on going is to remind myself to just be better than I was yesterday. For a long time I was holding myself to the standards of my heroes which usually just creates inauthenticity, bad technique, bad decisions, clutter, and setbacks. Sometimes I'm worse than I was yesterday so I need a little push and that's okay, too! The journey from Past Times to Again was a big balancing lesson of letting things go while learning you can always do more to improve. And it's no surprise; but the newer the album, the more proud and less embarrassed of it I am!
NON: You've played bass in Mainsail for roughly a year, maybe a bit more; how did you meet up with them? What spurred you joining?
ML: Yeah since February 2019 I've been in Mainsail. I've been friends with them since 2017 and they really helped me get my show in front of a lot of people in San Diego. When I finally moved out there Nick was really cool about bringing me out to shows and jamming together. They needed a new bass player so I figured I'd offer and it just all escalated really fast. Since finally accepting that it was time to move on from the name Rosedale I've had a lot of luck with being a sort of "yes man". I'm usually very strict with staying on the path to my vision, as it requires a lot of time, but since moving and letting go of the past I've been finding that sometimes letting the wind take you where you're needed can be really beneficial. And a lot of great things are starting to happen for Mainsail so it has been fun. It has also kind of kept a stream of new listeners seeing what Rosedale is all about too so that is a nice bonus.
NON: You've performed at the House of Blues in San Diego; how was the experience for you?
ML: It was one of the best moments of my life playing that stage in front of so many great SoCal people, some who have been supporting Rosedale over the years. That has always been one of my favorite venues and since moving to San Diego I've seen a lot of amazing shows there. House of Blues is always great in Boston and Anaheim too. I'm really grateful that they give independent acts like myself not only a chance to play there, but they really give you the same professionalism and respect as they do to the giant national acts, it's pretty remarkable. I really hope they're doing okay during this pandemic and I hope all venues find a way to pull through this. I can't imagine how tough it's getting for some.
NON: You've toured the U.S. and parts of Canada multiple times; played on a stage at Warped Tour, and toured Europe: What would you say is your most memorable moment?
ML: That is a great but very tough question. Playing in Vienna Austria in 2016 to a bunch of kids that knew my songs is definitely up there. But 2012 Warped Tour was probably the most fun and rewarding summer of my life. It was a grind and very uncomfortable at times, but there were so many epic moments packed into that summer that I look back on in disbelief. The biggest turning point was about two weeks into the tour in Minnesota (I think it was Minnesota...) I got called into the Warped production office and was told to check in with Kevin every morning for any open stage time, given a wristband, and some tasks to help out with in production. I played my DIY one-man-show in the parking lot that same night as kids were leaving the festival (as I would every night) and while I was standing at my merch table selling stuff and taking photos, I noticed that Ryan Dawson (from All Time Low) and Anthony Raneri (from Bayside) were hanging out watching. Once things slowed down they came over and bought 10 CDs each! It was so cool of them to even give me the time of day, let alone buy CDs to (probably) give out to people on the tour. I had a similar experience with Caleb Shomo (from Attack Attack/Beartooth) the year before outside of Cuyahoga Falls Warped tour. I had a drummer and bass player with me at the time and Caleb stood front & center to watch our whole set while kids kept coming up to him for autographs and I could see him pointing at us saying good things to all the kids. After our set he handed me all the cash he had in his pocked and apologized for not having more, I gave him some merch and we chatted for a good 15 minutes about how being an artist is a roller coaster and good things come and go, encouraging me to hang in there. He kept emphasizing how he just considered himself and everyone on the main stages lucky. All of those memories are enough motivation to last a lifetime and they're also reminders to pay it forward.
NON: Touring as much as you have, there must have been some odd things that have happened. What has been the strangest thing to happen to you while you were on the road?
ML: Lots of strange tour stories for sure. The little ghost girl I caught on camera in the former German concentration camp was pretty crazy. (You can find it in the RosedaleMike Europe Tour Blogs via Tumblr if you don't believe!) It always freaks people out when I show them. And I remember everyone's reaction in the van right after I caught the footage. But the craziest thing that happened to me...there's been so many hard luck slaps in the face, as so many touring bands have also experienced, I'm sure. One time I had this great opportunity to be the opener/direct support for Everlast in Colorado Springs. I had just released self-titled, the tour was going well, and this Everlast show was sold out at Black Sheep (a great venue!) I had a day off so I got to town a day early to be extra prepared. While at the gym I received an email from the venue that Everlast had to postpone due to weather conditions. So now the show was cancelled and I offered to find local bands to fill the night for the venue so that I can still play for my small crowd. I went straight to a library for wi-fi and started plugging away on my laptop, emailing bands asking if they wanna do me a solid and play a last minute show at Black Sheep tomorrow night. I had two confirmed, told the venue, and they announced on the Facebook event page that there will still be a show but Everlast will be rescheduled, and they made me a host so I could update the event as I confirmed new acts. Some kids in Montana saw this and started saying that Rosedale cancelled the Everlast show! It turns out that they just randomly decided to troll me. They were even sending pictures of these little ridiculous hand written notes they made that read something like "I am cancelling the show - Rosedale". They were leaving random comments claiming that they were Everlast and bashing my fans as they tried to help clear the confusion. People were messaging me asking "Why'd you cancel the show?!" I had to explain to them and the venue what was really going on. The venue was in shock watching it all happen too and they said they have never seen anything like that, ever. I went to a local show that same night and convinced a couple of the bands to play Black Sheep tomorrow. All four locals were really awesome and the show ended up turning out to be pretty well attended. Even some people that had Everlast tickets came out and had a great time. The venue was really impressed that I pulled an event together so last minute and I was stoked to have built another great venue relationship. I got in my van and started to drive to my next show in Flagstaff, AZ. As I was climbing a rocky mountain pass, some slick snow started coming down. I was pulling my trailer and sliding pretty bad until eventually I couldn't move anymore and was stuck on the side of the road. As the sun was coming up an emergency truck pulled up and started laying sand down in front of my van so I followed him until my wheels started spinning again and one wheel gripped to the sand while the other spun and blew my transmission and rear differential. I didn't make it to Flagstaff or the next five shows. $4600 repair bill. And the next show back in Encinitas was an afternoon show at a biker bar where I was told after my first set (of three) to pack up and only received one sixth of my guarantee as my fans started showing up for the second set. There ended up being some good intertwined in all of all of that but it was just such a frustrating and confusing week. Sometimes I swear I'm in a movie like The Truman Show.
NON: You draw a lot of inspiration from The Used; Blink-182 and Angels and Airwaves: Who else has inspired you along the way?
ML: I definitely have a lot of heroes. Death Cab For Cutie and The Postal Service, The Ataris, The Starting Line, Metro Station, Dashboard Confessional, Boys Like Girls, The Matches, Underoath, The Almost, Motion City Soundtrack, Red Hot Chili Peppers, All Time Low, The Band Camino, Owl City, Radiohead, John Mayer, Coldplay, Paramore, Yellowcard, Moneen, Boxcar Racer...That's probably 10% of them. I've been to a lot of great concerts and being six foot nine gives me a good view and very memorable experiences.
NON: Do you see yourself continuing making music or helping others in music in the future?
ML :Both!
NON: What song that you've written do you connect with the most?
ML: That's always changing to be honest. Depending on where I'm at, what I'm doing/going through. It's usually the most recent song or idea I've written which doesn't get released for sometimes a year or two after. Of the songs I've release, that would be Sustain. That is the most recent Rosedale song I've written. I wrote it right before we started tracking Self Titled and Again and its kind of about being in both shoes of that Warped Tour situation I just mentioned. People sometimes ask if I'm referring to myself as the Star or the Kid in that song and the answer is both! I'm still that star struck kid who can't wait to ask my favorite artists a thousand questions but I also get a lot of questions from fans who are trying to start their own thing or make their passion their career.
SHOUT OUTS
Mainsail, Palapalooza Podcast, Time & Distance, I Set My Friends on Fire, Alex Baker, Plans, The Home Team, OCML, FXav, Adam Sisco, my parents and family, everyone at Gnarlywood, Abby Lyn Records, Jonny Cooper, my old band mates and everyone who's ever come on tour with me- Thank you all. And all the bands, artists, venues, studios, street performers, restaurants that are trying to make it through this lock down. Hopefully all this is over soon and there is a light at the end of the tunnel. Believe things will get better eventually and use this alone time to improve yourself. Keep supporting live music even if you're stuck at home. And if you need help reach out and ask. Let's all stay safe and help one another
LINKS
Facebook
YouTube
Instgram
Twitter
Spotify
4 notes
·
View notes
Photo
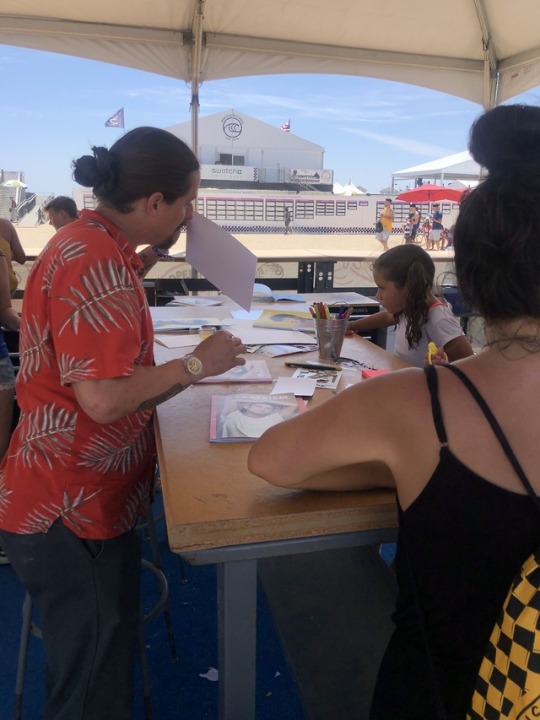
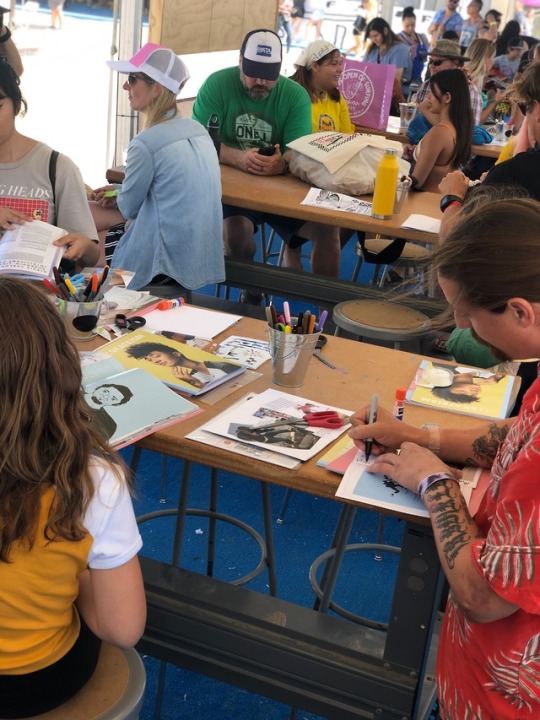
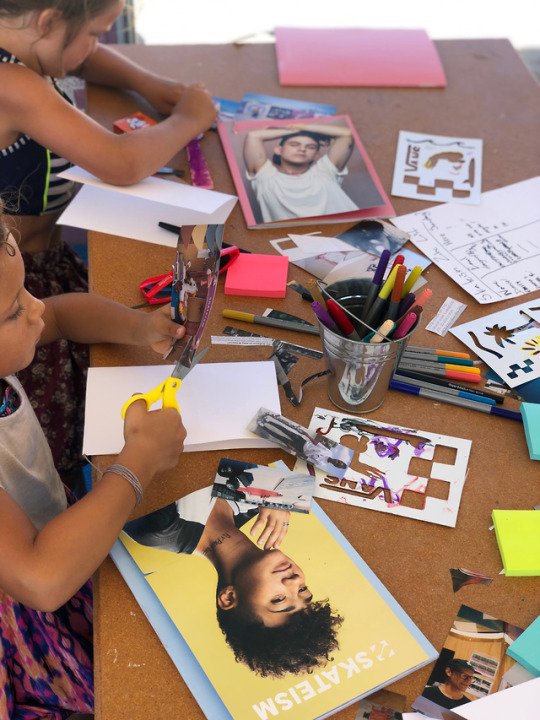
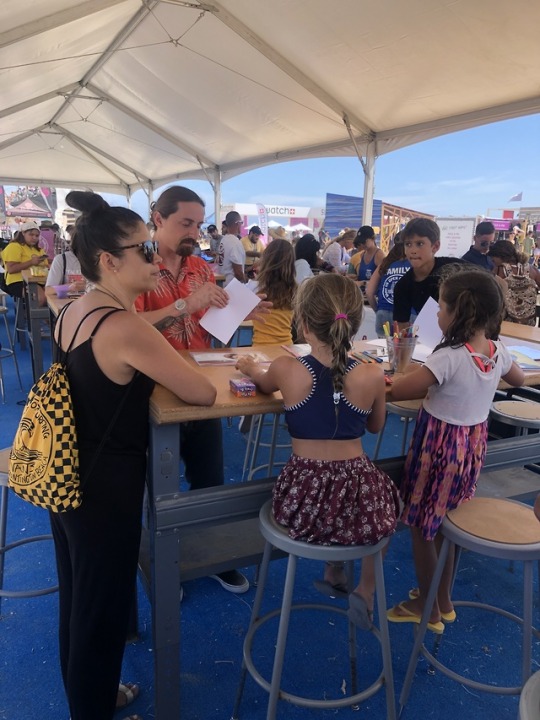
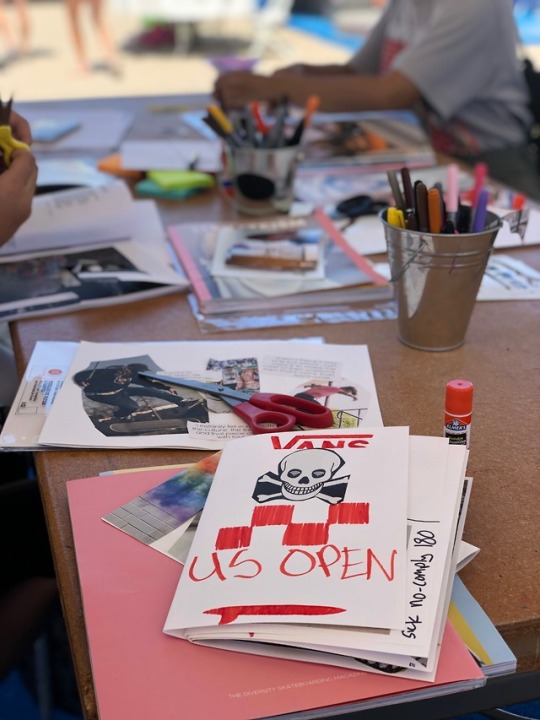
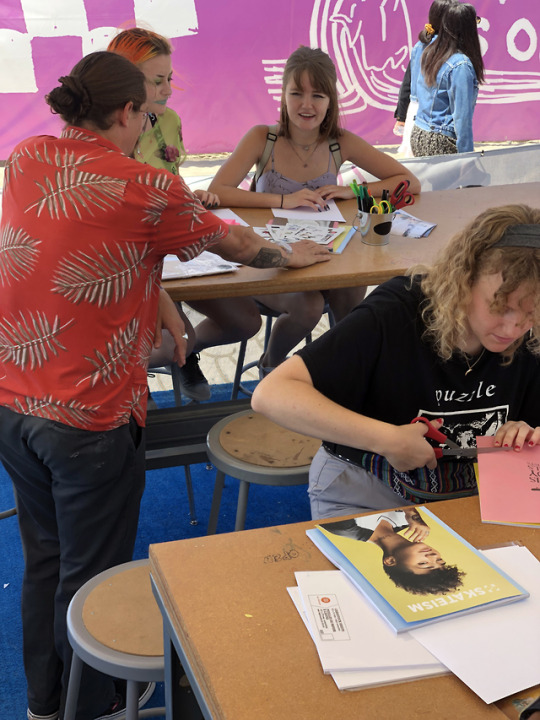
WORKSHOP SHOUT OUT | SKATEISM | VANS US OPEN
It’s the last weekend of the Vans US Open of Surfing, but we’re not ready to go just yet!
We’ve still got some of our favorite workshops over the week to share –like the fun folks over at SKATEISM who hosted a zine making workshop at Van Doren Village. We caught up with Tobias from SKATEISM to find out what folks created, more about the zine making process, and what special gift they're giving out on this final weekend.
Introduce yourselves and tell us a little bit about Skateism. My name is Tobias Coughlin-Bogue, and I’m the online editor for SKATEISM. The magazine was founded by Christos “Moch” Simos and Oisin “Osh” Tammas in Athens. It began as just a little local Athens skate blog in 2012, but when Osh signed on they started doing more English-language posts and international coverage. Moch is one of the only out skaters in Greece, and at some point he and Osh realized that the stories they were most interested in telling centered around that… as well as some other areas of skateboarding they felt had been neglected like skate charity, global scenes, and women’s skateboarding. They also realized they wanted to make a magazine, as a place for underrepresented populations in skateboarding to see themselves in a proper print publication. Two years and four issues later, that’s exactly what they’ve done and we’re very proud to present Issue #4 as the Pride issue, focusing on the experiences of LGBTQ+ skaters.
Take us through your workshop and what were you doing with attendees at the Vans US Open? Essentially we facilitated everything to make a zine except shooting photos or binding the final copies. We had prints of images on hand for people to cut and glue onto cardstock, creating what’s called a “master” page. Masters are what zinemakers make photocopies of that they then bind together into their final zine. We started the workshop by talking a little bit about what zines are and why we think they’re so cool. We covered the zinemaking process, and then dived right into it.
What about zinemaking do you think is super fun and accessible? Zinemaking was a fundamental part of the pre-internet skate culture. While it isn’t exactly a necessity anymore, when it comes to communicating our own unique visions of skateboarding it’s still super fun to do. It forces you to take all the things that catch your eye at an event like the US Open, that might be a quick Insta story or something, and put them all down on a page together in a thoughtful way. Plus we like writing about skating, and zines incorporate a lot more text than some of the forms of storytelling we do on social media these days.
As far as being accessible, well zines were kind of the social media in skateboarding (and punk and queer scenes too) before social media existed. They were cheap to make and there was a broad network of people sharing and exchanging them around the country, all interested in the same kind of subcultural topics. If you had an idea you wanted to share, you could just paste the images and words that capture it best to some backing paper and get to photocopying. Then mail it out to a distro or drop it off at the skate shop and — boom — you’re a publisher.
Obviously a lot more work goes into what we do with something like SKATEISM, which takes hours and hours of reporting and editing and designing to make, but I at least got into the world of skate media via zines, and I have a huge soft spot for them. For what I do, and what a lot of people getting into media these days do, learning to publish fast and loose is actually really helpful, because that’s the pace digital media operates at.
What type of materials did you have on-hand for folks to work with? We shot a few photos of the first weekend of the event on Kodak Fun Savers (a very accessible and enjoyable way to source art for your zine!), and made photocopies of the best exposures. Plus, we had copies of some pages from past issues of SKATEISM… And of course all the scissors, glue, card stock, staplers, and other stuff folks needed to put together their own master pages. We encouraged attendees to supplement the images we’ve provided with writing and drawing that documents their own experience at the event!
Are there any rules to zinemaking? Have a good time doing it and don’t be hateful. That’s about it.
Any tips you’ve learned over the years for readers who may want to try creating a zine on their own? Just start doing it. To borrow a concept from Ira Glass, you know what you like to see on the page, so keep trying until the stuff you make starts to look like that. Don’t stress out too much if it doesn’t work out at first. Technically speaking, it’s really important to think in terms of spreads (two individual pages facing each other is one spread), and understand that a magazine is essentially a bunch of sheets of paper stacked up, stapled, and folded in half. Making sure that the individual pages in the spreads line up correctly can be tricky, so it might help to take a bunch of blank sheets of paper, bind them, write page numbers on them, then remove the staples and use them as a template for what to paste on each master page as you’re working.
What other zine techniques can people incorporate besides cutting and pasting? Doing it by hand is obviously the classic method, and will get you the most zine scene cred. But I am not ashamed to admit that, after two issues of cutting and pasting my first zine, I started scanning my photos and putting it all in InDesign. There is no shame in using layout software, and it will give you a whole new appreciation for how much thought and effort goes into every single print publication you ever read. It’s not just what they’re writing and which photos they’re publishing, but where on the page that stuff is, where it is in relation to the other stuff, what color and font things are, what angles they’re tilted at, what the background is, and so on... It’s definitely a different look and feel than handmade, but now that design software is so accessible, we think it’s every bit as DIY.
What did participants create and walk away with after the workshop? Well, besides hands on experience making zine master pages, we’re going to take our favorite masters and make a limited run of a compilation zine to give out on the final weekend of the event.
So we’d like anyone who enjoyed the workshop to come back and grab a copy of that! And failing that, just a better understand of the zinemaking, DIY ethos that skateboarding was built on. Skateboarders have always made their own spots, their own rules, and their own fun. That definitely applies to their media too.
Who are some of your favorite zine makers? In the areas we’re focused on, you can’t not mention Xem Skaters by the Swedish nonbinary skater Marie Dabbadie. They’ve been making a rad, unapologetically genderqueer zine for years, and have done loads to change the conversation around gender in skateboarding. Of course, The Skate Witches are killing it too. In terms of general zines that I like, I grew up volunteering at the Zine Archive and Publishing Project in Seattle, which had copies of really rare ‘90s skate zines like Pool Dust, so I tripped out on those a lot growing up. Not ‘cause I’ve ever actually skated a real pool, just because they had this really scrappy, no bullshit aesthetic and made skateboarding look so cool.
Recently, I was on a team for Thrasher’s “Zine Thing” Challenge in Seattle, which gave people two weeks to shoot a zine with Fun Savers; two weeks to do writing, editing, and layout; and then gave awards in different categories. Looking through the compilation book of all the entries still blows my mind. It’s a great reminder that skateboarding is full of cool, creative people, and everyone has a wildly different experience of it. I still can’t pick a favorite, although Leo Bañuelos' ’Skaters in Drag’ article is pretty legendary.
Three words that describe what Skateism is all about? The underground and overlooked. Sorry that's four!
Who or what were you most excited to check out at the Vans US Open? Personally, I’m excited to finally skate Cherry Park (nearby). But that’s just because my joints are falling apart and I can only skate low ledges. At the Open, I was excited to see all the pros skate the course, especially the women. Women’s skateboarding has been growing at an insane pace in the last few years, and the level of talent is out of control. When I started skating, I never thought I would see little girls back-smithing huge hubbas and female pros filming back-tail-kickflip-outs for their video parts, but here we are. The rate of progression is so exciting to me, and I feel like people will definitely be throwing down for the event.
FOLLOW SKATEISM | WEBSITE | INSTAGRAM
#Art#Vans#VANSUSOPEN#SKATEISM#ZINE#ZINE MAKING#WORKSHOP#HUNTINGTON BEACH#SKATE MAG#PRINTED MATTER#COLLAGE
14 notes
·
View notes
Text
World Class Free Film School - Lesson 1 - Sign Zee Papers!
Welcome to World Class Free Film School!
In the following series of articles of we will impart the hard-won knowledge that we have gained as successful independent digital filmmakers. And (drumroll puh-leaze!) we will do this for FREE!
Now, why would we do such a thing for free? Well, because we're sweethearts. Because we love you and want you to succeed in this sometimes tricky and crazy thing called The Film Industry.
Now, there are many fine filmmaking schools in this big old world. Places where an aspiring director or producer can attend to learn many of the skills necessary to make a film.
There are also many excellent books out there that you can read that will give you all of the essentials to make a film. Unfortunately, for the poor huddled masses, these film schools and books will cost an initial investment of time and money. This amount you end up spending may be in the thousands of dollars. Now, there is nothing wrong with you spending money to educate you. Perhaps some film schools may actually help improve your chances of getting a job in the industry too, however...
Almost without exception, the graduates of these film schools will go on to find out that making their first few films as Directors will end up costing them several thousands of dollars more. They'll learn the hard way that precious few filmmakers ever see any kind of return on the money they've put up for funding their first few films.
That has been the reality of the situation for the independent filmmaker, up until now. There have been way too many stories told of those starry-eyed wannabe directors who begged, borrowed, or stole to produce their first few flops. At the end those sad stories, the tragedy is they never actually finished their first film. Maybe they never got started. Maybe they ran out of patience or time. Or maybe they ran over-budget, found themselves financially in the hole, bereft of family and friends for favors they could not repay. End result? Oh, I don't know, maybe you end up a bitter ex-filmmaker, working a crappy day job, nursing a sore ego while feeling like a huge failure after spending so much dang money on film school.
Are you ready for a paradigm shift? This is where World Class Free Film School is different! Here, you can learn all of the technical information for producing an independent film while NOT breaking the bank! In this free on-line film school, you will learn the basic principles of pre-production, production, and post. You will walk the path of a successful independent filmmaker and discover a self sustaining business model that I've followed from day one in the business.
You'll gain the perspective of the lessons that I've won and follow me step by step as I explain to you how I wrote, directed, and produced my first money-making film and went on using that as seed money to grow an income generating film library. You'll learn the tips and tricks of creating film revenue streams while satisfying that creative spirit which brought you to this page in the first place. These revenue streams will allow you build your filmmaking equipment arsenal, fund, produce and self-distribute more of the same revenue streams, and, yes, allow you the financial freedom to produce the occasional non-commercial short film, without giving a fig about where the funding will come from!
Interested? Good! Check back frequently! This is a work in progress, and it will evolve as we go happily skipping down the danger-strewn yellow brick road together in this crazy thing called show-biz. I'm looking forward to sharing and giving back some of the knowledge and experiences that have allowed me to proclaim myself a successful filmmaker. Yes indeed, sometimes I puff out my chest and shout my barbaric yawp; "I am a successful FILMMAKER, dammit!" I admit that I do get some funny looks sometimes too.
That being said, I honestly believe that at the end of this course, if you follow the tasty advice that I dish out for you, I have no doubt that you'll be able to shout the same barbaric yawp!
So, c'mon, jump in head first and follow me! You've got nothing to lose, and everything to gain. It's fun, it's entertaining, and you might learn something.
Best part is; it's all FREE!
Lesson 1 - Sign Zee Papers!
Ok, so you've decided that you want to make a film and you're not going let anything stop you. It's time to make like Nike, and just do it. You've got your crew all picked out and they said they would work for free (or almost free and a credit). They're all totally happy with the fact that you're making promises about what they can expect on the back-end profits. Everyone is confident that this film is a sure-fire win at Sundance, it's going to get picked up by a major distributor and everyone is going to get rich, right?
WAIT A MINUTE!!!!!
One of the biggest downers in this crazy business (and don't kid yourself, it is a business), is that it can make ordinarily nice people turn into totally greedy, insufferably egotistical, and absolutely insane monsters. This is no joke.
I don't know what it is, but one day you're buddy-buddy with someone who came on to your project two months ago to help collaborate, everything is fine and dandy, you're cruising toward that Sundance Award, then the next day, BLAMMO! It's like Invasion of the Body Snatchers. This previously "normal guy" has been replaced with an alien who grew out a pod last night while he was sleeping. Maybe you hired him to shoot some of your footage and he still has the tapes. He was supposed to start editing them, but now he says he wants a gazillion dollar advance, he wants 50% royalty on all sales, he wants complete creative control, and... Wait for it...he wants DIRECTOR credit on the film that was initially your idea two years ago.
OK, this is one of the most important tips that I am going to give you. Before you do anything else; get it in writing! Step one; when you finish the script, get it copyrighted. You can do this easily by logging on to copyright.gov, paying $35 bucks, and following their directions. Step two: when you bring someone on to your film to collaborate, use a contract! Spell everything out completely and make sure you don't give up certain things, like ownership. Make the terms as favorable for yourself as possible. Remember, it's your concept, your project, your business! As a business person, think of collaborators as employees. Employees whom you appreciate, take care of, and share with, but still; employees. To drive a film to completion, someone has to be the boss. If they want to be the boss, guess what? They can make their own frickin' movie! Even if they are working for free (or almost free), you need to be able to fire them if, say, they turn into pod-people. Don't be afraid to terminate someone if you need to.
Make the contracts as iron-clad as possible. Spell out what you are offering them and what rights you will retain. Personally, I would prefer to pay someone up front on a daily rate, rather than to have them work for free (or for some pie-in-the-sky by and by). It's much cleaner. Pie eating contests can get messy. Pay the cameraman a reasonable fee and have him give you the tapes immediately after each shoot, if you're doing the editing yourself. Or, if that's not feasible, go with him to his studio, wait while he captures the footage to hard-drive, then take the raw footage with you while he does the editing. When it comes down to it, he who has the raw footage in his possession, owns it. Doesn't matter if you paid him or not. He shot it and it belongs to him his until he hands it over. All this is a very good reason to learn how to do everything yourself, if you can.
It's hard to shoot, edit, and act in your own film all at the same time. You will probably need some kind of actors in your movie. This can be expensive unless you're shooting a documentary. That's why I like making docs. The talent tends to be free. Even then, you should still take care of the people who volunteer to be in your film. Feeding them is nice. Credits are a must. A complimentary copy of the film on DVD should be de rigueur. I like to give the folks in my documentaries the opportunity to buy extra DVDs from me, at production cost (50%) and let them hand-sell them for profit at the set retail price. It's actually a good self-marketing technique. You end up with a huge marketing team this way. They make 50% profit and you make 50%. But regardless of whether you decide to share the wealth, or not, be considerate!
One thing about getting people to work for free, please respect their time! If you say that a shoot will start at a certain time, be there. Nothing makes an unpaid volunteer more upset than taking time out of a valuable day and be left cooling their heels for a tardy director. If you're producing a narrative, you will need actors. Key words: be professional.
Try to keep it clean and simple. If you're able to, use SagIndie for talent. I know that it's not always feasible, but if you can, do it. It's only a hundred bucks a day and you will get quality performances. You can learn a lot working with professionals too. Maybe you won't need to do so many takes. And usually you will get better results than if you use your Aunt Mimi as the leading lady.
Either way, make sure you get talent and location owner's to sign a release form. Make sure that you make the release as broad as possible so that you don't get caught in a "aha, gotcha!" somewhere film alta definizione down that yellow brick road. No bigger buzz-kill than squabbling over something that is supposed to be fun. Remember, that is our definition of "success"? Having FUN? Well, follow the advice in this lesson and have everyone sign zee papers. Then have fun!
1 note
·
View note
Text
World Class Free Film School - Lesson 1 - Sign Zee Papers!

Welcome to World Class Free Film School!
In the following series of articles of we will impart the hard-won knowledge that we have gained as successful independent digital filmmakers. And (drumroll puh-leaze!) we will do this for FREE!
Now, why would we do such a thing for free? Well, because we're sweethearts. Because we love you and want you to succeed in this sometimes tricky and crazy thing called The Film Industry.
Now, there are many fine filmmaking schools in this big old world. Places where an aspiring director or producer can attend to learn many of the skills necessary to make a film.
There are also many excellent books out there that you can read that will give you all of the essentials to make a film. Unfortunately, for the poor huddled masses, these film schools and books will cost an initial investment of time and money. This amount you end up spending may be in the thousands of dollars. Now, there is nothing wrong with you spending money to educate you. Perhaps some film schools may actually help improve your chances of getting a job in the industry too, however...
Almost without exception, the graduates of these film schools will go on to find out that making their first few films as Directors will end up costing them several thousands of dollars more. They'll learn the hard way that precious few filmmakers ever see any kind of return on the money they've put up for funding their first few films.
That has been the reality of the situation for the independent filmmaker, up until now. There have been way too many stories told of those starry-eyed wannabe directors who begged, borrowed, or stole to produce their first few flops. At the end those sad stories, the tragedy is they never actually finished their first film. Maybe they never got started. Maybe they ran out of patience or time. Or maybe they ran over-budget, found themselves financially in the hole, bereft of family and friends for favors they could not repay. End result? Oh, I don't know, maybe you end up a bitter ex-filmmaker, working a crappy day job, nursing a sore ego while feeling like a huge failure after spending so much dang money on film school.
Are you ready for a paradigm shift? This is where World Class Free Film School is different! Here, you can learn all of the technical information for producing an independent film while NOT breaking the bank! In this free on-line film school, you will learn the basic principles of pre-production, production, and post. You will walk the path of a successful independent filmmaker and discover a self sustaining business model that I've followed from day one in the business.
You'll gain the perspective of the lessons that I've won and follow me step by step as I explain to you how I wrote, directed, and produced my first money-making film and went on using that as seed money to grow an income generating film library. You'll learn the tips and tricks of creating film revenue streams while satisfying that creative spirit which brought you to this page in the first place. These revenue streams will allow you build your filmmaking equipment arsenal, fund, produce and self-distribute more of the same revenue streams, and, yes, allow you the financial freedom to produce the occasional non-commercial short film, without giving a fig about where the funding will come from!
Interested? Good! Check back frequently! This is a work in progress, and it will evolve as we go happily skipping down the danger-strewn yellow brick road together in this crazy thing called show-biz. I'm looking forward to sharing and giving back some of the knowledge and experiences that have allowed me to proclaim myself a successful filmmaker. Yes indeed, sometimes I puff out my chest and shout my barbaric yawp; "I am a successful FILMMAKER, dammit!" I admit that I do get some funny looks sometimes too.
That being said, I honestly believe that at the end of this course, if you follow the tasty advice that I dish out for you, I have no doubt that you'll be able to shout the same barbaric yawp!
So, c'mon, jump in head first and follow me! You've got nothing to lose, and everything to gain. It's fun, it's entertaining, and you might learn something.
Best part is; it's all FREE!
Lesson 1 - Sign Zee Papers!
Ok, so you've decided that you want to make a film and you're not going let anything stop you. It's time to make like Nike, and just do it. You've got your crew all picked out and they said they would work for free (or almost free and a credit). They're all totally happy with the fact that you're making promises about what they can expect on the back-end profits. Everyone is confident that this film is a sure-fire win at Sundance, it's going to get picked up by a major distributor and everyone is going to get rich, right?
WAIT A MINUTE!!!!!
One of the biggest downers in this crazy business (and don't kid yourself, it is a business), is that it can make ordinarily nice people turn into totally greedy, insufferably egotistical, and absolutely insane monsters. This is no joke.
I don't know what it is, but one day you're buddy-buddy with someone who came on to your project two months ago to help collaborate, everything is fine and dandy, you're cruising toward that Sundance Award, then the next day, BLAMMO! It's like Invasion of the Body Snatchers. This previously "normal guy" has been replaced with an alien who grew out a pod last night while he was sleeping. Maybe you hired him to shoot some of your footage and he still has the tapes. He was supposed to start editing them, but now he says he wants a gazillion dollar advance, he wants 50% royalty on all sales, he wants complete creative control, and... Wait for it...he wants DIRECTOR credit on the film that was initially your idea two years ago.
OK, this is one of the most important tips that I am going to give you. Before you do anything else; get it in writing! Step one; when you finish the script, get it copyrighted. You can do this easily by logging on to copyright.gov, paying $35 bucks, and following their directions. Step two: when you bring someone on to your film to collaborate, use a contract! Spell everything out completely and make sure you don't give up certain things, like ownership. Make the terms as favorable for yourself as possible. Remember, it's your concept, your project, your business! As a business person, think of collaborators as employees. Employees whom you appreciate, take care of, and share with, but still; employees. To drive a film to completion, someone has to be the boss. If they want to be the boss, guess what? They can make their own frickin' movie! Even if they are working for free (or almost free), you need to be able to fire them if, say, they turn into pod-people. Don't be afraid to terminate someone if you need to.
Make the contracts as iron-clad as possible. Spell out what you are offering them and what rights you will retain. Personally, I would prefer to pay someone up front on a daily rate, rather than to have them work for free (or for some pie-in-the-sky by and by). It's much cleaner. Pie eating contests can get messy. Pay the cameraman a reasonable fee and have him give you the tapes immediately after each shoot, if you're doing the editing yourself. Or, if that's not feasible, go with him to his studio, wait while he captures the footage to hard-drive, then take the raw footage with you while he does the editing. When it comes down to it, he who has the raw footage in his possession, owns it. Doesn't matter if you paid him or not. He shot it and it belongs to him his until he hands it over. All this is a very good reason to learn how to do everything yourself, if you can.
It's hard to shoot, edit, and act in your own film all at the same time. You will probably need some kind of actors in your movie. This can be expensive unless you're shooting a documentary. That's why I like making docs. The talent tends to be free. Even then, you should still take care of the people who volunteer to be in your film. Feeding them is nice. Credits are a must. A complimentary copy of the film on DVD should be de rigueur. I like to give the folks in my documentaries the opportunity to buy extra DVDs from me, at production cost (50%) and let them hand-sell them for profit at the set retail price. It's actually a good self-marketing technique. You end up with a huge marketing team this way. They make 50% profit and you make 50%. But regardless of whether you decide to share the wealth, or not, be considerate!
One thing about getting people to work for free, please respect their time! If you say that a shoot will start at a certain time, be there. Nothing makes an unpaid volunteer more upset than taking time out of a valuable day and be left cooling their heels for a tardy director. If you're producing a narrative, you will need actors. Key words: be professional.
Try to keep it clean and simple. If you're able to, use SagIndie for talent. I know that it's not always feasible, but if you can, do it. It's only a hundred bucks a day and you will get quality performances. You can learn a lot working with professionals too. Maybe you won't need to do so many takes. And usually you will get better results than if you use your Aunt Mimi as the leading lady.
Either way, make sure you get talent and location owner's to sign a release form. Make sure that you make the release as broad as possible so that you don't get caught in a "aha, gotcha!" somewhere down that yellow brick road. No bigger buzz-kill than squabbling over something cb 01 that is supposed to be fun. Remember, that is our definition of "success"? Having FUN? Well, follow the advice in this lesson and have everyone sign zee papers. Then have fun!
1 note
·
View note
Text
How to Fail Successfully
From 2014 to 2016, I queried a novel for the first time.
I was a freshman in college. I extensively researched agents. I got a couple of requests. I changed my manuscript drastically. I queried again. I got some great leads. I got a lot of dead ends.
I started playing a game with my best friend; we guessed in a Final Four-style bracket who would reject me next. I got used to the epic silence of querying, and the fact that, after waiting six weeks and looking to my inbox like it was the bottom of the Christmas tree, “no answer” would have to be a sufficient answer for me.
My book was good. I still think so. I still have dreams about that story and I still get excited about how I could make it even better now.
Fortunately, I didn’t stop my writing career while I was querying. I wrote four more books while I waited. I became more integrated into the writing community on Twitter, and for the first time, I found writing friends.
I have seen a lot of people grow tired. Grow jaded with writing in general, and especially with the industry. That’s fine. Some people follow this path only to learn traditional publishing isn’t for them. Querying is such a good time for reflection. You’re suffering in the weirdest, easiest, most quiet way possible, and it’s a perfect moment to consider—or reconsider—why you want to write, why you want to share this story, and why your anxious stomach aches are worth it all.
There isn’t a simple fix on how to query fearlessly. Fear is part of the game. Losing hope is natural—if you hear no (or no response) at every turn, of course you’re going to feel like this whole writing thing isn’t for you.
Here are some things that helped me.
1. Make writing friends
Through #CPMatch and through Pitch Wars, I was able to meet people who critiqued my MS, shared their wisdom with me, encouraged me, and taught me so much. I read incredible manuscripts and learned how to write stronger. There were techniques I’d never tried before. Plot holes and weaknesses in my stories that I hadn’t really seen before. Above all, the empathy from my writing people is the best part. Querying, writing, revising; it’s all a battle, and to have someone check in on you, talk about their own struggles, and identify with the rough parts of the writing journey? It makes you feel like you aren’t alone and you aren’t stupid for attempting to share your story with the world.
2. Keep writing
Many writers find themselves tempted to go back and touch up their manuscript even while it’s sitting in an agent’s inbox. RESIST! This will end up being a hassle in the long run and you may never find yourself satisfied with the condition of your book. At some point, you have to take your hands away from your manuscript FOREVER, when it goes off to be printed… practice that self-control now!
Instead, edit an old story or start a new one! Becoming invested in new stories and new characters is a great distraction and reminds you why you thought writing was so great in the first place. It’s also great in case you want to try querying a different project someday—or if you land an agent, you might get to show off that new manuscript in your back pocket!
3. Reflect, don’t wallow
Taking time away from writing can also be a good thing. You should give yourself the chance to pause and think about why you want to query, why you love writing, why this story should be shared.
There is a dangerous and false assumption that being critical of yourself is the same as being humble. This isn’t the case. If you get a scathing rejection—which I’ve found to be rare, from my experience and others’—mourn, but don’t let those words define you. The writer you are today is not the writer you’ll be forever. One person’s critique of you doesn’t put you or the quality of your writing into a box. Even if one agent or critique partner—or two or three—points out a flaw you’re hyperaware of, turn that negative thought “I suck at this” into the more positive “I can get better at this.” Ask for help. Do writing exercises. Write fanfiction. The best way to grow in your writing is to exercise your writing muscle, and in my opinion, the best way to do this is to have fun while you do it.
You’re allowed to be sad or scared while you’re querying. You’re even allowed to feel hopeless. But the attitude you choose is also going to color how the next weeks and months of waiting will be. Don’t let your moment of sitting in your sadness turn into you rolling around in a puddle of tears.

4. Distract yourself
If you don’t want to distract yourself with writing, but still want to feel productive, read more books in your genre and/or age category. Consult with your Critique Partners or #amwriting; you may find a new and even better comp title for the novel you’re querying or your work in progress. Reading can also help you identify how other authors have addressed similar problems you find in your own writing (how to write strong dialogue, how to weave complicated plots together, how to juggle multiple POVs, et cetera).
Lastly, here are some things I learned while querying:
1. Query thoughtfully
As the process dragged on, I started to feel like my queries didn’t really matter, and I might as well send as many as I wanted on the off chance I got an agent’s attention. The thrill of clicking send and marking a new name on my query chart made me feel productive, even if I knew deep down that the agent wouldn’t be interested in my book.
If you find yourself sending a query to someone who didn’t say they didn’t want your genre… maybe reconsider.
The person you query is going to be your partner in your art. Make sure, even if they’re the eightieth person you query, that you know something about them, that you like them, and that you feel like they could actually be a good fit for your project.
2. Personalize your queries
This step is a given for most people, but it bears repeating and also connects to my previous point. Research your agents. Use MSWL (Manuscript Wish List). Check their Twitter. See what they like to read. Find blog posts or interviews. Find some sort of touchstone between your book and their interests and mention this in a line or two in your query. It shows that you’re not just spamming agents with queries and that you are invested in your project and willing to put in the work.
3. Make a chart
I made a document listing every agent I queried, their agency, and their email. I color-coded it according to what materials they requested or if they rejected. I also included the date I sent the query or the requested material, as well as an “expiration date”, the date when I would consider the query to be a “no reply means no.” Many agencies will list this expiration date on their website (it’s usually about six weeks), and QueryTracker is another place where you can see how long it takes for an agent to get back to you, typically.
4. Go slow and be willing to change your query or materials
When you first start out, send five to seven queries. Then wait. If you get no response at all, consider tweaking your query or looking back at the first ten pages you’ve sent. This is where your critique partners and other outside voices will help. Two agents told me they felt my story opened in the wrong place, and I paused, made my story stronger, and then sent more queries, to better results. Some other people suggested I change my age category. This also helped me get more positive feedback.
5. Make sure your story is “as advertised”
This is the biggest problem I see in queries I read over. If your selling point in your query is that your story heavily features robot unicorns and your first chapter takes place in ancient Babylon, I’m going to be a little confused and disappointed on the lack of robot unicorns. Your opening may be too slow, or your query may be making promises that are a little misleading in the grand scheme of your novel. Remember that an agent may only see the first five to ten pages of your book. You don’t necessarily need to name-drop the robot unicorns in chapter one, but give us enough of a teaser to make us believe that there will in fact be robot unicorns in your story.
If you’re querying now or if you’re thinking about it, I urge you to continue in your brave but worthwhile journey. I don’t regret the years I tried to get my book published. I’m not embarrassed with my attempts. Instead, I can already see how much I’ve grown, as a person, as a writer, as a critique partner. I’m going to query again someday soon. Maybe I’m met with dead ends like before. Maybe things will be different. Win or lose, I know that I will leave the battle proud of myself and ready to try again stronger.
1 note
·
View note
Text
Week 10 - Gibbs Reflective Cycle
Description
Writing and recording my song has been a massive learning curve, I usually get a chord progression or riff I like and record it into my phone. If I get lyrics to it at the time I write down as much as comes out at the time then tend to leave it there, no thought of the context of the song or the audience etc. This time I came up with a riff during guitar practice which I noted on my first diary entry and I really liked the riff so I decided as I knew I would be working towards submitting a complete song for the formative/summative I would develop it into a complete song with lyrics, using the courses resources to expand on my knowledge of my discipline to develop guitar parts for the song, to also consider the audience it could be aimed at based on the sound and feel of the song so I could then write a full set of lyrics to it and work the song out from start to finish. I wanted to get more technical, adding layers to the chorus guitar parts and developing a bridge part that had more of a rock guitar sound. I also wanted to use my amp for the majority of the recording (I was initially unsure as to if I would use the Slate plugins as I liked the solo sound I got in the formative version) I decided to look into more miking techniques and dual miking the amps cap with 2 different styles of mic (dynamic and condenser) to capture a nice full sounding gain tone which in the end I was happy with. I recorded the songs and aimed for around -6db as I had in my head that this was a good recording input level, I watched a lot of tutorials before going into the mixing process to give myself a good base knowledge as shown in my research pdf, starting with the static mix once everything is recorded setting the levels and panning then moving through the mix track by track assessing the sound and tone and noting down what I thought could be altered and adjusted such as EQ on the snare sound to adjust the tone with some added compression to add more punch, softening the drum overhead track to take the harshness away from them also with the vocals some compression to smoothen out the vocals in the chorus parts. I EQ’d the bass to add more mid-range and cut some of the low end so it was less muddy and cut through the mix a little more while still sitting in the lower end. Strategically working through each individual track’s sound adding and taking things away with purpose was my main focus.
Feelings
I was feeling anxious about the process as I knew I wanted to make a big improvement on this version of the song in comparison to the formative version and I knew I had to work completely in line with my action plan in order to get it done with enough time for me to review it before submission. I knew that I had to create a bridge/middle 8 which would change the songs dynamic and feel completely to keep from the song being to much of the same and surprise the listener. I knew I wanted it to have a more rock feel to add sit with the other pop style elements as I feel this is my style and knew this is what it was missing. Once I created the piece musically, I knew I had to write lyrics for it again something I was anxious about however I thought best to record the music side then see what came out lyric wise which worked well. I really enjoyed creating the sound with different mic techniques for the chorus and bridge parts and adding a slightly more gainy sound for those parts also, this gave the song added punch and bite that I also wanted, the subtle chorus on the verse guitar parts I thought worked a treat adding a slight sparkle to the sound. Going into the mixing process was the most daunting although I had watched a lot of tutorial videos as much as it had informed me it had intimidated me to firstly how much of an impact this stage has and how crucial it is but also how complex it seems to be watching somebody do it. However, I had so much fun working through the song track by track and tweaking the tones where I though it needed adding and taking away where necessary. I thought to myself “treat it like tweaking an amp or pedal to find the right sound” once I simplified it a little in my head concept-wise I just had to watch some tutorials as I went a long of how to use certain features of Pro Tools. I found myself lost in the process spending a lot of time looping up parts of the track trying to get it to where I wanted it and then mastering the track to bring the volume up without losing the musical sound. Once the song was done I was unsure about the video editing process, what programme to use, how to piece multiple bits of video together showing all my contributions and then to match this up with the audio. After it was all recorded, I tried to load the different pieces of footage into a free video editing software which did not go to well as the video were jittery and the audio was sipping so matching up the video to audio was basically impossible, so I decided to invest in adobe premiere pro via the creative cloud as students get a big discount on the monthly instalments. This created another problem, learning how to use a more complex video editing software, so began the rabbit whole of premiere pro tutorials however after a few I was away and began to play around with some animation for the starting title and end credits.
Evaluation
I thought the process went well, I worked to my action plan creating checklists for recording and mixing making sure I was keeping tight to them to leave myself a good amount of time to review the track over before submission so I could take a day out and go back at it with fresh ears and show it to a few others for feedback. I was happy with myself that I managed to get the recording and middle 8 created with words done quicker than I had thought and planned for, so it gave me a few days extra time for mixing/mastering. I surprised myself honestly, I thought I would really struggle but I was having a lot of fun throughout the whole process that I was excited to get started from waking up everyday and not wanting to stop at night. The whole process of piecing the song together then getting the drums back and adding them in and hearing it come together as a full song as if I were creating it with a band was great and so inspiring so much so I have been working on a couple of other songs in preparation for next term. I have learnt so much in such a short space of time I can not wait to see what my next recordings sound like on the back of this one. I think the song sound great in comparison to my formative version not just because it has full band arrangements but tonally however, I will look to re-record the song as my main error was the initially input levels were too high and this does not sit well when compression is involved so that was a massive learning curve. I sent the link to my song/performance video to a couple of friends who are also musicians for feedback regarding the musical arrangements and sound, also my friend’s girlfriend as she is a big music fan and I was thinking about my target audience which should we would be a part of so I wanted some feedback from someone who the song would generally be aimed at and all was positive, my friends thought the riff was really catchy and had the John Mayer vide I got from it and also loved the middle 8 as it was a refreshing rocky element which again I wanted and was so happy that they noticed. Also, one of them said the vocals were a little Ed Sheeran like (I was not at all going for this, but I’ll take it). My friend’s girlfriend said it would be something she would listen to daily and will be doing as she cannot get it out of her head which you could not really ask for more, this is also something my brother and my dad have said, I hear them humming or whistling it sometimes around the house and it gives me a really good feeling. Lastly, I delved into video editing, something just as daunting as using premiere pro was not easy initially but after a few tutorials I pieced the video together with the audio and even delved into some simple animation for the title and credits sections. Once I had played around with the masking for the title animation as I did not want to use a template, I wanted to create my own and the rolling end credits I tried something different a section of the guitar solo. The video is in black and white for the most part as I had to record in different rooms of the house and wanted to clean up the background a bit without using green screen techniques, I felt the black and white was simple and gave it an old tv feel. However, for the section of the solo I wanted to add a bit of colour and movement at the part where I slide down the neck so I added movement to the screen and an offset colour effect which is almost like the blue/red colour effect you would get from a stuttering VHS tape.
Analysis
I think I overlooked the recording aspect in favour of the mixing side of things initially, I thought I had the recording part down and was confident in my mic placement and tones however I did not take into account the input level as I set the input gain to as high as it could be without it clipping which in hindsight after some further research it seems -18db to -12db seems to be a sweet spot for input level to keep the sweetness of the sound and will be something I will be experimenting with moving forward before my next recordings as I found once the mix/mastering had be done the compression seemed to bring out some harsh tones in the chorus guitar parts, snare and lead guitar part. I will also be trying to relax more when I’m playing not worrying to much about how many takes I have to do and just having fun playing so that feeling comes out in the recording (I was so conscious about getting the lead guitar part right note for note that I picked to hard while playing) this is something that I come to notice a lot once the mix had been compressed. I will also be looking to purchase a better pop shield and portable vocal isolation booth, I feel the ‘T’s’ stick out too much in the mix (I have done all I can to take the harshness out of them) the pop shield I have is not very good and is a little small. Also, I want to isolate the vocals to prevent reflections from nearby walls as I work in small spaces mostly and this can be a problem, this will hopefully give me the truest vocal sound to work with when recording. Lastly, I want to look into video editing more to create performance videos for my songs that look clean and good quality and the after some investment into camera equipment potentially music videos as to add to my capabilities for my work portfolio, for use with my band and for my own personal satisfaction. I loved seeing it come to life in video and I also want to begin content creating via YouTube and Instagram in the future.
Conclusion
Moving forward I would set the input levels lower than I did initially as you can also turn the levels up in the mix, this will help to keep the tone and musicality of the instrument sounds when they are compressed when mixing/mastering. I would also make sure I am going into the recording stage with all parts of the song wrote so I do not have the pressure of writing while recording for the most part as I will always make adjustments where I feel they are necessary if they feel right when recording. I will be investing in some better equipment for recording, RODE NT-1a mic with Rode’s pop shield as mine does not cut it and a vocal isolation booth to capture the true vocal sound. Most importantly I will be learning to relax more and not take notice of the amount of takes I am doing as I am still very new to the whole process and it takes as long as it takes until it sounds right, I want the fun of creating my own music to come across in my playing and to capture that in the recording so when it comes to mixing and the end product I am completely happy with my work and what I have created. I have learnt so much about recording and mixing that it has inspired me to record and write more, I just want to create, capture, and release my music as much as possible moving forward. This course so far has been everything I could have ever wanted and needed, it had opened my mind to the possibility of me being a recording artist in whatever capacity that may be and has given me a passion I will continue to develop throughout my lifetime. Also, it has helped me prove to myself I am able to do it and given me the confidence to do so moving forward something I will be forever grateful for. I can know set up my equipment and get a song recorded, mixed and mastered to a point I will be happy with and if not I will know where I need to change it to make it something I will be proud to release to the world and then move on to performing live which will be the next step in my career when I have around 5 songs I can send to people and perform as a short set in local venues.
Action Plan
I would definitely create an action plan, recording/mixing checklist, again. This was something that helped keep me on track and gave me a clear path to follow and also eased my anxieties surrounding my progress as I was always aware as to where I was at. I will be researching further on recording and mixing so I can continue to develop my skills to get better sounding mixes and hopefully get good enough to add this to my future work portfolio as a private recording engineer. I want to develop my video filming/editing skills again to add to my future work portfolio, but I also want to create content for YouTube and Instagram for my band and my own personal channels, I enjoyed piecing my video together and adding the effects/animation bringing it all to life was great and I would also like to potentially do this for other people. I need to improve generally on the whole process, but I feel now I have a great base knowledge of recording music, video and mixing which I can develop on and progress for the next assignments and I am looking forward to it. One thing I have been inspired to do is write more and finish more songs, I have loads of riffs and chord progressions with either no words or some words so I will be going through the arsenal so finish them, something I have already done with 2 songs. I am going to continue to push myself to my limits as I think it brings out the best in me and I have surprised myself in how much I have accomplished in just a few months.
0 notes
Text
𝙴𝚟𝚊𝚕𝚞𝚊𝚝𝚒𝚘𝚗
My initial thoughts when starting this project were to research designed album covers to gather inspiration and thoughts on what my final album cover could look like. I looked at online images using a combination of Pinterest, Tumblr and Google images taking inspiration from graphical design and fine art ones. When looking through these designs I chose my favourites and added them to a mood board that I could refer back to at a later date as I progressed further through this course. I feel the selection of album covers I have shown different styles and techniques used to create them for example the fine art styles of Billie Ellish and Lorde covers compared against the type design of Ariana Grande and Doja Cat. Once happy with my research and mood board design I continued to do further research into Artists that have designed album covers of their own.
My first artist Kate Gibb has designed album artwork for various artists but has a longstanding relationship with The Chemical Brothers, her designs are very colourful, and I love the composition of the designs. My second artist Matt Maitland worked with artists such as Michael Jackson and Galantis, his designs very fantasy/space inspired using layering and collage is very eye catching and inspiring. Third artist is Roy Lichtenstein using an iconic pop art style of design which is very recognisable, I love his cover for The Fratellis it suits the genre and the band as a whole. Fourth artist is Jimmy Turrel a famous graphic artist and video director. His style of work using a combination collage, screen print and sketching. The bold bright colours really stand out and the tears in the paper from the layering of materials and often repurposes found images and graphics from different eras.
My fifth and final artist I chose to research is Banksy. I chose to look into Banksy because, I like his overall style in his prints and his message in the current climate. He uses his platform to send messages and promote certain subjects his most recent design being in support of the NHS. His use on stencils and spray paint create a eye catching combination, I like his technique used to create the album cover for Blur and his design worn by Stormzy to wear at Glastonbury.
After researching my five artists I decided to uncover more information about The Recycled Orchestra of Cateura a Paraguayan musical group, which my final outcome from this project is intended for. I looked onto their website to learn that the group use instruments entirely made out of garbage and that Cateura is built on top of a landfill site. Favio Chavez the groups creator began using the rubbish to create instruments for the children in the nearby neighbourhoods. I found this very inspiring and due to the current climate with Global Warming I think it’s a great idea not only to recycle but, doing it in such a creative way. Looking into the band this way I can get a feel of the kind of print I’d like to create that would suit the targeted audience and The Recycled Orchestra as a whole.
Reviewing all my gathered research for this project I was confident enough to start working on some experimental designs and tasks set by my tutor. The first task to create collage design ideas in reference to Jimmy Turrel and his work. Selecting my favourite Stevie Nicks I gathered images from Pinterest to digitality manipulate then print to add to a collage design. Using materials from my home such as train tickets, receipts, newspapers etc I collected and ripped them to create raw edges. I created 3 A3 style pieces using various images and materials combined, my favourite design is the second collage I made just due to the overall composition and images used. I was more confident heading into collaging this piece due to my first design being more trial and error but overall, I liked how the 3 designs turned out. Although using the same techniques as Jimmy Turrel wasn’t enough and I didn’t feel like my designs referenced his enough which is why I did some further development and digitally edited images using Photoshop Camera, my favourite collage to intensify colours and to create similar compositions. Following on from the collage I created some type designs inspired by Jimmy Turrel using the same effect I did on the collage piece.
Looking at logos and type design I researched an artist called Alan Kitching who is one old the world’s most foremost practitioners of letterpress and typographic design and printmaking. I like how bold his designs are and the use of capital lettering in most of his designs, I also like how the type is printed and the background is white. It creates a crisp letter shape which is also eye-catching. I designed three different type design using stamps, ripped paper and washy tape and red acrylic paint which is my favourite print. I spent the most time on my last design and how it references Alan Kitching really well although my design is inverted with the background having colour and my text being white.
My third artist experimentation were logo designs inspired by my chosen artist Banksy. Initially I wanted to reference this artist by using real spray paints and stencil designs then upload what I’d created and then edit further digitally like I have done in previous experiments. Although I would have loved to have done this, the cost and also the space I currently have at home wouldn’t have allowed it. So instead, I used the initial digital logo I designed with spray paint lettering and an application called Painter to add more spray paint and watercolour effect brushes to create my desired effect and I’m happy with the outcome I created. If I had longer on this project, I would’ve love to use spray paint and stencils in real life.
My final experimentation task was to research and reference the artist Andy Welland. A visual artist using bright colours and experimental compositions. To reference his work, I used an app called Adobe Draw to create 3 separate designs. This was definitely my favourite experimentation task I had a lot of fun using this app and the use of colours and a sporadic composition. My favourite design is my second once I created, I feel this because, I became more confident using the app making use of layers, in app shapes and colour themes. If I were to create another design, I’d definitely incorporate image layers to add texture and depth. I enjoyed using the app so much I further developed my Alan Kitching research creating digital designs referencing him.
Looking into different artist styles benefited me within this project as applied some of these experimentations and references into my final outcome the Album Cover. Before creating final, my design dabbled with Canva creating 2 initial designs using my imagery taken at The Kelvingrove Bandstand. My tutor set us a task to gather images throughout the project initially I took photos of items you see every day to reference ‘The beauty in the Mundane’. These initial photos were taken on my daily walks and commutes. Whereas with the Kelvingrove Bandstand I felt related almost too well with the next task referencing words set by my tutor which were chorus, orchestra, piano, music, note, conductor, concert, jazz and loud. Although I took these words to literally, I like how my images turned out with the composition, depth of field and viewpoints from where they were taken.
Having my images, experimentations and experience with Canva I felt confident enough to create my final outcome my Album Cover. Already using my first hand images in 4 initial design already with my final cover, I wanted to create something different but, still use elements from these designs I liked with my final outcome. I liked my images facing the bandstand and of the seating area but, didn’t want to incorporate them as images having done this prior. I decided to print the image and draw over details using fine liner pen then uploaded it into Photoshop Camera to apply the yellow artist effect. Using letter frames on Canva to reference Alan Kitching I added the image to each individual letter to create the type for The Recycled Orchestra. I then added different paper elements and ripped effects to elevate the recycled/rubbish aspect to keep in reference to my intended audience.
Overall, I like both my front and back covers for my album covers. Throughout this project I’ve become more confident in both my analogue and digital designing. My chosen artist was Banksy but, I felt when using his using logo style which my imagery they weren’t very complimentary of each other whereas the type design referencing Alan Kitching I much preferred. I’m glad I looked at my different options and experimentations first as my initial album designs look very different to my final outcome. The overall composition to the design I’m very happy with I feel a little more shadowing around the title would help it stand out more but other than that the colours and different textures applied make all together an eye catching design.
0 notes
Text

University of Brighton BA Illustration Year 1 reflection 2019-2020: (for myself and my new tutors in level 5).
Coming straight from college having done the A Levels: Art and Design (A), Film Studies (A), History (B). Aged 18 from Nottingham, my move to Brighton and onto this unique and diverse course wasn’t an easy and smooth adjustment.
I immediately felt overwhelmed by my surrounding classmates of varied ages (most a few years older than me) and with a wide range of high quality skills either backed with foundation courses or successful commission work I felt out of my depth. The level of talent around the studio was unanticipated and coming from consistent good grades at college university was very humbling as there was so much yet to learn.
I didn’t truly understand the course nor was I confident to come out of my shell and truly experiment in the way I wanted and needed to. Durning my college years in art we were pressured to stick on one visual path and perfect one technique to ensure good grades at the end. We had two self lead projects, mine interlinking closely as the visuals were meant to do so. While I am confident in my drawing ability, it is in close portraiture and my ability to exercise body proportions and dimensions of objects and perspective surroundings is limited.
I have also really embraced the idea that illustration is not limited to drawing on a paper base, and that process is becoming less and less important to me/desired. Having been a person only confined to the use of a sketchbook, pencil, fine liner and rubber, my growth has been great. While I am still keen to work initially from sketchbooks and analogue drawing is still important to me and the practise of the drawing skill, I’ve had much more fun with my out of sketch book experiments. I never used to use colour in my work and I’ve found myself to actually be a very playful and colourful person. My work always had a serious and almost depressing tone, and while I like the fine art skill, I’ve become much more entertained by my silly work (you can convey serious messages and profound concepts in a light and uplifting way, if anything it feels more powerful reclaiming pain a way that shows you to have strength in your good health and happiness).
My fist semester was rocky and I was battling with mental and physical health problems. I was used to not opening up to authority figures and generally having little contact with my teachers. My tutor Claire stressed the importance of good communication and made me feel very comfortable to approach the tutors with help and any general guidance, which would be key to improving. After an unsatisfying and average grade of a weak C after the fist semester (52%), I could understand so as I was not enjoying the work I was making and was still limiting myself to mundane and average ideas with little ambition and outcome. My productivity was not impressive but it was an ok way to start. I had passed and started to understand the course while settling in to the university and new home life, while my health had begun to improve. I had a good support system of tutors and friends but I had yet to come out of my shell.
The semiotics project was the first that I truly enjoyed and I finally gave up on my own censorship as I was unsatisfied with being average and not being entertained by my own practise. Being in an adult environment I felt less afraid to explore more “inappropriate” and ridiculous themes. As a child you expect to be punished to say things you were not allowed to say in school, I could have explored this in college but was too afraid to put my self into a potential light that might incite question and confrontation. I am no longer a child and my first year really helped me to grow into the adult I am now.
My productivity sky rocketed as I was living the work I was making, and really felt the privilege that I was on a course that allowed my to do what ever I wanted to express myself creatively every day, and that’s my life. I love working hard and pushing the boundaries of what I know and honestly feel that an evolved version of my former self. I don’t think I have changed as such but become more of the person I knew I was through my practise in my work and daily life. I have felt comfortable to be the best and most extra version of my self.
After another successful project (the self directed project) both interlinking with improved practise and evolution of new skill, I was confident I was in a much improved place both personally and grade wise. My end of year grades/ for the projects and last semesters were improved but dissatisfying to me personally.
I think as my own mental health and productivity grew, as well as great ambition and good exploration of experimentation and new techniques I’d broke own own boundaries to explore, I had clouded my own reasonable judgement of the actual academic outcome of these projects. My AGP404 (semiotics) had reached 59% (C+) and my AGP403 (self directed) 62% (B-). While I was up a grade boundary from where I’d begin I felt my progress had made so much more of an impact on my grade, but with reflection there’s so much I have left to learn.
While I am happy with my most recent projects, and have made more progress and personal growth as I could have imagined this year, personal growth does not nessesarily reflect a perfected practise. With all I had leaned over come to accept this is only the very beginning and I’m happy with the start I’ve made. This fist year in a way was the foundation year I didn’t have and I have no regrets starting university when I did.
With the feedback I received from my tutors and a one on one tutorial with Claire, I now understand and accept my grades. I feel like the grade boundary explanations they give us are quite vague and I feel like a lot of where I go wrong or don’t go far enough is due to my lack of understanding with some parts of the course or how I am meant to present things for assessment/ how things are actually graded. Dave wanted to group us with people in our boundary’s to understand where we were and look at both the work above and below us to understand where we need to be going more clearly, due to teacher strikes we were never able to do this.
A lot of my improvement has to do with reflection. As I was being very productive I have myself a lot to do with a set vision, not taking the time to stop and reflect on where I could improve and push final outcomes even further. There are somethings I wished to do with my final outcomes but couldn’t due to a lack of the required resources as the university had closed due to the epidemic. I had only the technology of my mobile phone at the time, and to do the collected magazines/ books and photo shoots I wanted to which was the desired final outcome I needed a computer, photocopier, other people to model and the photography studio (as well as tutor guidance to show me how someone the technology worked). However as I wasn’t able to do this I was resourceful with what I did have, I used my phone to create video work, and instead of doing my photo shoots I created performance art using myself as I was living alone. While I’m happy with what I did do I understand how this could’ve been pushed further, but was proving difficult on my old phone with limited storage and no editing software. I realise tutors cannot mark what is not there so I feel that lockdown did affect my grade.
None the less I am happy with the progress I’ve made, the work I’ve produced and the person I have become from my first year of university. I am happy and comfortable in that environment and love the course and it’s wide range of possibilities only being limited to what I limit myself. I understand moving forward from here I need to take more reflection time to polish, perfect and truly realise my visuals while always pushing the outcomes even further for the best possible final products. Presenting my work for assessment could use more focus as well as finding more relevant research.
I will take the time in the summer to keep busy with more self lead creative projects, exploring new techniques, outcomes and possibilities with reflection time to try and act on my feedback so I may start my second year (level 5) with confidence and a good chance to improve.
#first year#illustration#uniofbrighton#end of year#reflection#level4#moving forward#grades#feedback#improveyourself
0 notes
Text
Ultimate Guitar Pro App

If you are looking for the best guitar apps, the 2021 is looking bright for you. Today we are going to talk about some of the top-rated learning Android and iOS guitar apps for beginners, both free and paid ones. We’ve made sure to include the apps that are as efficient as they are user friendly. So, without any further ado, let’s get straight to it.
Ultimate Guitar Pro Sign In
Ultimate Guitar Pro App Free
Ultimate Guitar Tabs Pro App
Ultimate Guitar Pro Tab
Here are the best guitar apps 2021:
Your #1 source for chords, guitar tabs, bass tabs, ukulele chords, guitar pro and power tabs. Comprehensive tabs archive with over 1,100,000 tabs! Tabs search engine, guitar lessons, gear reviews. The Guitar Pro application allows all musicians to view and play sheet music and tablature created with the famous Guitar Pro tab-editing program for Windows and Mac. This mobile version is the ideal companion for you to practice your favorite songs and share them any time, anywhere! Coming up with some arpeggio, a riff, a chord sequence?
1. AmpliTube
The AmpliTube is loved by beginners just as much asexperienced guitar players love it. It’s an app that can be used to do prettymuch anything; from playing around with different sounds, over tuning, torecord demos and actual songs.
This app is actually more of a studio as it boasts a broad selection of virtualized sound models from world-famous guitar gear. Furthermore, it’s not a type of guitar application built exclusively for guitarists, as bass players can use it just as well.
Despite the fact that it has a ton of pretty cool features, it is still quite simple to use. Most of the work can be done with the easy drag-n-drop method, although you will need some experience with actual amps and effects if you want to find proper sound models.
AmpliTube rocks a wide variety of stompbox effects,including delay, fuzz, wah-wah, chorus, flanger, overdrive, octave, phase, anddistortion. On top of that, you’ll be wiring the effects via five amps, fivecabinets, and two microphones. It’s quite safe to say that you will be able tofind the sound you are looking for with it.
This guitar app is essentially free; you will get the Custom Shop, the app, and a dozen gear pieces to start, but the ‘expansion gear’ costs a couple of dollars apiece. AmpliTube might be the best guitar app for iPhone/iPad users.
Image credit: IK MultimediaCheck App Store
A huge selection of effects, amps, and cabinets.
Quite simple to use.
Drag-n-drop mechanism.
Very authentic sounds.
2. PocketAmp
PocketAmp is exactly what it sounds like, it’s a portable amp device which doubles for an actual amp if you have any kind of instrument adapter. If you are looking for an app for learning how to play guitar, this one shows quite a bit of promise.
Basically, you’ll need a plug which would convert your guitar cable’s jack into a smartphone-compatible jack, plug your guitar into your phone, and start the amp. From there you will gain access to four different amps, seven guitar pedal effects, and four cabinets.
You will probably be surprised to find how authentic the tone of PocketAmp is, however, going overboard with distortions and overdrives might thump your speaker, so try to avoid going too crazy on it.
The best thing about this guitar app is that it allows you to simulate an entire guitar rig directly from your phone. Although it isn’t free, it’s available at a rather attractive price. It’s a massive, and probably one of the best apps to learn guitar for beginners.
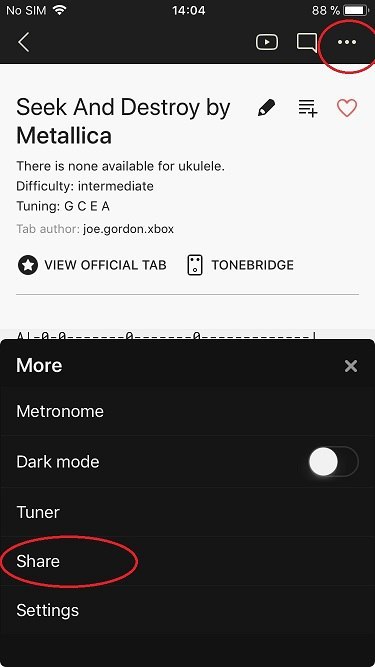
Image credit: PocketlabworksCheck App Store
Very easy to use.
Packed with four cabinets, seven effects, and four amps.
High-quality tone.
Perfect for beginners and novice guitar players.
3. OnSong
The OnSong is a guitar app made for performingguitarists. It’s basically a chord chart app which was intended to replacephysical chord charts with digital and interactive ones.
There are many musicians who struggle with memorizing dozens of songs, especially if they are complex in nature, that’s where OnSong comes in. It has a massive storage capacity where you can store huge chord chart collections and access them quite easily.
Furthermore, it’s compatible with various online store apps, such as Dropbox and Cloud; you can use these to import your songs directly to the OnSong app. To utilize this app’s full potential, combine it with a foot pedal; then you will be able to scroll down your charts hands-free. It’s easily one of the best guitar apps for iPad out there.
Image credit: OnSongCheck App Store
Simple and straightforward to use.
Huge song chart storage.
Compatible with online storage apps.
Perfect for live performing musicians.
4. Play Guitar Hits
The Play Guitar Hits is one of the most well-rounded guitar apps you can find on the App Store. It’s completely free to download, doesn’t take up much space, and you’ll get a variety of features at your disposal.
One of the best things about Play Guitar Hits app is that you can customize the interface to best suit your preferences. You can choose between standard tablatures, slash, and the classic fretboard view.
What makes Play Guitar Hits different from other guitar apps is that it offers a highly interactive learning mode – you will get to learn your favorite songs and techniques while watching play-through videos.
Simply put, the Play Guitar Hits comes with a dual-screen feature: on one side you’ll see the interactive tablature while on the other side of the screen you’ll see a play-through video of your song (if it’s available).
Furthermore, you will get the opportunity to choose different levels; the fact that there are four selectable ‘experience’ levels means that this guitar app offers a unique and entertaining mode of progression.
Of course, you will always be able to halt the tracks if you think that you should practice certain parts a bit more. Additionally, you can morph songs into backing tracks and practice with isolated instruments for a better, real-time feeling.
The Play Guitar Hits is a very versatile guitar application that you can download for free on the App Store; it’s certainly one of the best guitar learning apps available on the market, as well as among the best free guitar apps.
Image credit: Play Guitar HitsCheck App Store
Remarkably easy to use.
Comes with a couple of demo songs.
Versatile video display positions.
Four selectable levels.
Dissectible song parts makes practicing easier.
Available for free on App Store.
5. Anytune
Anytune is not your average guitar app. It’s uniquein a way that it lets you play around with different tempos of the songs, butwithout interfering with their pitch.
Ultimate Guitar Pro Sign In
The value of this guitar app actually depends on how you use it, and luckily, it has a nearly limitless potential. You will be able to slow the songs down if you’re struggling to nail certain parts, or speed them up to experiment. Additionally, you can start a bit slower and pick up the tempo as you go.
Ultimate Guitar Pro App Free
Image credit: AnytuneCheck App Store
Quite fun to use.
Simple guitar app, great for beginners.
A couple of unique features.
Available for free on App Store.
6. Ultimate Guitar: Chords & Tabs
Ultimate Guitar is one of the most famous guitar tablature websites on the internet, and if you are looking for a quality app, you might as well start with this one. This guitar app boasts the largest chord & tab database, so it’s pretty safe to say that whichever tablature you were looking for, you can find it here.
The Chords & Tabs app comes supplied with GuitarTools pack which is comprised of a metronome, a tuner, and a personalized chord library. Most beginners start out by using Chords & Tabs and find themselves browsing through the vast tab database even years later, so it’s easy to say that it’s perfect for both beginners and pros.
With the auto-scroll feature, the UG Chords & Tabs is a perfect tool for home practice. Moreover, it’s available for free on the App Store and Google Play. If you happen to like what it has to offer, you can upgrade to Ultimate Guitar Pro with the in-app purchase of additional content.
Image credit: Ultimate GuitarCheck App StoreCheck Google Play
Huge tablature and chord database.
Intuitive interface, very easy to use.
Perfect for both beginners and professional guitarists.
Loads of interesting features.
Available for free.
7. Fret Trainer
Ultimate Guitar Tabs Pro App
Fret Trainer is an app designed for beginner guitarists, that much is certain. It’s an application that utilizes different ‘games’ to help new players understand the basics.
You will be able to switch between severalinstruments and game modes, including the scale explorer, name note, colormatch, staff and fretboard, and many others.
Ultimate Guitar Pro Tab
Although the game appears to be somewhat childish and focused on the younger population, it actually uses the simplest method to teach something that is taught in very specialized schools for years on end. If you’re looking for the best guitar lesson apps, feel free to check out the Fret Trainer.
Image credit: Strong AppsCheck App StoreCheck Google Play
Incredibly simple to use.
Intuitive UI.
Very entertaining, several game modes available.
Perfect for beginner guitarists.
Available in iOS and Android.
8. Guitar Pro
Guitar Pro is, hands down, one of the best guitartab apps that you can find. It might take you some time to get used to theinterface, but once you do, it will feel so natural to you that you’ll wonderwhy you even ever considered any other app before.
The Guitar Pro app is packed with features that are equally useful to both musicians and song composers. You will actually be able to learn a great deal of music theory by just using this app.
The Guitar Pro application is built in the spirit of GP’s desktop variant, although there are very little similarities between them in terms of user’s interface. You’ll be able to pack several different instrument tracks on top of each other and tweak them to perfection. The only downside is that Guitar Pro uses MIDI, which might not appeal to everyone.
Image credit: Guitar ProCheck App StoreCheck Google Play
Quite easy to use.
Available at a bargain price.
Incredible versatility.
Educational tool for learning music theory.
Great for musicians and composers.
9. Fender Tune
Fender is a huge name in the guitar world, and obviously enough, their tuner is one of the best guitar tuner apps that money can buy.
In anutshell, this is a simple app which can be expanded with in-app purchases;initially, it offers the Pro Tuner, Rhythm, Scales, and Chords modes. The tunermode itself offers automatic tuning and manual (tune by ear) options.
Aside from being a very reliable tuner, all of the other features of the Fender’s Tune app are quite great too. You’ll be able to learn quite a bit of scales and warm-up exercises with it, as well as discover the vast world of music theory.
Image credit: FenderCheck App StoreCheck Google Play
Very easy to use.
Versatile app packed with several features.
Superb for beginners.
Available for iOS and Android.
Final thoughts
Even though some guitar players might tell you that learning how to play a guitar is tough, it’s actually quite easy. At least handling the fundamentals is. The truth is, it’s up to you to decide whether you will take an easy road, or a hard one. By using the apps we’ve suggested, you’ll certainly thread on the former.
0 notes
Text
Writing for Social Media: 7 Tips and Tools
There’s loads of great articles about writing, including writing for social media.
Maybe this will become one of them. Whatever.
However, this piece is different.
You’ll see.
Bonus: Get the step-by-step social media strategy guide with pro tips on how to grow your social media presence.
7 writing tips for social media
…and for any kind of persuasive writing.
Sure, great writing may take talent and innate creativity. And hey, you’ve got something to say, right? No matter your current level of experience or skills. With a little gusto in your writing step, you can make the reader feel something, take an action, or be more informed than before.
A few tips below to show you how.
Suggestion: let loose, try some (or all) of these, and repeat them for a few of your posts. Build those new writing-muscles.
You’ll be amazed at how clear you’ll write, and how you’ll zero-in on your voice.
1. Barf it out
Writers block is a myth. if you wanna balst past it just write out anything in your head, without leaving teh keybord. just keep your fingers typing, looking at the keyboard not the screen, so your brain engages. forget about sentence structure, spelling, punctuation… just keep your fingers moving and p[ower through any blockages. do this for an articel, tech-doc, and kind of writing thingie. Even for a paragraph or three. whenever your stuck just typw. editing will come later. This is a brain excercise, not a make-it-look-just-right process. Editing comes later, but don’t mix the two. It’s never write the first time. but push stuff that’s in your head onto the page, then mnake your 4 or 5 or 6 or 7 edits…. LATER.
Okay, I’m back.
Whenever, I’m ‘stuck’, for any kind of writing… I just type. Every time, something useful appears before my writing-eyes-and-brain.
The same will happen to you, too.
Punch the so-called “writer’s block” right in the gut. It’s bunk.
2. Write to an 8th grader
Not because they are dumb. Because it forces you to write clearly. And to ditch the jargon and terms that eyeballs just gloss over.
“Drive innovation.”
“Become a disruptor.”
And my absolute non-favorite, “Transform your business…”.
Oh please. Some of the most over-used, under-effective statements of all time.
Companies and their writers hide behind these terms every day, all across the web. Statistically speaking, probably you, too. I’m just sayin’.
I don’t know if this intentional or not. But here’s the thing…
Terms and jargon say little, while making you and your biz appear as a commodity. Like many others. Better to do the heavy lifting for the reader. Because they certainly won’t. They’ll stop and leave, versus stay and scroll.
Do the work. Say something real. Practice on your kid, mom, or any outsider to tell your important and useful message.
Your readers will appreciate it. It makes good business sense.
3. Write to the reader
Because no one cares about what you (or I) do. Readers only care what they can get from what you (or I) do.
So then, write from the readers’ perspective. Make them the hero.
A list of features? B-o-r-i-n-g.
Words that paint a picture for how the reader’s life will improve, that’s the ticket.
Sometimes, “standing out” is nothing more than writing from the reader’s point of view. Because most of your competitors don’t.
4. Write with a purpose
And write that purpose at the top of your draft piece.
To keep your mind on the target while you write.
For an email, blog post, white paper, and of course for any social media post—be clear on the purpose.
What action do you want the reader to take?
Click the buy, call, or contact us button?
Or maybe you just want them to feel a certain way. Empathy? Bliss? Informed?
Too often, we humans write to write. Not a problem.
Unless you want to sell your stuff.
Social posts are usually a top-of-mind selling approach. And an opportunity to build, show, and share your brand.
And still, write with a purpose to raise your signal, lessen your noise.
Hey, don’t forget to delete the purpose reminder at the top of your draft.
5. Write to make the reader feel successful
Which is hard to do when reading long paragraphs, without breaks—like single lines and bolded lines.
Lead your reader down the page by breaking up your message.
Short paragraphs. Short sentences. Transition lines. Bullets. Some bolded items, too. Like this one…
Allowing your readers to skim and scan your message is nice.
It helps them feel a series of successes as they move down the page.
The more they read, the more they understand.
Good for everyone, right?
Oh yeah, and questions are good too. They encourage the reader to ‘lean in’, with interest.
What are you doing to help your readers scroll down the page?
Maybe I’ve overdone the short paragraphs in this post. Maybe not. Part of the just-try-it-and-see-for-yourself model. Better ‘too much’ than ‘too little’. You can dial it down later.
6. Write with a hyper-focus
…and with a tomato.
What the…?
Stay with me.
Too often, we look at a piece of work and think, ‘Ah man, I need a bunch of time to do this post.’
There’s a better way.
By defining and going after a small section or piece of your post, document or whatever you’re writing. Right now. Say, in the 15 minutes before your next meeting.
Define a small portion to write (I’m doing this right now for this single section)
Set a tomato timer, that you can hear going tick-tock-tick-tock
Barf it out (like we talked about above)
Make your edits
Finí
Go to your meeting
Progress made. Feels good.
I wrote this section in 17 minutes. You can, too. String a bunch more of these together to complete your writing, iteratively. Without feeling like you have to set aside a load of time in one or two sittings.
I love the Pomodoro Technique for getting anything done with a hyper-focus.
7. Use pictures to enhance the words
I’m not going to say much about this.
Of course, pictures enhance the words.
This piece is about the words.
I don’t want to leave you hanging though. Here’s one of a thousand good reads about adding pictures to your work.
7 writing tools for social media
Opinion: writing for social media is fun. Those writing tips and tricks help me enjoy the process. And so do these writing tools.
1. Session buddy (Chrome extension)
Good for: Reducing browser clutter by restoring windows and tabs for your writing project. In seconds. Cost: Free.
When writing, I usually do web searches to find related content or topics. These often become input into my writing piece. I arrange browser instances and tabs within each instance. Then, place them carefully on the screen to move around as needed.
Now, say I need to work on something else. Fine:
Click on the session buddy icon, in the Chrome toolbar
Name and save the session
Close the all the windows
Now you’re ready for action on a new task. Distraction free. Without any browser clutter.
Then, when it’s time to resume that project:
Click on the session buddy icon
Select and open the named session
Everything like before, instantly
Here’s a list of alternatives. Try and use what works for you.
Bonus: Get the step-by-step social media strategy guide with pro tips on how to grow your social media presence.
Get the free guide right now!
2. Hemingway app
Good for: Writing anything succinctly and clearly. Cost: Free online, $19.99 for the desktop app.
Hemingway app will make you a better writer. Period.
That whole jargon thing I complain about, it all goes away when you write like Ernest did.
Same for long sentences, unnecessary adverbs, superlative adjectives, and passive phrases. And, with hints for alternatives.
Write what you write
Paste it into Hemingway app
Visually see what works, what doesn’t
Make your changes, to do more of what does work
Paste back into your writing piece
Use Hemingway app often to build your writing skills. After a bit you’ll need it less. Though I still use it often to keep me in check. An amazing tool.
3. Markdown
Good for: Writing an easy-to-read, easy-to-write plain text format, then convert it to HTML. Cost: Depends. There’s a load of editors to write your markdown. Some are free, others cost. But not much.
Markdown allows you to write plain text for nearly all your writing projects. Find and choose a Markdown editor, for Windows, Mac or web.
Word, Google Docs, and the others of that same ilk? Oh please.
Feature bloat, complex to use, and limited to a tool. No thanks.
Markdown just works. With a simple WYSIWYG editor for headers, bolding, italics, bullets, highlight, horizontal dividers, and quotes.
Who needs more than that?
And, instantly convert your work to HTML to post on any platform, using their already-in-place CSS formatting.
In other words… you write text, export as HTML, publish anywhere.
Not sold?
Fine, try it out on your next writing piece. Easy to learn, even easier to use.
Markdown is the only way I write nowadays. Be careful, the same might happen to you. If you’re lucky.
4. ZenPen
Good for: Distraction free writing. Cost: Free.
There’s plenty of clutter in life. ZenPen is one small corner of the distraction-free-universe to help you write without outside interference.
Go to zenpen.io
Type and write
Copy and paste, or download (via markdown, plain text, or html)
Do something beautiful with your new Pulitzer-prize-like content
5. Grammarly
Good for: Making your writing clear, effective, and correct. Cost: Free online
Grammarly promises to keep your social posts on point. It will flag everything from contextual spelling errors to poor word choices. And, the tool integrates with lots of online platforms, including Twitter, Gmail, and Tumblr.
I make up words all the time, and misspell others. Not always a bad thing for getting people’s attention. As long as one is intentional about it.
Use Grammarly to convert the unintentional to the intentional.
6. Pomodoro Technique
Good for: Staying focused, for writing or anything else. Cost: Depends on the specific timer tool you choose. Loads of free ones.
I know, I already mentioned this.
It’s worth another mention.
The Pomodoro Technique is a time management method developed by Francesco Cirillo in the late 1980s. It uses a timer to break down work into 25 minute intervals (usually), separated by short breaks. Each interval is known as a pomodoro (Italian for tomato).
Cute, huh?
But Pomodoro is more than cute for getting s&$% done.
I use it all over the place, especially when writing:
Define a section or two to write
Set the timer (for 25 minutes)
Work until it rings (and only on that task)
Put down a checkmark on a piece of paper
Take a short break
Lather, rinse, repeat
Works as a good tracker, too. For instance, four checkmarks = about two hours for the completed effort.
I use an online Pomodoro timer that makes an obvious tick-tock (a kitchen timer works great, too). My wife knows not to interrupt me when in this highly-focused state.
As long as I follow up with her about the ever growing to-do list she came to me for.
7. Dropbox Paper
Good for: Writing and collaborating with others. Cost: Free for the individual or small business. It costs for the enterprise.
Dropbox paper is my main writing, editing, and collaboration tool. Clients dig it, too. I teach them how to use it in one minute.
It looks and reads beautiful
Super-duper easy to write, distraction free (with a simple toolbar that pops up only when text is highlighted)
Works as web content editor, versus a document editor (who needs line breaks anymore?)
Write together with others, real-time
Alert your mates, immediately, with comments off to the side
Export and download in the common formats to publish elsewhere
Not much more to say. Try it yourself. I dare you.
Compose, schedule, and publish your expertly written posts to all the major social media channels—including Instagram—from one dashboard using Hootsuite. Try it free today.
Get Started
The post Writing for Social Media: 7 Tips and Tools appeared first on Hootsuite Social Media Management.
Writing for Social Media: 7 Tips and Tools published first on https://getfblike.tumblr.com/
0 notes
Text
Learning Report
Crafting the Digital Image was interesting and exciting, but also at times challenging module for me to study in my first year. A report by the National Committee of Inquiry in Higher Education states that in the UK ‘overall, just over a third (36%) of all students had chosen their course mainly because they liked it and the subjects that it covered.’ (Callender, n.d.). Personally, I think this is terrifying statistics and I fall into those 36% of students that chose to study something that they like. However, despite the fact that I chose something that I knew I liked, at the start of the year I had no prior knowledge or practical skills in terms of digital media. Not only that I was unfamiliar with the theoretical part of the studies, I have also never worked with professional equipment, so I did not know anything about available settings, good framing, lighting etc. First sessions of the module left me clueless and I started wondering about my further progress in the module.
David Buckingham states that ‘Young people are frequently described as a ‘digital generation’, a generation defined in and through its experience of digital computer technology.’ (Buckingham and Willett, 2013). I kept a blog to support and store my worth throughout the year and although we were given an option to keep a physical notebook as well, I chose to create a blog because I feel more comfortable working digitally. An ability to keep everything in one place regardless of what it is – a sketch, video/audio file or research I have done helped me to stay organised. It can be argued that this particular choice of mine is a confirmation of so-called digital generation theory existence. However, (Nicky Hockly 2011) argues that even though young people may have fewer barriers in terms of using digital technology than older people, that does not mean that younger users interact with the technology more effectively. He states that key skills of effective digital technology use such as a general understanding the working principals, filtering online information etc., do not come automatically and must be learned regardless whether you grow up surrounded by technology or discovered it on your mid ages. As mentioned, when I started my studies I had no prior knowledge in the digital field and with the progress of the academic year I was introduced not only with theories, techniques and terms which I was unfamiliar with, but also, we started working with to me completely new software and that only proves that digital skills need to be learned.
In the module, I was presented with a brief history of still and moving images. This was something new to me and fascinating. I found it amazing how fast technology progresses. For instance, from painted pots turned around and around to create movement in ancient Egypt, progressed to slide projectors and to optical devices such as the Thaumatrope* or Zoetrope** to what we have today. Because this brief introduction to the history of the moving image left me curious and made me realise that I am generally interested in the video industry and editing, I did some research on my spare time and chose to read ‘In the Blink of an Eye’ by (Walter Murch 2001). After reading this book I gained a deeper understanding of editing footage then and now. Not only the evolution in the technology itself that left me amazed but perhaps the change that it made on the creation process and the realisation of how much more simplified it is now.
Another interesting thing about this module to me was that very shortly after the start of the academic year I have realised that I was not paying attention to my everyday activities. An online survey done by (Statista 2017) shows that an average person in 2017 spent about 135 minutes a day on various social media sites. It is fair to say that I spend a similar amount of time on social media daily as well. However, Crafting the Digital Image module made me realise that I have never bothered to analyse the visual content presented to me, for example, on Instagram. Therefore, a need for ideas in this module and a given better understanding of how visual content is made encouraged me to question, for instance, how one or the other photograph is made or what framing or editing techniques are used on some video that I saw online. After a while of briefly analysing the visual content over different online platforms, I have come to a conclusion that an idea that is fully original does not exist. An inspiration is taken from something already seen, later developing it into something different. As Mark Twain once said ‘There is no such thing as a new idea. It is impossible. We simply take a lot of old ideas and put them into a sort of mental kaleidoscope.’ After making this implication I decided to change my social media feeds by following pages or people that I could potentially get inspiration from, to use the time, I spend on social media productively without even realising it. But then what I found quite challenging was documenting it all, even with just brief notes sometimes I had no ability to document all these ideas that were given to me by other people work constantly showing up on my news feed. I switched my blog from WordPress to Tumblr as a solution, because Tumblr has easy to use app that does not require internet connection to make drafts. This way I could easily note my thoughts everywhere I go.
My decision to transform my social media feed into personal inspiration source came in handy when we were given the first semester brief. We were given a theme, specifically to create a campaign to promote Worcester city, and five different options, of which we had to pick two. I chose to do five photographs and a timelapse because I have taken photos before, the process of creating timelapse I briefly knew as well, aside from the editing, so I felt more comfortable and confident about it. I struggled with ideas at first, but then saw a double exposure on social media and decided to do it, because I already had an idea for the timelapse and thought it ties in together nicely. Another challenged that I faced with this brief was that I was not familiar with any video editing software, so I had to work harder to understand it and get used to it but eventually, I got the hang of Adobe Premiere Pro. For the second semester brief, it was slightly different. We were asked to create a video for a quote of our choice. It was easier to generate and select ideas, also I already had an idea how to deal with this type of tasks, so I was better at being organised and managing my time. I was not familiar with After Effect software but because I already used Premiere Pro it was easier to understand After Effects too. However, I faced different challenges. I have found that for me as a wheelchair user sometimes framing can be tricky because most of the time I am lower than eye-level height, but in most cases, this is quite an easy fix, I can always sit somewhere higher or attach a camera to a high tripod. What I found not as easy is getting access to places. Sometimes it was just generally inaccessible, other times I was not given permission to shoot footage in certain places. I have also noticed while working on both briefs that finding models can be as hard as getting permissions. Because I chose a motivational quote for my second brief, it gave me a lot of creative freedom in terms of footage, so not being able to film in some places did not become a problem that would ruin my whole piece of work. It challenged me to rethink my ideas, put aside something that I cannot do and change it into something better.
In conclusion, Crafting the Digital Image module was exciting and challenging at the same time. I have improved my organisation and research skills because of keeping a blog, learned how to generate and develop ideas. Gained knowledge about the history of creative media and understood how impactful visual content can be. Realised the importance of details. Understood and learned to apply theories and techniques such as the Rule of Thirds, Mise-en-scene, framing etc. Practically went through stages of production and location planning, had a chance to work in photography, video and sound studios, use professional software and equipment. All of that gave me a good understanding in what environment I might work after graduation which I think is really useful because I got a chance to try lots of different things that I could do as a job. At times Crafting the Digital Image was fun, at times challenging, it was not only beneficial academically but also to me as a person.
Bibliography:
Buckingham, D. and Willett, R. (2013). Digital generations. 2nd ed. London, New York: Routledge, p.1.
Callender, C. (2018). Report 2 - Students' motives, aspirations and choices. [online] Leeds.ac.uk. Available at: https://www.leeds.ac.uk/educol/ncihe/r2_021.htm [Accessed 8 May 2018].
Hockly, N. (2011). The digital generation. ELT Journal, 65(3), p.324.
Mark-twain.classic-literature.co.uk. (n.d.). Mark Twain - Mark Twain, a Biography volume III Part 1 1900-1907 Page 103. [online] Available at: https://mark-twain.classic-literature.co.uk/mark-twain-a-biography-volume-iii-part-1-1900-1907/ebook-page-103.asp [Accessed 8 May 2018].
Murch, W. (2001). In the blink of an eye. 2nd ed. Los Angeles: Silman-James Press.
Statista. (2017). Global time spent on social media daily 2017 | Statista. [online] Available at: https://www.statista.com/statistics/433871/daily-social-media-usage-worldwide/ [Accessed 7 May 2018].
0 notes
Text
12.4.1 Week 4 Mastery Journal
1) How has each course contributed to your personal and professional development as an instructional designer?
Month 1: Mastery: Personal Development and Leadership
I found the book we used in this class, Mastery by Robert Greene, to be very interesting. One of the points the book made repeatedly was that people need to play to their strengths. As I progressed through this course of study, I found myself going back to that idea over and over. The result was that I used the skills I already have to add a new skill – instructional design – to my repertoire.
Month 2: Strategies for Learner Engagement
In this course, I began to see the power of interactive infographics. When I created the interactive infographic that was the main assignment, I was amazed at how much more engaging the information became. The result is that I have used that concept very effectively on my job, and have received a lot of positive feedback from people, because of how much more appealing the information is.
Month 3: Visual and Verbal Communication in Instructional Design
In this class, I learned a lot about why feedback among peers is important, as well the right and wrong way of giving feedback. For example, during this class, we were involved in creating typography posters. Since several of my classmates were not designers by profession, I was able to share with some of them a few of the principles of good design. Hopefully, they found it to be helpful.
Month 4: Corporate Training and Motivational Development
This was the first class where we had to write a script, and then edit it to a specific time or shorter. One of my problems is that, too often, there is so much information that I think is necessary to impart, that I can run long – sometime, way too long. Even though there were several classes where we had to edit our scripts brutally, this class was the first that let me know that well-edited scripts were going to be a necessity.
Month 5: Instructional Design and Evaluation
This class was actually one of the ones that I found to be harder than the others, because this one focused more closely on educational theory than the ones before had. While previous classes had touched on educational theory to varying degrees, this one was the first where I actually found myself struggling at times to understand and discuss the subject matter.
Month 6: Digital Media and Learning Applications
This class was the first one where we had to write one of those research papers that all of us hated so badly. I think that I learned more about APA formatting in this class than I had in all of the ones before it. The project that we did in this class – the interactive web quiz – also came in very handy, because I was able to take that framework and use it very effectively later on at my job.
Month 7: Music and Audio for Instructional Design
I think this class was the one I found to be the most fun. I have a long history of doing voiceover work and sound design, so I was able to just have fun with the assignments. However, that is not to say that I did not learn anything from the class. In my experience, it doesn’t matter how familiar you may be with a particular discipline, if you take a class on it, you will learn something you did not know before. In this case, I was able to learn certain audio compression and equalization techniques that I did not know before.
Month 8: Filmmaking Principles for Instructional Design
The real thing I learned from this course that helps me as an instructional designer is how to use storytelling techniques make a subject more interesting. Furthermore, I learned techniques to use that would keep the story from going into a lot of unnecessary detail, but to keep it as short and succinct as possible.
Month 9: Game Strategies and Motivation
In this course, I learned that it is possible to use gamification techniques without making a game. I remember that one of my classmates works for a Department of Energy contractor just like I do, and we were able to have several very productive discussions on this subject. The fact is that a profession like the nuclear industry is usually populated by technical people who tend to look down on games as “not serious enough.” This class taught me how to use the techniques without having to make a “game” of it.
Month 10: Learning Management Systems and Organization
I had never worked in an LMS before, so this class presented a new experience for me. In fact, in my opinion, I was very lucky that this class fell during the month of July, and we had the week of Independence Day as a free week. Consequently, I was able to do a lot of extra research to learn what I needed for this class.
Month 11: Media Asset Creation
Creating a Training Needs Assessment from start to finish was the single biggest challenge that this class offered. I really struggled with this assignment, but the feedback I received from Dr. Wyly was extremely beneficial. Of course, once I turned in my first draft and received her feedback, I had to go back and redo a large portion of it, but, as is usually the case in a situation like this, I learned more from what I did wrong than what I had done correctly.
Month 12: Final Instructional Design and Technology Project
This class was helpful in teaching me the correct way to create a portfolio web site. I had created them before, but as I worked with Professor Cleveland and Dr. Wyly, I learned several things that helped me make it more effective. In fact, my work on this portfolio site will not stop with this class. I plan on using this as my portfolio from this point on, and to continue to refine it.
2) How well were you able to utilize the concepts and techniques you learned from the program (theories, systems design, interface styling, and the creation of multimedia content) as you designed, developed, and implemented your Final Project?
I believe that I was able to utilize what I have learned throughout this course of study extremely well. I would like to give one basic example: As I have progressed as a multimedia designer over the years, I have come to understand that it is a good idea to keep your designs as simple as possible. In my opinion, to many designs are ruined just because the designer wanted to do all kinds of “neat stuff,” and did not know when to stop. Bu then I learned that, as much as I am a proponent of simplicity, I still had the tendency to make things more complicated than necessary. The result was that this over-complication in design actually had the capability of preventing students from learning the material well. Therefore, a lot of the work I did later in the program had a very different look than it did when I began the program. Even on my job, my work has begun to take on a very different appearance, and it has been a definite improvement.
3) Describe your most outstanding personal triumph in each course.
Month 1: Mastery: Personal Development and Leadership
I believe the biggest triumph I experienced in this class was coming to the conclusion that, yes, I could do the work. I was very nervous going into this program, because I was not at all confident that I was capable of passing. I tend to struggle with what is known as the imposter syndrome, where I have a tendency to downplay my accomplishments, and suspect that the day will come when I am exposed as a fraud who is not nearly as smart as people think I am, and that I really don’t have a lot of talent as a designer. And while that is probably something with which I will struggle all my life, this first class did give me a shot of confidence in my ability to do the work the program demanded.
Month 2: Strategies for Learner Engagement
As I stated earlier, one thing that had a profound effect on me was Mayer’s Principles of Multimedia. It was in this class where I was first exposed to those principles, and what I learned from them literally transformed my work, not only from an academic standpoint, but professionally as well.
Month 3: Visual and Verbal Communication in Instructional Design
In this class, one of the concepts we explored was the connection between effective visuals and believability. We were taught that there is a direct correlation between effective design and credibility. Personally, I felt vindicated by that, because this is something that I have been trying to convey to some of the engineers with which I work. Or course, sometimes I feel like I am fighting a losing battle, but it is nice to have research to back up my assertions.
Month 4: Corporate Training and Motivational Development
I think it was during this class that I was really able to help some of my classmates with shooting video in front of green or blue screen. That is something I do on a regular basis on my job, and most of them had no experience with it at all. I really enjoyed being able to reach out and answer questions and give advice on how to make it work. It was a good feeling.
Month 5: Instructional Design and Evaluation
I think what I am most proud of in this class is the teamwork that may classmates and I showed in the final project. I have said this multiple times: We could not have had a better composition of skills than the one we saw in this class. For the final project, each of us played to our strengths: Robyn and Bruce used their educational backgrounds to outline the project; Heather’s skills as a graphic designer were put to effective use in creating the look of our project; my skills in voiceover and interactivity came into play as I put everything together. The result was that Dr. Deason said that it was one of the best presentations of that nature he had seen in a long time.
Month 6: Digital Media and Learning Applications
The first week of this class, I was on vacation. I also had the first of those hated research papers due. So, I spent something like 25 hours of my vacation researching and writing my paper. I turned in the first draft of my paper on the last day of my vacation. Imagine my surprise when I received Dr. McBride’s feedback, and I had a lot fewer changes that needed to be made than I expected. If I recall correctly, my final grade on the paper was a 95.
Month 7: Music and Audio for Instructional Design
As stated earlier, I really enjoyed this class. However, I think the thing that I consider the biggest personal triumph was Dr. Deason’s reaction to the final version of my audio version of Little Red Riding Hood. He was very complimentary about how I put it together. Then, he set up a web camera so I could see his daughter’s reactions when she listened to it. It was a really good feeling to know that he thought that highly of it.
Month 8: Filmmaking Principles for Instructional Design
The thing of which I am most proud as a result of this class was my rediscovery of how necessary storyboarding is. I have been doing video and animation for many years, but my storyboarding techniques were scattered, at best. The result was that, in too many cases, I wasted too much time when I ran into a problem. What I learned from this class is that creating detailed storyboards will frequently allow you to anticipate problems and solve them before you actually get into the production process.
Month 9: Game Strategies and Motivation
Ultimately, I considered the game I created for this class to be a personal triumph. Game creation and gamification were new concepts for me, so I was not at all confident in my ability in this area. However, at the end of the class, my final grade was around a 98, so I was satisfied with what I had done.
Month 10: Learning Management Systems and Organization
What I considered to be a personal triumph for this class was the sheer amount of work that I produced for it. The short course that I created was called Compositing in Photoshop, and I created five 10-minute tutorials for it, as well as an interactive simulation of Photoshop to help the students learn the interface. I was very proud of the final product.
Month 11: Media Asset Creation
In this class, I believe I produced some of the best material during the past year. Once I nailed down the Training Needs Assessment, I had all of the ideas in place; all I needed to do was generate the assets. Even though I was only given a week to produce each part, I had worked out so many of the details while I was writing the TNA that I could put every bit of creativity I possessed into the different pieces.
Month 12: Final Instructional Design and Technology Project
What I consider to be the biggest triumph of this class is the fact that I completed the entire course of study. For the last year, I have worked to the point of exhaustion, and have gotten discouraged several times. However, the encouragement of my classmates, my instructors, and my wife always gave me just enough motivation to stay the course.
0 notes
Text
Podcast #20 – Eric Helms Answers Your Most Popular Questions
In this 60-minute interview, researcher and coach, Eric Helms, answers twenty reader questions posted in our Facebook Group. We talk about a variety of topics including RPE (Raising of Perceived Exertion), full-body versus splits, protein frequency and how bodybuilders can progress through a plateau.
The show also starts off with an exclusive musical number by yours truly. Enjoy! – Links after the jump.
Subscribe via iTunes or Stitcher. (Here’s the direct RSS feed URL for other players.)
Listen on Soundcloud.
Selected links
The Muscle and Strength Pyramid Books – Andy and Eric co-authored these books
Mike Tuchscherer – The specific RPE iteration that Eric studies
Dorian Yates – Someone who Trains until failure
Album with Andy / Dorian
RippedBody.com Training – A free sample program, incorporating RPE
RPE Mastery Email Course – How to implement RPE into your programming (Free Intensive Course)
MASS – Eric’s research review
The Complete Guide to Setting Up Your Diet – A great place to start setting up a diet
3DMJ Podcast – Eric’s Podcast
Sleep FAQ – Your checklist for sleeping better
Evidence-based recommendations for natural bodybuilding contest preparation – Fantastic Article Written by Eric
Find Eric on Facebook | Youtube | Instagram
Show notes
What is RPE? – RPE stands for Rating of Perceived Exertion. Eric has a Ph.D in a specific type of RPE. It is essentially a scale that tells you how hard the perceived effort of training is to accomplish, which was developed by Gunnar Borg. Eric studies an iteration of RPE developed in 2007 by Mike Tuchscherer, which adds the layer of repetitions in reserve. RPE is used as a simple way to auto-regulate your training volume. In addition, RPE can be used to measure progression and manage fatigue. [2:00]
What about going to failure? – While Dorian Yates got ripped by training to failure, however, using RPE can be an effective tool in knowing when you should, or if you should, go to failure. Training to failure all the time will likely put you at a higher risk of injury, with Dorian being a prime example. [5:30]
What we know about hypertrophy. – Hypertrophy is primarily related to the amount of work you do at an adequate level of effort (intensity) for what you are capable of doing. In addition, hypertrophy is related to repeating that work and effort as often as possible. [7:00]
Andy trained with Dorian Yates. – Andy trained back with Dorian about five years ago. Here’s a photo album with some photos Andy took. [8:00]
How useful can RPE be for bodybuilders versus power-lifting or other sports. – RPE would be applied differently depending on the context. A powerlifter might have a heavy singles day using RPE to build technique. Intensity of load is calculated by repetition maximum or percentage of repetition maximum. Volume is calculated by sets x reps x load. RPE is just intensity of effort. RPE is a way to quantify the data and is part of any training program, tracked or not. [10:00]
Why use RPE when you could use percentage of repetition maximum? – The further you get away from failure, the less accurate RPE becomes. Anything more than three reps left in reserve, the accuracy of RPE goes down. [12:15]
The 2% rule. – If you have rated something at 8.5 RPE and the goal was 8, you drop the load 2%. If you rated it at 7.5 RPE, you would increase the load by 2%. This works fairly well to adjust the load in the right direction. [14:00]
Sample programs using RPE. – You can see RPE sample programs in The Muscle and Strength Pyramid Books or on RippedBody.com in the Training section. There is also the RPE Mastery Email Course. [15:00]
How did MASS start? – Greg Nuckols messaged Eric about starting a research review and brought Michael Zourdos on board. MASS was born. They pick the most prominent articles that result in you learning how to program better. [16:00]
A minimum calorie intake for clients? – Eric bases it on a weekly average and tries not to go below is 10kcals/pound (22kcals/kilogram). However, contest prep clients will have this rule broken. Instead of going lower in calories, increased cardio might be the only option. Andy mentions that there is often a counting or tracking issue when a client is unable to lose weight. Eric will sometimes use single-ingredient food list for the short-term to prove that they can lose weight. Eric also mentions being realistic with clients, especially when they are the general population. Eric also turns to a week-long diet break before trying to cut calories further. [19:00]
Eric talks about the simple meal plan they use. – Potatoes, rice, lean meats, and other foods that do not need to be prepared. If a client is spending two hours preparing food, they have been dieting too long. Eric mentions that everything must be weighed on the scale, within the context of assessing a diet. [27:00]
Updates coming to the Muscle and Strength Pyramid Books? – There will be translations coming to the ebooks. Might be new video content. Eric has new information for the second edition and wants to talk about the “recovery diet.” Andy mentions the potential of making the ebook into a course. [29:30]
What’s the best protein frequency for maximum muscle gain? – There is acute mechanistic data which is not very realistic. However, based on this data, getting 20-40 grams of protein per feeding every 3-4 hours would be optimal. With this in mind, the timing is insignificant compared to actually getting enough daily protein. Intermittent fasting and protein spread should not be opposing strategies, as Eric points out they can be used effectively together. [34:00]
Eric talks about his protein research. – Eric is very focused on applied outcomes in the context of resistance training. 1.6-2.2 grams per kilogram of total body mass is optimal. The idea of “a gram per pound” is fairly accurate advice. Resistance training will do more to help maintain muscle mass than protein intake. [37:30]
Can a natural bodybuilder train full-body or upper-lower split and maintain hypertrophy? – Eric says yes. Steroids simply make everything work better. A more appropriate question would be on the frequency, intensity and volume required to maintain hypertrophy. Frequency of 2-3 times per week. Hitting each muscle group with at least 10 sets per week. There is an endless number of ways to run your programming, including splits and full-body. [40:30]
Does the rate of weight loss impact how much is lean muscle mass or fat? – You could have someone in any ratio. The leaner you get, the more weight loss will be lean muscle mass. The greater caloric deficit, the greater loss will be lean muscle mass. A good target is losing 0.5-1% of your body mass per week with a good diet, de-loads, and adequate training. If you would like simple guidelines, check out The Complete Guide to Setting Up Your Diet. [42:30]
Should bodybuilders track volume like power-lifters? – Total repetitions makes more sense for bodybuilders. Total sets would also work. Another way would be relative volume, which is sets x reps x % of 1 Rep Max. Eric thinks modifying sets over time is the best way for bodybuilders to get over a plateau. [45:00]
Is there anything coaches are missing in the fitness industry? – More emphasis needs to be on actual coaching for behavior change. Eric’s 3DMJ Podcast covers this concept regularly. [47:45]
How to get over insomnia. Minimize screen time after dark. Make your bed a place for sleeping. A regular eating pattern. Melatonin is also an option, but start at a very low dosage. Having a meal before bed might work. Not training at night. Andy has a checklist for better sleep on his FAQ page. [49:30]
What is Eric’s daily routine? – Eric is a big picture thinker and broke up his time into blocks. Eric would train 4-6 times per week, while never neglecting sleep or food. Eric likes to schedule fun time and it helps him from getting distracted. Eric also schedules time away from others. [52:00]
Nutrition advice for bodybuilding peak week. – Eric suggests reading Evidence-based recommendations for natural bodybuilding contest preparation. You want to not be carb depleted, not be dehydrated, and not be low-blood pressure. Eric uses salt water with his clients right before they go on stage. [57:45]
Thoughts on research versus experience. – Eric doesn’t see them as competing forces. Experience is still a form of evidence. [1:03:30]
The difference between a Ph.D. and a Masters. – The research project is larger in scope for a Ph.D. You also take more graduate classes for a Ph.D. Differs based on country of study and school. [1:06:00]
If you could a put a billboard anywhere in the world, saying anything, what would it say? – Put yourself in other people’s shoes more often. [1:08:05]
Thank you for listening! – Andy and Eric
The post Podcast #20 – Eric Helms Answers Your Most Popular Questions appeared first on RippedBody.com.
0 notes
Text
Kicking the Cubicle: Rachel Reinert, Artist
“Kicking the Cubicle” is a interview series on The Blonde Abroad featuring women around the world sharing their inspiring pursuits of dream-worthy jobs, how they got where they are and what a day in their shoes looks like. Here, artist, Rachel Reinert shares her story!
Rachel Reinert is one of the most inspiring and creative people I’ve come across– she has created art for private collectors, interior designers, businesses, and public venues, and even designed textile lines and illustrated her own series of “grown-up” coloring books.
Being from California and Colorado, Rachel grew up in beauty of the outdoors and has had her share of wanderlust. She spent 2 years abroad, living and traveling around Australia, and since then spent time visiting Thailand, Malaysia, Singapore, Japan, Korea, China, France, Canada, Germany, and Iceland with me!
As a woman that has translated her passion, creativity, and love for art into a successful career, Rachel is exactly the sort of female entrepreneur I am excited to share with you!
Rachel, you have successfully built an art and illustration brand, created art for private collectors, interior designers, and businesses, AND have published amazing coloring books. Where did your journey as an artist begin?
As a child, I was always interested in the natural world. I took notice to the tiny details in plants and flowers in my backyard. I also loved creating things with my hands. When I was around 3 or 4, my mom gave me all kinds of crafts to do and special coloring books that came to life when painted over with water.
As I got older, I wanted to capture what I saw in the world on paper as accurately as possible. From a very young age I knew that I wanted to be an artist, even though I wasn’t really sure what that meant.
What did you study in school? Do you think it’s helped you create the brand you have today?
I studied fine arts in school. I ended up getting an art education degree, along with a teaching credential to teach art. It definitely taught me to develop a strong routine in self discipline and challenged the quality of my work under deadlines. Following through a project from beginning to end, along with harsh classroom critique, pushed me to strengthen my skills. But really, it was completely up to me to create my style and do something with it in the end!
You ask yourself questions like, “Why am I doing this?” and “Who is this art for?” and if you can’t answer them, it’s hard to find purpose in your work.
Being an independent self starter is essential as an artist, or else your work will never be realized. That’s something that isn’t really taught. You have to learn to transition out of school projects for a grade to creating work on your own to sell and finding patrons.
It’s nearly impossible to be an artist if you don’t have the drive or resources to make it work.
The art making practices I learned in school were academic, so it didn’t really prepare me for the commercial type work I do now. Though I think that type of atmosphere pushed my work to really bloom, even if I went in a lot of different directions for years. It helped me learn to accept that my art will change and progress.
Read more about Rachel’s journey here!
Being an artist, inspiration must strike at odd times (or all the time!). How do you keep a balanced work & life schedule? What is a typical day like for you?
Every day is different! I have a home studio, so the work/life balance isn’t really there…hah! There are perks to it though. I can get up when I like, make coffee, walk down the hall, and create. But in order to stay sane, I have to get outside each day! I usually go hiking around San Diego or stroll the streets of North Park where I live.
Again, being in nature revives my spirit and feeds my inspiration too.
On a typical day, I might be taking and editing photos, working on a painting/illustration/coloring book project, writing my next book, posting content, checking emails, responding to social media messages, and looking for ways to promote my work in my community. Often I have 3-5 projects going on, whether it be a commission, a personal project, experiment or whatnot.
I can be hard when I feel inspired by something but can’t actually go create or work on it right away. But I’ve learned that the secret is to just GET TO WORK. Often I don’t really feel like working on something. But if I sit down, turn on my music, and get going, then I’ve found that I will eventually enter into the “flow” and I can get into the groove!
You love to travel, and are constantly on the go. How does your art fit into your travels?
Great question! When I’m on a trip somewhere it’s pretty hard to squeeze the time in to draw or make art. But when I have down time like being on a plane or in an airport, I work on a page from one of my coloring books, or a pre-painted watercolor page to illustrate on.
I love taking photos so most of the time while I’m traveling I’m absorbing the beauty of the country and trying to capture what I see! Then when I return home I can take what I’ve learned and apply it to my next project.
What have you found most challenging about working in the art industry?
Being an artist or any freelancer means that there are slow times and there are busy times. It’s hard to rely on anything, so I always keep that in mind. I think I am still learning a lot about the art industry!
I’ve lived in many different cities and every community has their own special vibe.
Because I move around a lot, it can be challenging to develop myself as a local artist. I am constantly learning and meeting all kinds of creatives, but it takes years to establish yourself in a new place.
You’ve worked on all sorts of projects. What have you created that you are most proud of?
I am really, super proud of my coloring books. I am totally humbled and honored that I am a published author/illustrator, and every time I see my books in stores that I shop in normally or photos of them colored in by individuals all over the world I have such a huge sense of gratitude!
I’m also really proud of the textile line I created for a fashion designer in Australia, which gives me confidence to pursue pattern making with my art.
There are ups and downs with any business. What inspires you, and what motivates you to keep going?
Seeing other artists, illustrators and designers create beautiful things always gives me inspiration! I love seeing new ideas and innovation, and seeing other people create things. It makes me feel like I can do it too. Seeing others succeed in my field gives me motivation to continue to create what I am truly passionate about.
What advice would you give someone hoping to start their own creative brand?
I’ve said this before, but, just go DO IT. A lot of budding artists and creatives fear that they aren’t good enough, or that there is too much competition, or that they will fail. Having that fear will always keep you from doing what you were meant to do.
Put yourself out there, don’t be too snobby to collaborate. Be humble. Try new things.
And learn from those who are already doing it. Also, make your work AMAZING. If your work is done thoughtfully and is full of quality, you will be respected.
What does success look like to you?
Romantics would say true success is having fulfillment in what you do. But for me, making enough money to keep creating is my goal. I can’t be too romantic about it, or I will become a starving artist! And a starving artist can’t create stunning work when she is hungry.
I lied… I’m actually a total romantic deep down, but I do try to be realistic!
Lastly, what are you working on now that you are particularly excited about?
This is the most exciting question! Right now I am SUPER excited to be working on launching an online art course, along with my third book this year!
I’ve had so many questions about techniques in coloring and painting, so I’ve created a step by step tutorial book, and am working on video courses too! If you want, subscribe to my newsletter on my website to get more info on it!
Look out for this in May and June of 2017!
Lastly, a few fun questions!
What did you want to be when you grew up? An artist!
#1 on your travel bucket list: This is always changing…but…Egypt!
Song that has you dancing: Currently, anything by Goldroom!
Quote that keeps you smiling: “Every child is an artist. The problem is how to remain an artist once he grows up.” -Pablo Picasso
Check out Rachel’s coloring books now!
Kicking the Cubicle: Rachel Reinert, Artist is a post from: The Blonde Abroad
via Travel Blogs http://ift.tt/2jDP20Q
0 notes