#gpose tutorial
Explore tagged Tumblr posts
Visit Tumblr Blog
Explore Tumblr blogs with no restrictions, modern design and the best experience.
Last Seen Tumblr Blogs


Fun Fact
Premium Tumblr themes are available from anywhere between $9 to $49.
Text
Teary Eyes Posing Tutorial
So I've been desperate to replicate the teary eye effect we see in cutscenes (mostly Tataru unleashing her LB3 on WoLs) and all similar questions I've seen on the crime tool discords are met with the same "can't be done, photoshop it" line of answers if any. So if you have zero photoshopping skills like me and want a fix of that sweet angst, here's a quick way to fake it in-game directly while gposing:
(Requires very basic Anamnesis or Brio experience)
-
(You might want this to be the last step after you're done posing your character, since you'll be dealing with a hand prop.)
Equip this prop to both your main and offhand, by typing in the numbers: 9072, 1, 1. and click below them to "show weapon."

2. Now since they're tiny little droplets, they'll be hard to see, so I suggest you click on the weapon bone in your preferred posing mode and scale them up to around 5. Raising the z value (3rd one) slightly higher makes the droplets rounder and easier to work with. And if the size doesn't change for some reason, try scaling the root or abdomen bone instead of the weapon bone.

3. Shove that thing up your eye (lovingly). It helps if you rotate each droplet sideways so that its shape matches that of your eye. (smaller tip toward your inner eye corner, large tip toward the outer corner)
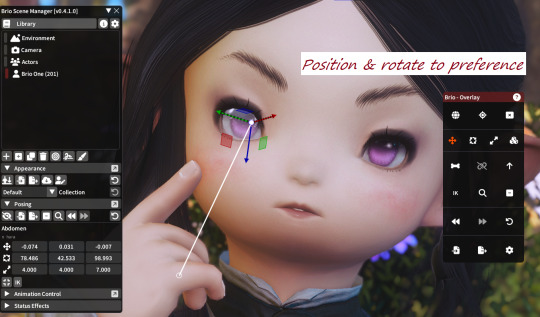
4. Now the fun part! You can do this several ways: If you want the full-on LB3-level brimming-with-tears effect like Tataru's, just keep tweaking the scale of the droplet til it's about the size of your eye and position it just over the whole eye, tweaking and rotating until it fits perfectly inside your eyelids without clipping out, et voila.

The LB2 level: Another (more realistic?) way would be to lower the droplets to have them "well up" around your lower eyelids:

LB1 level: Or you can simply lay the droplets at their original size at the outer corners of your eyes for a "threatening to turn on the waterworks but can be assuaged with cake" effect

Bonus tips for extra realism:
- As with most other things, best to avoid symmetry
- Mix & match shapes & sizes
- The more dramatic your lighting the more dramatic they'll look
If you try this please show me. Angst gives me life thankyou.
728 notes
·
View notes
Text
WoL Magic Cards Tutorial!
I'd made a custom Magic: the Gathering card of Johnny recently, and shared it in the Seafloor discord, and since there was a lot of interest in the concept I figured a tutorial might be nice so we have something to do while we wait for plugins to come back. Here goes!

Download CardConjurer This is the tool I use to make custom cards. It's just a web app developed by a college student; he got DMCA'd by WOTC so it's not hosted on the internet anymore, but you can still run it locally.

Just unzip the contents somewhere, and then run launcher.exe when you're ready. It should open up the app in a browser tab.
2. Navigate to the Card Creator


3. Pick out a Frame
Enter this search box on the right. We're going to be using the Nickname ("Godzilla") frames. These give us a small subtitle box below the card name that indicates what the Magic card's actual name is.
If you want to create a custom card instead, use the Borderless frames.

In the menu below, you should see the different colors of the borderless frames. You'll have to add three of these elements to the card: the text box, the card name, and the power/toughness box. Do them in that order, by clicking each element and then Add Frame to Card. If your card is legendary (or if you feel like it), use the Crown option rather than just Title.

You'll have to choose the correct color. If your chosen card is monocolor or >=3 colors, this is very easy since you can just choose that color or gold, but for two-color cards the process is slightly more involved. First, add the color that goes on the left using the Add Frame to Card button, and then add the right color using the Add Frame to Card (Right Half) button. Use the gold power/toughness box.
If any of the card elements get out of order, you can reorder them using the layers controls at the bottom of the page.

4. Import the card text

Navigate to the Import/Save tab, and type in the name of the real card you're putting your OC over. Select the specific version of it using the dropdown afterwards.
(For some reason, Firefox suggests completing this field with my credit card information. I think it knows more about Magic than it's letting on.)
After the card is imported, navigate back to the Frame tab, and click Load Frame Version. This will force the text on the card to fit into the frame set that's currently selected in the bar on the right, which should still be the Nickname ("Godzilla") from earlier.

We should have something closely resembling the real card in the editor, now.

5. Make it yours!
First off, go to the Art tab, and upload your image. Once it shows up, you can adjust it by clicking the actual card in the editor. Clicking and dragging pans it around, shift+clicking scales, and ctrl+click rotates.

Next, pop over to the Set Symbol tab and remove it, since this is your own card and isn't from a Magic set.

And now, go over to the Text tab to finish this off! Start by entering your card name into the Nickname tab.

If your chosen card name is too long and ends up clipping the mana cost, you can reduce the width of the text box with the Edit Bounds menu until it fits.
Next, go to Rules Text to update the name if the card refers to itself. I changed all instances of "Vadrik" to "Johnny". Since this card is really just to look at and not to play with, I also renamed the Day/Night mechanic to fit the Black Mage flavor even better. Feel free to get creative!

You can use {flavor} to add flavor text as well. I added the {lns} commands after some words to add line breaks to make the text blocks look better.
You can also edit the typeline in the Type tab, if the creature type doesn't match your WoL. Johnny is already a Human Wizard though, so I didn't have to do that. Technically this would be a mechanical change of the card, but since these aren't real cards anyway I think it's a valid concession to make. Just don't go abusing it if you actually end up printing these out LOL
6. Download the card image
Finally, head back over to Import/Save, scroll all the way to the bottom, and hit Download you card.

And you're done! There's obviously a lot more that's possible with CardConjurer, and tons of avenues for creativity. If you end up following this tutorial, or creating any other FFXIV-related MTG cards, I would really love to see them!

143 notes
·
View notes
Text
youtube
i've gotten a couple common questions now about how i do my camera stuff in gpose, so i hope this can answer questions for anyone else that's curious to do it themselves!
51 notes
·
View notes
Text

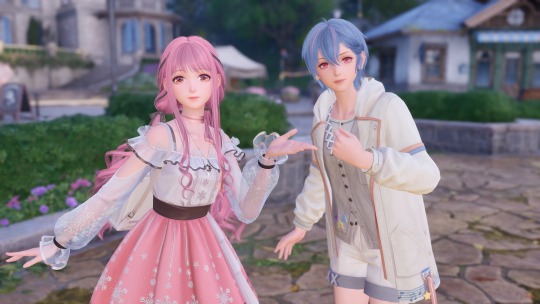
Goin' Gatherin'
vvv close-up vvv
#Final Fantasy XIV#FFXIV#X'vahl Tia#ffxiv gpose#X'vahl and two of his best girls#(at the moment...)#practicing some more with these face bones#and with some more dynamic poses#since I tend to go much more subtle with my gpose story sets#I'd like to do some more experimenting with this though#none of this was without help from from-eorzea's expression tutorials and poses
64 notes
·
View notes
Text
What programs do people use for advanced gposing? I'm looking to get into it more thoroughly
#i would also appreciate tutorials if you have em#personal#ffxiv#ff14#gpose#final fantasy 14#final fantasy xiv#gpose programs#ff14 gpose#ffxiv gpose
21 notes
·
View notes
Text
Video Camera + Tomestone Overlays
From my two most Recent Posts
I've made transparent overlays in case anyone wants to use them! Video Camera is meant for landscape and Tomestone is meant for portrait (like a phone). More under the cut; pls message me if you have any questions or the quality is bad and I'll make a zip to download or something. If you use these overlays I'd love to be tagged if you post it :D Edit: Tbh if this flies over your head or you don't have easy access to an art program just message me and I'll do it for you lmao
These should save as Transparent PNGS
Tomestone
Open this in any art program that allows layers first, then open your screen shot under it and adjust the positioning to get what you want inside the viewport. The proportions are a little taller than a normal screenshot to accommodate the UI.

Video Camera
This one is a little more involved- you can use just the overlay like in the Tomestone version(No positioning should be necessary) but I also did a screen effect so I'll put how I did that here as well!
This is the order you want your layers to be. You'll need two of the recording effect- They're green in this example but I changed the coloring to purple since everything in s9 is powered by electrope:

Change the type of layer/blending to Multipy/Overlay for the recording effect layers, with multiply on top of overlay. I adjusted the opacity down to around 30% but play with them as you like! You can also adjust the hue back to green, or another color of your choosing.


How to get a blurrier effect on your screenshot
I use a combination of the in game filters- namely the Noise 1 and Noise 2 timed correctly, plus other ones(And I think the shader I'm using has a small amount of chromatic aberration). I import all of the screenshots I want to use as separate layers, with the bottom layer being the one I like the most. Three is a good number here.
I set the two top layers at 50% opacity (or less- play around! this works great with multiple shaders that you want to combine- click around the blending options to find something you like) Then to get the blurry effect I move 0NE layer 1-2 pixels in one direction, and the OTHER in the opposite direction. For the Video Camera shot I moved it a couple left and then a couple right. For the Tomestone shot I moved the first layer one pixel up and left, and the other one one pixel down and right. To get it extra blurry I added a motion blur to the base screenshot at a 45 degree angle that followed were I moved the layers (So it looked like this: \ )
Happy recording your WoLs and OCs!
24 notes
·
View notes
Text
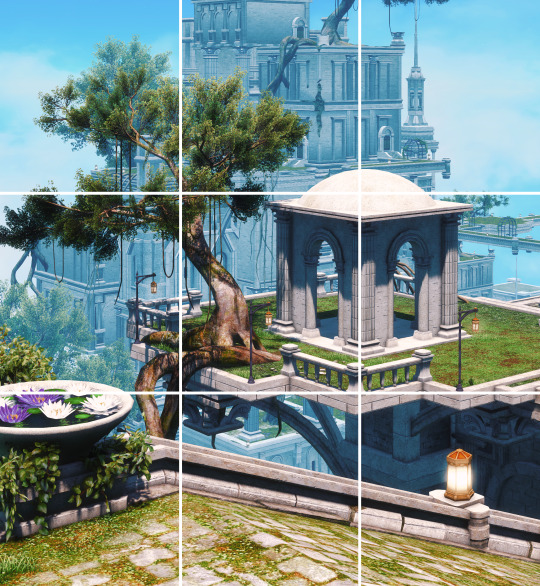
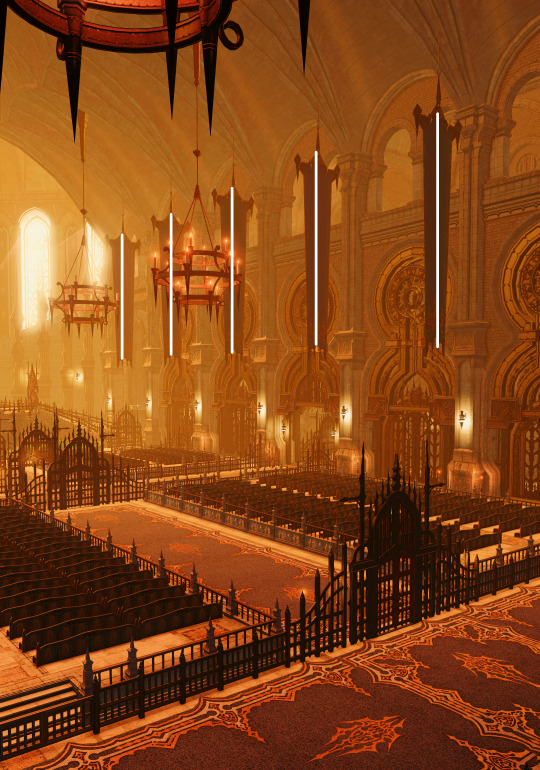
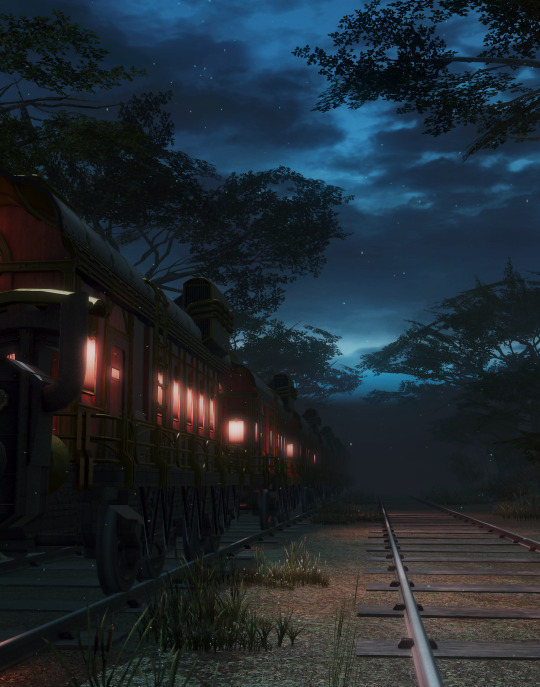
Virtual Photography Guide: Composition (Part 2)
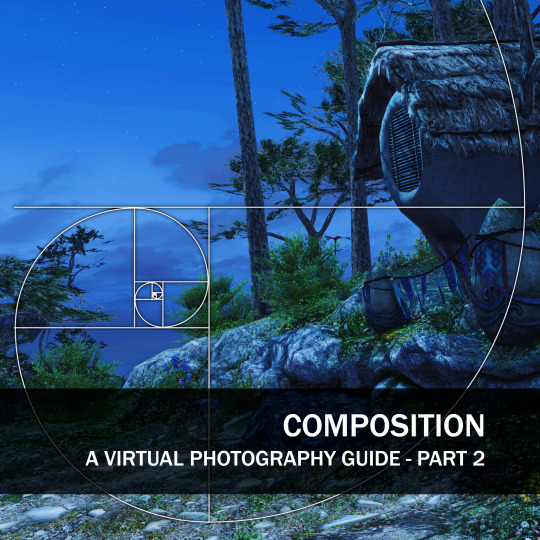
Let's continue exploring composition with a few more guidelines used in real-life photography, together with some FFXIV examples!
Rule of Thirds
The Rule of Thirds involves dividing the viewport into a 3x3 grid by drawing two horizontal lines and two vertical lines, resulting in nine equally sized rectangles. According to the rule, placing key elements of interest along these gridlines or at their intersections create harmonious compositions and draws the viewer's eye in a visually pleasing and balanced way:
Rule of Odds
The Rule of Odds suggests that using an odd number of elements, such as three or five, tends to be more visually interesting and engaging compared to an even number. The Rule of Odds can be used to create a sense of asymmetry, tension, and visual flow:

Rule of Space
The Rule of Space emphasizes leaving empty space or room within the frame, specifically in the direction that the subject or elements are moving or looking towards. It adds a sense of direction or movement and allows the viewer to engage with the image more effectively:
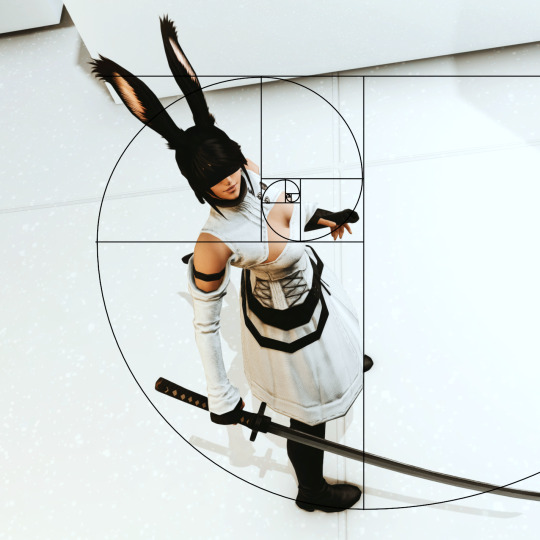
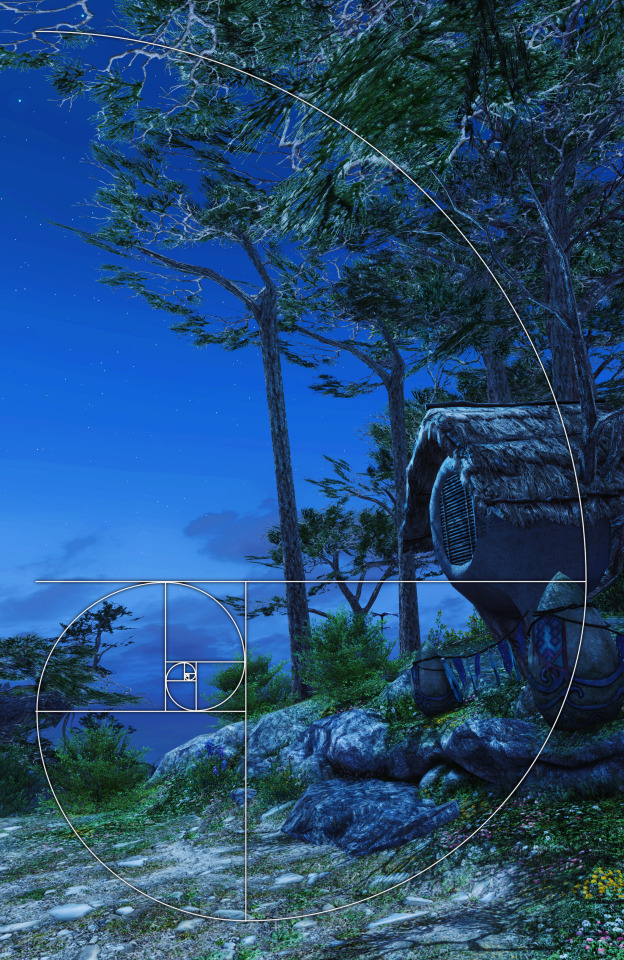
Golden Ratio
The Golden Ratio, also known as the Divine Proportion or Phi (Φ), is a mathematical concept and compositional guideline used in various art forms. It is a ratio of approximately 1.618:1 and is considered aesthetically pleasing to the human eye. In photography, dividing the frame into sections based on the Golden Ratio and positioning important subjects or focal points along these divisions creates a visually appealing and balanced composition. That way, compositions that feel harmonious and naturally pleasing:
So there you have it! while not comprehensive, these guidelines may help create shots that are engaging and pleasing to the eye.
You can now find this and all the previous guides and reference materials in our Discord server, Sights of Eorzea. Come check it out!
470 notes
·
View notes
Text

Small test run of Infinity Nikki done! Mostly just finished the tutorial (and kicked Momo around), but it so far it seems pretty fun~
Also photo mode is so nice ♥
#there's some janky animations in those manual progress cutscenes#and after the crash cutscene i had some big lag#but that vanished after progressing the quest#tutorial was somewhat annoying (i hate those “and now click here” ones that refuse to let you do anything else before you finish them)#but didn't take that long#and yeah the photo mode is a godsent for someone used to gpose lol#so many games have pretty graphics but absolutely refuse to let you pose for pics#or god forbid edit colors or lights to make them look better#i can maybe see some of the same problems that shining nikki had#as in. 3d outfits refusing to play nice together when mixing outfits#as that was something i loved doing in love nikki#but so far i haven't got any “you can't use that piece with this outfit” that i remember getting A LOT during shining#anyway uhhhhhh#i should probably come up with a tag for these pics#for organizational purposes u know?#neri in miraland#that'll do#AH also if any mutuals/followers try the game feel free to toss your friend codes my way 👉👈#i've yet to see what the friend system even lets you do but still#infinity nikki#edit: oh right i forgot to clarify - if you walk into momo he kinda shuffles out of your way#and if you keep doing it multiple times he comments something about it lol#i got “okay okay i'll get out of the way!” and something about him need some protective gear lol
10 notes
·
View notes
Text
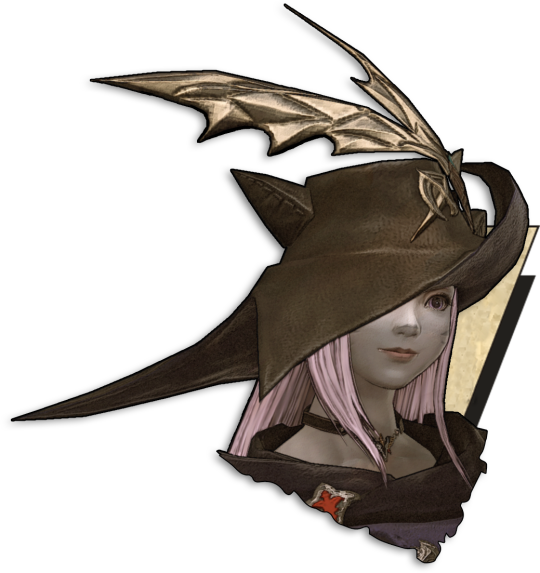
big hat
tutorial by @twitter-sakuranokaze (thank you for sharing :D)
#i ended up painting over most of her hair; it just wanted to make PIXELATED LINES#endwalker spoilers in the tutorial#ehriyu#ff#ffxiv#gpose#?
20 notes
·
View notes
Text

Spent the day getting my Twintania minion
#ffxiv#final fantasy xiv#ffxiv oc#gpose#ffxiv gpose#ffxiv wol#audrey valentine#hyur midlander#if anyone needs help w/ the tutorial stages#some of them are hard I'll admit- really just the odin one and the final stage#the rest are pretty snoozy#took me maybe 2 hours to finish? not even
8 notes
·
View notes
Text


Hope spending some time with her four children while her darling and beautiful and amazing wife Josie's back home looking after the house or something (and totally not because I ran out of characters to take this poorly positioned group photo rip)
#hosie#hosie ffxiv au#THIS TOOK WAY TOO LONG FOR ME TO SET UP#i did my best to make Hope in this game#i'll try and make Josie next time#but good god I am so confused and there's not a lot of tutorials out there that can help me figure this out#eprika rambles#rika plays ffxiv#hosie fankids#ffxiv#ff14#final fantasy xiv#final fantasy 14#gpose#hyur#miqote
9 notes
·
View notes
Text

I was working on Gpose Tips, Tricks, and Resources before DT was released, but with DT came a lot of questions and little tutorials scattered around various social media sites. I've gathered what I can and put them into one spreadsheet! This resource has tutorials and tips on how to do various things in gpose (vanilla and modded), some general photography tutorials that can be applied to posing, and templates you've probably seen people use on social media :)
Of course, this list isn't all-inclusive, so if there is something you think needs to be added, feel free to message me here or on Bluesky. As a note, I try not to add Twitter links unless there's no other choice, because people are consistently taking their accounts down/making them private, making the tutorials unavailable.
Reshade shaders and mod links are very minimal on this, btw! Only because it's a slippery slope with keeping track and trying to figure out what to add. Searching the various mod sites will generally be more fruitful anyway :) (Reshade tips and tricks are not limited, just links to shaders themselves)
I will keep this updated as I see new stuff that will help!
498 notes
·
View notes
Text
SEA'S COMMUNITY COMPENDIUM UPDATE
We have a massive one today! Huge thanks to a close friend of mine who sent me every single bookmark of xiv resources she had. 💖
Additionally, a good handful of these resources were sourced from a list originally created by @rinhkitty, which you can find here. I have tried to include the more recent/active of the lot, so it's not a one-for-one. Thank them for a lot of the large scale resources you'll find below! ✨
As of 04/12, I have added the following resources (in no particular order) to Sea's Community Compendium for FFXIV Creatives:
LARGE SCALE
GARLAND TOOLS — Contains XIV resources such as Garland Data, everything database, crafting lists and equipment calculators; Garland Bell, gathering timers, collectable resources and hunt windows; and FFXIV Fisher, daily fishing windows, bait paths and catch checklist. Maintained by Clorifex Ezalor of Zalera.
TEAMCRAFT — Create crafting lists and collaborate with others, set gathering alarms, simulate crafting rotations, and more!
CAT BECAME HUNGRY - FFXIV ANGLER — Contains everything and anything to know about fishing including specific fish guides, location, baits, aquarium fish and more!
FFXIV - CRAFTING AS A SERVICE — Crafting information and planning for FFXIV!
FFXIV GARDENING — The FFXIV Gardening Database is a collection of everything related to gardening in Final Fantasy XIV: A Realm Reborn. It was created to organize and visualize the results obtained from crossbreeding.
SIGHTSEEING LOG HELPER — This tool will help those trying to complete their pesky Sightseeing Log by letting them know upcoming weather patterns for each zone!
EUREKA TRACKER — For everything and anything to do with Eureka mobs, tracking and weather patterns.
FFLOGOS — for tracking of items/actions related to Eureka.
FFXIVSQUADRON — A comprehensive tool that helps you assess the success rate of various squadron missions.
FFXIV CHOCOBO COLOUR CALCULATOR — Will calculate what chocobo feed you will need to get from your current colour to your desired colour. *rng not included.
FFXIV HOUSING — A site specialising in the documentation of all housing items available in game.
HOUSING SNAP — A compilation of player-made housing designs. Can be used for inspiration or places to visit!
MISC
NPC CHAT BUBBLES — Would you like more NPC chat bubbles for edits? Say no more! Created by @alexoisxiv.
OLD TUMBLR LAYOUT BY PIXIEL — While not XIV specific I know a lot of people aren't fans of the new Tumblr layout, so this is a fix that will revert it to an as close as possible approximation of the new one. I won't tag the creator as I don't think they're in the xiv community, but it's run by @/pixiel!
HOW TO CURSE LIKE AN ISHGARDIAN — Do you want to make the church blush? Do you want to incur the wrath of Halone? @stars-and-clouds has compiled a list of appropriate curses/swear words for you!
FINAL FANTASY XIV SIDEQUEST GUIDE - HEAVENSWARD EDITION — maintained by @chatty-moogle, this guide explores interesting sidequests in Heavensward that will give you more information about the lore, titbits about locals and other interesting information!
TRUST BANNERS FOR XIV — If you have ever wondered how people mimic the Trust banners used in XIV, look no further! @locke-rinannis has a template for you.
MAKING USE OF RECOMMENDATIONS — created by @autumnslance, this guide will help you make your recommendations tab useful rather than annoying.
BOTANICA EORZEA — A guide to the flora of Eitherys and her reflections, including fungi and seedkin. For reference in writing and roleplaying. Maintained by @tinolqa.
GPOSE TIPS — A tutorial on how to achieve clarity and detail in your XIV screenshots! Created by @aryalaenkha.
UI MACRO MENUS — A guide on how to use macros to create small UI menus for XIV. Written by @diskwrite-ffxiv.
TYPHON GATE RESEARCH — Created by @mcstronghuge, these are the statistically best places for your character to stand for the Typhon Gate!
CHANGELOG
HYDAELYN HEALTH HAVEN has been removed at the request of the owner.
Moved THE BALANCE higher on the list to reflect alphabetical sorting, excluding names that start with The.
Misc formatting as needed.
Added some additional clarification around large-scale discords/spaces; in particular: Large-scale community discords such as the XIV Reddit Discord, Hunts, GPOSE promotions and broad-space roleplay servers that harbour a large number of people and are publicly available to all. These may not have an RP focus but will assist in other aspects of the game. Also includes well-known tools/resources that are utilised by large groups of people and assist in gameplay elements.
Added a quick-jump menu to the bottom of each of the table of contents menus to assist in navigation.
Want to submit? You can either fill out the google form here, send me an ask with the relevant information contained on the Compendium, or join my Discord at SEAFLOOR (21+ only)!
I am sure there's probably a couple of things I have missed or links/formatting that might be broken. Please don't hesitate to let me know if anything is out of place. I'm going to take a break now. I'm pretty sure that's the biggest edit that's ever going to occur on this document!
#final fantasy xiv#ffxiv#crystal rp#crystal roleplay#。・゚゚・ — sea's community compendium#。・゚゚・ — sea speaks
162 notes
·
View notes
Note
I'm sure you've answered this before but I'm super curious if you might have a place you maybe share tips for post processing gposes?
Heya! Actually never recieved ny questions about it lol
I never really made a guide/tutorial of how I edit bcs I just use knowledge/process that I also apllied on digital illustration (it's been a year that i dont draw anymore but for around 6 years I made freelancer work and even more time just as a hobbie!) this also helps with compositions and colors sometimes!
Ok, so. My use of post process will depend on the pic mostly! Sometimes I'll do more and others i'll do less. I can show some pics with no post (gshade only) & with post, and explain a little.. dunno if it will be useful tho!

This one my main nitpick was with the polygons sticking out, as the 3D models are not 100% smooth, and with the way I pose they can get worse sometimesl ol take a look specially on the arms/forearms, blonde's dress on shoulders.. I also corrected the light and small bits of shadows on the bun's face with blend tool. Eyes highlights and little dot at the blonde's mouth corner

Here I too mostly worked on smoothing the face shadows as they had no transition and that bothered me. Also the top left lip corner had a weird shadow bcs of the weird posing that I fixed (sometimes if better to fix this kind o ting on post then fight with the model in game bcs that can become frustrating!) The smoke and pacticles effect was with StageDepth.fx on gshade!

This one was mostly face light reflections (specially blonde's face and eyes! And her glove too, forgot that) and miqo's mouth/cheeck corner was too harh so I smoothed a little! Obviusly the tube effect, and I think some more light reflections, like miqo's vest lapel and tie. The blu light effect was achieved with ktisis light actor and the red was from the in game cauldron. The light depth and contrast was achieved using RTGI.fx from MartysMods iMMERSE pack!

Here was more fx like the dus and movement blur. Ronka's face (eyes and inner of mouth that had shadows) And characters face shadows that were too light! In the first, the bike mount was with movement enabled so it already had a little ground dust!

This one had basically just the spell effects and better blur on bg. The face was only frown lines under the inner eye corner!
Some other pics I didn't use post at all, not even for color correction, like tose down here


This ^ one I only did color correction for the white sky light that was too f strong lol the leaves are stage depth too!
Sorry again for the long ass answer and post :')
44 notes
·
View notes
Text

About Ava - Warrior of Light Warning: Adult themes, FFXIV Spoilers through Dawntrail
✧ I'll update this post on a regular basis ✧
Ava's Story
Name: She goes by Ava, a nickname given to her by Baderon Azem name: Aphrodite Pronouns: She/her
Theme Song: Heroes Fall - Hidden Citizens
✧ Relationships ✧
✧ Love Interests - it's complicated. ✧
Ava has a number of romantic interests that don't work out before she becomes involved with G'raha Tia.
✧ Friends and Family ✧
✧ Y'shtola Rhul: Best and closest friend and confidante. ✧ Alphinaud Leveilleur: Close friend and surrogate son. ✧ Alisaie Leveilleur: Close friend and surrogate daughter. ✧ Thancred Waters: Bar brawl buddy, wing man, close friend. Most likely to get into trouble with.
✧ Personality ✧
She is a force of nature that is stubborn to a fault, an imp that has perfected lookin innocent, and a little scary sometimes. She is kind, and makes time for those that need her.
✧ My World Canon ✧
✧ All AU stories, alternate WoL stories, etc., are canon. It's just another shard, maybe even another Source.
✧ General ✧
My FFXIV Music Playlist on YT My FFXIV Humor Playlist on YT
✧ I do my best to spoiler tag, but sometimes I forget. I'm human. Keep that in mind when you read my blog.
✧ I suffer from anxiety. Please be kind with your comments.
✧ I reblog. A lot. If you follow me, prepare for onslaught. 98% of it will be FFXIV content.
✧ I love ALL of the OCs. Modded, not modded, pick your orientation, couples, throuples, AUs, MSQ stories - I adore them all and I love this community.
✧ Tutorials - both mine and others ✧ Gposes and Screenshots ✧ My Animations ✧ Crossover Events ✧ My Favorite Posts ✧ Epic Moots ✧ My Voice ✧ Ava Bun Archive
✧ If you want me to see something and I missed it, tag me! Poll? Tag me! I love tags and do my best to go through them all.
✧ Toxicity, anti-trans sentiment of any kind, homophobia, misogyny, TERFs and racism will not be tolerated and it isn't up for debate. Anything along these lines will result in an immediate block.
Link to where I got this great template, credit to @onepunchcatboi General section inspired by @ishgard
8 notes
·
View notes
Text
I wanted to put together a little video tutorial for my DRK mains on how to get this particular shot in gpose! it's really easy to achieve especially if you don't have any mods. also I'm sorry about my mics quality, I'm stuck using the mic in my PS5 controller for the time being ^^;
400 notes
·
View notes