#highcharts dashboard
Explore tagged Tumblr posts
Visit Tumblr Blog
Explore Tumblr blogs with no restrictions, modern design and the best experience.
Last Seen Tumblr Blogs


Fun Fact
Post activity is at the highest at 4:00 pm EDT; notes peak at 10:00 pm EDT.
Text
HighCharts API And Looker Chart Config Editor Tips & tricks

Make your data story more comprehensive by using personalized Looker charts and visualizations with HighCharts API.
Looker Chart Config Editor Tips And tricks
A collection of numbers is all that data is unless it can be used to tell a story and obtain further information. Google Cloud is always working to enhance Looker’s features so you can work together with reliable metrics and share your data stories. It has added the capability to add bullet chart, sunburst, venn, and treemap visualizations to Looker Explores and dashboards by utilizing the Chart Config Editor to previously available Looker visualizations. It wanted to offer some best practices on how to use the Chart Config Editor to enrich your visualizations and make meaningful data experiences so that you can make the most of these new Looker visuals.
HighCharts API
For those who are unfamiliar with the Chart Config Editor, Looker visualizations show your data using the Highcharts interactive charting library. You may customize your visualizations by utilizing the editor, which exposes portions of the Highcharts library API. In order to enhance your visualizations, it will explore the Highcharts API and discover some useful Chart Config Editor tips and tricks in this post. You need have access to Chart Config Editor and be familiar with the JSON format in order to fully comprehend its examples in order to get the most out of this post.
HighCharts API reference
In a line chart, set the labels and look of each line
Consider a representation of a line chart that shows several time series, each represented by a single line. You might find it difficult to distinguish between the lines in the dashboard viewer, or you might want to highlight a certain line more than others. Highchart offers several `series} properties that you can use to modify how each line is presented and styled. Among the qualities are:
{dashStyle} to alter the pattern of each line
To alter the thickness of every line, use {lineWidth}.
{opacity} to alter the opacity of each line
Use dataLabels to add labels to the values or data on a line.
You can apply each {series} property in any combination to make the data in your line visualization easier for your stakeholders to grasp.
By setting the default styling across all lines using Highchart’s plotOptions attribute, you can further simplify the settings shown in the above sample. Afterwards, you may use the {series} element, which changes the default styling, to further modify individual lines. The following Chart Config Editor setting sample shows both the overriding and default styling:
Allowing visuals to scroll inline
Imagine a column chart visualization where each column represents a month and the date time x-axis spans several decades. The width of your dashboard limits the visualization you may use, so as time goes on, the widths of each column get smaller and the monthly or annual trends are compressed, making them difficult to grasp.
To enable horizontal scrolling for your stakeholders through a column or line-chart visualization, try defining the width of your visualization using Highchart’s chart.scrollablePlotArea} attribute. TheminWidthattribute allows you to establish the minimum width of your visualization, while thescrollPositionX` attribute allows you to specify the visualization’s starting scrolling position. The visualization’s minimum width of 2,000 pixels and its initial scrolling position to the right are established in the Chart Config Editor configuration sample below.
chart: { scrollablePlotArea: { minWidth: 2000, scrollPositionX: 1 } },
Try experimenting with the scrollPositionY} andminHeight` attributes as well to allow scrolling vertically in your visualizations.
Complete control over the data labels for additional chart visualizations, such as pie charts
You can name each pie slice using the plot menu options in a pie chart visualization, but usually you can just display the slice’s value or percentage. To fully comprehend all of the data, the observer must perform a double take, glancing between the legend and the data labels. Additionally, all of the data will not be accessible in a scheduled PDF delivery of the dashboard containing the visualization, even if users might mouseover each pie slice to view it.
To help your stakeholders quickly extract information from your charts, you can use the Chart Config Editor to display any information that is available on the HighCharts PointLabelObject on the data labels. This includes the percentage and value displayed simultaneously. You can also further customize the labels with HTML. To modify the format and style of a chart’s data labels, you must set up the previously stated Highchart {dataLabels} attribute from its first example. The following {dataLabels` attributes need to be configured:
{enabled}, as demonstrated in our first example, to enable data labels on the chart
To enable HTML styling of data labels, use useHTML.
To apply CSS styles to every data label, use {style}.
Use {format} to specify the piece and format.
The data labels of the pie chart are shown in the Chart Config Editor configuration sample below with a font size of 12 pixels. If the property name for the format} attribute is enclosed in curly braces, then all of the PointLabelObject's properties can be shown in the data label. The example assigns the following string to theformat` attribute}:
The pie slice name bolded with the key attribute of the PointLabelObject within an HTML Draw Focus On This Aspect
The value of the data point with the `y} property of the PointLabelObject
Specifies the percentage of the data point with one decimal place formatting using the PointLabelObject’s percentage property
The format of the final data label is as follows: Category: 11.5%, 596524.
Keep in mind that the tooltip.format} attribute and thedataLabels.format} attribute function similarly; the documentation has more information on this. Also take note that for pie charts, it need the plotOptions.pie.dataLabels} attribute. You must override theplotOptions.line.dataLabelsattribute if you wish to format a line chart with the same data-label style. The interface and functionality of many chart kinds are mostly shared via thedataLabels` element.
Make your charts more insightful and powerful
We hope that these illustrations will work as a springboard for you as you investigate the HighCharts API and discover how to set up your Looker visualizations to convey useful and compelling narratives. You now know how to enable inline scrolling of visualizations, edit data labels, and change the appearance of each series of your data using the Looker Chart Config Editor and HighCharts API.
Read more on govindhtech.com
#HighChartsAPI#LookerChartConfig#EditorTips#GoogleCloud#dashboard#Lookervisualizations#Makeyourcharts#chartvisualizations#datalabels#tricks#api#technology#technews#news#govindhtech
0 notes

Text
JavaScript Bar Chart
There is more to bar charts than meets the eye with data visualization. JavaScript Bar chart is just one example of many visual tools which can be used to convey information in the most effective way. Bar charts, bar graphs, pie charts, or other charts and graphs are one of the most common methods of displaying information of various kinds.
#JavaScript Charts#Maps Customization#custom maps online#custom pdf#highcharts dashboard#dataviz tools
1 note
·
View note
Photo

And here is the World's first book, written by Sourabh Mishra which talks about How to develop Interactive and stunning dashboard using Highcharts with Angular. #highcharts #angular
1 note
·
View note
Text
Awesome Things to Do with PHP Web Development in 2023
PHP is a versatile programming language that is used for web development. When it comes to website development, PHP web development is always a popular choice for many years. PHP continues to evolve, it provides developers with new opportunities and creates amazing websites with its flexibility and functionality. Many incredible things can be done with PHP web development. As a website development company in India, you can leverage the power of PHP to create amazing websites that are both functional and attractive. We will explore some of the top things that website development companies in India and website developers in India can do with PHP in 2023.
PHP web development is used to create responsive websites which adapt to any device. With the increasing use of mobile devices, websites must be optimized for mobile screens. Using PHP web development techniques, website developers in India can create responsive websites and provide a seamless user experience across all devices.
PHP web development can be used to create e-commerce websites that are feature-rich and highly customizable. Online shopping has become a part of our daily lives, and businesses need to have an e-commerce website that meets to the needs of their customers. With PHP web development website development companies in India can create e-commerce websites that are visually appealing, easy to navigate, and provide a seamless checkout process.
PHP web development can be used to create customized content. Without requiring technical knowledge CMS allows website owners to create, manage, and publish digital content. To get fit your client's specific needs you can build custom CMS with PHP, you can use frameworks like WordPress, Joomla, and Drupal to create a user-friendly and scalable CMS that offers robust functionality.
PHP web development can be used to create dynamic web applications that provide a rich user experience. Website developers in India can create web applications with PHP that are highly interactive, responsive, and provide real-time updates. This will create opportunities to create web applications for various industries.
PWAs are web apps that offer an immersive user experience and offline functionality. They look and feel like native mobile apps but are accessed through a browser and can be installed on a user's home screen. With PHP, you can build PWAs that are fast, reliable, and engaging.
Chatbots are gaining popularity as they offer personalized customer support, answer frequently asked questions, and provide round-the-clock assistance. With PHP, you can build chatbots that integrate with popular messaging platforms.
With PHP, you can build web scrapers that can collect data from multiple sources and store them in a database. You can use this data for market research, competitor analysis, and lead generation.
With PHP, you can build web scrapers that can collect data from multiple sources and store them in a database. Web scraping is the process that automatically extracts data from websites. This data is used further for market research, competitor analysis, and lead generation.
With PHP, you can create APIs that can be integrated with various applications and services. You can use frameworks like Laravel, Symfony, and CodeIgniter to build robust APIs that offer security, scalability, and flexibility and the systems can communicate with each other seamlessly.
Interactive dashboards allow users to visualize data and make informed decisions. With PHP, you can build interactive dashboards that integrate with various data sources like databases, APIs, and spreadsheets. You can use frameworks like D3.js, Highcharts, and Chart.js to create stunning visualizations.
Machine learning is an emerging technology that can help websites provide personalized recommendations, predictions, and insights. With PHP, you can integrate machine learning algorithms into your websites using frameworks.
Microservices architecture allows you to break down your application into small, independent services that can be developed, tested, and deployed separately. With PHP, you can use frameworks like Lumen, Silex, and Slim to build lightweight and scalable microservices.
To create awesome websites in 2023 PHP web development will offer an array of opportunities.
0 notes
Photo

¡Hey! I am a Professional Computer Scientist, and I will not going to fix your Computer, Printer, and neither your WiFi connection. ¿Want to know why? Because I'm not Technical Support of anyone, well, only for my fiance Idania Margarita de España @idavart. Just don't be a dickhead, type in your Web Browser @google and find the solution of your issues and if you don't know how to read, go to @youtube. ¿How many @friends you have that expect that from us? I got a complete bunch of idiots who pretend to be unuseful on Technical issues, but they are awesome finding free Porn. Here I am with my workstation (Lovely fellows of @apple sponsor me with a Macbook Pro), having coffee in @tucafearabica, Orange Juice and Vaping with @wismec and @smok_tech, and tasting new e-liquids like Grapefruit @skwezed, Juicy Mango with Strawberry @fruitpopeliquid and Cake Berry Blaster @rocktpunch. If you live at Caracas, go to the @todovaporstore awesome attention they had everything you want. Building a Software Development Proposal, make an awesome Landing Page and Dashboard using Angular, Bootstrap and JQuery, probably Highcharts too; also a Back-end using NodeJS, Express, Mongo for building API Restful and why not some JSON Web Tokens. The Project is incredible, really awesome. I had a long time that I don't work with Ethical Hackers and is amusing. I am ready to Rock n' Code. So have your eyes wide open, opportunities like this one are few, don't be afraid, just buckle up and enjoy the ride. ¡That's all for tonight my dear mates, and Let's get ready to rumble!. Photography made by an awful phone like @samsungmobile Galaxy J2 Prime (People of @oneplus sponsor me with nice smartphone). #computerscience #codinglife #entrepreneur #developer #frontend #backend #meanstack #mongo #express #angular #nodejs #website #life #love #software #security #ethicalhacker (at Café Arábica) https://www.instagram.com/p/BmUwIUIn6k8/?utm_source=ig_tumblr_share&igshid=ay8n8k0v1152
#computerscience#codinglife#entrepreneur#developer#frontend#backend#meanstack#mongo#express#angular#nodejs#website#life#love#software#security#ethicalhacker
16 notes
·
View notes
Photo

Download Syndron - Bootstrap5 Admin Template on Codecanyon
Description Syndron - Bootstrap5 Admin Template :
Download Syndron - Bootstrap5 Admin Template. The theme releases on Thursday 4th March 2021 By The author codervent on Codecanyon. It’s makes use of with admin,admin dashboard,admin template,bootstrap,bootstrap 5 admin template,bootstrap admin,dashboard,responsive,responsive admin,internet app. Item Title: Syndron - Bootstrap5 Admin Template Category: html5/templates Price: $15 Author: codervent Published Date: Thursday 4th March 2021 07:22:22 PM More Info / DownloadDemo
Description
Syndron is a responsive bootstrap 5 admin template. It has a number of dashboard variations. It is constructed with the most recent bootstrap 5 frameworks. It works on all main internet browsers, desktops, and all smartphone units. It is an easy-to-customise and developer-pleasant template. It has an enormous assortment of UI parts with the most recent jQuery & bootstrap plugins. It can be utilized for any kind of internet purposes eCommerce dashboard, customized admin panel, mission administration admin, CRM, cms, and many others.
Template Key Features
Multiple Color Dashboard
60+ Responsive HTML Pages
Easy to Customizable
200+ UI Icons
Multiple Chart Options
W3C Validated Code
Multiple Table Layout Examples
100% Html Responsive Pages
Data Table with Paging & Sorting
Different Type Form Layouts
Validation Forms
Range Slider
Forms Wizard
Invoice Page
User Profile Page
Different Type Notifications & Sweet Alerts
Login/ Registration Pages
Compatible with Small, Medium & Large Screens
Dynamic & Static Widgets
Well Documentation
Sources and Credits
getbootstrap.com
jquery.com
Chart JS
Boxicons
Apex Charts
Highcharts
Gmaps
Jvector Map
Lineicons
Themify Icons
Flag Icons
Summernote
Fullcalendar
Bootstrap Datatable
Bootstrap Datepicker
Select2 org
Note
We have used Images just for demo functions. Images usually are not included within the obtain bundle.
More Info / DownloadDemo #Syndron #Bootstrap5 #Admin #Template
#admin#admin_dashboard#admin_template#All_Code_amp_plugin#bootstrap#bootstrap_5_admin_template#bootstrap_admin#Code_amp_plugin_Rising_stars#dashboard#HTML5_Rising_stars#HTML5_templates#responsive#responsive_admin#Rising_stars#web_app
0 notes
Text
15 Data Visualization tips you need to know to make Effective Charts
There are many great resources available that offer tips on effective design for data visualization. But who has time to search various articles, websites, and research articles for useful tricks and hidden gems? We want to help you create great graphics right now, so we've put together this list of quick tips for you to consider when creating your next presentation.
15 quick data visualization tips
1. Before you start designing your board, stop to think about your story. What are you trying to say? Once you understand your message, the process is much easier.
2. Keep it simple. If it doesn't support your story, leave it out. You don't want to saturate your boxes with unnecessary text, colors, drop shadows, or 3D images.
3. Give your painting a strong title that clearly frames your message. Great titles make graphics more memorable and helpful.
4. Scale your board appropriately. Always take care that the scale you use on each axis must have equal intervals. This is a quick way to make sure your chart is displaying correctly.
5. Choose a font for your title, axes and legends labels that are easy to read. You want people to connect to your message quickly.
6. For the sake of transparency, always quote your sources. This builds credibility, builds trust, and gives your readers the opportunity to visit the source for more information.
7. Organize your data logically. Carefully arrange all columns and bars in order by value to make them more easy to compare at a glance.
8. Use color to draw attention to a specific part of your graphic. Bright colors quickly attract attention, helping to get the message across faster especially when you’re working on map visualization.
9. Avoid making rainbows or using mixed color palettes. They may be pretty, but they are not necessarily effective. We suggest that you choose a color for the whole picture or use a touch of color to highlight the important areas in the map visualization or visualization through graphs.
10. Do not select the data you choose to view. While you may have impressive numbers to share, you should give context and tell the full story.
11. Label your data directly, so you can make your table easier to understand quickly. Put labels next to the corresponding lines or bars if a legend takes too long to read.
12. Grid lines should be used only if they make your data easier to read. Play around with vertical and horizontal grid lines until you feel your frame is clear and concise.
13. Always use company colors, fonts, and branding when presenting data internally. This makes your graphics look polished and professional.
14. Try to avoid using pie charts to make comparisons. Pie charts are difficult to compare at a glance; it is best to use bar or column tables.
15. It's easy to get lost in a visualization when you try to do it right. Give it to a friend or colleague to see if they can understand your message in 30 seconds or less.
#maps visualization#Maps Customization#data visualization#highcharts dashboard#data science#Dataviz tool
0 notes
Photo

Angular Admin Dashboard Panel from scratch using Angular Material, highcharts and flex-layout 🎉🎉 http://ehelpdesk.tk/wp-content/uploads/2020/02/logo-header.png [ad_1] The goal of this tutorial is to ... #adminpanel #androiddevelopment #angular #angular8 #angularadmindashboard #angularadminpanel #angularadmintheme #angularcharts #angulardashboard #angularflex-layout #angularhighcharts #angularmaterial #angularmaterialdashboard #angulartutorialforbeginners #angulartutorials #c #css #dataanalysis #datascience #deeplearning #development #docker #highcharts #iosdevelopment #java #javascript #machinelearning #materialangular #node.js #python #react #unity #webdevelopment
0 notes
Text
Introducing Netlify Analytics
You work a while on a side project. You think it's pretty cool! You decide to release it into the world. And then… it goes well. Or it doesn’t go well. Wait, is that right? You forgot to add analytics — it just didn’t cross your mind at the time. Now you’re pretty curious how many people have been visiting the site, but… you’re not sure. Enter Netlify Analytics.
There are so many times where I:
Forget to add analytics
Don’t want to incur the extra page weight, or
I'm concerned with privacy issues
I released a CSS Grid Generator last month and I forgot to add analytics. The release went well, but now it's a bit of a black box for me as far what happened there or if I need to adjust a release in the future. Now, however, I can enable Netlify Analytics and see into the past without having lost any information. Sweet.
Netlify Analytics doesn’t have a ton of bells and whistles — it’s not meant to be a replacement for super comprehensive marketing tools. But if you want to get some data about your site without adding a lot of scripts, it can be a handy tool.
One really nice thing about it is the accuracy. Since the data is coming from the server, you can have a clear picture of what the server actually served, rather than relying on a third party which might have varied reporting due to things like add blockers that can skew client-side reporting (15% of users are estimated to use tools like Ghostery, for instance), caching, and other factors.
The Analytics Dashboard
The dashboard for each site shows some “at a glance” information:

Then you can dive into more detailed information by specific date:

There’s a bit of information from top sources and top pages:

There's an area for "Top Resources Not Found", which shows any pages, images, anything that your visitors are trying and failing to retrieve from your site. When I enabled it on mine, I was able to fix a broken resource that I had long forgotten about.
It’s going to be awesome being able to check how some of my dev projects are doing. But I'm also really excited to take that extra implementation step out of my work. The caveats to keep in mind is that your site needs to be hosted by Netlify in order to use the Analytics tools, and it's a paid feature. Any site you enable will show up to 90 days (3 billing cycles) in the “Bandwidth used” chart, and up to 30 days in all other charts if it’s old enough, however it could take up to 2 days between when you enable analytics and when your dashboard is calculated and populated.
Under the hood
The analytics dashboard itself is built with React and Highcharts. Highcharts is a JavaScript charting library that includes responsive options and an accessibility module. All of the components consume data from our internal analytics API.
Before development began, we conducted an internal comparison survey of data visualization libraries in order to choose the best one for our needs. We landed on Highcharts over other popular options like d3.js, primarily because it means any engineer at Netlify with JavaScript experience can jump in and contribute, whether they have deep SVG and D3-specific knowledge or not.
While the charts themselves are rendered as SVG elements, Highcharts allows you to render any text inside the graph using HTML, simplifying and speeding our development time and allowing us to use CSS for advanced styling. The Highcharts docs are also top notch and offer a ton of customization options through their declarative API.
We used the Highcharts wrapper for React in order to create reusable React components for each type of graph. The "Top sources," "Top pages," and "Top resources not found" cards use a different component that displays a <table> using the data passed in as props.
One of the trickier challenges we encountered on the UI side while building these graphs was displaying dates along the X axis of the area charts in a way that wouldn't look overwhelming.
Highcharts offers an option to customize the format of an axis label using a JavaScript callback function, so we hooked into that to display every other date as a label. From there, we wrote an algorithm to capture the first date of each month that was being displayed and add the month name into the markup for the label, making the UI a bit cleaner and easier to digest.
Other Analytics Alternatives, with Snippets
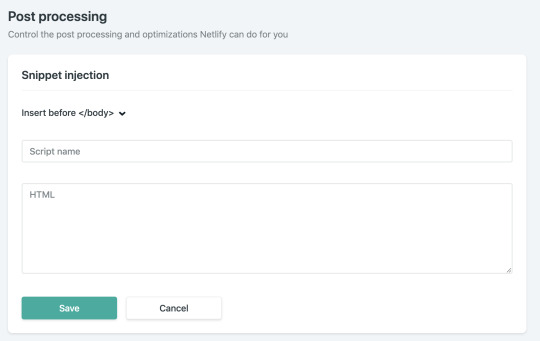
If you’d still like to run third-party scripts and other kind of analytics, Netlify has capabilities to add something globally to <head> or <body> tags. This is useful because, depending on how your site is set up, it can be a bit of a pain to add third-party scripts to every page. Plus, sometimes you want to give the ability to change these scripts to someone who doesn't have access to the repo. Go to the particular site in the dashboard, then Settings → Build & Deploy → Post processing.
That's where you will find Snippet Injection:

Click "Add snippet" and you’ll be able to select whether you want to add the third-party snippet to the <body> or the <head> tag, and you’ll have a change to post your code in HTML. For example, if you need to add Google Analytics, you’d wrap it in a script tag like this:
<script async src="https://www.googletagmanager.com/gtag/js?id=UA-68528-29"></script> <script> window.dataLayer = window.dataLayer || []; function gtag(){dataLayer.push(arguments);} gtag('js', new Date()); gtag('config', 'UA-XXXXX-XX'); </script>
You’ll also name it so that you can keep track of it. If you need to add more later, this is helpful.
That’s it!
You’re off and running with either the new Netlify Analytics offering that’s built-in or a more robust tool.
The post Introducing Netlify Analytics appeared first on CSS-Tricks.
Introducing Netlify Analytics published first on https://deskbysnafu.tumblr.com/
0 notes
Text
Idea Journal #3
My topic for Idea Journal #3 is on Design of Automobile Dashboards / Panels. My design process for the Idea Journal begins with research on the topic. From the readings on information graphics case studies, it notes the importance of “understand(ing) a data set” and information you are designing with. “Seventy-five percent of our time is spent reporting, gathering, and distilling information.” This is relatable while researching for this specific topic (as I’m not very familiar with car engines and dashboards to start with).
As designers, this is important as we cannot know about everything in the world. For me, in the process of gathering information, it is just as important to know the details as it is with the overall and complete picture. It is only when research is thorough (when you feel like you know enough about the topic) to know what the key information is, the message to deliver and what details to eliminate.
Research
Here, I’ve researched on some basic information of automobile dashboards. From its definition, automobile dashboards are used to display controls for vehicles’ operations. The most common configurations of the dashboards are: Speedometer, Tachometer, fuel and temperature indicator.
Below are common designs of dashboards:


Below are common designs of specific speedometers / tachometer / fuel indicator:

Below are dashboard placements:

I’ve also researched on other forms of dashboards:

Dashboard for motorcycles with limited space

Dashboard for large trucks

Dashboard for airplanes
Asking Questions as Inspirations
The readings discuss experimentation and inspiration as the heart of the creative design process. When we are experimenting, we look, see, respond to the situations and circumstances. Our likes and dislikes, interests and experiences all shape and influence our design. From these various aspects and according to my own preferences, I came up with some questions to fuel the research and design process.
From the basic configuration of dashboards (with only four key features mentioned above), why do automobile dashboards appear rather clustered? What are all the other information provided? Are they relevant?
Are the clusters of information distracting the drivers? How do the drivers interact with the information?
How many milliseconds do drivers have to glance the dashboard while driving?
Why are modern dashboards providing information in circular shapes?
Why are the placement of dashboards typically behind the steering wheel?
With individual experiences and opinions, we then come up with different ways to solve our problems. Personally, I am someone with limited capacity when it comes to dividing attention and multitasking. Therefore, I dislike cluster and distractions in information (thus the first question raised). My preference is then to keep designs minimal and having only the essential information so it is free from distractions.
Below are some minimal design inspirations of dashboards I found:


Design Failures
Industrial Complexity

The textbook readings examine that the challenge in creating info graphics is to translate technical concepts for general audiences. It is the attempt to give a less sophisticated audience a better understanding of the technological innovations. I believe this can be applied to automobile dashboards. The average driver (me) is usually very confused and helpless when the unusual icon lights up on the dashboard. There are possibly be over 100 icons lighting up on the dashboard. With complex computerized cars today, these light indicators (attempting to tell the driver the problem) become impractical as one cannot simply find and fix the problems by hand according to the signals as they now have to be checked and fixed by the computer systems. Instead of having each icon specifically about the different parts of the engine, they can be simplified and grouped into, for example, actions that are required (regular checkup / maintenance). This can simplify information and avoid confusion as drivers would then exactly know to take the right actions according to the light indicators.
Analyses of Design Failures

After research, glance-ability and simplicity are two key factors for effective car dashboards. A clear structure and hierarchy is important to avoid confusion in the information provided. In the example above, the speedometer attempts to provide both KM/H and MPH information. These two different scales combined together create a cluster of numbers in the speedometer. If the driver wants to know its speed in terms of KM/H while driving, they would have to pay close attention to inner circle with small numbers (and overlapping numbers from other information), this makes the speedometer very low in glance-ability. Sticking to the essentials - picking only one scale and taking out the information in the middle - will help clear up the speedometer for a more clear display of information.

In the example above, the tachometer (left circular area) with a red needle is larger than the speedometer (digital screen in blue font). At a glance, this can become very confusing as drivers’ attention may be easily diverted to tachometer rather than the blue digital speedometer. Changing the colours and sizes of the different features here can help divert drivers’ attention when operating the vehicle.

Here, we have a speedometer being placed on the right side of the driver’s seat. While driving, the driver now needs to look down to the its right side to check the speed. This is a rather inconvenient location for information as it is not a natural movement for the driver’s head and eyes to tilt downwards to the right.
Experimentation
Sketches

Here, I’ve used sketches and doodles to try out new ideas as it is one of the most immediate ways for a designer to explore their ideas by visually building and refine them. While doodling the traditional ways of displaying information for a speedometer, I also took inspirations from weights, watches, bar charts, etc. to see how they would work when displaying speed information. I find that this is a good way to visualize thoughts. When imagining ideas in the head, it is often too easy to idealize the concepts. It is only when you sketch it out to realize the flaws in the designs.

I have sketched out possible placements of these information (as opposed to traditionally having the dashboards behind the steering wheel). The idea comes from avoiding drivers to take their eyes off the road to get information. Limited eye and head movement is required when dashboard information is placed on the window.
Code Snippets
Below are some code snippets I found online for creating animated Speedometer.
#1 Minimalistic Semi-Circle Speedometer
<style> $speedometerSize : 400px; $speedMarkerWidth : 5px; $speedMarkerHeight : 20px; $color : saturate( skyblue, 70%); $totalMarkers : 13; $kmTotal : 240; // ------------------------------- * { box-sizing: border-box; }
html, body { width: 100%; height: 100%; }
body { font-family: 'Sarpanch', sans-serif; background:#1a1a1a; }
.speedometer { width: $speedometerSize; height: $speedometerSize; display: block; margin: 0 auto; position: relative; transform: rotate(-90deg); }
.speed { text-align: center; color:$color; font-size: 5em; text-shadow: $color 0 0 $speedMarkerWidth*2; transform: rotate(90deg); transform-origin: 0 0; position: relative; left: 1.7em;
&:before { content: '-'; position: absolute; top: 0; left: 0; width: 100%; animation: kmh 6s linear 0s 1 forwards; }
span { font-size: 0.3em; display: block; } }
[class^="speed-marker-"] { height: $speedometerSize/2; opacity: .4; }
[class^="speed-marker-"], [class^="speed-marker-"]:after { width: $speedMarkerWidth; }
[class^="speed-marker-"], [class^="speed-marker-"]:after, [class^="speed-marker-"]:before { display: block; position: absolute; top: $speedometerSize/2; left: 0; margin-left: floor($speedMarkerWidth/2) * -1; transform-origin: top center; }
[class^="speed-marker-"]:after { content: ' '; height: $speedMarkerHeight; }
[class^="speed-marker-"]:not(:first-child):before { content: ' '; height: $speedMarkerHeight + 3; width: floor($speedMarkerWidth / 1.5); margin-left: -1 * $speedMarkerWidth * 5; }
[class^="speed-marker-"]:after, [class^="speed-marker-"]:before { background: $color; box-shadow: 0 0 $speedMarkerWidth $speedMarkerWidth/2 $color; }
@keyframes toggleMarkers{ 0% { opacity: .4; } 50% { opacity: .7; } 100% { opacity: 1; } }
@keyframes kmh{ @for $i from 0 through ($totalMarkers - 3) { @if(($i * 10) < 100){ #{($i * 10)}% { content : '#{($i * 20)}'; } }@else{ 100%{ content : '#{($kmTotal)}'; } } } }
@for $i from 1 through $totalMarkers { .speed-marker-#{$i} { $d : 0-($i * $totalMarkers); transform: rotate(#{$d}deg); animation: toggleMarkers 500ms linear #{($totalMarkers - $i)/2}s 1 forwards; @if $i < ($totalMarkers/2) { &:before { transform: rotate(#{$i * 2}deg); } } } }
</style>
<div class="speedometer"> <span class="speed-marker-1"> </span> <span class="speed-marker-2"> </span> <span class="speed-marker-3"> </span> <span class="speed-marker-4"> </span> <span class="speed-marker-5"> </span> <span class="speed-marker-6"> </span> <span class="speed-marker-7"> </span> <span class="speed-marker-8"> </span> <span class="speed-marker-9"> </span> <span class="speed-marker-10"> </span> <span class="speed-marker-11"> </span> <span class="speed-marker-12"> </span> <span class="speed-marker-13"> </span> <p class="speed"> <span>km/h</span></p> </div>
#2 - Speedometer with Animation
<script src="https://code.highcharts.com/highcharts.js"></script> <script src="https://code.highcharts.com/highcharts-more.js"></script> <script src="https://code.highcharts.com/modules/exporting.js"></script>
<div id="container" style="min-width: 310px; max-width: 400px; height: 300px; margin: 0 auto"></div>
#3 - Full Circle Speedometer
<style>
#loader-wrapper{position: absolute; left: 0; top: 0; right: 0; bottom: 0; background: #000; z-index: 15; overflow: hidden;}
.loader{width: 150px; height: 150px; border: 1px #fff solid; position: absolute; left: 50%; top: 50%; margin: -75px 0 0 -75px; border-radius: 50%;}
.loader .loading{font-size: 10px; position: absolute; width: 100%; text-align: center; line-height: 14px; font-family: 'Century Gothic', sans-serif; font-style: italic; left: 0; top: 50%; margin-top: 20px; color: #fff; font-weight: bold; text-transform: uppercase;}
.loader-circle-1{width: 138px; height: 138px; left: 5px; top: 5px; border: 1px #fff solid; border-radius: 50%; position: absolute; border-right-color: transparent; -webkit-animation: spin 3s linear infinite; animation: spin 3s linear infinite; }
.loader-circle-2{width: 126px; height: 126px; left: 5px; top: 5px; border: 1px transparent solid; border-radius: 50%; position: absolute; border-right-color: #e81512; -webkit-animation: spin 5s linear infinite; animation: spin 5s linear infinite; }
.loader .line{width: 10px; height: 2px; background: #fff; position: absolute;}
.loader .line:nth-child(1){left: 16px; top: 50%; margin-top: -1px;}
.loader .line:nth-child(2){transform: rotate(45deg); -moz-transform: rotate(45deg); -webkit-transform: rotate(45deg); -ms-transform: rotate(45deg); left: 33px; top: 33px;}
.loader .line:nth-child(3){top: 16px; left: 50%; width: 2px; height: 10px;}
.loader .line:nth-child(4){transform: rotate(135deg); -moz-transform: rotate(135deg); -webkit-transform: rotate(135deg); -ms-transform: rotate(135deg); right: 33px; top: 33px;}
.loader .line:nth-child(5){right: 16px; top: 50%; margin-top: -1px;}
.loader .line:nth-child(6){transform: rotate(45deg); -moz-transform: rotate(45deg); -webkit-transform: rotate(45deg); -ms-transform: rotate(45deg); right: 33px; bottom: 33px; background: #e81512;}
.loader .subline{position: absolute; width: 3px; height: 2px; background: #fff;}
.loader .subline:nth-child(7){transform: rotate(22.5deg); -moz-transform: rotate(22.5deg); -webkit-transform: rotate(22.5deg); -ms-transform: rotate(22.5deg); left: 21px; top: 50px;}
.loader .subline:nth-child(8){transform: rotate(67.5deg); -moz-transform: rotate(67.5deg); -webkit-transform: rotate(67.5deg); -ms-transform: rotate(67.5deg); left: 50px; top: 21px;}
.loader .subline:nth-child(9){transform: rotate(112.5deg); -moz-transform: rotate(112.5deg); -webkit-transform: rotate(112.5deg); -ms-transform: rotate(112.5deg); right: 50px; top: 21px;}
.loader .subline:nth-child(10){transform: rotate(157.5deg); -moz-transform: rotate(157.5deg); -webkit-transform: rotate(157.5deg); -ms-transform: rotate(157.5deg); right: 21px; top: 50px;}
.loader .subline:nth-child(11){transform: rotate(22.5deg); -moz-transform: rotate(22.5deg); -webkit-transform: rotate(22.5deg); -ms-transform: rotate(22.5deg); right: 20px; bottom: 49px; background: #e81512;}
.loader .needle{width: 14px; height: 14px; border-radius: 50%; border: 1px #fff solid; position: absolute; left: 50%; top: 50%; margin: -8px 0 0 -8px; z-index: 1; -webkit-animation: pegIt 3s infinite ease-in-out; animation: pegIt 3s infinite ease-in-out; }
.loader .needle:before{content: ""; width: 0; height: 0; border-style: solid; border-width: 3.5px 50px 3.5px 0; border-color: transparent #e81512 transparent transparent; position: absolute; right: 50%; top: 50%; margin: -3.5px 0 0 0; border-radius: 0 50% 50% 0;}
@keyframes pegIt { 0% {transform: rotate(0deg);} 16% {transform: rotate(75deg);} 25% {transform: rotate(55deg);} 30% {transform: rotate(90deg);} 36% {transform: rotate(170deg);} 42% {transform: rotate(150deg);} 50% {transform: rotate(227deg);} 100% {transform: rotate(0deg);} }
@-webkit-keyframes pegIt { 0% {-webkit-transform: rotate(0deg);} 16% {-webkit-transform: rotate(75deg);} 25% {-webkit-transform: rotate(55deg);} 30% {-webkit-transform: rotate(90deg);} 36% {-webkit-transform: rotate(170deg);} 42% {-webkit-transform: rotate(150deg);} 50% {-webkit-transform: rotate(227deg);} 100% {-webkit-transform: rotate(0deg);} }
@-webkit-keyframes spin { 0% {-webkit-transform: rotate(0deg);} 100% {-webkit-transform: rotate(360deg);} } @keyframes spin { 0% {transform: rotate(0deg);} 100% {transform: rotate(360deg);} }
</style>
<div id="loader-wrapper"> <div class="loader"> <div class="line"></div> <div class="line"></div> <div class="line"></div> <div class="line"></div> <div class="line"></div> <div class="line"></div> <div class="subline"></div> <div class="subline"></div> <div class="subline"></div> <div class="subline"></div> <div class="subline"></div> <div class="loader-circle-1"><div class="loader-circle-2"></div></div> <div class="needle"></div> <div class="loading">Loading</div> </div> </div>
#4 - Three Different Colored Speedometer
<style>
@import compass
.speedometer width: 200px height: 100px position: relative border-radius: 200px 200px 0 0 margin: 20px auto //+box-shadow(inset 0 -5px 10px rgba(black, .1)) &:after background-color: #fff width: 20px height: 10px left: 50% margin-left: -10px border-radius: 20px 20px 0 0 content: "" display: block position: absolute bottom: 0 > .pointer position: absolute width: 0 height: 0 left: 50% bottom: 2px animation: speed-1 0.5s alternate infinite ease-in-out &:after content: "" display: block position: absolute top: 0 left: 0 border-style: solid border-width: 90px 0 0 3px border-color: #fff transparent transparent width: 0 height: 0
&.speed-1 background-color: #ed1c24 > .pointer animation-name: speed-1 &.speed-2 background-color: #f59122 > .pointer animation-name: speed-2 &.speed-3 background-color: #fcee21 > .pointer animation-name: speed-3 &.speed-4 background-color: #add732 > .pointer animation-name: speed-4 &.speed-5 background-color: #39b54a > .pointer animation-name: speed-5
@keyframes speed-1 from +transform(rotate(100deg)) to +transform(rotate(110deg))
>@keyframes speed-2 from +transform(rotate(130deg)) to +transform(rotate(140deg))
@keyframes speed-3 from +transform(rotate(175deg)) to +transform(rotate(185deg))
@keyframes speed-4 from +transform(rotate(230deg)) to +transform(rotate(240deg))
@keyframes speed-5 from +transform(rotate(250deg)) to +transform(rotate(260deg))
</style>
.speedometer.speed-1 .pointer
.speedometer.speed-2 .pointer
.speedometer.speed-3 .pointer
.speedometer.speed-4 .pointer
.speedometer.speed-5 .pointer
0 notes
Text
PHP Dashboard (Codeigniter, Highcharts, Ajax Form, MySQL) (Forms)
PHP Dashboard (Codeigniter, Highcharts, Ajax Form, MySQL) (Forms)
Purchase $14.00 Today, business is very Necessary decision-making right and fast. With our template of Dashboard, you can read of information by the information system interface Easier to understand as well and quickly intervening Assist state analysis so that it can assist in effective decision making. We provide the template of Dashboard that integrated with Database. It is very simple code and…
View On WordPress
0 notes
Text
There are many great resources available that offer tips on effective design for data visualization. But who has time to search various articles, websites, and research articles for useful tricks and hidden gems? We want to help you create great graphics right now, so we've put together this list of quick tips for you to consider when creating your next presentation.
15 quick data visualization tips
1. Before you start designing your board, stop to think about your story. What are you trying to say? Once you understand your message, the process is much easier.
2. Keep it simple. If it doesn't support your story, leave it out. You don't want to saturate your boxes with unnecessary text, colors, drop shadows, or 3D images.
3. Give your painting a strong title that clearly frames your message. Great titles make graphics more memorable and helpful.
4. Scale your board appropriately. Always take care that the scale you use on each axis must have equal intervals. This is a quick way to make sure your chart is displaying correctly.
5. Choose a font for your title, axes and legends labels that are easy to read. You want people to connect to your message quickly.
6. For the sake of transparency, always quote your sources. This builds credibility, builds trust, and gives your readers the opportunity to visit the source for more information.
7. Organize your data logically. Carefully arrange all columns and bars in order by value to make them more easy to compare at a glance.
8. Use color to draw attention to a specific part of your graphic. Bright colors quickly attract attention, helping to get the message across faster especially when you’re working on map visualization.
9. Avoid making rainbows or using mixed color palettes. They may be pretty, but they are not necessarily effective. We suggest that you choose a color for the whole picture or use a touch of color to highlight the important areas in the map visualization or visualization through graphs.
10. Do not select the data you choose to view. While you may have impressive numbers to share, you should give context and tell the full story.
11. Label your data directly, so you can make your table easier to understand quickly. Put labels next to the corresponding lines or bars if a legend takes too long to read.
12. Grid lines should be used only if they make your data easier to read. Play around with vertical and horizontal grid lines until you feel your frame is clear and concise.
13. Always use company colors, fonts, and branding when presenting data internally. This makes your graphics look polished and professional.
14. Try to avoid using pie charts to make comparisons. Pie charts are difficult to compare at a glance; it is best to use bar or column tables.
15. It's easy to get lost in a visualization when you try to do it right. Give it to a friend or colleague to see if they can understand your message in 30 seconds or less.
#maps visualization#Maps Customization#data visualization#highcharts dashboard#data science#Dataviz tool
0 notes
Text
HTML5 Data-Driven Documents (D3js) Charts (Charts and Graphs)
This easy to use library allows non-programmers (and programmers alike) to create a wide variety of customized D3js charts using straight HTML (no javascript coding necessary!) Create custom charts mashing up D3js charts with Highcharts and Mapbox streetmaps. This script simplifies the use of D3js charts on webpages. Check it out! FEATURES
• Supports the following standard D3js data visualizations- Bubbles, Force Graph Layout, Sticky Force Bubbles, Zoomable Circle Packing, Valandingham Bubbles, Calendar View (Horizontal), Calendar View (Vertical), Chord Diagram,Code Flower, Collapsible Radial Tree, Collapsible Tree, Heirarchal Edge Bundling, Parallel Dimensions, Starburst,- Treemap, Word Clouds • Customize charts above without writing a single line of JS (through HTML5 scripting!) – Placing multiple charts on a page, positioning charts, changing background colors, changing chart colors, adding drop shadow, changing the data used to render each chart, changing title and format, create popups with HTML formatted content, create popups with images, create popup with videos, create D3 charts with interactivity with other D3js charts, create charts with interactivity w/ Highcharts, create charts with interactivity w/ Mapbox. • Easy to install and use (simply unzip contents onto your server and start scripting. • Many easy to read examples • Easy documentation with code samples in JS sandbox (liveweave.com)- click here for the How-To Guide.
Version History v1.0 (10/24/2017) – Initial release
My other scripts at Codecanyon: - (BRAND NEW!!!) PHP Uber-style GeoTracker - PHP Dashboard v4.0 Collaborative Social Dashboards - PHP Dashboard v2.7 – Responsive Carousels/D3js/Highcharts/Highmaps/MySQL - PHP Dashboard v3.0 – For Mobile Devices - HTML5 Cloud Dashboard Designer - HTML5 Streetmaps - PHP Streetmaps OTHER LINKS
About Author – Data Ninja at Codecanyon.net
Data Ninja Portfolio at Codecanyon.net
Data Ninja’s Wordpress blog
Data Ninja’s Youtube Video Channel
Data Ninja’s Email:: [email protected]
from CodeCanyon new items http://ift.tt/2hkfUof via IFTTT https://goo.gl/zxKHwc
0 notes
Link
how to make bar chart in laravel,dynamic charts in laravel,laravel stacked bar chart,laravel google charts,laravel gantt chart,laravel organization chart,laravel highcharts,laravel statistics dashboard
0 notes
Text
ENABLE FASTER DATA-DRIVEN DECISION MAKING.
It is not an easy task to manage a large amount of data at one place if there is no Big Data. Let it be a desktop or a sensor, the transition can be done very effectively using Big Data. So, if you think your company requires Big Data development services, you must have to choose the company that offers amazing processing capabilities and authentic skills.
ProminentPixel is one of the best Big Data consulting companies that offer excellent Big Data solutions. The exceptional growth in volume, variety, and velocity of data made it necessary for various companies to look for Big Data consulting services. We, at ProminentPixel, enable faster data-driven decision making using our vast experience in data management, warehousing, and high volume data processing.
OUR BIG DATA SOLUTION & SERVICES We offer real time, customizable big data solutions at affordable prices with top-notch data analytics.
OUR TECHNOLOGY Our Big Data development team has proficiency in majority of Big Data ecosystem tools, technologies and efficient use of the technologies in solving complex real life problems.
WHY BIG DATA DEVELOPMENT? Finding out the hidden insights using Big Data has become simple with ProminentPixel. Being the best big Data consulting services in India, we offer accurate insights that enhance your real-time business. We provide Big data solutions to the clients across the globe thus we dealt more than a hundred projects till now. Among different services in Big Data, our Hadoop Big data solutions have created the ever-lasting impression about our services because of the huge success of the projects related to it.
Hadoop is designed in the way that it can be operated on very large sets of data at an affordable price. Our Big Data team is specialized in providing the productive solutions by fulfilling specific needs of the business and clients.
01 New Products & Services At ProminentPixel, we provide a wide range of Big Data development services, and we use the top Big Data tools such as Cloudera, Datameer, Kognitio, and Lucid Imagination. Also, our skilled team will always will be updated with the latest products and techniques that comes in market.
02 Improved Customer Service ProminentPixel helps you improve customer service using Big Data analytics. Today, everyone knows how important customer satisfaction is for the success of the business and so there is no way you can ignore it. Our team of Big Data experts will improve your customer service by creating exact insights that adds value to your long lasting relationships.
03 Data Visualization for End User Data Visualization plays the important role in generating the leads thus huge business. It allows us to have visual access to a large amount of data with easily understandable visuals. At ProminentPixel, we use various tools such as Tableau, Chart.js, Dygraphs, D3JS, and HighCharts for visuals and stories. We also generate custom dashboards, reports, and metrics according to your business.
04 Get New Business Opportunities Big Data helps you get the new business opportunities and creates competitive advantages using data as a strategic asset which has real-time information that helps to increase customer experience. Big Data in recent days has become an ideal choice to develop new products, services, and even business models. With the help of cloud and other new technologies, Big Data is able to offer services to the enterprises of all sizes.
OUR TEAM IN BIG DATA DEVELOPMENT We have an excellent team who can provide Big Data consulting services and till now, they have helped hundreds of enterprises to build their using data management and analytics platforms. To leverage the best industry tools to store, process, analyze, and visualize data, our team uses various technologies such as Hadoop, Spark, Tableau, Highcharts and many more.
As per the requirement of our valued clients, our team of experts offers customized Big Data development services. Your organization operations can be managed faster, smoother, and secured through our Big Data analytics solutions. We also offer the services at affordable prices to all small, medium, and large enterprises.
WHAT WE DO WHY PROMINENTPIXEL AS YOUR NEXT BIG DATA DEVELOPMENT PARTNER? Our proven experience, domain expertise and agility at affordable price helps organizations in leveraging 3Vs of Big Data for making their business more effective and profitable.
DOMAIN EXPERTISE Our core strength in understanding multiple domains and delivering the optimal solutions for different domains places our development team among the most desirable development team across the globe.
0 notes